OFFICIAL: The Great Build Off Campaign
Wisconsin, United States
Joined: September 11, 2009
KitMaker: 1,917 posts
AeroScale: 563 posts
Posted: Wednesday, January 15, 2014 - 02:55 PM UTC
Hurry up, Jessie! How much time left?

It is funny to see all the familiar pieces in everyone's posts, but also neat to see the different treatments.
Cheers!
Sean H
Current: model railroad layout
Stalled a while ago:
. 1950's Chrome, WW II Twins
Last completed: Police Car
Ontario, Canada
Joined: March 29, 2010
KitMaker: 1,151 posts
AeroScale: 985 posts
Posted: Wednesday, January 15, 2014 - 05:20 PM UTC
Jess you'll catch me yet. I torqued the nozzle of my airbrush off last night after cleaning out some remarkable sludge. No movement on the vampire aside from, mercy of mercies, I could fit bb's into the nose through the opening under the cockpit.
It is indeed very interesting to see the different methodologies. I notice jess has her ip decal on already. Whereas it was virtually the last thing I did.
British Columbia, Canada
Joined: September 03, 2009
KitMaker: 6,965 posts
AeroScale: 6,247 posts
Posted: Wednesday, January 15, 2014 - 07:52 PM UTC
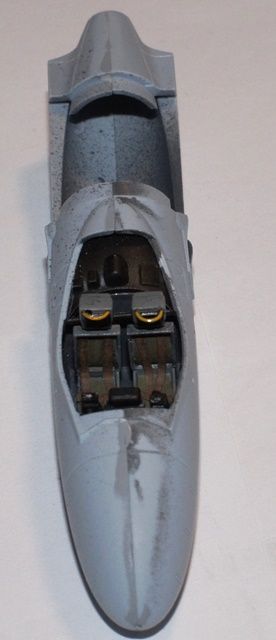
I sat down this evening to do a little building in the cockpit when suddenly
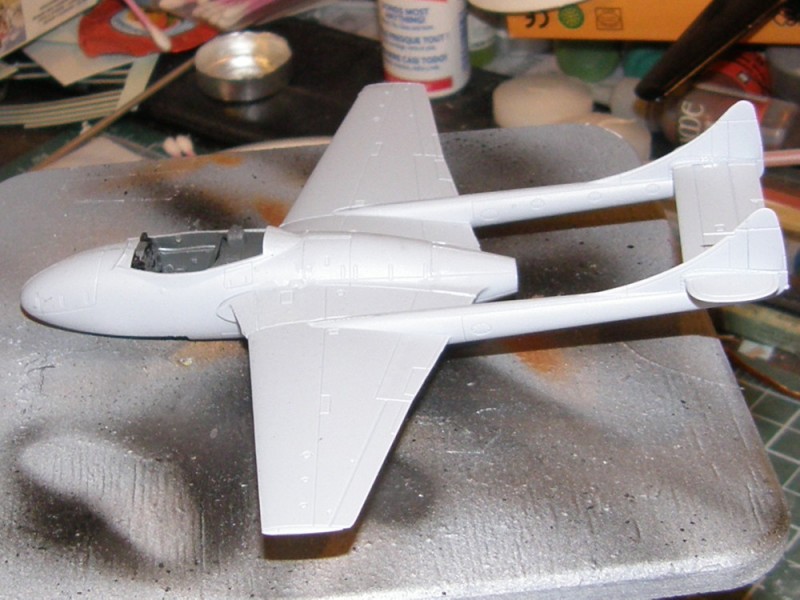
Vampire!
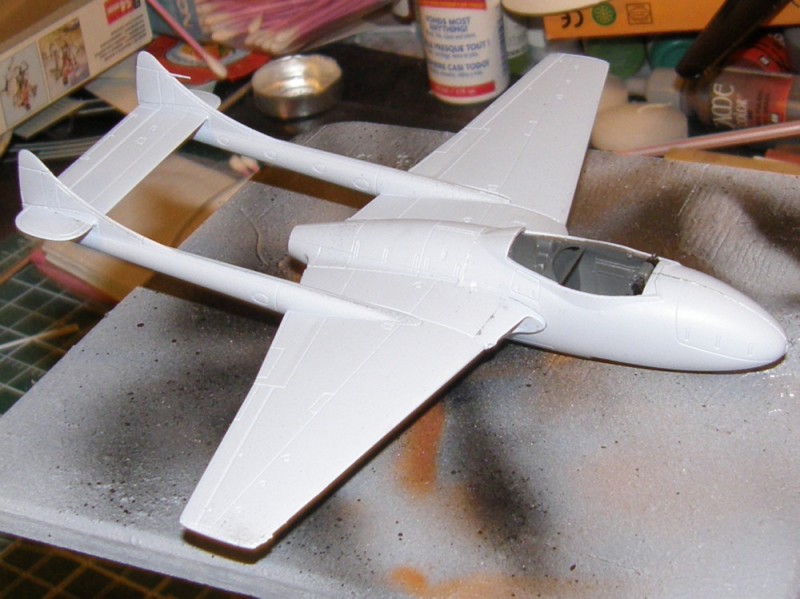
I'm not terribly thrilled with the fit; there are some serious gaps in the wing root undersides, and that's accounting for the very soft plastic which responds well to liquid glue. There's going to be a serious session with Mr. Surfacer in the near future. The plastic around the tailplane attachments was a trifle short-shot, which will mean a filling session needs to happen three, too. I did a little detailing in the cockpit with my silver Prismacolor pencil; giving it a little wear and tear to liven it up a bit.
When once you have tasted flight you will walk the Earth with your eyes turned skyward.
For there you have been, and there you will always long to return.
-Leonardo Da Vinci
England - West Midlands, United Kingdom
Joined: August 01, 2012
KitMaker: 960 posts
AeroScale: 391 posts
Posted: Thursday, January 16, 2014 - 12:23 AM UTC
Jessie, Richard, Sean, Mike, Micheal and everyone it's great to see how each one of you is approaching the assembly. It is comforting to know that I'm not the only one to forget to add weight to a model or have fit issues. This campaign is a great learning experience for me.
Wisconsin, United States
Joined: September 11, 2009
KitMaker: 1,917 posts
AeroScale: 563 posts
Posted: Sunday, January 19, 2014 - 03:17 PM UTC
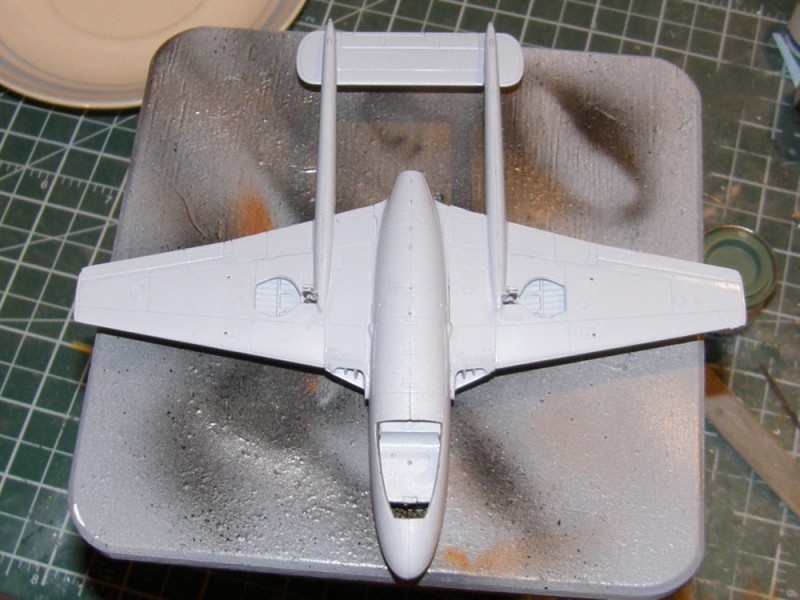
I tried to change my ways on my last couple planes, but I'm back to masking the canopy with standard office cellophane tape. Here's my vampire, ready for paint...
Cheers!
-Sean H.

Current: model railroad layout
Stalled a while ago:
. 1950's Chrome, WW II Twins
Last completed: Police Car

#439
Washington, United States
Joined: November 05, 2005
KitMaker: 4,950 posts
AeroScale: 3,192 posts
Posted: Wednesday, January 22, 2014 - 09:10 AM UTC
Well, I was off on a search for how to make seat belts, when I found this
Aeroclub Ejection seats T.11 Vampire Haven't actually found any for sale yet. So'm I'm back to making my own seat belts. Any clues beyond folded tape? I'm guessing that folding 6mm tape in half produces a 3mm belt that's over 8" wide in scale. any better guidance is appreciated.

Hanger Queens in Waiting:
Monogram 1/72 F8F-1
Corsair the Sky Pirate - 1/72 Ace A-7D
Century Series - Airfix 1/72 F-105G
Anti Shipping - Academy 1/72 PBJ-1D
Academy 1/72 F-84E
Wisconsin, United States
Joined: September 11, 2009
KitMaker: 1,917 posts
AeroScale: 563 posts
Posted: Wednesday, January 22, 2014 - 09:20 AM UTC
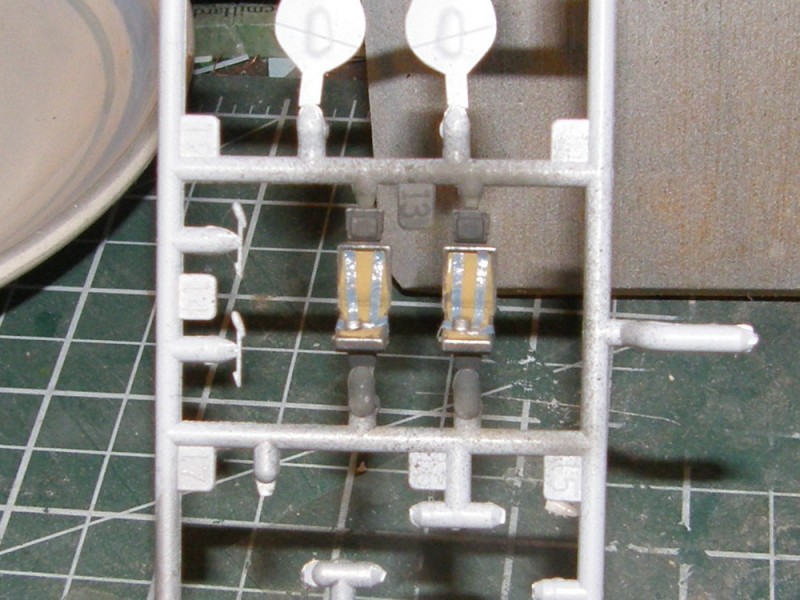
As you can see back on the posts from 7 to 14 January, Richard and I both used masking tape, cut to thin strips, and stuck on by its own adhesive for seatbelts-- not folded in half. I imagine that would be tricky to fold and as you said, not very thin in scale either.
My painting was a little sloppy (it looked better before I put the paint on.
)
-Sean H.
Current: model railroad layout
Stalled a while ago:
. 1950's Chrome, WW II Twins
Last completed: Police Car
#439
Washington, United States
Joined: November 05, 2005
KitMaker: 4,950 posts
AeroScale: 3,192 posts
Posted: Wednesday, January 22, 2014 - 09:28 AM UTC
So, I'm guessing about 1mm wide would look nearly right. Just shy of 3" in real life.

Hanger Queens in Waiting:
Monogram 1/72 F8F-1
Corsair the Sky Pirate - 1/72 Ace A-7D
Century Series - Airfix 1/72 F-105G
Anti Shipping - Academy 1/72 PBJ-1D
Academy 1/72 F-84E
Ontario, Canada
Joined: March 29, 2010
KitMaker: 1,151 posts
AeroScale: 985 posts
Posted: Wednesday, January 22, 2014 - 01:44 PM UTC
I tried for 1mm. I dabbed a little gap filling ca on the belts so they don't fall off.
Not much progress here. New nozzle for the neo is on its way. And I just treated myself to a new harder and steenbeck for my birthdaymas present.
British Columbia, Canada
Joined: September 03, 2009
KitMaker: 6,965 posts
AeroScale: 6,247 posts
Posted: Wednesday, January 22, 2014 - 02:40 PM UTC
The only way to buy Aeroclub products these days is directly from John himself. Head over to Britmodeller and look for the user
John Aero. Send him a message through the Britmodeller PM system (if you're a member) or e-mail sales(at)aeroclub-models.com
When once you have tasted flight you will walk the Earth with your eyes turned skyward.
For there you have been, and there you will always long to return.
-Leonardo Da Vinci
Wisconsin, United States
Joined: September 11, 2009
KitMaker: 1,917 posts
AeroScale: 563 posts
Posted: Saturday, January 25, 2014 - 04:16 AM UTC
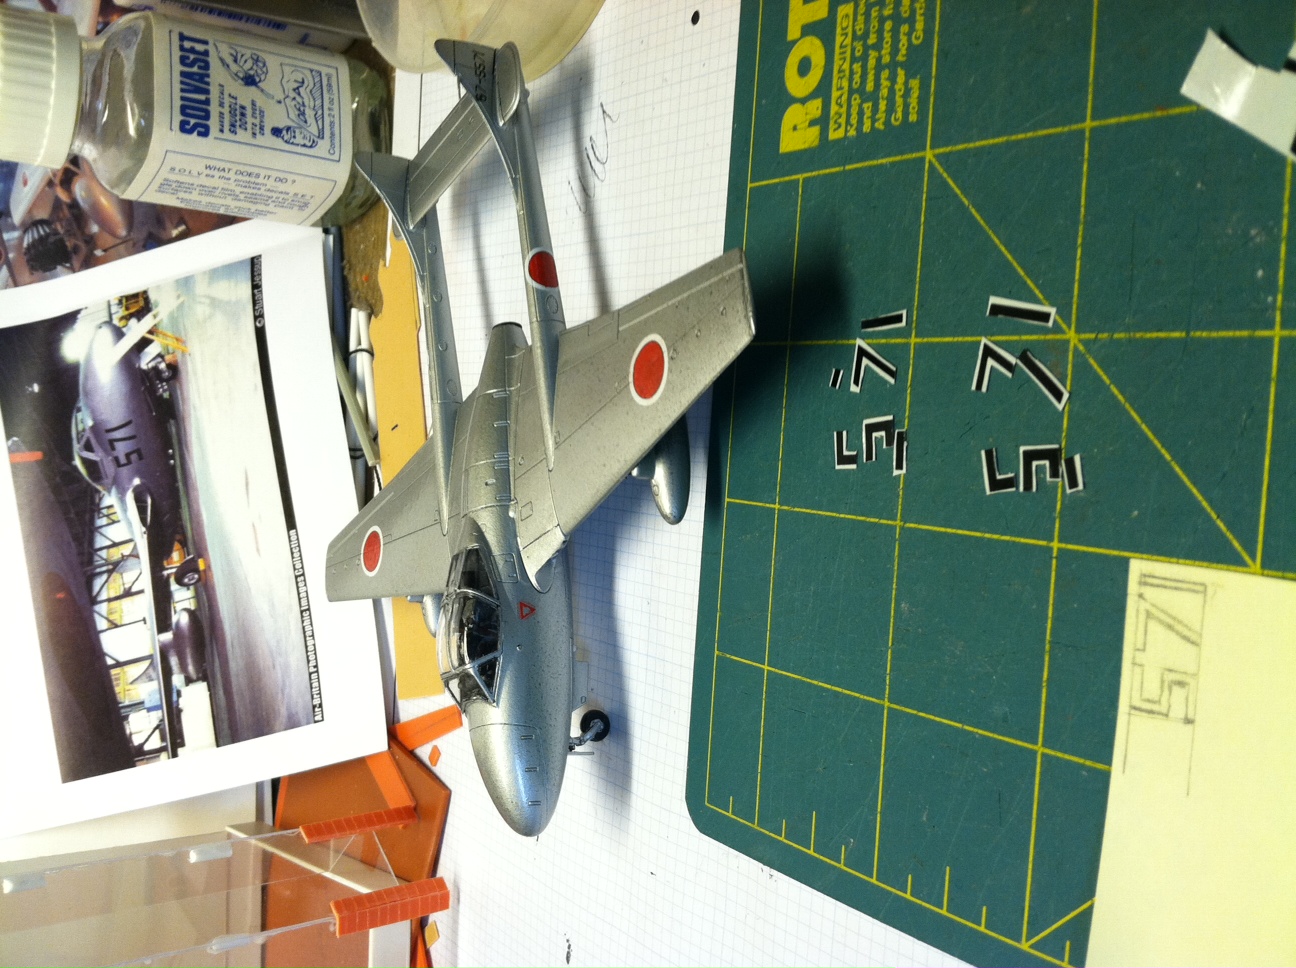
The old girl has layers of black primer, spray can silver, and Future floor polish applied with a relatively large, soft brush. The finish is a little spotty-- I'm wondering if I didn't rub off enough of the sanding dust between coats. I'm very happy with the canopy results-- I finally took my time, cutting around the masks with an X-acto blade before removing them, and rubbing with the tip of a toothpick anywhere the paint was cheating in on the edges.
One note, see in the background the set of MicroScale #72-05 Japan WW II decals. Do the roundels (hinomaru?) look too brown? Was there a time that Japan used a more brown roundel, or did MicroScale get that wrong, or are these decals themselves just too old?
Cheers!
-Sean H
Current: model railroad layout
Stalled a while ago:
. 1950's Chrome, WW II Twins
Last completed: Police Car
Ontario, Canada
Joined: March 29, 2010
KitMaker: 1,151 posts
AeroScale: 985 posts
Posted: Saturday, January 25, 2014 - 06:25 AM UTC
Those decals are just way off. They never mess with hinomaru. Japanese aircraft had notoriously poor paintwork. But the hinomarus never shared in the chipping. Always bright and crimson and solid.
Wisconsin, United States
Joined: September 11, 2009
KitMaker: 1,917 posts
AeroScale: 563 posts
Posted: Saturday, January 25, 2014 - 11:56 AM UTC
Thanks much, Richard!
-Sean H
Current: model railroad layout
Stalled a while ago:
. 1950's Chrome, WW II Twins
Last completed: Police Car
Wisconsin, United States
Joined: September 11, 2009
KitMaker: 1,917 posts
AeroScale: 563 posts
Posted: Sunday, February 02, 2014 - 09:02 AM UTC
First in the gallery! That never happens, ha ha.
Anyway, here's how I got there...
 Created 571s where there were EL and some black stripe before
 by
windysean, on Flickr
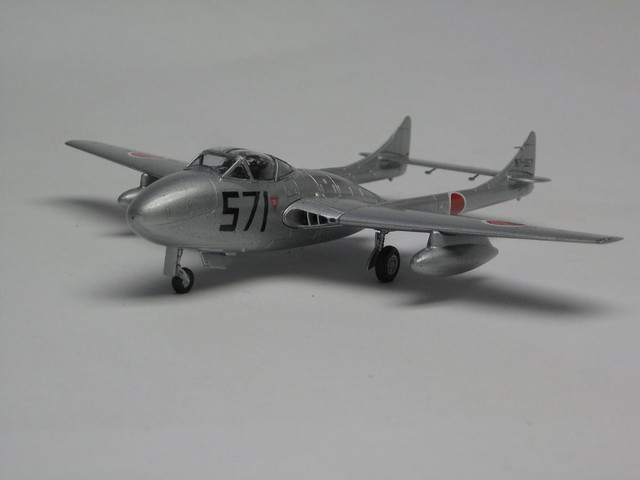 JASDF T55_ft qtr
 by
windysean, on Flickr
I apologize, new computer, and I can't get the photos copied from Flickr here to any usable size.
-Sean

Current: model railroad layout
Stalled a while ago:
. 1950's Chrome, WW II Twins
Last completed: Police Car
Wisconsin, United States
Joined: September 11, 2009
KitMaker: 1,917 posts
AeroScale: 563 posts
Posted: Monday, February 03, 2014 - 12:45 AM UTC
I forgot to finish my earlier thought.
I used the brown MicroScale roundels, but painted the insides red with a brush afterward. The colors are close enough that the eye doesn't perceive any skips in the red paint, as long as I stayed inside the white border.
-Sean H

Current: model railroad layout
Stalled a while ago:
. 1950's Chrome, WW II Twins
Last completed: Police Car
British Columbia, Canada
Joined: September 03, 2009
KitMaker: 6,965 posts
AeroScale: 6,247 posts
Posted: Monday, February 03, 2014 - 03:34 PM UTC
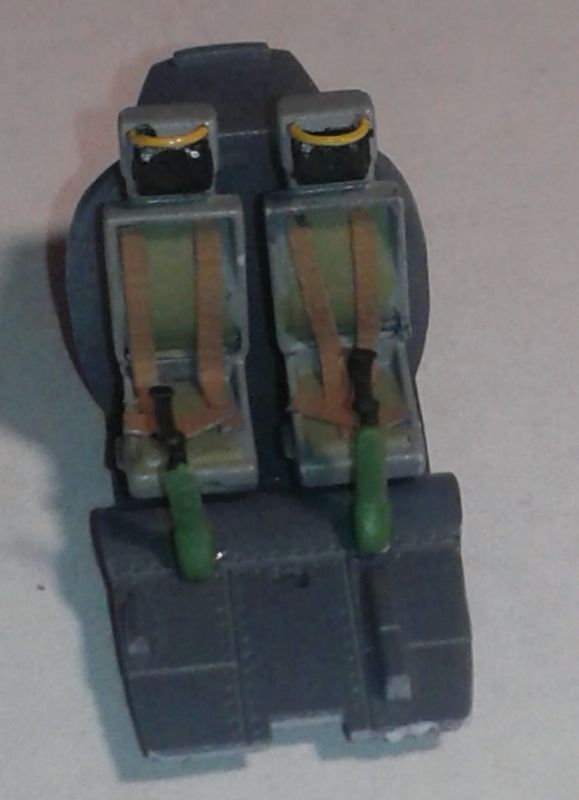
I've got the seat belts done, complete with horribly overscale fittings which just might show up through the coke-bottle transparencies.
When once you have tasted flight you will walk the Earth with your eyes turned skyward.
For there you have been, and there you will always long to return.
-Leonardo Da Vinci
MichaelSatin
 Campaigns Administrator
Colorado, United States
Joined: January 19, 2008
KitMaker: 3,909 posts
AeroScale: 2,904 posts
Posted: Saturday, February 08, 2014 - 02:46 AM UTC
Very interesting concept and builds going on here, well done everyone!
Not to be a pest (part of the job, I fear) but still no ribbon showing on the
campaign page .
Michael

On the bench:
Sorta depends on your definition of "on the bench"...
#439
Washington, United States
Joined: November 05, 2005
KitMaker: 4,950 posts
AeroScale: 3,192 posts
Posted: Monday, February 10, 2014 - 08:04 PM UTC
Sorry, not much help with graphics. But I've been going to school on the great work other folks are sharing. One of the better cockpits I've ever built.
Hanger Queens in Waiting:
Monogram 1/72 F8F-1
Corsair the Sky Pirate - 1/72 Ace A-7D
Century Series - Airfix 1/72 F-105G
Anti Shipping - Academy 1/72 PBJ-1D
Academy 1/72 F-84E
Ontario, Canada
Joined: March 29, 2010
KitMaker: 1,151 posts
AeroScale: 985 posts
Posted: Monday, February 17, 2014 - 04:32 PM UTC
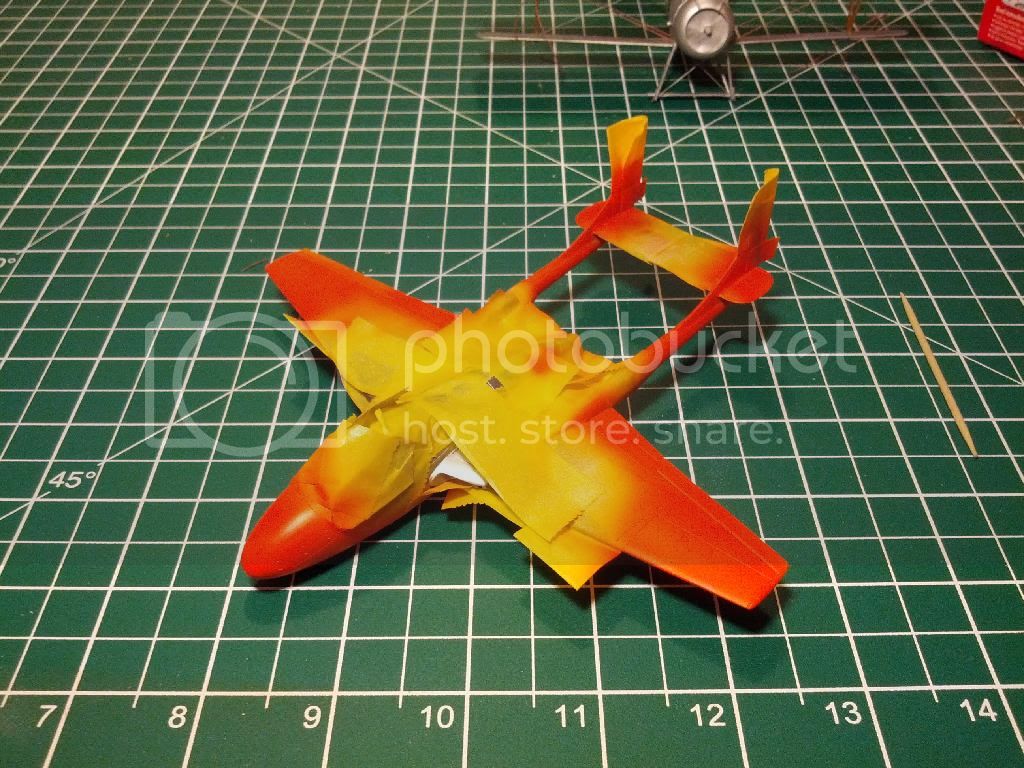
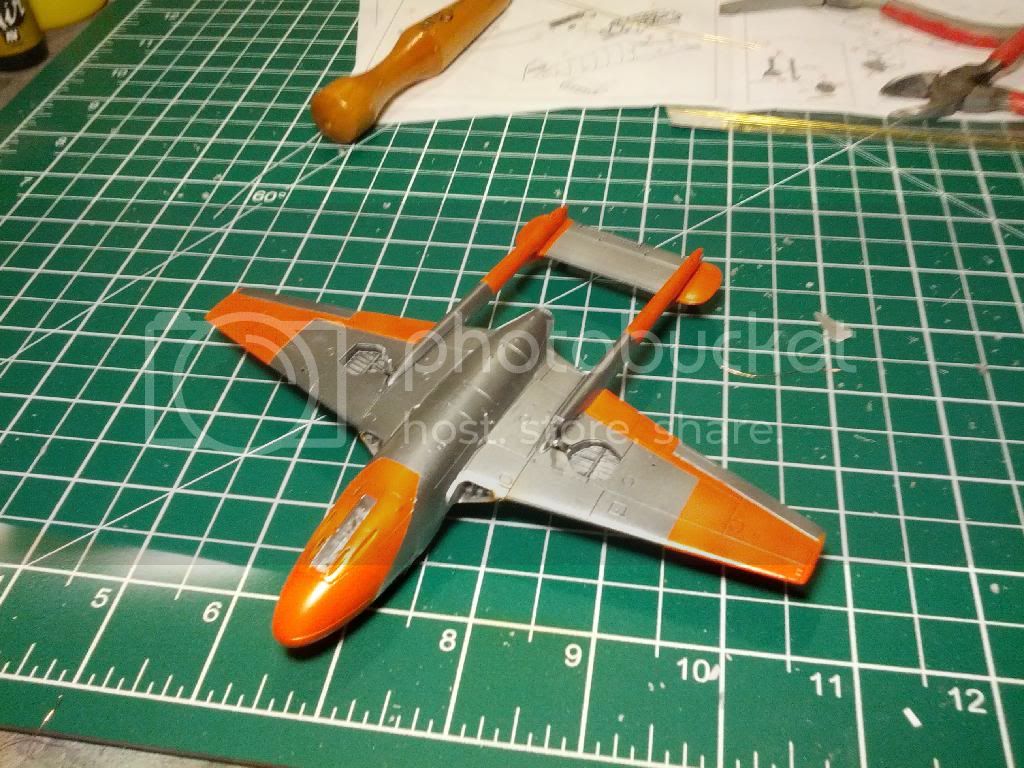
OK so I think I've gotten to a healthy place in my relationship with alclad. I layed tamiya rattle can black as a base. Then steel wool polished it and rinsed the Steel lint off. Spraying at10 psi or so it's a nice product. Although I always have to do a full strip and clean of the airbrush after I use it.
Masking went quickly and I quickly learned I needed to lay white down ahead of th valejo orange or it just makes metallic orange when applied to alclad.
Should be something pretty here tomorrow.

#439
Washington, United States
Joined: November 05, 2005
KitMaker: 4,950 posts
AeroScale: 3,192 posts
Posted: Tuesday, March 04, 2014 - 07:44 PM UTC
Got the fuselage (with 9 gr of shot) all buttoned up and ready to move on.
Hanger Queens in Waiting:
Monogram 1/72 F8F-1
Corsair the Sky Pirate - 1/72 Ace A-7D
Century Series - Airfix 1/72 F-105G
Anti Shipping - Academy 1/72 PBJ-1D
Academy 1/72 F-84E
Wisconsin, United States
Joined: September 11, 2009
KitMaker: 1,917 posts
AeroScale: 563 posts
Posted: Wednesday, March 05, 2014 - 03:31 AM UTC
9 grams! Even more than the 7 specified in the instructions.
I noticed that at this stage, I would regularly forget how nose-heavy it was when I'd pick mine up, almost dropping it every time.
Those seams do take some work, so when it's primed, we'll see where you stand so far. I'm not primarily an aircraft builder, although over my life I've built many dozens, but I'm really loving the shared experience of this campaign.
Cheers!
-Sean H.
Current: model railroad layout
Stalled a while ago:
. 1950's Chrome, WW II Twins
Last completed: Police Car
#439
Washington, United States
Joined: November 05, 2005
KitMaker: 4,950 posts
AeroScale: 3,192 posts
Posted: Wednesday, March 05, 2014 - 04:50 AM UTC
The instructions did say 7, but I assumed that they included the pilots in the weight and balance calculations. I'm leaving them out. They weighed a gram total, so I pored out 8 g plus a bit just to be sure....
The top seams aren't being too challenging, it's the bottom seam, with little dangly bits in the way that's got me worried.

Hanger Queens in Waiting:
Monogram 1/72 F8F-1
Corsair the Sky Pirate - 1/72 Ace A-7D
Century Series - Airfix 1/72 F-105G
Anti Shipping - Academy 1/72 PBJ-1D
Academy 1/72 F-84E
Ontario, Canada
Joined: March 29, 2010
KitMaker: 1,151 posts
AeroScale: 985 posts
Posted: Friday, March 07, 2014 - 09:27 AM UTC
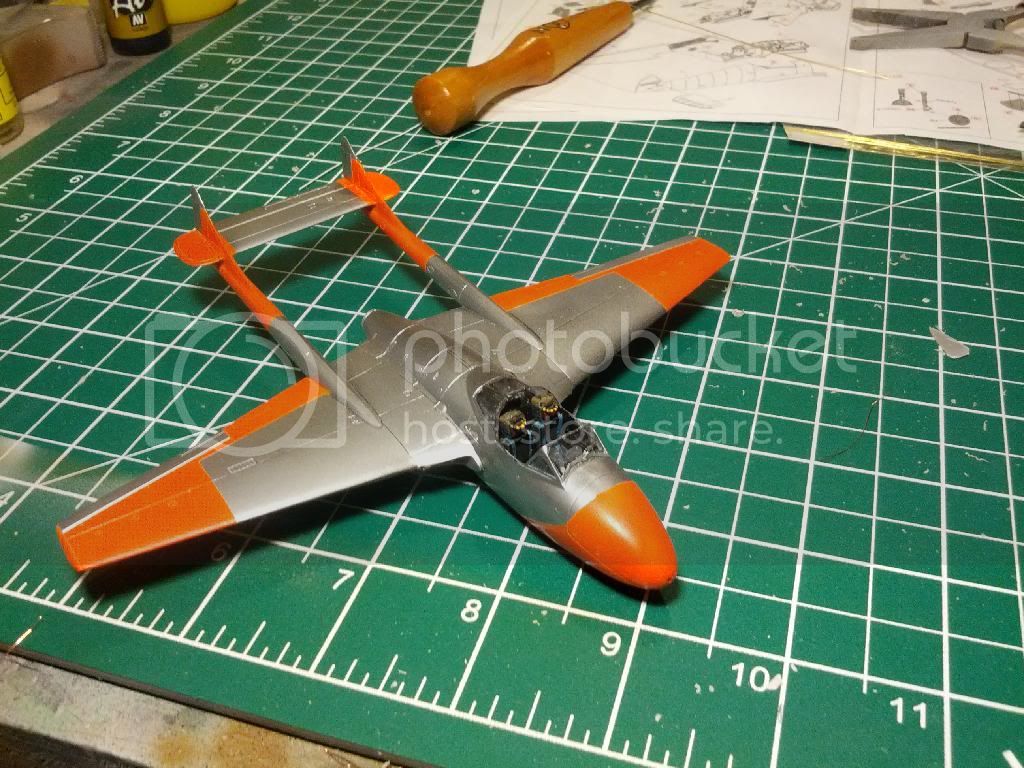
There is never enough time... Meant to post this last week.
Wisconsin, United States
Joined: September 11, 2009
KitMaker: 1,917 posts
AeroScale: 563 posts
Posted: Friday, March 07, 2014 - 09:29 PM UTC
Wo ho! That orange really grabs you around the throat!
That's some beautiful work, Richard! A very clean build, as they say.
-Sean
Current: model railroad layout
Stalled a while ago:
. 1950's Chrome, WW II Twins
Last completed: Police Car
#243
England - North East, United Kingdom
Joined: March 21, 2008
KitMaker: 996 posts
AeroScale: 915 posts
Posted: Sunday, March 16, 2014 - 11:22 AM UTC
Time to get this build off the ground
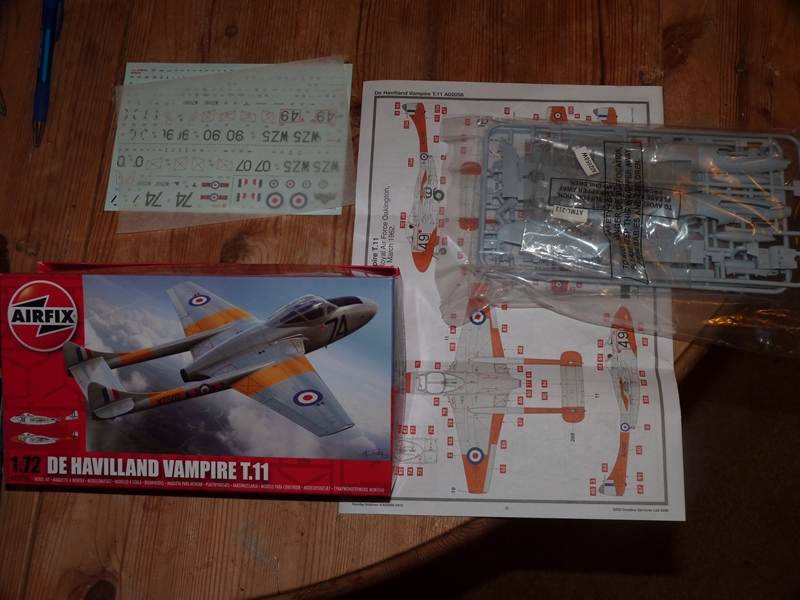
I'll be building OOB but I may have a slow start, quite a lot going on in real life right now
Andrew
Pfalz DIIIa, Eduard 1/48 Uffz Max Hitschler Jasta 18 Late 1917


