

Good Lord Jessie! Don't you ever sleep? Nice work, as always.
Michael
Air Campaigns
Want to start or join a group build? This is where to start.
Want to start or join a group build? This is where to start.
Hosted by Frederick Boucher, Michael Satin
OFFICIAL: Then and Now Campaign
MichaelSatin


Joined: January 19, 2008
KitMaker: 3,909 posts
AeroScale: 2,904 posts
Posted: Monday, January 06, 2014 - 01:27 AM UTC

cinzano
Joined: January 13, 2009
KitMaker: 419 posts
AeroScale: 378 posts
Posted: Monday, January 06, 2014 - 02:42 AM UTC
Quoted Text
Good Lord Jessie! Don't you ever sleep? Nice work, as always.
Michael
The real question to me is: How do you display all your finished work, Jessie? For me, space is proving to be an unforeseen limiter in progressing on more models. I have 25 completed craft on display and have room for, maybe, a half dozen more. Even thinking about giving away my really old work just to clear out space for newer projects.
How do you do it Jessie? Are you donating display models for the nearest aircraft museum? Do you have a huge pull barn?

Cheers,
Fred


phantom_phanatic309

#372

Joined: March 10, 2010
KitMaker: 2,568 posts
AeroScale: 1,619 posts

Posted: Tuesday, January 07, 2014 - 09:20 AM UTC
I'm in with a Mosquito NF.II and E.E Lightning F.6.
The Mossie will be built from the old Airfix kit. A bagged and unboxed example I've had for seemingly ages. I need to dig out the instructions from wherever they ended up.

The Lightning is the Revell re-pop of the Frog.


Again its been in the stash for ages and its about time it got built. I was surprised to find a little etch set by Airwaves and pair of Aeroclub seats in the box. Completely forgotten I had bought those!
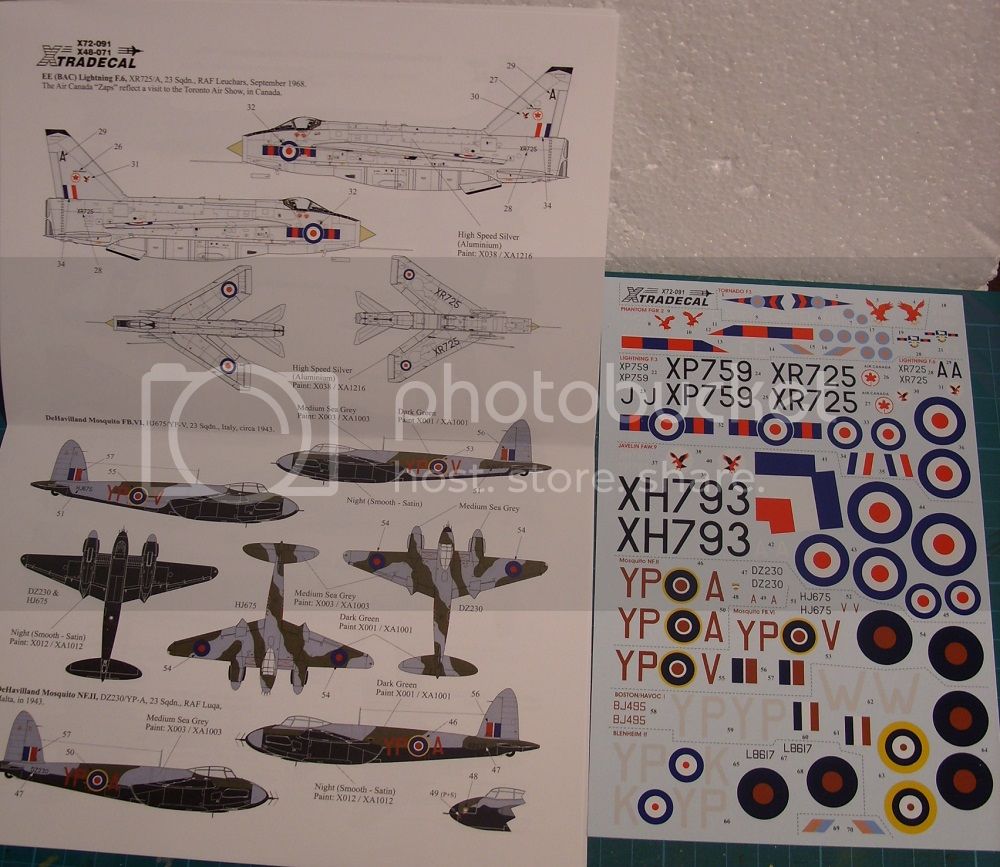
Decals are the Xtradecal set for RAF 23 Squadron 1940-1990. The sheet covers a Blenheim, Douglas Boston, Mosquito, Javelin, Lightning, Phantom and Tornado F.3.
I had planned on building the Airfix Bristol Bulldog which comes with some very nice pre-war markings for 23sqn. But the thought of doing another bipe after recently finishing one, and starting another for the Dehavilland campaign, does not sound like fun!
Neither kit has any nasty surprises so they should be fairly quick builds. I may live to regret saying that!
The Mossie will be built from the old Airfix kit. A bagged and unboxed example I've had for seemingly ages. I need to dig out the instructions from wherever they ended up.

The Lightning is the Revell re-pop of the Frog.


Again its been in the stash for ages and its about time it got built. I was surprised to find a little etch set by Airwaves and pair of Aeroclub seats in the box. Completely forgotten I had bought those!
Decals are the Xtradecal set for RAF 23 Squadron 1940-1990. The sheet covers a Blenheim, Douglas Boston, Mosquito, Javelin, Lightning, Phantom and Tornado F.3.

I had planned on building the Airfix Bristol Bulldog which comes with some very nice pre-war markings for 23sqn. But the thought of doing another bipe after recently finishing one, and starting another for the Dehavilland campaign, does not sound like fun!
Neither kit has any nasty surprises so they should be fairly quick builds. I may live to regret saying that!

phantom_phanatic309
#372
Joined: March 10, 2010
KitMaker: 2,568 posts
AeroScale: 1,619 posts
Posted: Wednesday, January 08, 2014 - 09:55 AM UTC
Started off with the Mosquito tonight.
First thing to do was to improve the basic cockpit. I made up a rear shelf with a section of rectangle plastic and glued on the kits radio. I also cut down the navigators seat to make it look a bit more like the aircraft.s original. On the instrument panel I made up the radar scope from some plastic strip and tube squashed in slightly. And that's its, ready for some paint now. Not much will be seen through the fairly thick canopy but at least it will look a bit busier.

Comments welcome.
Stephen

Jessie_C

Joined: September 03, 2009
KitMaker: 6,965 posts
AeroScale: 6,247 posts

Posted: Monday, January 13, 2014 - 05:43 PM UTC
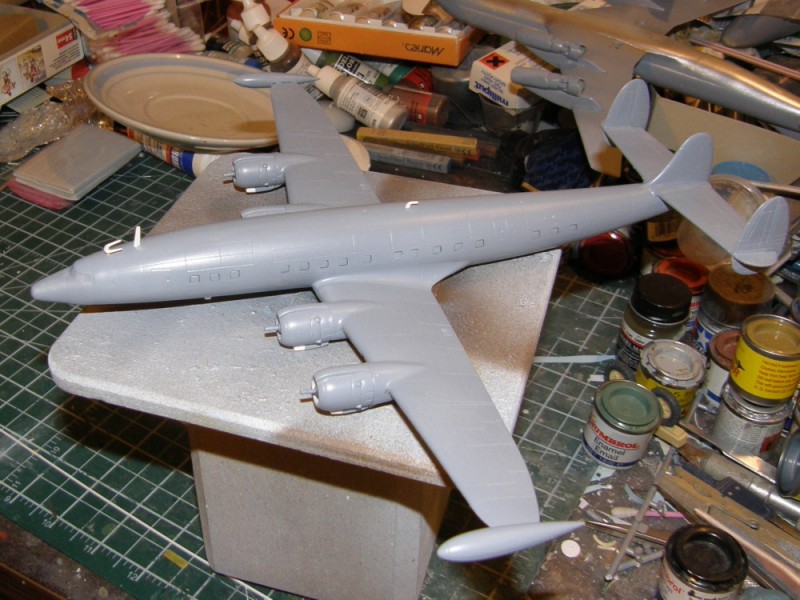
The Constellation is nearly done, with the exception of the landing gear and the sense antennae which live on the lower fuselage and are extremely prone to being knocked off. Time for the white paint on the upper fuselage.
Jessie_C
Joined: September 03, 2009
KitMaker: 6,965 posts
AeroScale: 6,247 posts
Posted: Wednesday, January 15, 2014 - 01:27 PM UTC
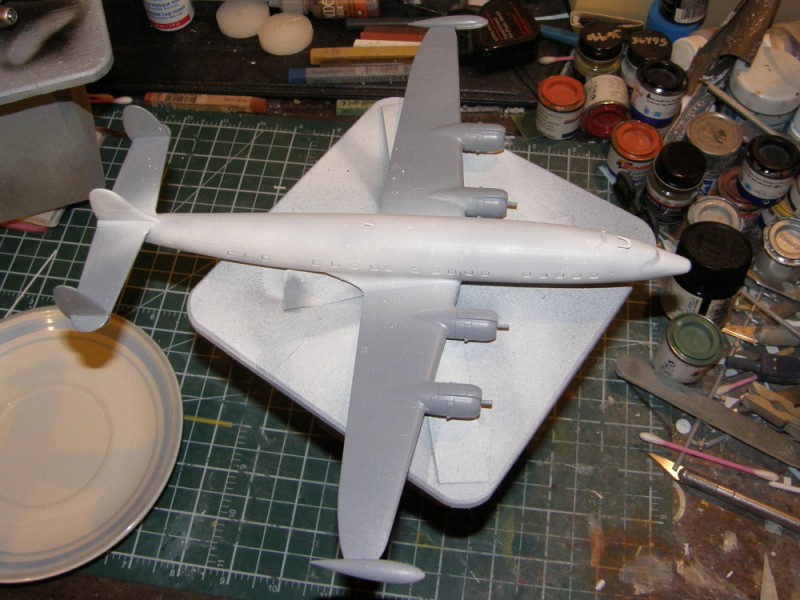
A first coat of white on the fuselage top
MichaelSatin
Joined: January 19, 2008
KitMaker: 3,909 posts
AeroScale: 2,904 posts
Posted: Saturday, January 18, 2014 - 12:48 PM UTC
Nice work everyone!
I actually made some progress on the Accurate Miniatures Yak-1:
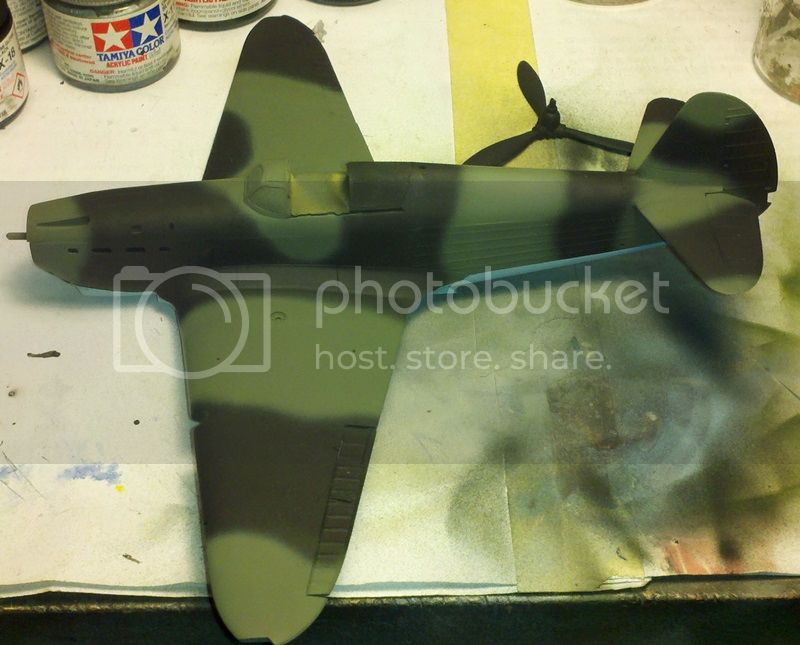
Now gotta let it dry before clear coating for decals. I'd like to get the MiG-21 going in February, and I might actually make it!
Michael
I actually made some progress on the Accurate Miniatures Yak-1:

Now gotta let it dry before clear coating for decals. I'd like to get the MiG-21 going in February, and I might actually make it!
Michael
phantom_phanatic309
#372
Joined: March 10, 2010
KitMaker: 2,568 posts
AeroScale: 1,619 posts
Posted: Wednesday, January 22, 2014 - 10:31 AM UTC
Looking good so far Jessie and Michael.
I picked up a few packs of Barracudacals Mossie stencils for my build. I have a couple of other Airfix Mossie's knocking about so they'll help enormously with those. I plan on one day doing them as the cannon-armed MkXVII along with a pair of silver RAAF and IDF Fb.VI's.


Quite nice and cheap. It very thoughtfully includes stencils for day and night schemes, although only one set of 'Keep Off' walkway markings and some for the cockpit. It could probably still be pushed to do two aircraft.
I used the instrument panel decal to add a bit more life there. Seatbelts are made from painted tissue paper. Looking at the pics I noticed that I do need to add a little gloss black in the radar scope and then its onto final assembly on this, then jamming it between the fuselage halves.

Planning on getting some started on the Lightning this weekend.
MichaelSatin
Joined: January 19, 2008
KitMaker: 3,909 posts
AeroScale: 2,904 posts
Posted: Sunday, January 26, 2014 - 08:49 AM UTC
Great looking stuff going on here!
I have finished the first half of my contribution, the Accurate Miniatures 1/48 Yak-1 flown by Lilya Litvyak of 296.IAP in the Stalingrad area, spring 1943:
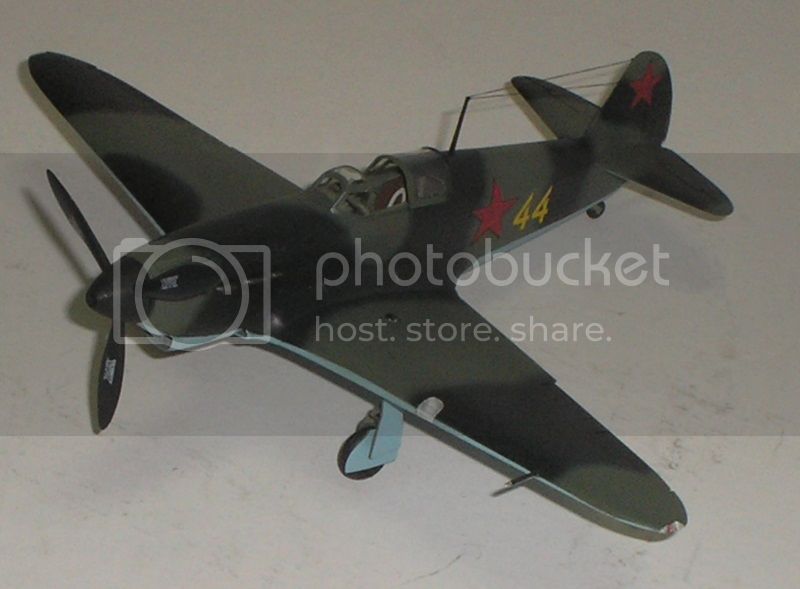
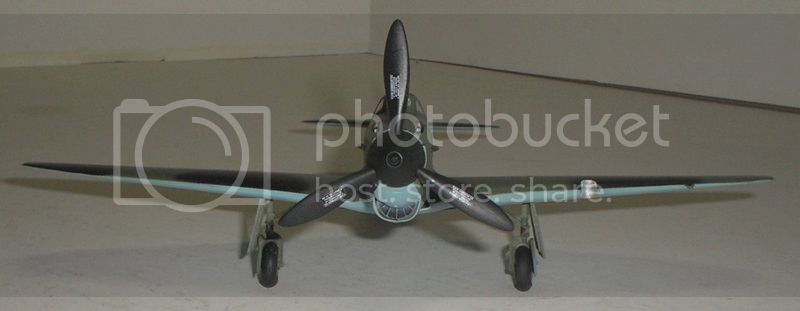
A nice kit built mostly out of the box (I added the arial from EZ Thread and a couple of pieces of plastic rod as guns). I used Tamiya and AeroMaster paints.
Now, bring on the Eduard MiG-21SMT!

Michael
Jessie_C
Joined: September 03, 2009
KitMaker: 6,965 posts
AeroScale: 6,247 posts
Posted: Monday, February 03, 2014 - 03:39 PM UTC
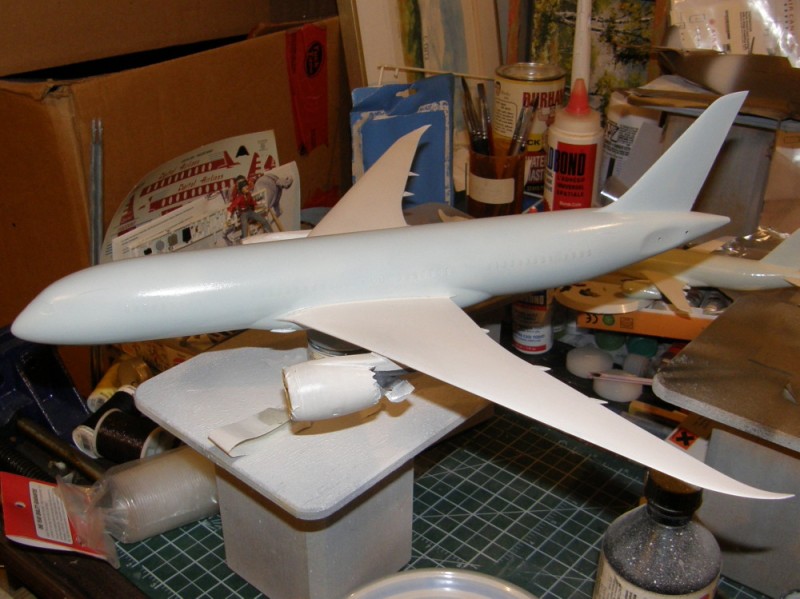
Air Canada calls the pale blue they paint their fuselages with "Ice Blue". Pilots call it something else. I call it painted.
MichaelSatin
Joined: January 19, 2008
KitMaker: 3,909 posts
AeroScale: 2,904 posts
Posted: Tuesday, February 04, 2014 - 01:10 AM UTC
Looks painted to me!
Michael
Michael
MichaelSatin
Joined: January 19, 2008
KitMaker: 3,909 posts
AeroScale: 2,904 posts
Posted: Sunday, February 09, 2014 - 12:25 PM UTC
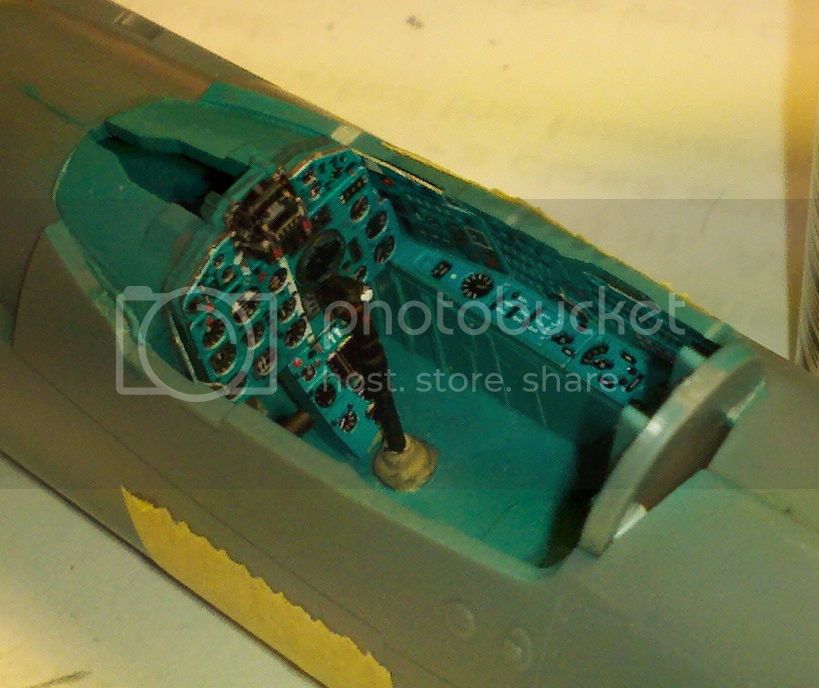
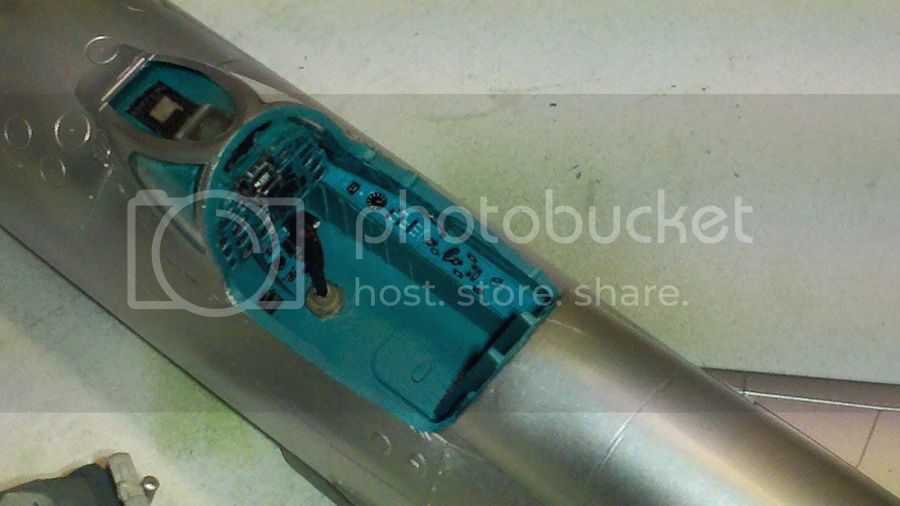
Progress on the Eduard 1/48 MiG-21SMT, preliminary painting done, time to start building:
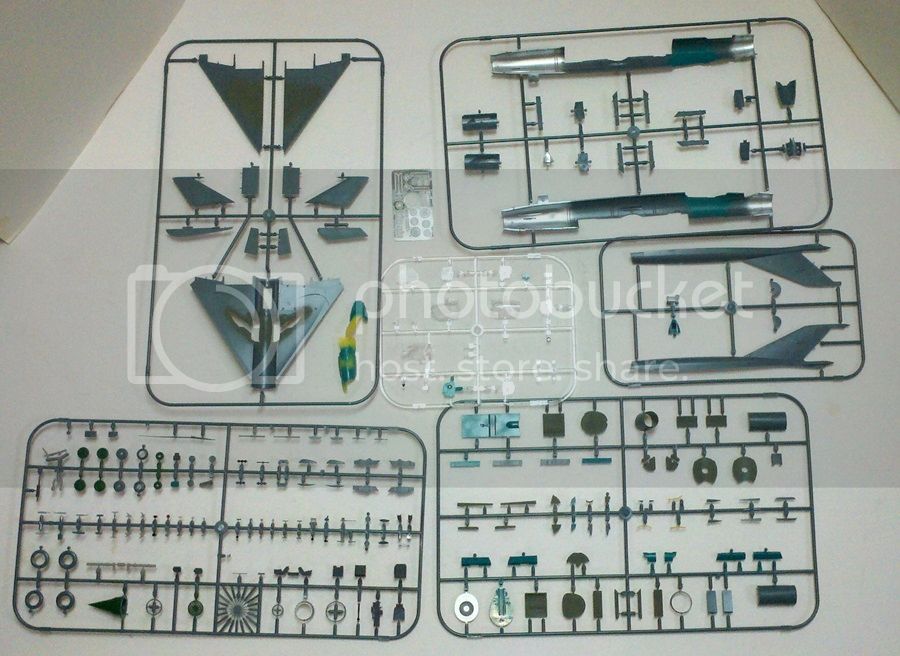
Since I like to use Tamiya paints when I can, I've had to mix up my own interior color to go with Eduard's pre-painted photo etch and a shade of green to match the small stripe decals for the dielectric panels, radome, etc. But now it's on to gluing!
Michael

Since I like to use Tamiya paints when I can, I've had to mix up my own interior color to go with Eduard's pre-painted photo etch and a shade of green to match the small stripe decals for the dielectric panels, radome, etc. But now it's on to gluing!
Michael
MichaelSatin
Joined: January 19, 2008
KitMaker: 3,909 posts
AeroScale: 2,904 posts
Posted: Sunday, February 16, 2014 - 10:50 AM UTC
OK, actual construction of the Eduard 1/48 MiG-21SMT underway:


Fuselage buttoned up, getting ready to add the spine.
Great kit so far!
Michael


Fuselage buttoned up, getting ready to add the spine.
Great kit so far!
Michael
MichaelSatin
Joined: January 19, 2008
KitMaker: 3,909 posts
AeroScale: 2,904 posts
Posted: Saturday, February 22, 2014 - 07:19 AM UTC
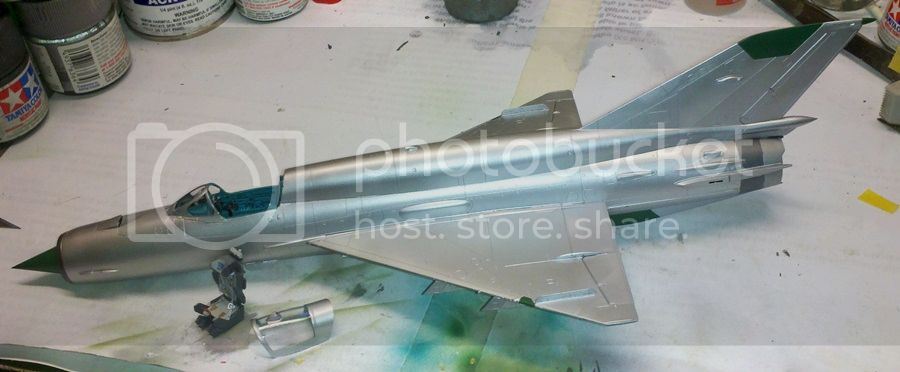
The Eduard 1/48 MiG-21SMT just about ready for paint:
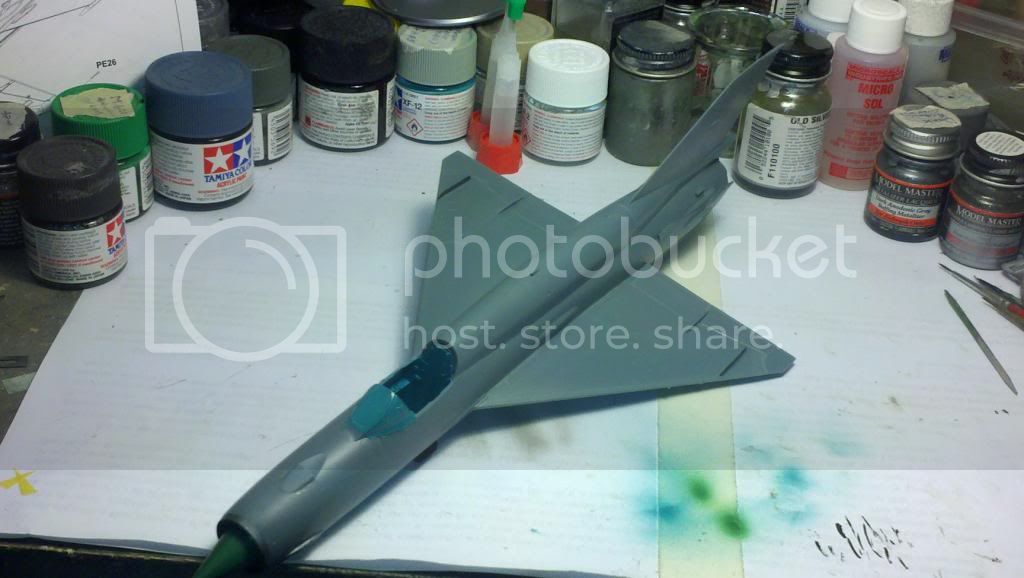
I use Floquil Bright and Old Silvers for my bare metal schemes. We'll see how this goes!
Michael


I use Floquil Bright and Old Silvers for my bare metal schemes. We'll see how this goes!
Michael
MichaelSatin
Joined: January 19, 2008
KitMaker: 3,909 posts
AeroScale: 2,904 posts
Posted: Sunday, February 23, 2014 - 07:19 AM UTC
And here is the base coat of Floquil Bright Silver:
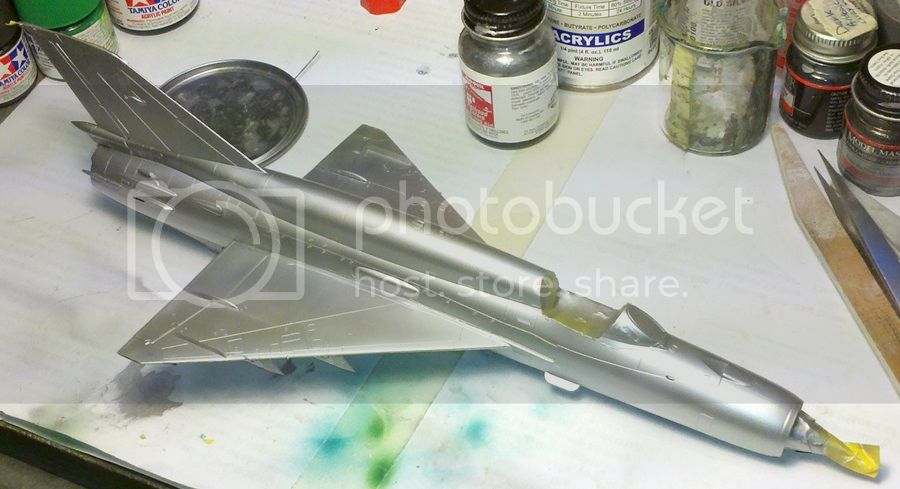
Let that dry, then on to adding some different shades.
Michael

Let that dry, then on to adding some different shades.
Michael
MichaelSatin
Joined: January 19, 2008
KitMaker: 3,909 posts
AeroScale: 2,904 posts
Posted: Sunday, March 02, 2014 - 08:32 AM UTC
OH NO, NOT AGAIN?!
Yes, it's true. With two months to go in the campaign, I'm starting something new. Seems my birthday is tomorrow and I finally had enough cash and points to get the kit I really wanted for this campaign. So, my NEW plan is:
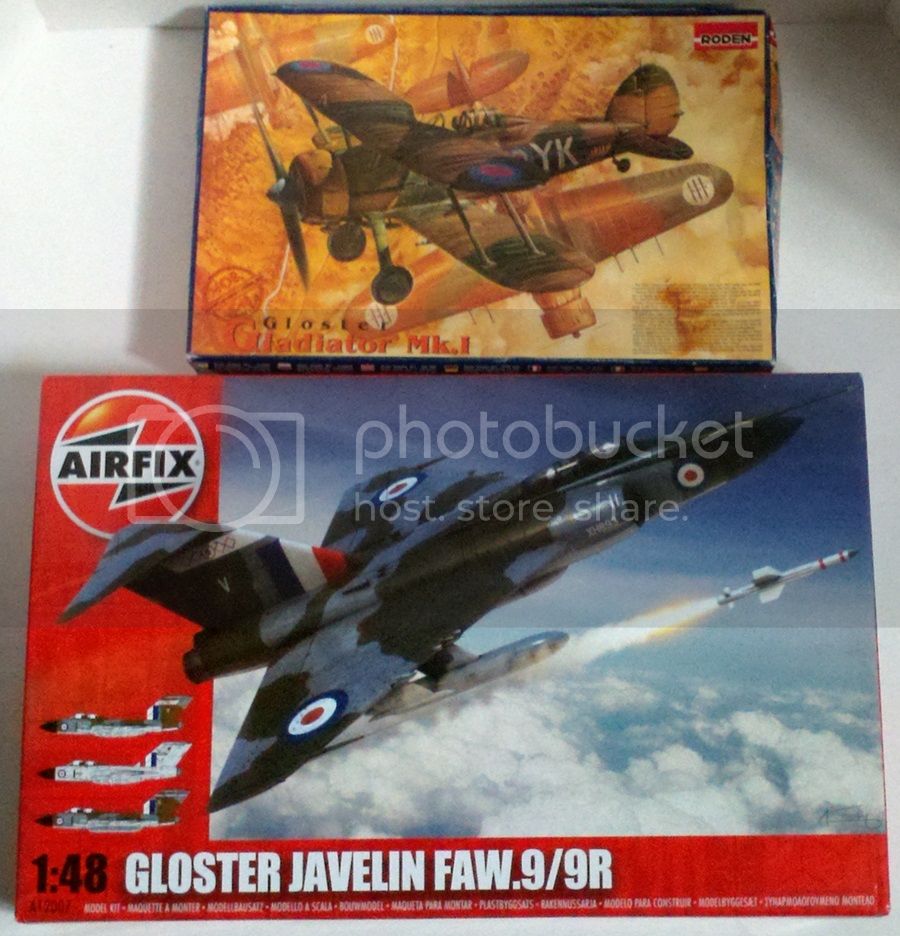
Both from 33 Squadron, RAF. The Gladiator pre-war 1939 in Ramle in what was then Palestine, the Javelin in 1962 based at Middleton St. George, England.
I'm starting with the Gladiator:
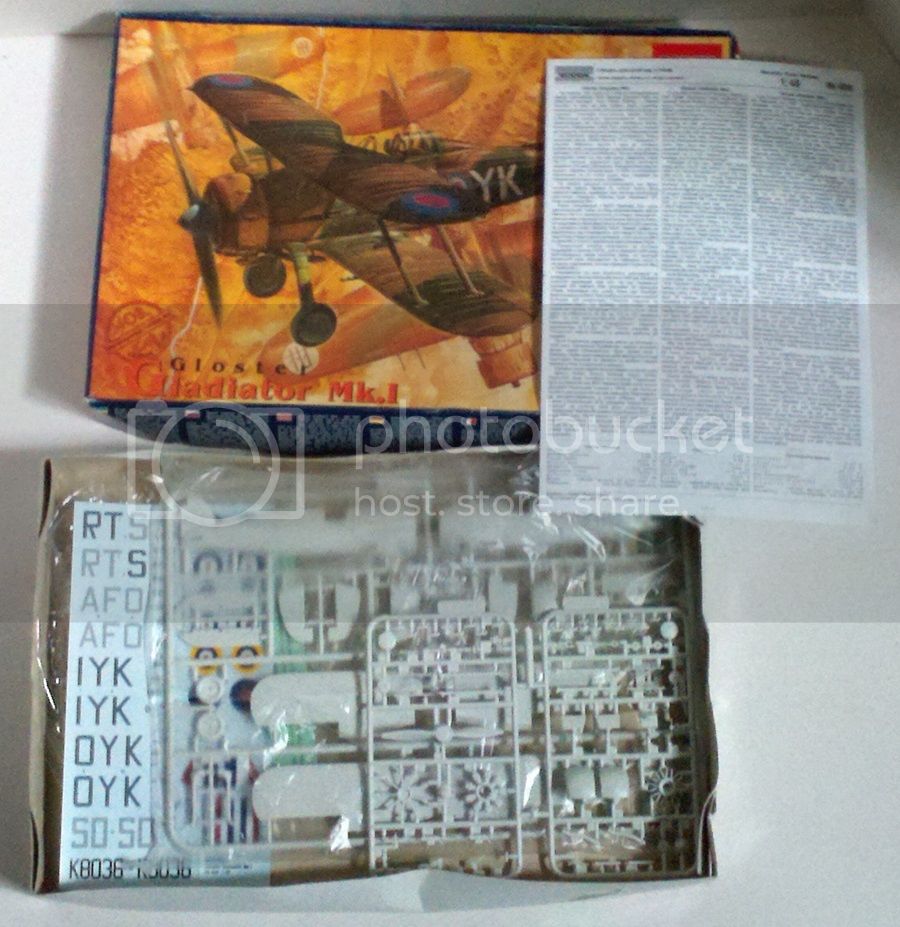
I've drilled out all the holes for rigging and started interior painting. Let's see if I can actually finish these up in the time allowed!
Michael

tinbanger
Joined: February 04, 2008
KitMaker: 2,507 posts
AeroScale: 1,814 posts
Posted: Tuesday, March 04, 2014 - 10:46 AM UTC
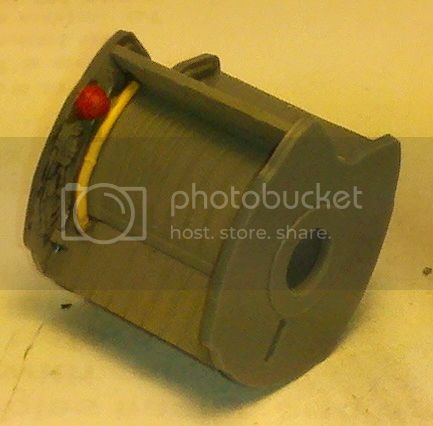
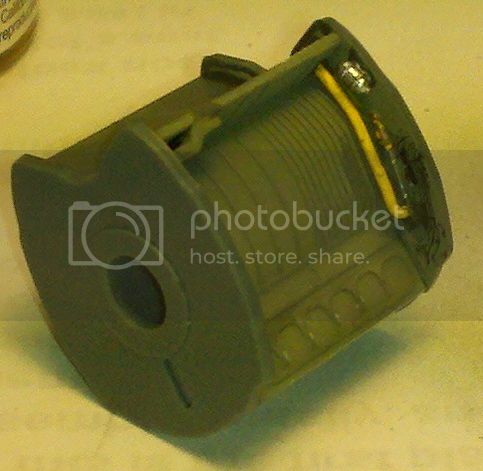
Here are the pilots work areas:- Wimpy and CF-18


Now for some paint.
Now for some paint.

MichaelSatin
Joined: January 19, 2008
KitMaker: 3,909 posts
AeroScale: 2,904 posts
Posted: Sunday, March 09, 2014 - 07:36 AM UTC
I'm happy to say that I've come to my senses and gone back to the MiG-21. Time is really not available for me to start over. So:
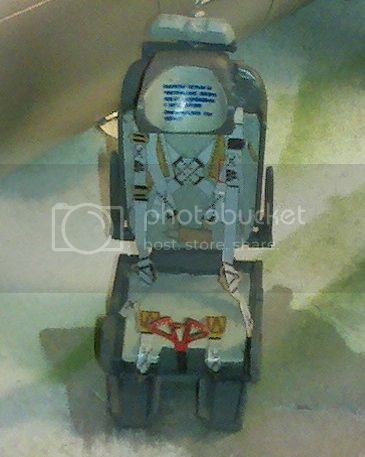
Very nice seat once all the belts are installed!
Main painting done (there is some shading, but it's hard to see in the photos). Just about ready for decal slog to begin!
Michael

Very nice seat once all the belts are installed!


Main painting done (there is some shading, but it's hard to see in the photos). Just about ready for decal slog to begin!
Michael
Jessie_C
Joined: September 03, 2009
KitMaker: 6,965 posts
AeroScale: 6,247 posts
Posted: Sunday, March 09, 2014 - 08:12 AM UTC
I'm glad that your MiG wasn't abandoned; I was hoping to see it finished 
MichaelSatin
Joined: January 19, 2008
KitMaker: 3,909 posts
AeroScale: 2,904 posts
Posted: Saturday, March 15, 2014 - 09:49 AM UTC
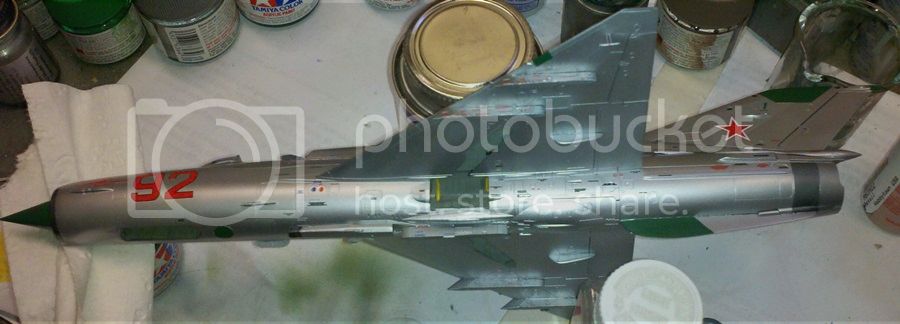
I appreciate your vote of confidence Jessie! The thing is, if I had done the Gladiator and Javelin, there probably wouldn't have been so much of this:
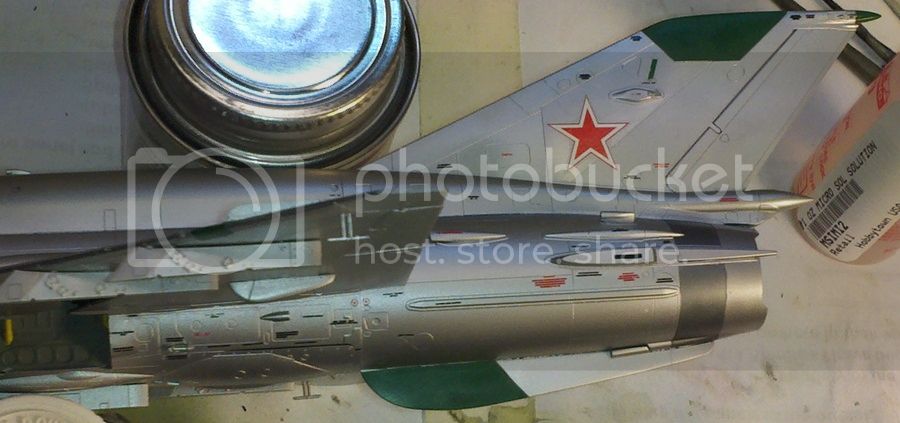
Whew, there are a lot of these little buggers!
Michael

Whew, there are a lot of these little buggers!
Michael
Jessie_C
Joined: September 03, 2009
KitMaker: 6,965 posts
AeroScale: 6,247 posts
Posted: Saturday, March 15, 2014 - 10:07 AM UTC
I remember that from my F-86D that I did for the Night Fighters campaign. The trick is to break the model's surface into reasonably-sized sections instead of trying to do it all at once.
MichaelSatin
Joined: January 19, 2008
KitMaker: 3,909 posts
AeroScale: 2,904 posts
Posted: Sunday, March 16, 2014 - 02:48 AM UTC
Quoted Text
I remember that from my F-86D that I did for the Night Fighters campaign. The trick is to break the model's surface into reasonably-sized sections instead of trying to do it all at once.
Indeed, it's the only way to keep from going cross-eyed. Still, this is the kind of thing that makes me miss the days when air forces didn't think they had the print the manual right on the airframe!
Michael
MichaelSatin
Joined: January 19, 2008
KitMaker: 3,909 posts
AeroScale: 2,904 posts
Posted: Sunday, March 16, 2014 - 09:37 AM UTC
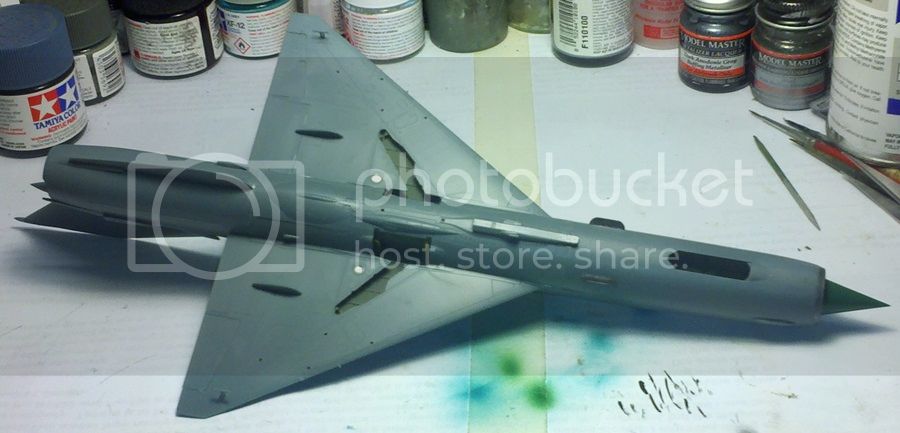
Whoo hoo, port side all done! And from what I see in the instructions, it has far more stencils than the starboard side, top or bottom!
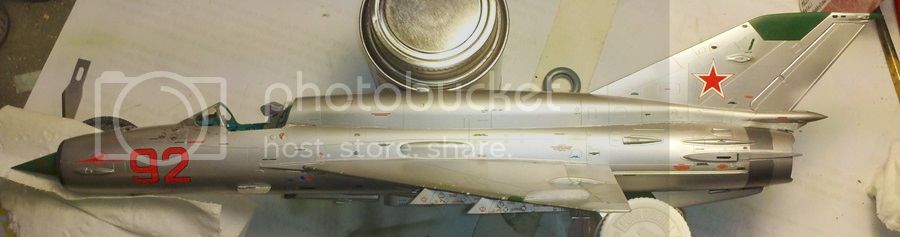
I also looked again at the instructions for the Javelin and it isn't much better, so I'm planning to stick the MiG-21 out.
Michael


I also looked again at the instructions for the Javelin and it isn't much better, so I'm planning to stick the MiG-21 out.
Michael
MichaelSatin
Joined: January 19, 2008
KitMaker: 3,909 posts
AeroScale: 2,904 posts
Posted: Monday, March 24, 2014 - 09:52 AM UTC
OK, both sides stenciled and up on its gear. Only the top and bottom to stencil now.
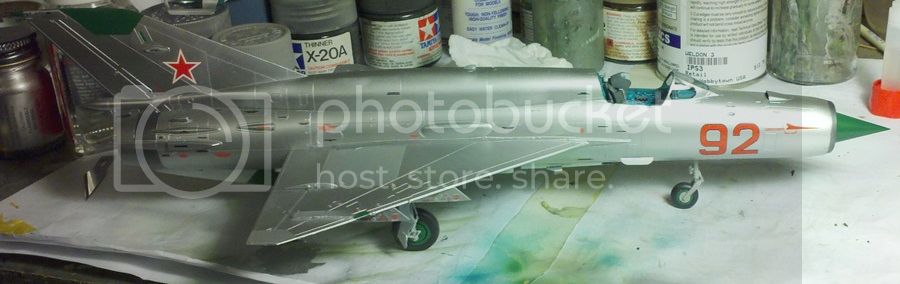
Sometimes I'm in too much of a hurry to get the gear on to make sure I put enough weight in the nose (I did). I don't think it'll get in the way too much.
BTW, I had a tough time with the seat. I think the photo etch side console parts extended a bit too much into the cockpit. A little work with a file will probably take care of it but I used the old elbow grease and popped it in.
Landing gear's a bit fiddly too, but looks good when done and fits positively into the wing and fuselage.
Michael
phantom_phanatic309
#372
Joined: March 10, 2010
KitMaker: 2,568 posts
AeroScale: 1,619 posts
Posted: Monday, March 24, 2014 - 10:22 AM UTC
Michael, the Mig is looking great. Wish I could get a metal finish as good as that. Luckily my Lightning, not almost all RAF aircraft of its day, was painted in high speed silver.
Speaking of the Lightning I managed to make a start on it tonight.
I glued in the fuselage floor to provide a good firm base for the etch cockpit to sit on. Also stared that. Floor and rear bulk head and side consoles were bent to shape. Nothing terribly complicated which is just as well as I'm still on a learning curve with working with etch. I stuck in some small sections of 'L' beam onto the cockpit floor to attach the consoles to.

Stephen
 |

WEB HOSTING BY


Copyright ©2021 AeroScale and Kitmaker Network, a subsidiary of Silver Star Enterprises
All Rights Reserved. Please read our Conditions of Use and Privacy Policy.
All Rights Reserved. Please read our Conditions of Use and Privacy Policy.