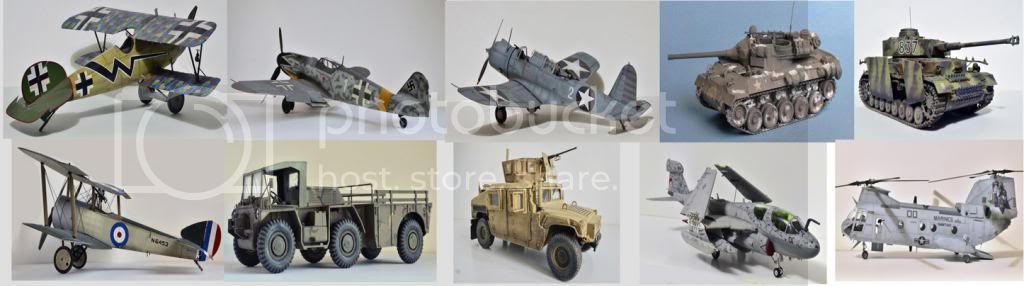
OFFICIAL: Douglas Parade of Propeller Power
Ontario, Canada
Joined: February 04, 2008
KitMaker: 2,507 posts
AeroScale: 1,814 posts
Posted: Wednesday, August 28, 2013 - 01:04 PM UTC
Congratulations Jessica on a fine double finish!
First to complete campaign.

" The Die Hards"
43rd MIDDLESEX REGIMENT
MACHINE GUN CORPS
XXX CORP
The most effective way to do it, is to do it.
- Amelia Earhart
Pennsylvania, United States
Joined: June 17, 2009
KitMaker: 566 posts
AeroScale: 507 posts
Posted: Thursday, August 29, 2013 - 03:25 PM UTC
Nice! They'll certainly give the gallery a strong start!
"...Fat, drunk, and stupid is no way to go through life son"
Pennsylvania, United States
Joined: June 17, 2009
KitMaker: 566 posts
AeroScale: 507 posts
Posted: Thursday, August 29, 2013 - 03:30 PM UTC
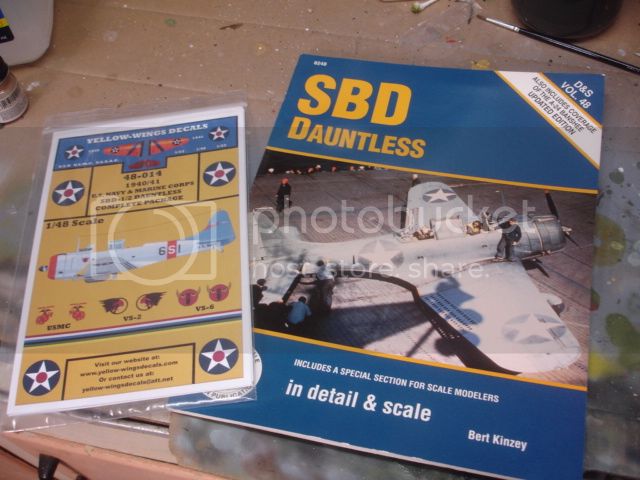
As for me, some reference material and decals arrived....Let the festivities begin!
"...Fat, drunk, and stupid is no way to go through life son"
Distrito Federal, Mexico
Joined: November 09, 2005
KitMaker: 8 posts
AeroScale: 2 posts
Posted: Friday, September 06, 2013 - 10:18 AM UTC
Hi!
I enlisted in this campaign and my likely target is an A-24 Banshee in 1:48 scale dressed as a Mexican Air Force attack bomber circa 1944. Being a virtual copy of the SBD-5 I hope it qualifies!
I was waiting for the Hasegawa A-24B model but after receiving it I noticed that the thing is maybe the worst Hasegawa kit I have ever seen. It may require a lot of work to correct all inaccuracies. I'm getting an Accurate Miniatures SBD-5 in case things go really bad with Hasegawa's.
Regards,
Luis Alvarez
Ontario, Canada
Joined: February 04, 2008
KitMaker: 2,507 posts
AeroScale: 1,814 posts
Posted: Friday, September 06, 2013 - 10:36 AM UTC
Welcome Luis and good luck.
" The Die Hards"
43rd MIDDLESEX REGIMENT
MACHINE GUN CORPS
XXX CORP
The most effective way to do it, is to do it.
- Amelia Earhart
Removed by original poster on 09/08/13 - 13:53:11 (GMT).
Ontario, Canada
Joined: February 04, 2008
KitMaker: 2,507 posts
AeroScale: 1,814 posts
Posted: Sunday, September 08, 2013 - 01:54 AM UTC
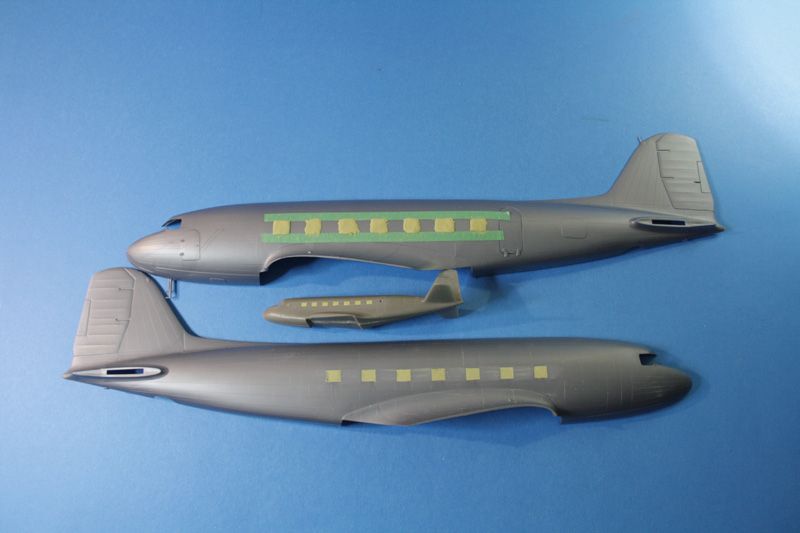
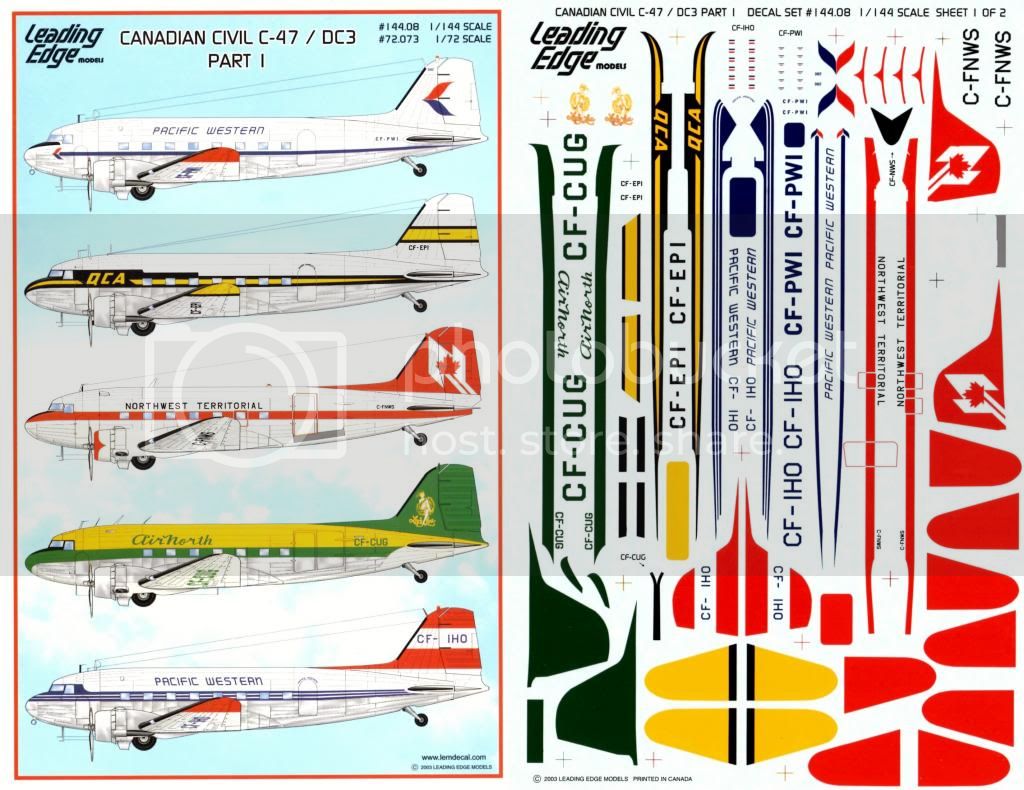
Working on the windows!
DC-3 1:48 & DC-2 1:144
" The Die Hards"
43rd MIDDLESEX REGIMENT
MACHINE GUN CORPS
XXX CORP
The most effective way to do it, is to do it.
- Amelia Earhart
Joel_W
 Associate Editor
New York, United States
Joined: December 04, 2010
KitMaker: 11,666 posts
AeroScale: 7,410 posts
Posted: Sunday, September 08, 2013 - 04:13 AM UTC
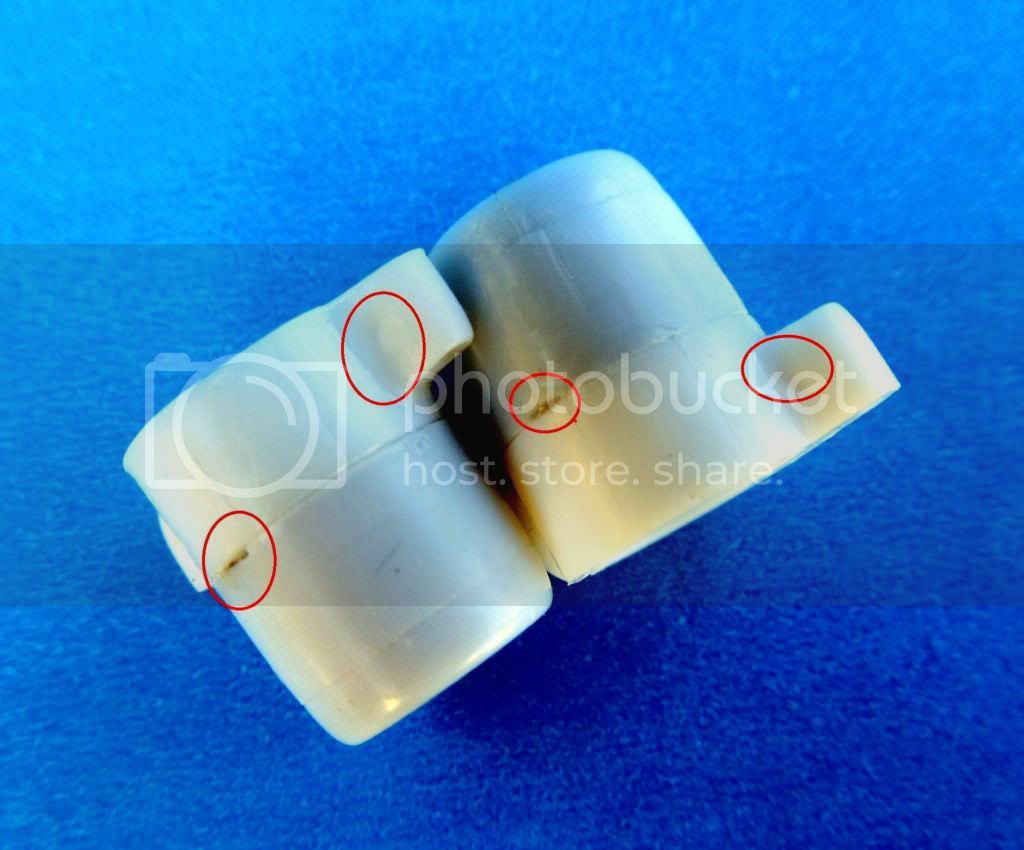
Richard, looks like the 1/72 scale fuselage just gave birth. Can't believe how small 1/144 is.
Joel
On my Workbench:
Monogram 1/24 scale 427 Shelby Cobra
Just Completed:
Beemax 1/24 scale BMW M3 E30 1992 Evolution II
Alberta, Canada
Joined: April 07, 2010
KitMaker: 1,028 posts
AeroScale: 939 posts
Posted: Wednesday, September 11, 2013 - 12:14 PM UTC
Just an update.
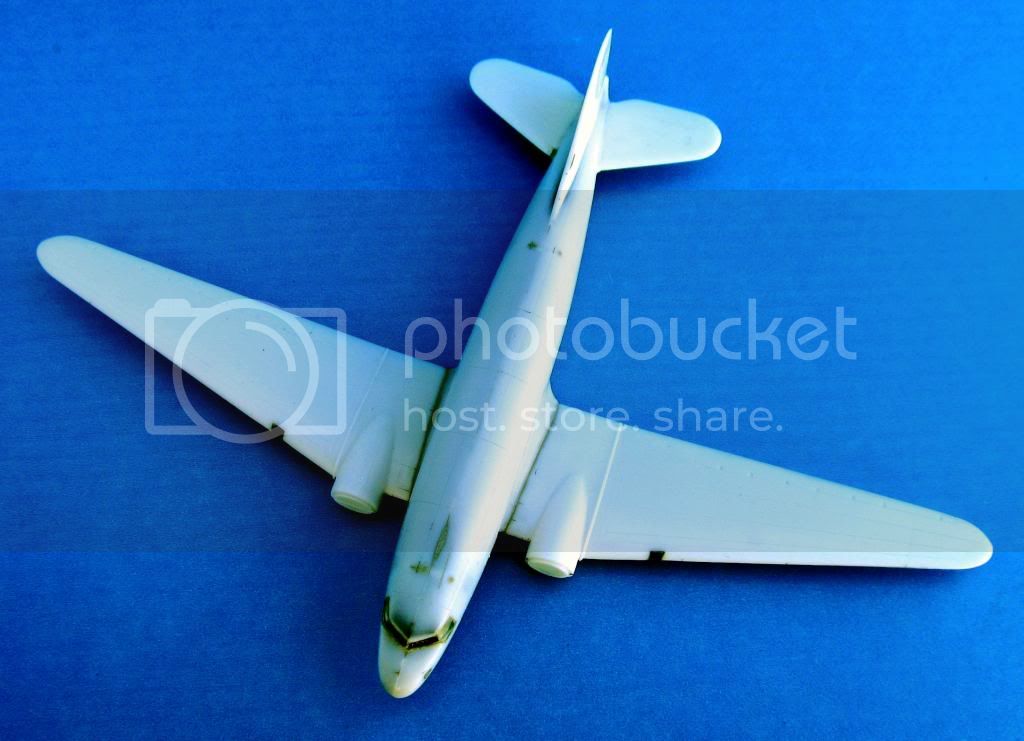
My fuselage is all filled and sanded. A model always looks horrible at this stage.
With that sanding dust on the inside, I'll be using decals for wind-screen.
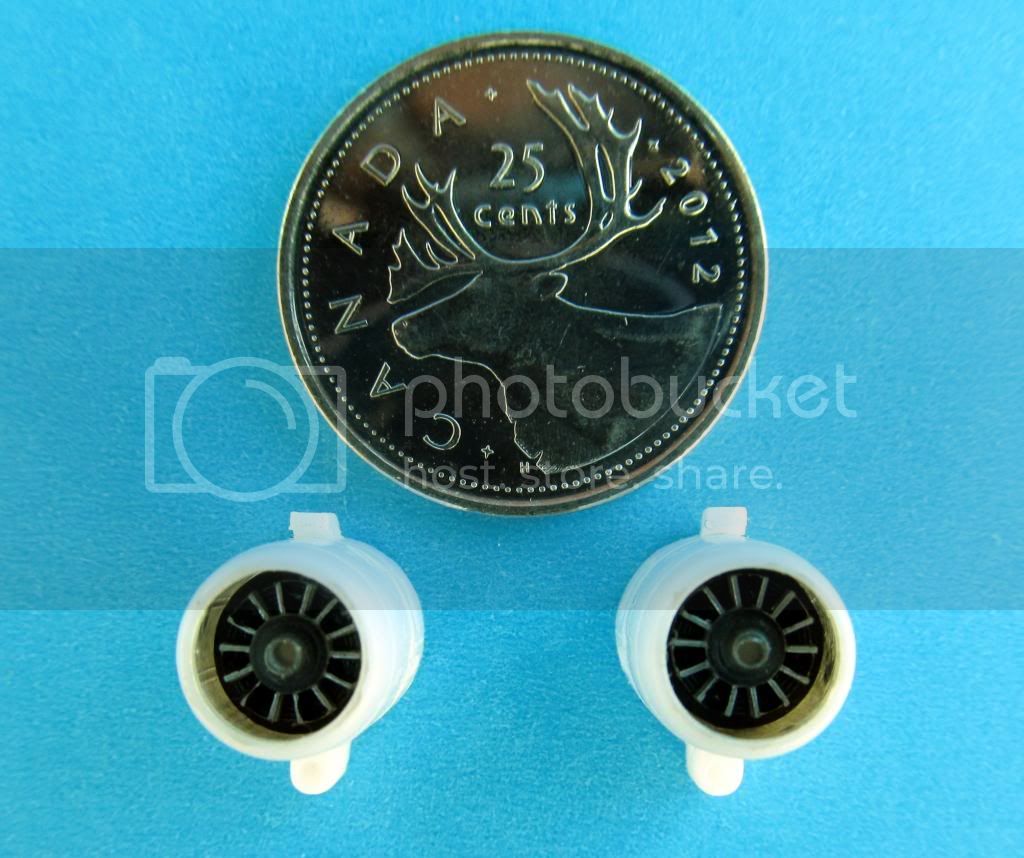
For the size, I thought the engines came out very well. I still need to fill and sand the cowlings before they can be attached.
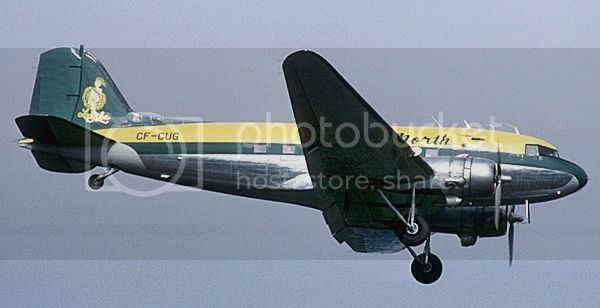
I've decided on this scheme:
For that end, I have the Leading Edge Decal
I do hope it all works out.


To prevent being called an 'expert', screw something up good every now and again.
Ontario, Canada
Joined: February 04, 2008
KitMaker: 2,507 posts
AeroScale: 1,814 posts
Posted: Wednesday, September 11, 2013 - 12:23 PM UTC
Nice work Ben.
I must check out those decals.
" The Die Hards"
43rd MIDDLESEX REGIMENT
MACHINE GUN CORPS
XXX CORP
The most effective way to do it, is to do it.
- Amelia Earhart

#439
Washington, United States
Joined: November 05, 2005
KitMaker: 4,950 posts
AeroScale: 3,192 posts
Posted: Wednesday, September 11, 2013 - 12:34 PM UTC
So Ben are you implying that it's a two bit kit?
Looking good so far, that Air North livery really stands out.
Hanger Queens in Waiting:
Monogram 1/72 F8F-1
Corsair the Sky Pirate - 1/72 Ace A-7D
Century Series - Airfix 1/72 F-105G
Anti Shipping - Academy 1/72 PBJ-1D
Academy 1/72 F-84E
Joel_W
Associate Editor New York, United States
Joined: December 04, 2010
KitMaker: 11,666 posts
AeroScale: 7,410 posts
Posted: Thursday, September 12, 2013 - 01:03 AM UTC
Ben, looking real good. Still can't believe how small those 1/144 models are. Nice choice of decal scheme. Looking forward to seeing your build with some paint on it.
Joel
On my Workbench:
Monogram 1/24 scale 427 Shelby Cobra
Just Completed:
Beemax 1/24 scale BMW M3 E30 1992 Evolution II
Ohio, United States
Joined: March 09, 2002
KitMaker: 818 posts
AeroScale: 137 posts
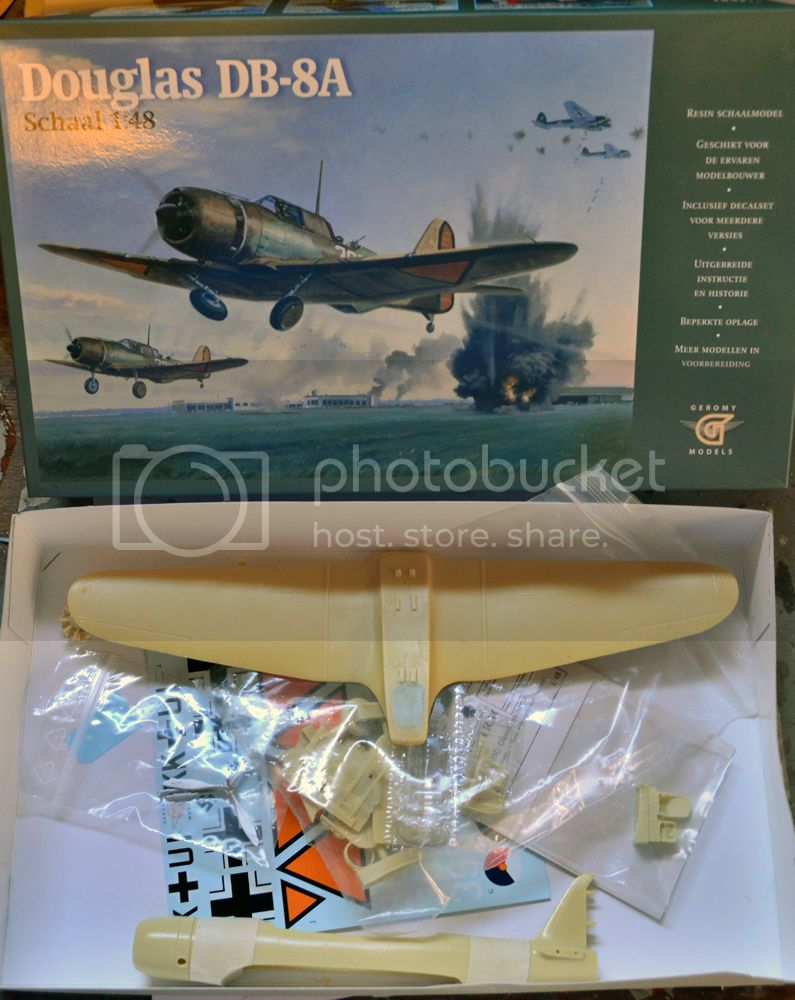
Posted: Tuesday, September 17, 2013 - 05:47 AM UTC
This is Geromy's 1/48 Douglas DB-8
Ontario, Canada
Joined: February 04, 2008
KitMaker: 2,507 posts
AeroScale: 1,814 posts
Posted: Tuesday, September 17, 2013 - 06:01 AM UTC
Quoted Text
This is Geromy's 1/48 Douglas DB-8
Looking forward to seeing the build.
" The Die Hards"
43rd MIDDLESEX REGIMENT
MACHINE GUN CORPS
XXX CORP
The most effective way to do it, is to do it.
- Amelia Earhart
Ohio, United States
Joined: March 09, 2002
KitMaker: 818 posts
AeroScale: 137 posts
Posted: Wednesday, September 18, 2013 - 04:24 AM UTC
British Columbia, Canada
Joined: September 03, 2009
KitMaker: 6,965 posts
AeroScale: 6,247 posts
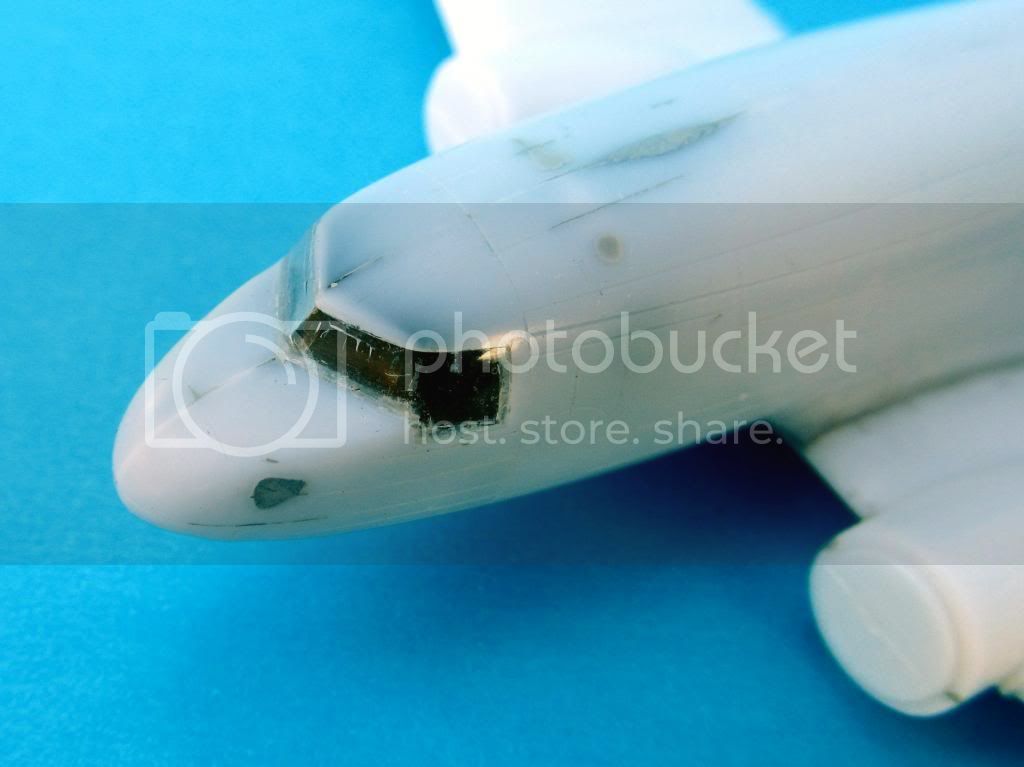
Posted: Wednesday, September 18, 2013 - 04:31 AM UTC
Oh my! Cleaning up that wing to fuselage gap is going to be so much fun!
When once you have tasted flight you will walk the Earth with your eyes turned skyward.
For there you have been, and there you will always long to return.
-Leonardo Da Vinci
Ohio, United States
Joined: March 09, 2002
KitMaker: 818 posts
AeroScale: 137 posts
Posted: Wednesday, September 18, 2013 - 05:15 AM UTC
Thanks for the support

Joel_W
Associate Editor New York, United States
Joined: December 04, 2010
KitMaker: 11,666 posts
AeroScale: 7,410 posts
Posted: Wednesday, September 18, 2013 - 05:28 AM UTC
I'll 2nd Jessica's "Oh MY". That wing/fuselage gap is really nasty. It' big, deep,& it's edges are rolled. Makes for a very hard seem to blend in correctly and smoothly. Also the few close ups show how rough the overall surface is.
Joel
On my Workbench:
Monogram 1/24 scale 427 Shelby Cobra
Just Completed:
Beemax 1/24 scale BMW M3 E30 1992 Evolution II
British Columbia, Canada
Joined: September 03, 2009
KitMaker: 6,965 posts
AeroScale: 6,247 posts
Posted: Wednesday, September 18, 2013 - 05:39 AM UTC
This kind of kit is why the modelling gods invented Milliput.
When once you have tasted flight you will walk the Earth with your eyes turned skyward.
For there you have been, and there you will always long to return.
-Leonardo Da Vinci
Ontario, Canada
Joined: February 04, 2008
KitMaker: 2,507 posts
AeroScale: 1,814 posts
Posted: Wednesday, September 18, 2013 - 06:00 AM UTC
Quoted Text
This kind of kit is why the modelling gods invented Milliput.
And Injection Molding

" The Die Hards"
43rd MIDDLESEX REGIMENT
MACHINE GUN CORPS
XXX CORP
The most effective way to do it, is to do it.
- Amelia Earhart
Joel_W
Associate Editor New York, United States
Joined: December 04, 2010
KitMaker: 11,666 posts
AeroScale: 7,410 posts
Posted: Wednesday, September 18, 2013 - 06:40 AM UTC
If it was my build, I'd start filling that gap with epoxy, but make sure I keep it a little below the surface line. Then finish with Green Stuff. Without a rock solid base, fillers could continue to shrink and sink.
Joel
On my Workbench:
Monogram 1/24 scale 427 Shelby Cobra
Just Completed:
Beemax 1/24 scale BMW M3 E30 1992 Evolution II
British Columbia, Canada
Joined: September 03, 2009
KitMaker: 6,965 posts
AeroScale: 6,247 posts
Posted: Wednesday, September 18, 2013 - 07:27 AM UTC
Quoted Text
If it was my build, I'd start filling that gap with epoxy, but make sure I keep it a little below the surface line. Then finish with Green Stuff. Without a rock solid base, fillers could continue to shrink and sink.
Joel
Thus the Milliput two part epoxy putty which may be sculpted with water when it's wet and dries rock hard without shrinking. Great stuff.
When once you have tasted flight you will walk the Earth with your eyes turned skyward.
For there you have been, and there you will always long to return.
-Leonardo Da Vinci
Joel_W
Associate Editor New York, United States
Joined: December 04, 2010
KitMaker: 11,666 posts
AeroScale: 7,410 posts
Posted: Wednesday, September 18, 2013 - 08:31 AM UTC
Thanks Jessica for the info. Never used it. I've always used Squadron Green Stuff since the mid 70's. Will have to order some and check it out.
Joel
On my Workbench:
Monogram 1/24 scale 427 Shelby Cobra
Just Completed:
Beemax 1/24 scale BMW M3 E30 1992 Evolution II
Ohio, United States
Joined: March 09, 2002
KitMaker: 818 posts
AeroScale: 137 posts
Posted: Wednesday, September 18, 2013 - 10:08 AM UTC
I'll be using a 2-part epoxy putty called Paleo Bond. I've used it for years reconstructing damaged fossils. Like Milliput you can shape it with water before it cures


]
Joel_W
Associate Editor New York, United States
Joined: December 04, 2010
KitMaker: 11,666 posts
AeroScale: 7,410 posts
Posted: Wednesday, September 18, 2013 - 10:45 AM UTC
Mike, that Paleo bond really looks like a excellent way to go. Doesn't look course where a fill coat will be needed to smooth the surface. Where can I buy some?
Joel
On my Workbench:
Monogram 1/24 scale 427 Shelby Cobra
Just Completed:
Beemax 1/24 scale BMW M3 E30 1992 Evolution II


 ]
]