

I originally planned on doing the GWH TBD-1 Devastator for this campaign. I had finished my F4U-1A Corsair a few weeks prior to the start date, so I picked up an old Hasegawa 1/48 scale SBD-4 Douglas Dauntless, as I've planned on doing a detailed build. The kit has been in my stash for a few years, and at some point I must have opened the box up and checked it out. The kit came with a PE sheet for the dive flaps, but over the years they just have seemed to disappeared, so I started off my build by cutting out the dive flaps, drilling the 300 plus holes, and started the ribs and braces. Now I can't put the kit down and pick up the Devastator.
I reached out to Tinbanger to see if I could still enter the Dauntless. It's fine with him, as long as no one objects. To date all the dive flaps are done, and the basics of the interior has been started. So I'll wait a few days to see how everyone feels before I post anything.
Joel
Air Campaigns
Want to start or join a group build? This is where to start.
Want to start or join a group build? This is where to start.
Hosted by Frederick Boucher, Michael Satin
OFFICIAL: Douglas Parade of Propeller Power
Joel_W

Joined: December 04, 2010
KitMaker: 11,666 posts
AeroScale: 7,410 posts
Posted: Wednesday, August 07, 2013 - 05:43 AM UTC

Joel_W
Joined: December 04, 2010
KitMaker: 11,666 posts
AeroScale: 7,410 posts
Posted: Wednesday, August 07, 2013 - 11:48 AM UTC
Sorry to drive everyone crazy about using the Dauntless for the campaign build, but after seeing just how much I've actually done on the kit with the extra detailing, it's just way too much to be considered for this campaign. Going to finish the Dauntless as a separate build, and the Devastator for this campaign.
Joel
Joel

tinbanger

Joined: February 04, 2008
KitMaker: 2,507 posts
AeroScale: 1,814 posts

Posted: Wednesday, August 07, 2013 - 01:32 PM UTC
Quoted Text
Sorry to drive everyone crazy about using the Dauntless for the campaign build, but after seeing just how much I've actually done on the kit with the extra detailing, it's just way too much to be considered for this campaign. Going to finish the Dauntless as a separate build, and the Devastator for this campaign.
Joel
Joel thank you for your honesty.


Mcleod
Joined: April 07, 2010
KitMaker: 1,028 posts
AeroScale: 939 posts
Posted: Wednesday, August 07, 2013 - 02:32 PM UTC
Not to much to report. Just like to photograph things as I'm going along.
I'm not sure yet if I'm using the clear windscreen, or the windscreen decals. I brush blacked the interior anyway.
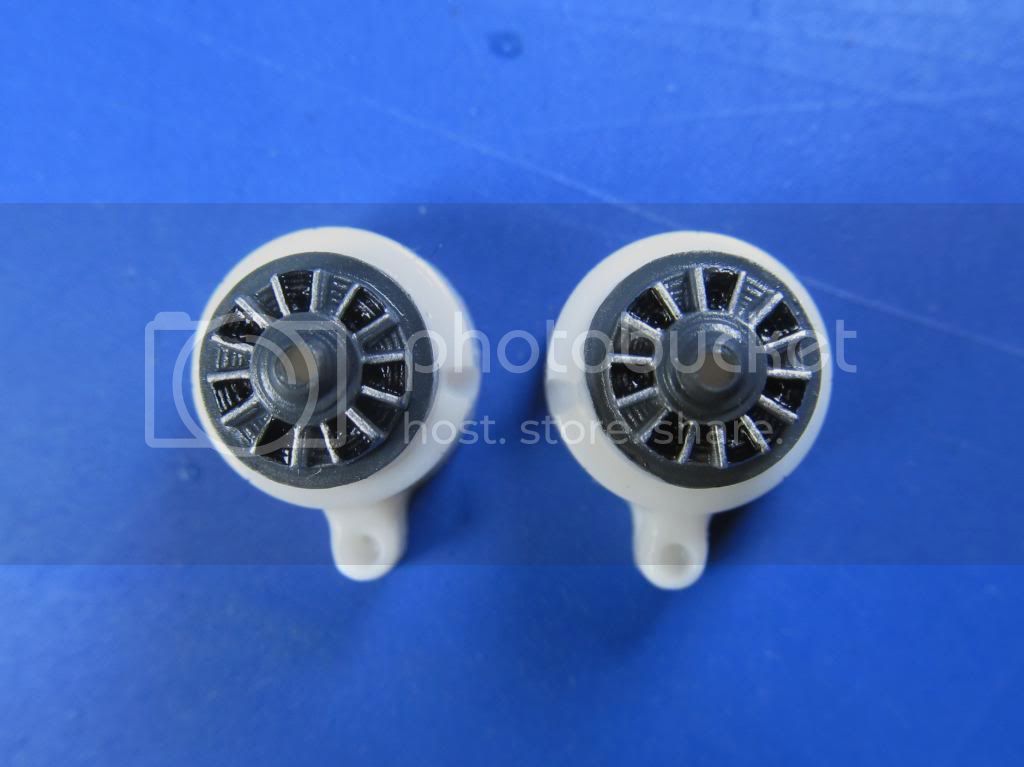
These tiny engines are not all that hard to brush paint to an acceptable point. I'm happy with them.
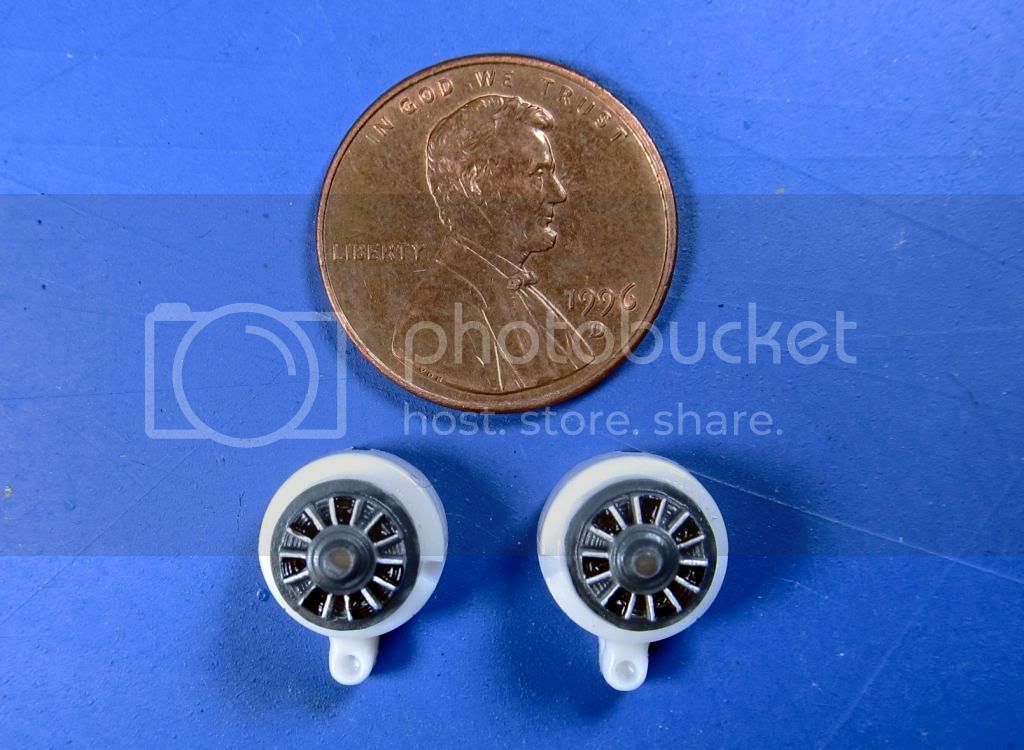
A size comparison, using Mr Lincoln:
Just being patient, trying to work my way slowly through all thats on my table. Ben
I'm not sure yet if I'm using the clear windscreen, or the windscreen decals. I brush blacked the interior anyway.

These tiny engines are not all that hard to brush paint to an acceptable point. I'm happy with them.

A size comparison, using Mr Lincoln:

Just being patient, trying to work my way slowly through all thats on my table. Ben

Jessie_C

Joined: September 03, 2009
KitMaker: 6,965 posts
AeroScale: 6,247 posts

Posted: Wednesday, August 07, 2013 - 04:55 PM UTC
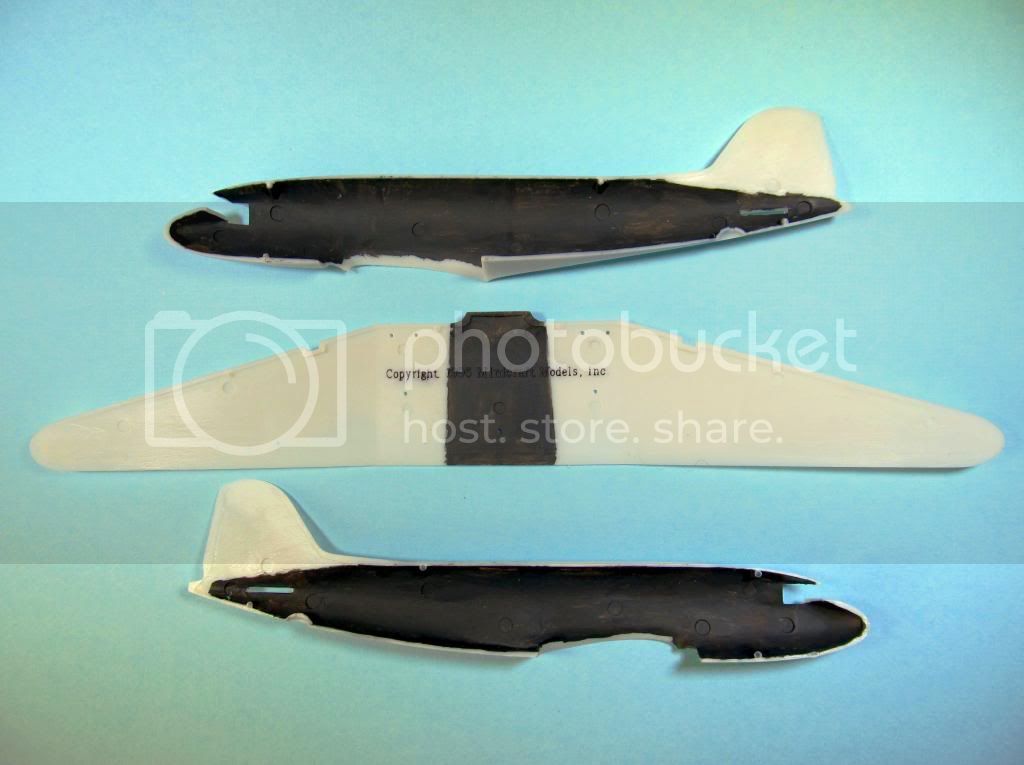
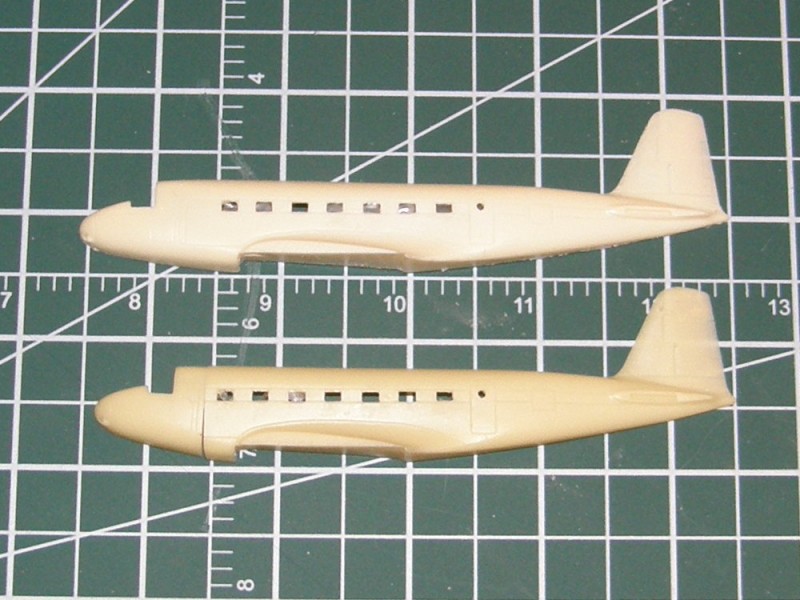
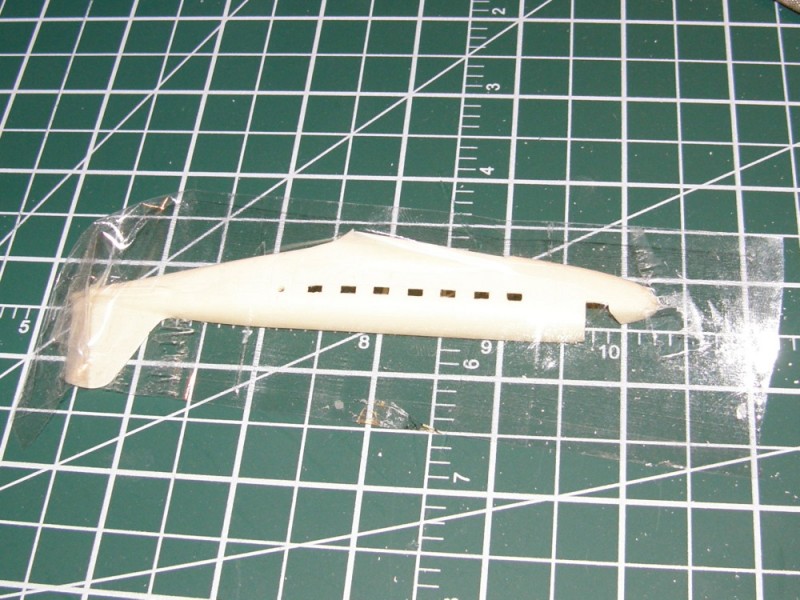
When the DC-2 went into production, the fuselage was lengthened ahead of the wing by 2 ft in order to increase the passenger capacity. in 1/144 that works out to roughly 4 mm. I've inked in a 4 mm band on the nose where there aren't any panel lines to get in the way. This is what I'll have to remove.
Jessie_C
Joined: September 03, 2009
KitMaker: 6,965 posts
AeroScale: 6,247 posts
Posted: Wednesday, August 07, 2013 - 05:49 PM UTC
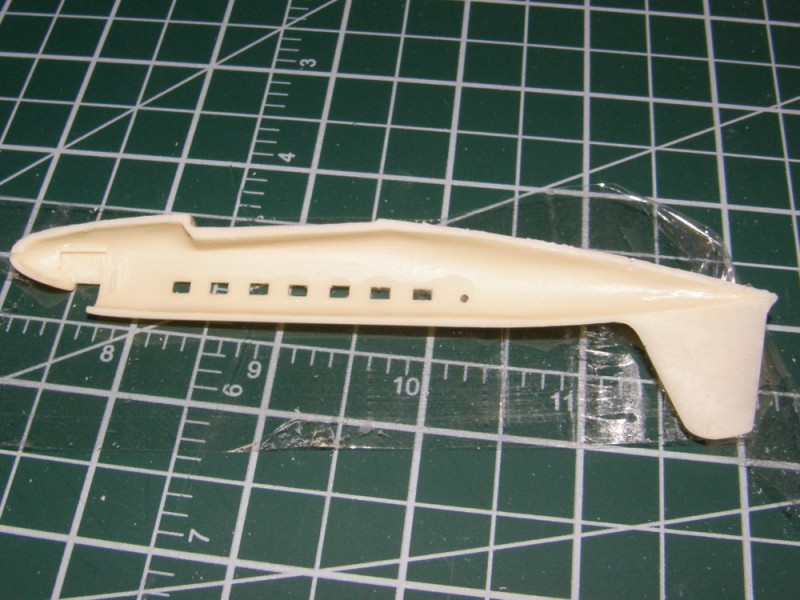
Cuts made, I compare the shortened fuselage half with a standard DC-2 fuselage. There's a bit of a step on the underside to sort out but luckily a bit of sanding and polishing will take care of that. This concludes the work required for the conversion.

warreni

Joined: August 14, 2007
KitMaker: 5,926 posts
AeroScale: 2,201 posts
Posted: Wednesday, August 07, 2013 - 07:49 PM UTC
Hi everyone.
Just to make sure this doesn't turn into a DC-X build I will make my contribution a 1/72 Special Hobby Douglas DB-8 Bomber. Will get some piccies up next week. Bit busy with a Hood at the moment..
Cheers
Warren
Just to make sure this doesn't turn into a DC-X build I will make my contribution a 1/72 Special Hobby Douglas DB-8 Bomber. Will get some piccies up next week. Bit busy with a Hood at the moment..
Cheers
Warren
tinbanger
Joined: February 04, 2008
KitMaker: 2,507 posts
AeroScale: 1,814 posts
Posted: Wednesday, August 07, 2013 - 10:26 PM UTC
"A size comparison, using Mr Lincoln"
Hi Ben
Would you like me to send you a Canadian penny? or have you in Alberta gone over to $US?
Hi Ben
Would you like me to send you a Canadian penny? or have you in Alberta gone over to $US?
Joel_W
Joined: December 04, 2010
KitMaker: 11,666 posts
AeroScale: 7,410 posts
Posted: Thursday, August 08, 2013 - 02:22 AM UTC
Ben, Just can't believe how small those two engines are in 1/144 scale. And I gave up 1/72 scale as being just too small for these tired old eyes.
Jessica, Nicely done. Looks like a piece of cake as long as the cut lines are straight.
Joel
Jessica, Nicely done. Looks like a piece of cake as long as the cut lines are straight.
Joel
Jessie_C
Joined: September 03, 2009
KitMaker: 6,965 posts
AeroScale: 6,247 posts
Posted: Thursday, August 08, 2013 - 02:25 PM UTC
On to the windows. The fit is less than exceptional, but since I'm going to be using decals it's a moot proposition. Flood in the superglue. Yes, they're supposed to stick up like that.
And check the outside. Lots of room for cleaning up.
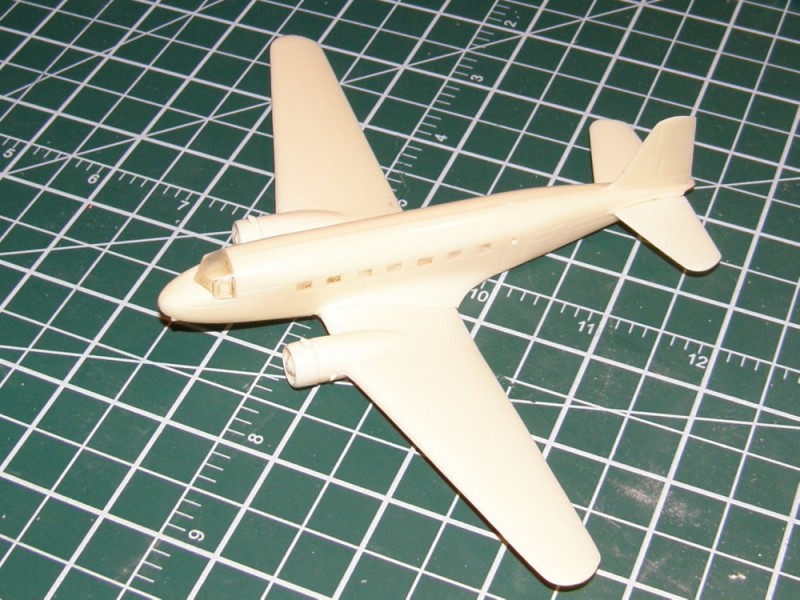
A quick little bit of building later and we have a closed up fuselage and the wings are on.
Add the tailplanes and we have an airplane!
Once it's all hardened up I'll give it a coat of primer and see how much filling needs to be done.
And check the outside. Lots of room for cleaning up.
A quick little bit of building later and we have a closed up fuselage and the wings are on.
Add the tailplanes and we have an airplane!
Once it's all hardened up I'll give it a coat of primer and see how much filling needs to be done.
Jessie_C
Joined: September 03, 2009
KitMaker: 6,965 posts
AeroScale: 6,247 posts
Posted: Friday, August 09, 2013 - 04:14 AM UTC
Okay, I couldn't resist putting on some putty first.
As far as it goes, this isn't an extreme amount of putty. I've built several resin kits which require much more than this.
I'm a little worried about engine #1. It looks as though it slipped a little before the glue set up. I may have to pop it off and reposition it.
As far as it goes, this isn't an extreme amount of putty. I've built several resin kits which require much more than this.
I'm a little worried about engine #1. It looks as though it slipped a little before the glue set up. I may have to pop it off and reposition it.

JClapp

#259
Joined: October 23, 2011
KitMaker: 2,265 posts
AeroScale: 1,715 posts

Posted: Friday, August 09, 2013 - 08:29 AM UTC
Coming along nicely. Howard Hughes would approve.
Its interesting how much visual impact shortening the fuselage made.
Its interesting how much visual impact shortening the fuselage made.

JClapp
#259
Joined: October 23, 2011
KitMaker: 2,265 posts
AeroScale: 1,715 posts
Posted: Friday, August 09, 2013 - 08:52 AM UTC
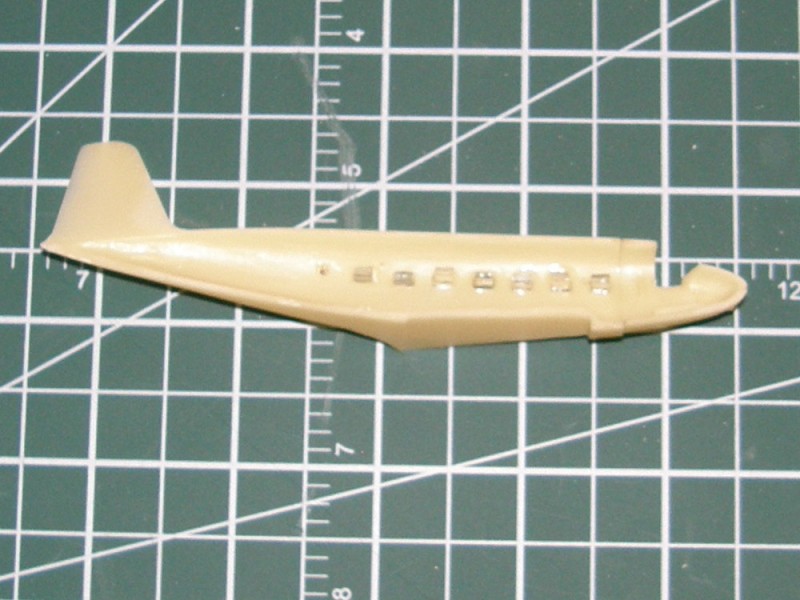
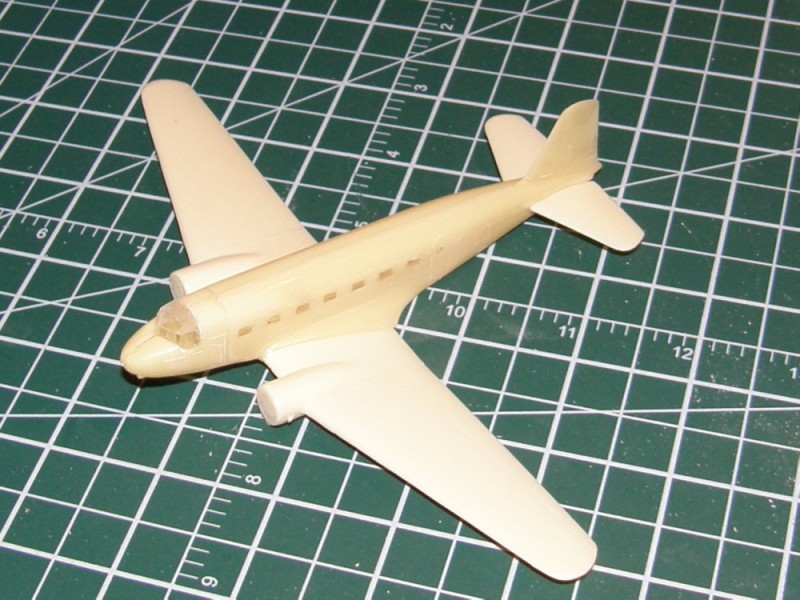
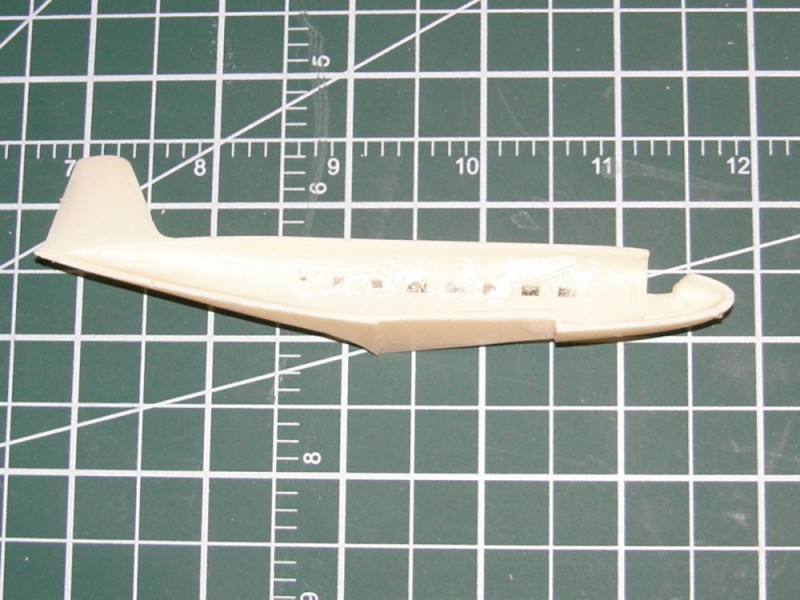
I put in a day of work on the Welsh C-47

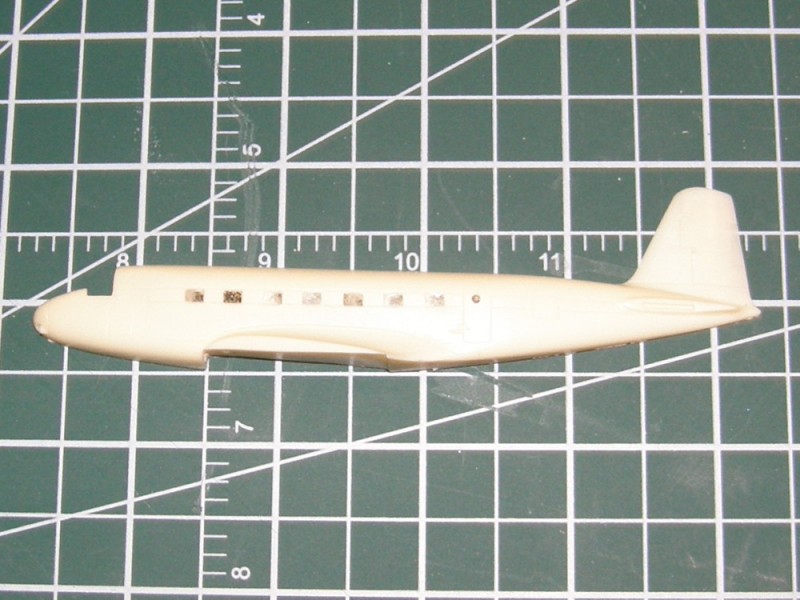
The Welsh model is devoid of surface detail, accept for the control surfaces, and windows (which I could do without).
Something Ive attempted recently with not much success is scribing panel lines. Armed with the right tools, a role of genuine Dymo tape and a genuine Squadron scribing too, Im making another attempt.
Ive cranked the contrast on this picture way up, but its still hard to make out. They look pretty good in person, I think.
Bringing this reference picture along
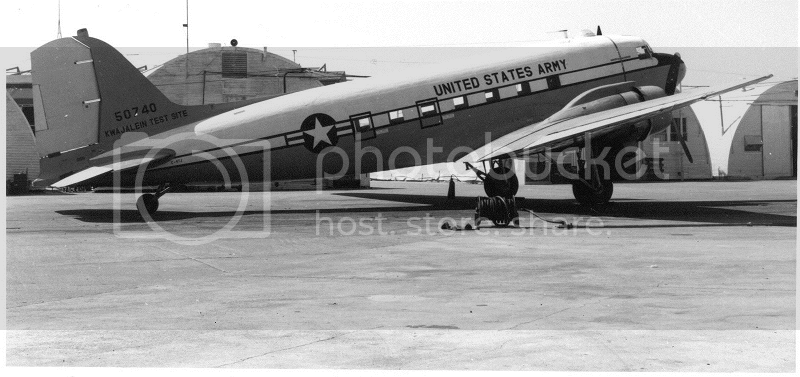
The squares around the aft windows, I assume indicate emergency escape doors - opinions please, do you think they are red or black lines?
The Welsh model is devoid of surface detail, accept for the control surfaces, and windows (which I could do without).
Something Ive attempted recently with not much success is scribing panel lines. Armed with the right tools, a role of genuine Dymo tape and a genuine Squadron scribing too, Im making another attempt.
Ive cranked the contrast on this picture way up, but its still hard to make out. They look pretty good in person, I think.
Bringing this reference picture along
The squares around the aft windows, I assume indicate emergency escape doors - opinions please, do you think they are red or black lines?
Jessie_C
Joined: September 03, 2009
KitMaker: 6,965 posts
AeroScale: 6,247 posts
Posted: Friday, August 09, 2013 - 09:19 AM UTC
Compared to the known red in the insignia right beside them, I'd say that they're likely black, or possibly insignia blue. They have the same tonal value as the cheatlines and the blue in the insignia so it could go either way.
tinbanger
Joined: February 04, 2008
KitMaker: 2,507 posts
AeroScale: 1,814 posts
Posted: Friday, August 09, 2013 - 09:24 AM UTC
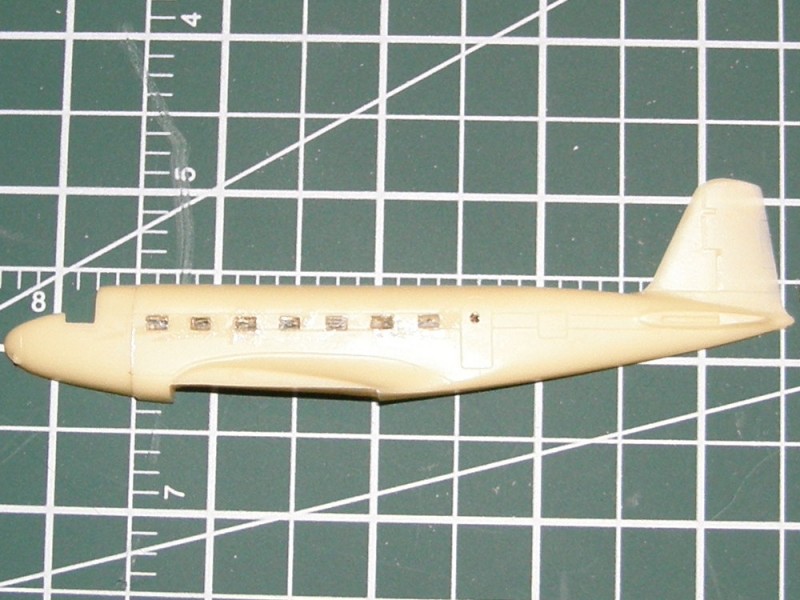
Here is my DC update:-

The resin window inserts were way to big so I have used Micro Glaze with tape doubled up as a backing.
next time I will fill in the openings and print the windows on a decal sheet.
The resin window inserts were way to big so I have used Micro Glaze with tape doubled up as a backing.
next time I will fill in the openings and print the windows on a decal sheet.
Jessie_C
Joined: September 03, 2009
KitMaker: 6,965 posts
AeroScale: 6,247 posts
Posted: Friday, August 09, 2013 - 09:25 AM UTC
In parallel with the DC-1, I'm doing a DC-2. After having messed around with the windows in the DC-1, I'm using the superglue and packing tape trick. Once again I'm going to use decal windows, so having them crystal clear is not important. The first task is to lay on a strip of packing tape. Make certain that there aren't any folds, ripples or air bubbles under the tape. This will keep the superglue in the windows instead of running all over the outside of the fuselage.
The tape in place
Now carefully pour in the superglue, taking care not to let air bubbles develop in the windows.
Apply accelerator and allow the glue to harden. I let it sit overnight. Peel the tape and inspect.
Inside
Outside
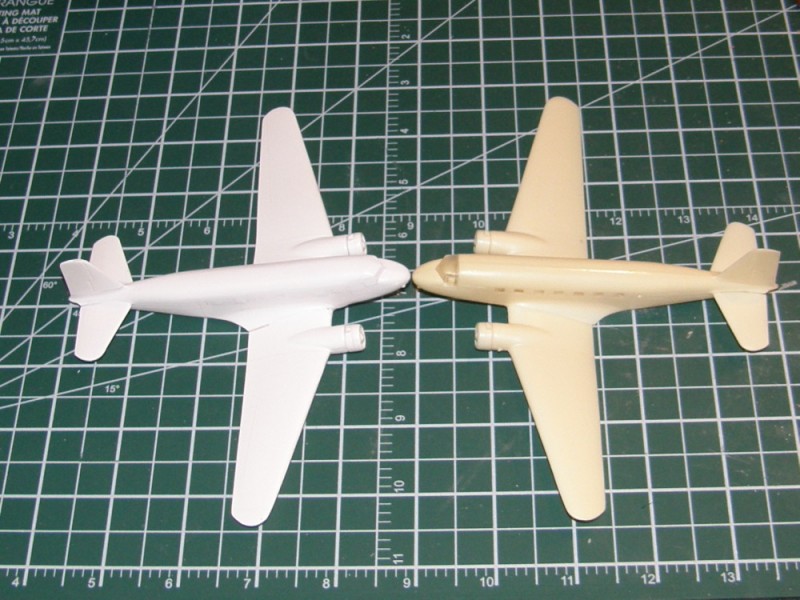
And a short while later, we have a DC-2
Nose to nose with the DC-1
Richard, talk to Michael at Vintage Flyer. He'll print you windows at a reasonable cost
The tape in place
Now carefully pour in the superglue, taking care not to let air bubbles develop in the windows.
Apply accelerator and allow the glue to harden. I let it sit overnight. Peel the tape and inspect.
Inside
Outside
And a short while later, we have a DC-2
Nose to nose with the DC-1
Richard, talk to Michael at Vintage Flyer. He'll print you windows at a reasonable cost
Mcleod
Joined: April 07, 2010
KitMaker: 1,028 posts
AeroScale: 939 posts
Posted: Friday, August 09, 2013 - 10:36 AM UTC
Quoted Text
Would you like me to send you a Canadian penny? or have you in Alberta gone over to $US?
I have pennies, so I'd like you to send me something significantly larger, please. I don't have those.
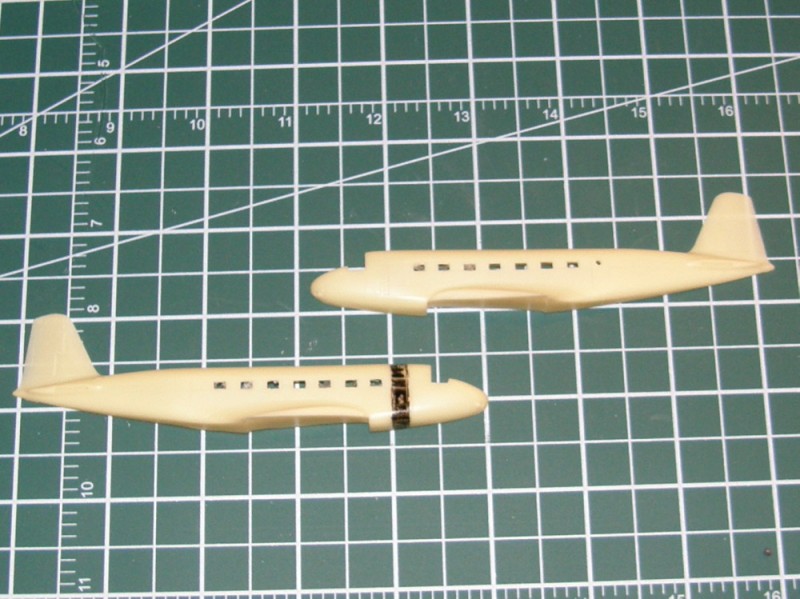
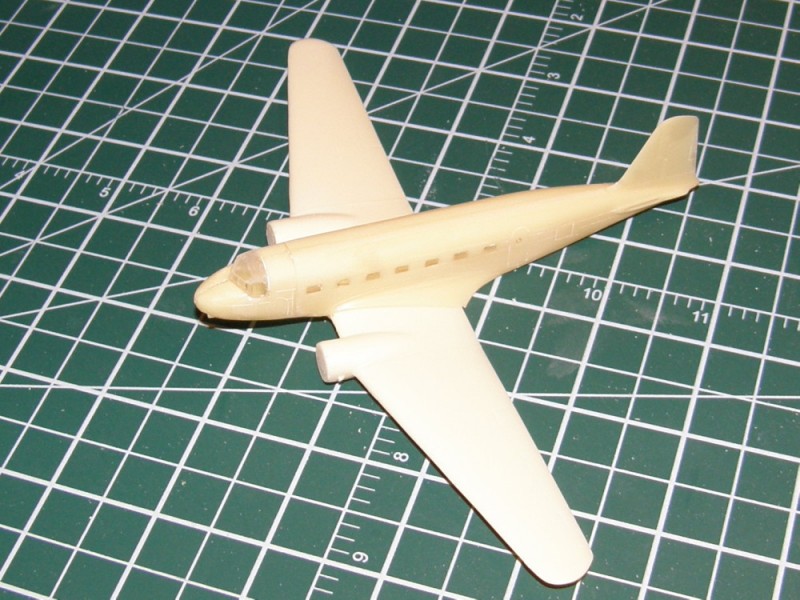
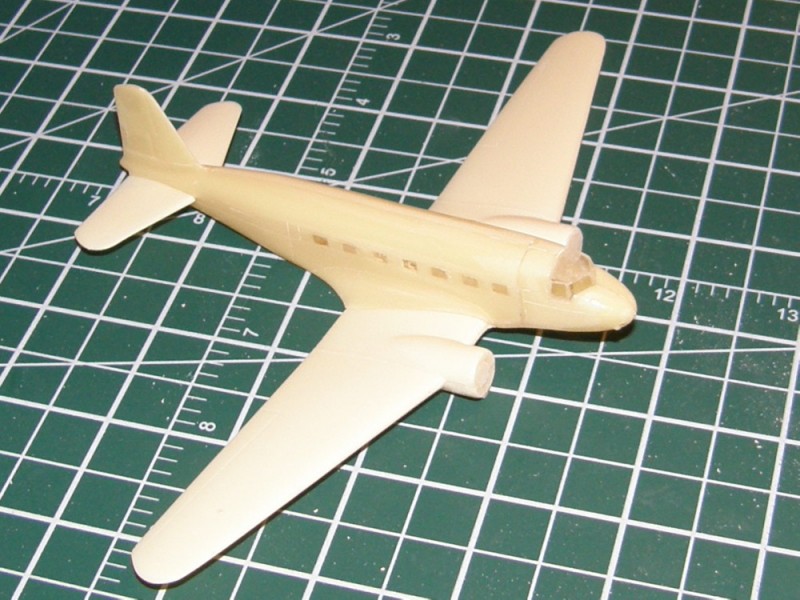
Some really nice DC-?s going on here. Mine is just beginning to look like an airplane as well:


I'm still not sure if I'll use decals for the cockpit glass, or spit-n-polish, then mask. I suppose that since the fuselage windows will be decals, she might look uniform with the pit glass decaled.

I'm wishing Mr. Lincoln was in the picture, so those who don't know, could see how small that glass really is.
Well done by everyone so far.
tinbanger
Joined: February 04, 2008
KitMaker: 2,507 posts
AeroScale: 1,814 posts
Posted: Saturday, August 10, 2013 - 12:29 AM UTC
"Richard, talk to Michael at Vintage Flyer. He'll print you windows at a reasonable cost"
Hi Jesica
Thank you for the Vintage Flyer link.
I am not happy with the glaze that I did so out with the filler!
Good tip demo with the super glue glaze.
Ben:-
I work at The Royal Canadian Mint in Ottawa! we have some coins going for around $60,000 CDN but you would have to build 1;32 scale to keep size ratio!
Jessie_C
Joined: September 03, 2009
KitMaker: 6,965 posts
AeroScale: 6,247 posts
Posted: Saturday, August 10, 2013 - 02:34 PM UTC
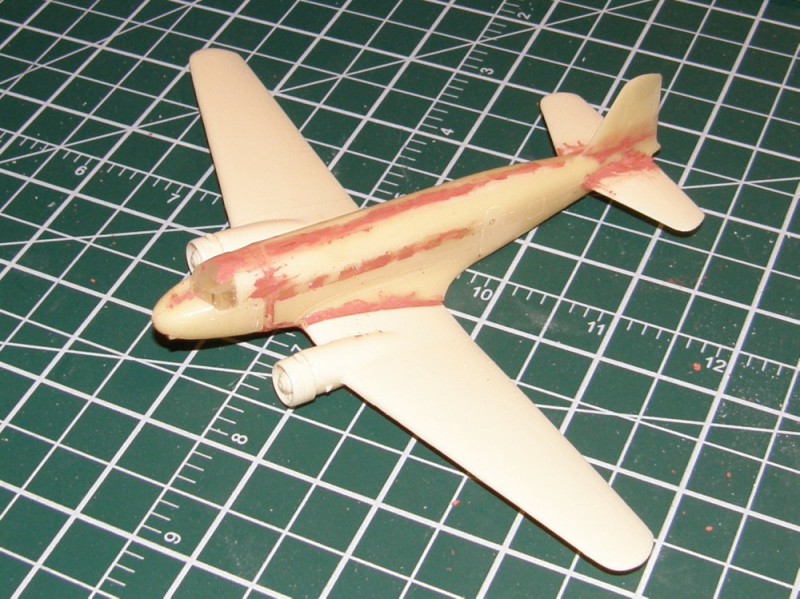
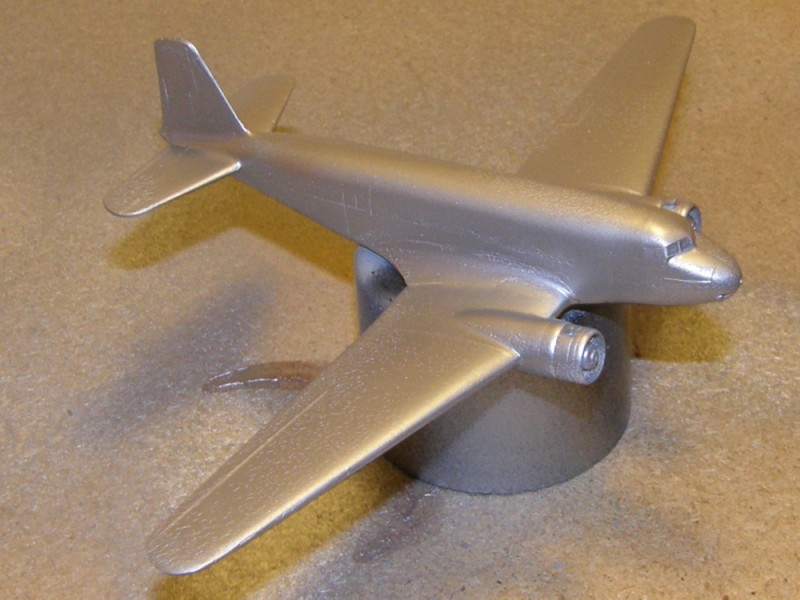
Now that I've finally unpacked the rest of my paint, I can get some grey primer on the DCs.

There's still much to do with filling, sanding and making ready for the metal paint scheme.
There's still much to do with filling, sanding and making ready for the metal paint scheme.
Jessie_C
Joined: September 03, 2009
KitMaker: 6,965 posts
AeroScale: 6,247 posts
Posted: Saturday, August 10, 2013 - 06:11 PM UTC
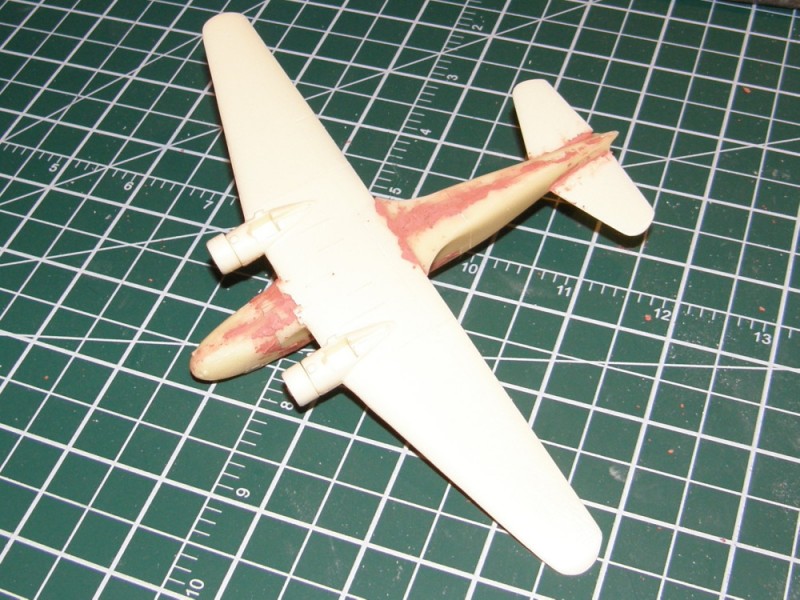
Oops. The silver reacted with the undercoat.
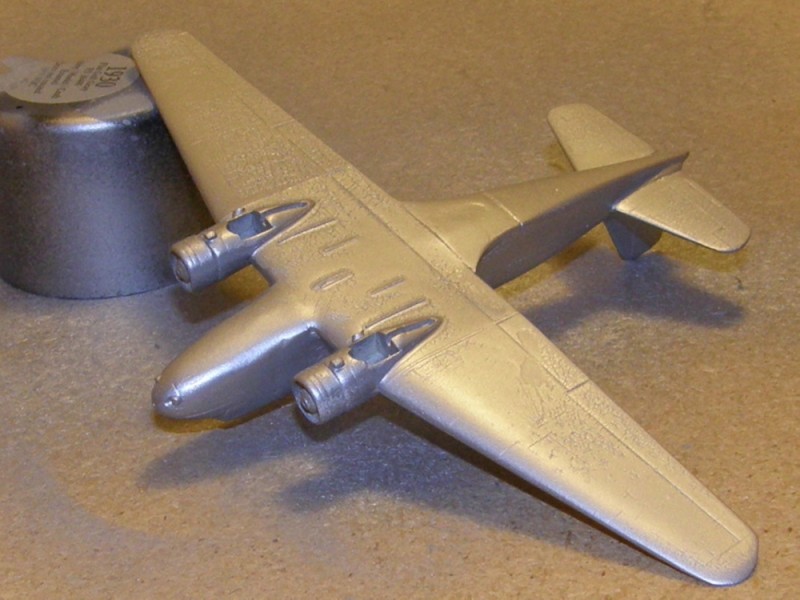
I think that I need to think about how to solve this. Perhaps some Rub'n Buff over an acryllic barrier coat?
I think that I need to think about how to solve this. Perhaps some Rub'n Buff over an acryllic barrier coat?
Joel_W
Joined: December 04, 2010
KitMaker: 11,666 posts
AeroScale: 7,410 posts
Posted: Sunday, August 11, 2013 - 04:34 AM UTC
Jessica, Having both DC's seating on top of the tops of spray cans, just drove home the point how small those models really are.
As for the Silver paint issue, what primer did you use? I always prime with Tamiya Gray lacquer primer, then polish it out till it's smooth with polishing pads that I have to grade 12,000, which is never really needed. After that I lay down a base of either gloss or matt black depending on the finish I'm after. That is also polished out.
I've only used Model Master Metallic paints to date, but will be switching over to Alcad's.
Your silver issue could also be that you applied way to heavy of coats, and the silver paint dried unevenly, causing those ripples.
Joel
Jessie_C
Joined: September 03, 2009
KitMaker: 6,965 posts
AeroScale: 6,247 posts
Posted: Sunday, August 11, 2013 - 04:36 AM UTC
I used Tamiya superfine white, followed by Badger Modelflex grey. I think the problem was caused by the Modelflex not being completely cured. I'm going to wait a couple of days, sand everything down and try again.
Joel_W
Joined: December 04, 2010
KitMaker: 11,666 posts
AeroScale: 7,410 posts
Posted: Sunday, August 11, 2013 - 05:07 AM UTC
Quoted Text
I used Tamiya superfine white, followed by Badger Modelflex grey. I think the problem was caused by the Modelflex not being completely cured. I'm going to wait a couple of days, sand everything down and try again.
The Tamiya White is lacquer based, so that can't be the issue if it fully dried. I'm assuming that the plastic was completely clean before you applied the primer coat. That could also have been a contributing factor. Just a little confused as to why you would use a Lacquer based white fine pigment primer, then follow up with a water based flat gray base paint from Modelflex. I would think that you would be much better off just using Tamiya's Lacquer Gray primer.
I'm once again assuming that the Silver paint was also Lacquered based. Was it applied via a airbrush or from a rattle can?
Joel
Jessie_C
Joined: September 03, 2009
KitMaker: 6,965 posts
AeroScale: 6,247 posts
Posted: Sunday, August 11, 2013 - 05:14 AM UTC
Why did I do it? Partially because I'm stupid about things and rushed, partly because I just got my paints and airbrushes unpacked and partly because the silver is plain old Testors spraybomb enamel which I've had catastrophically react with Tamiya primers before.
The cure will be to let everything cure, sand it back and try again.
The cure will be to let everything cure, sand it back and try again.
Joel_W
Joined: December 04, 2010
KitMaker: 11,666 posts
AeroScale: 7,410 posts
Posted: Sunday, August 11, 2013 - 05:50 AM UTC
Quoted Text
Why did I do it? Partially because I'm stupid about things and rushed, partly because I just got my paints and airbrushes unpacked and partly because the silver is plain old Testors spraybomb enamel which I've had catastrophically react with Tamiya primers before.
The cure will be to let everything cure, sand it back and try again.
You should have a great attitude. Nothing seems to phase you. Sure wish I was more like that. This time go with the Tamiya Gray primer, Alcad black, then anyone of their shades you want as an Aluminum base color.
 |

WEB HOSTING BY


Copyright ©2021 AeroScale and Kitmaker Network, a subsidiary of Silver Star Enterprises
All Rights Reserved. Please read our Conditions of Use and Privacy Policy.
All Rights Reserved. Please read our Conditions of Use and Privacy Policy.