Kinetic F-16I (Storm)build review
Florida, United States
Joined: January 14, 2009
KitMaker: 2,798 posts
AeroScale: 2,443 posts
Posted: Sunday, February 12, 2012 - 01:35 PM UTC
So I began my build after reviewing the kit and I will be building following the instructions step by step to show you how this comes together OOB

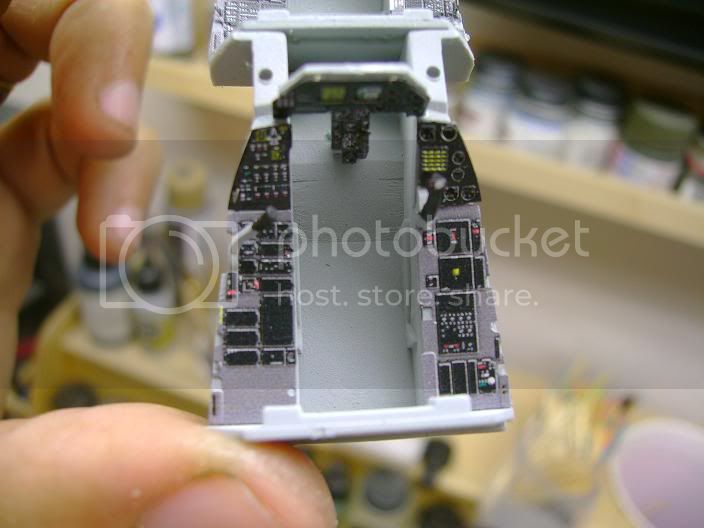
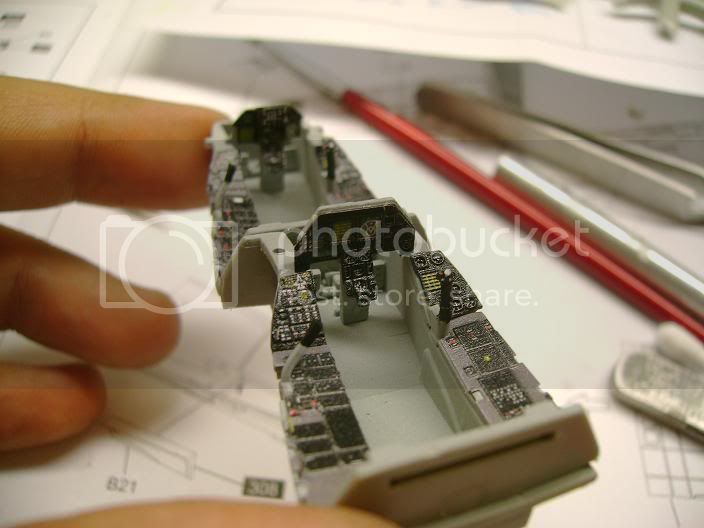
Step 1:
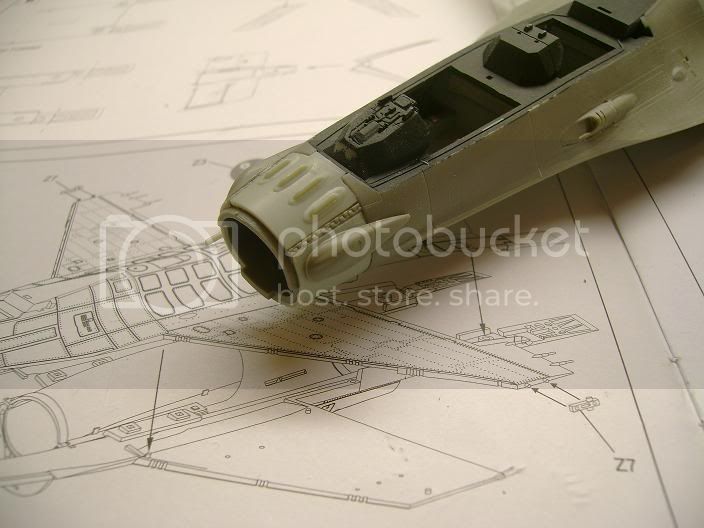
Just like other kits you start out in the office,the tub has some weird tooling in the bottom but cleans out easily and is painted in light ghost gray.added Pe details supplied with the kit makes it pop.
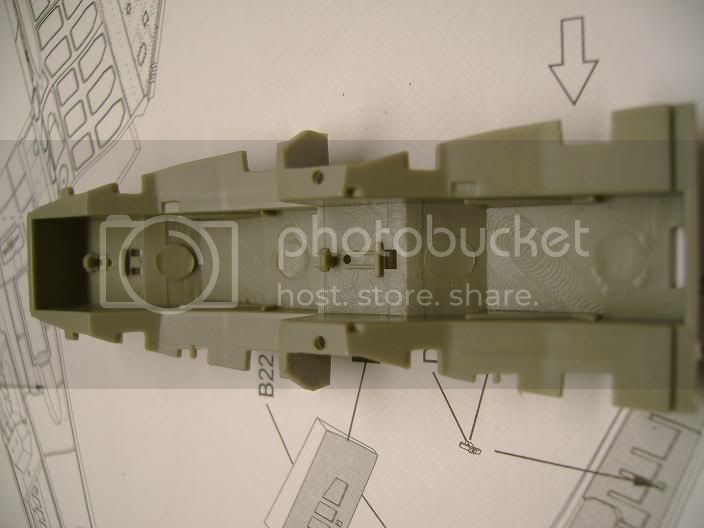

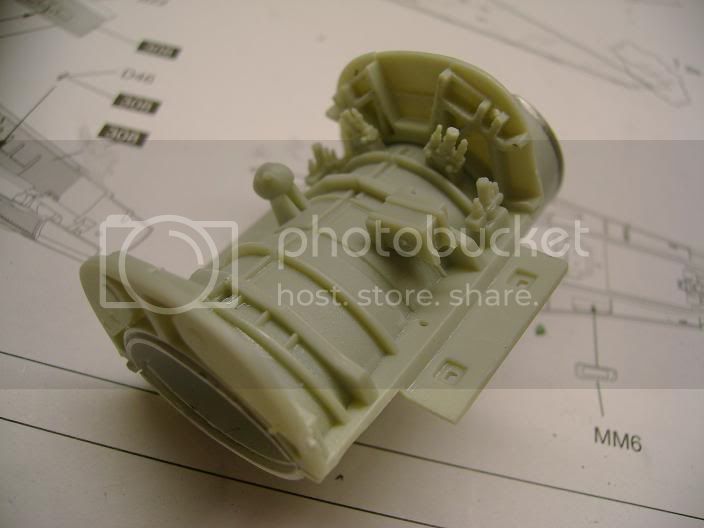
Step 2:
The intake has some mold sprues still left which also are easily removed.I assembled the two halfs and filled with tamiya putty to make seamless i will post pics of completed efforts shortly.this assembly also acts as the wheel bays so there's a lot of details that will get added.
Step 3:
top fuselage assembly is strait forward and goes together well.
More soon

"From time to time, the tree of liberty must be watered with the blood of
tyrants and patriots."
- Thomas Jefferson
IPMS#47611
Texas, United States
Joined: December 27, 2009
KitMaker: 71 posts
AeroScale: 69 posts
Posted: Sunday, February 12, 2012 - 02:20 PM UTC
Off to a great start Justin. The Israeli F-16's are a special breed and I look forward to more of your updates.
Mark
Florida, United States
Joined: January 14, 2009
KitMaker: 2,798 posts
AeroScale: 2,443 posts
Posted: Sunday, February 19, 2012 - 02:23 PM UTC
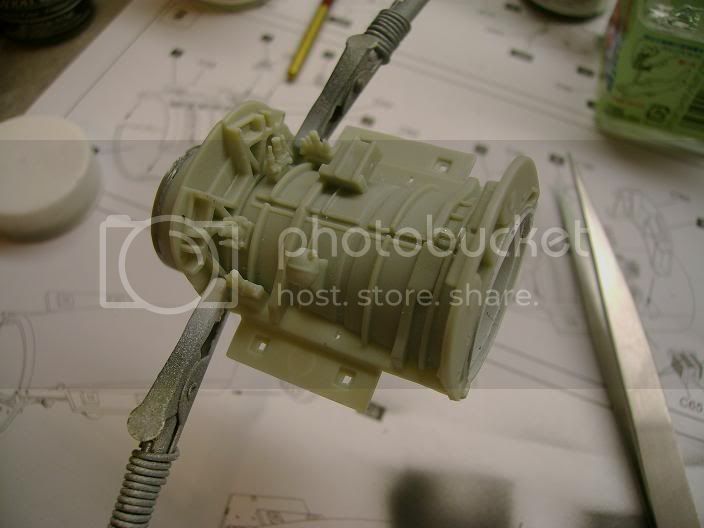
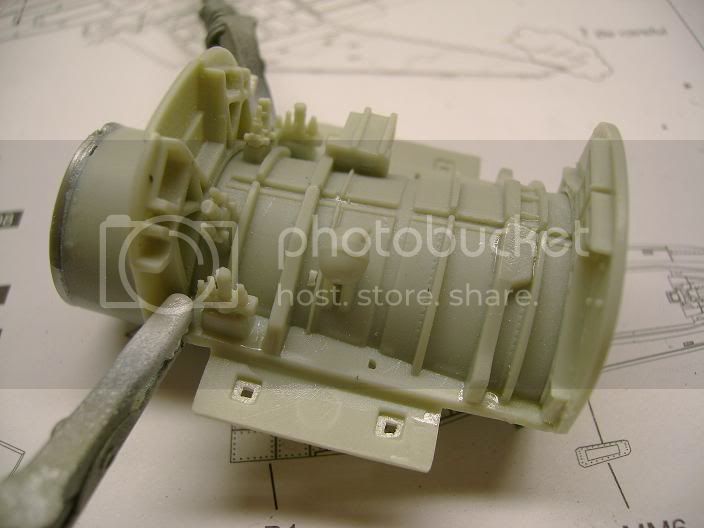
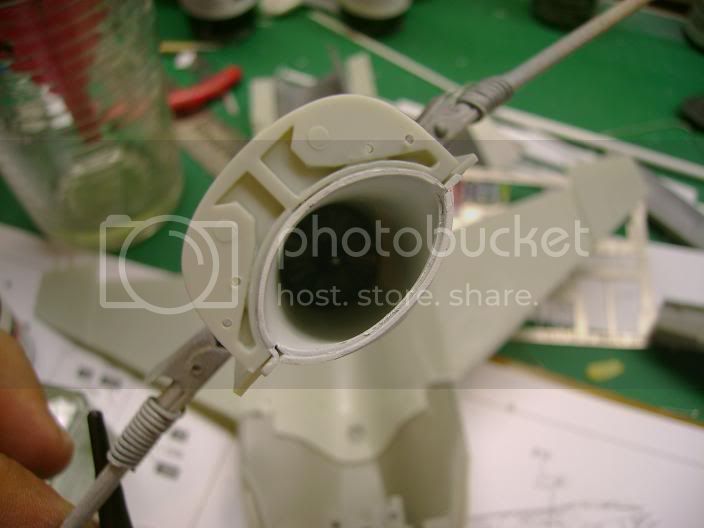
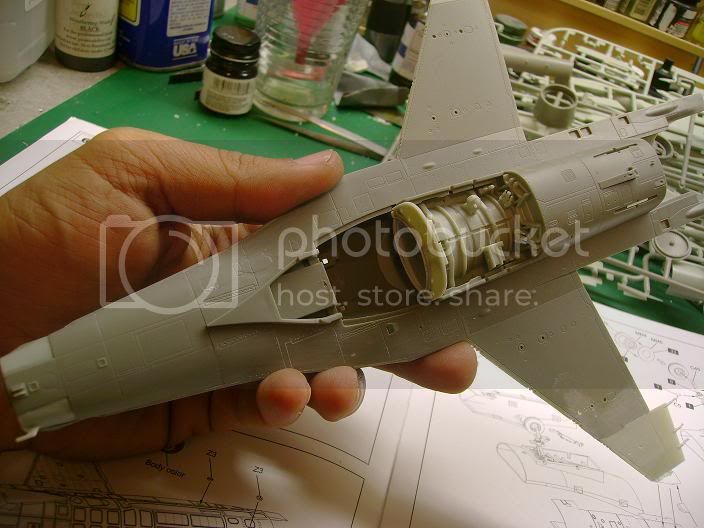
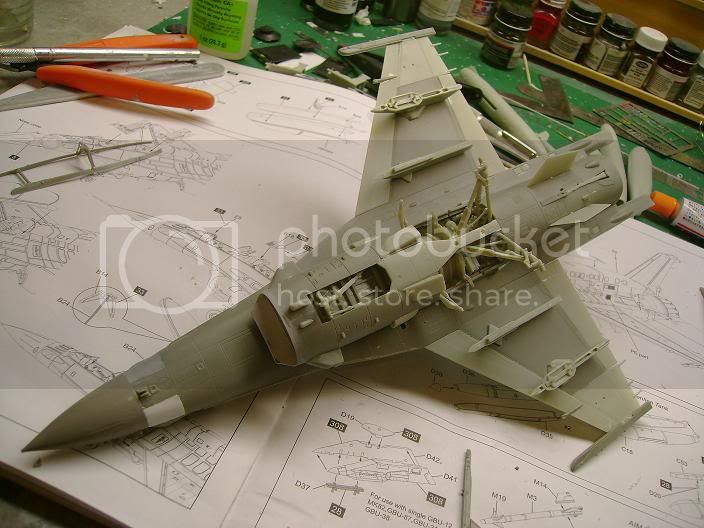
continued from step#2 I completed the main gear bay assembly which also includes an additional air intake continuation to the face of the engine intake nice compared to some others with out them.I made the intake seamless and sprayed with flat white and then applied a few layers of future to give it the smooth appearance.There are also some injection marks on the fan I didn't remove them because your not going to be able to see them with out a flashlight.

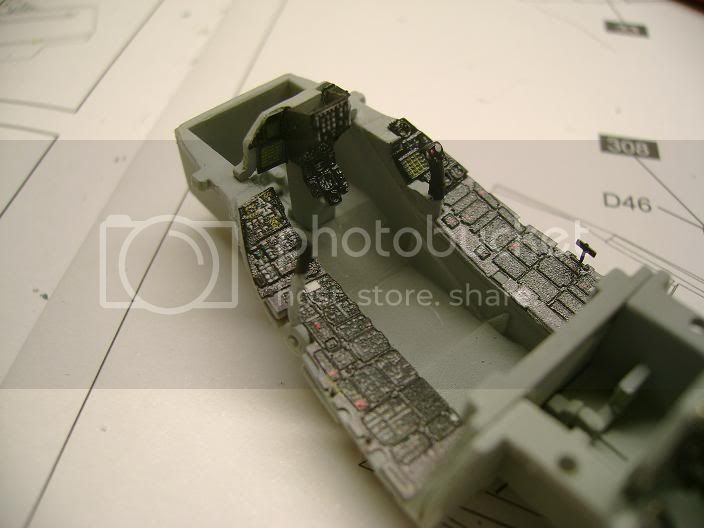
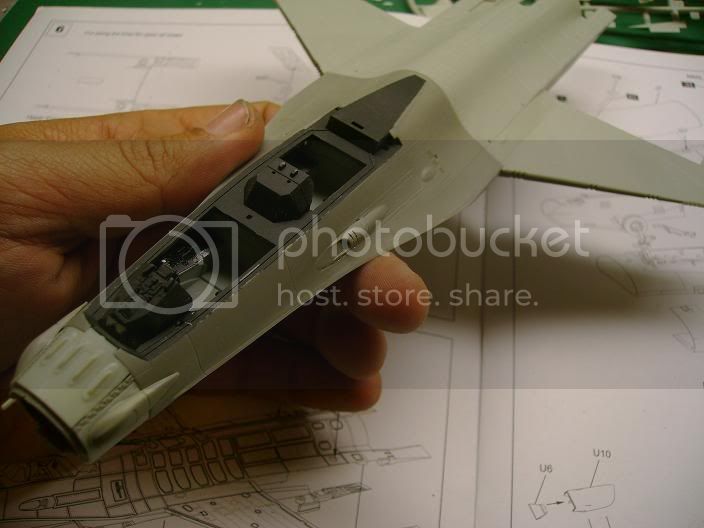
steps#3-5
In these steps we install the cockpit and main gear bay into the upper fuselage.
step#6
This step is if you want to have the speed brakes open.I didn't open mine as I think it takes away from the slick lines of the planes.
step#7
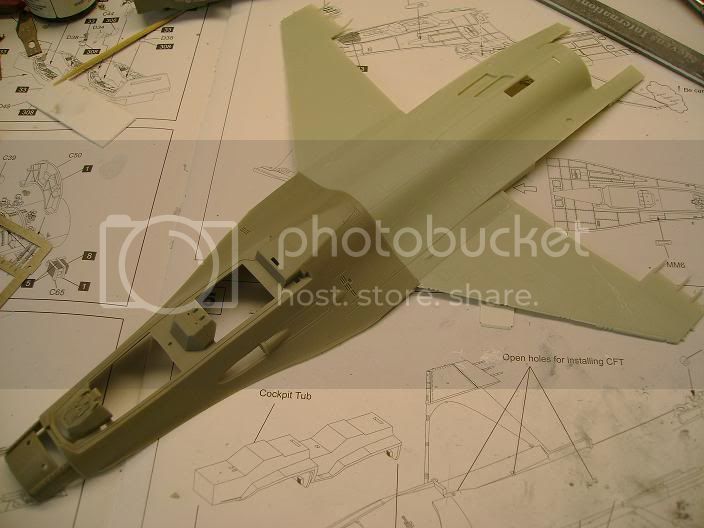
We mate the upper and lower parts of the fuselage just some minor adjustments to make every thing come together in harmony.Then I added some sensor's to the nose and started step 8 which is the assembly of the forward intake and front landing gear.This will be made seamless as well.
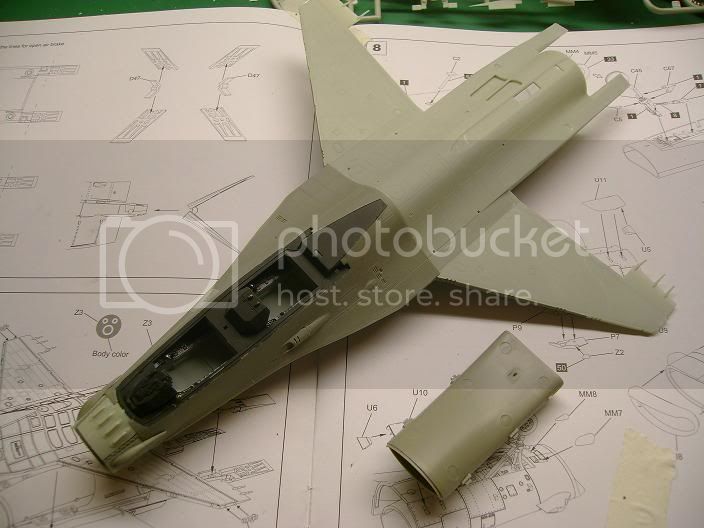
The two large sensors on the nose are actually labeled wrong the instructions call them parts MM4 and 5,these parts are actually #P4 and 5.
more soon
"From time to time, the tree of liberty must be watered with the blood of
tyrants and patriots."
- Thomas Jefferson
IPMS#47611
Tasmania, Australia
Joined: February 25, 2012
KitMaker: 34 posts
AeroScale: 14 posts
Posted: Saturday, February 25, 2012 - 07:43 PM UTC
I have the same kit about a step further ahead than yours (I have the intake mouth section on. Along with you I had ejector pin marks on my fan as well and your 100% right you cant see them without a flashlight and then its only if your looking for them.
I must say thanks this has given me the inspiration to restart the kit again (after its been a shelf queen for 9 months).
A couple of questions though. You canopy like mine seems to have mold line in the middle what are your plans for that? 2. Do you plan to tint the canopy or leave it clear?
Florida, United States
Joined: January 14, 2009
KitMaker: 2,798 posts
AeroScale: 2,443 posts
Posted: Sunday, February 26, 2012 - 03:20 AM UTC
I will be posting more pics later now that I'm further along.the canopy line I will remove with various grits of sand paper all the way up to 2000 then dip it in future before doing any painting.as for the tint I've seen pics where it is obviously tinted depending on the angle that your looking at it and some where you can't see it at all so I'm still on the fence about it
"From time to time, the tree of liberty must be watered with the blood of
tyrants and patriots."
- Thomas Jefferson
IPMS#47611
Florida, United States
Joined: January 14, 2009
KitMaker: 2,798 posts
AeroScale: 2,443 posts
Posted: Tuesday, March 06, 2012 - 12:45 PM UTC
Here are the steps I took for the canopy line which you can clearly see below.
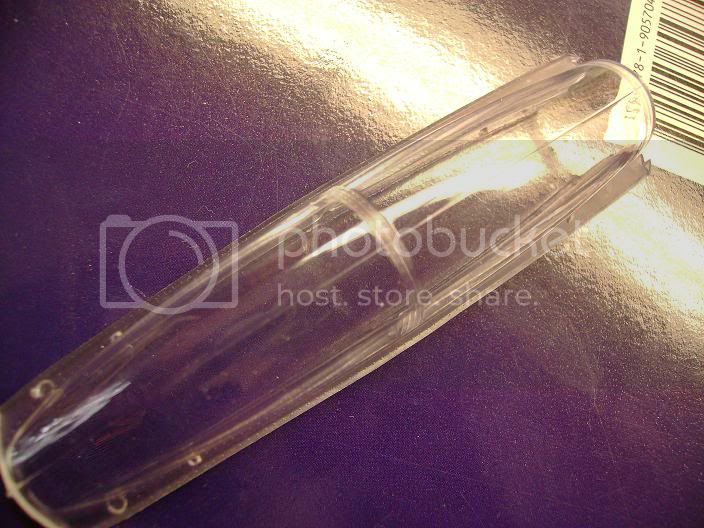
Step#1
I remove the bulk of it with a 600 grit sanding stick:
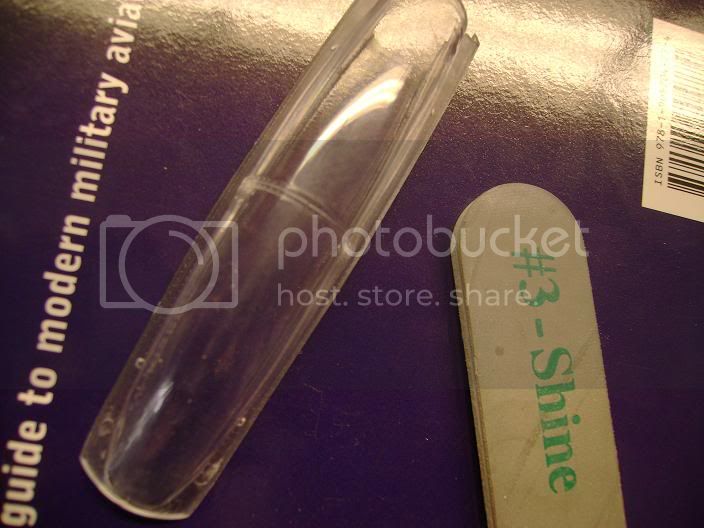
Step#2
I go back over it with 2000 grit to smooth things out followed up by a buffing stick found where ever you find girl stuff.
Step#3
let it soak in a bath of warm dish soap rinsed clean not touching it using tweezers.
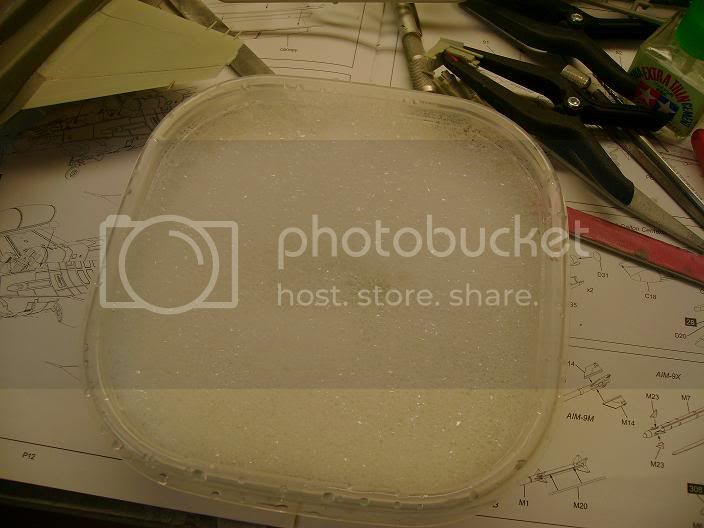
this keeps the oils off it.
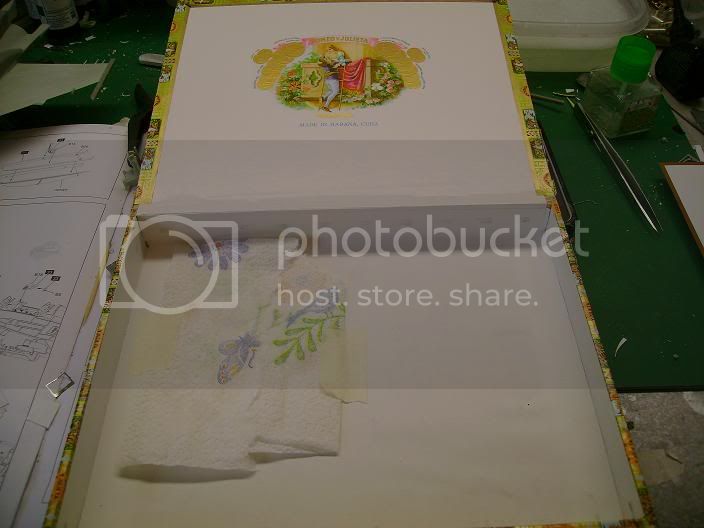
Step#4
I then let it air dry in a cigar box that I keep dust free with a little pc of paper towel taped to the bottom to absorb water and future.
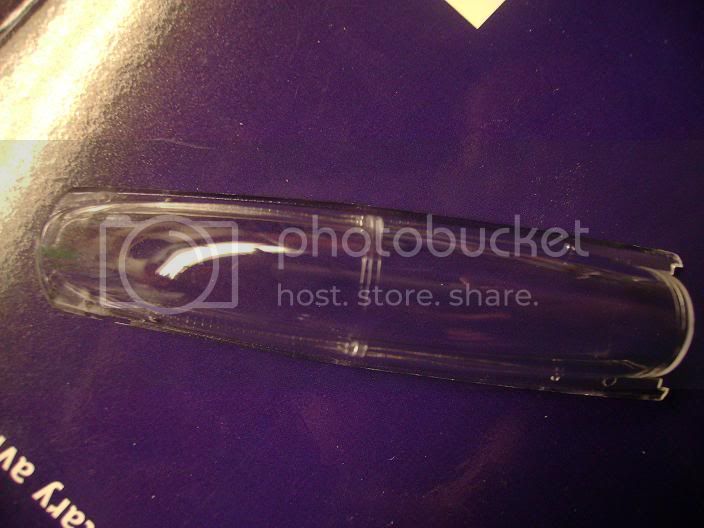
Step#5
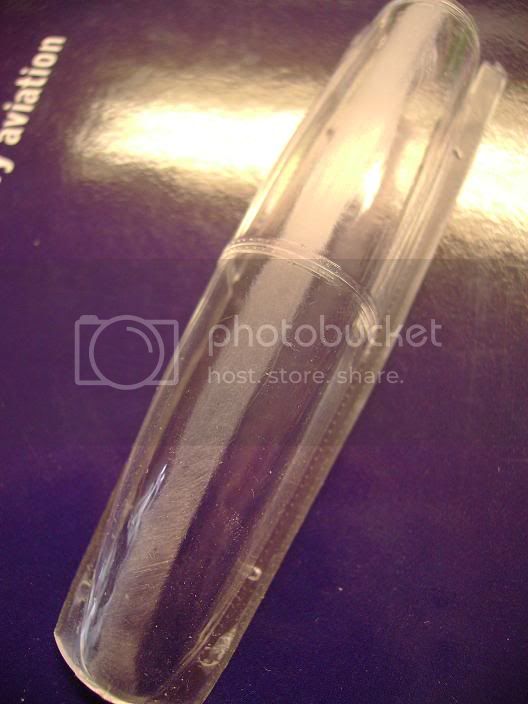
I take the clear part dip it in a glass of future still using tweezers.place it back in the box for about an hour to dry and let the excess drip into the paper towel and it comes out like this
hope this helped and im pretty far into the build now i will post some pics and explain a few bumps that have held me up soon
"From time to time, the tree of liberty must be watered with the blood of
tyrants and patriots."
- Thomas Jefferson
IPMS#47611
Florida, United States
Joined: January 14, 2009
KitMaker: 2,798 posts
AeroScale: 2,443 posts
Posted: Wednesday, March 14, 2012 - 12:33 PM UTC
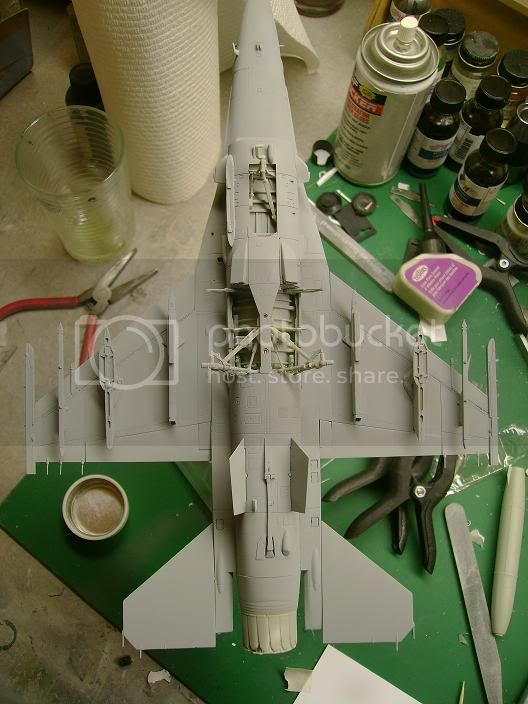
Just to show you I haven't been slacking there's been a few bumps in the road.
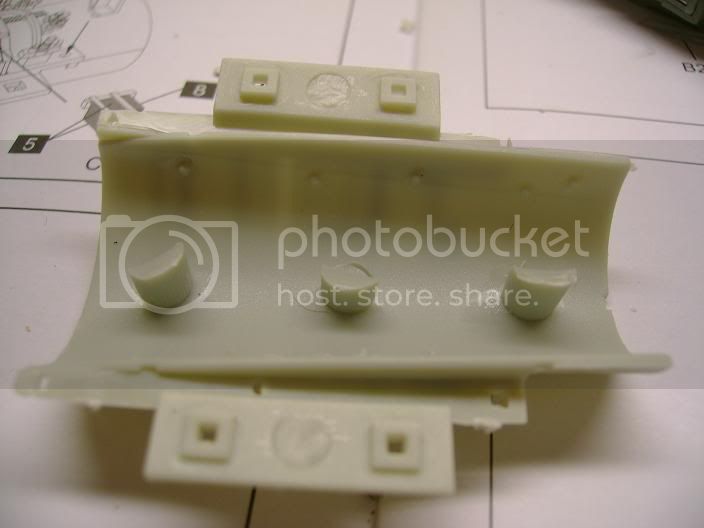
This is part#c71 and c70 which are not mentioned in the instructions at all they are the parts that attach to the bottom of the wing flaps by the fuselage.
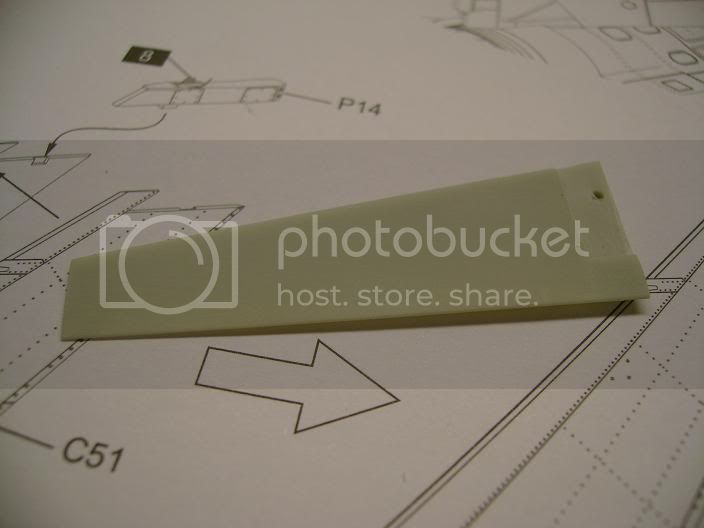
also the tail part # is incorrect it should be Part#p3 not #c22.
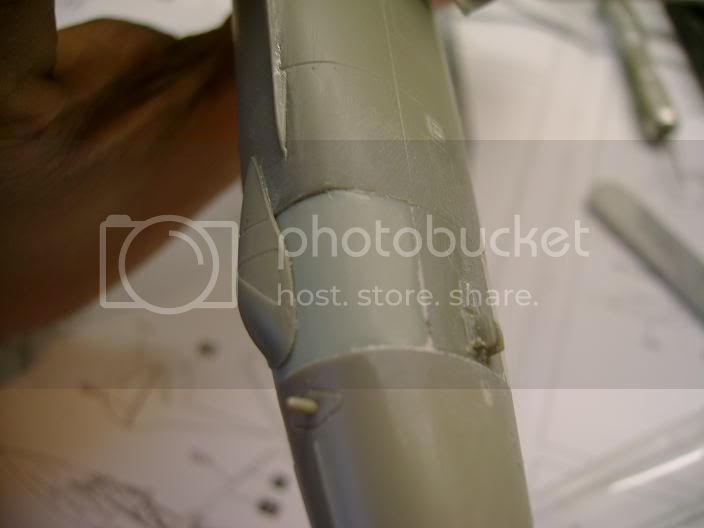
Now to the bumps there are two pc's that go on the fuselage just behind the nose these are incredibly thin and do not match the sides at all.my fault i got in a rush and did not think things through.the proper fix here would be to elevate these with plastic card and the fill and sand.I on the other hand had to fix my oops because I made an assumption.
this is before i tried to sand to get the edges to meet up but in the end it would change the profile.
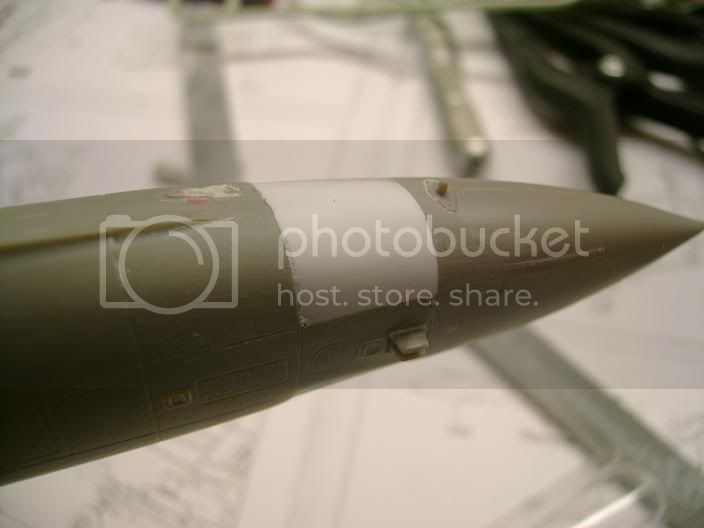
this was my fix.

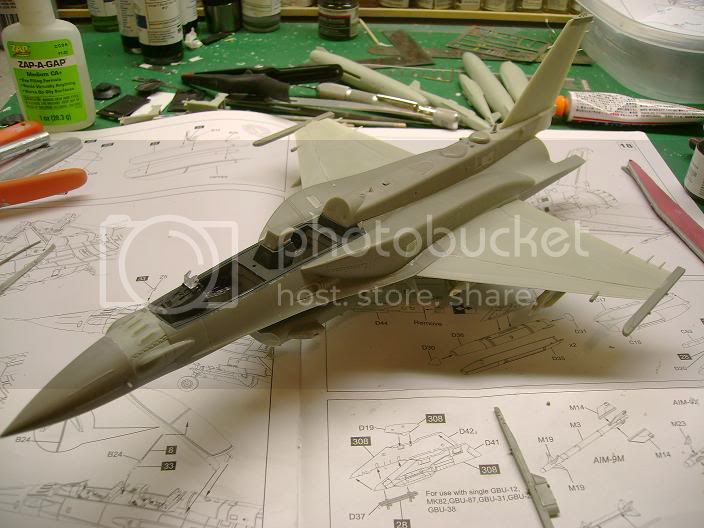
and this is where it stand will start getting into paint soon.

"From time to time, the tree of liberty must be watered with the blood of
tyrants and patriots."
- Thomas Jefferson
IPMS#47611
Florida, United States
Joined: January 14, 2009
KitMaker: 2,798 posts
AeroScale: 2,443 posts
Posted: Monday, March 26, 2012 - 01:44 PM UTC
Finally moving into the painting phase

gray is down letting dry for tonight and then i should start on the camo tomorrow
"From time to time, the tree of liberty must be watered with the blood of
tyrants and patriots."
- Thomas Jefferson
IPMS#47611
Florida, United States
Joined: January 14, 2009
KitMaker: 2,798 posts
AeroScale: 2,443 posts
Posted: Tuesday, March 27, 2012 - 12:39 PM UTC
Well I started painting the sand today.didnt pay attention and spilled my paint cup all over the top lol.wet sanding abounds me.this build just gets more annoying as it goes along.my first set of advice is to chunk the seats they don't go together well at all and there not very accurate.this kit is entirely way over engineered.its making for a decent looking kit but there is alot of work involved out of the box.for me it has lost its fun.there are quite a few inaccurate prints in the directions.so the modler should take extra care and double check refs while building.thats all for now just hope to finish soon

"From time to time, the tree of liberty must be watered with the blood of
tyrants and patriots."
- Thomas Jefferson
IPMS#47611
JPTRR
 Managing Editor
#051
Tennessee, United States
Joined: December 21, 2002
KitMaker: 7,772 posts
AeroScale: 3,175 posts
Posted: Tuesday, March 27, 2012 - 02:40 PM UTC
Hi Justin,
Looking good! Can't wait for the paint to go on.
If they demand your loyalty, give them integrity; if they demand integrity, give them your loyalty.--Col John Boyd, USAF
Any plan where you lose your hat is a bad plan.
Burgos, Spain / España
Joined: September 08, 2005
KitMaker: 117 posts
AeroScale: 42 posts
Posted: Tuesday, March 27, 2012 - 10:39 PM UTC
I know it's too late for your build, but...
The SUFA cockpit is suppoused to be completly black, not grey, isn't it?
As is the one of the IDF F-16 block 30 (or block 40 one of them) and the F-15I, for a better use of the night vision devices
I've got this one in 1/72 and have the same troubles in some areas, but the worse of all is that the decal instructions is the same as the 1/48 kit, but the decal sheet has diferent numbers. I've asked them for a new instruction sheete and they answered me a year ago that they were going to send me the right one, but still waiting...

Can someone upload a good quality scan of the 1/48 decal sheet just to mix and match the nos. of both sheets.
Thanks in advance
Florida, United States
Joined: January 14, 2009
KitMaker: 2,798 posts
AeroScale: 2,443 posts
Posted: Tuesday, March 27, 2012 - 11:11 PM UTC
No sir the tub is gray rest is black
Thanks guys
"From time to time, the tree of liberty must be watered with the blood of
tyrants and patriots."
- Thomas Jefferson
IPMS#47611
Burgos, Spain / España
Joined: September 08, 2005
KitMaker: 117 posts
AeroScale: 42 posts
Posted: Wednesday, March 28, 2012 - 01:50 AM UTC
OK, I'm wrong then, I've read this somewhere but perhaps my mind have mixed the airplanes and the colors
Alabama, United States
Joined: December 05, 2007
KitMaker: 204 posts
AeroScale: 202 posts
Posted: Wednesday, March 28, 2012 - 10:59 AM UTC
The F-16I cockpit is painted near the same as USAF cockpits:
Floor, rudder pedals, cockpit sidewalls, console facia, and seats- FS36231 gray.
Instrument panel, seat chute pack (fold down pitots) and seat cushion are black.
Also note, the console sidewalls vary from gray to black. It's not uncommon to see the front cockpit console sidewalls gray and the aft, black.
Wow, the color PE cockpit placards have a good deal or orange peel to them; kind of unusual.
Mike V
Florida, United States
Joined: January 14, 2009
KitMaker: 2,798 posts
AeroScale: 2,443 posts
Posted: Sunday, April 08, 2012 - 02:56 PM UTC
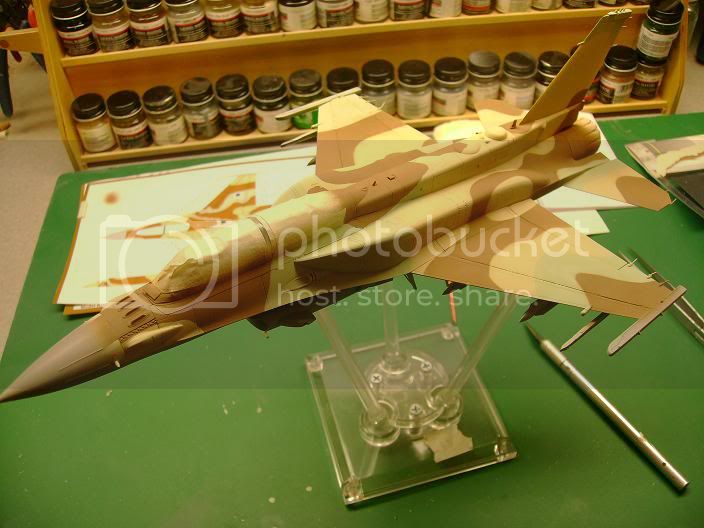
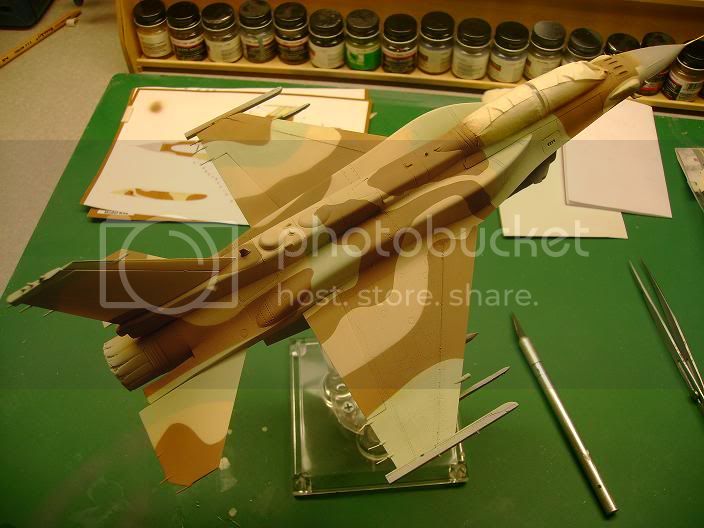
Small update I started applying the camo and it's coming along so far also started my entry for the pin ups campaign
Pics soon almost there
"From time to time, the tree of liberty must be watered with the blood of
tyrants and patriots."
- Thomas Jefferson
IPMS#47611
Florida, United States
Joined: January 14, 2009
KitMaker: 2,798 posts
AeroScale: 2,443 posts
Posted: Saturday, April 14, 2012 - 10:30 AM UTC
"From time to time, the tree of liberty must be watered with the blood of
tyrants and patriots."
- Thomas Jefferson
IPMS#47611
Nicaragua
Joined: July 21, 2010
KitMaker: 125 posts
AeroScale: 45 posts
Posted: Saturday, April 14, 2012 - 05:57 PM UTC
Great paint job!Who'd you go about setting up the camo job if I may inquire?
Florida, United States
Joined: January 14, 2009
KitMaker: 2,798 posts
AeroScale: 2,443 posts
Posted: Sunday, April 15, 2012 - 04:19 AM UTC
Copy paper cut to shape and then tacked in place with bits of masking tape rolled up so it hovered just above the surface to get that feathered look.the more complicated parts I masked
Thank you for the kind words
"From time to time, the tree of liberty must be watered with the blood of
tyrants and patriots."
- Thomas Jefferson
IPMS#47611
United States
Joined: May 04, 2011
KitMaker: 23 posts
AeroScale: 2 posts
Posted: Wednesday, April 18, 2012 - 04:52 PM UTC
quick question for you.. or anyone really, Does the Self adhesive PE from Kinetic for the Sufa also fit the Barkeet? They're both 2 seat F-16's, I'm just not sure of the differences in the cockpit.
Thanks in Advance
Alabama, United States
Joined: December 05, 2007
KitMaker: 204 posts
AeroScale: 202 posts
Posted: Wednesday, April 18, 2012 - 06:39 PM UTC
Let me start by informing everyone theres no such Hebrew word as Brakeet. The correct Hebrew name for the IAF F-16C/D block 30s is Barak and for the F-16C/D Block 40s, is Barak II. Not sure who started that disinformation, but its spread far enough that even kit manufactures are still getting that wrong.
In my kit, the self adhesive PE looks cheesy; pretty much like most color PE. Like the color PE used on this build, mine has a heavy orange peel to it, which is unlike the Eduard color PE sets I used to have. Since color PE does not look realistic, limited to flat 2-diemsnional detail, and the gray doesnt even come close to matching FS 365231, I never use it. For those who do want to use the color PE cockpit set; yes it will fit Kinetic F-16D Barak kit as it has the same basic 2 seat tub.
The cockpit consoles have some differences in the box layouts, but since Kinetic didnt get this right for a Block 52+, it shouldnt matter much. However, the Block 40 Barak II F-16C/Ds have nearly all black cockpits, so youd have to paint all the gray on the color PE consoles, black.
Id strongly suggest using the Aires cockpit, as not only does the cockpit Color PE looks gimmicky, but the Kinetic seats are poorly done and under scaled. If closing it up, then I wouldnt fret much about it.
I can see a lot of work getting this kit whipped into shape; nice work and well done paint work BTW.
Mike V
Florida, United States
Joined: January 14, 2009
KitMaker: 2,798 posts
AeroScale: 2,443 posts
Posted: Wednesday, April 18, 2012 - 11:00 PM UTC
Thank you
"From time to time, the tree of liberty must be watered with the blood of
tyrants and patriots."
- Thomas Jefferson
IPMS#47611
United States
Joined: May 04, 2011
KitMaker: 23 posts
AeroScale: 2 posts
Posted: Friday, April 20, 2012 - 09:26 AM UTC
Thanks for the correctios viperenforcer. Please forgive my lack of knowledge on the subject as I'm normally an armor builder.
Im going to take your advice and purchase the aires pit, but should I be getting the one for the Sufa or the one for the kinetic F-16D?
OP, Sorry for the threadjack, great looking bird, I will definitely be using this thread when I start mine.
California, United States
Joined: January 31, 2008
KitMaker: 274 posts
AeroScale: 9 posts
Posted: Sunday, April 29, 2012 - 12:27 AM UTC
So Justin there's been plenty said about the nose on the Kinetic F-16 kits being wrong but by the looks of it, it appears to be fine. Can you fill me in on your take? Great build btw!
Florida, United States
Joined: January 14, 2009
KitMaker: 2,798 posts
AeroScale: 2,443 posts
Posted: Sunday, April 29, 2012 - 02:29 AM UTC
I've compared it to alot of photos and short of breaking out my ruler and checking the specs it looks fine to me.Imo the only down falls I've found on the kit are multiple errors in the instructions,the kit seats definetly need replaced as the ones provided are just horrible.there are to plates that are installed on the sides right behind the nose that are to thin and don't fit requiring pcs of plastic card behind them.this will save the modeler alot of hassle later on down the road.Im getting ready to decal today pictures soon
"From time to time, the tree of liberty must be watered with the blood of
tyrants and patriots."
- Thomas Jefferson
IPMS#47611
California, United States
Joined: January 31, 2008
KitMaker: 274 posts
AeroScale: 9 posts
Posted: Sunday, April 29, 2012 - 04:22 AM UTC
Great,great news!!! And to think I was about to go out and purchase both the Tamiya F-16C and the Kinetic F-16AM in order to backdate the Tamiya kit all because I feared the nose was that noticeably wrong! Thank you Justin you just saved me a small fortune! Look forward to seeing the new pics