_GOTOBOTTOM
Pre-Flight Check
Constructive critique of your finished or in-progress photos.
Fairey Swordfish Mk I
29Foxtrot
_VISITCOMMUNITY
Victoria, Australia
Joined: September 19, 2003
KitMaker: 708 posts
AeroScale: 674 posts
Posted: Sunday, February 21, 2010 - 06:47 AM UTC
Hi All,

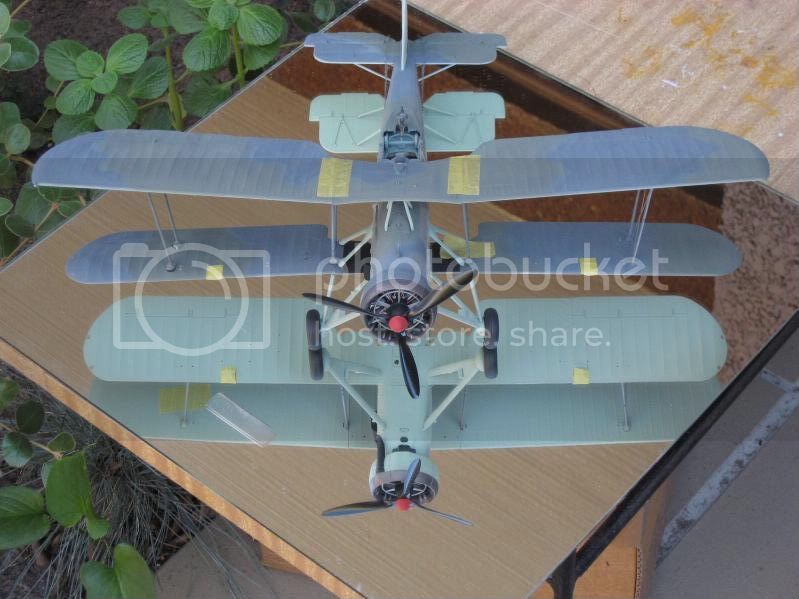
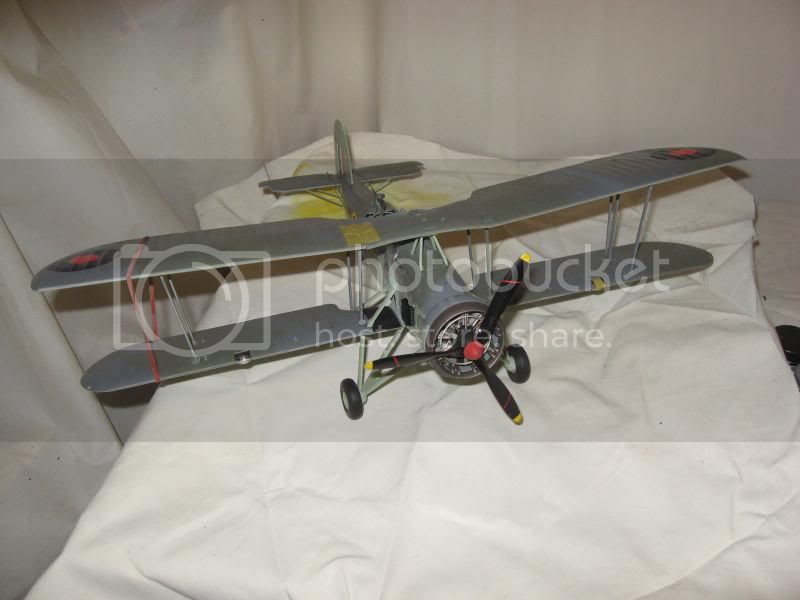
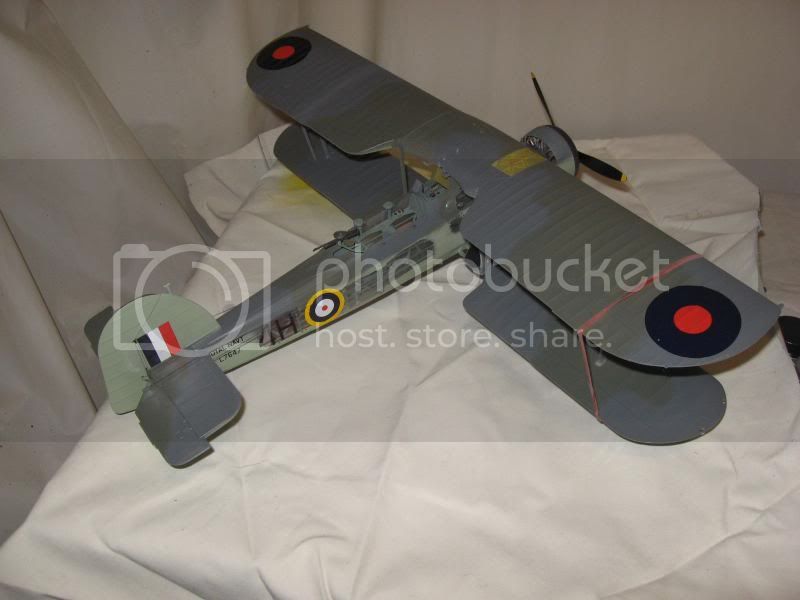
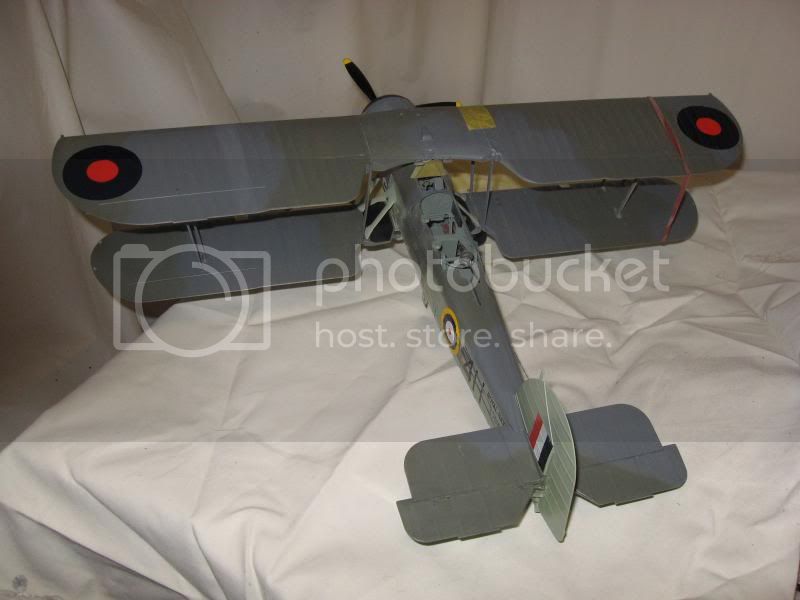
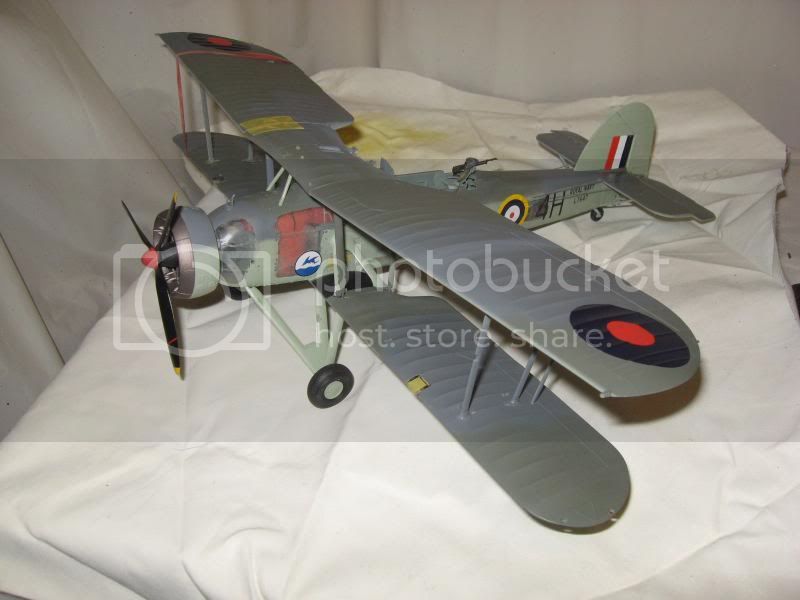
This is the Trumpeter 32 scale offering of the Mk I Swordfish, there are a few options in this kit which, consist of a grey plastic or clear plastic fuselages, cut outer wing sections and 2 decal options.
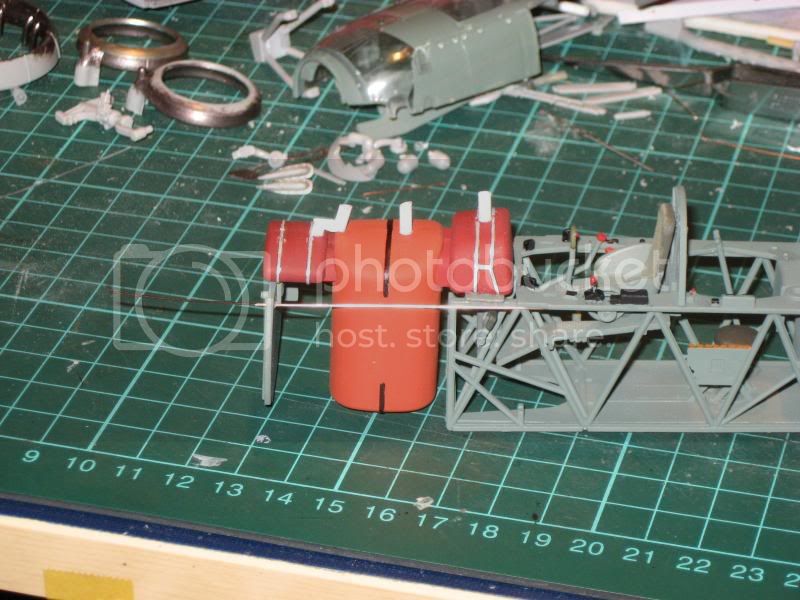
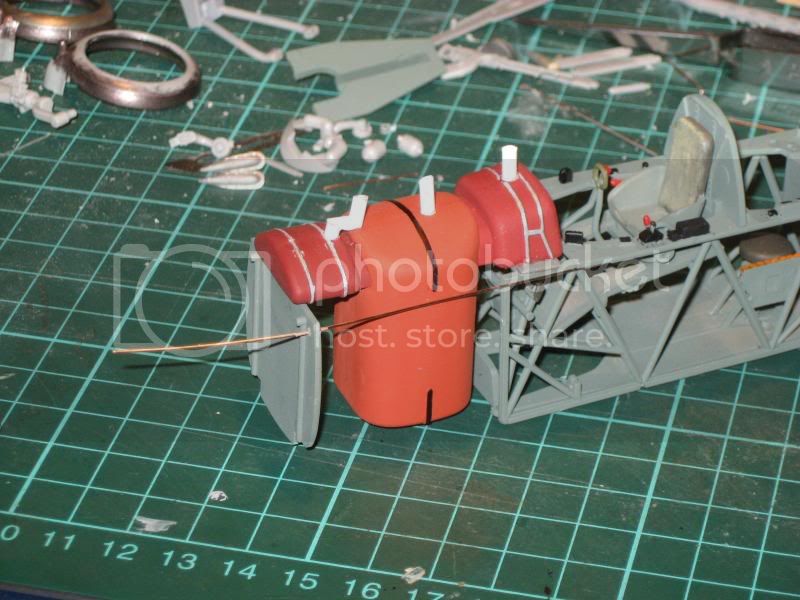
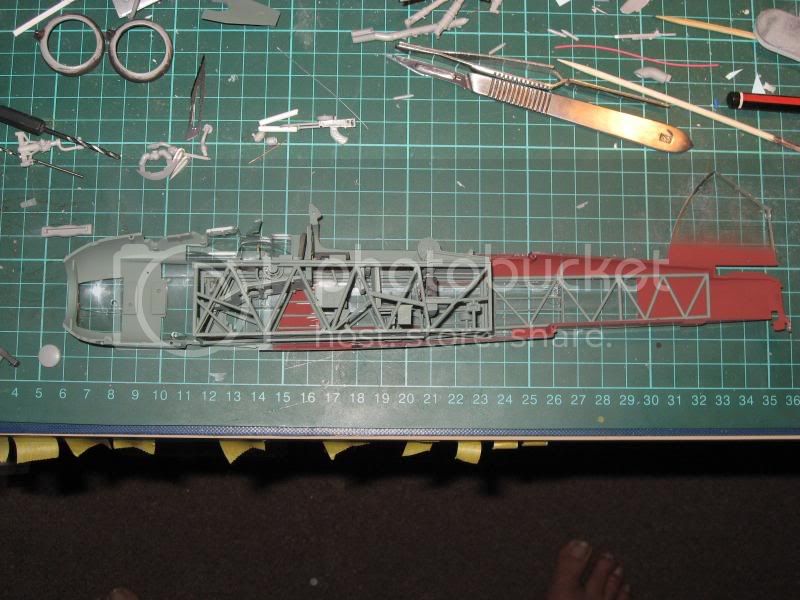
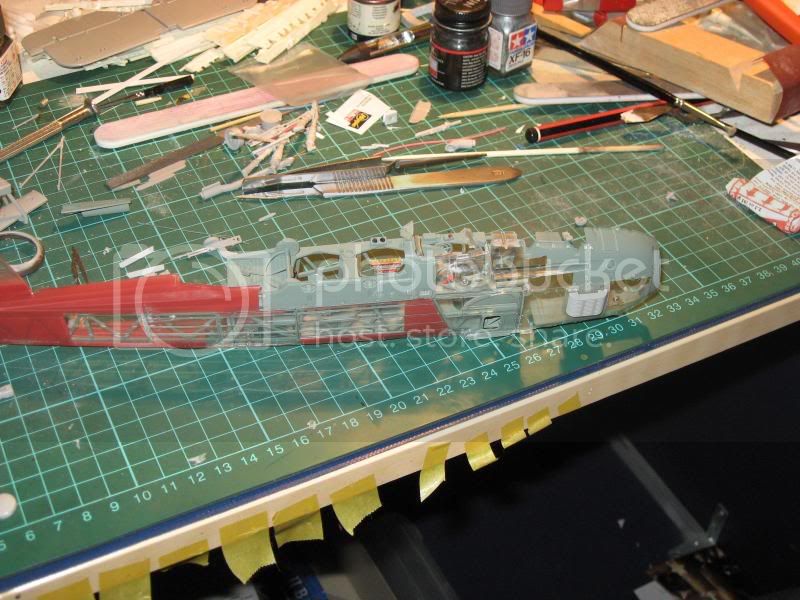
Apon opening the box, I immediately elected to use the clear fuselage sections, with the idea of adding a little extra internal detail. Having planned the way I wanted to present the fuselage section, I masked the internal halves and where the 'Canvas' sections had to be painted, I mixed Humbrol enamels #'d 73 and 132, untill i got the desired effect of the redish dope colour. Once that was dry I then proceeded to cut the stringers and cross members of the framework, before using Model Master's RAF interior grey/green.

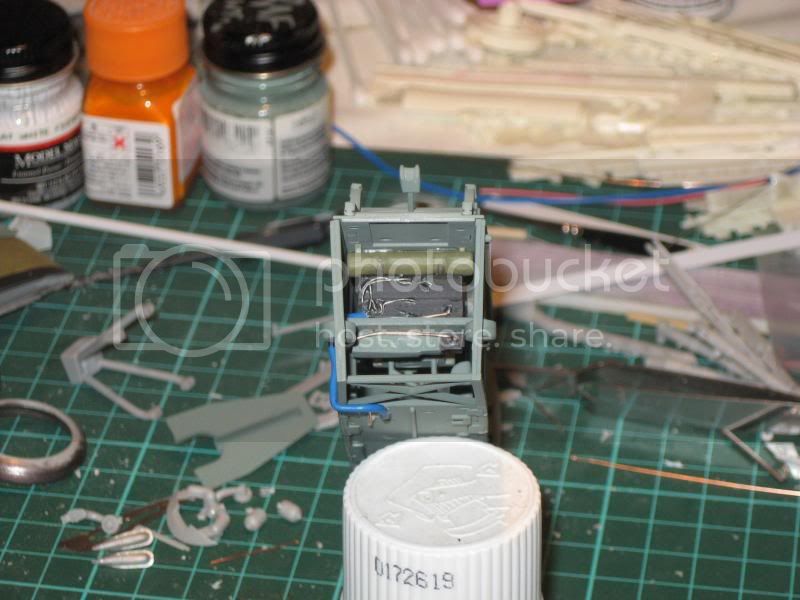
The instrument panel was a clear plastic section that required 4 decals to make up the instrumentation panel and I applied Tamiya 'Clear Blue' to the compass base (as yet to paint the semi gloss black areas).


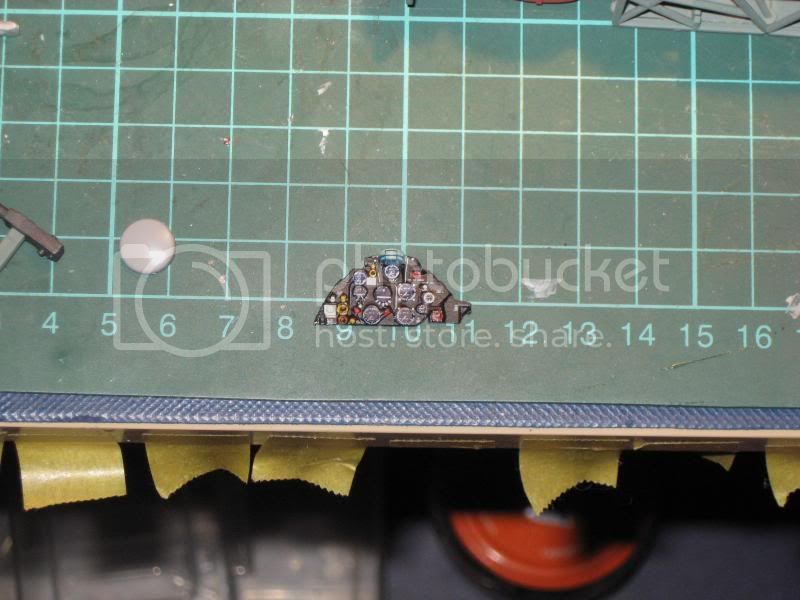
The instrument panel.


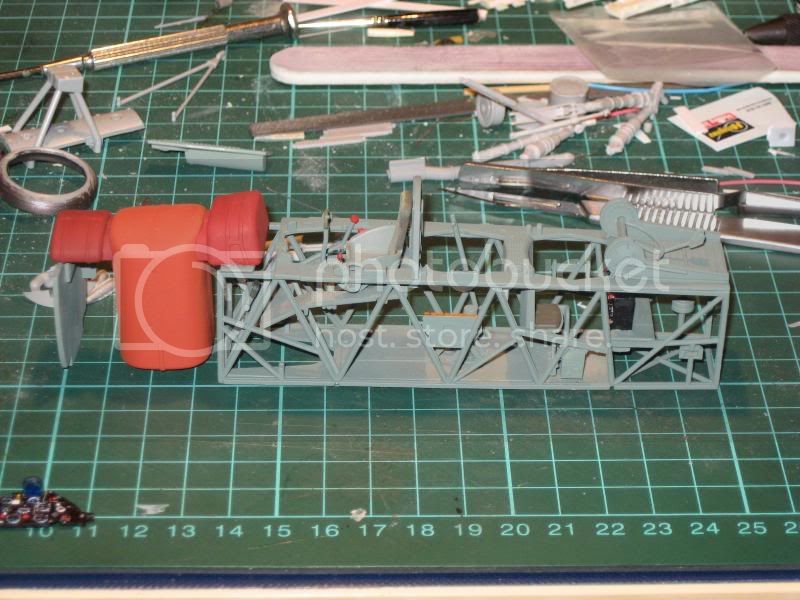
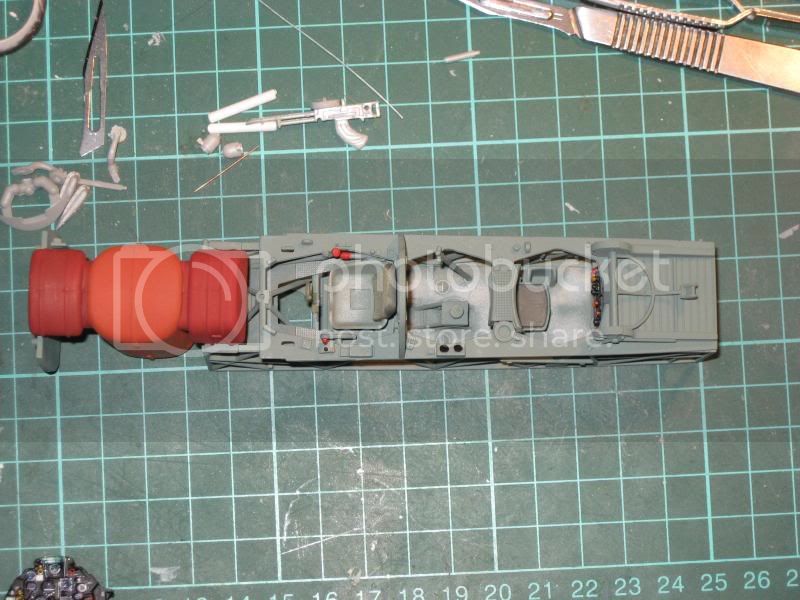
2 views of the cockpit interior, complete with the fuel and oil tanks.


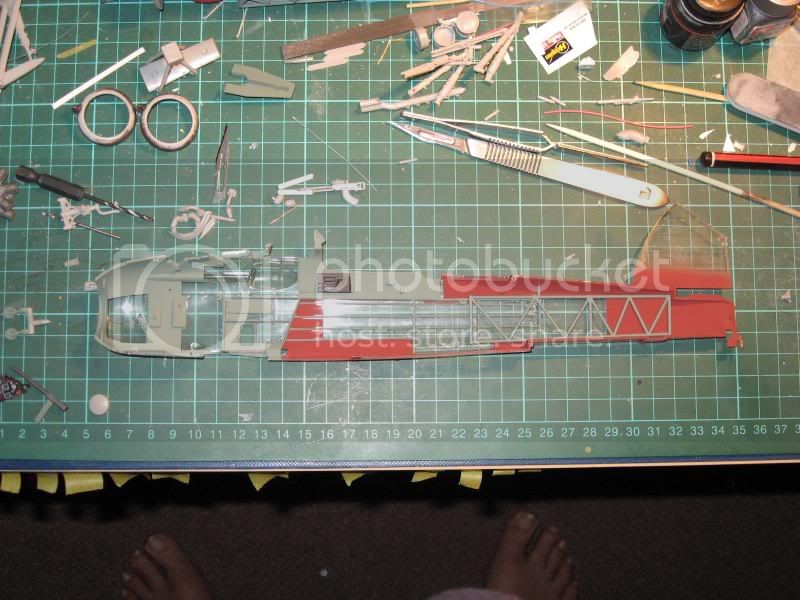
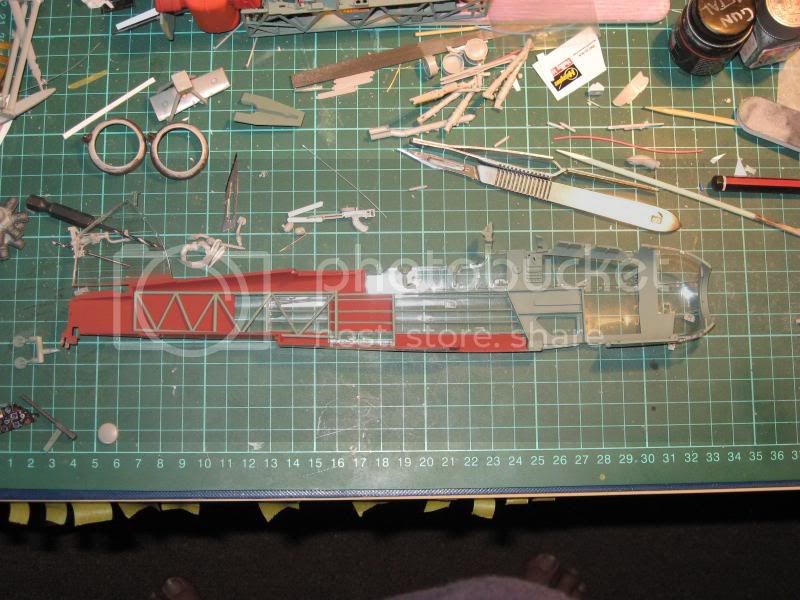
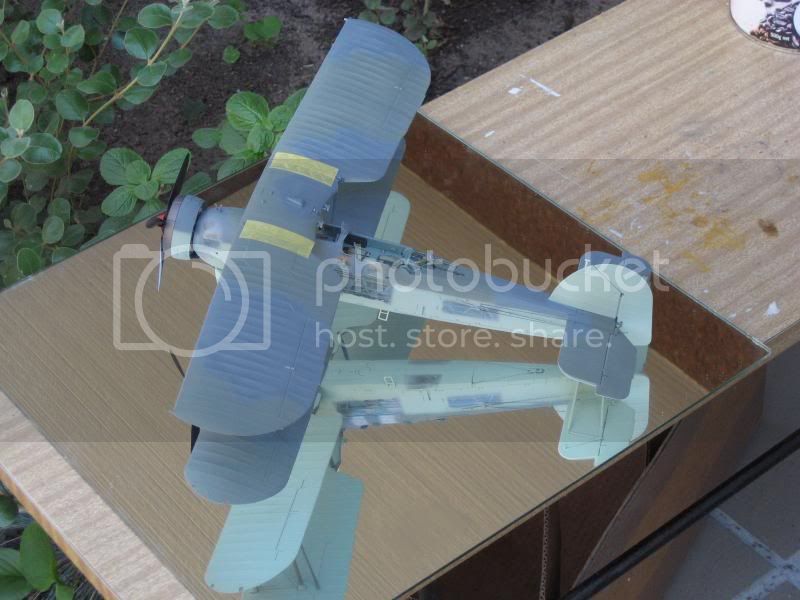
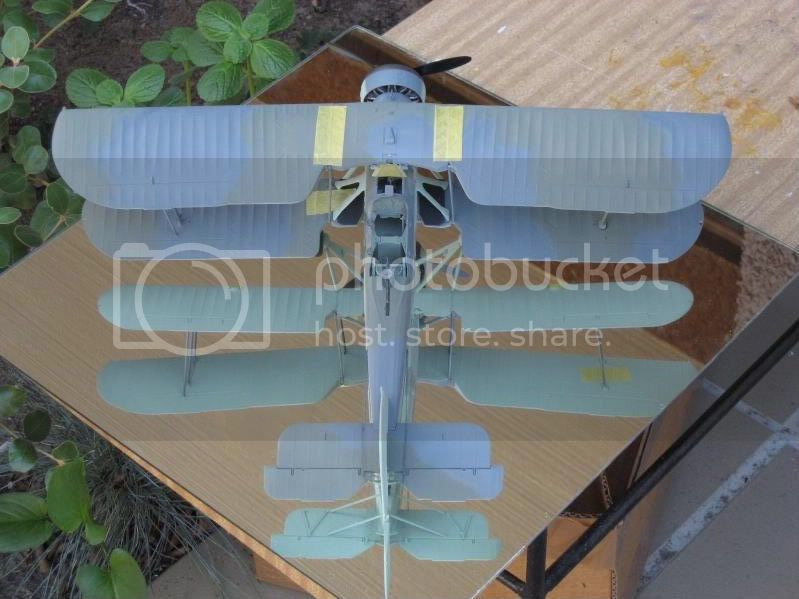
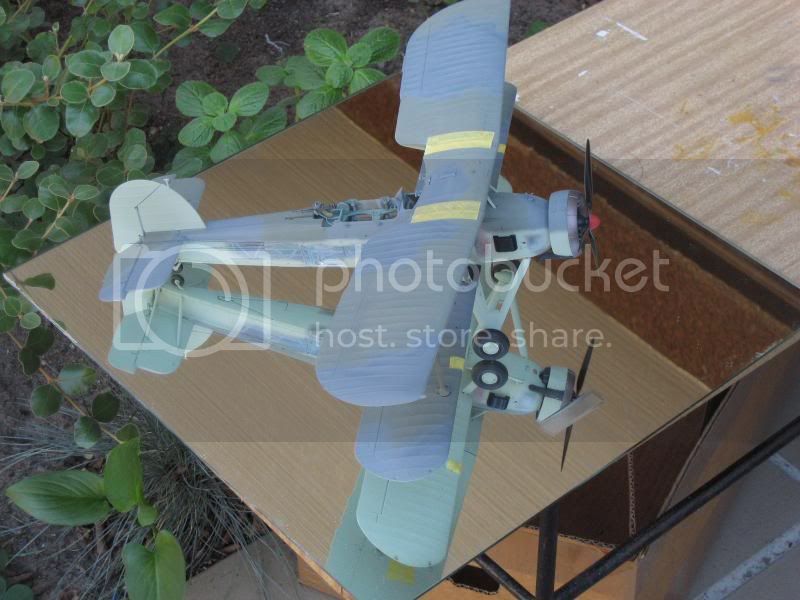
The fuselage halves.


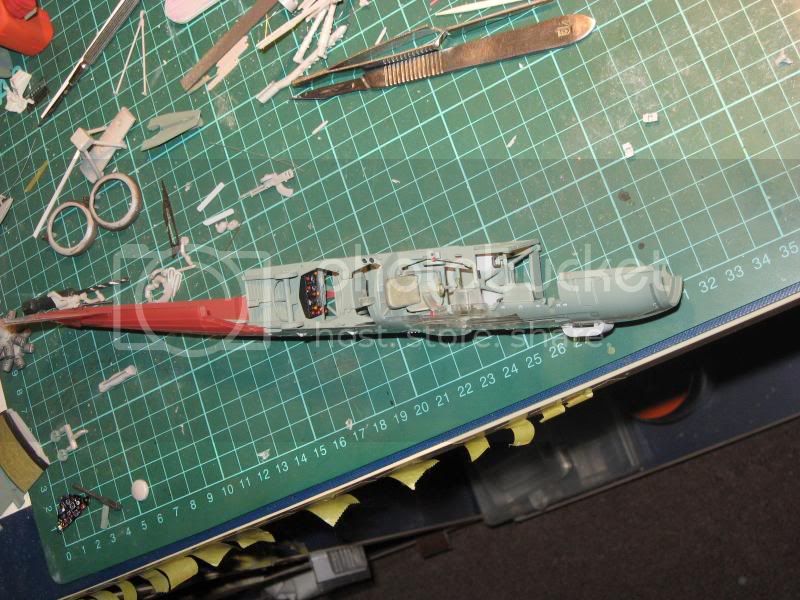
3 views of the cockpit framework dry fitted to the fuselage half.

Note: There is a lot of scope for added detail within this kit.
JackFlash
_VISITCOMMUNITY
Colorado, United States
Joined: January 25, 2004
KitMaker: 11,669 posts
AeroScale: 11,011 posts
Posted: Sunday, February 21, 2010 - 07:26 AM UTC
Greetings Rob,

Very decent build in the Swordfish. Tell us about your references. As you mention there seems to be a good potential for details. What are your general impressions of the fit, built in details of the mold, design (is it a duplicate of the Tamiya 1:48 kit?). It seems that if they did the fuselage with clear substitutes that the kit would benefit by having clear wing panels too. A simulated wing structure shouldn't be too difficult to add. The instrument panel you did looks very detailed.
29Foxtrot
_VISITCOMMUNITY
Victoria, Australia
Joined: September 19, 2003
KitMaker: 708 posts
AeroScale: 674 posts
Posted: Saturday, February 27, 2010 - 11:34 AM UTC
Stephen,

The reference I'm using is the 'Squadron' In Action Book on the Swordfish aircraft type, as for a duplicate of the Tamiya 48 scale, only the fuselage halves, the centre wing mounting section, rear gun cover plate, radio box are clear plastic, {whereas Tamiya had several other clear parts in their 48 ofering}.
The engine detail is totally different to the Tamiya in as much as the cylinder head section is 2 piece {and diferent to the Tamiya kit in} the valve push rods 'spider' is at the front of the cylinder heads, with the exhaust collector ring mounting frames are 2 piece with the crankshaft mounting fixed by a keyed centre section to the engine.
There is minimal flash on all parts of the interior frame work, but there is a few ribs and stringers that are missing from the interior fuselage {if using the clear moulded pieces}, the lower wing centre section has 3 small circular 'window' holes bit they are not supplied in the kit, only the forward clear rectangle part is supplied, as I mentioned earlier the wings are cut allowing the modeller the option of folded or in flight flight fitting, as the inner wing struts are moulded for the folded or flight in mountings, the outer lower wing halves have the mounting points of the ordinance holes covered over, but the ordinance is not supplied in the kit, just the torpedo and it's mounting frame.
Their are 2 decal options on this kit being, L7647 4H of 820 Sqn HMS Ark Royal 1941 and W5948 H during the 'Channel Dash' of February 1942, all paint colours are the Gunze and Mr Clor range, but the difference of the two options is the 2/3 'Sky' fuselage as opposed to the overall camo fuselage.

As the following pix show I've added the fuel and oil tank filler snorkels but as yet have not added the remaining plumbing, the addition of .020 thou copper wire I made up the ingnition harness, throttle cable and a couple of wires into the transcievor as well as a piece of 7 stran wire also added to the rear of the radio.
The exhaust on the inner part of the cowling is a hollow channel to which I filled using a bamboo scewer and filler, to make a more realistic looking representation.


Engine, Cowling and Exhuast detail.


Fuel and Oil tank filler tubes and the throttle cable.


Wire loom fitted to the radio transciever.
JackFlash
_VISITCOMMUNITY
Colorado, United States
Joined: January 25, 2004
KitMaker: 11,669 posts
AeroScale: 11,011 posts
Posted: Monday, March 08, 2010 - 06:06 PM UTC
Excellent info Rob. Thanks. I have the Mk. II kit (3208) and it has all of the weapons stores you note missing from the Mk.I kit.
JimMrr
_VISITCOMMUNITY
Ontario, Canada
Joined: January 03, 2007
KitMaker: 1,505 posts
AeroScale: 595 posts
Posted: Wednesday, March 10, 2010 - 03:15 AM UTC
looking good!
29Foxtrot
_VISITCOMMUNITY
Victoria, Australia
Joined: September 19, 2003
KitMaker: 708 posts
AeroScale: 674 posts
Posted: Thursday, March 11, 2010 - 02:30 AM UTC
Stephen,

No problem and I have also ordered the Mk II kit, so I'll be pliffering a few of the weapons from that when I get it home, to add to my Bismarch attacker. I'll have some more pix on this bird in the next couple of days.
29Foxtrot
_VISITCOMMUNITY
Victoria, Australia
Joined: September 19, 2003
KitMaker: 708 posts
AeroScale: 674 posts
Posted: Sunday, March 14, 2010 - 11:26 AM UTC
A little more progress on this subject. The wings are not fixed as yet, as the PE requires more time than normal, I have a little clean up on the 'clear sections' before the final stages are completed.


More to follow later.
JackFlash
_VISITCOMMUNITY
Colorado, United States
Joined: January 25, 2004
KitMaker: 11,669 posts
AeroScale: 11,011 posts
Posted: Sunday, March 14, 2010 - 02:25 PM UTC
Excellent progress. Overall how do you find the fit of the parts? Are there any glaring problems you have had to address?
29Foxtrot
_VISITCOMMUNITY
Victoria, Australia
Joined: September 19, 2003
KitMaker: 708 posts
AeroScale: 674 posts
Posted: Monday, March 15, 2010 - 06:34 AM UTC
Stephen,

There are a few minor issues, with this Mk I Swordfish kit, following the manufacturer's instructions of the build, in stage 13 of the instructions - the wing assembly.
As these are cut to allow the modeller the alternative of either spread or folded, if the model is built with the wings folded the lower wing half has a spar to keep it in alignment, (some care is needed to maintain the alignment during this step).
If the wings are spread for flight as there is no lower wing spar to keep them aligned as the rib and strut is only about 1/8 of an inch to fix the lower wing joint, which is also part of the undercarriage leg mounting.

I found the outer wing struts, both top and bottom need a little sanding down as they're a fraction high, if the kit PE is used as a wing bracing, they seem a little thick, but all the PE connection positions are punched out of the plastic surfaces that they're keyed too fit into, their are some very fine plastic parts that need a little care when removing from the sprue.

I encountered a few minor fit issues with some of the internal framework parts, but nothing major.
PanzerMike
_VISITCOMMUNITY
Hamilton, New Zealand
Joined: May 09, 2007
KitMaker: 298 posts
AeroScale: 120 posts
Posted: Saturday, March 20, 2010 - 10:25 AM UTC
Great looking stringbag you are building there
29Foxtrot
_VISITCOMMUNITY
Victoria, Australia
Joined: September 19, 2003
KitMaker: 708 posts
AeroScale: 674 posts
Posted: Friday, March 26, 2010 - 10:34 AM UTC
Hi all,

I got the decals on this build and found that a lot of care needs to be taken in applying them, [as they will curl or fold inside themselves], due to being thin in their printing, but they settled well on the model.
I have not completely fitted the outer upper wings and the rubber band is what I used when gluing the struts into position, I have decided not to use the PE on the wings, I intend to use fine piano wire instead.
The next part is applying the dullcoat to the model and the weathering.


Note: I have purposely built this model subject using the clear fuselage sides, with sections of either inner or the outer camo removed.
JackFlash
_VISITCOMMUNITY
Colorado, United States
Joined: January 25, 2004
KitMaker: 11,669 posts
AeroScale: 11,011 posts
Posted: Monday, March 29, 2010 - 04:18 PM UTC
By the way the flat wires are meant to represent RAF wires. Flat crossections are accurate.
 _GOTOTOP