_GOTOBOTTOM
World War II: Great Britain
Aircraft of Great Britain in WWII.
Hosted by Rowan Baylis
AZmodels Spitfire Mk.I "early"
magnusf
_VISITCOMMUNITY
Stockholm, Sweden
Joined: May 02, 2006
KitMaker: 1,953 posts
AeroScale: 1,902 posts
Posted: Thursday, November 12, 2009 - 01:49 AM UTC
My blogs often start with the words "every now and then something interesting turns up..." as an excuse to push the current project aside and give room for something else. This "something else" often seems to be a Spitfire and this is the case this time as well!

I picked up the new AZmodel Spitfire at Telford and here are some initial impressions!
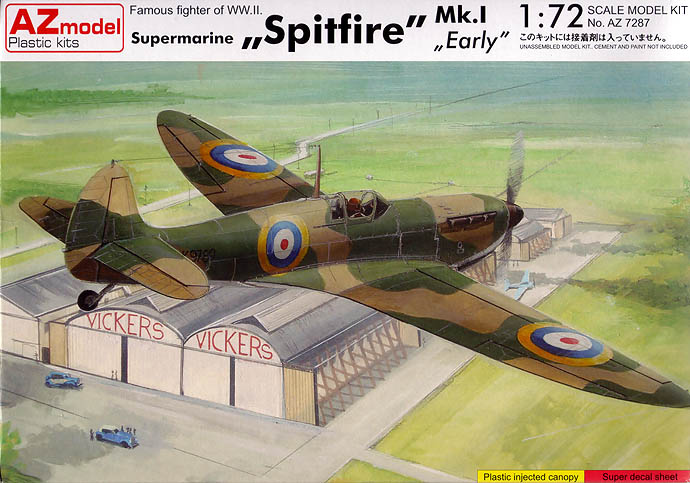

Nice box art!


Three different marking options, all pre-war from No. 19 squadron with flat canopies and Watts two-blade props. This was the main reason for me to pick this boxing, I like the fact that the very early Spitfires look so odd with their huge props!


Decal sheet - no idea how they perform yet but the printing is top notch!


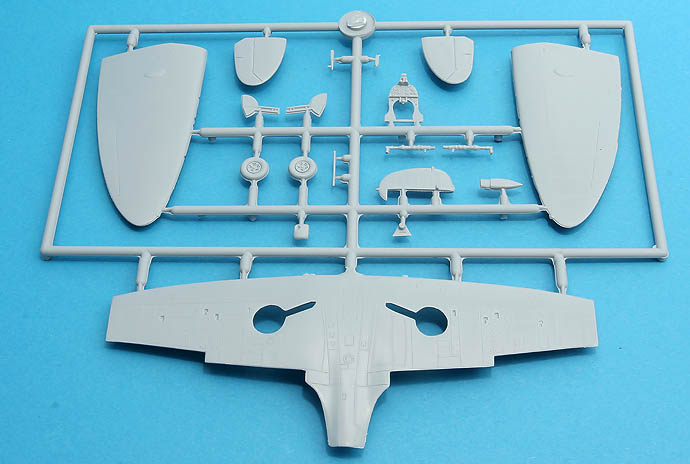
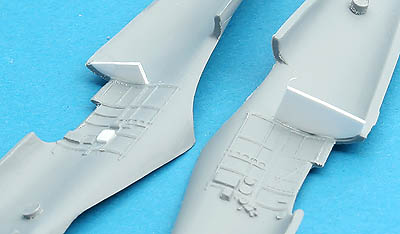
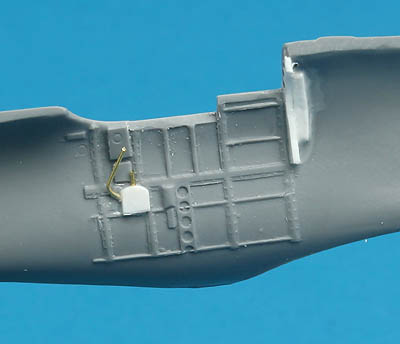
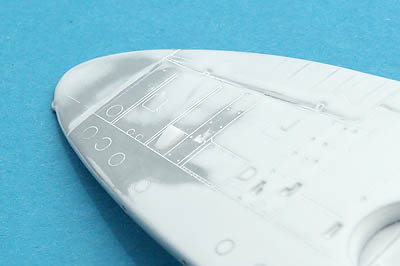
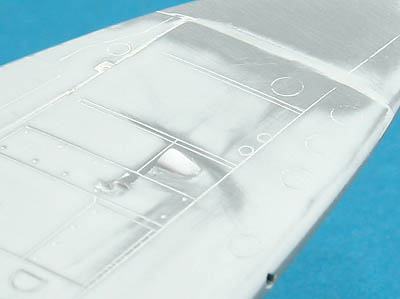
Two sprues of grey plastic in the box, this is one of them...


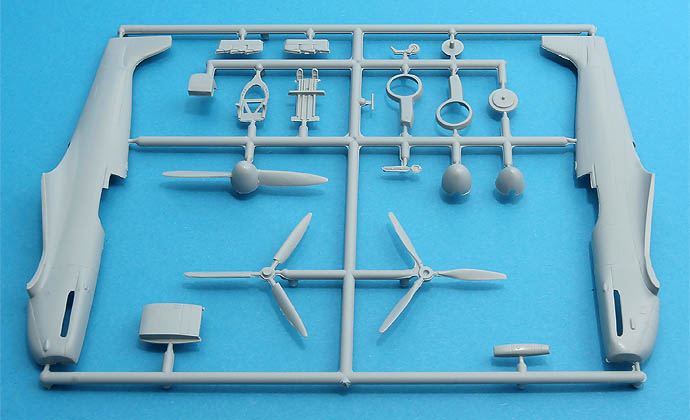
...and this is the other one of course ! Note the inclusion of Watts, DH and Rotol props.


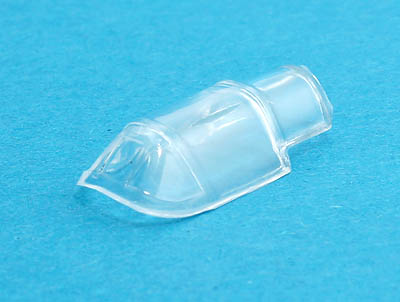
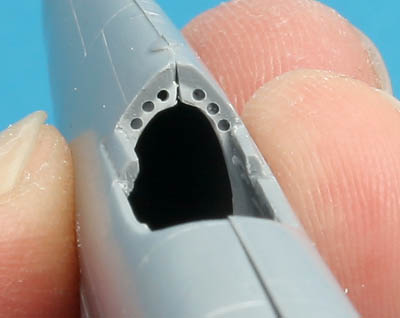
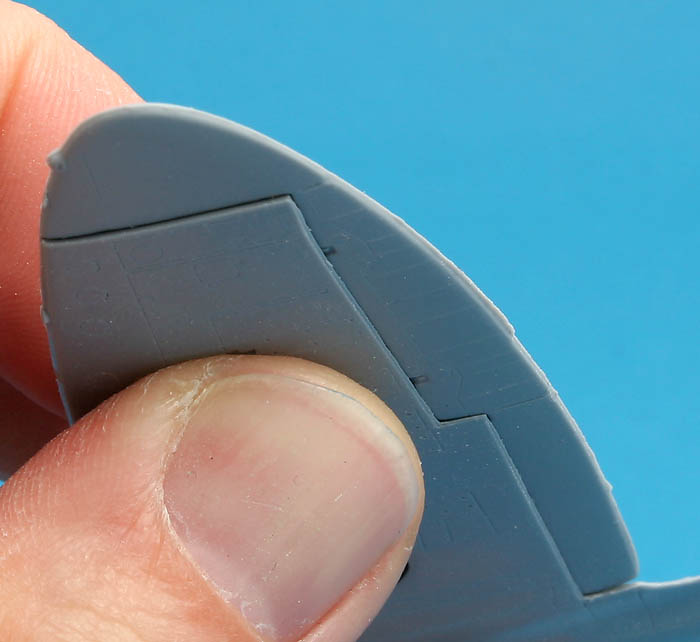
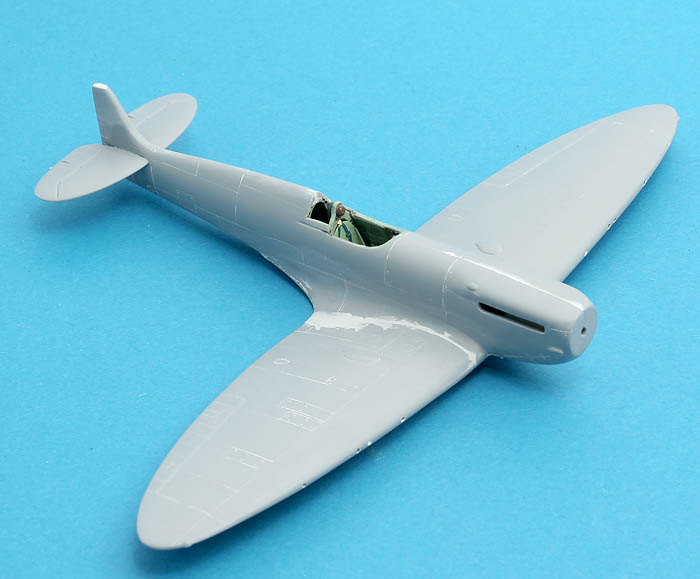
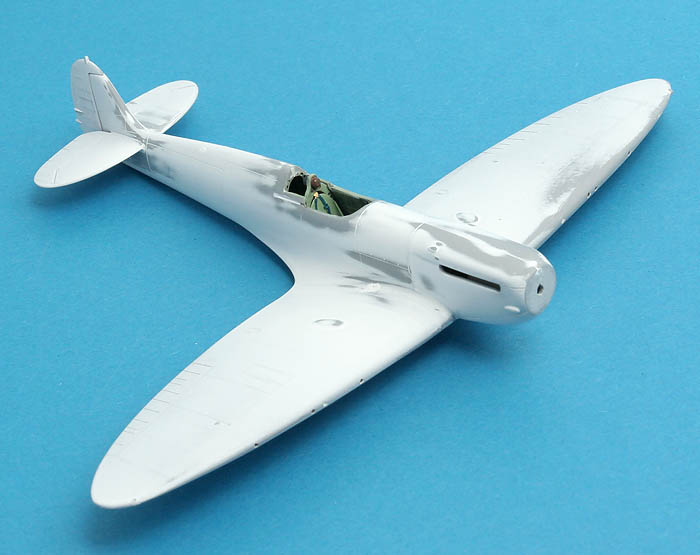
There is only one canopy included, a flat one with unarmoured windscreen. And this is where the trouble starts: the windscreen is too short resulting in a too steep angle from the fuselage and the flat panel being too short. It simply looks squashed .


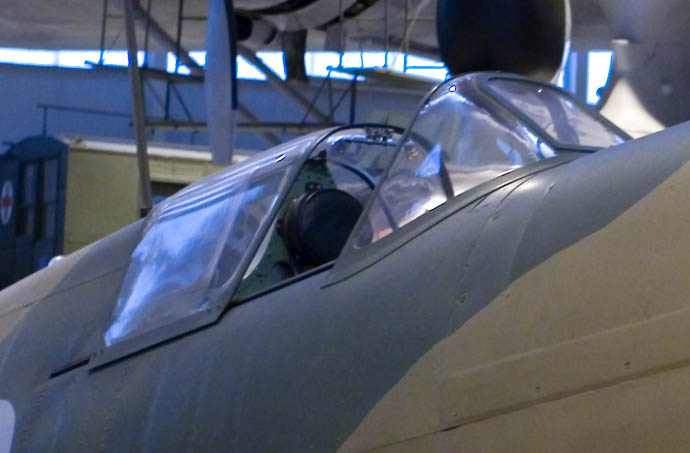
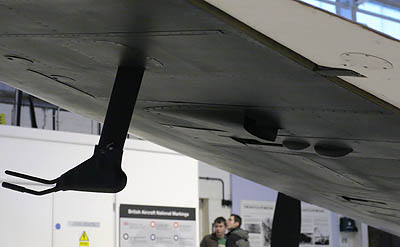
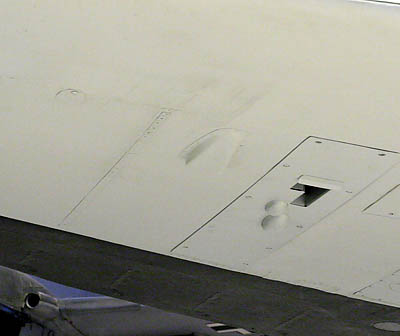
Two photos of the Spit I at Cosford taken last Friday (not that the date matters really...)


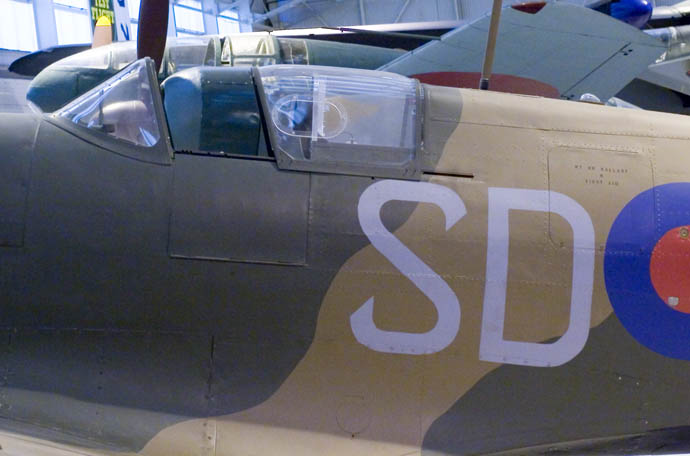
Scribing is delicate, shape looks good compared to photos and drawings and then they mess up the one thing that is really hard to fix! I am ANNOYED!

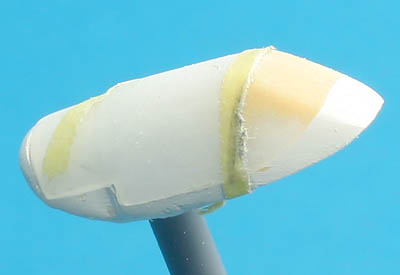
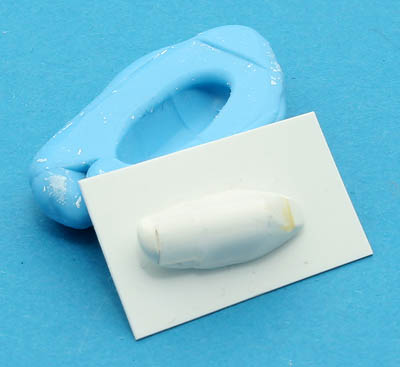
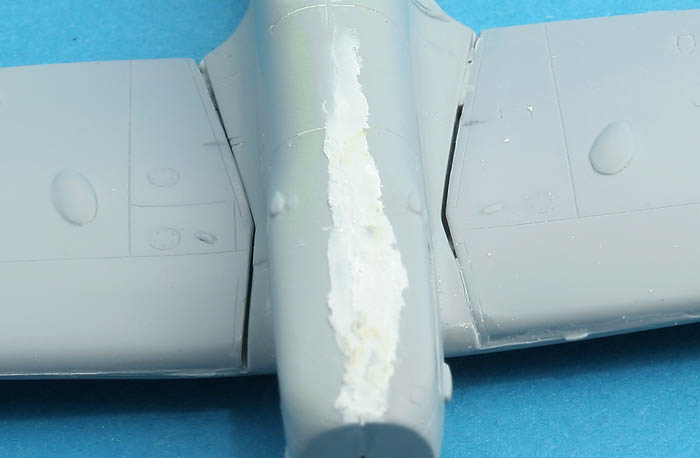
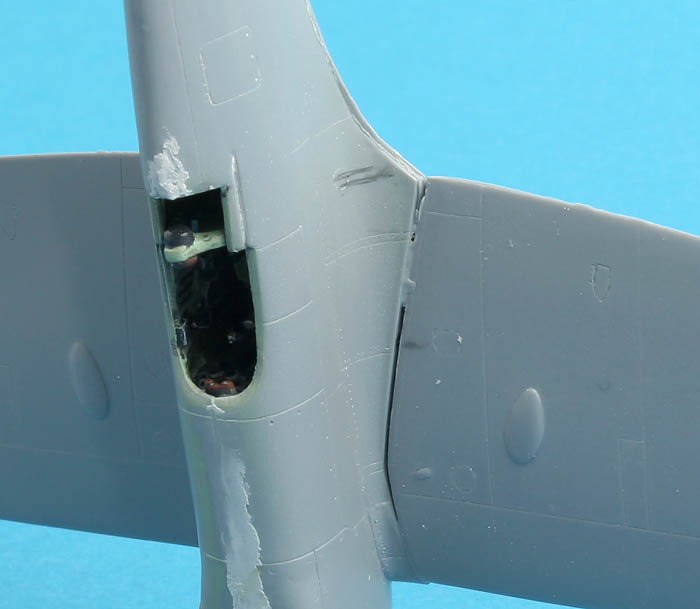
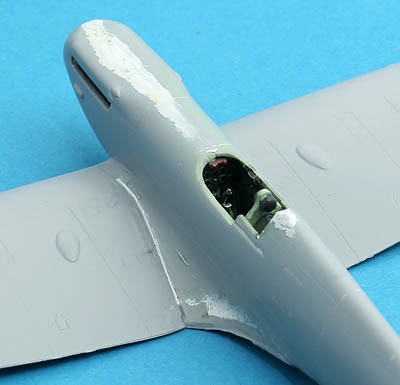
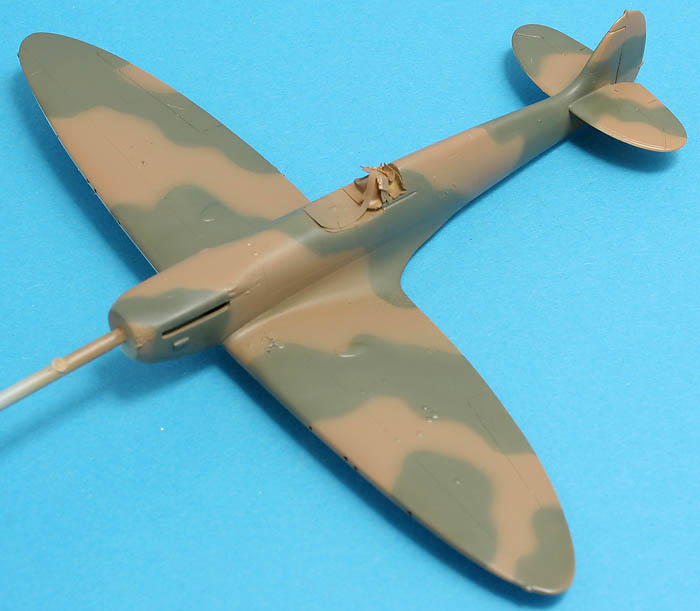
After a good night's sleep I decided to order a set of Spitfire canopies from Falcon just in case. And as a revenge against the plastic I will use the original kit part for painful experiments, hopefully this exorcism will result in a new canopy!


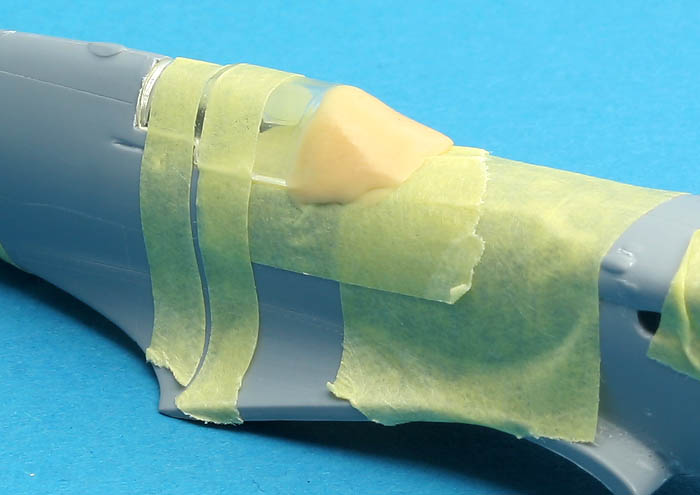
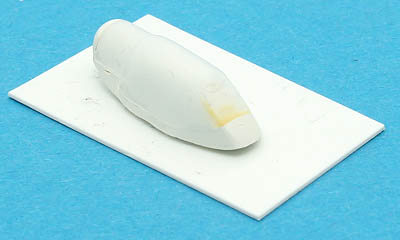
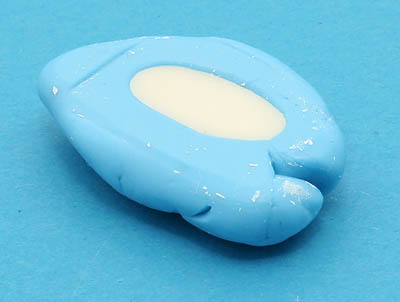
Preparing for painful plastic experiment...


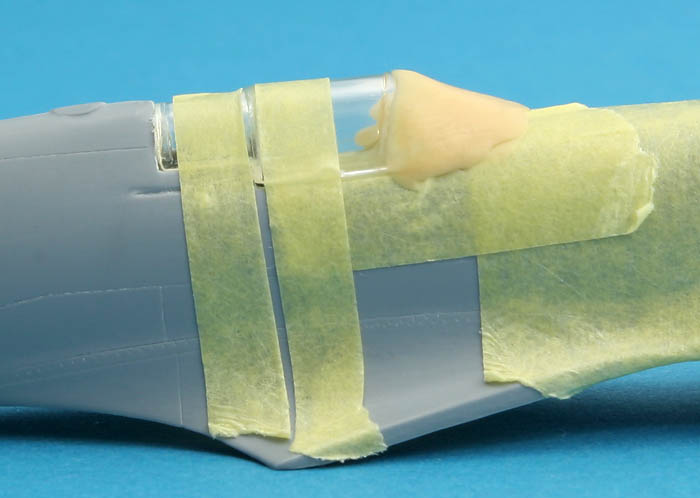
...and then I haven't started to use the file yet! Ain't I evil!


Evil Magnus, the Plastic Torturer
robot_
_VISITCOMMUNITY
United Kingdom
Joined: March 08, 2009
KitMaker: 719 posts
AeroScale: 691 posts
Posted: Thursday, November 12, 2009 - 05:44 AM UTC
I will be keeping a close eye on your thread, as I also picked up one of these at Telford, but in the PR IG boxing. Luckily the PR canopy looked ok at a glance, but I have a spare Aeroclub one anyway. Funny that they still had "plastic injected canopy" on the PR box, when it was in fact only supplied with the vac-form!

The surface detail is really nice, hopefully the fit is good too.
magnusf
_VISITCOMMUNITY
Stockholm, Sweden
Joined: May 02, 2006
KitMaker: 1,953 posts
AeroScale: 1,902 posts
Posted: Thursday, November 12, 2009 - 07:58 AM UTC
Ben! I promise to keep you posted !

A bit more work on the interior. The bulkhead that can be seen through the rear part of the perspex is missing.


Two oversize pieces of plastic are fitted inside the fuselage halves. Securely glued since they will have to withstand a bit of carving later!


After shaping the inside with scalpel and file and drilling a few holes.


The centre will have to be filled and sanded after the fuselage halves are mated.


Magnus
Merlin
Staff MemberSenior Editor
AEROSCALE
#017
_VISITCOMMUNITY
United Kingdom
Joined: June 11, 2003
KitMaker: 17,582 posts
AeroScale: 12,795 posts
Posted: Thursday, November 12, 2009 - 09:54 AM UTC
Hi Magnus and Ben

Between the two of you, we want a Review!

This is potentially such an exciting series of kits!

All the best

Rowan
magnusf
_VISITCOMMUNITY
Stockholm, Sweden
Joined: May 02, 2006
KitMaker: 1,953 posts
AeroScale: 1,902 posts
Posted: Sunday, November 15, 2009 - 09:37 AM UTC
Painful plastic experiment continues...

More of an illustrated guide to how I do canopies than Spitfire modelling tonight!


Original canopy, filled with Milliput for stability and with material added for re-shaping.


Very little of the extra material left... Windscreen now leans much more backwards.


I make a mould out of silicone clay. It is impossible to use the old canopy/plug to make new canopies since the plastic cracks due to the heat. The different materials (plastic and Milliput or Tamiya putty) will also leave marks in the finished canopy no matter how much time one spends on sanding and polishing!


A new resin plug is cast in the mould.


The finished plug! A bit of polishing then it is vacuum time!


Two prototype canopies (more polishing needed...), the plug and my home-made vacuum tool. This attaches to the vacuum cleaner and a toaster is used to heat the plastic!


Magnus
FalkeEins
_VISITCOMMUNITY
England - South East, United Kingdom
Joined: March 07, 2005
KitMaker: 868 posts
AeroScale: 690 posts
Posted: Sunday, November 15, 2009 - 11:07 PM UTC

Thanks Magnus ..i think I need to see that again ..but slowly this time
almonkey
_VISITCOMMUNITY
England - East Midlands, United Kingdom
Joined: March 23, 2003
KitMaker: 2,124 posts
AeroScale: 788 posts
Posted: Monday, November 16, 2009 - 10:03 AM UTC
hi magnus, any chance of more info on your vac forming set up?
a feature maybe......
magnusf
_VISITCOMMUNITY
Stockholm, Sweden
Joined: May 02, 2006
KitMaker: 1,953 posts
AeroScale: 1,902 posts
Posted: Tuesday, November 17, 2009 - 07:47 PM UTC

Quoted Text

hi magnus, any chance of more info on your vac forming set up?
a feature maybe......


Phil and Neil! I might do a feature on canopies one day, until then there is an older article here describing the principles.

On to the model!


Interior parts prior to painting. I did a new seat from plasticard and drilled out a few of the holes in the bulkheads, otherwise all is straight from the box. Funnily there is no mention of the control stick in the instructions. I suppose that most of you know where it goes anyway!


Fuselage half with landing gear pump handle and selector added. I haven't checked the rest of the details but thought it felt good to add this typical feature of early Spitfires!


Magnus
almonkey
_VISITCOMMUNITY
England - East Midlands, United Kingdom
Joined: March 23, 2003
KitMaker: 2,124 posts
AeroScale: 788 posts
Posted: Wednesday, November 18, 2009 - 05:57 AM UTC
thanks magnus! did i mention i too, bought this kit at scale model world? so it looks like i may need to get my hands on a replacement canopy too, either a falcon one or a home made one (i have nearly everything that article says i need somewhere lying about) and some already damaged oop canopies that no-one makes a vac replacement for.
magnusf
_VISITCOMMUNITY
Stockholm, Sweden
Joined: May 02, 2006
KitMaker: 1,953 posts
AeroScale: 1,902 posts
Posted: Wednesday, November 18, 2009 - 08:12 PM UTC
Phil! I can't say that I enjoy doing new canopies (it is tedious and boring) but it can be useful sometimes!


Interior parts after painting. Seat belts came from a Hurricane etch sheet while the rest if from the kit. Note that gun sight was cut away at an earlier stage since this aircraft had a ring-and-bead sight.

On the subject of interior colours, I read this article by Brett Green that includes a discussion on the subject of early Spitfire cockpit colours. This should have been a colour looking like "Eau-de-Nil", literally "Water from the Nile".


A quick google turns up lots of pictures of Eau-de-Nil, I did a colour chip from a selection of what I found. Regarding "Water from the Nile": bring your swimwear if you dare to jump into water this colour

My cockpit paint is a mix of Lifecolor UA116 and UA060 in proportions 2:1.


Magnus
robot_
_VISITCOMMUNITY
United Kingdom
Joined: March 08, 2009
KitMaker: 719 posts
AeroScale: 691 posts
Posted: Thursday, November 19, 2009 - 01:42 AM UTC
Hi Magnus- great progress- I love the extra structural bits you've added and the holes drilled.

The colour looks good- I guess it's quite close to RAF sky, but a with a bit of pale blue. Is the harness staying that colour?

Looking forward to seeing how well (or not) the fuselage goes together.
magnusf
_VISITCOMMUNITY
Stockholm, Sweden
Joined: May 02, 2006
KitMaker: 1,953 posts
AeroScale: 1,902 posts
Posted: Thursday, November 19, 2009 - 02:12 AM UTC

Quoted Text

Hi Magnus- great progress- I love the extra structural bits you've added and the holes drilled.

The colour looks good- I guess it's quite close to RAF sky, but a with a bit of pale blue. Is the harness staying that colour?

Looking forward to seeing how well (or not) the fuselage goes together.


Harness is supposed to be "lavender"-coloured (goes so lovely with the "Eau-de-Nil", care for a swim? ). I don't know if this is correct but there is still time to fix it if someone has a better suggestion !

Fuselage goes together very well, it is already done! Mainly to conceal a goofed-up dark wash... I had a long demonstration session with Mr. "Promodellers Weatheringwash" at Telford who assured me that their ready-mixed washes are goof-proof. Well they aren't, at least not for me! On the other hand - I have never really gotten the hang of washes at all (please don't tell anyone, my fellow modellers would laugh at me...).

Interior will be inserted from below through the wing cutout. And it will go in there with absolutely no trouble whatsoever - yeah right!

Stay tuned, more entertainment to follow...


Magnus
EdgarBrooks
_VISITCOMMUNITY
England - South East, United Kingdom
Joined: June 03, 2006
KitMaker: 397 posts
AeroScale: 384 posts
Posted: Friday, November 20, 2009 - 09:14 PM UTC
From what I've found, early (and some late) Spitfire cockpits were in a shade matched by the old Humbrol 90. Hornby were unaware of this, and, thinking that 90 should be Sky, have changed the formula.
Sutton harnesses were a light tan, almost sand, colour, and did not have any form of clip, or buckle, on the ends of the straps. The parachute-style "box" fitting was a post-war item.
Looking at that instruction sheet, only pattern 3 is correct; the starboard wings, on 1 & 2, should be a mirror image of the pattern on the port wing of 3. Probably invisible in an assembled 1/72 kit, but the rudder pedals only had a single bar, plus leather strap, until late 1940.
Edgar
magnusf
_VISITCOMMUNITY
Stockholm, Sweden
Joined: May 02, 2006
KitMaker: 1,953 posts
AeroScale: 1,902 posts
Posted: Friday, November 20, 2009 - 10:25 PM UTC
Edgar! Excellent feedback! Thanks!


Quoted Text

From what I've found, early (and some late) Spitfire cockpits were in a shade matched by the old Humbrol 90. Hornby were unaware of this, and, thinking that 90 should be Sky, have changed the formula.


Do you think I am about right?


Quoted Text

Sutton harnesses were a light tan, almost sand, colour, and did not have any form of clip, or buckle, on the ends of the straps. The parachute-style "box" fitting was a post-war item.


Thanks Edgar! I can still reach in and repaint, no worries ! By the way, the "lavender"-colour, do you know anything about that? Is it a figment of my imagination?


Quoted Text

Looking at that instruction sheet, only pattern 3 is correct; the starboard wings, on 1 & 2, should be a mirror image of the pattern on the port wing of 3.


Thanks for confirming pattern 3, I'm going to do that one!


Quoted Text

Probably invisible in an assembled 1/72 kit, but the rudder pedals only had a single bar, plus leather strap, until late 1940.


I won't be able to reach in there now otherwise I would have fixed it!


Magnus
EdgarBrooks
_VISITCOMMUNITY
England - South East, United Kingdom
Joined: June 03, 2006
KitMaker: 397 posts
AeroScale: 384 posts
Posted: Saturday, November 21, 2009 - 01:55 AM UTC

Quoted Text

Edgar! Excellent feedback! Thanks!


Quoted Text

From what I've found, early (and some late) Spitfire cockpits were in a shade matched by the old Humbrol 90. Hornby were unaware of this, and, thinking that 90 should be Sky, have changed the formula.


Do you think I am about right?

By the way, the "lavender"-colour, do you know anything about that? Is it a figment of my imagination?
Magnus


Your cockpit colour looks pretty good, so I'd stick with it, and, before somebody says that you should have done the seat (plastic) red, early seats were metal, so were green, or (possibly) black, so you're fine.
Post-war harnesses, with the quick-release box, were known as the QS or ZB harnesses, and were often blue, so I suspect that's where the lavender colour arose.
Edgar
magnusf
_VISITCOMMUNITY
Stockholm, Sweden
Joined: May 02, 2006
KitMaker: 1,953 posts
AeroScale: 1,902 posts
Posted: Monday, November 23, 2009 - 10:48 PM UTC
Wings and fuselage mated together!


Wings won't fit together properly without thinning the lower wing and removing plastic from the mating surfaces of the upper wing.


Wing roots are always troublesome on Spitfire kits! I will fill with plastic card.


Rear part of the wing had to be forced up against the fuselage but the end result was OK. Filling with CA and careful sanding will probably yield a good result!

Edgar! I haven't gotten around to repaint the belts but it WILL be done before canopy is on!


Magnus
robot_
_VISITCOMMUNITY
United Kingdom
Joined: March 08, 2009
KitMaker: 719 posts
AeroScale: 691 posts
Posted: Tuesday, November 24, 2009 - 10:47 PM UTC
Good progress Magnus- the wings look pretty troublesome, and I'll be watching closely how you fix those gaps!

I looked at my blistered PR canopy the other day, and compared it with the Aeroclub one (which is advertised as a PP Mk.Ia canopy, but is actually that used on some PR Mk.Ib's and later- a wrap-around front part with no armour). The Aeroclub canopy looks like a 1/48 one next to the AZ one- which is really narrow. I have a feeling it is more acurate than the Aeroclub.
magnusf
_VISITCOMMUNITY
Stockholm, Sweden
Joined: May 02, 2006
KitMaker: 1,953 posts
AeroScale: 1,902 posts
Posted: Thursday, November 26, 2009 - 10:23 AM UTC


Shims of thin plastic filling the gaps. One has to be careful when doing this so the wing dihedral doesn't change and also so that the plastic really bridges the gap and sticks well to both edges. If not, it will go "crack" at the least convenient moment (after painting but before decals is a favourite!).


After a bit of sanding and some more putty to fix a few last blemishes! Stabilisers have also been added, without any locating tabs . I did my own by drilling through the fin and inserting thin steel wire, this helps to keep it square while the glue is drying!


Magnus
almonkey
_VISITCOMMUNITY
England - East Midlands, United Kingdom
Joined: March 23, 2003
KitMaker: 2,124 posts
AeroScale: 788 posts
Posted: Sunday, December 06, 2009 - 08:45 AM UTC
the wing root pic, before you repaired it sent a shiver down my spine!
i'm looking forward to building this kit myself, but at the minute i'm being strict about not opening any more boxes until i finish some of the half built stuff!
magnusf
_VISITCOMMUNITY
Stockholm, Sweden
Joined: May 02, 2006
KitMaker: 1,953 posts
AeroScale: 1,902 posts
Posted: Monday, December 07, 2009 - 01:40 AM UTC
Phil! I wish I was better to keep my fingers off the boxes as well...

Final work before painting finished! There is one outlet below each wing tip, probably for ejecting gun heating air. I have no explanation why they are not of the same size though!


I'll just need to finish that canopy, then it is painting time!


Magnus
chukw1
_VISITCOMMUNITY
California, United States
Joined: November 28, 2007
KitMaker: 817 posts
AeroScale: 729 posts
Posted: Monday, December 07, 2009 - 04:03 AM UTC
Nice job of beating this one into submission, Magnus! Looking at the initial fit shots I felt a pang for you- but you've ironed it out quite nicely. Excellent modeling skills here, folks!

Cheers-
chuk
magnusf
_VISITCOMMUNITY
Stockholm, Sweden
Joined: May 02, 2006
KitMaker: 1,953 posts
AeroScale: 1,902 posts
Posted: Sunday, December 20, 2009 - 12:09 AM UTC
Chuck! Coming from you, that's praise indeed! Thanks! I follow your 410-build , I am a great fan of your helpers!

I've been a bit slow updating lately, I have concentrated on modelling instead of the computer!


I've come to seriously dislike masking RAF camo. This is an idea that I have had in my mind for some time (and I might have tried it before at some point but I don't remember...). I brush paint the demarcations and then fill in with the airbrush. I am quite happy with it, the brush painting got a bit thick in some places but with practice and care I think it can be avoided in the future.


And this is what the final result looks like after a bit of touch-ups here and there!


The main attraction of the scheme: the-night-and white lower surfaces! White is well, white, but with a drop of black and a drop of brown added. Black is the other way around: Black with white and brown added. This gives an effect that is a bit softer than pure black and white. It will get a set of silver ailerons and elevators just to add to the enjoyment factor...


I painted around the wing roots, engine panels and gun bays with GW "Mithril silver" to simulate wear. I then "dotted" over Maskol before painting the rest of the camouflage. I think the wear and tear got a bit too heavy but it will be easy to adjust it during the weathering stage.

Hope to be back a bit sooner next time!

Photos seem to be on holiday but I am convinced they will be on-line in a few hours!

:-H

Magnus
Mecenas
Joined: December 23, 2007
KitMaker: 1,596 posts
AeroScale: 1,275 posts
Posted: Sunday, December 20, 2009 - 12:19 AM UTC
Sorry Magnus, but I lost all your pics from this thread...
robby249
_VISITCOMMUNITY
Flemish Brabant, Belgium
Joined: August 18, 2008
KitMaker: 115 posts
AeroScale: 6 posts
Posted: Monday, December 21, 2009 - 10:36 AM UTC
i must say with the half black it is something special
Mecenas
Joined: December 23, 2007
KitMaker: 1,596 posts
AeroScale: 1,275 posts
Posted: Monday, December 21, 2009 - 11:16 AM UTC
I don't know what was wrong but everything works fine now although I didn't change anything in my settings.
 _GOTOTOP