_GOTOBOTTOM
Early Aviation
Discuss World War I and the early years of aviation thru 1934.
Eduard1:72 Dr.I (Weekend Edition)
robot_
_VISITCOMMUNITY
United Kingdom
Joined: March 08, 2009
KitMaker: 719 posts
AeroScale: 691 posts
Posted: Monday, September 28, 2009 - 09:54 AM UTC
Eduard have kindly supplied this kit for review.
After this build is complete, I shall write it up as a full review article.

This kit is the basic 'weekend edition' kit, which has no photo-etched metal parts, no masks and one marking option. The plastic components of this kit were first released in 2000, I believe. This edition is a new release (September 2009).


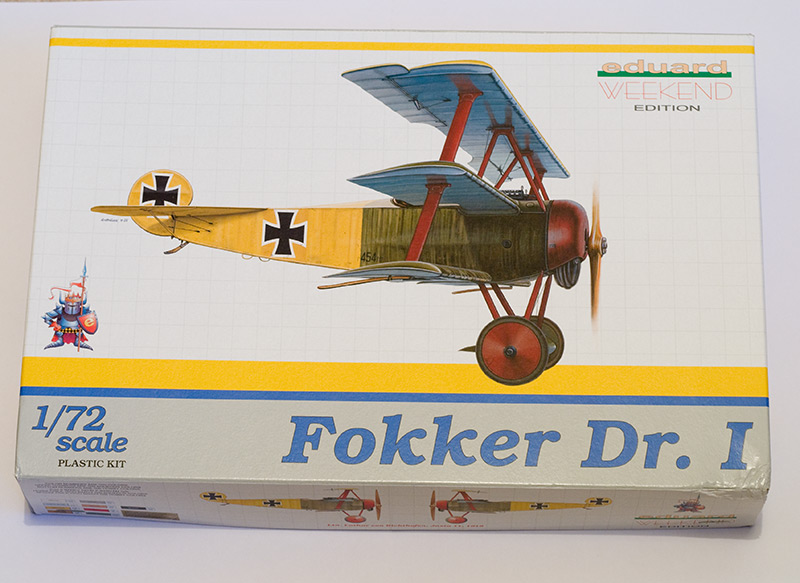
I was slightly surprised by the size of the box- it being large enough for most 1/48 aircraft- I guess this is due to standardisation in box and sprue sizes. The artwork on the box is really nice- not quite a profile, so the plane looks a bit less flat- the prop and cylinders are shown in motion. The edges of the box repeat the painting instructions, which is useful as they are in colour.


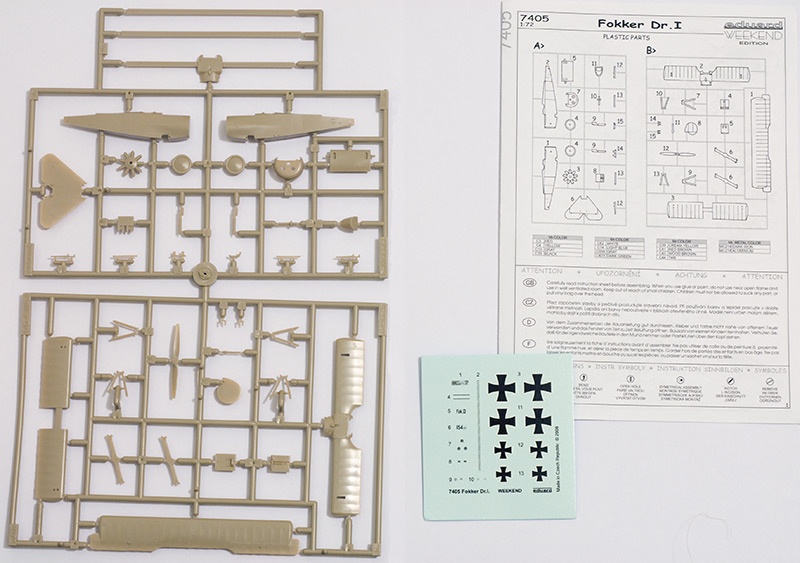
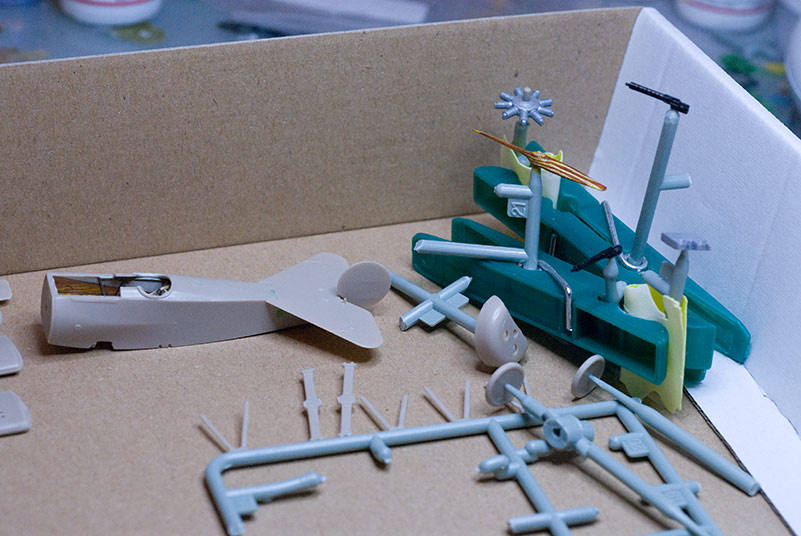
The box contains a small transfer sheet, and a clear re-sealable bag containing one sprue in light brown plastic. There are 38 parts on the sprue, three of which are not used (they are used for making a 'skeleton-wing' strip-down version requiring a lot of photo-etch). The instruction sheet is a single folded sheet of A4, printed in black and white on both sides.


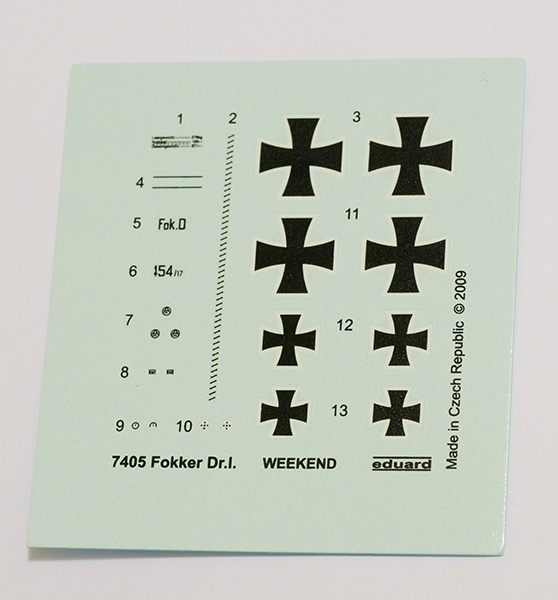
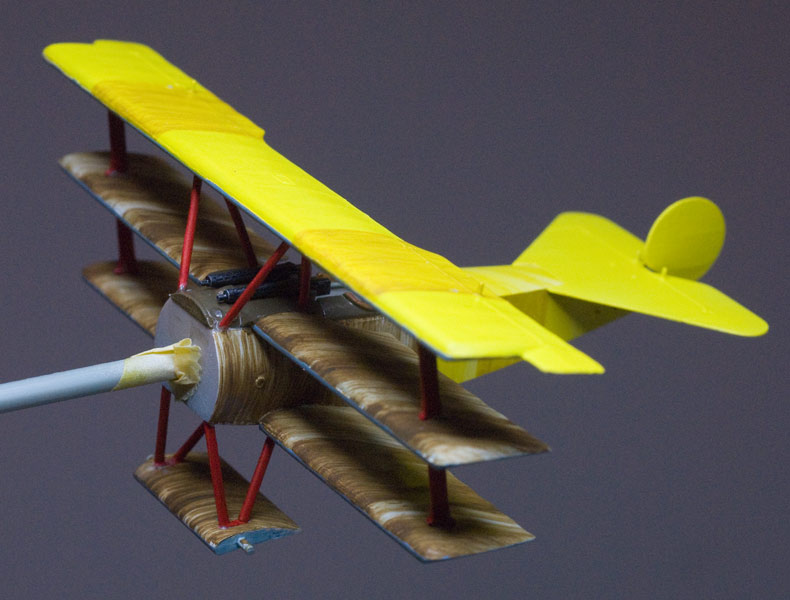
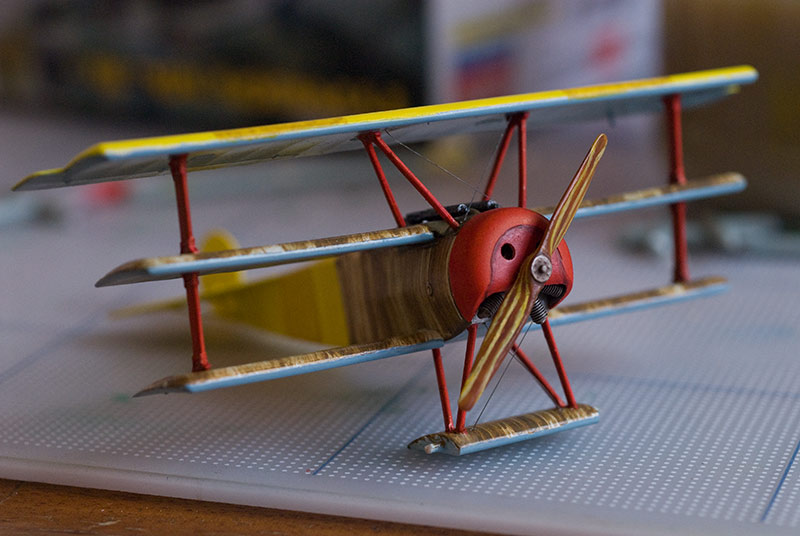
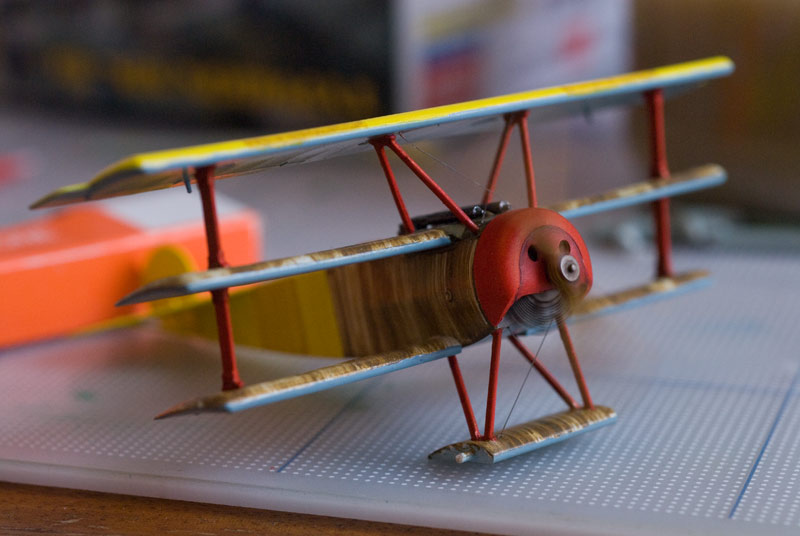
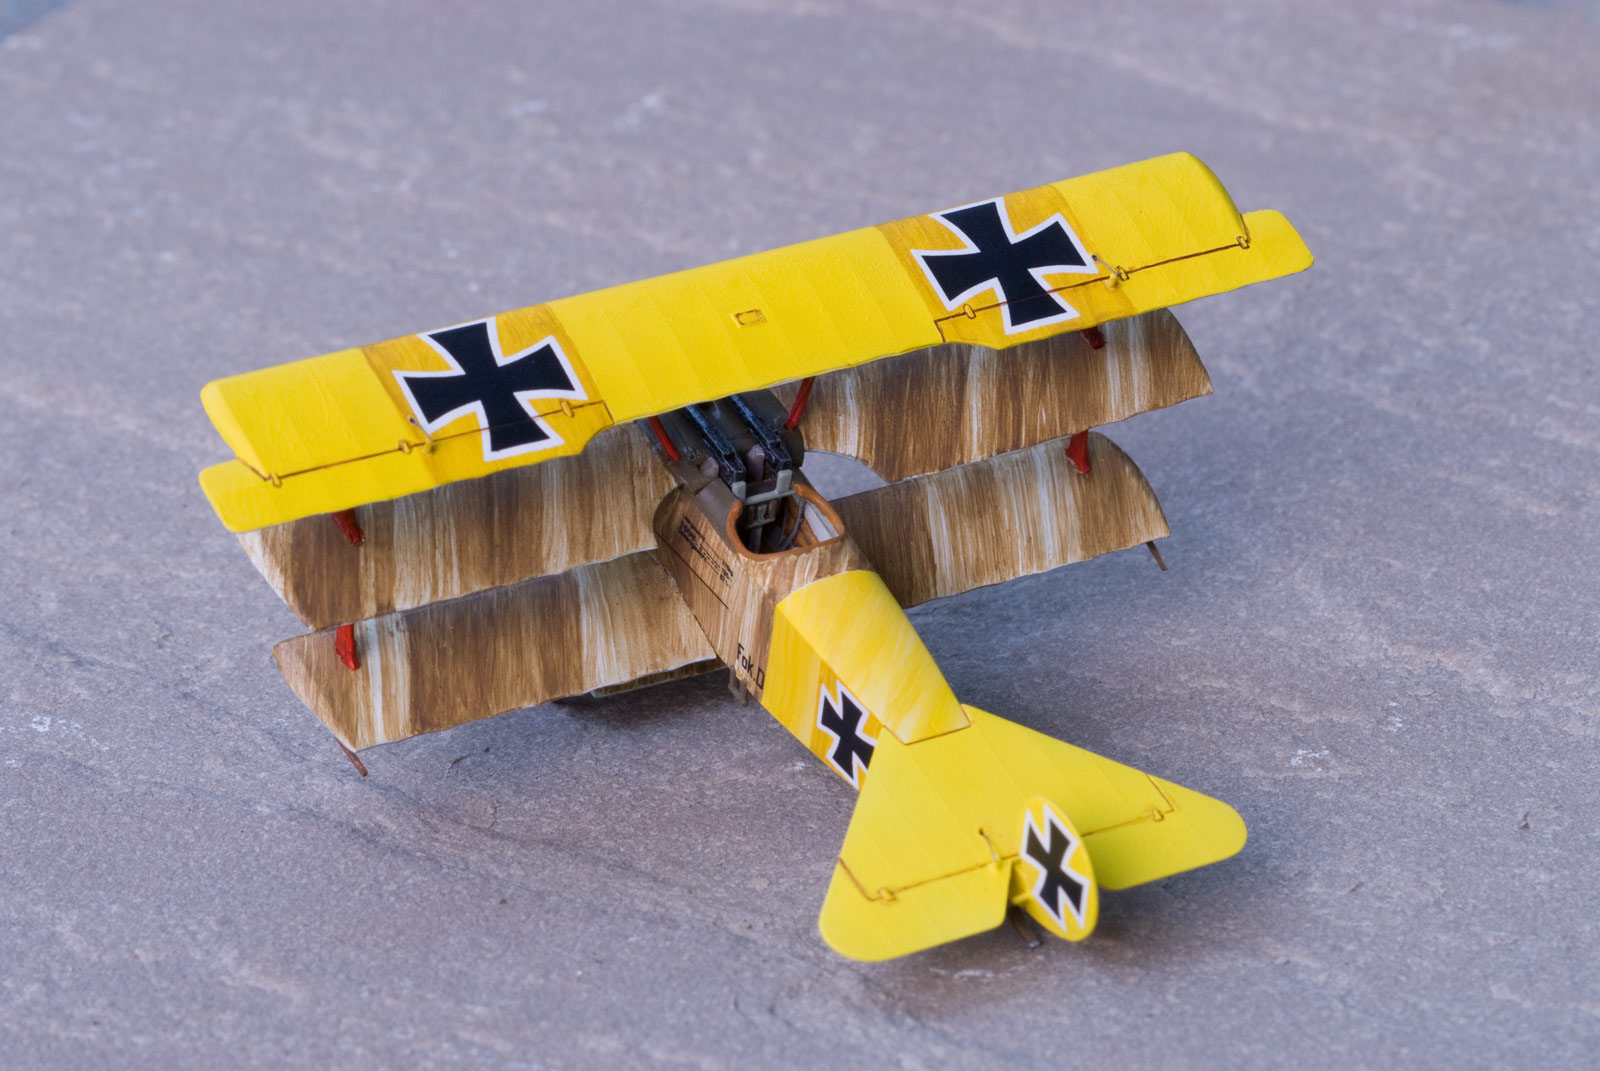
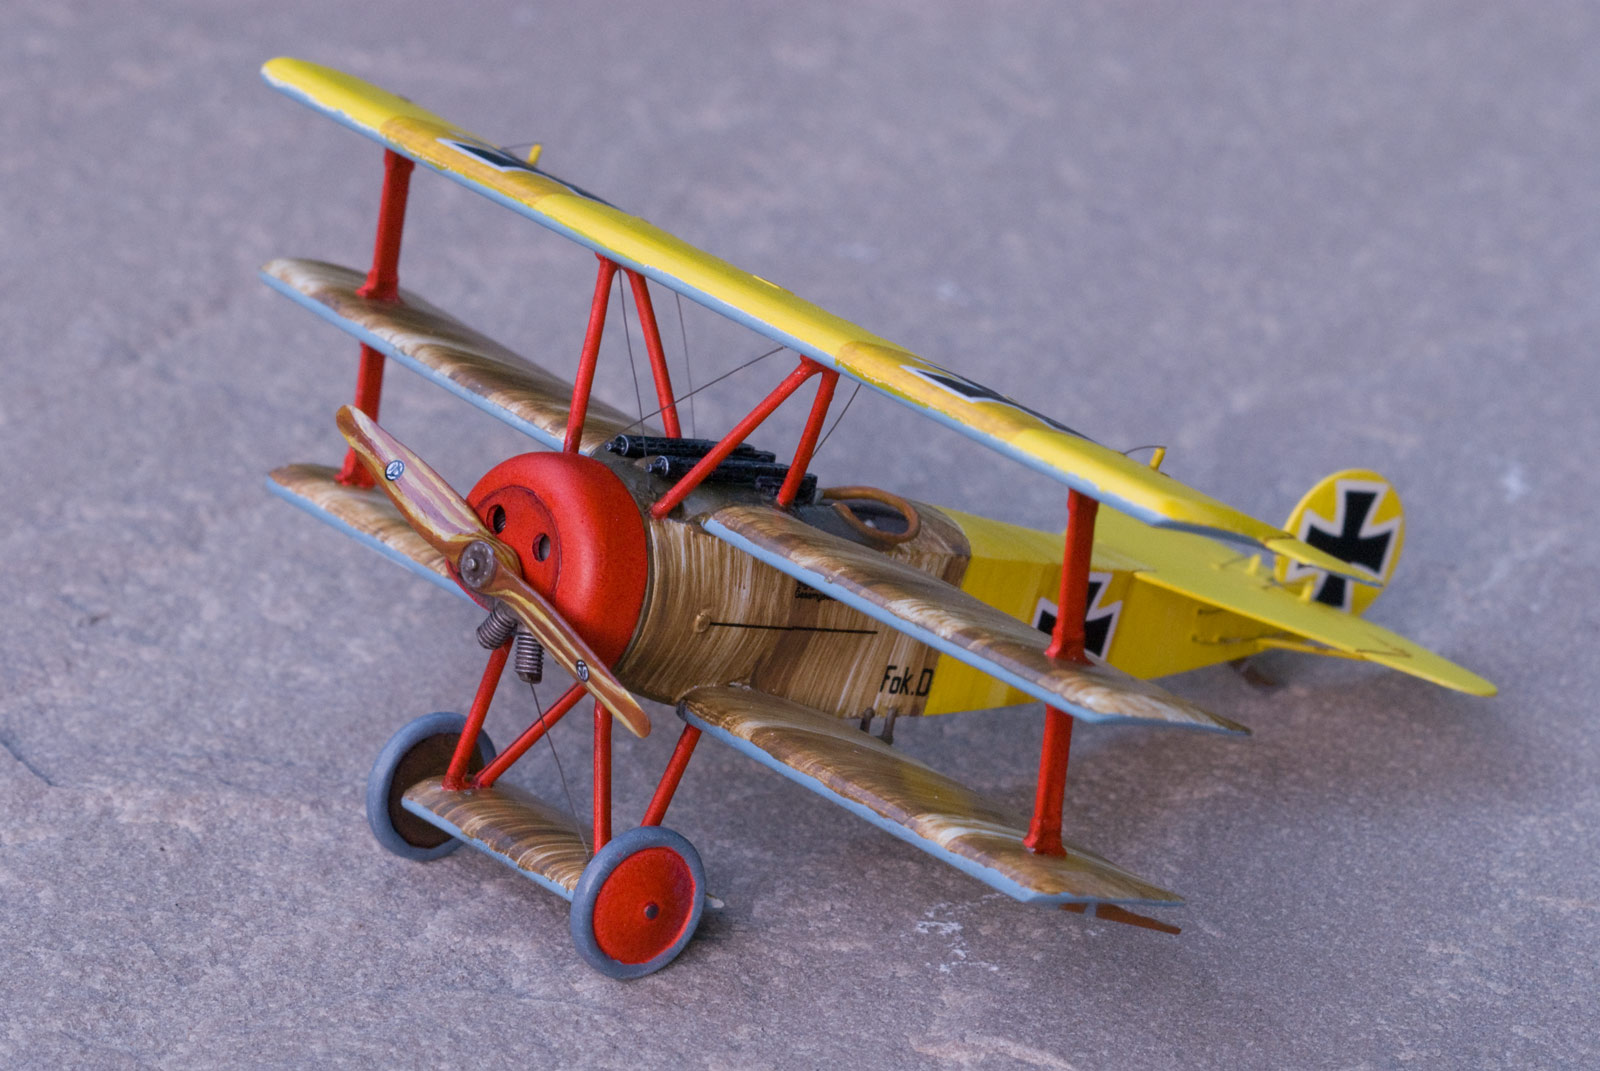
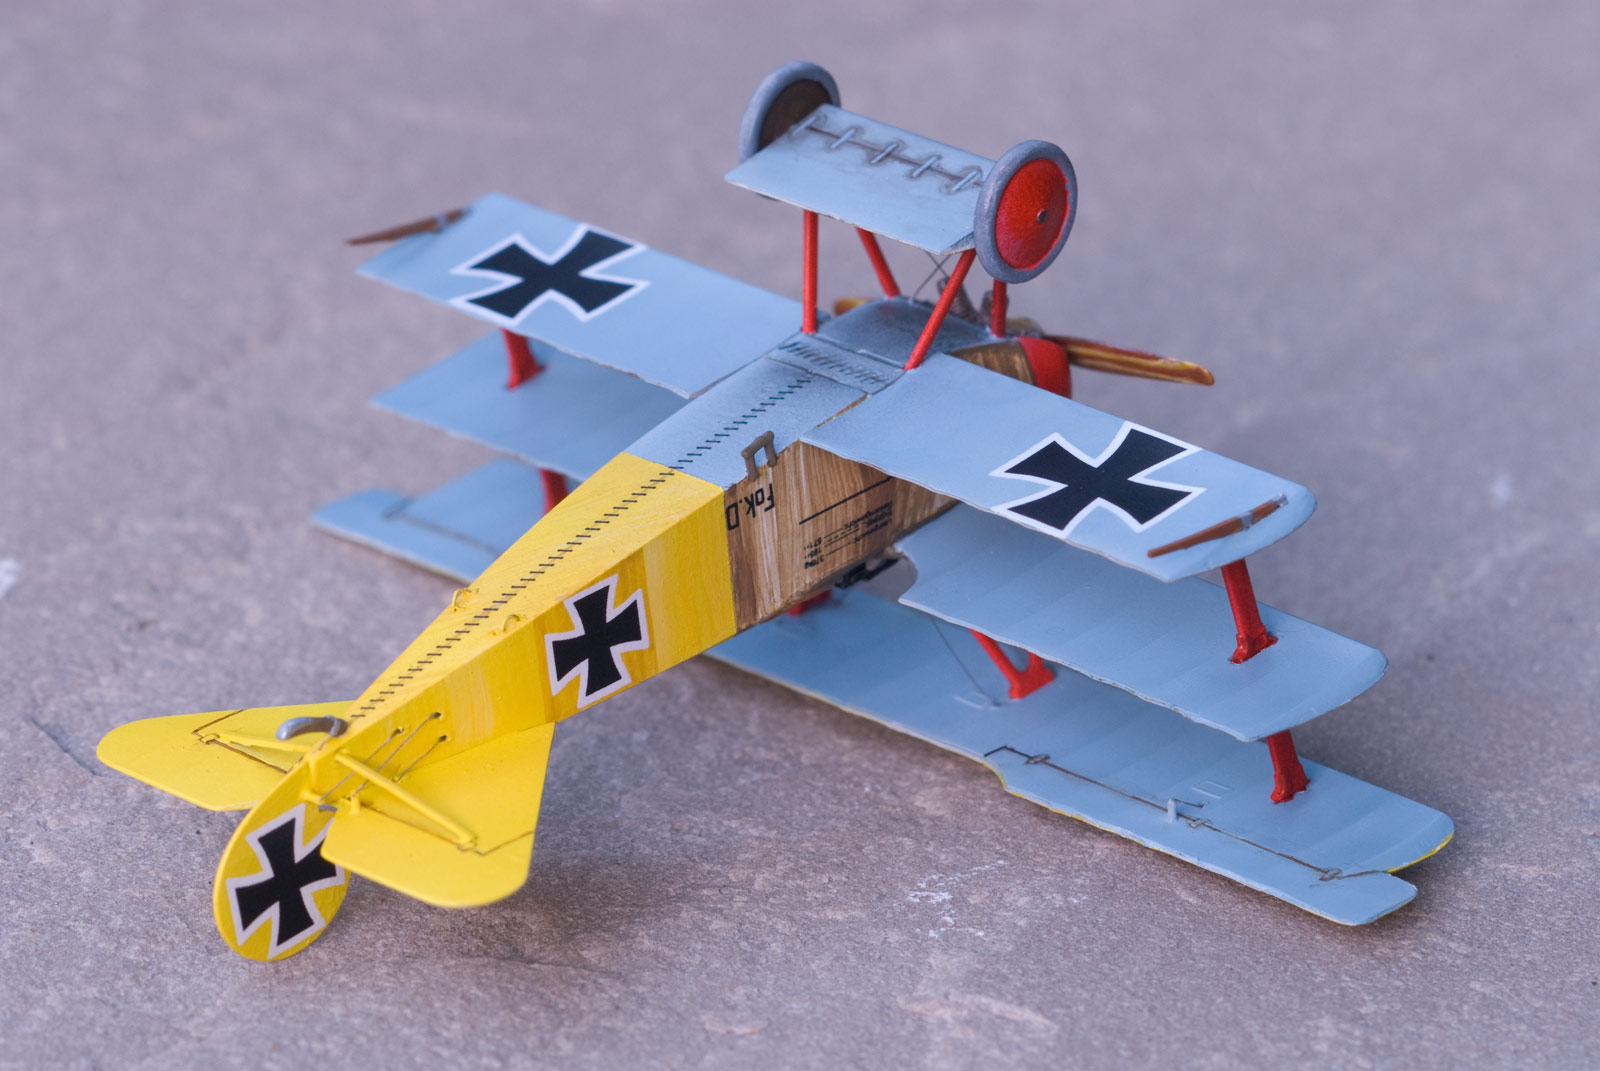
The box contains transfers for just one aircraft- Lothar von Richthofen, Jasta 11, 1918. I was glad that the colour scheme was not red! This colour scheme looks very attractive. The instructions give no history or background to the pilot. He was, of course, brother to Manfred von Richthofen, and was successful in his own right- achieving 40 confirmed victories, most of which were attained in very short periods of activity, with periods in hospital recovering from injuries between them. He was the more hot-headed of the siblings. His yellow plane reminds me a bit of Ralph Schumacher's yellow Jordan F1 car- also German, and in the shadow of a world-famous older brother who achieved many victories in red.

The transfers include some nice touches- dials for instruments, manufacturers labels for the engine cowling and prop, and stitching for the underside of the fuselage.


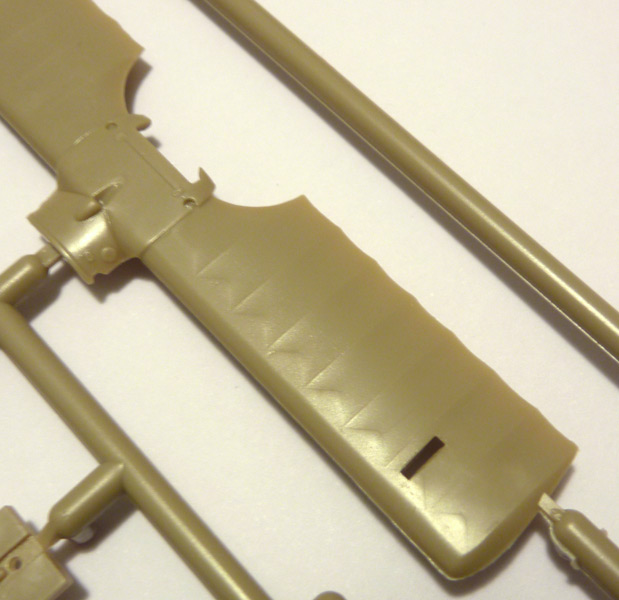
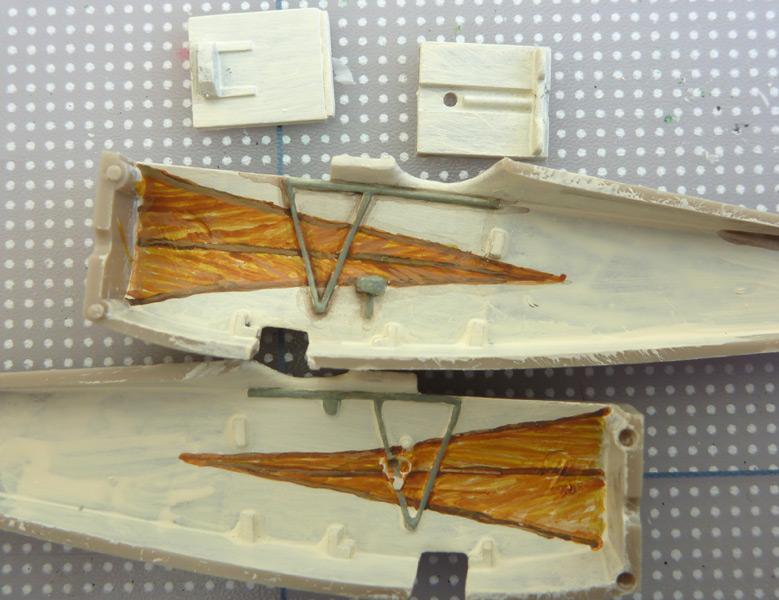
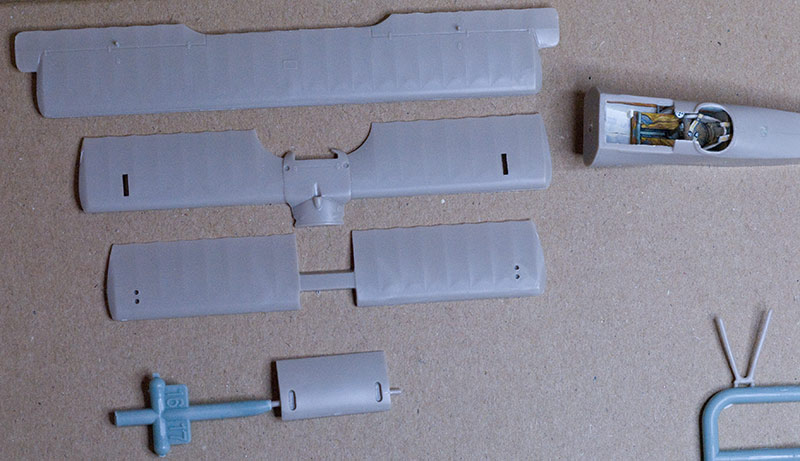
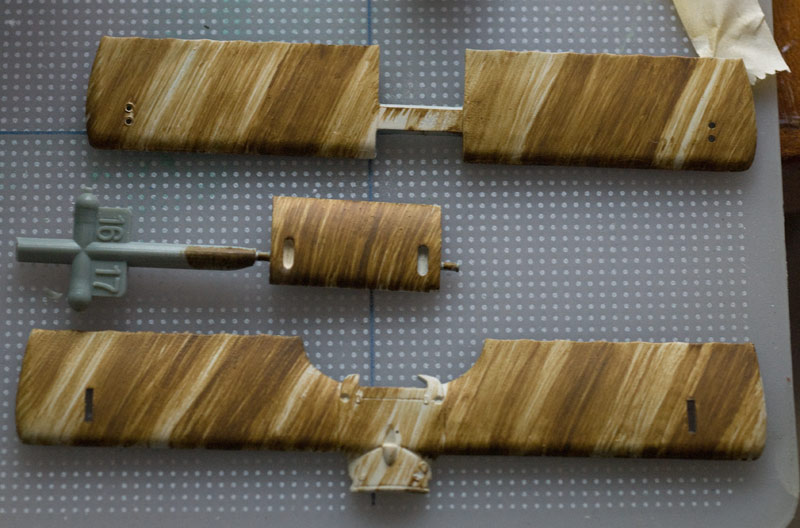
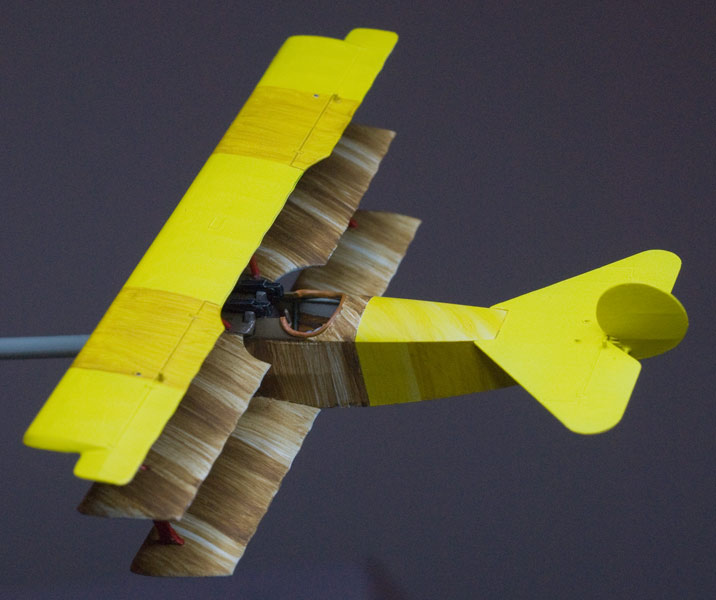
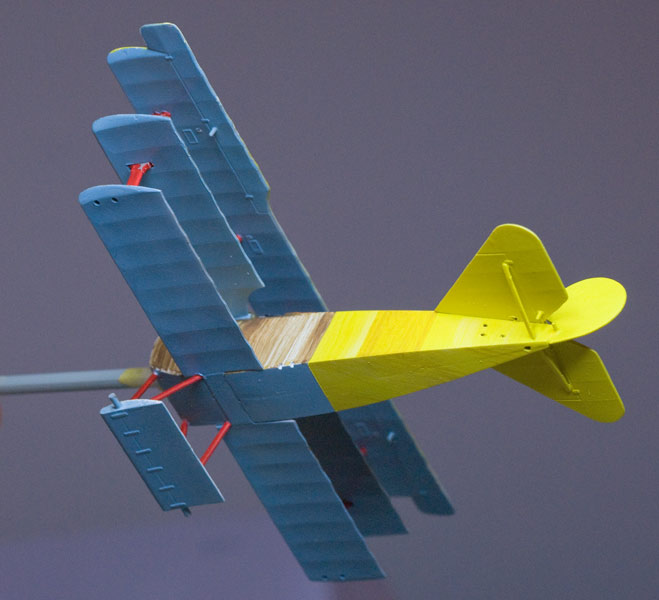
The moulding of the parts is very nice- the trailing edges of the wings are very sharp, and the horizontal tail part is very thin. The fabric detail is very restrained. I have had to angle the camera just right for the detail to catch the light.


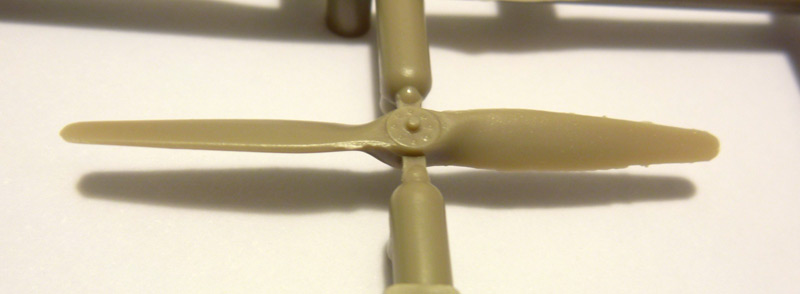
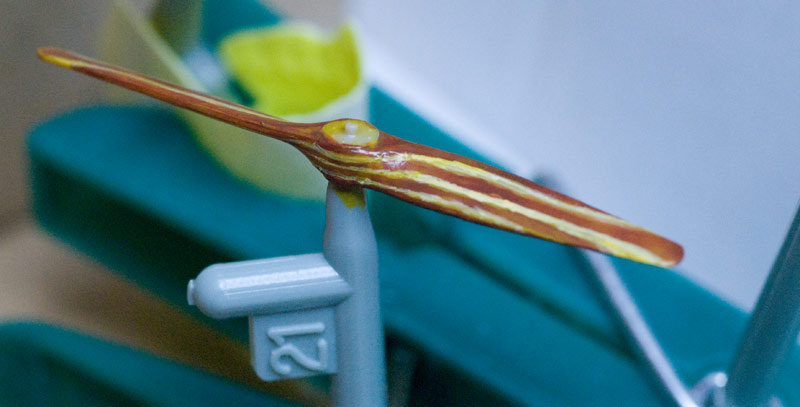
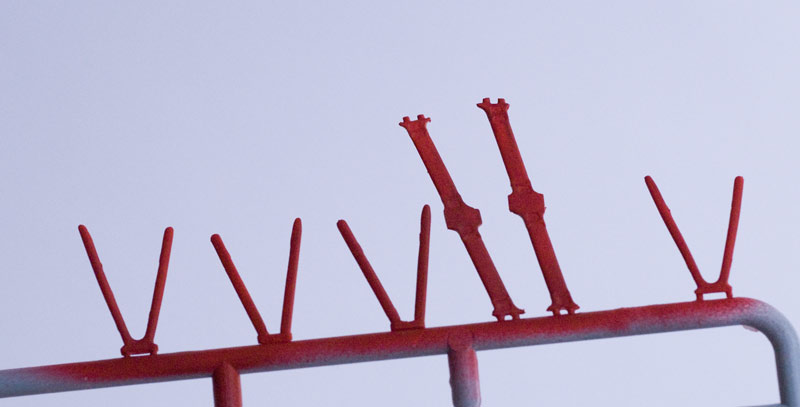
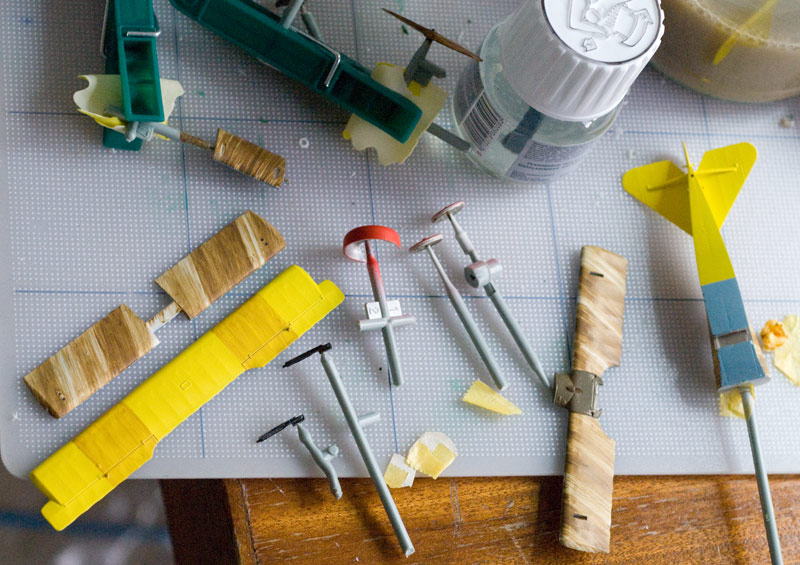
There are some tiny bits of flash on the parts- seen here on the prop. I guess this may be due to the moulds getting worn. It isn't something I would worry about, though it would be nice for a super-quick build if there was none at all. The prop and engine are free to rotate in the finished model, a little touch that does add something (lacking on most short-run kits).


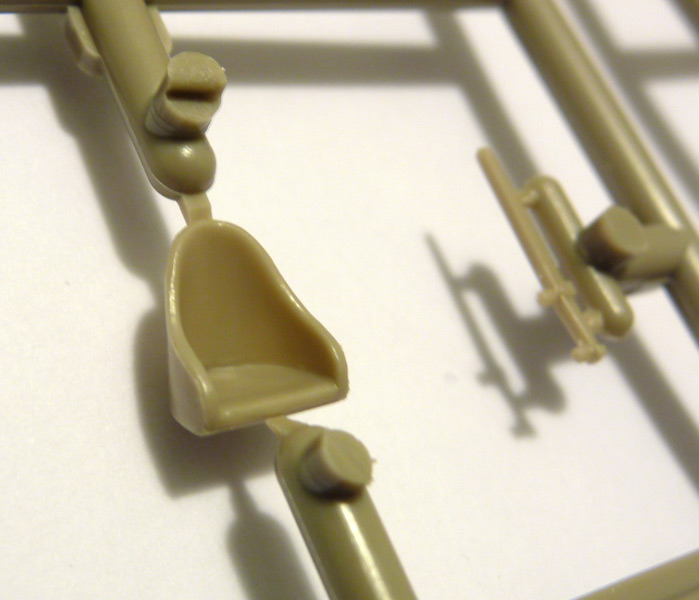
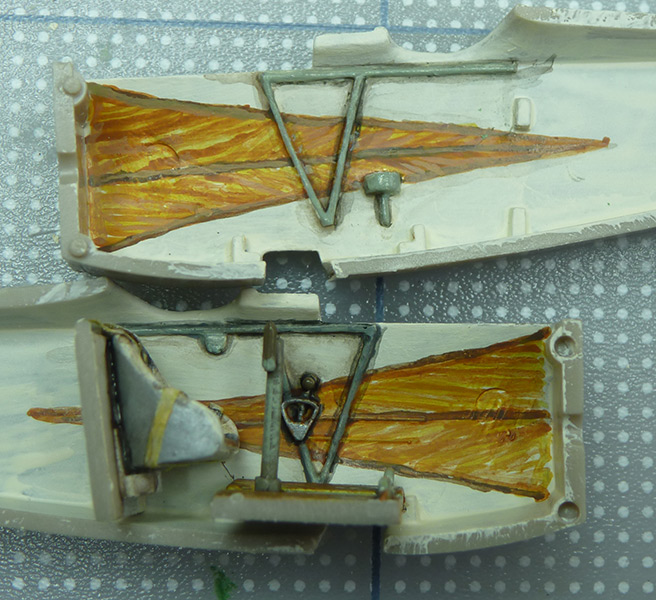
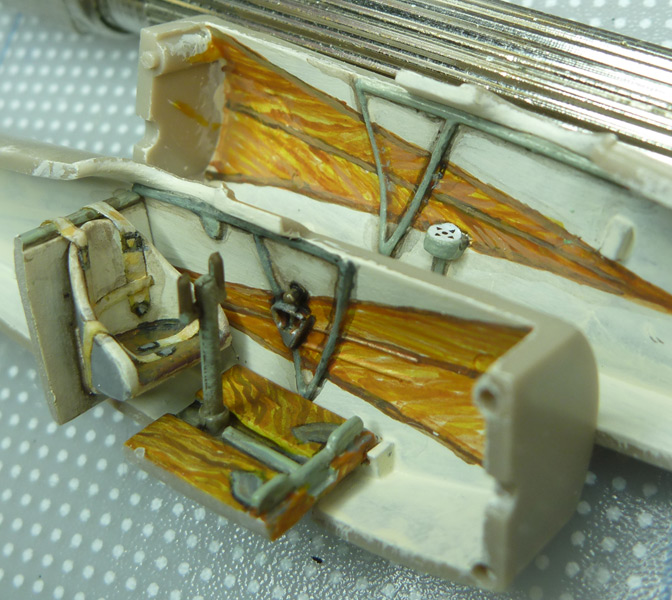
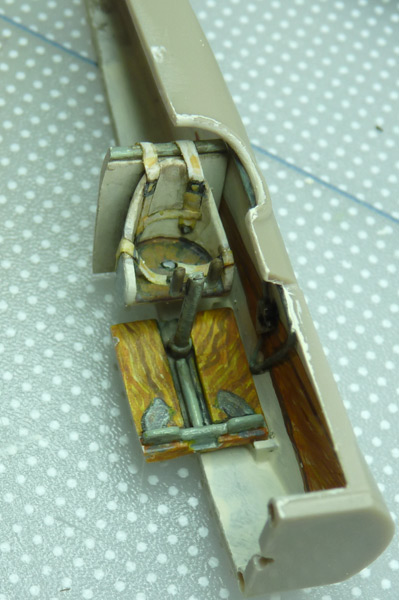
The chair has a nice, deep and crisp look to it.


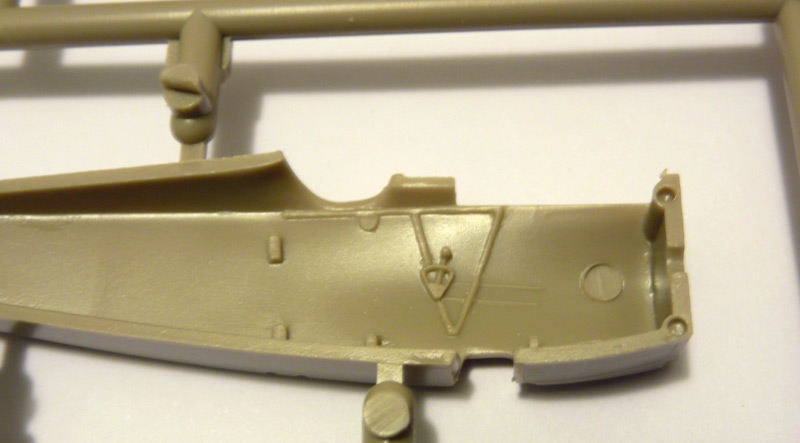
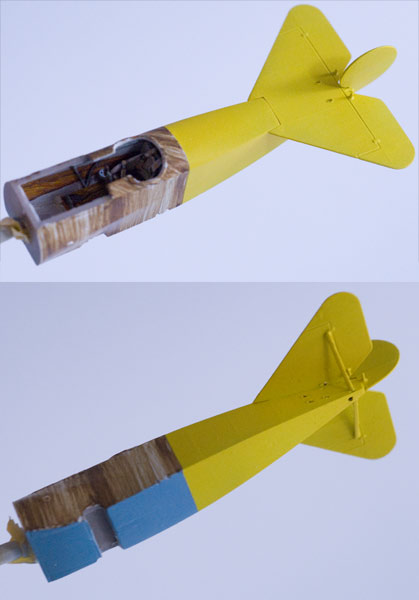
The internal detailing is not outstanding- the kit has in the past been supplied with photo-etch to make up for this. However, in this scale, and with the size of opening, the detail is adequate. Some moulded guidelines for which area should be painted as wood, and which in beige, would be nice (the painting instructions show the triangular areas of wood).


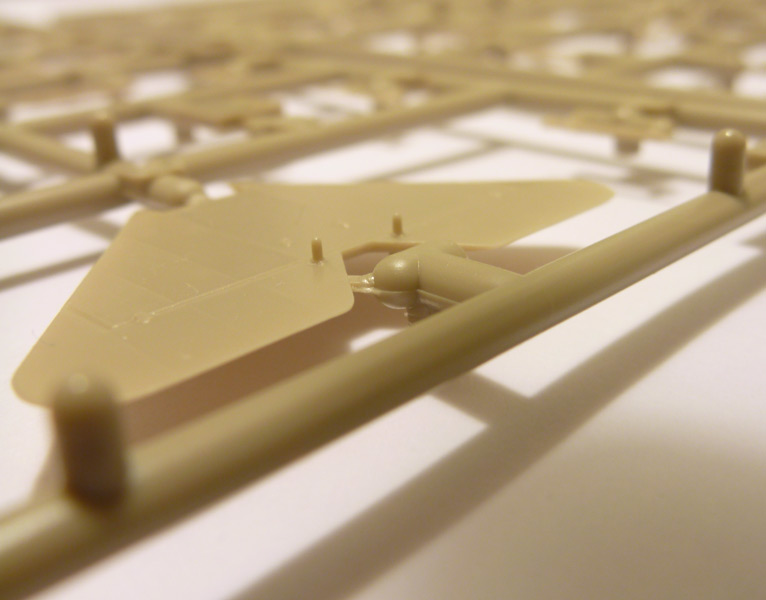
I love the finely moulded control horns that are present on all the control surfaces. The holes where the control lines pass through the horizontal surfaces of the tail need to be drilled out before the control lines are rigged.


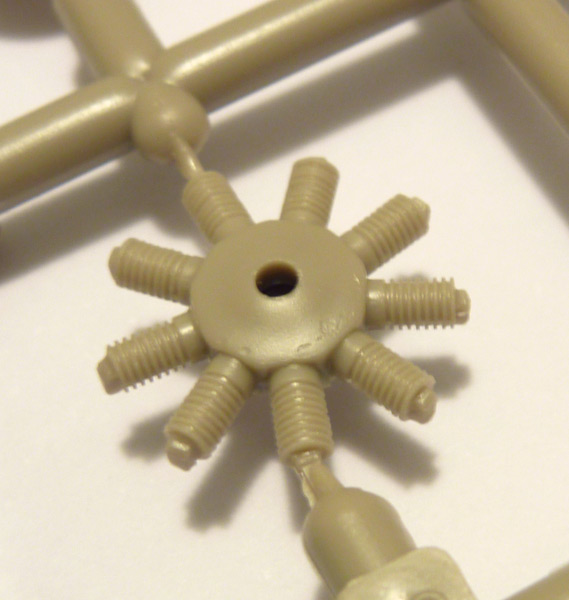
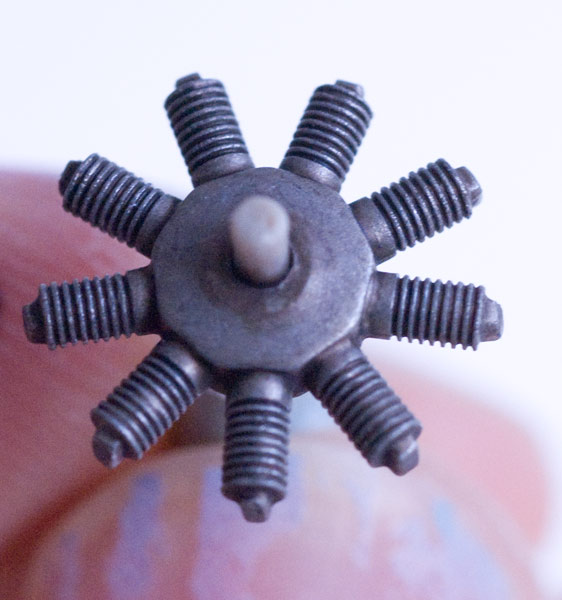
The engines has super-fine cooling ridges moulded onto the cylinders- they are so fine, that at first glance I thought there was a lack of detail. They should pop when dry-brushed.

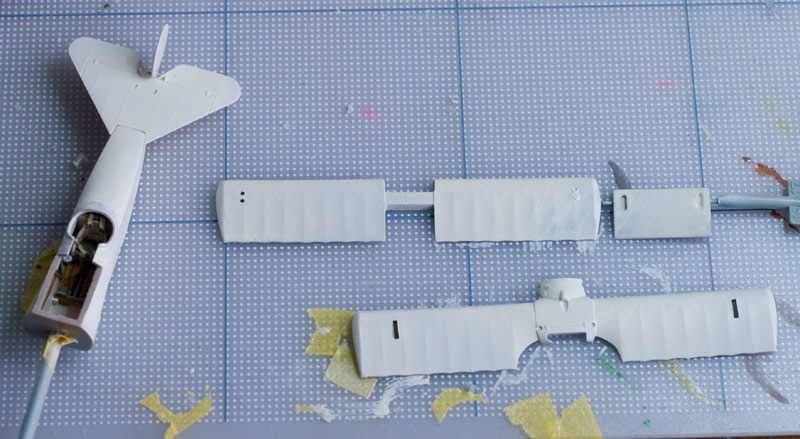
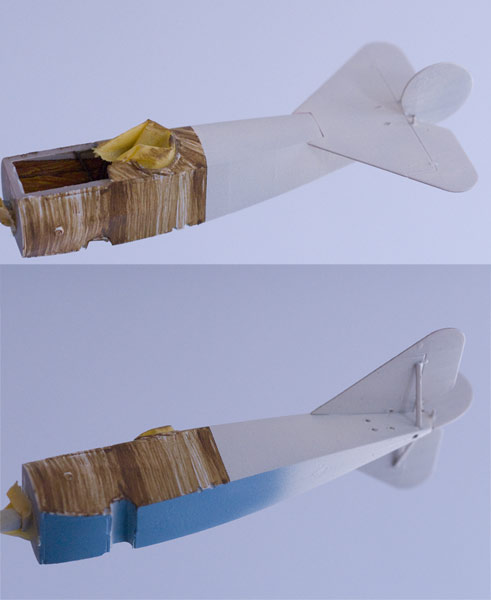
I'm really looking forward to building this little kit, though I am a bit daunted by painting the streaked camouflage. I have started cleaning up the cockpit parts, and will try to get some paint on them very soon!
robot_
_VISITCOMMUNITY
United Kingdom
Joined: March 08, 2009
KitMaker: 719 posts
AeroScale: 691 posts
Posted: Monday, September 28, 2009 - 08:44 PM UTC
Early start today to get some paint on the cockpit.


It looks terrible at this magnification, but I think it will look OK through the small opening. Only the top half has had washes around the tubular structure. The grey-green was a mix of RAF Sky and RAF Ocean Grey.
robot_
_VISITCOMMUNITY
United Kingdom
Joined: March 08, 2009
KitMaker: 719 posts
AeroScale: 691 posts
Posted: Tuesday, September 29, 2009 - 10:10 PM UTC
Cockpit is now finished. With paint on the parts, you need to sand the canvas bulkhead behind the seat, and the floor section, to be able to close the fuselage without a gap.


The seat was painted according to Stephen's review build of the 1/48 version. The instructions say to paint the whole chair red brown. Tamiya tape belts are the only addition to the kit parts. I painted on the heel plates on the floor under the rudder pedals, again using Stephen's build as a reference.
FalkeEins
_VISITCOMMUNITY
England - South East, United Kingdom
Joined: March 07, 2005
KitMaker: 868 posts
AeroScale: 690 posts
Posted: Tuesday, September 29, 2009 - 10:24 PM UTC
..built the Revell Dr. 1 in this scale recently ...it was so small...I had to wear reading glasses to see the thing.... Your pics are about five times real size ! Excellent looking interior !
robot_
_VISITCOMMUNITY
United Kingdom
Joined: March 08, 2009
KitMaker: 719 posts
AeroScale: 691 posts
Posted: Tuesday, September 29, 2009 - 11:34 PM UTC
Thanks Neil. Yes, it is pretty tiny! Makes the 1/72 Hawker Typhoon next to it on the bench look like a beast.
thegirl
_VISITCOMMUNITY
Alberta, Canada
Joined: January 19, 2008
KitMaker: 6,743 posts
AeroScale: 6,151 posts
Posted: Wednesday, September 30, 2009 - 01:19 AM UTC
Looks good Ben . It is a very small aircraft in this scale ! Have the profipack dual combo in this scale and was thinking about making a pair of earrings with them
robot_
_VISITCOMMUNITY
United Kingdom
Joined: March 08, 2009
KitMaker: 719 posts
AeroScale: 691 posts
Posted: Friday, October 02, 2009 - 11:21 AM UTC
Tonight's progress:


The wings are waiting to be airbrushed. I will primer both sides with a cream primer, then paint the bottom surfaces light blue. The green streaks with be brush painted- have got to try some techniques out first. I decided to put the tail on the fuselage, as it all needs to be painted yellow. I decided to paint the engine silver, and wash with browns and blacks to get the right look, rather than undercoat in black and dry-brush up to a metallic finish. Hopefully make a lot of progress tomorrow....
robot_
_VISITCOMMUNITY
United Kingdom
Joined: March 08, 2009
KitMaker: 719 posts
AeroScale: 691 posts
Posted: Saturday, October 03, 2009 - 05:58 AM UTC
Good progress, as hoped!


Primer (useless stuff, I should throw it out- just beads on the surface of the plastic, even when not thinned very much, and still clogs the airbrush like no other paint...).


Just painted silver, then washed with Citadel Devlan Mud.
I have done a lot of dry fitting of the engine and prop, and the cowling will only fit if the engine is mounted backwards (i.e. the reverse of the way the instructions say). I'm not sure whether it is an error in the instructions, or ill-fitting parts.


After cleaning up the struts, they were lightly super-glued to a piece of sprue for air-brushing.


I really enjoyed doing the streaking- also much easier than I thought.

I invented my own method:
Spray a coat of linen base.
Get a 1.5cm or 2 cm flat brush (has to be very dry)
Thin some olive paint (I used Xtracrylix RAF Olive Drab)- thinner than normal for brush painting
Use a small, but heavily-ladden brush to transfer spots of paint onto the big flat brush- apply plenty, but just in isolated spots, not all over the brush.
Place the wing at the right angle (I used Stephen's "two ribs per stripe" rule)
Drag the brush across the wing, beginning with the trailing edge (I found the paint didn't get to the leading edge if I did it in the opposite direction)- I over-shoot on both side of the wing to make sure I have covered it.
After each pass, you will have to re-spot paint on the big brush.
After 3 passes, you have to wash the big brush out, and dry it (I used a hair dryer)- it must be dry before re-loading with spots of paint.
The darker bits can have a second pass.
If you miss a bit, make a pass in the reverse direction, without rotating the brush.

That sounds complicated, now that I have typed it all out, but is is very quick (even with all the brush drying!). I am sure it is less hassle than using transfers.

I used this same technique to add the subtle streaks to the yellow (I think they were done after the photos). For the yellow, I used linen and tan paint on the same flat brush, which nicely added subtle lighter and darker shades.


Hope to make more progress tonight!
robot_
_VISITCOMMUNITY
United Kingdom
Joined: March 08, 2009
KitMaker: 719 posts
AeroScale: 691 posts
Posted: Saturday, October 03, 2009 - 09:00 AM UTC
Assembled most of the bits into something that looks like a triplane now:


Being a triplane actually made alignment issues go away, pretty much. The outer struts pass through the middle wing, making it very sturdy, and unable to be very mis-aligned. The undercarriage was more of a struggle though.

All in all, much easier than the average biplane, and great for beginners, or those who don't like being driven mad aligning things.

Should finish it tomorrow- I received the kit on Monday, so it'll be done in a week, which isn't bad (not quite a weekend).
TedMamere
_VISITCOMMUNITY
Moselle, France
Joined: May 15, 2005
KitMaker: 5,653 posts
AeroScale: 4,347 posts
Posted: Saturday, October 03, 2009 - 09:24 AM UTC
Hi Ben,

Wow, excellent and fast work!

Having had the kit in my hands, I can confirm that the model is very small. There must be some lilliputians at work here...

Jean-Luc
JackFlash
_VISITCOMMUNITY
Colorado, United States
Joined: January 25, 2004
KitMaker: 11,669 posts
AeroScale: 11,011 posts
Posted: Saturday, October 03, 2009 - 03:35 PM UTC
Nice build Ben! Will you do any rigging? Will this be a stand alone display or will you incorporate it with some others in the same scale?
robot_
_VISITCOMMUNITY
United Kingdom
Joined: March 08, 2009
KitMaker: 719 posts
AeroScale: 691 posts
Posted: Saturday, October 03, 2009 - 07:23 PM UTC
Jean-Luc- thanks for the nice comments! I've always liked small, detailed work.

Stephen- yes I will rig it. I was thinking originally of an in-flight diorama with a Camel (I have the Roden Bentley version coming, and I will make the Black Prince for the Fokker vs. Camel Campaign). I was thinking of suspending them by their wing-tips to a vertical wall with clouds on it. But, due to lack of pilots, I may just put the two of them on a varnished wooden base together. I was thinking of a title to go with them, something like: 'Knights from an otherwise unchivalrous war'.
robot_
_VISITCOMMUNITY
United Kingdom
Joined: March 08, 2009
KitMaker: 719 posts
AeroScale: 691 posts
Posted: Saturday, October 03, 2009 - 08:53 PM UTC


Bbbbrrrrrrmmmm...
robot_
_VISITCOMMUNITY
United Kingdom
Joined: March 08, 2009
KitMaker: 719 posts
AeroScale: 691 posts
Posted: Sunday, October 04, 2009 - 07:21 AM UTC
My first WWI build is complete! Transfers settled down very nicely over Klear (the first time I've used it- it is nice!). I used Micro Set, but I didn't need to use Micro Sol, as the surfaces are smooth, and the upper surface crosses went down into the aileron gaps with some persuasion from a brush.

I lost one of the wing tip skids to the carpet monster. Wasted a lot of time trying to find it- a negative of having carpets in Eduard-styrene-matching beige. I made two replacements, which are slightly thinner, but probably more to scale anyway.


Click for bigger version.


The rigging was going OK, I had a couple of pieces a bit loose, so I try to re-tension them with a blown-out match, but ended up burning through both! After some swearing, I managed to glue new ones in tension.


Click for bigger version.


I did minimal weathering, just some dark brown water colour airbrushed for the exhaust staining, and some brown water colour around the control surfaces. Then airbrushed an acrylic flat coat.


Click for bigger version.


Thanks again to Eduard for their kit to review. Thanks also to Stephen, and for Jean-Luc for getting the kit to me.
thegirl
_VISITCOMMUNITY
Alberta, Canada
Joined: January 19, 2008
KitMaker: 6,743 posts
AeroScale: 6,151 posts
Posted: Sunday, October 04, 2009 - 11:42 AM UTC
Awesome job done Ben ! Your streaking turned out really well . Thanks for sharing the build review with us .
robot_
_VISITCOMMUNITY
United Kingdom
Joined: March 08, 2009
KitMaker: 719 posts
AeroScale: 691 posts
Posted: Sunday, October 04, 2009 - 07:15 PM UTC
Thanks Terri! It has been a very fun build- the streaking was the best part, as it was so quick to get the effect over a large area.

It was so nice not to have to worry about references and accuracy, and just build, build, build!
FalkeEins
_VISITCOMMUNITY
England - South East, United Kingdom
Joined: March 07, 2005
KitMaker: 868 posts
AeroScale: 690 posts
Posted: Sunday, October 04, 2009 - 09:31 PM UTC

Quoted Text


It was so nice not to have to worry about references and accuracy..


..that can indeed be a problem with these little Fokkers (sorry!) since none of the refs seem to agree on colours & finish, Lothar's machine being one of those 'difficult' ones.

nice work on such a miniscule model !
jaypee
_VISITCOMMUNITY
Scotland, United Kingdom
Joined: February 07, 2008
KitMaker: 1,699 posts
AeroScale: 1,384 posts
Posted: Sunday, October 04, 2009 - 10:15 PM UTC
Looks like great fun Ben. I've bookmarked this thread as I've got one of these in flyboys movie colours I've never bothered with.
Looks a good candidate for Dr.I vs Camel.
flyeven
_VISITCOMMUNITY
Portugal
Joined: September 11, 2009
KitMaker: 49 posts
AeroScale: 37 posts
Posted: Wednesday, October 28, 2009 - 11:07 AM UTC
Any decal sheet to make easy the streaking
JackFlash
_VISITCOMMUNITY
Colorado, United States
Joined: January 25, 2004
KitMaker: 11,669 posts
AeroScale: 11,011 posts
Posted: Wednesday, October 28, 2009 - 03:16 PM UTC

Quoted Text

Any decal sheet to make easy the streaking


Here you go.
Microsculpt

Gunsight Graphics
robot_
_VISITCOMMUNITY
United Kingdom
Joined: March 08, 2009
KitMaker: 719 posts
AeroScale: 691 posts
Posted: Wednesday, October 28, 2009 - 06:53 PM UTC
Jose, although the description of the streaking technique I used sounds complicated, give it a try- I was very surprised at how quick it was. I'm sure I would have been more frustrated with application of a decal.
flyeven
_VISITCOMMUNITY
Portugal
Joined: September 11, 2009
KitMaker: 49 posts
AeroScale: 37 posts
Posted: Sunday, December 06, 2009 - 04:20 AM UTC
I´m going too start painting my Eduard Dr.I
linen base - Which brand
Humbrol?, Tamiya?, LifeColor?, Gunz GSI?
Thank you to all,

José César
JackFlash
_VISITCOMMUNITY
Colorado, United States
Joined: January 25, 2004
KitMaker: 11,669 posts
AeroScale: 11,011 posts
Posted: Sunday, December 06, 2009 - 05:54 AM UTC
The colour was unbleached linen and varied according to the stock they had from the textile mill. Any of the colours you mention should be a decent base.
 _GOTOTOP