background
The Fieseler Fi-156 was an excellent light aircraft built by Germany prior to and during WWII to meet the requirements of a short takeoff and landing (STOL) airplane. Production started in 1937 at the Fieseler factory in Kassel, then switched to the Morane-Saulnier factory in Puteaux, in occupied France in 1942. It was also manufactured in Romania. It continued in production in France after the end of the war.
The Storch was used on every front throughout the entire war. The aircraft was not built for speed. The only rounded shape was the engine cowling, which was followed by a boxy, angled body and long, spindly fixed landing struts which were the source of it's nickname, "stork". Powered by a 240hp engine, it could hover over a battlefield, flying at 35 mph. Suprisingly, at that speed, it was a difficult target for other aircraft to hit. It could land in 30 meters and take off in less than 80, although in windy conditions it could reportedly just drop to the ground safely, or even land flying backwards. It could be used as a taxi, for recon/observation, as an air ambulance, and perhaps most famously, for the rescue of Mussolini. It was very reliable and popular design and captured examples were used by the Allies, notably Montgomery, who used one as his personal transport, and Eisenhower, who pressed on into service in France.
The aircraft was imitated or copied with varying degrees of success by most of the other combatants in the war. Of particular mention are the Vultee L1A, ordered to production after military commanders saw the Fi-156 in a demonstration flight, which could land in its own length, and the Piper L4, the most direct Allied counterpart, which reportedly beat the Fi-156 in a slow speed contest at an air show by flying 17 mph. The last reported dogfight on the Western Front involved a Piper L4 and a Fieseler Fi-156. The crew of the Piper fired on the crew of the Fi-156 with a pistol, forcing them down, and then captured them.
The Fi-156 C-3 varied from previously produced aircraft by offering a "Universal" cockpit that could be used for observation or liason. It had a convertible rear seat, carried an MG 15 for self defense, added supports to the landing struts and increased range with the addition of fuel tanks in the wings. The "Tropen" version included filtered intakes for dusty climates. The C-3 variant was the most widely produced type of the Fi-156, with 1,230 produced by Fieseler and 525 built at the Morane-Saulnier plant.
The model
The Tristar kit was first previewed
HERE.
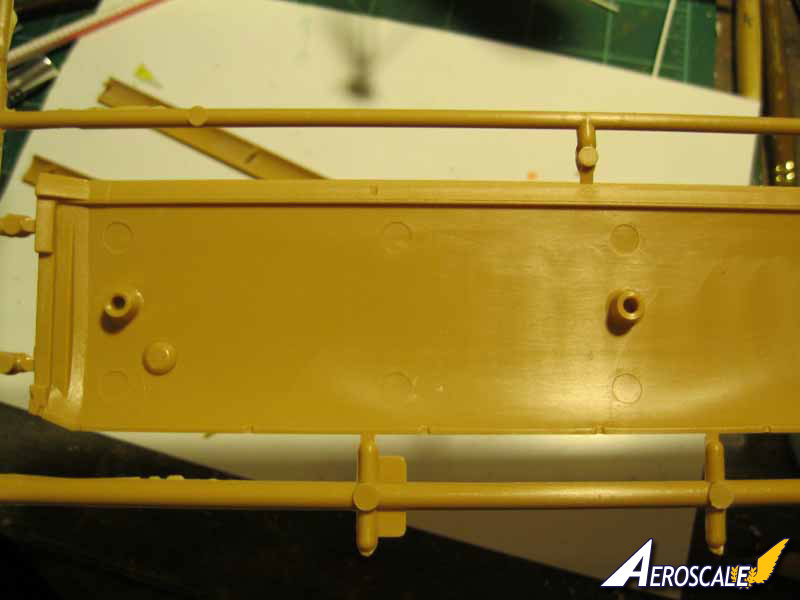
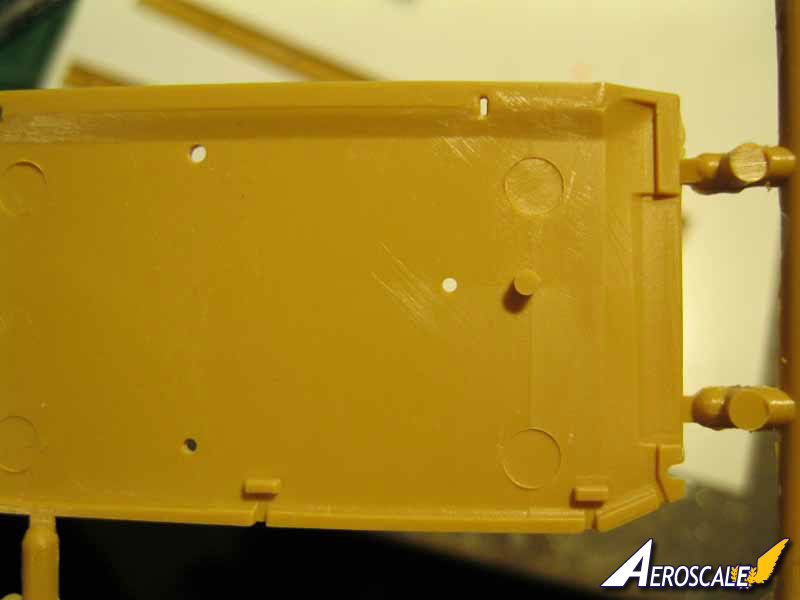
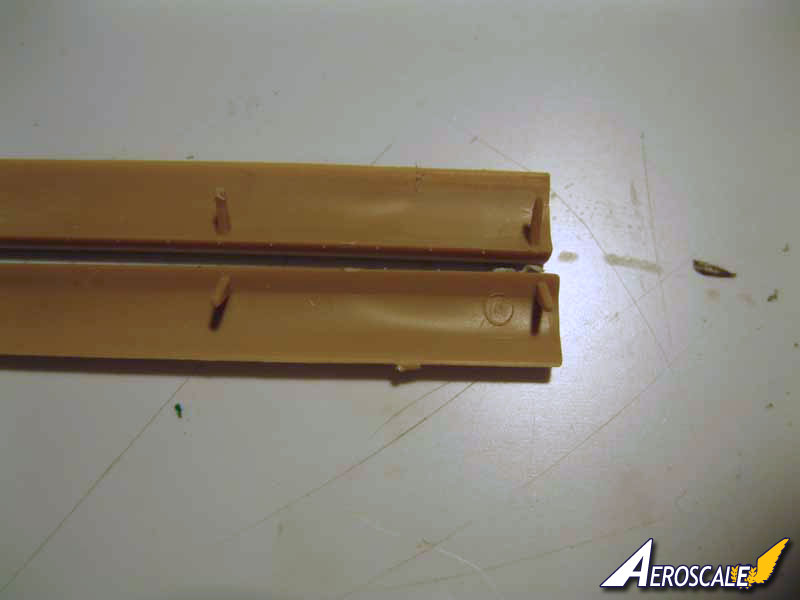
The preview included excellent detail photos of all the sprues ans well as the instructions. I have included basic sprue shots to accompany a description of each.
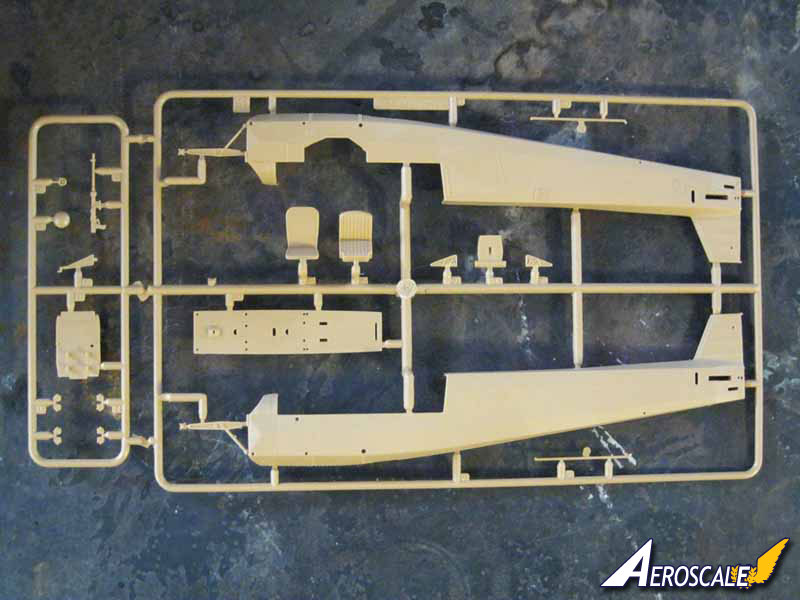
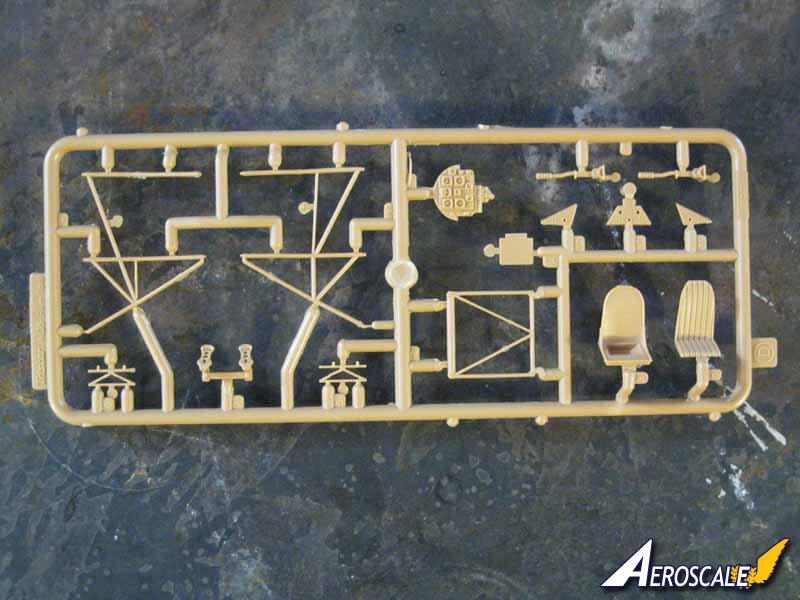
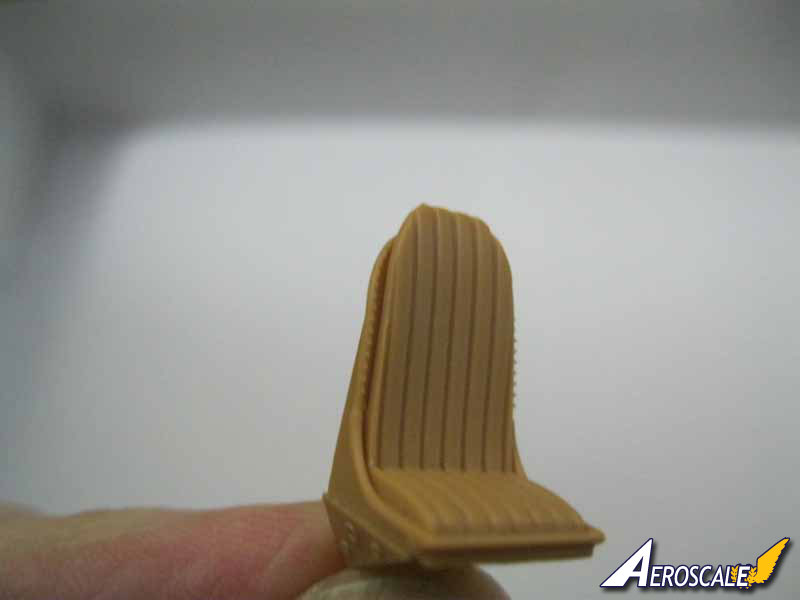
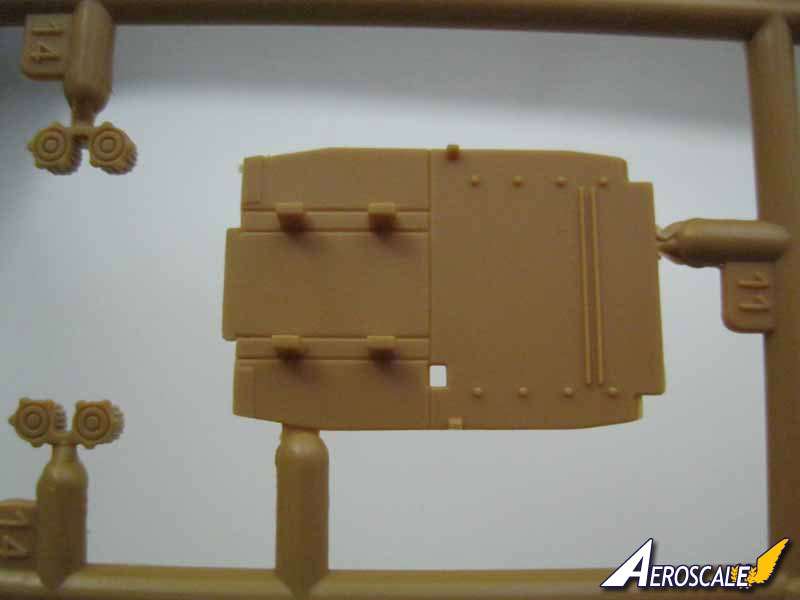
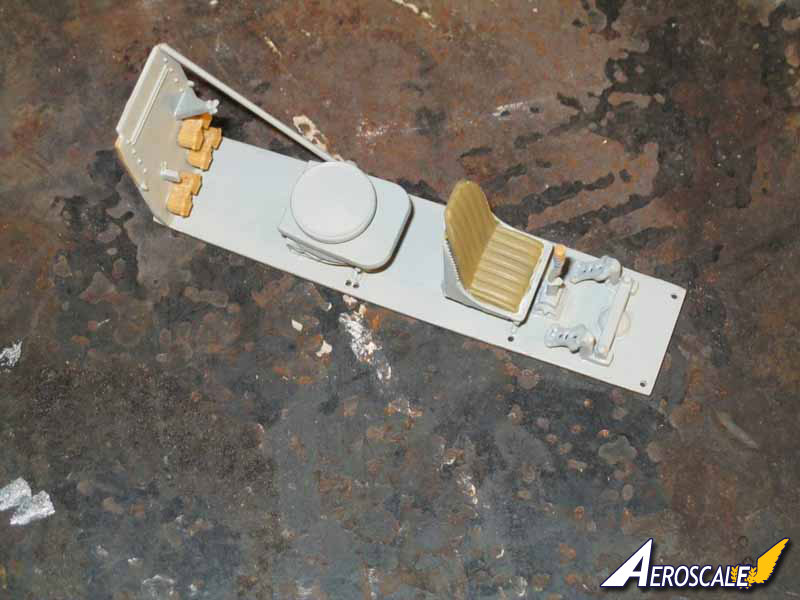
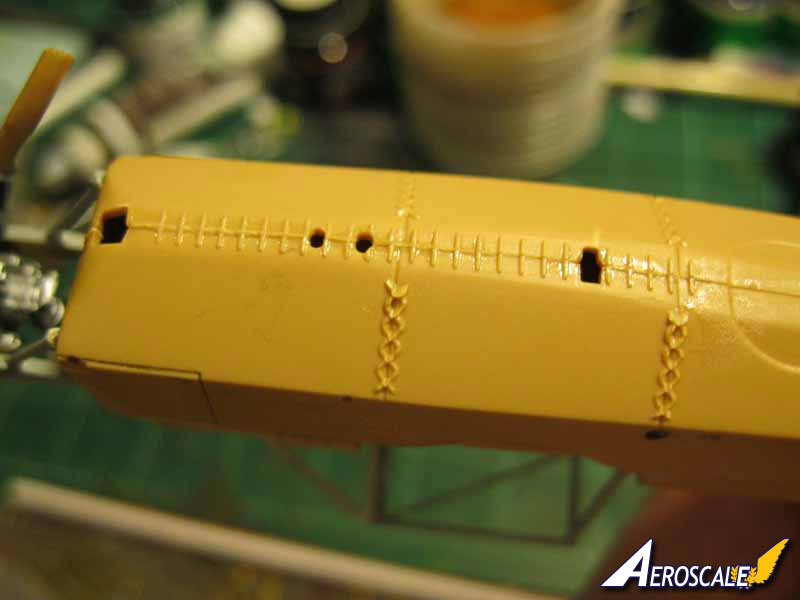
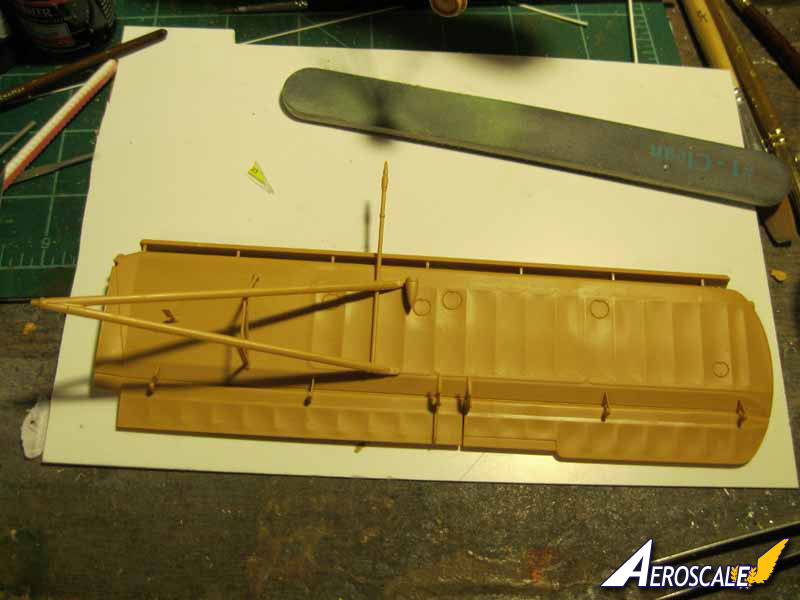
The "A" sprue is the fuselage havles and some cockpit details. There is some stitching detail on the lower portion of the fuselage, a nicely rendered MG15 and four double drum magazines for the gun, which mount on the included rear bulkhead. The base for the pilot's seat is nicely detailed as well but a little thick. The muzzle of the MG15 will need to be drilled out.
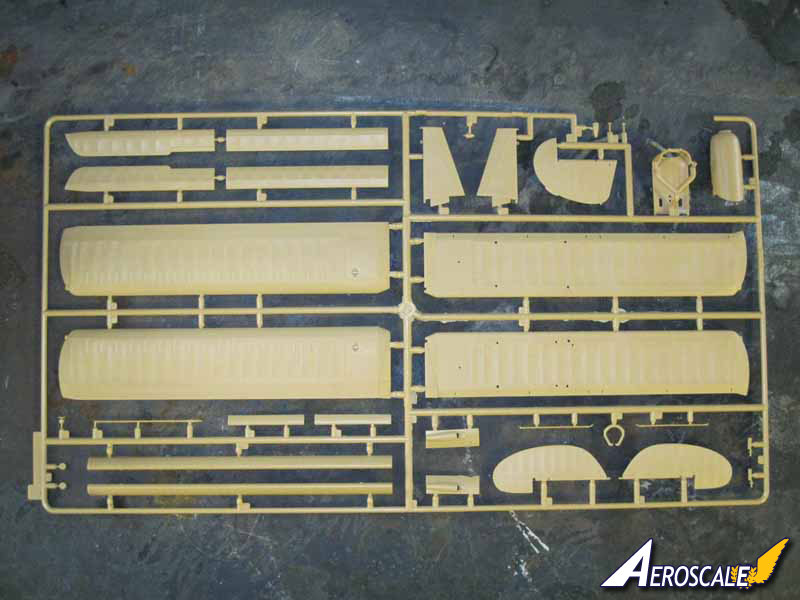
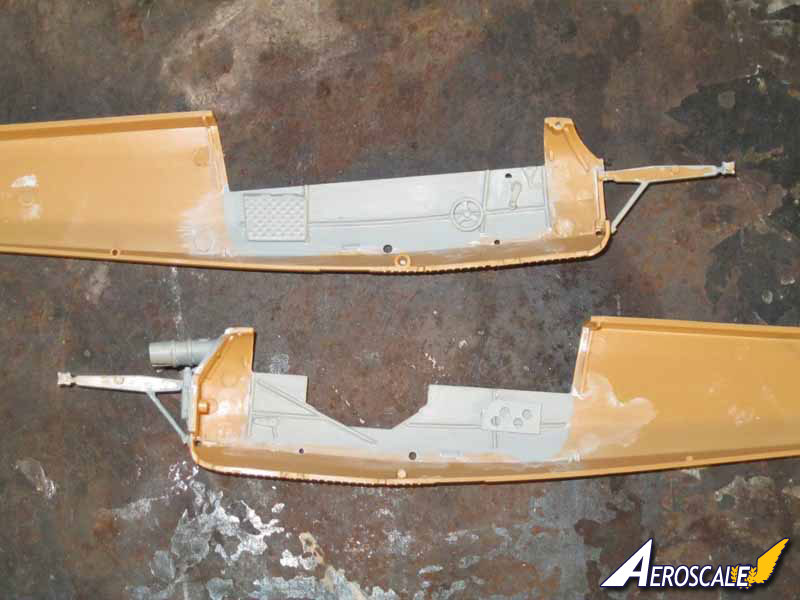
The "B" sprue is from the previous release and has the control surfaces for the wings, rudder and rear stabilizers and the lower half of the engine cowling. There is very nice detail showing rivets and fabric on the control surfaces. The included wings and upper cowling are not for use.
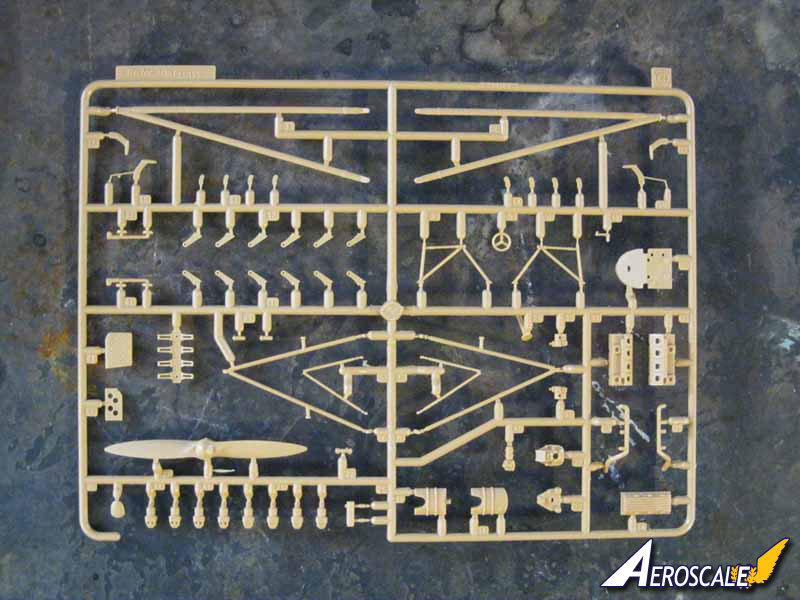
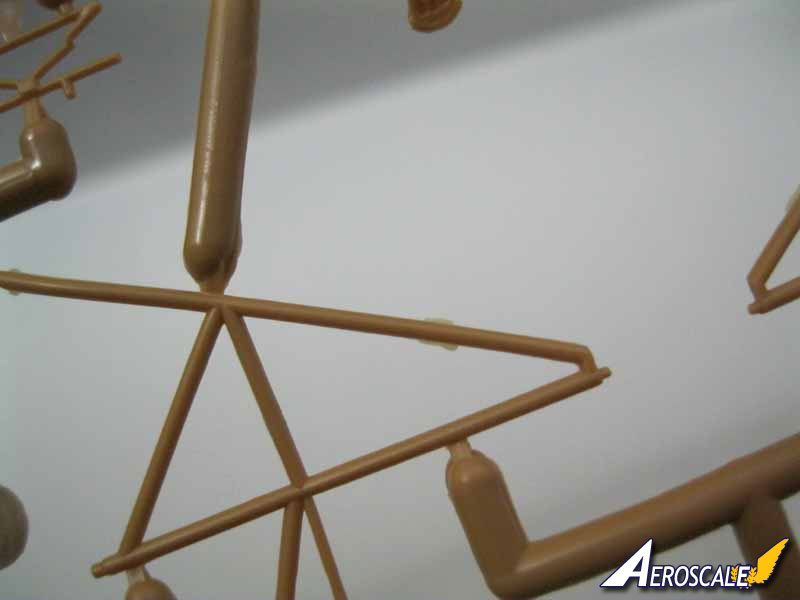
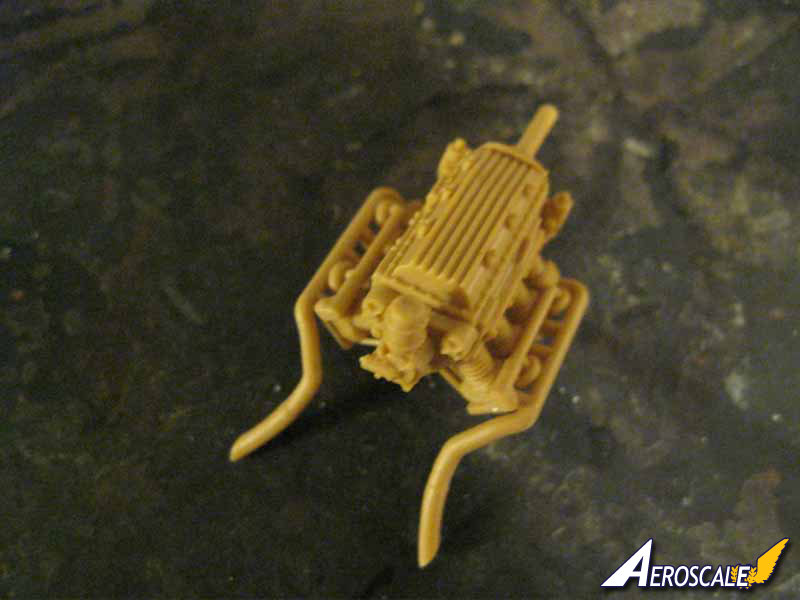
The "C" sprue has the struts, levers for flaps and the engine, with individual cylinder heads and other separate details. The level of detail is enough to look good on it's own, or make the base for some super detailing for advanced modelers.
The "D" sprue has the remainder of the cockpit parts, including two control sticks, foot pedals and a cross member for the front of the seats. The cage for the cockpit is also included.
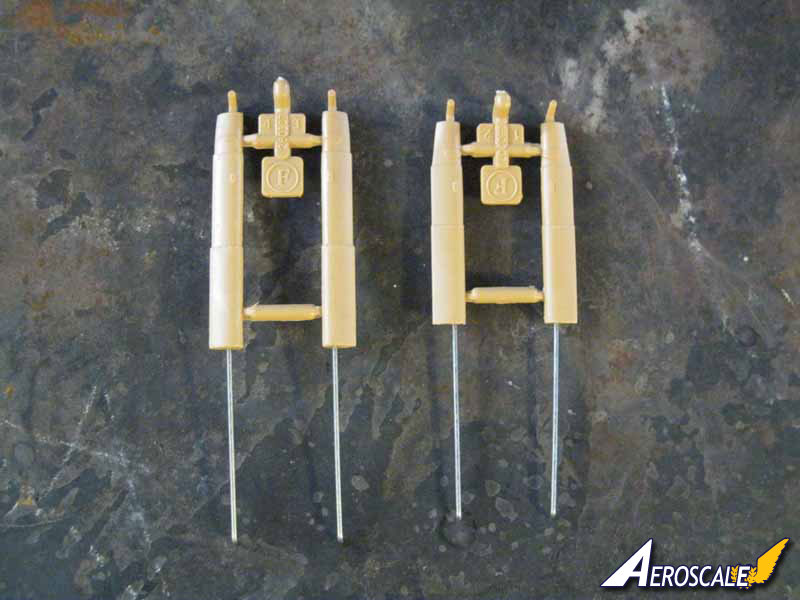
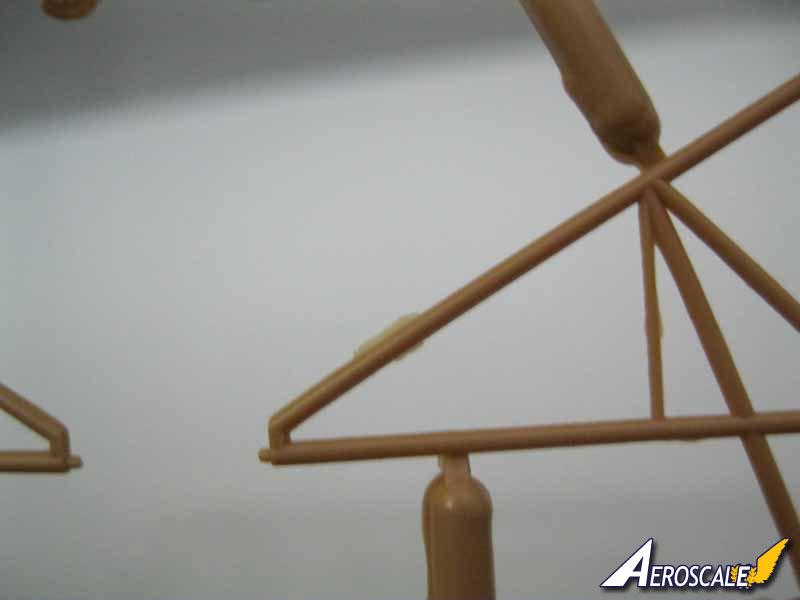
"F" parts are two sets of landing struts, one compressed (the shorter set) for when the aircraft is on the ground, and one longer set for in flight. They include a wire insert for added strength as the completed model is fairly heavy.
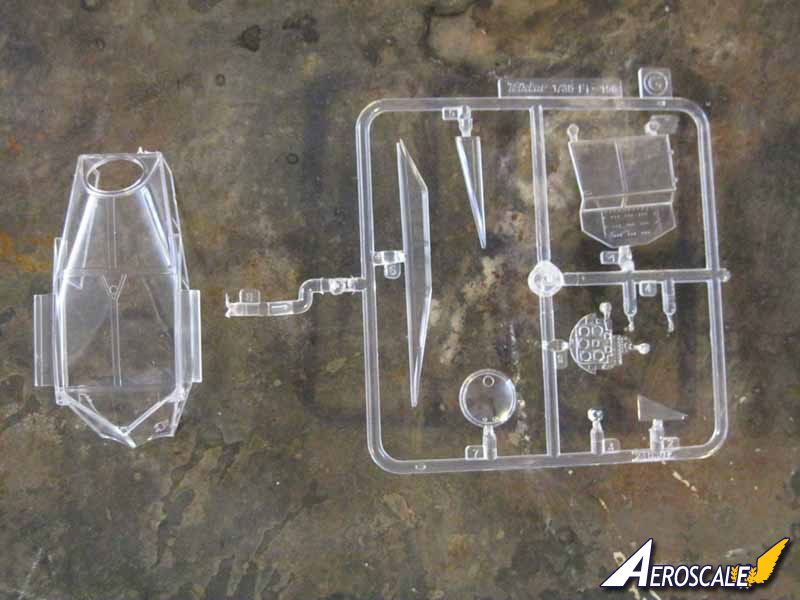
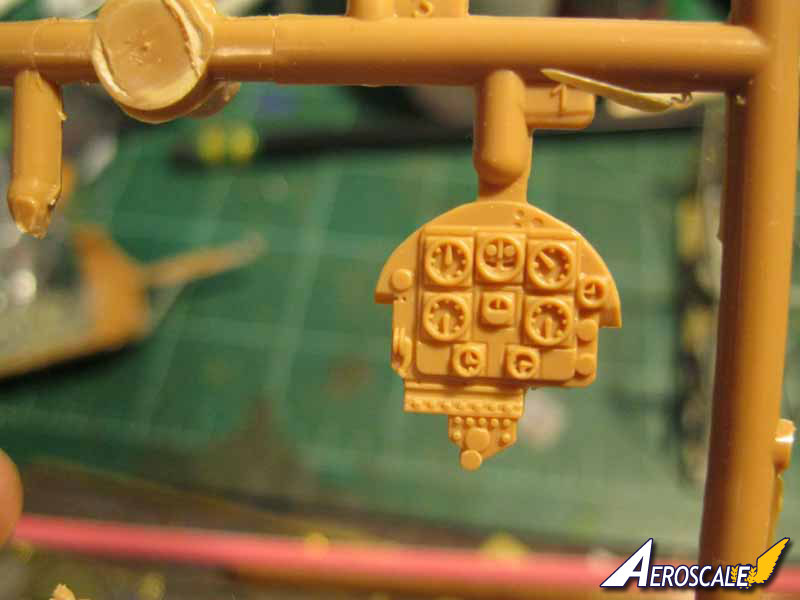
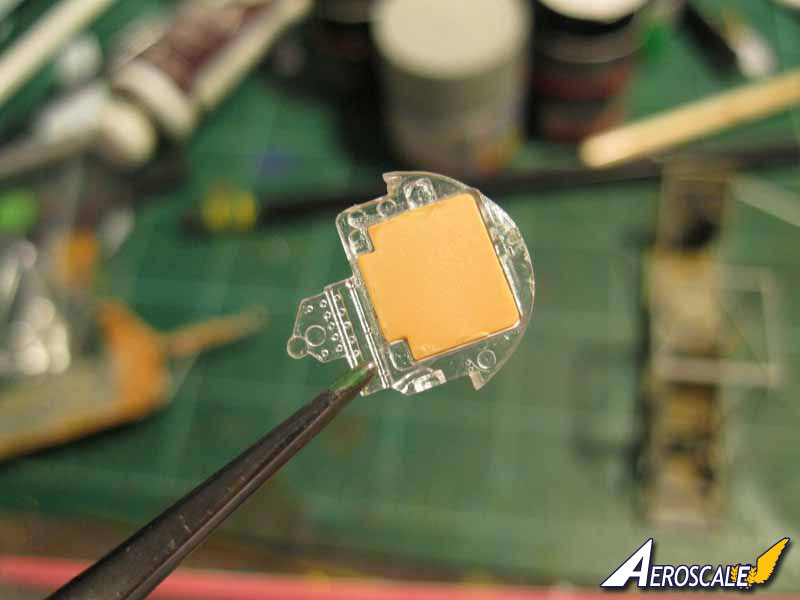
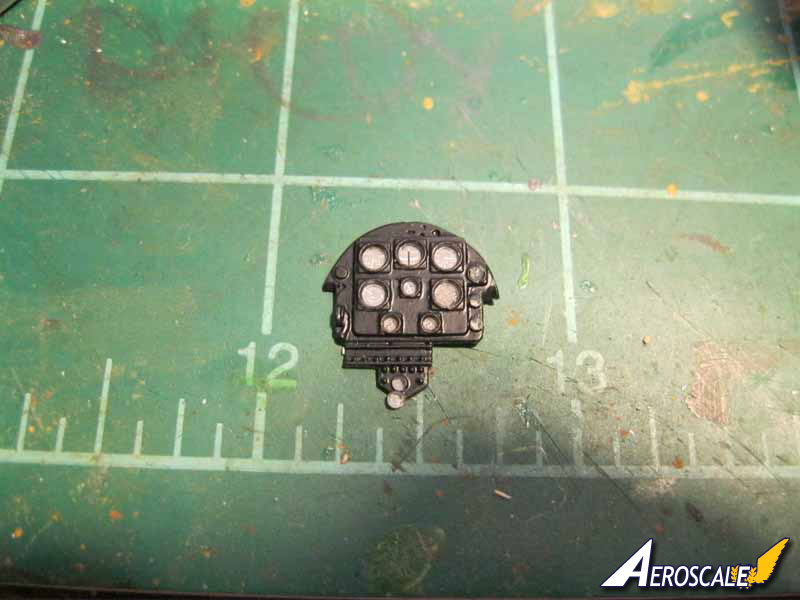
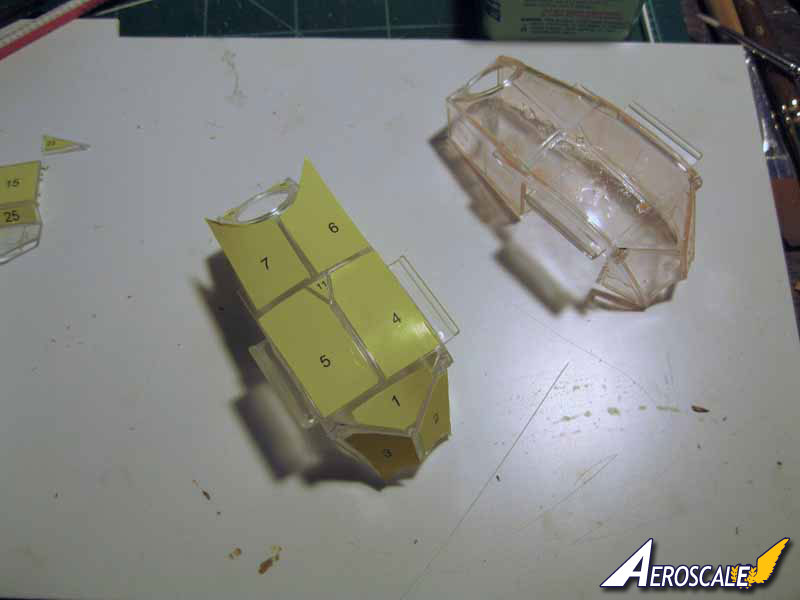
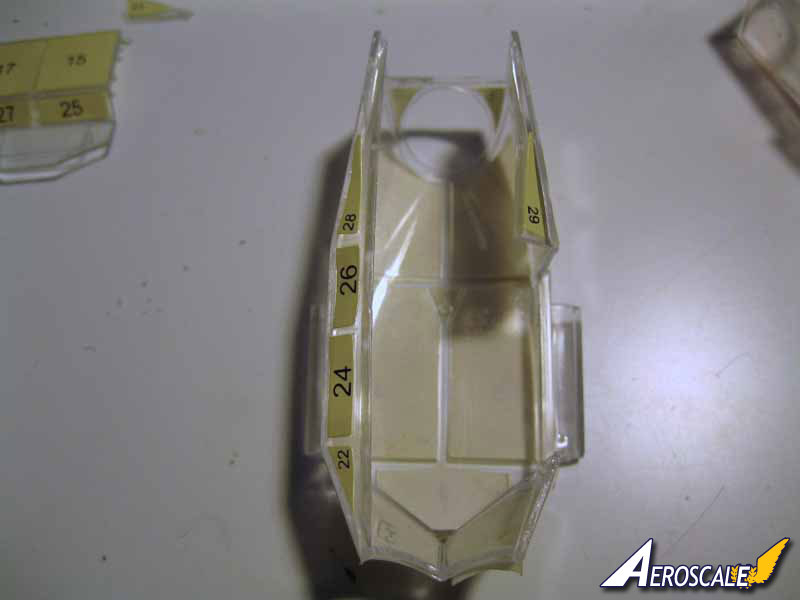
"G" sprue is the clear parts sprue, with the complete greenhouse canopy for the aircraft, an optional instrument panel and optional landing lights. There are two identical sprues in the box.
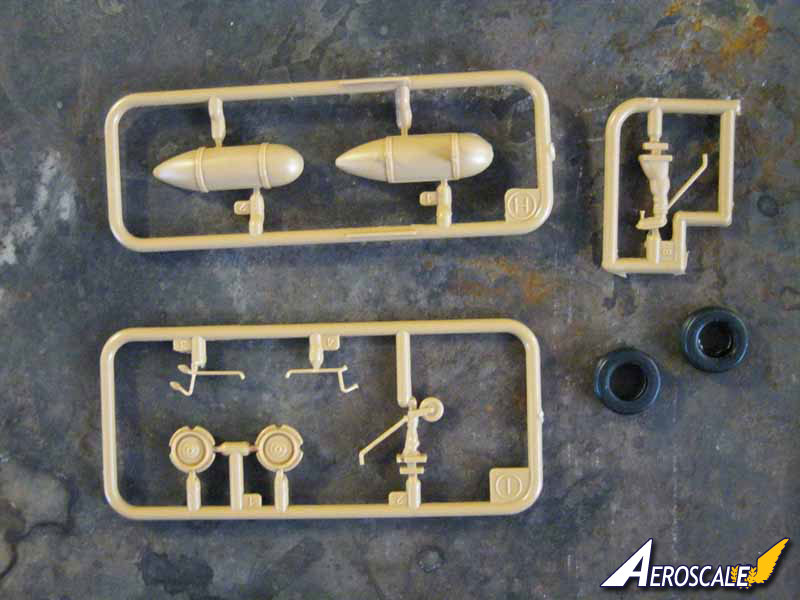
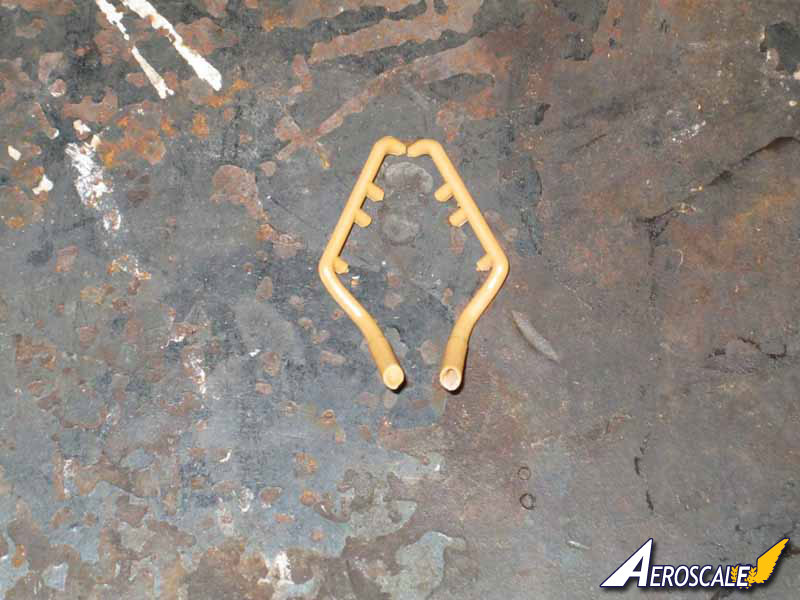
The "I" sprue has the tail wheel assembly and the wheel hubs.
The "H" sprue has the external drop tank.
"J" is an optional rear skid, in place of a landing wheel.
"K" parts are two rubber tires for the landing wheels.
The "L" sprue is new to this kit, with the wings having the added fuel tanks and the rear seat being convertible. A new upper engine cowling is added with openings for extra ventilation, and the new exhaust tubes have extensions. The level of detail on the wings is again excellent, giving a good impression of stretched fabric.
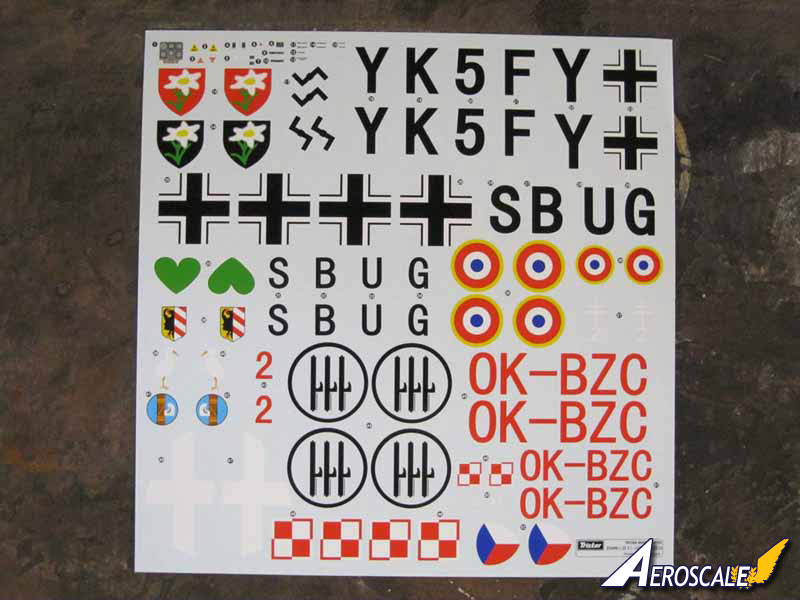
Decals are for six different aircraft as follows:
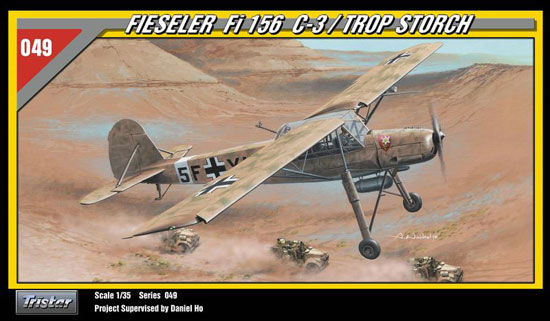
Scheme 1, German Air Force 2(H)/14, Farbe, North Africa, early 1941. This aircraft is sky blue underside/dark yellow upper with sky blue serpentine or "vermicelli" pattern, coded 5F YK, with an edelweiss crest on the cowling in two color options. The box art depicts
this aircraft, although the pattern is more subdued and appears to be
green rather than blue for the pattern camo.
Scheme 2, German Air Force, 1/JG 54, Russia 1942. Gray underside
with a dark green/darker green hard edge pattern over the upper, coded
SB JG, with a heart on the cockpit side and shield on the cowling.
Scheme 3, French Air Force, Gr3/33, after WWII, gray underside, dark green upper,
Scheme 4, Italian Air Force, Tirana, Albania, 1942, gray underside, multicolor camo upper, coded black 2, with a white bird on the fuselage side.
Scheme 5, Czechoslovak Air Force, post WWII, light gray body with a red cowling, coded OK-BZC.
Scheme 6, Air Forces of the Polish Republic, post WWII, gray underside, dark green upper.
All paints are identified by a color code system, with paints from Tamiya and GSI creos.
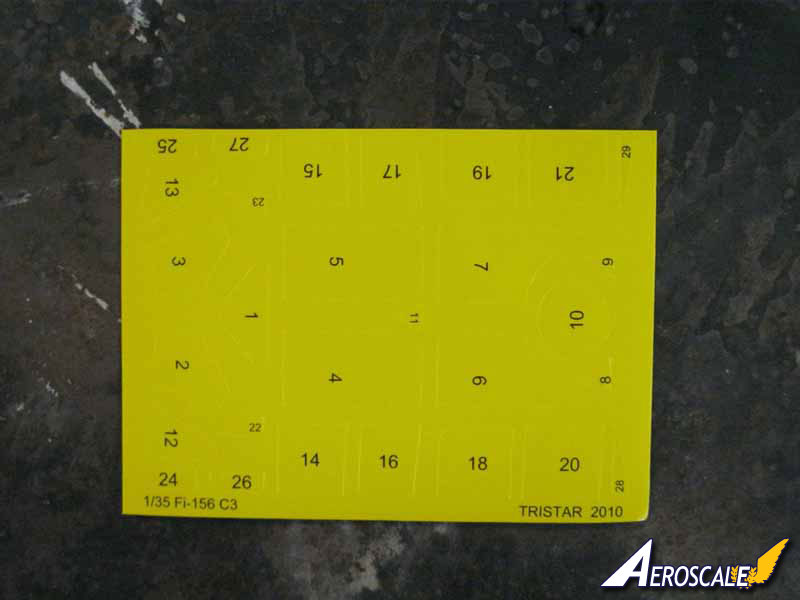
The decals are all clear and on register. The colors are very nice and bright. They are a little on the thick side. There is a sheet of masks for the canopy windows, all numbered, with a guide in the instructions for placement.
I researched the model online, searching by name. Most links I found all went back to, and even quoting entirely, the results found on Wikipedia.
Construction
The kit instructions present the assembly in 12 steps, although step 12 just shows the completed model. Some steps are subdivided into smaller assemblies. Painting is called out in detail in each step.
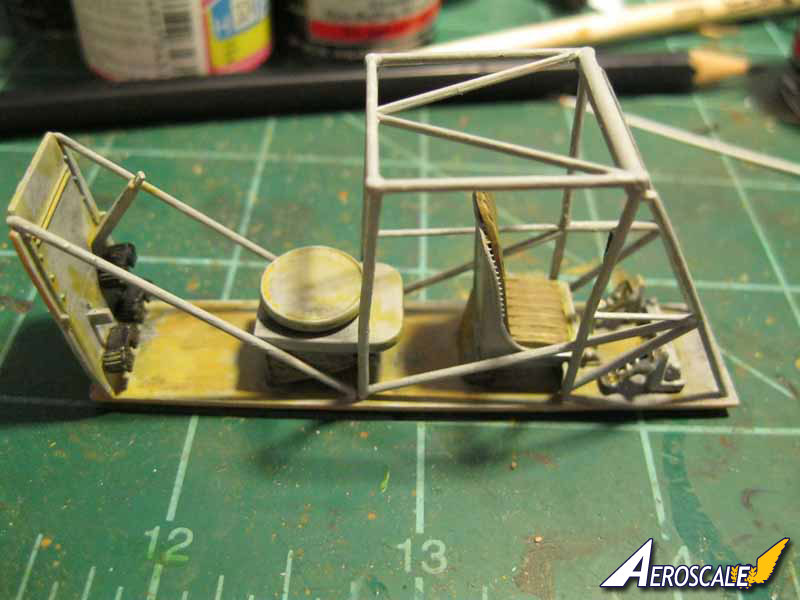
Step 1 is the assembly of the pilot's seat and convertible rear seat. Step 2 attaches the seats and springs to the cockpit floor. Here I found the first small issue with the kit. The crossmember spring for the front of both seats was broken. The parts are very fine, and the attachment points are rather thick. It broke more when I tried to remove it from the sprue, but was easily repaired. I also noted some flash present on the cage assembly parts for the cockpit.
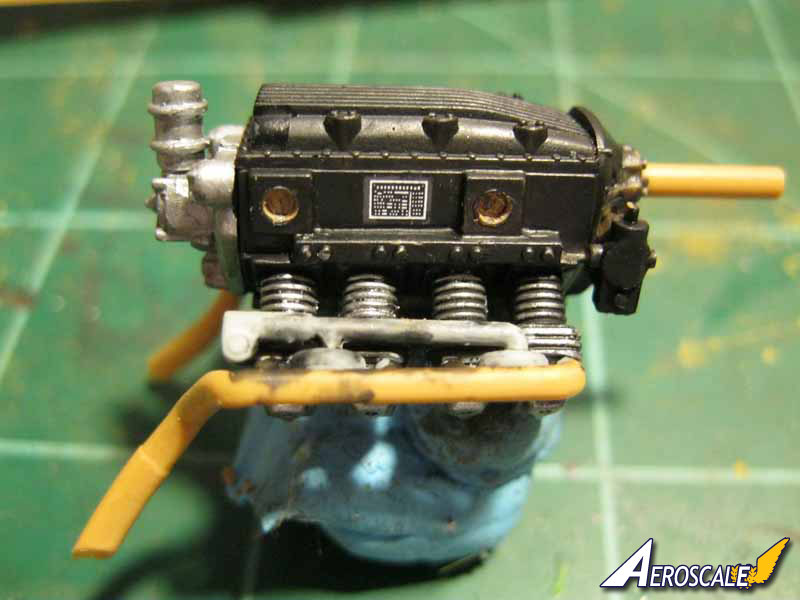
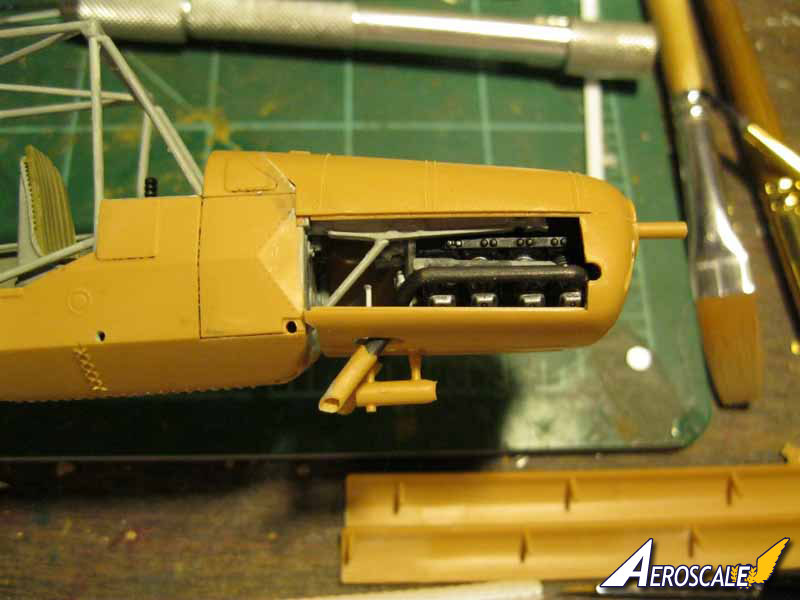
Step 3 was the engine assembly. The exhausts have a small indent on the end which I drilled out further. I also thinned the sides. The cylinder heads need cleaning up as well if they are going to be displayed as there is a small seam line that runs down the sides. The propeller shaft is free spinning when attached, but does have some wobble, just in case you plan on playing with it after the kit is done. On line references show a variety of colors on various parts of the engine. I tried to stick with the painting guide from the instructions, but painted the cylinder heads steel.
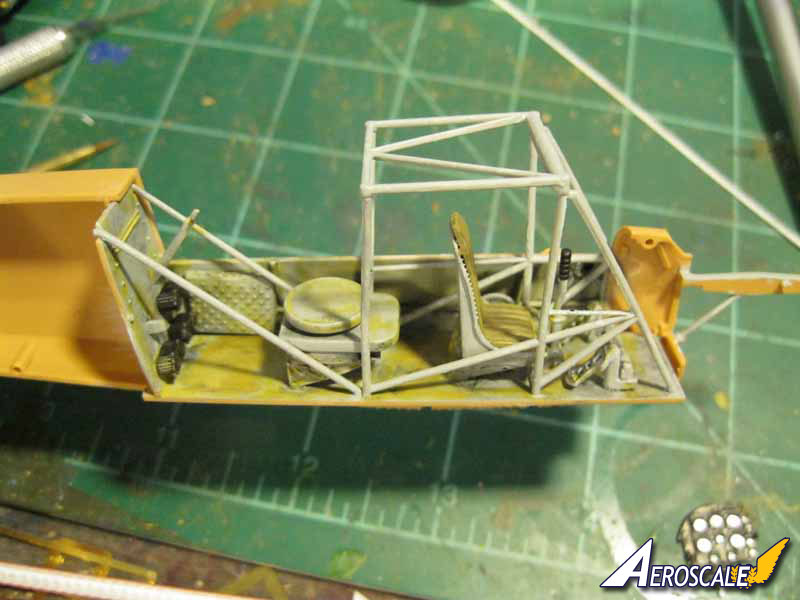
Step 4 deals with the two fuselage halves. For the left side a small lever, part C-10, is pictured but not identified. It goes to the front of the cockpit. The firewall has some parts attached as well before going into place. There was a slight amount of flash on some of these parts, and an ejector pin mark that I removed, although after assembly it wasn't visible. I painted everything light gray (IJN light gray) as indicated, and did some weathering. I have read that the floor was wood and so added some brownish tones rather than the usual scuffed aluminum. The foot pedals were cast metal, and looked the part. There is a hole in the floor for the rear control stick, which is not shown used in the instructions. I cut off the tab and put it in the hole to fill it, then filing it down smooth.
The instrument panel comes with two options, either clear plastic with a decal inserted behind, or solid plastic that is heavy and clunky looking. Both clear panels had a cloudy flaw. I dipped one in Future, but it didn't seem to clear it up. However, with the decal in place it wasn't really visible. However, when I attached the plastic backer, the decal was damaged. I wasn't thinking at that point. Any glue, including CA, will damage the decal face. Future would provide a good, clean bond that would not affect the decal. After painting the front of the panel, it didn't look so bad, and won't be very visible from the outside.
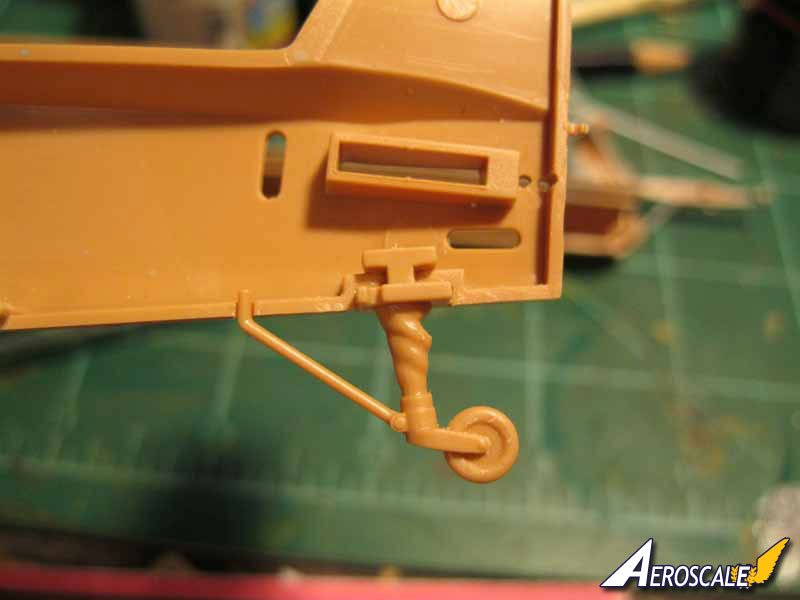
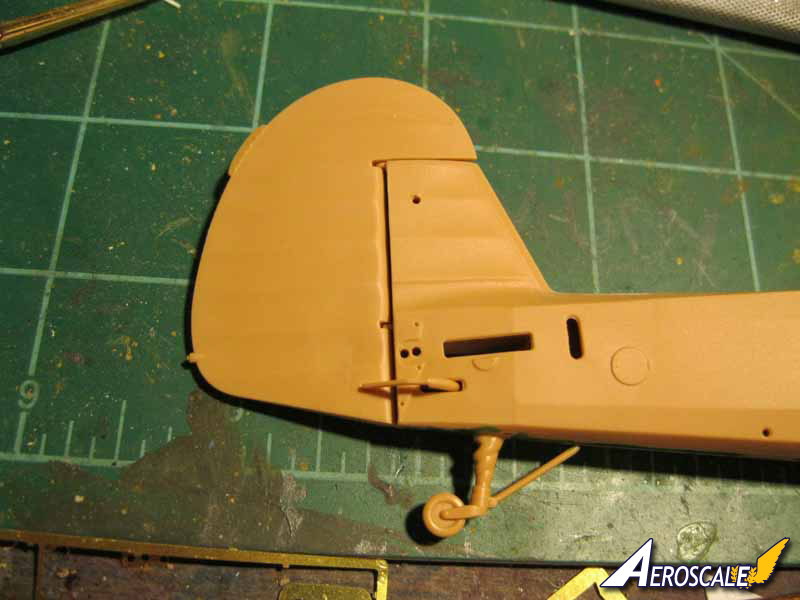
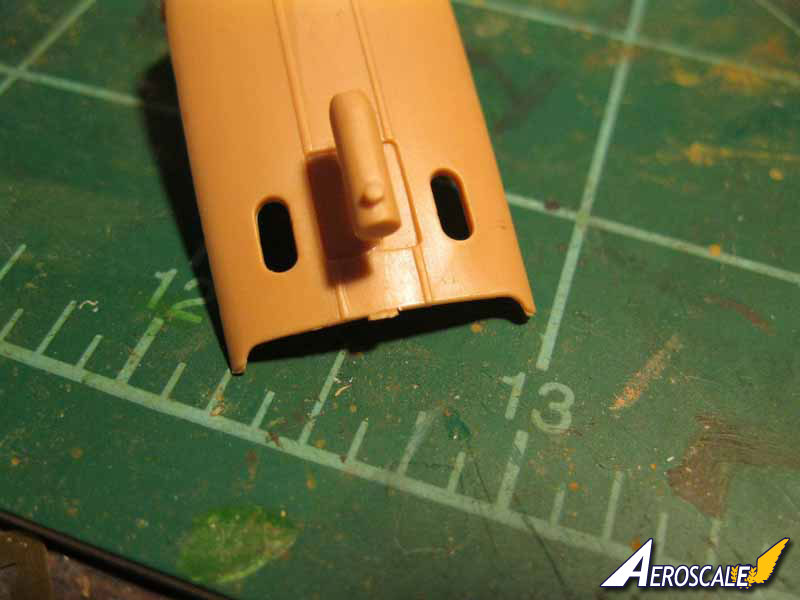
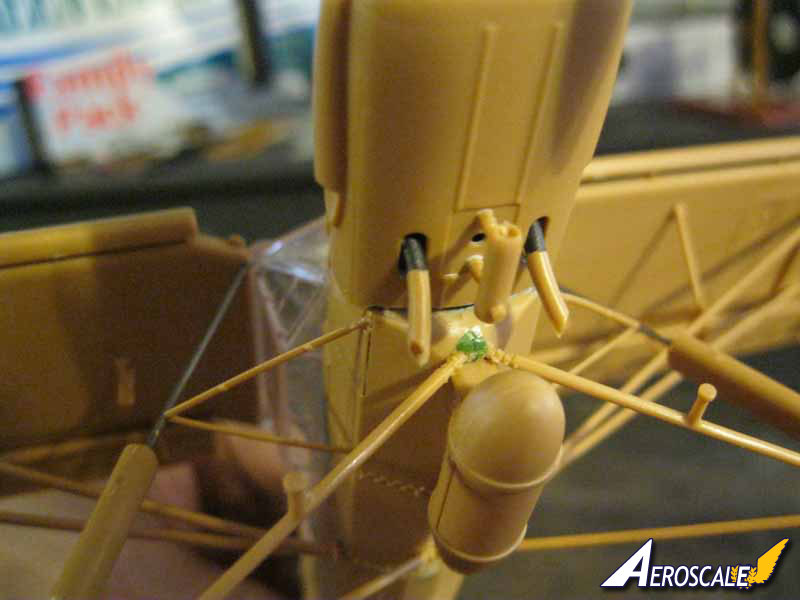
The tail wheel is also added at this point, and is a little thick looking. I would have thought it could have been molded more delicately, but then it would have been more fragile. I opted to leave off the brace on the rear, parts I-3 and I-4, until final assembly, to prevent it getting broken.
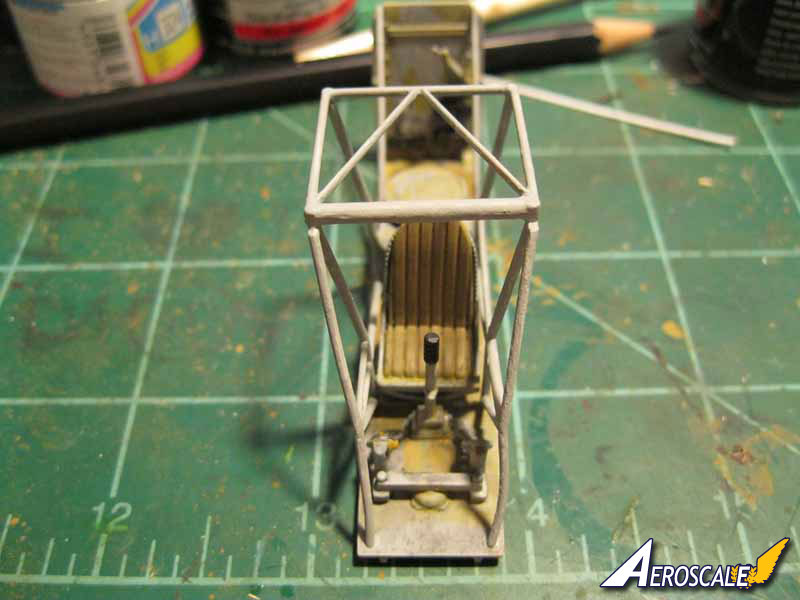
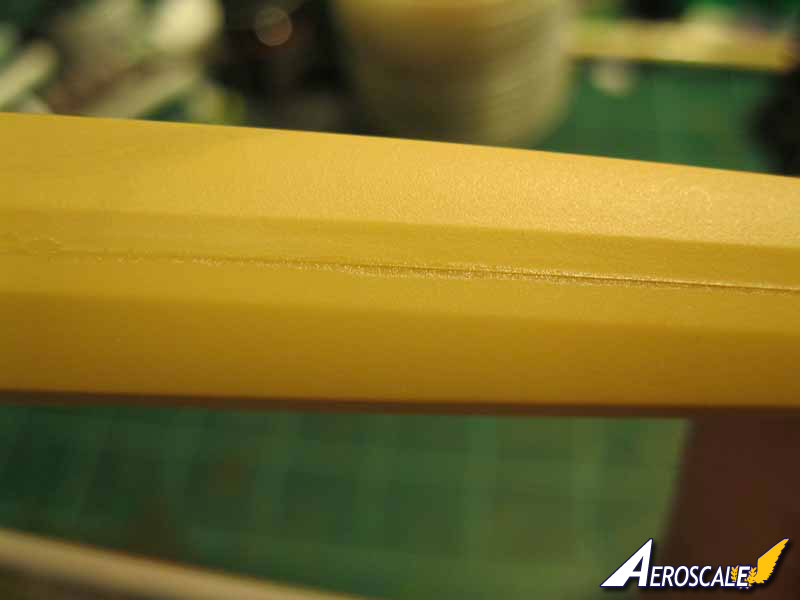
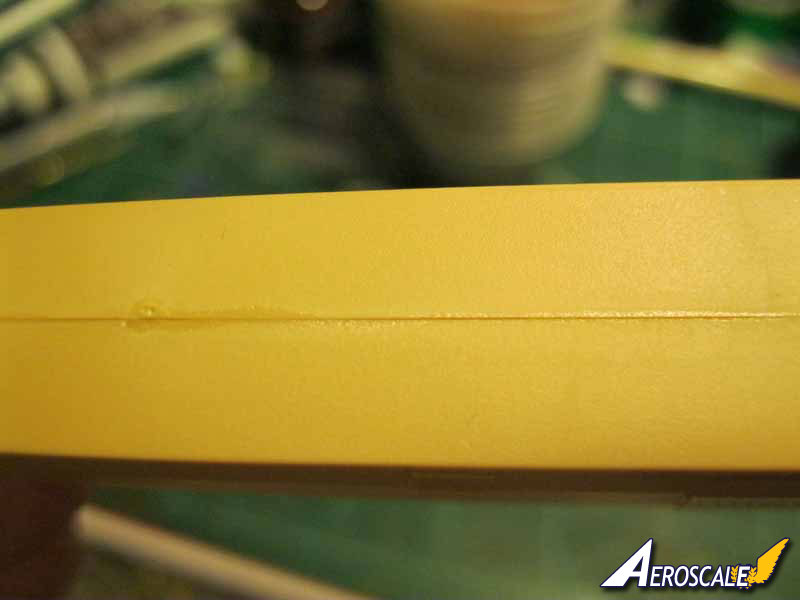
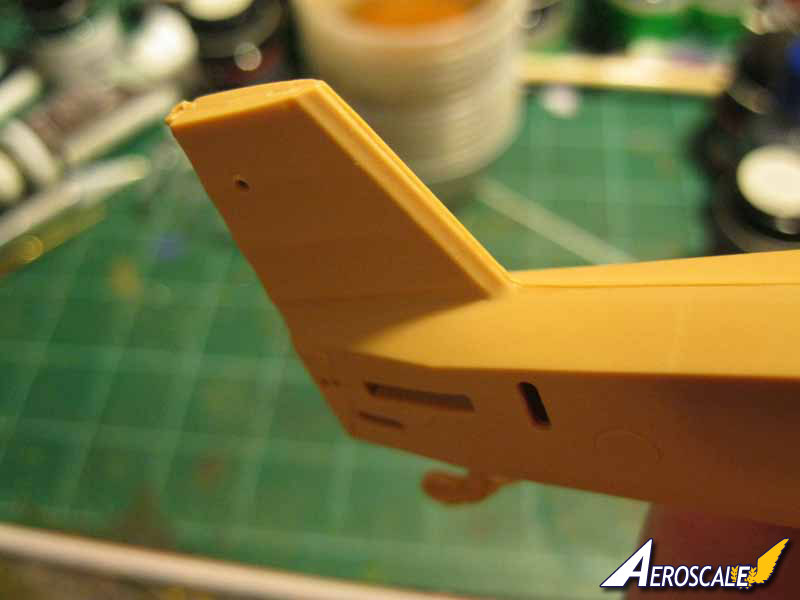
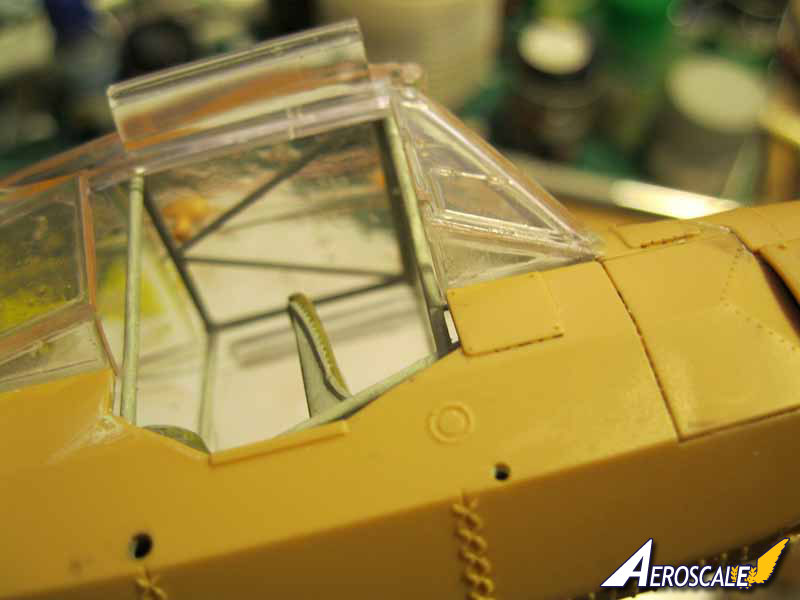
The cockpit cage looked a little crooked, but is very fragile. It gets a small decal, as does the engine, and then both are glued into place. I added both the cockpit and instrument panel to the same side to make sure there would be no fit issues with either. The two fuselage halves mostly matched up, with a couple of small areas to be fixed. The tail assembly has a small ring that the instructions say to insert before assembly of the two halves. I waited so I could clean up the seams, and then was able to fit the part without breaking it. Just be careful. The rudder also has two small pins that go in rings on the tail. I nipped both rings enough to snap the rudder into place. It is a moveable part, if you wish to display it as such.
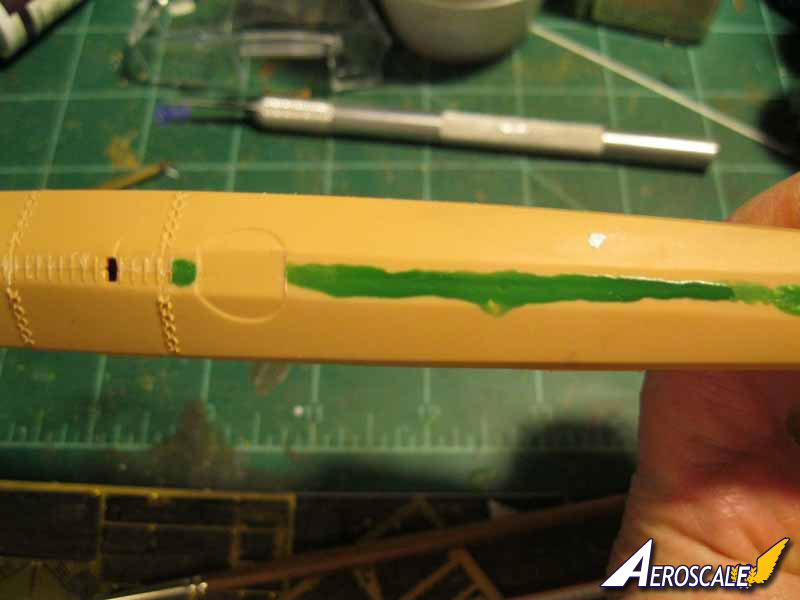
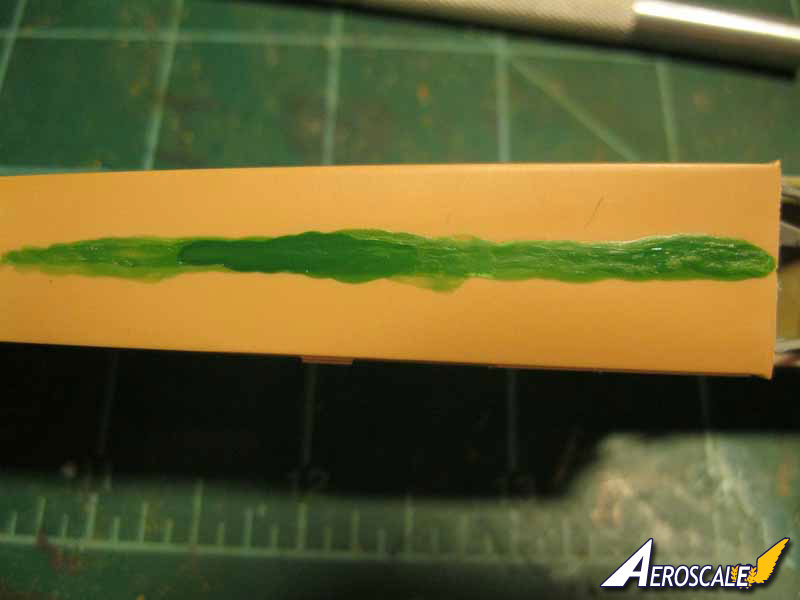
For the seams, I added a home made mixture of Squadron green putty and Tamiya extra thin cement, then sanded it smooth.
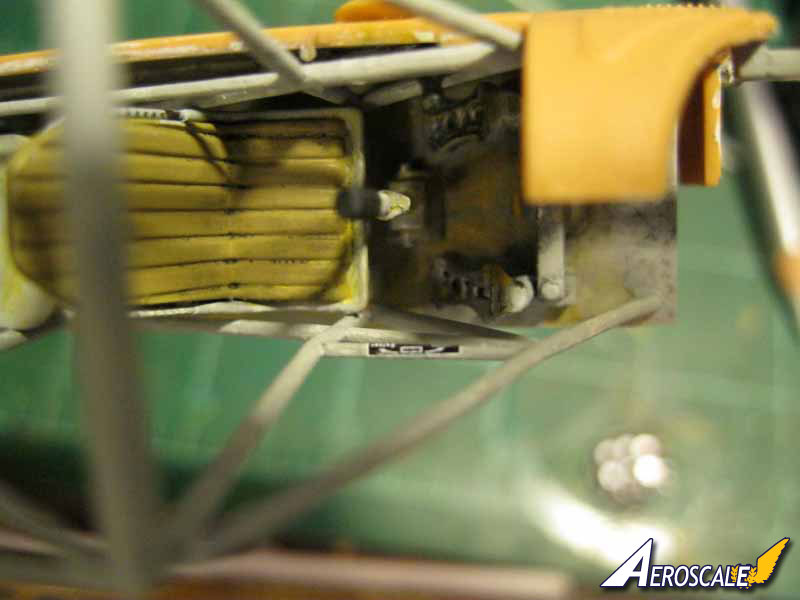
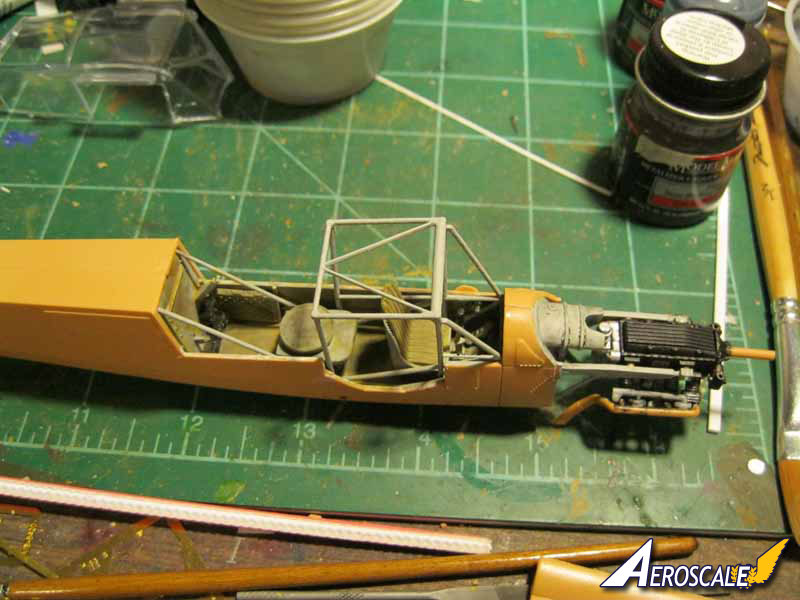
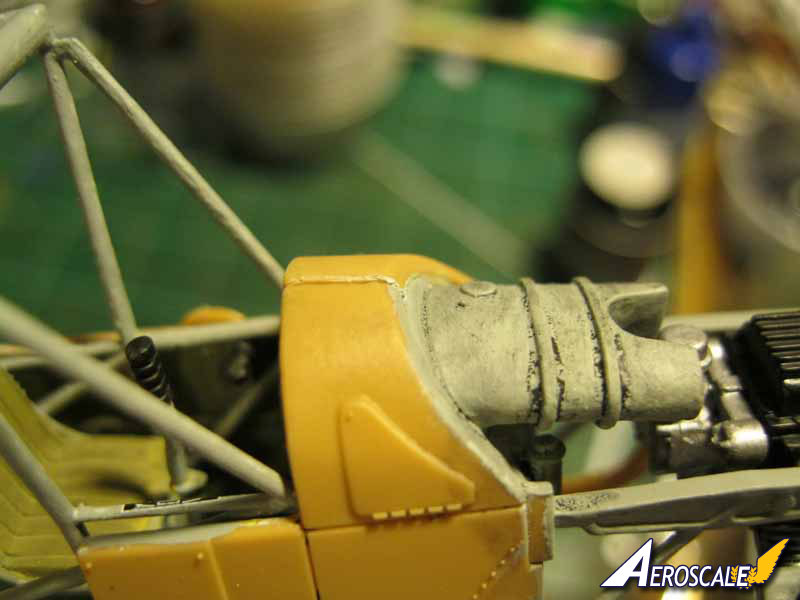
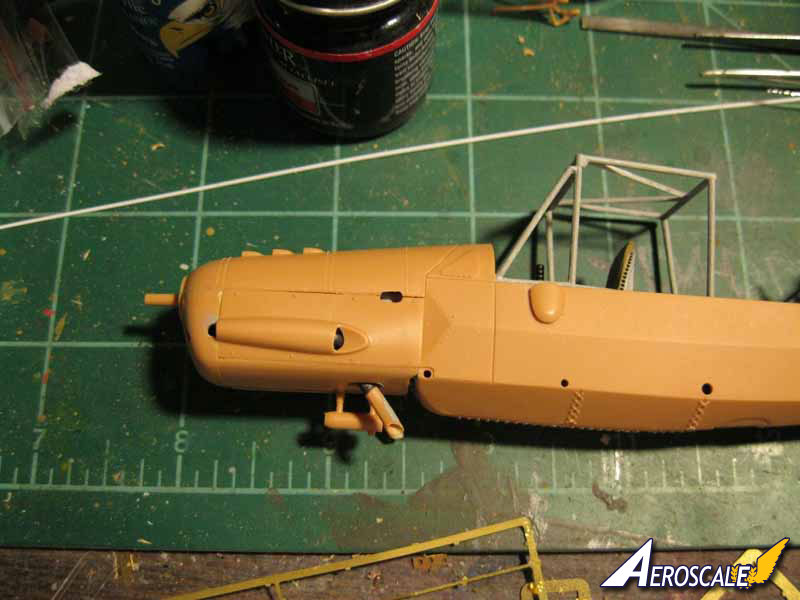
Step 5 is the engine cowling. the lower part, B-21, had a small tab on the rear that needs to be removed, and a little flash as well. Exact positioning of the exhaust pipes was a little questionable as the instructions are not too specific on that part, and I had to reposition them when I placed the lower cowling to get them in the right slots. I held off on installing the propeller to keep it from getting broken. The sides can be left off as optional to display the engine if you like. Some of the inner surfaces are visible from the outside, so I painted them gray, like the other interior surfaces.
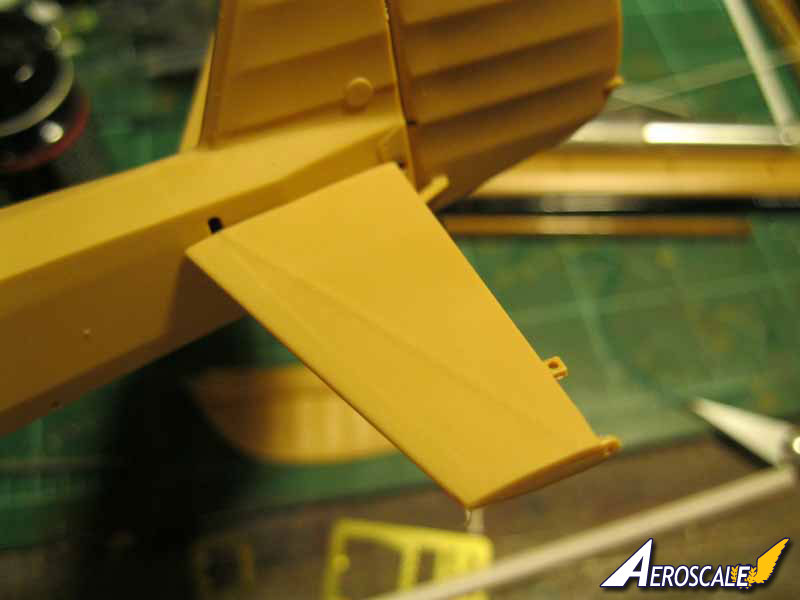
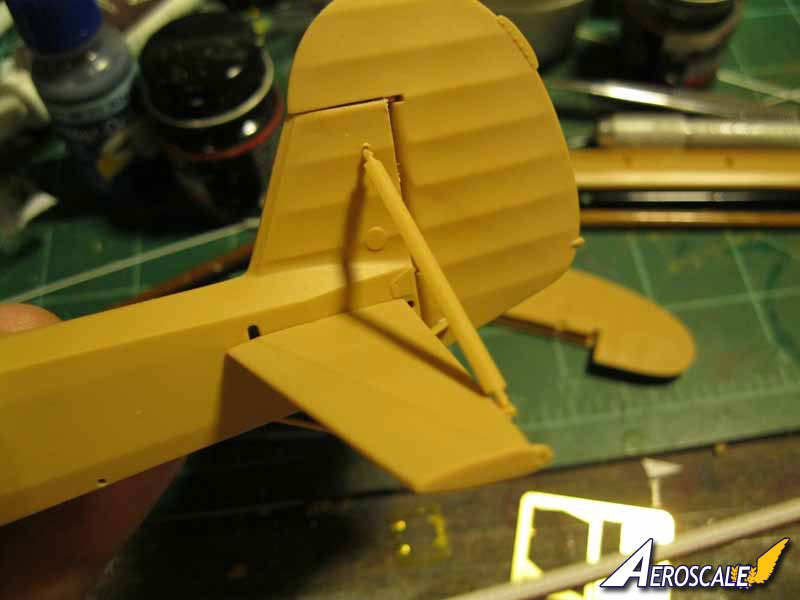
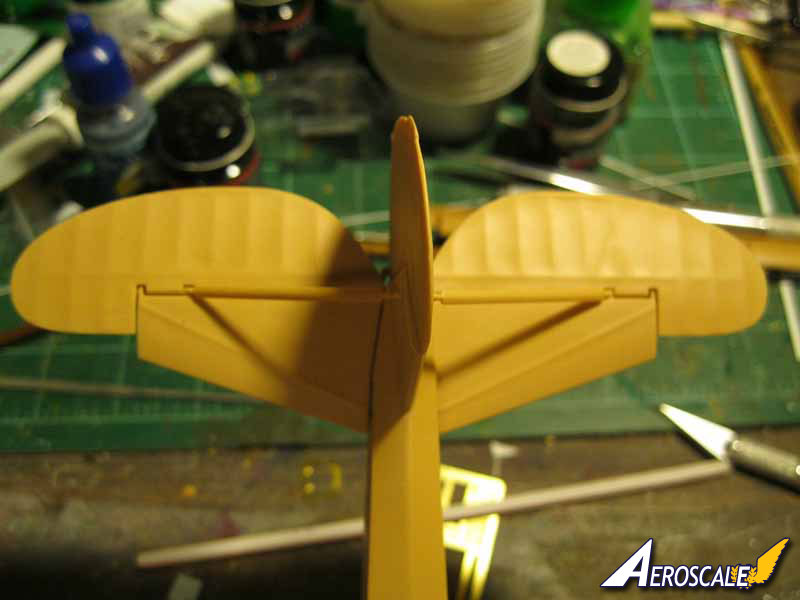
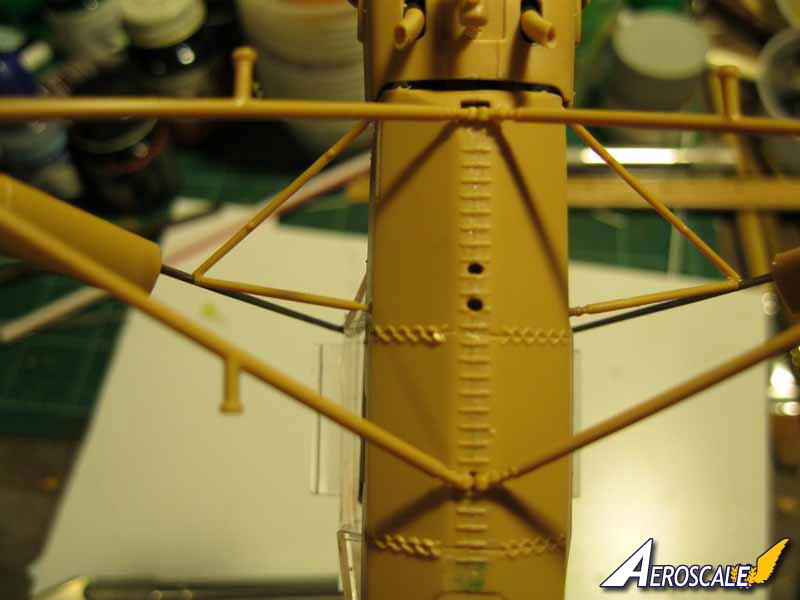
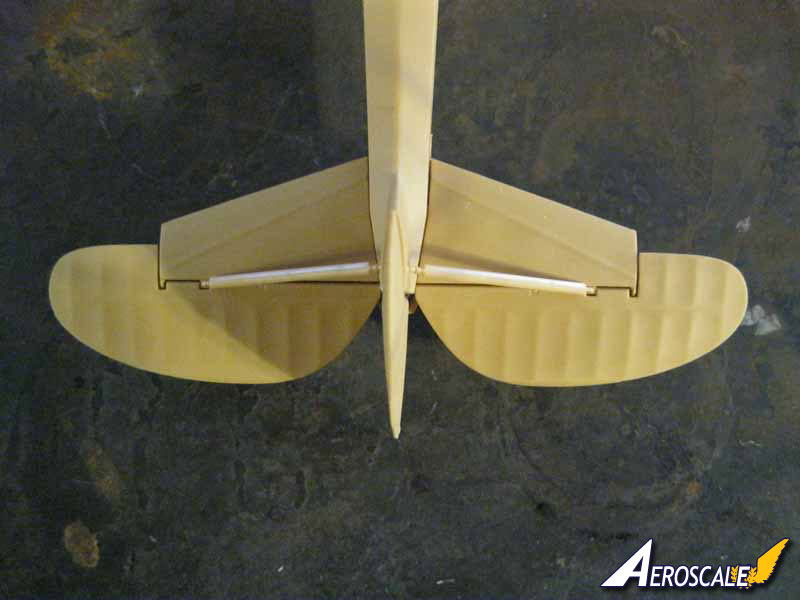
Step 6 is the installation of the tail stabilizers. I added the forward sections, parts B-11 and B-14, then the struts, and last the control surfaces, which again are also moveable parts. There was again some clean-up but it was easy.
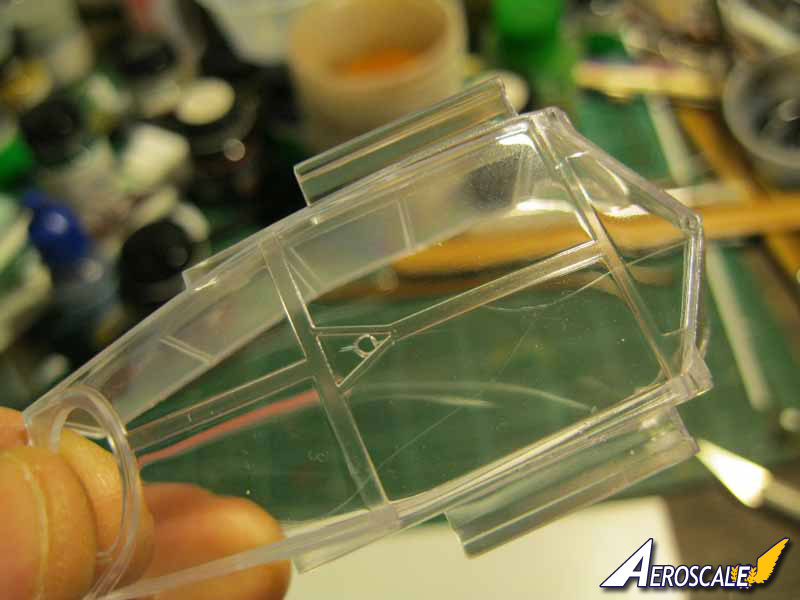
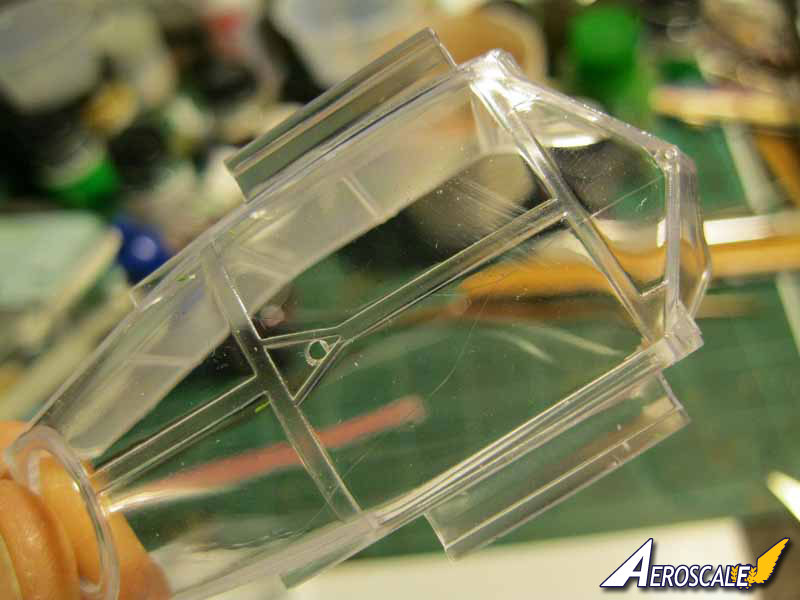
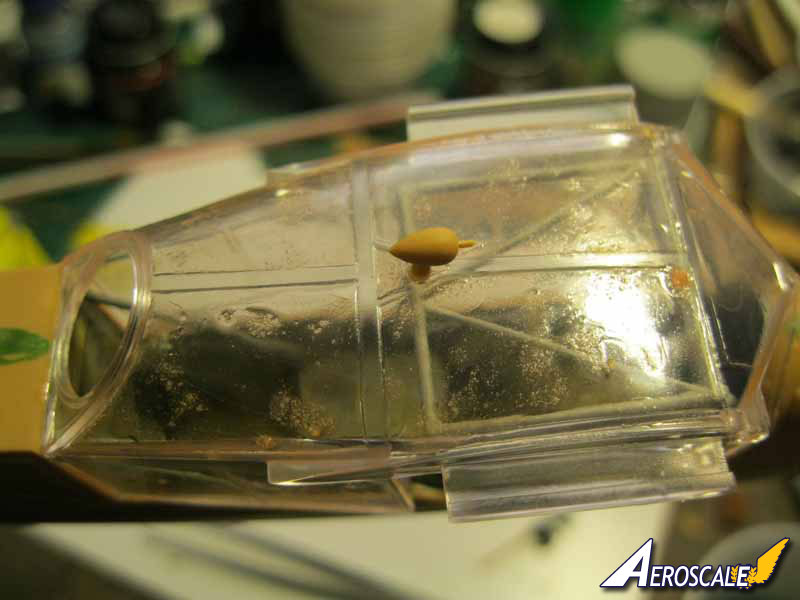
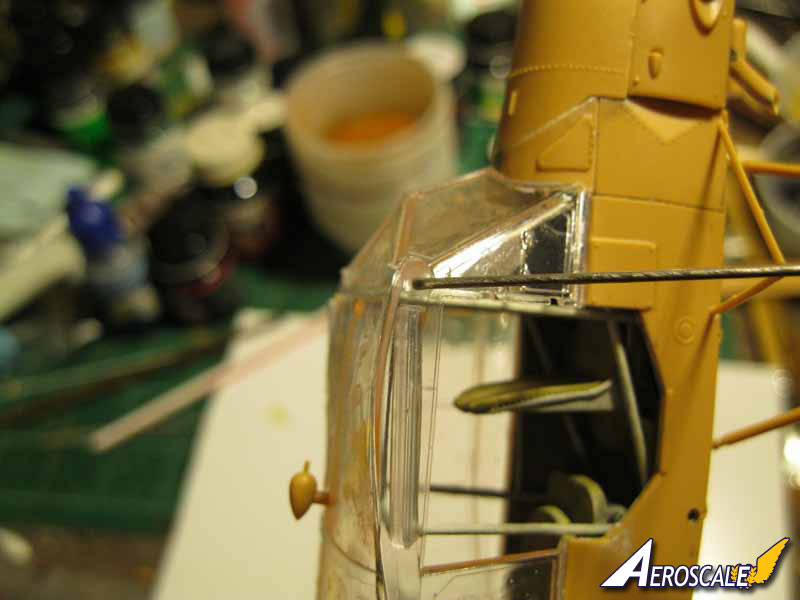
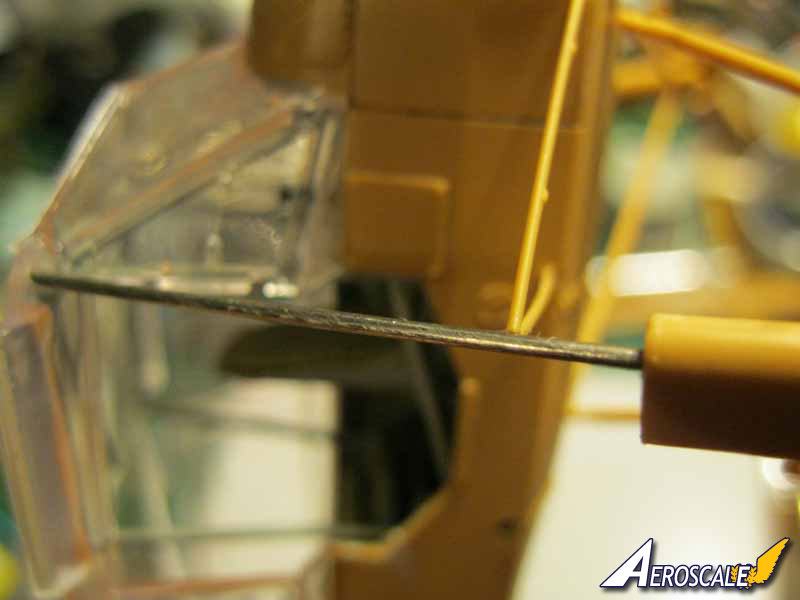
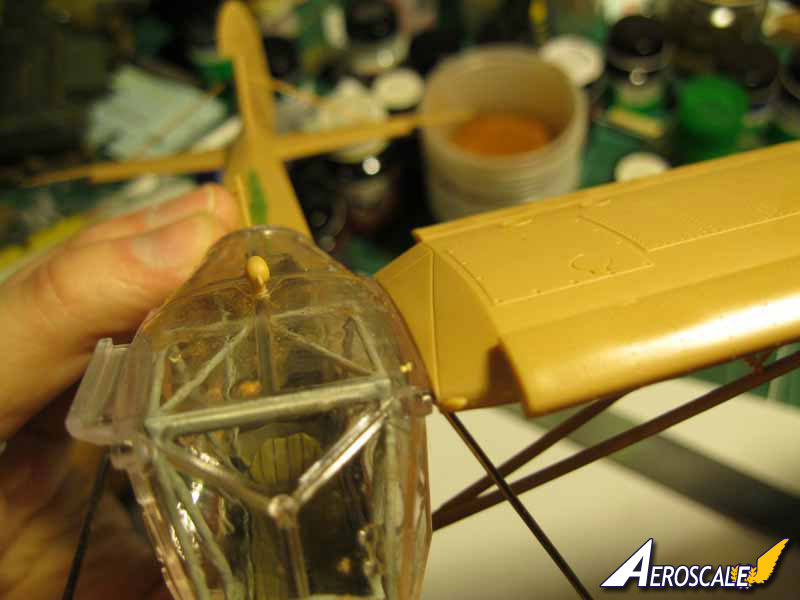
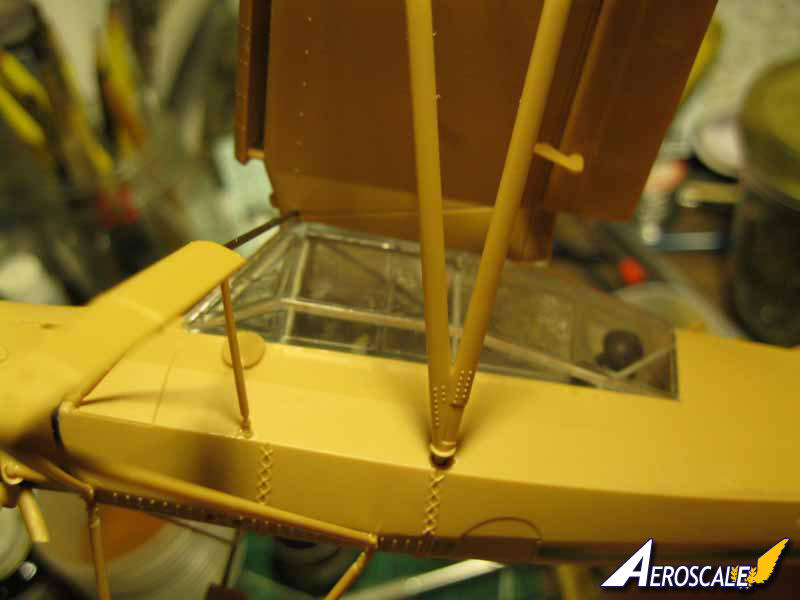
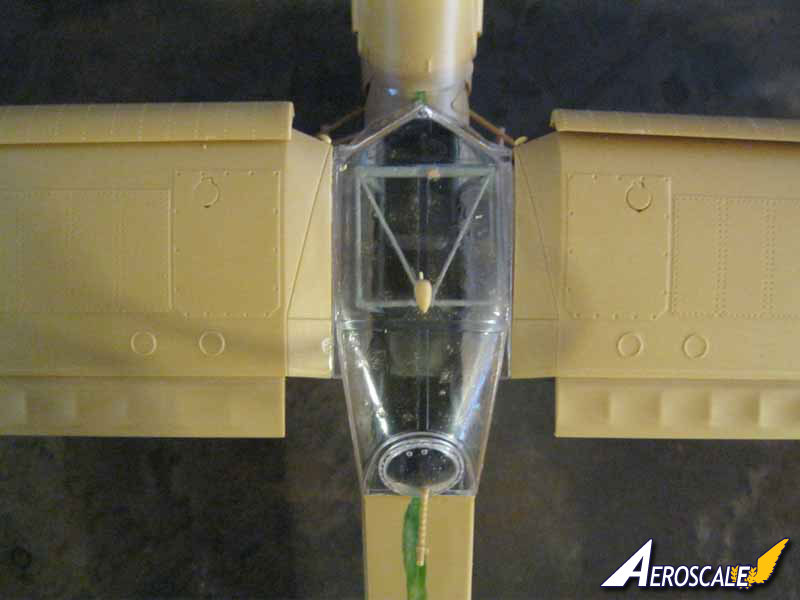
Step 7 is the greenhouse canopy. There are two identical sprues included in the kit. The plastic is somewhat heavy, but considering that the canopy will also support the weight of the wings, it must be built sturdy. Both canopy bodies in my kit had the exact same flaw, what appeared to be similar to crazing lines. I applied future top and bottom, but the flaw was still visible. After some handling of the parts, I was afraid of damaging the surface, and wanting to see how the masks would work out, I applied them. Application was easy, but some of the stickers would not adhere to the surface, which was clean and dry. Also, they don't stretch very well, which was a problem as there are some curves to follow. I applied Frisket liquid mask over the other canopy, tested removal, and, as that canopy seemed to fit better to the fuselage, went with it. Before you install the canopy, test the fit of the wires on the landing struts in the holes on the canopy roof, so there is no struggling with the parts on the assembled model.
Important at this point is not to assemble the entire canopy. If you do, it won't fit over the cockpit cage. I added part G-6, the left side lower part, and G-5, the right rear. I then had to carefully "screw" the cockpit down over the cage, fix it into place, and then add part G-2, the right front lower glass. It took a couple of tries to get it right, and in the process, I forgot to add part B-28, which goes on the inside of the glass. I assembled the MG-15 with it's drum magazine and shell bag, and painted the part on the inside. I left off the door until later in the build as I debated whether to leave it open or have it closed.
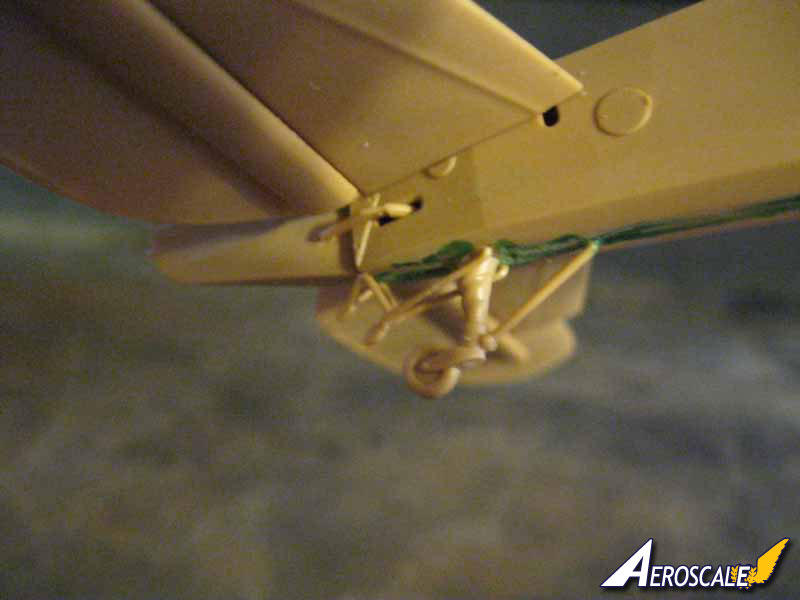
Step 8 is the assembly of the landing strut assembly. You have to decide if your plane will be shown in "flight" mode or "grounded" mode. I chose to have it on the ground as there is no pilot figure. The struts include a wire insert as the model is already at this stage somewhat heavy, and the wings haven't been added yet. The supports needed some seam line removal and were then installed. The instructions are again somewhat vague, only pointing to the bottom area of the fuselage. There are two squared holes in the fuselage bottom. The rear arms go in the rear hole. The front arms go to the FRONT of the forward hole, not the rear as I initially built mine. I left the rubber tires off until after painting.
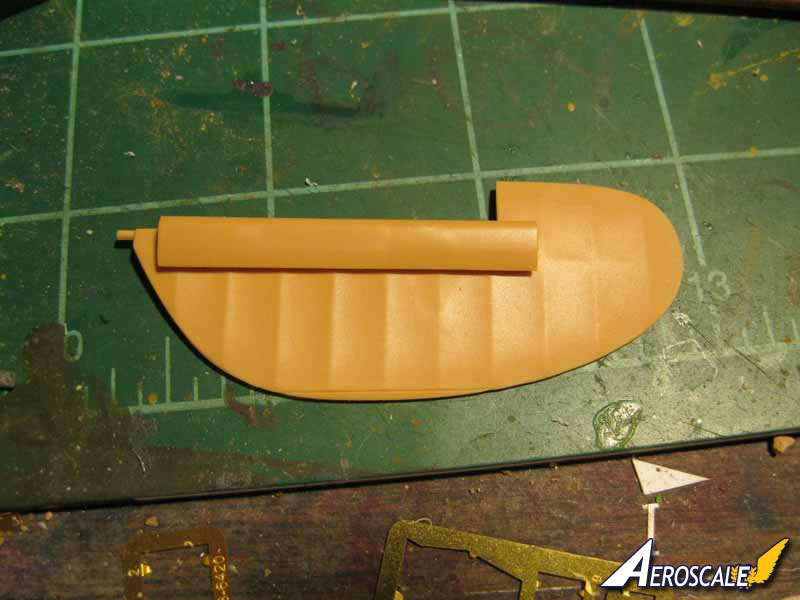
Step 9 is the assembly of the wings. These are large parts with prominent locator holes and tabs on the inner wing surface to help with alignment. Fit was very good, with only a little sanding on the front edge on the wing when it was complete. The fixed slat on the leading edge had prominent ejector marks on the inner surface. I cleaned them up on one side as they are slightly visible from underneath, but left them on the other side, except for the outermost mark.
Step 10 adds control surfaces and hinges, struts and a light on the left side, as well as a pitot tube. Optional clear or solid landing lights go on the wing tips. I left them off until after painting. On the inner wing, plastic pins need to be shortened and fit carefully before assembly or they will force the wing to part slightly.
Step 11 attaches the wings to the canopy. The wings were designed to be folding for transport, although the hinge point was not visible. I don't know if there should be a gap visible, or how big it should be, between the wing and canopy frame. To avoid damaging the fragile hinges they could be left off until after the wings are attached. The drop fuel tank is also attached at this point in the build. If, like me, you attached the support brace for the landing strut in the wrong place, this is where you will find out. It is attached at the rear of the front square hole. Having attached the wings, I then attached the fuselage door, opting to place it in the closed position.
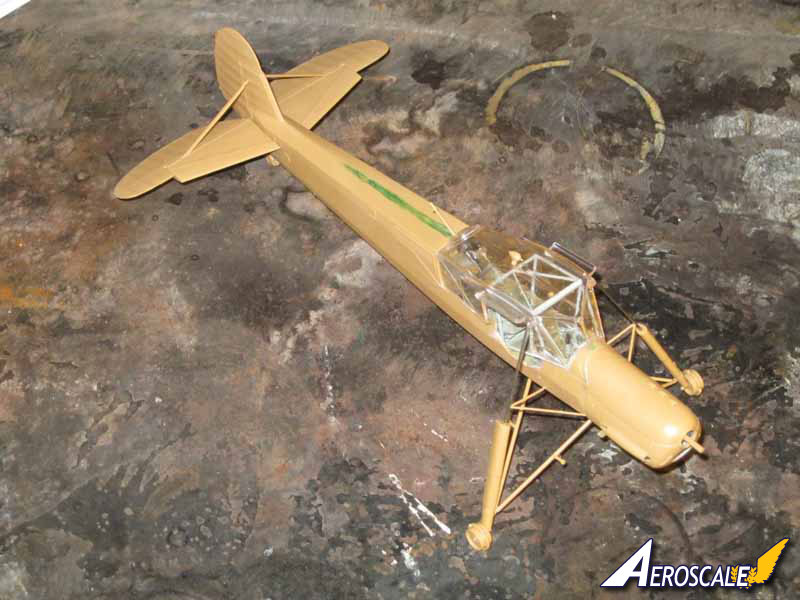
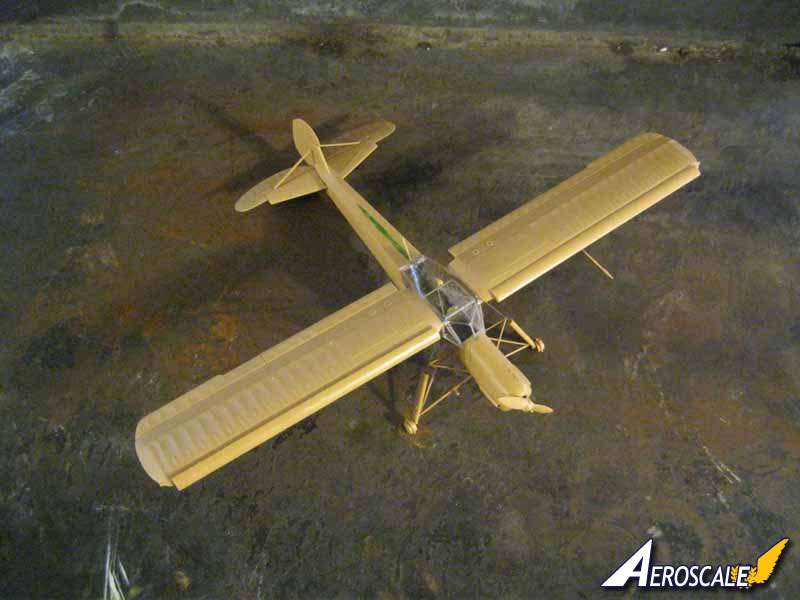
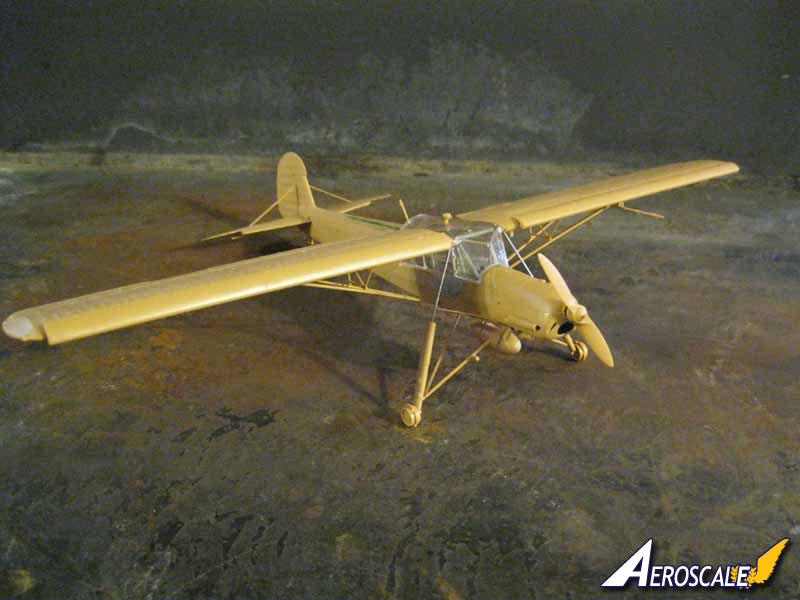
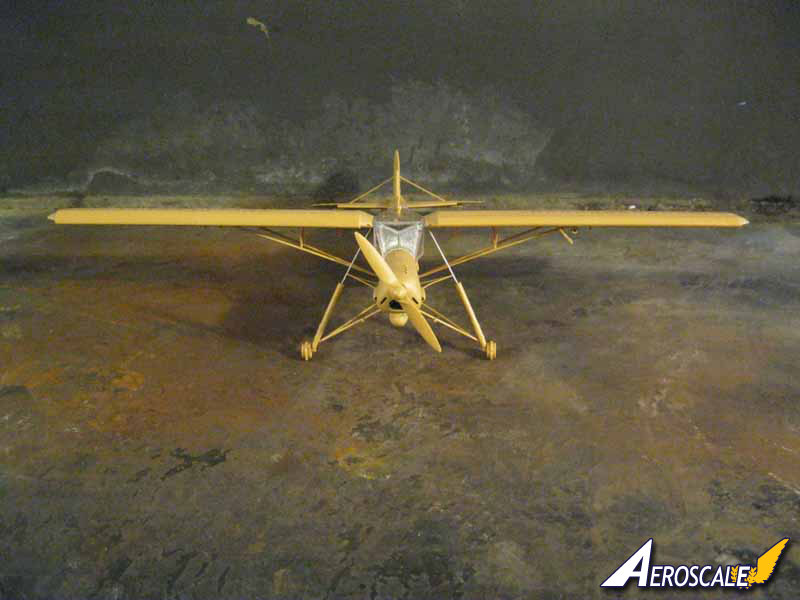
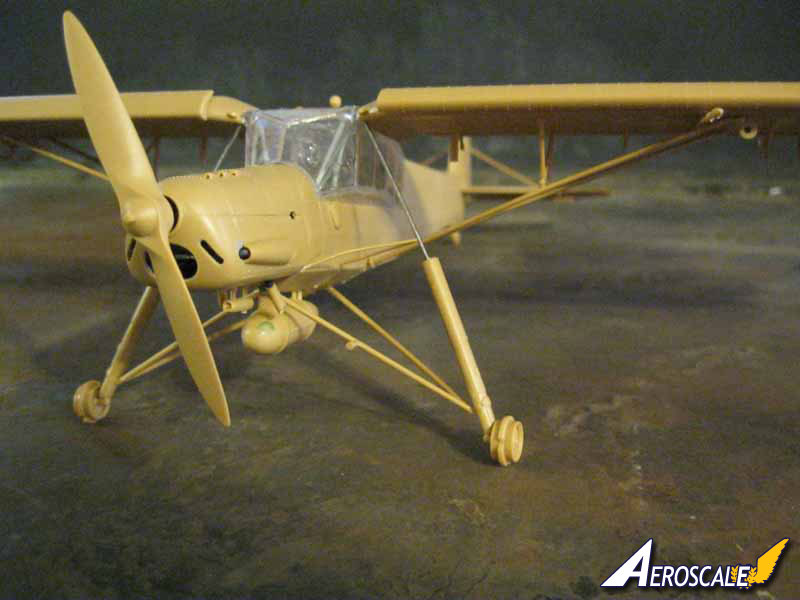
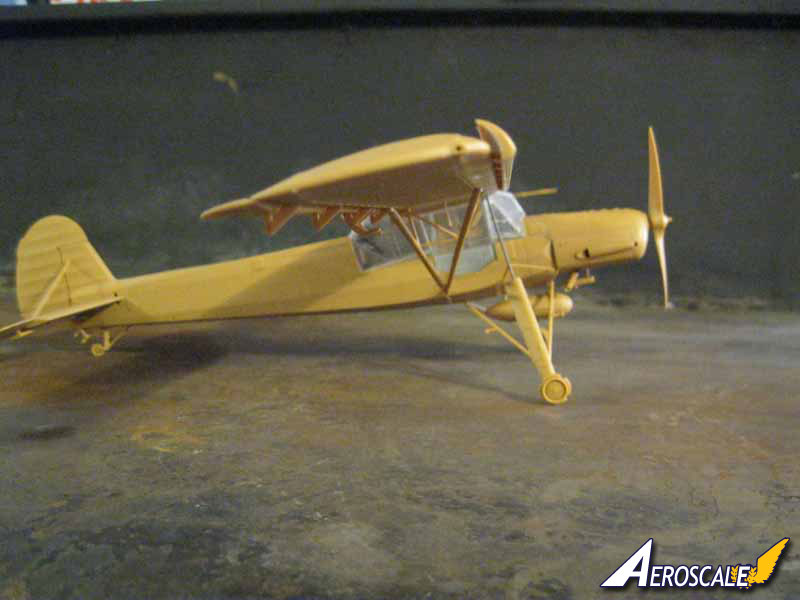
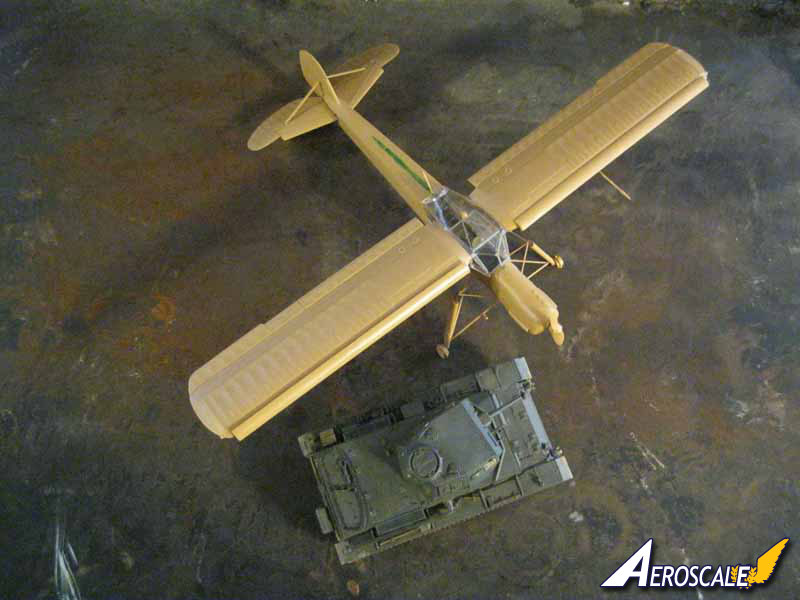
At this point, I attached the small brace frame for the rear landing wheel. Aside from the propeller and the sight for the MG, assembly is completed. The kit is large. I have placed a panzer III next to it for size comparison. Looking at the built model one can see where the spindly aircraft got it's name. The model is also fairly heavy, as it involves a lot of plastic.
Step 12 shows a picture of the completed aircraft. I have only to paint the model, and I am just waiting for the weather to cooperate, as I have to paint outside. I am leaning towards the first camo scheme, blue serpentine over yellow. There is a lot of debate online over whether or not this is a viable scheme. For myself, I will follow the instructions. Having lived in and spent time in the local desert, sky blue, whether in the air or on the ground, is an effective disruption and I think a viable paint scheme in the environment.
Conclusion
This kit is not too difficult to build. It takes some time in a couple of parts, and, like any kit, careful attention to clean-up of parts. There were no serious flaws apart from the lines in the canopy. Some sprue attachment points were quite heavy, especially for smaller parts. The plastic was soft and easy to work with, and those small parts that broke were easily repaired. Details in some parts were a little basic looking, but maybe at some point after market manufacturers will step in to fill any voids.
The only thing I felt this kit really needs is a good set of figures to go with it, either a ground crew or flight crew, or both, to enhance the diorama possibilities. It is a good tie in for both aircraft and armor fans as the scale fits the most popular armor scale (my apologies to any 1/72 fans I may have just offended) and there are a large number of vehicles to accompany it, as well as jerry cans, fuel drums and other items.
I found this to be a very interesting subject to build. I recommend the kit to anyone out there, especially if you want some variety.
Please remember, when contacting retailers or manufacturers, to mention that you saw their products highlighted here - on
AEROSCALE.


Comments