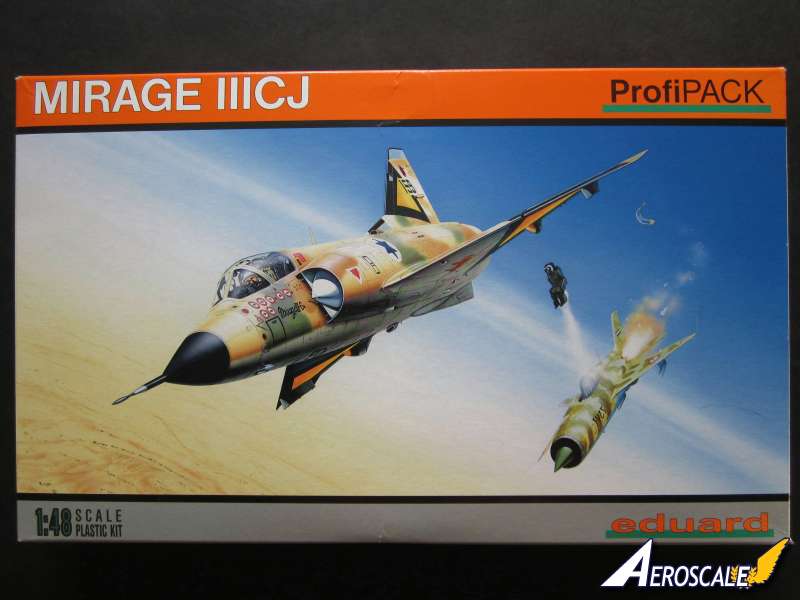
Eduards latest release of their Mirage III series is the export version, the Mirage IIICJ. Eduard have provided markings for five Israeli aircraft, two in natural metal and the other three are camouflaged. This edition is offered as a Profipack, included with the injected plastic parts are PE items, paint masks and decals from Cartograf.
History.
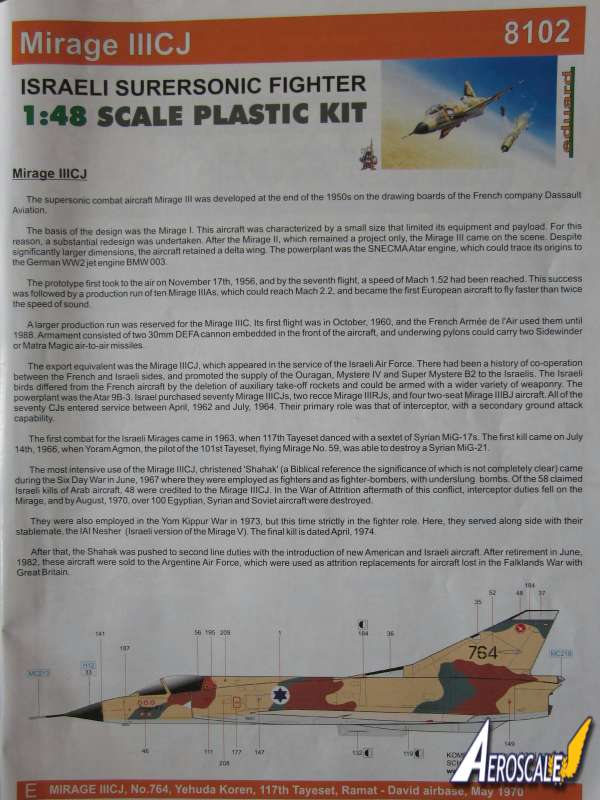
The supersonic combat aircraft Mirage III was developed towards the end of the 1950's on the drawing boards of the French company Dassault Aviation. The basis of the design for the Mirage III was the Mirage I. The small size of the Mirage I limited it's equipment and payload so a substantial redesign was undertaken. A design for the Mirage II powered by two Turbomeca Gazibo engines was designed, but never built. The Mirage III prototype first flew 17th November, 1956 and after successful tests ten Mirage IIIA's were produced. The Mirage III became the first European built aircraft to exceed Mach two. The Mirage IIIC was the most numerous production run, serving with the Armee de l'Air until 1988. Armament consisted of two 30mm DEFA cannons placed under the fuselage just forward of the main undercarriage bays.
The export version and the one depicted here is the Mirage IIICJ. The Israelis had a tradition of acquiring French combat aircraft. The Mirage IIICJ of the Israeli Air Force, christened 'Shahak', differed from the standard Mirage III in that it had the Atar 9B-3 engine and could carry a wider variety of loads. The Mirage III entered service with the Israeli Air Force between 1962 and 1964. Israel acquired 70 aircraft as interceptors with a secondary role as ground attack. The first combat for the Israeli Mirages came in 1963, when the 117th Tayset clashed with six Syrian MiG-17's. The first kill came on July 14th, when Yoram Agmon destroyed a Syrian MiG-21.
The most intensive use of the Mirage IIICJ, was during the Six Day War in June, 1967, when they were employed as both fighters and fighter bombers. Of the 58 claimed Israeli kills of Arab aircraft, 48 were credited to pilots flying the Mirage IIICJ.
The Mirage IIICJ saw further action during the Yom Kippur War in 1973, in the role of interceptors. After the war the Mirage IIICJ was relegated to second line duties before being replaced by American built aircraft. After retirement in 1982 the remaining Mirage IIICJ's were sold to Argentina to replace aircraft lost during the Falklands War.
Contents.
The box is a sturdy top opening affair. The contents fill the box, but it's not bursting to come out. So good news if you are acquiring one via your postal service.
Contents.
1 x 12 page A4 instruction booklet.
1 x clear plastic sprue.
8 x dark grey plastic sprues.
2 x decal sheets.
1 x pre-coloured PE fret.
1 x paint masks.
167 plastic parts are contained in this kit, but not all are used. The sprues show evidence of high pressure injection with fairly thin sprues and the attachment points to the parts are very fine. Should make the separation of parts that much easier. Sprue A.
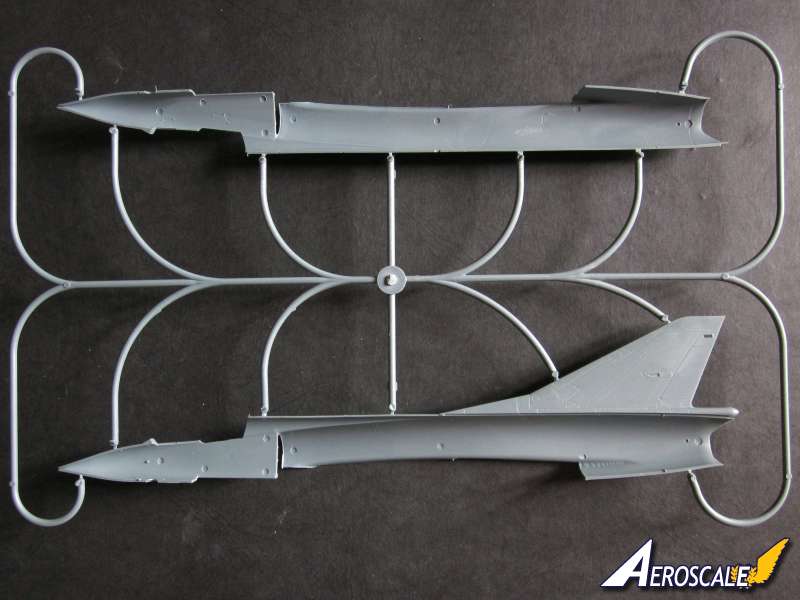
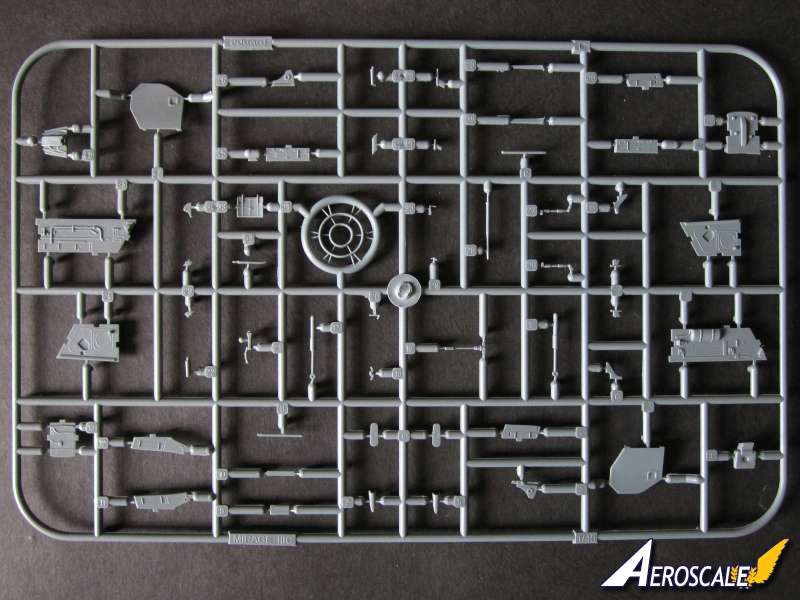
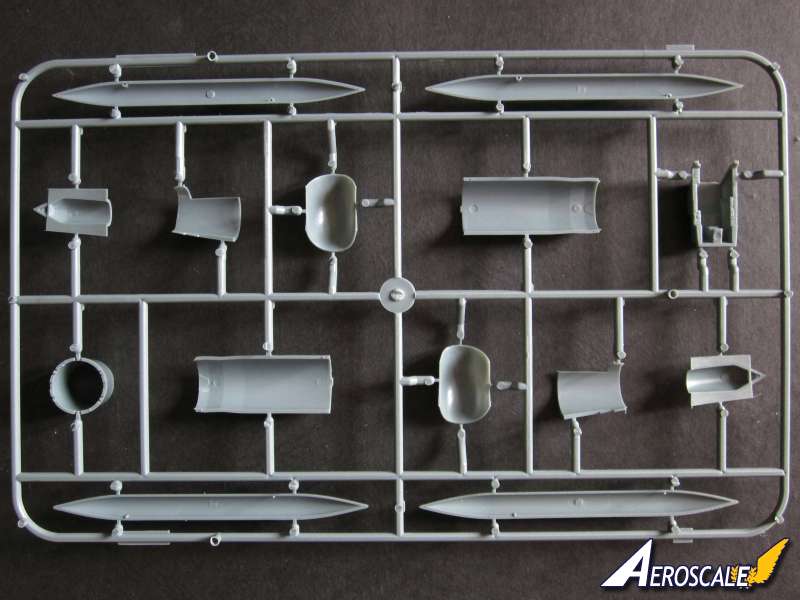
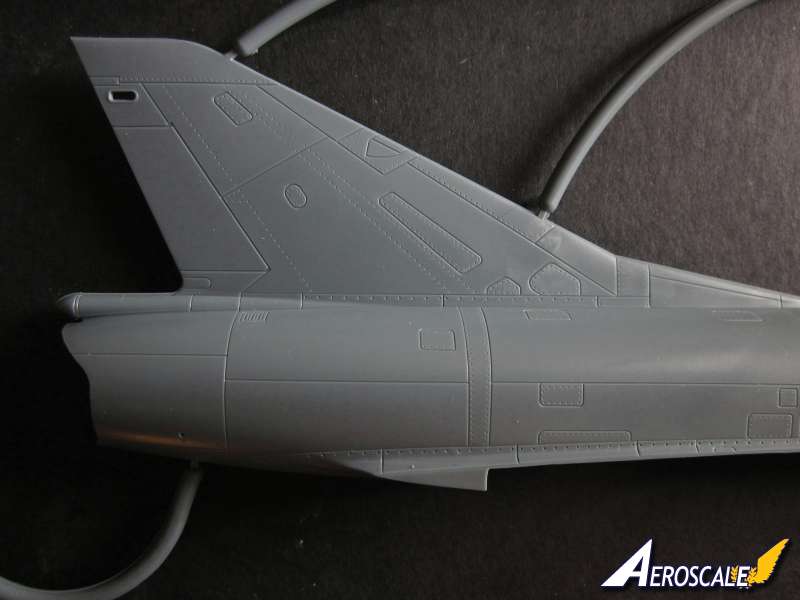
This rather exotic looking sprue arrangement contains both fuselage halves. The starboard fuselage has both sides of the vertical fin attached. The nose is moulded with the two fuselage halves. The shape is beautifully captured by Eduard and I was surprised at the size of the Mirage III, much bigger than I thought. Panel lines and rivets are recessed and are exemplary in their execution. The vent mid way along the starboard fuselage/wing root is very well done. On the inside of the port fuselage there are very fine location points for the cockpit and the engine. There are no location points for aiding the joining of the two fuselage halves. Sprue B.
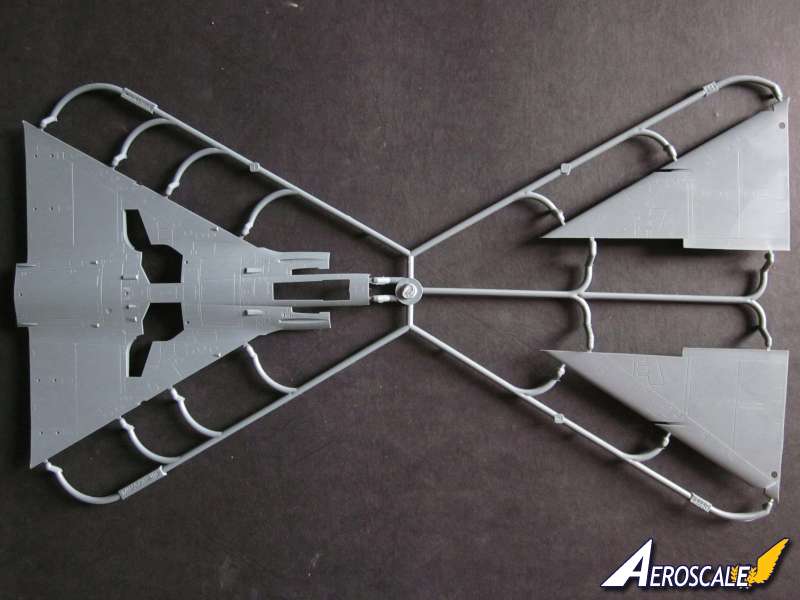
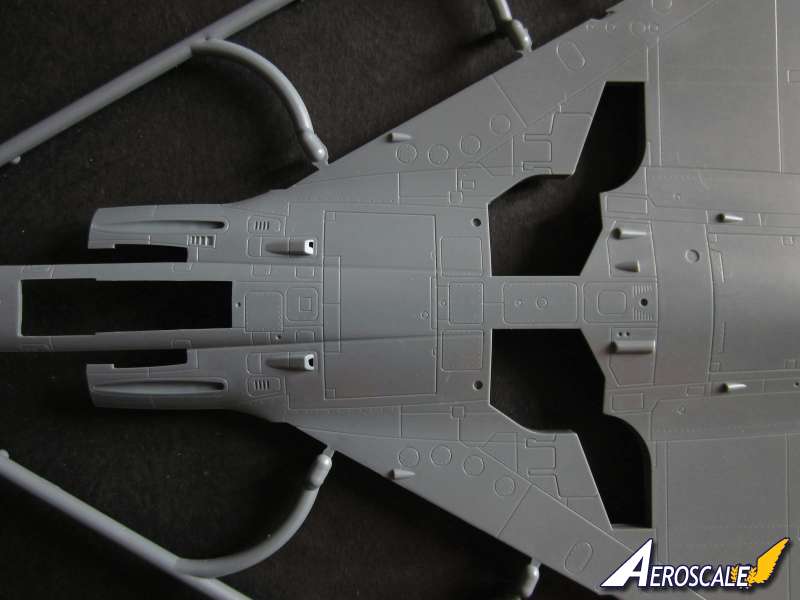
Contains the three piece wing. The lower wing comes in one piece, while the upper surface is made up of two pieces. Panel lines and rivets are again beautifully recessed, and look just right. There are various intakes and vents moulded onto the lower wing surface, but they are not hollowed out. The fastidious might want to drill them out, but they look fine if you choose not to. The cannon troughs are nicely done and the shell ejection ports are moulded open, although there is a little flash to clean up. There are two circular cut outs on the tips of the upper wing. These are filled with transparent plastic, so whether they are lights I am not sure. They don't seem to be an obvious feature of the Mirage III photos I have seen. The saw tooth feature mid way along the leading edge is cut a bit excessively, the gap should be a little narrower. On the inside of the upper wing where the wheel bay roof is, some detail is evident. On the lower wing surface there are holes for locating the elevon and aileron actuators. If you want to hang any stores then some drilling is required, Eduard have moulded partly formed holes to start you off. As with the fuselage there are no locating points to aid aligning the wings when gluing. Sprue C.
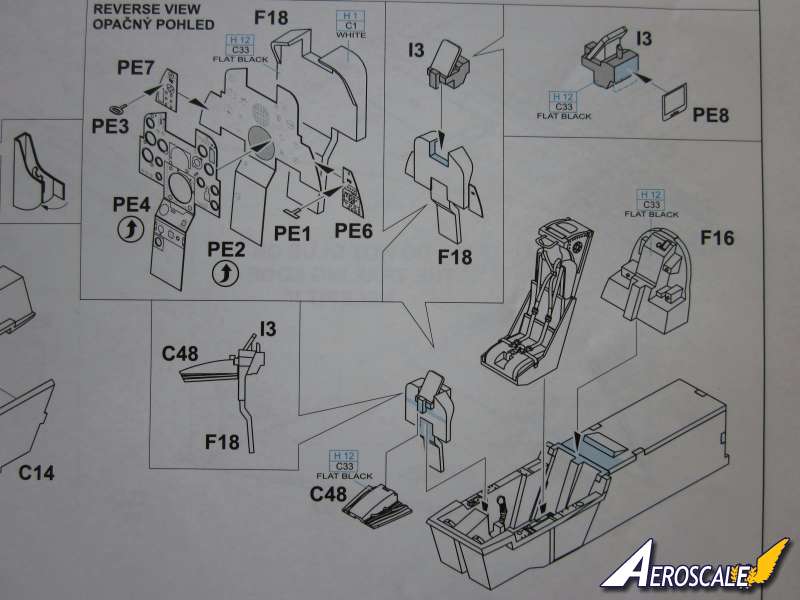
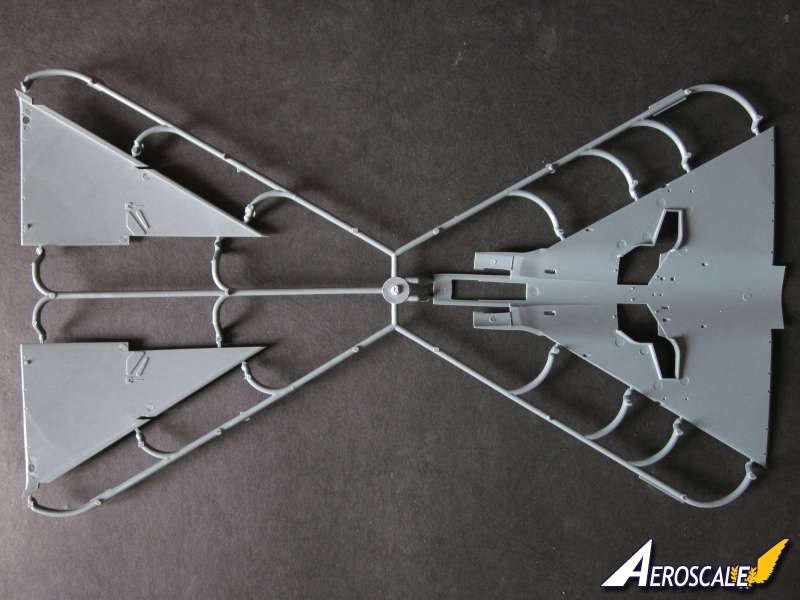
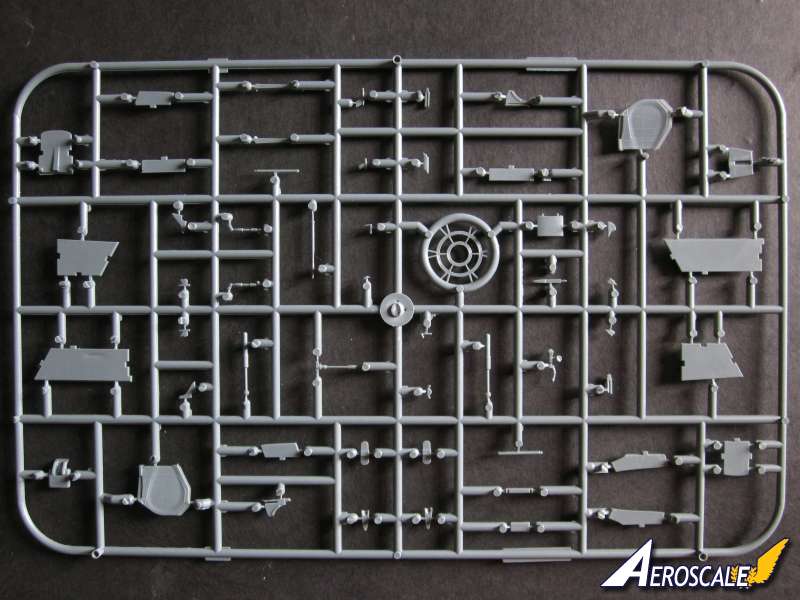
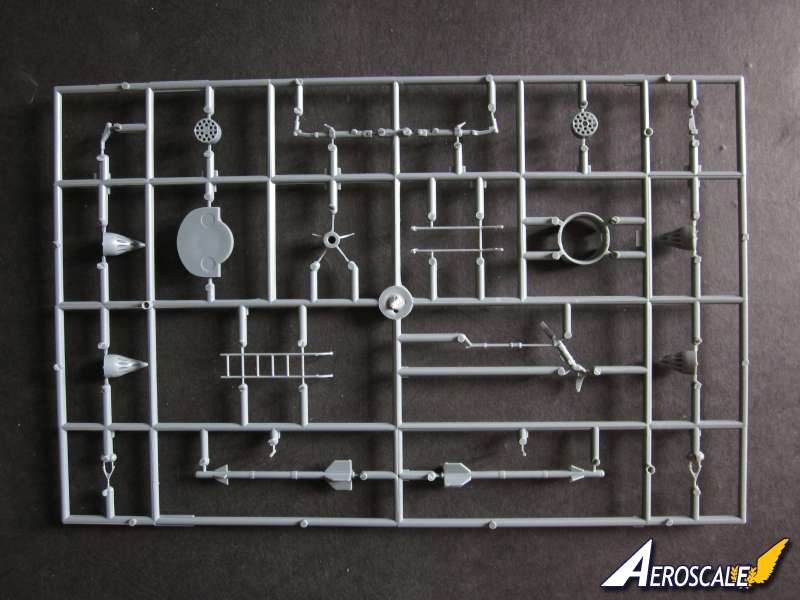
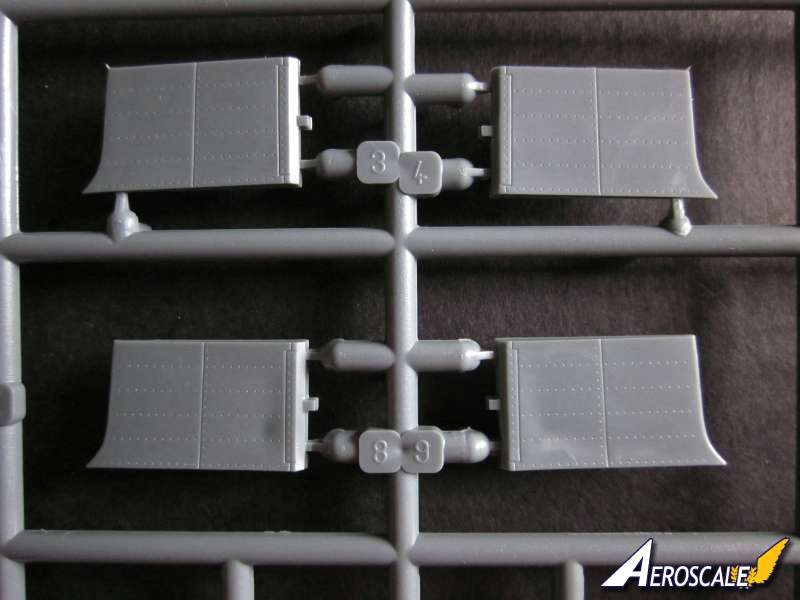
First thing to notice is that the two sprues [C and D] contained in the bag are locked together. No, the parts are not tangled, but there are a couple of locating pins holding them together, lessening the chances of the two sprues rubbing together scratching the components. Nice one Eduard. A quick check reveals that the remaining sprues have the same feature. This sprue contains the majority of the parts to detail the cockpit. Also included are parts to construct the front and main undercarriage bays. The main undercarriage bay is made up twelve plastic parts. All the parts are very nicely moulded, with a mixture of low relief and engraved details. The main gear doors are particularly well done with the inner doors having a concave surface with very fine recessed rivet details. The re-heat fuel pipe will need some care to detach from the sprue. Sprue D.
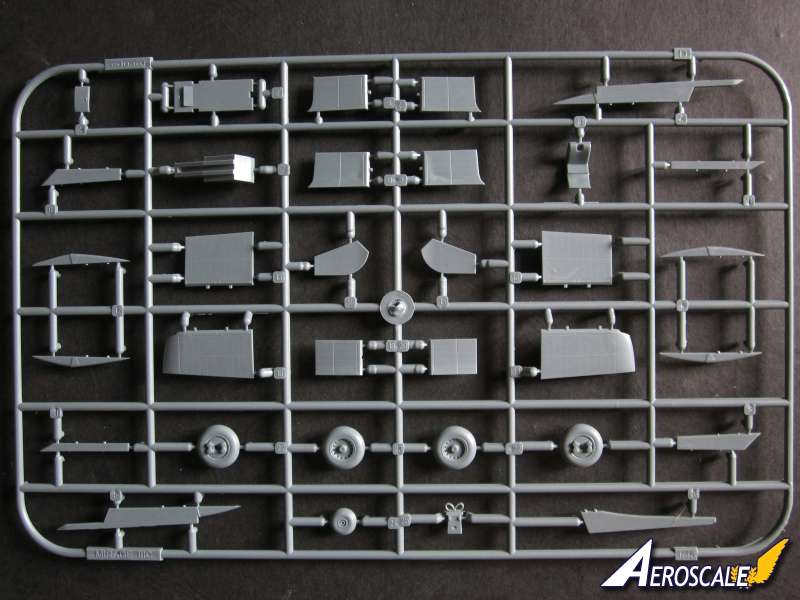
The four separate elevons and two ailerons look good. Closer examination of the inner elevons reveals a slight sink mark in the middle, a little too obvious to dismiss as a stress mark in the metal. The reason for this is that Eduard, in making the control surface one piece and because of the thickness of the part, were probably pushing the plastic too much beyond it's limits. On the same sprue there are two additional elevons made up of two pieces. These are marked not to be used in the instructions, but I don't see why they could not be swapped for the more dimpled parts. Also on the sprue are some of the components for the bang seat, control surface actuators, weapons pylons for the Sidewinders, rear gear doors and wheels. The front wheel is one piece, while the two main wheels are made up from two pieces. The detail of the wheels is superb with fine treads as well as brake and rivet details. Sprue E.
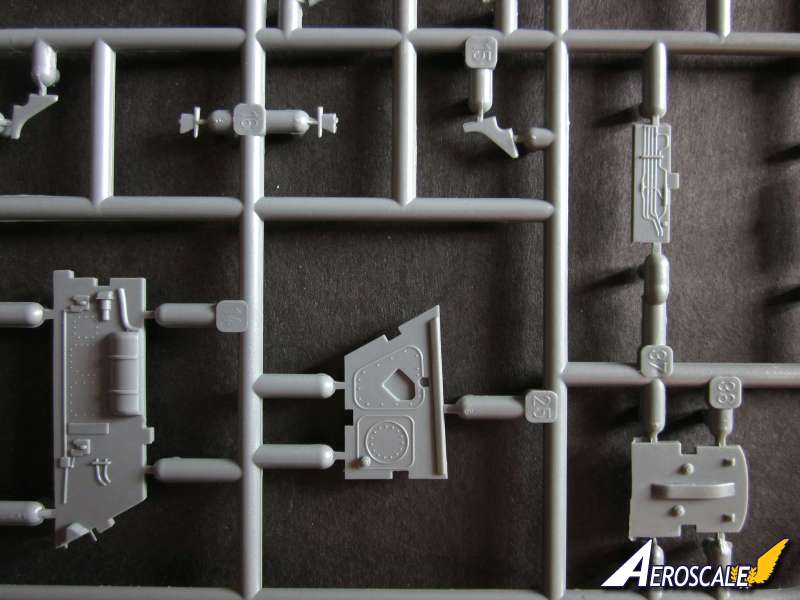
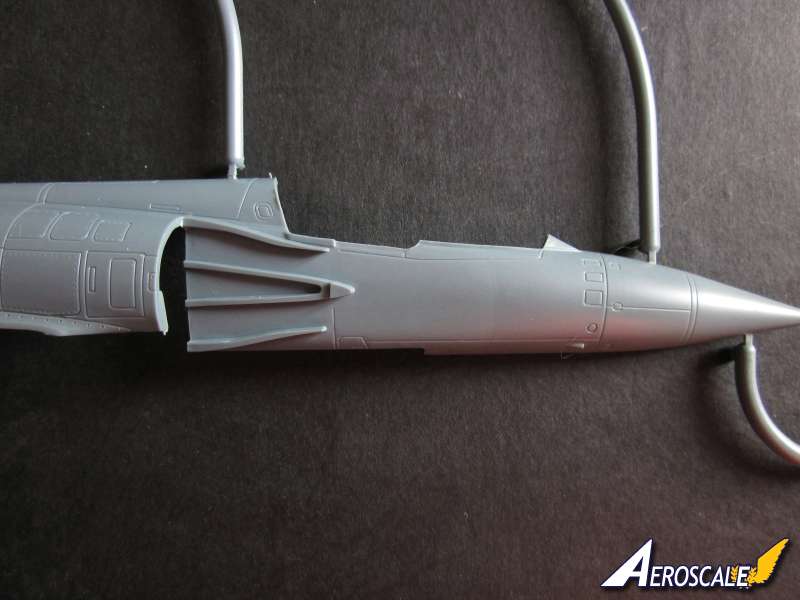
There is a two part jet pipe that is split vertically. There are some moulding marks on the inside to remove before joining. It's not going to be easy to disguise the joint once the two halves are joined. How important this will be will only be shown once the jet pipe is completed. The parts for the air intakes are nicely moulded and free of any unwanted moulding marks. Each inlet is made up from two parts. There is a rather intriguing method of blocking the view into the fuselage from the air intakes. There are two parts that look a bit like small mudguards that are located behind the intakes after the fuselage halves are joined. A section of jet pipe is also on the sprue. The part makes up the section behind the rear compressor up to the re-heat fuel pipes. The cockpit tub has low relief detailing on the side consoles that you might want to highlight if you do not fancy using the PE parts. The two part 500 litre drop tanks are also on this sprue. Sprue F.
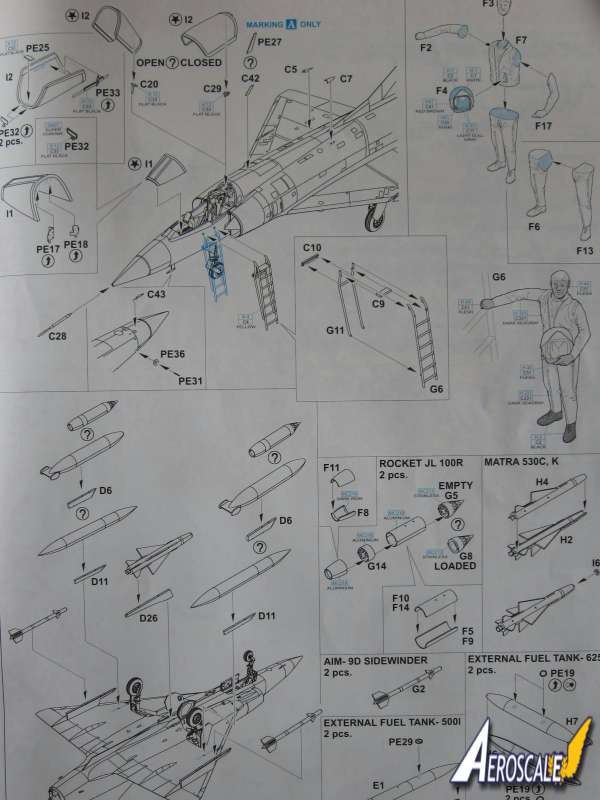
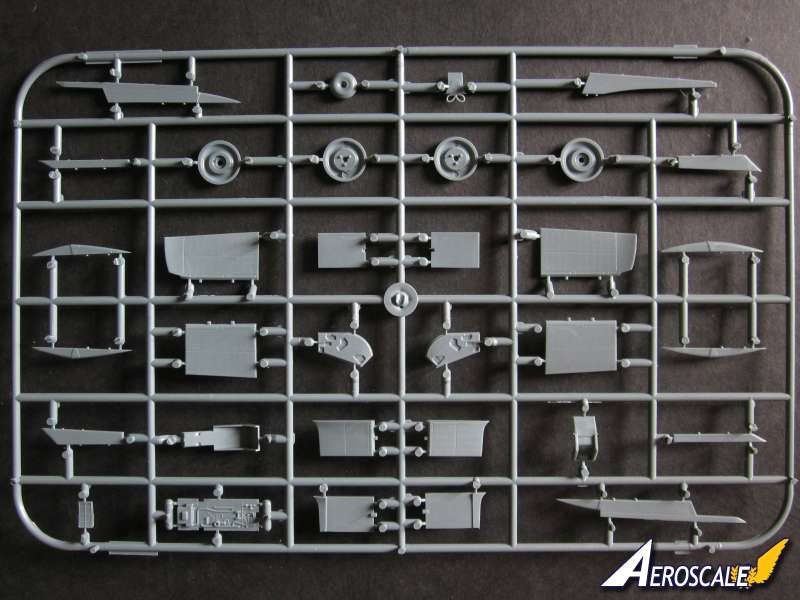
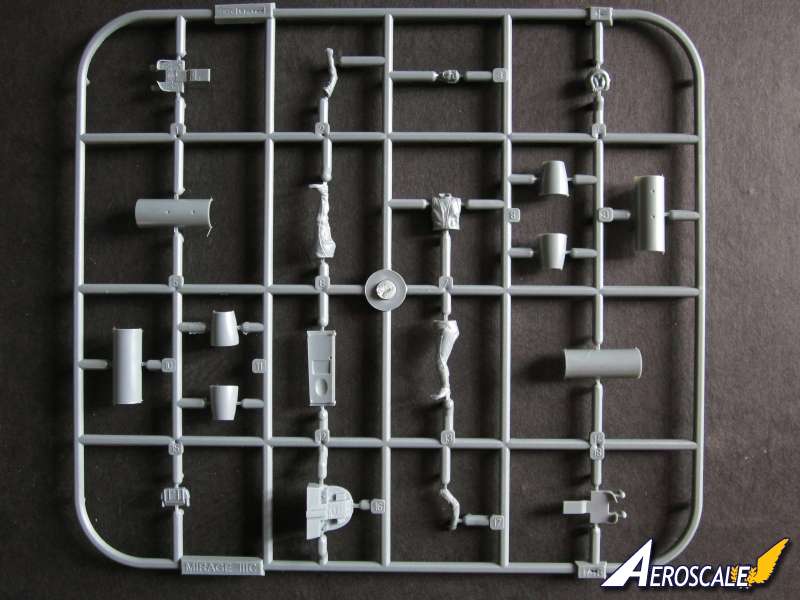
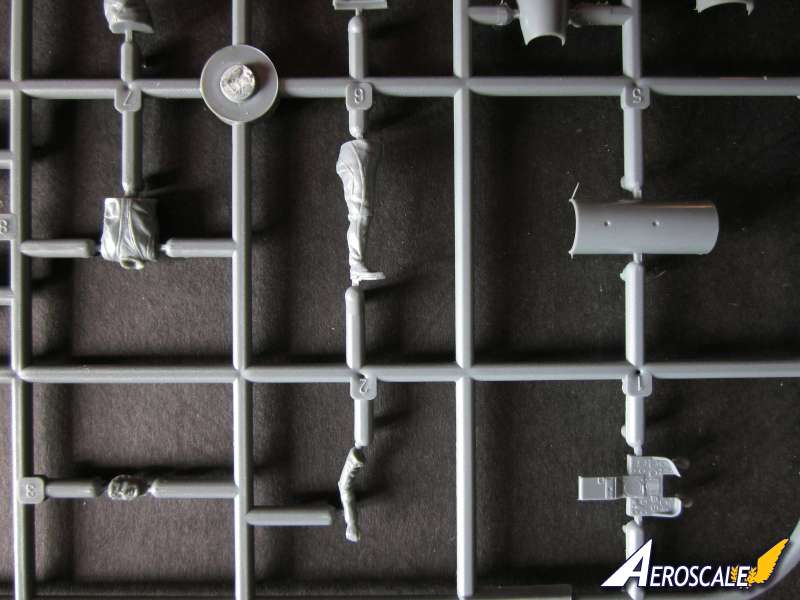
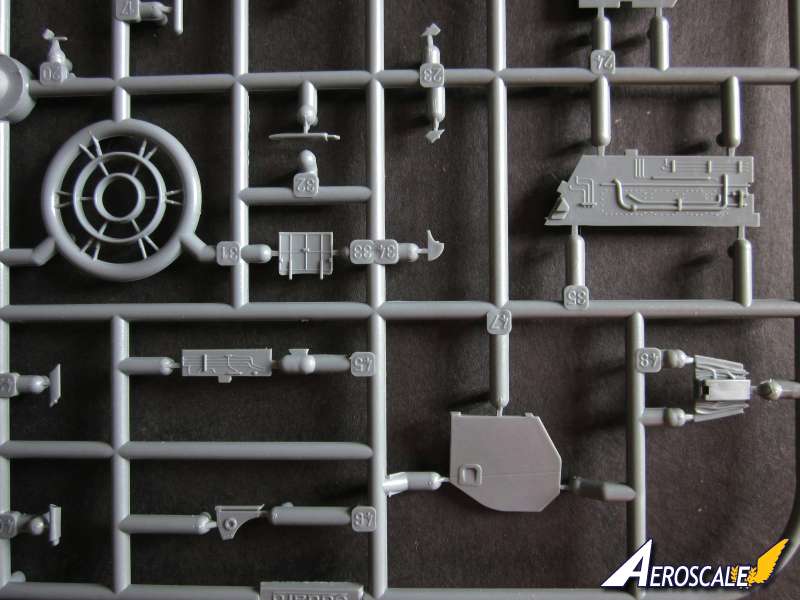
The six part pilot figure is a great inclusion in this kit. Even better is the inclusion of a separate flying helmet, which would be great to stick on the windscreen combing or on the seat. The instrument panel has low relief dials and scopes which will benefit from dry brushing if you don't want to use the PE parts. Some of the components for the JL100R launchers as well as a great looking front undercarriage door. Sprue G.
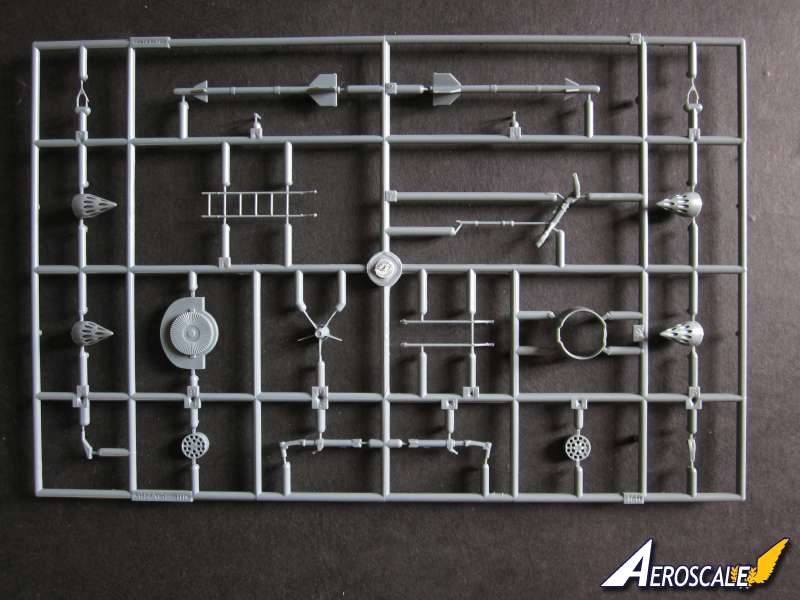
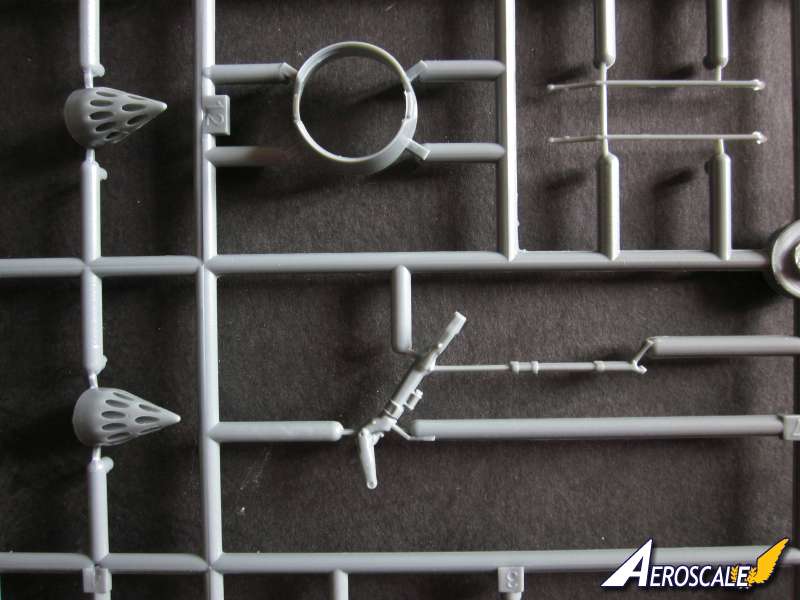
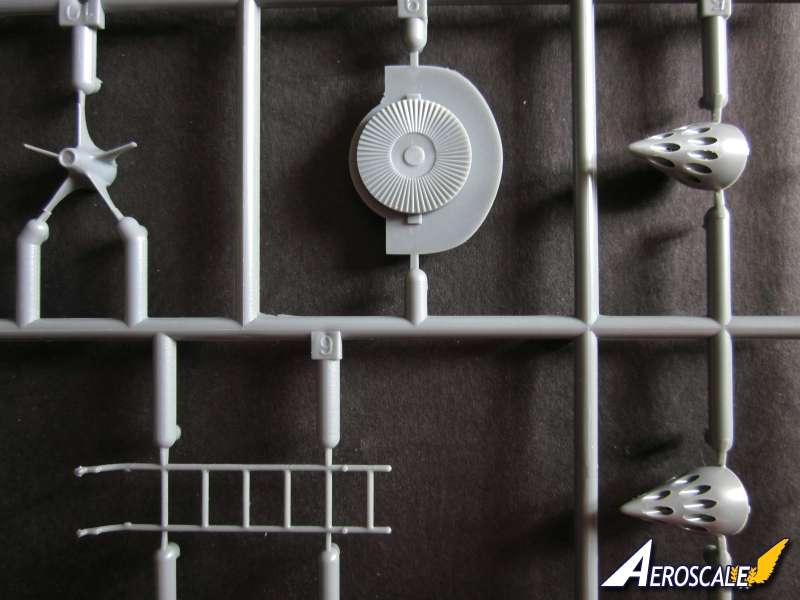
A finely detailed rear turbine attached to a bulkhead immediately catches the eye. The bulkhead is designed to give strength to the rear fuselage. There is also part of the engine just forward of the re-heat fuel pipes that is nicely moulded. The rear jet pipe is also on this sprue, this replicates the appearance of the real thing, with the two distinctive notches in the fairing. Front and rear undercarriage legs look excellent, although there is a hint of a seam on all three. Care will be needed when removing the front undercarriage leg from the sprue, as the very delicate looking hydraulic piston is an integral part of the leg. The front and rear of the JL100R launchers look really well done. The holes at the rear are very clean and will need no cleaning out at all. Also on the sprue are two AIM-9D Sidewinders and two tiny parts that could easily be overlooked, which are the Aden cannon barrels. There is a tiny indentation in each to represent the muzzle. Another nice touch by Eduard is the inclusion of a crew ladder. So along with the pilot the kit is crying out to be displayed on a diorama. Sprue H.
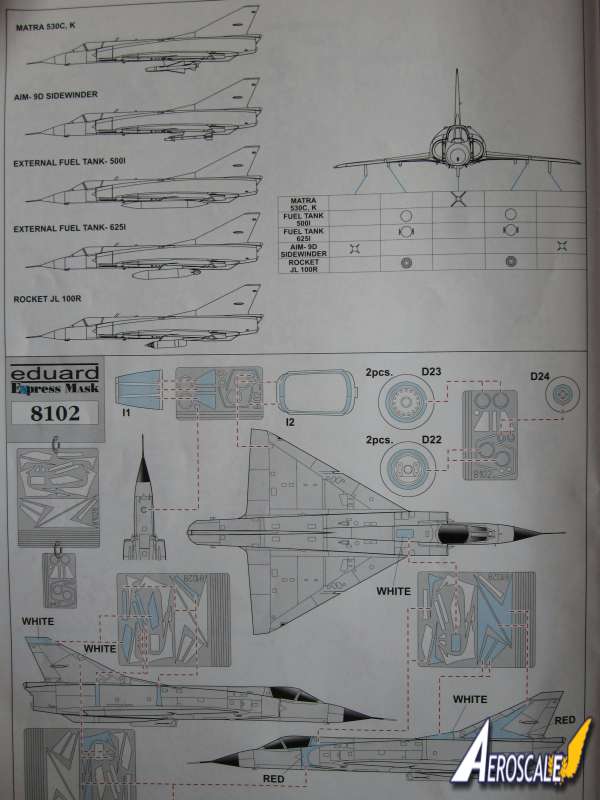
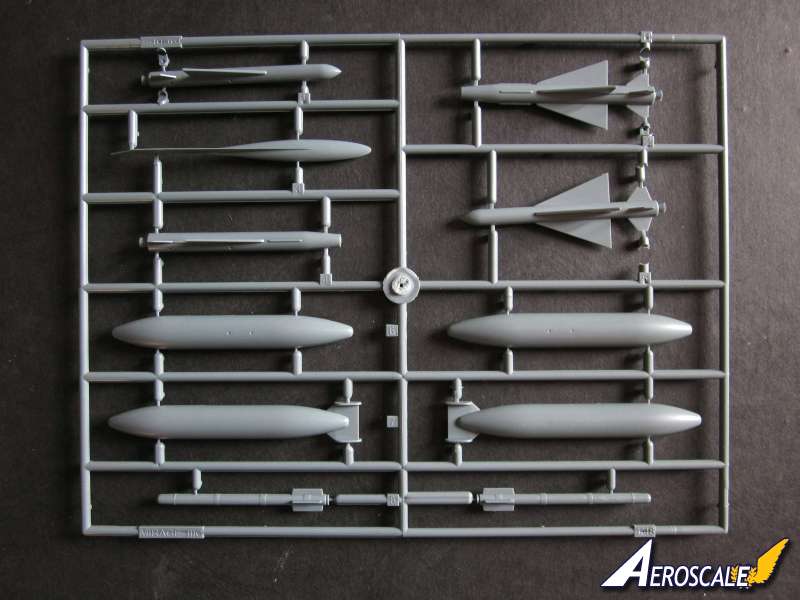
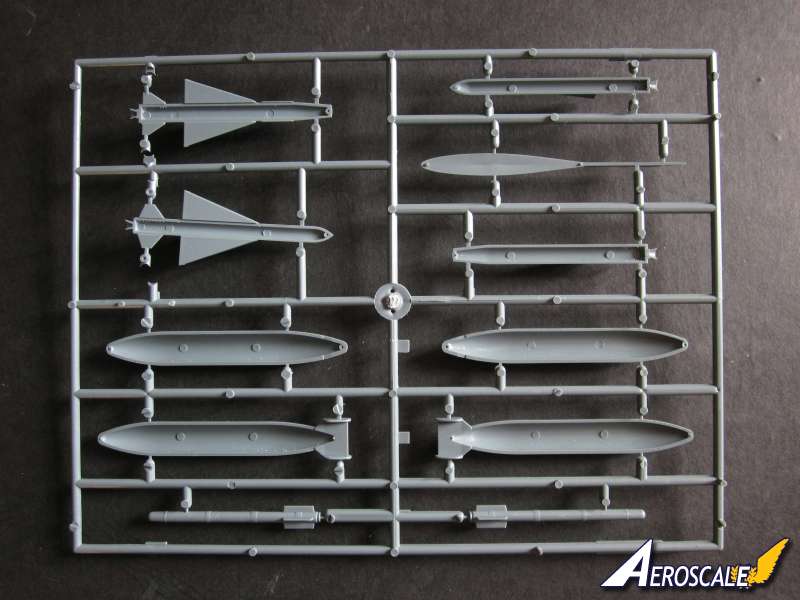
Contains most of the stuff you will want to hang from this aircraft, if you don't mind spoiling the clean lines of this Mirage III. Included are:
1 x Matra 530C,K AAM.
2 x 625 litre drop tanks.
Along with on other sprues:
2 x AIM-9D Sidewinders.
2 x 500 litre drop tanks.
2 x JL 100R Rocket pods.
Also on sprue H are three other unidentified missiles that are not used. There is also a ventral fuel tank and fin. Sprue I.
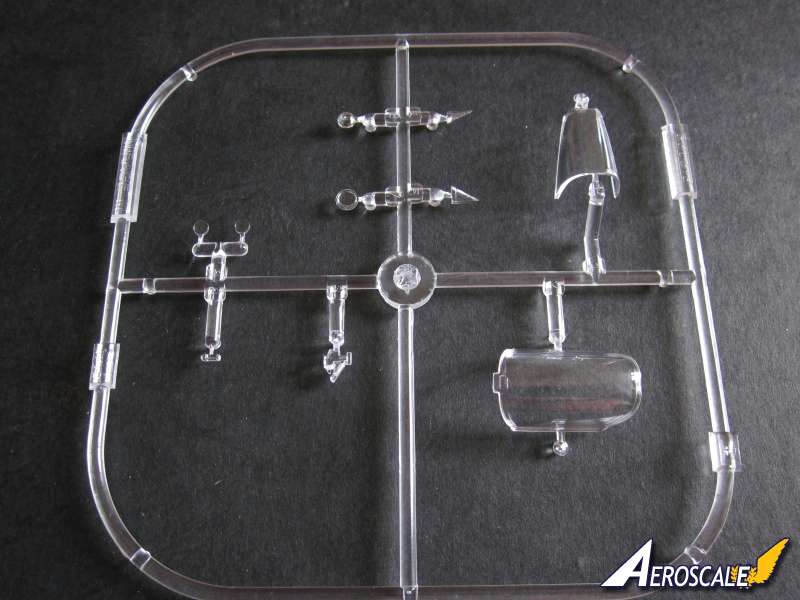
The transparent parts contained in their own re-sealable bag. The separate windscreen and canopy are moulded thinly. Also included is a HUD, wing tip navigation lights, which are made slightly enlarged so that it will be easier to blend them into the wing without damaging the clear bits representing the lights. PE Parts.
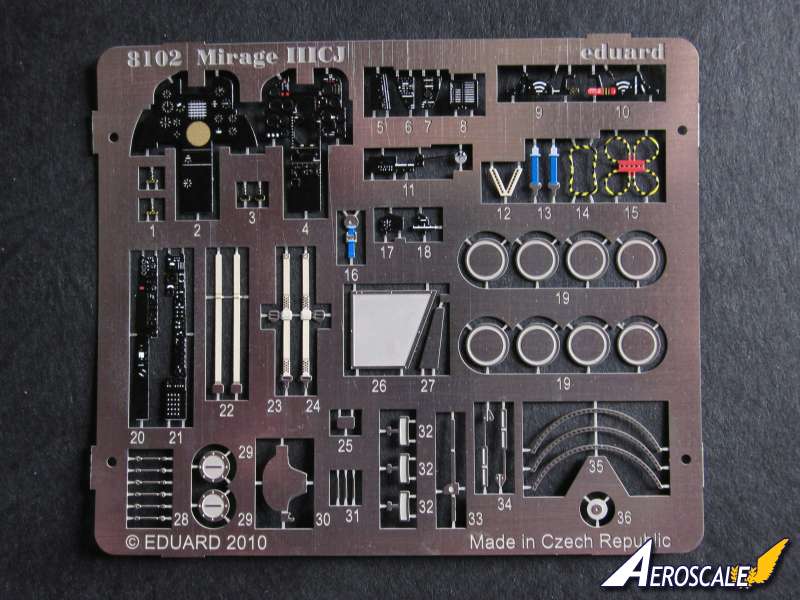
The majority of the parts are to detail the cockpit. The pre-coloured components include a two part instrument panel. Instruments faces are on the backing piece to which the instrument panel face is attached. The quality of the other bits for the cockpit are remarkable in their detail and size. Great care will be needed removing these from the fret and gluing to the cockpit. I really like the ejector seat activation rings, that need folding before attaching. Also included are seat harnesses. The mirrors are a nice addition, as are the filler caps for the external fuel tanks. Masks.
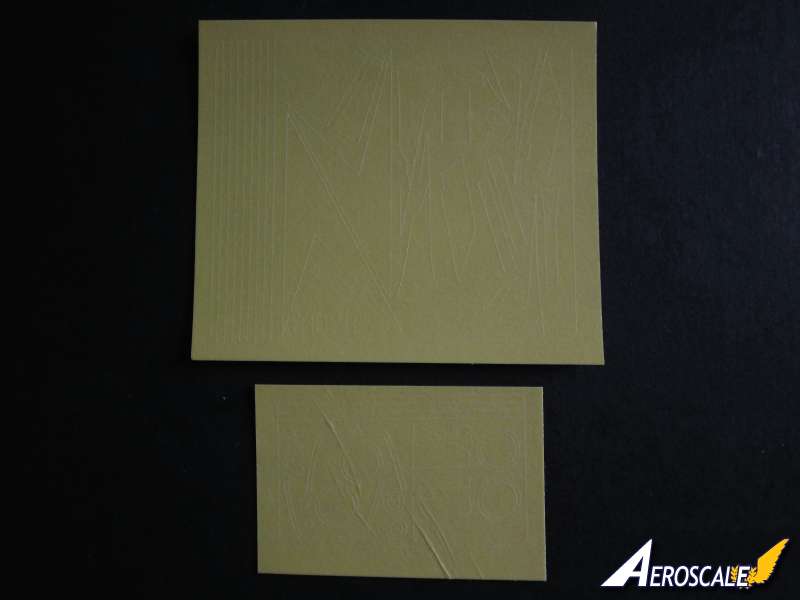
There are paint masks for the wheels, windscreen and canopy. You will have to fill the central part of the canopy yourself, but there is usually sufficient spare kabuki tape to do this. There are masks to mask off the coloured areas and also the different metallic surfaces to the rear of the aircraft on the natural finished Mirages. One slightly disappointing aspect is that there are no masks for the ID triangles on the camouflaged aircraft. Not a big deal as these come as decals. If you don't want to use the decals it would not be difficult to create your own masks. My sample masks were slightly wrinkled, nothing serious. I am sure they will smooth out when applying. Decals.
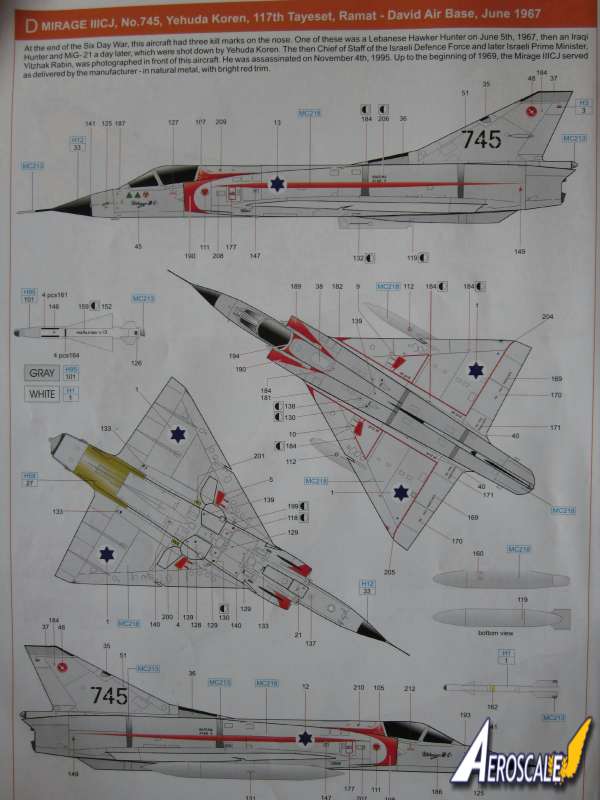
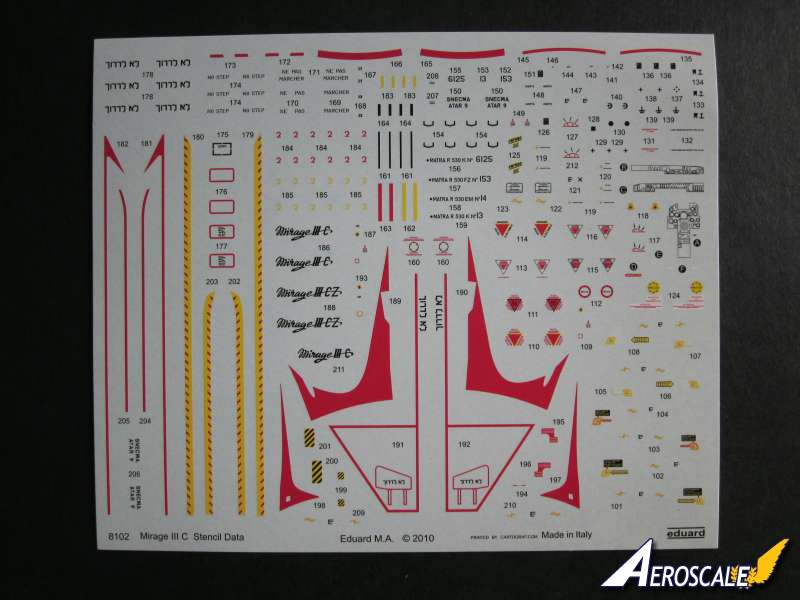
The two sheets of decals are printed by Cartograf. If you don't fancy painting some of the larger markings, they are supplied as decals. There are kill markings, mostly indicating shot down Egyptian aircraft, but the aircraft of Yehuda Koren [option D] has two Iraqi and one Lebanese kill marks on his aircraft. Stencils are a mixture of Hebrew[?], French and English. All the stencils are numbered to help location. Wing walkways are also included. If you prefer decal instrument panels and side consoles, there are some included. Marking options.
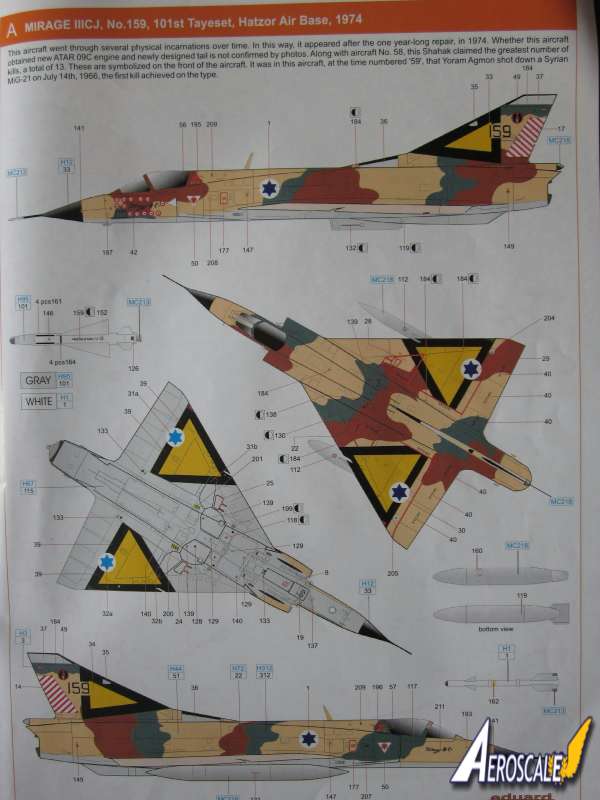
Mirage IIICJ, No.159, 13 kills, 101st Tayeset, Hatzor Air Base, 1974.
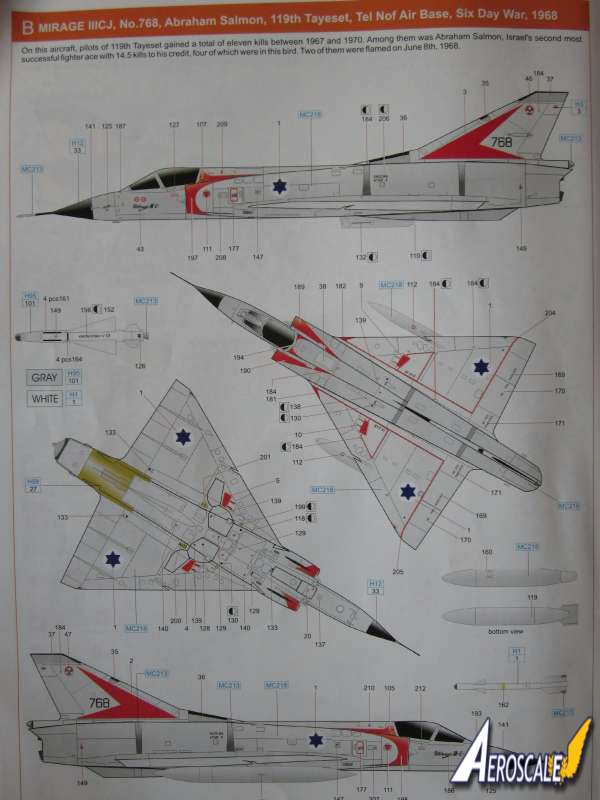
MirageIIICJ, No.768, 2 kills, Abraham Salmon, 119th Tayeset, Tel Nof Air Base, Six Day War, 1968.
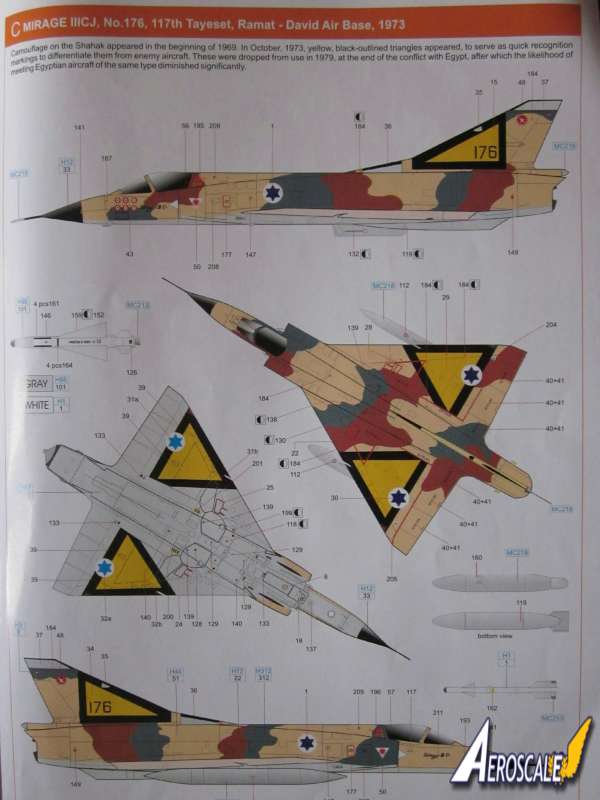
Mirage IIICJ, No.176, 6 kills,117th Tayeset, Ramat - David Air Base, 1973.
Mirage IIICJ, No.745, 3 kills, Yehuda Koren, 117th Tayeset, Ramat - David Air Base, June 1967.
Mirage IIICJ, No.764, 5 kills, Yehuda Koren, 117th Tayeset, Ramat - David airbase, May 1970.
If you do acquire this kit one of the marking options is on the first page of the instructions, not at the back with the other colour and decal references. Colour reference are for Gunze Sangyo paints and the camouflage colours have FS references.
Instruction.
Comes in the form of a 16 page booklet. Construction information is illustrated with black and white exploded drawings, the areas to be glued are highlighted in blue. With each part there is information about painting as well. Some of the English written instructions are a bit odd, for example: don't glue on the witeel well edge!!, but the meaning is fairly clear. There is a good set of instructions for using the masks. The paint guides are in colour and they also include stencil placement.
Conclusions.
This is a lovely looking kit from Eduard, providing lots of options to hang from your Mirage IIICJ and a very interesting choice of markings. The PE parts add a whole new dimension to the cockpit , With some of the intricate parts involved in the construction it is not a beginners kit. If you have a few kits under your belt, this would be an ideal one to try out the world of PE detailing.
SUMMARY
Highs: Superb moulding plus all the exra goodies that come with Eduard's Profipack range. Excellent price also.Lows: The jet pipe is a very minor niggle.Verdict: Outstanding, well done Eduard. Highly recommended.
Our Thanks to Eduard! This item was provided by them for the purpose of having it reviewed on this KitMaker Network site. If you would like your kit, book, or product reviewed, please contact us.


Comments