The Halberstadt CL. IV prototype type was put through its paces in Feb. 1918. Its role was seen as a replacement for the heavier Halb. CL. II as an escort to the larger C class bombers and reconn aircraft of the time. In January 1917, four of the Kampfgeschwadern were disbanded and reformed into Schutzstaffeln( Protection Flights) each with six C Class aircraft. Protection Flights flew close escort with Fl.Abt or Fl.Abt.(A) they were assigned to. In March 1918 these Schusta units were redesignated as Schlachtstaffel ( Battle flight). The Schlachtstaffeln units usually had a maximum of six aircraft each and they machines were numbered 1- 6 along with whatever unit markings were assigned. They were additionally assigned to low level strafing and bombing missions. It was to initially use the same Mercedes D.IIIa 170hp but by late 1918 the Mercedes D.IIIaü 180hp had replaced it as a standard.
Kit,
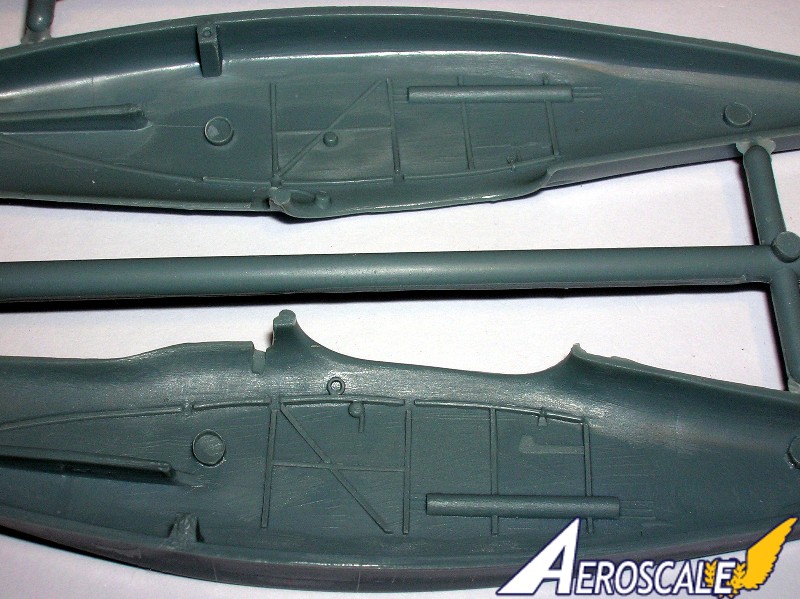
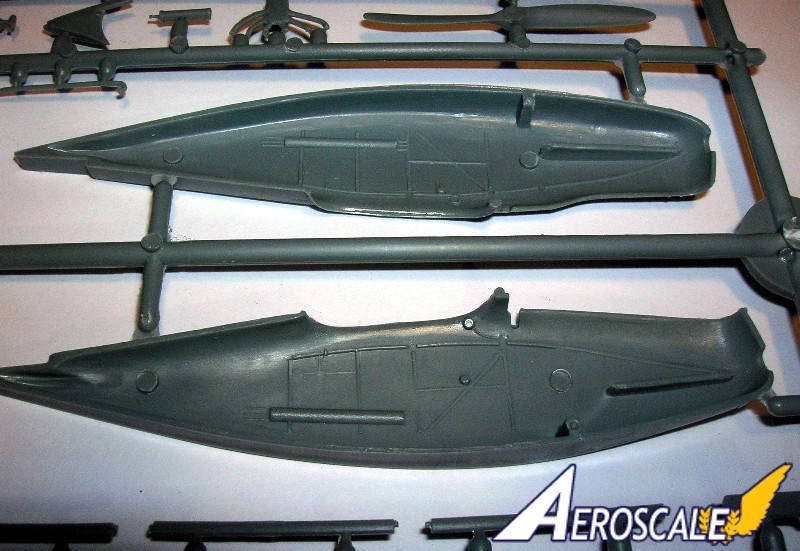
When considering various types of kits one needs to remember that each has its pluses and its minuses. It depends on what the modeler feels comfortable with. Building a vacuform, resin or an injected kit demands differing methods of approach. In this instance I will discuss the new Karaya kit . The plastic parts conform well with Windsock Datafile #43 drawings. there are some ejector pins on the inside of the fuselage halves, theat are in well-placed locations. These do not interfere with the detail moldings. Both short and long fuselages are included in all three kit variations. The kits differ only in the decals and profile views and box art.
Kit contents:
1. One plastic parts sprue is cut in half to give you two sprues,
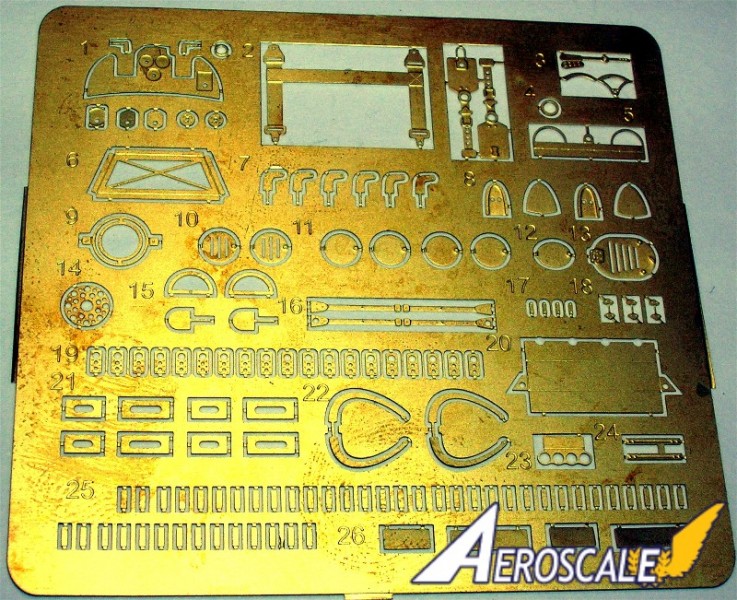
2. Small fret of etched brass detail parts.
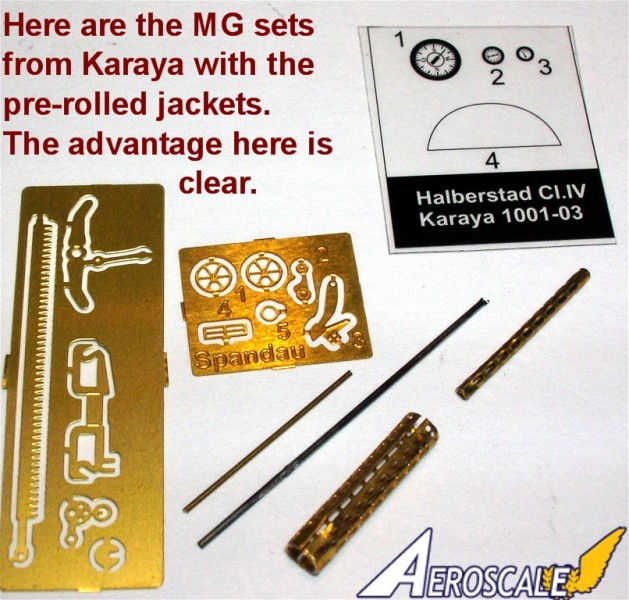
3. Two additional new etched brass sets for the machine guns and pre-rolled jackets
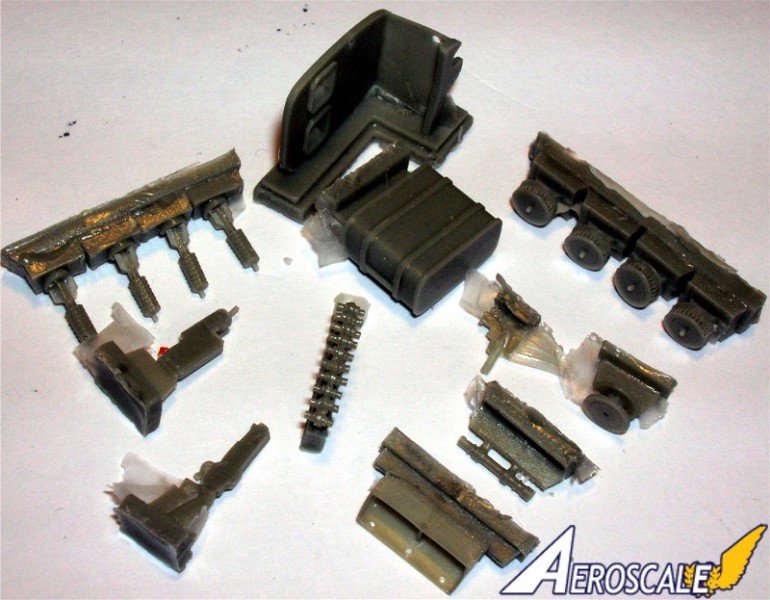
4. A small bag of fine moulded resin parts. (This has been Karayas strong suit in the past.)
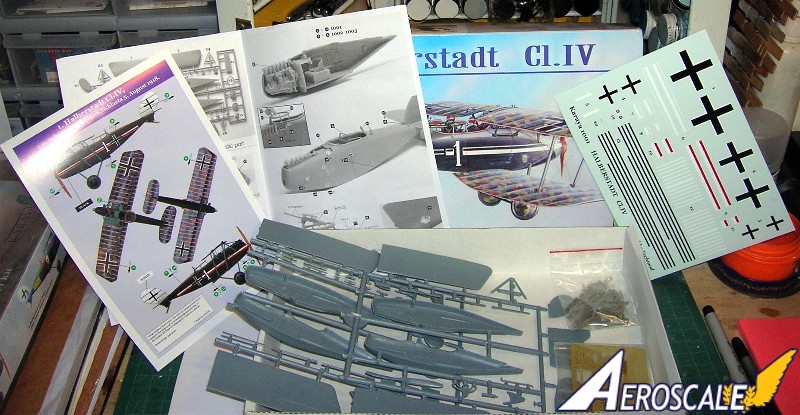
5. A decal sheet for two schemes.
6. Two sided half sheet of full colour views for painting and decal placement.
7. The assembly instructions are meager in the form of 4 half pages of black and white images concerning a build on the internet by a master modeler with PE application references. The last image shows rigging assembly paths in black lines applied to a photograph of the assembled but unpainted model.
Begin with a general clean up of all seams and a wash of all parts in a mild anti-bacterial soap. This is especially needed in the resin parts. Pre-drill all rigging and strut locator holes. Like the old Eduard kits the strut locations are represented by fine dimples or pips.
The fuselage:
The interior has finely moulded frame and longeron detail and the Duraluminum guard over the control wires present in the rear cockpit. I will replace all the struts with cut and shaped brass sections. The lower wing fuselage attachments / unions have small holes in the fuselage and matching stubs on the wings. These stubs should be replaced with brass pins and the holes drilled through. gun ring appears sufficient. Master modeler Wojtek Fajga has created the small fret of brass included in th kit and the Aerodrome thread previously mentioned has the images showing their application. There is also the resin cast main fuel tank with raised details. The wheels are not an issue. But the elevator and rudder are moulded to their stabilizers.
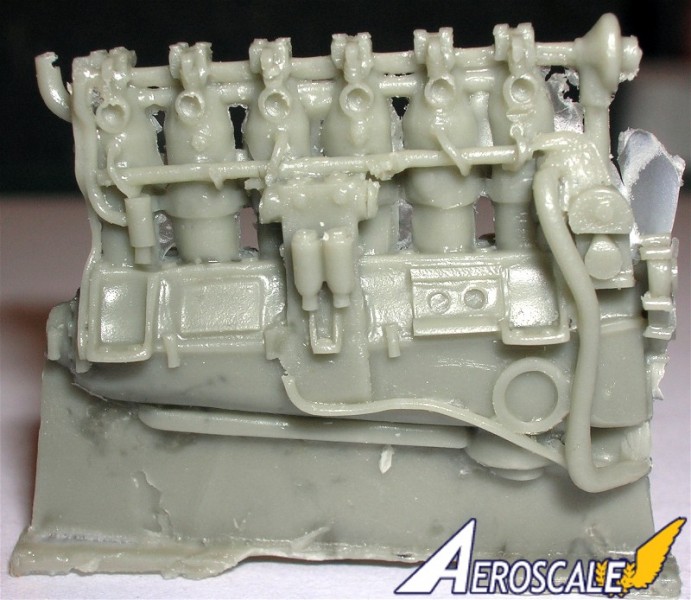
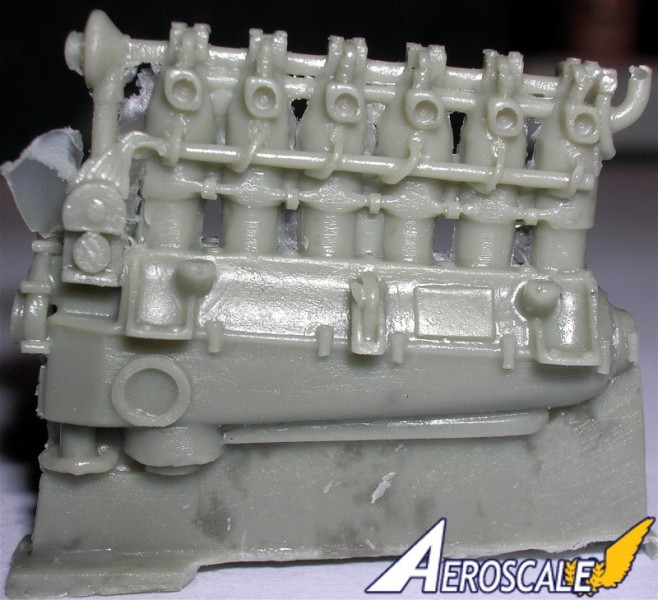
The engine:
The one piece resin inline motor is a specific representation for the late production Mercedes D.IIIa 170hp. For the CL. IV this item should represent the D.IIIaü 180hp. Check the references provided at the end of this article for some keynote differences in the types installed. Not sure why but the intake pipes for the carburetor don't seem to be in the boxes? The cylinder jackets were the color of blued metal. The immediate visual difference in the early Mercedes D.III 160hp / D.IIIa 170hp and its progeny the D.IIIaü 180hp or D.IIIav 200hp are in the rocker boxes above the cylinder jacket heads. On the D.III and D.IIIa motors the rocker springs are centered on the sides of the rocker box covers. On the D.IIIaü and D.IIIav motor the rocker springs are located on the forward leading edge of the same covers. The Mercedes D.III 160hp was outclassed by 1917. The Mercedes D.IIIaü 180hp was the standard engine in both of the Halberstadt CL.II & IV types starting in late 1917 through 1918. Then in early 1918 came the Mercedes D.IIIav 200hp. Many, many older D. III and IIIa type motors were rebuilt to the D.IIIaü specs at the airparks as the war progressed. That is why some captured examples had motors with the i.d. designation of D.III 160hp cast into their crankcases. This has caused the misconception that the standard 160hp and 170 hp were used in 1918 at a time when they had become obsolete. Often these were referred to as 160hp over-compressed engines.
The armaments:
Additionally there are two PE sets for the guns (1 @ Spandau and Parabellum) with pre-rolled jackets. These are now sold separately by Karaya as detail kits ( B04 - 06 ). Also there are two sections of fine hollow tube for the gun barrels that are crimped at one end. In resin there are five Parabellum drums / magazines (four loaded and one empty to receive the brass-etched ammunition belt forward bulkhead / fuselage station, both gun breaches, an optic sight for the observers gun, a simulated flare pistol, four fragmentation grenades, 10 flares and a box to be mounted on the fuselage side for Parabellum magazines. There are not any muzzle flash suppressors included.
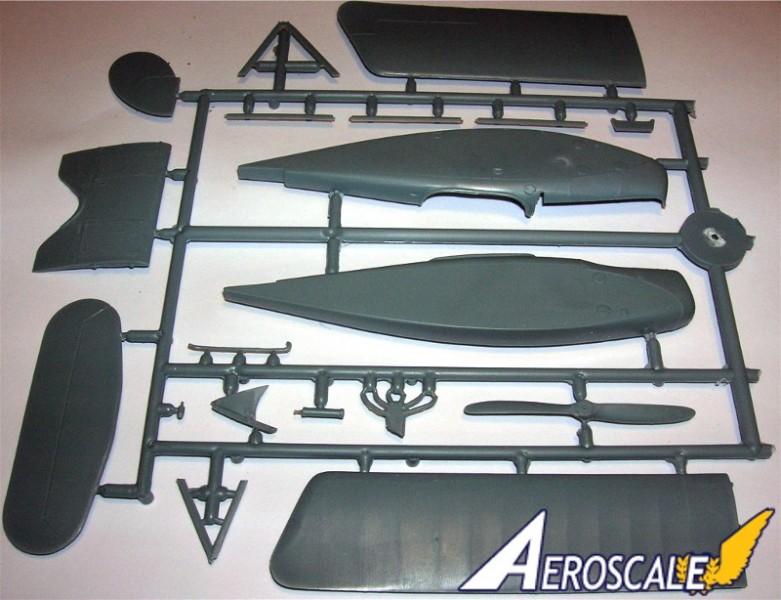
The wings:
Surfaces are finely designed and the wash-out at the tips both upper and lower wings are nicely represented. The typical up-turn to the root trailing edge of the lower wings is present. Trailing edges are commendably thin with decent rib representations. But the ailerons are moulded to the wing psnels. The center section of the upper wing is well done, representations of the radiator surfaces, fuel tank and leather edging on the trailing edge cut out. The upper wing center section has pins moulded for joining the wing panels and dimples in the wing panels which will certainly need drilling out and here again brass pins are to be recommended.
The Decals:
The decals are done by Techmod and are in good register are for two options in each kit. The early Halberstadt CL.IV production, short-fuselage kit (1001).
1. The first has markings for Schlasta 5 as flown by Ltn. Hans-Joachim Rath with red / white fuselage stripes and the numeral 1 There is some speculation that the red portion may simply have been a white outline over the underlying fuselage colour, and an alternative decal is provided without the red. The profile drawings show the fuselage over-painted black.
2. The second markings are for a machine of Schlasta 21 as flown by Obltn. Hans Ebel. It is a series of black and white stripes to be applied to a white fuselage and printed fabric horizontal tail surfaces respectively. It is supposed to represent the scheme on the NASM restored machine. But, Since he was the unit commander the white portions should be thicker than the black.
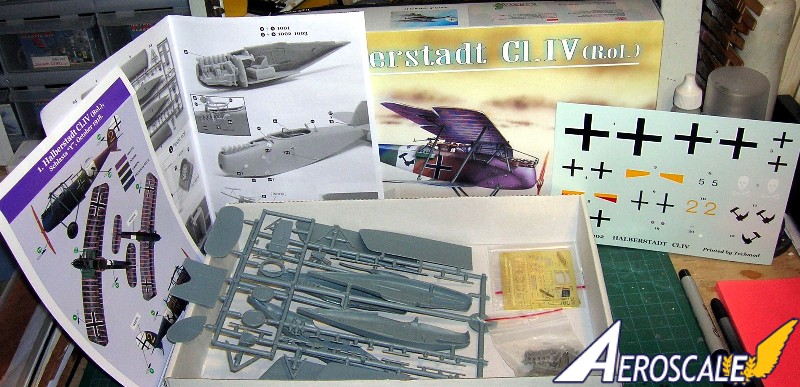
The Roland-license built version (1002) has markings for two aircraft
1. The first scheme is from an unknown unit and carries the arm and hammer logo (noting a labor movement in western Europe before the war.) It is featured on the front cover of the Windsock Datafile. The modeler needs to apply a 16mm white band to the fuselage and a yellow 2 decals for the fin.
2. The second markings are for a Schlasta 6 machine as flown by Obltn. Jurgen Ludeckes with a white skull and cross bones and yellow or an alternate yellow and red pennant flash on the fuselage side and a black 5 for the rudder stabilizer.
The Camouflage:
Kit 1001 only displays the wing applied printed 5 colour Farbenflugstoff (commonly know as lozenge). But you will have to get these from Microsculpt.com to get the best on the market for colours and application. The kit does not provide any.
Kit 1002 carries fuselage scheme of dark blue / black, ochre, dark green and mauve for the port side. And the instructions would have you reverse it for the starboard, meeting on the aircraft centreline above and below. These colours were applied with a Binks spray gun at the factory and the edges should be muted.
I purchased my two kits from Misterkit USA.com
References:
Airforce Museum Rolls out. . . by David Layton, Over the Front Vol. 10, #2, Pp.353 - 358.
Albatros D.Va by R. Mikesh, Smithsonian Inst. press 1980 (Excellent reference on the motor).
Aviation Awards of Saxony and the men that earned them (Vol.III of the series) by Neal O Connor. P.235.
Circus Colors #10 Schlachtsaffel Markings by G. VanWyngarden, Cross & Cockade USA Vol. 25 #3,
German Army Air Service by R. Rimell, Vintage Warbirds # 2, Osprey Pub.1985.
Halberstadt CL. II by Ray Rimell, The best of Windsock Vol. 2 1991.
Halberstadt CL. II by P. Grosz, Windsock Datafile # 27 .
Halberstadt CL. II article in Wingspan May 1989 Pp. 44 - 45.
Halberstadt CL. IV by P. Grosz, Windsock Datafile # 43. 1994.
Halberstadt CL. IV, Flight Magazine Report 10 Oct. 1918.
Halberstadt serial numbers by D. T. Pardee, Over the Front, Vol. X, #X Pp. 88 - 99.
Pictorial History of the German Army Air Service by A.Imrie, Allan Pub. 1971.
Sclachtflieger! by R. Duiven and Dan San Abbott, Schiffer Pub. 2007.
Sclachtstaffel Fighter, Halberstadt CL. II & CL. IV Aviation News, Pp 1152 - 1162 27 April - 10 to May 1990.
World War One in the Air by Rimell, Arms & Armour Press, Warbirds #9, 1988.
When contacting the manufacturer or sales outlet please tell them you hears about thier product through Aeroscale
SUMMARY
Highs: Very decent moulding, colourful markings choices, excellent brass bits. Lows: Ailerons and elevator are not separate mouldings. Detailed instructions for the build are only on the internet. There is no discussion of the lower wing dihedral. Engine rocker boxes are wrong for 180hp. Verdict: This is an above average kit that experienced modelers will be glad to have a crack at. I don't regret the purchases but I am fortunate to have good references at my dispoal.
About Stephen T. Lawson (JackFlash) FROM: COLORADO, UNITED STATES
I was building Off topic jet age kits at the age of 7. I remember building my first WWI kit way back in 1964-5 at the age of 8-9. Hundreds of 1/72 scale Revell and Airfix kits later my eyes started to change and I wanted to do more detail. With the advent of DML / Dragon and Eduard I sold off my ...
Well I started a thread on the Blue Max & Pegasus kits and the first offering was the BM Halberstadt CL.II. The Karaya Halb. CL.IV kits are definately a step above the Blue Max simply in reference to the plastic detail, brass & resin. In many ways they are similar.
Blue Max thread here.
Hi again
My kit arrived today. It looks fantastic! These are the colour schemes - with really good quality Techmod decals to match (note: like the other versions, you have to supply your own lozenge decals):
All the best
Rowan
Stephen,
I have the Tom's Modelworks Halberstadt CL.IV in the stash.Wondering how well it stacks up compared to the new Karaya kit.Any opinions or information would be greatly appreciated.
Highest Regards,
Gregory Jouette
I have the resin version of "Tom's Modelworks" Halb. CL.IV and I started a thread just for his st kits. I'll bring it up to page 1. There were two kits by the way. One vacuform and one resin from "Tom's Modelworks".


Comments