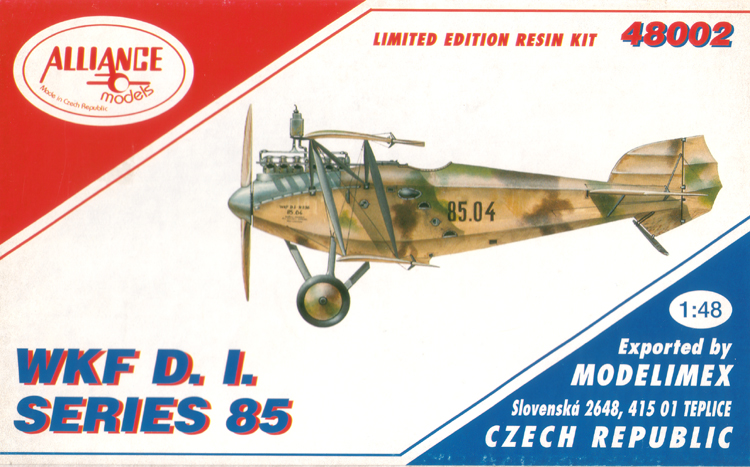
Background (based largely on the kit instructions)
I must admit the WKF D.1 was completely unknown to me until my chance purchase of the Alliance Models kit. Even then, my trusty edition of Jayne's Encyclopedia of Aviation was no help whatsoever and it was time for some searching on the internet for details. As far as I can tell, WKF - the Wiener Karosserie und Flugzeugfabrik - produced mostly licence-built aircraft for the Austro-Hungarian empire. But during 1918 they tested a series of prototype fighters of their own design - the D.1 80.06 and 80.10, culminating in the D.1 Series 85. This biplane design was powered by a 230 h.p. Hiero engine and armed with a pair of Schwarzlose M.16 machine guns. The promising performance of the new prototype resulted in an order for 48 D.1 fighters, with 20 scheduled for delivery by the end of 1918.
Top speed was about 121 mph and, unusually for a WW1 fighter, the aircraft is said to have been fitted with a radio. The WKF D.1 never saw combat, but there are rumours that a number of complete airframes were stored after the Armistice and smuggled out of the country to serve abroad.
The Kit
I bought my kit second hand, but Alliance Models' WKF D1 is still in production and distributed by
Modelimex. The kit is packed in a sturdy little box and consists of:
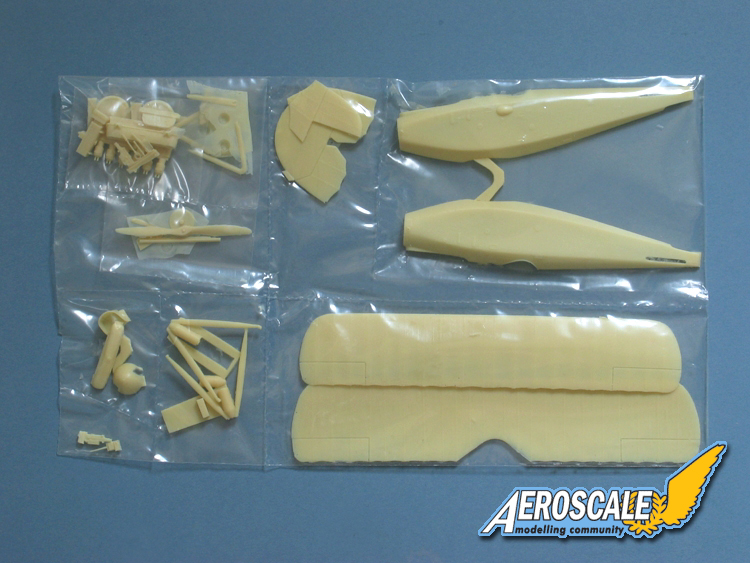
37 x beige resin parts
Decals for a single aircraft
The casting throughout is very good. As with their earlier
Aviatik 30.40, it rather reminds me of a Planet Models kit - particularly in the way the pour-stubs are designed. The fuselage is split into conventional halves and the wings are already separated from their pouring blocks, while some of the smaller parts are cast in a wafer. There's a little "flash" here and there to take care of and I found one or two pin-prick bubbles at the trailing edge of the wings but, generally, clean-up should be pretty quick and painless. Surface detail consists of finely depicted ribs on the wings and tail, while the basically smooth fuselage has a few raised louvres and foot-holds.
There's not really any way to do a test-fit, but it's immediately apparent that that a simple assembly jig is definitely to be recommended, thanks to the slightly unusual configuration of the original aircraft. Although it may look reminiscent of a rather corpulent Albatros from the side, the front view tells a very different story; the slab-sided fuselage tapers to a very thin attachment point for the lower wing. This means a very small glueing area on the kit and plenty of scope for the fuselage to sit out of true.
Construction Breakdown
The instructions are neatly drawn and, while they obviously don't match the standard of those produced by major manufacturers, they are clear enough to do the job, breaking the assembly down into 7 stages. Along with the instructions, there's a set of 1/48 scale plans and scrap views included with the kit. The plans are a little simplified and the thickness of some of the lines makes it hard to judge the exact dimensions, but the parts seem to match pretty well, except for the top wing which is a little short.
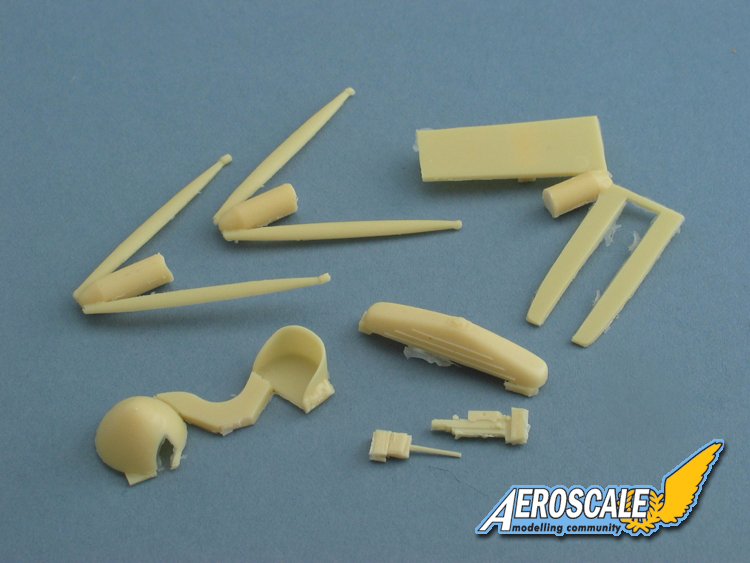
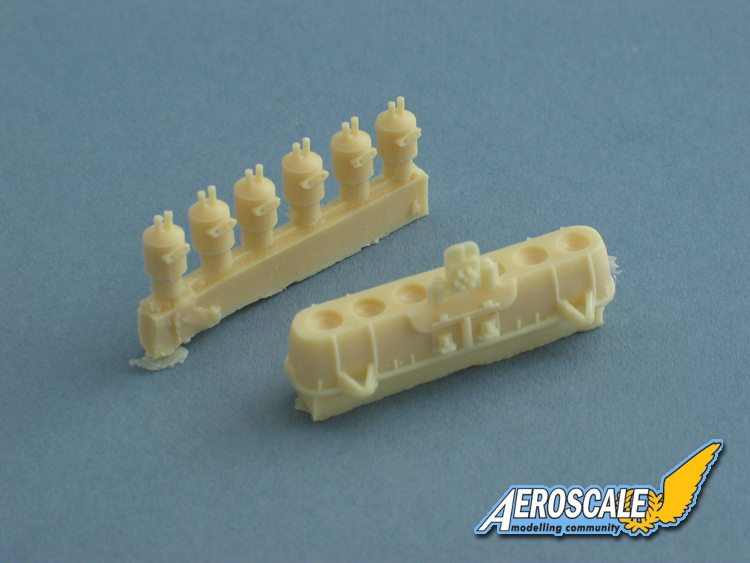
Stage 1 - Deals with the engine, which is split into a beautifully cast 2-part block and separate cylinders. You'll need to do a bit of scratch-building for the exhausts and plumbing, refering to the scrap views provided.
Stages 2 & 3 - The cockpit is quite straightforward - just a floor, seat, joystick and rudder pedals, plus a neat little instrument panel. With so few references available, I've no idea if the interior is accurate or just an educated guess on the part of the pattern-makers. There's no seat harness provided, but there are plenty of aftermarket sets available. The inside of the fuselage is marked for the position of the cockpit floor, but you're left to judge the position of the engine bearer yourself using the hole for the propeller shaft as a guide.
The slot for the horizontal tail must be opened up and a small casting block removed before the fuselage halves can be closed.
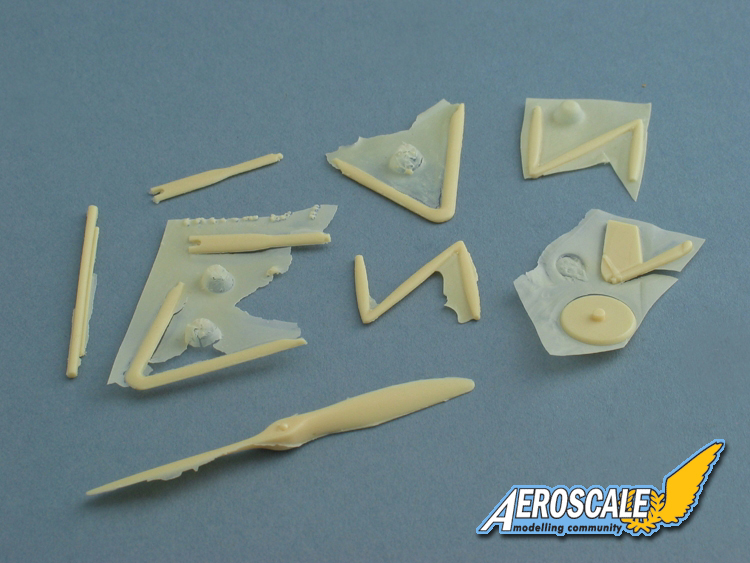
Stages 4 & 5 - The crucial point in the assembly, with the attachment of the wings. As noted above, a jig will definitely help keep everything square. It's important to note that, apart from the cabane struts, the locations of the struts aren't marked on the parts and, unlike the Aviatik, measurements aren't given in the instructions. Instead you'll need to refer to the set of plans provided and transfer the positions to the model. The struts themselves aren't strengthened, but the wings are very thin and light, so this may not be a problem.
This stage also includes the prominent radiator attached to the leading edge of the top wing and the propeller with its spinner and back-plate.
Stage 6 - Comments about the interplane struts hold true for the undercarriage. Here they form a tripod on each side so they could well be strong enough to support the model. The wheels are nicely cast and match the photos I've seen of the aircraft with canvas covers.
Stage 7 - Consists of a tiny rigging diagram. In itself, the diagram is pretty hopeless, but using it in conjunction with the scale plans you can figure out what's needed.
Painting and decals
There are no colour details for the interior, but a 4-view diagram illustrates the camouflage scheme of brown and green mottle over beige (doped linen) background. To be honest, the limitations in how the diagram is printed makes it a bit hard to tell the brown and green apart, but the full colour boxtop helps and one of the photos of the aircraft on the link below gives a good view of the port side.
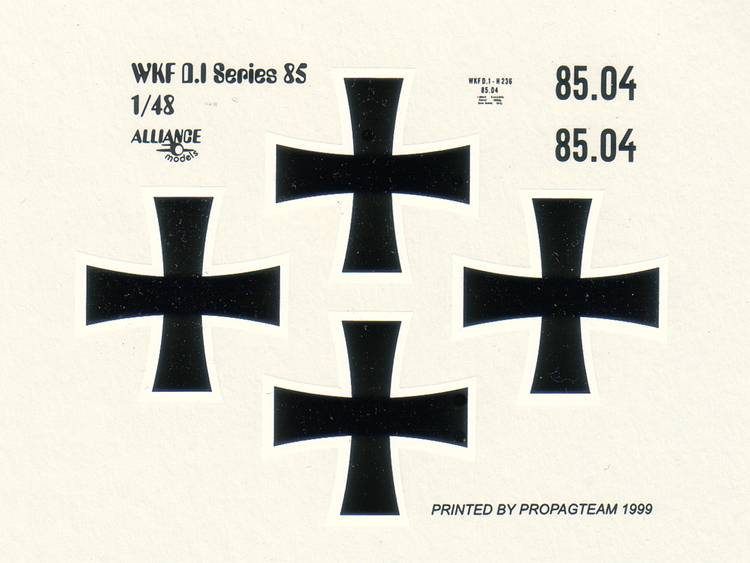
The decals are printed by Propagteam and are thin, glossy and in good register. The sheet is very simple with just crosses for the wings, a pair of fuselage serials and a stencil marking.
Conclusion
The WKF D.1 is another excellent little kit from Alliance Models and should appeal to WW1 enthusiasts looking for an unusual subject. It's not suitable for beginners, as you'll need some basic scratch-building skills to make some of the details, but experienced modellers should really enjoy the challenge it offers. The finished model is bound to attract attention and be a source of fun as people try to figure out what on earth it is!
On-line Reference
http://air.wz.cz/80-wkf/80.htm#80-06
Please remember, when contacting retailers or manufacturers, to mention that you saw their products highlighted here - on
AEROSCALE.


Comments