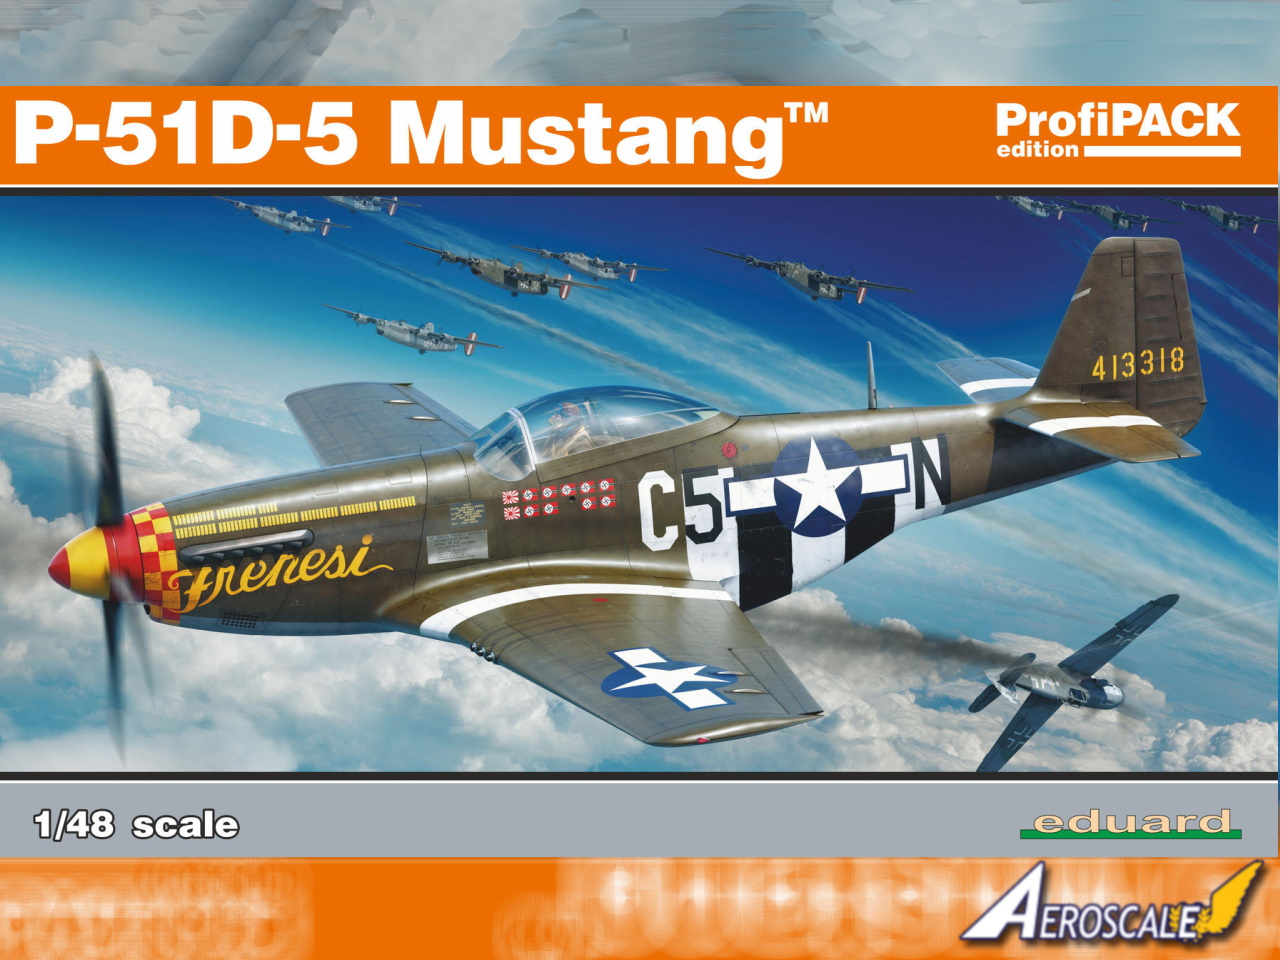
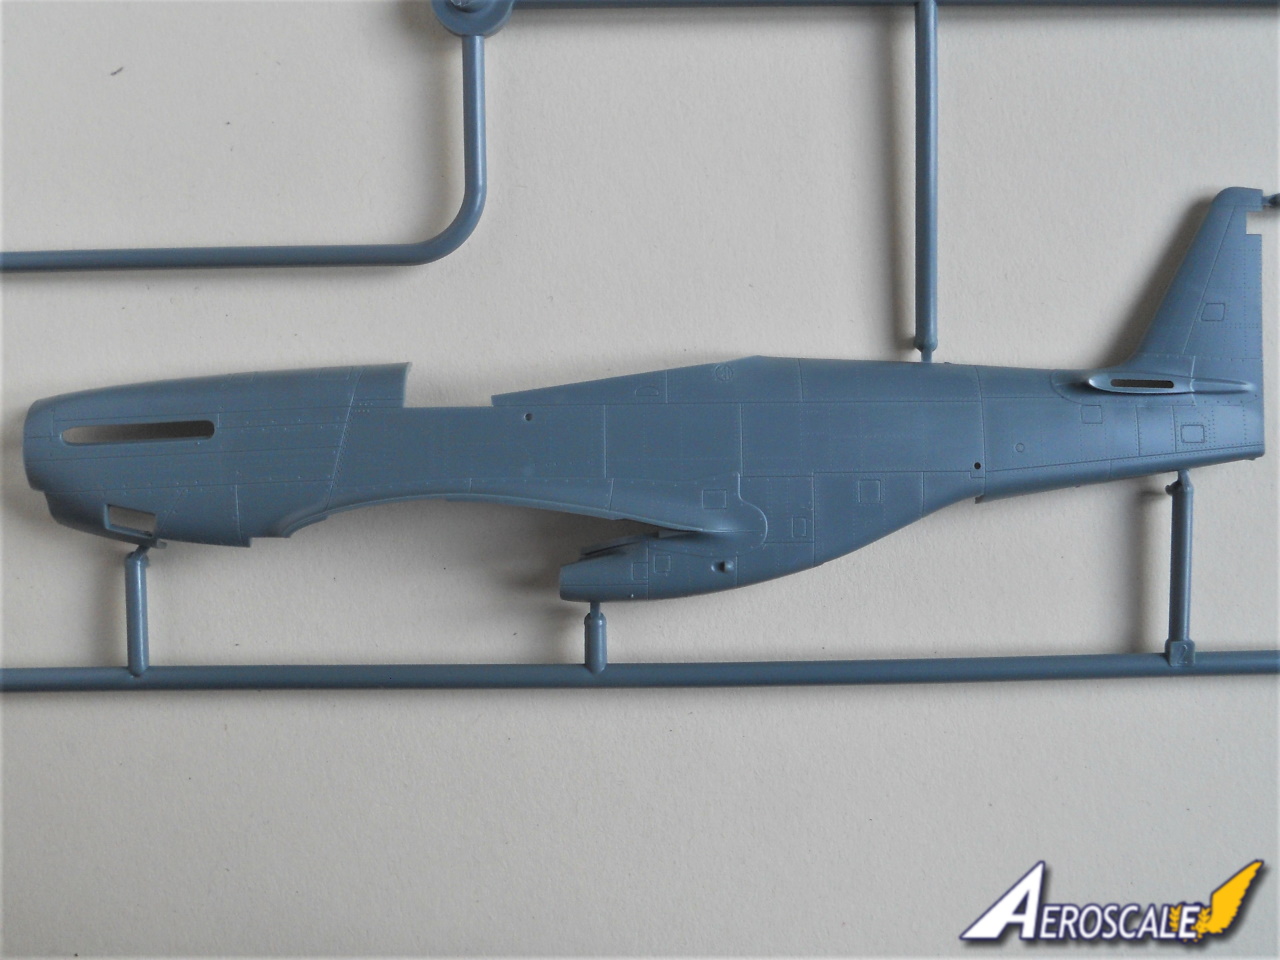
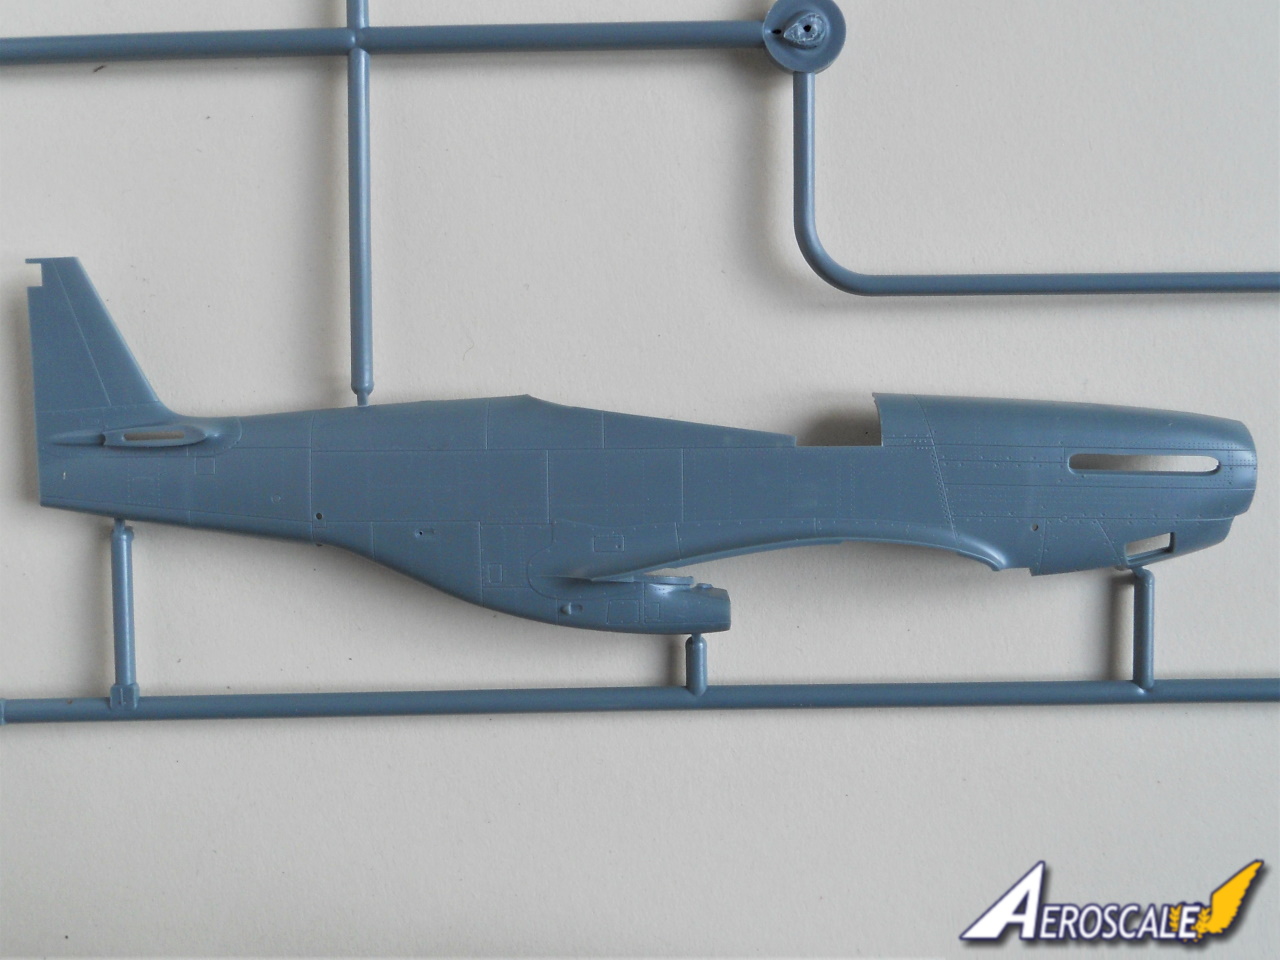
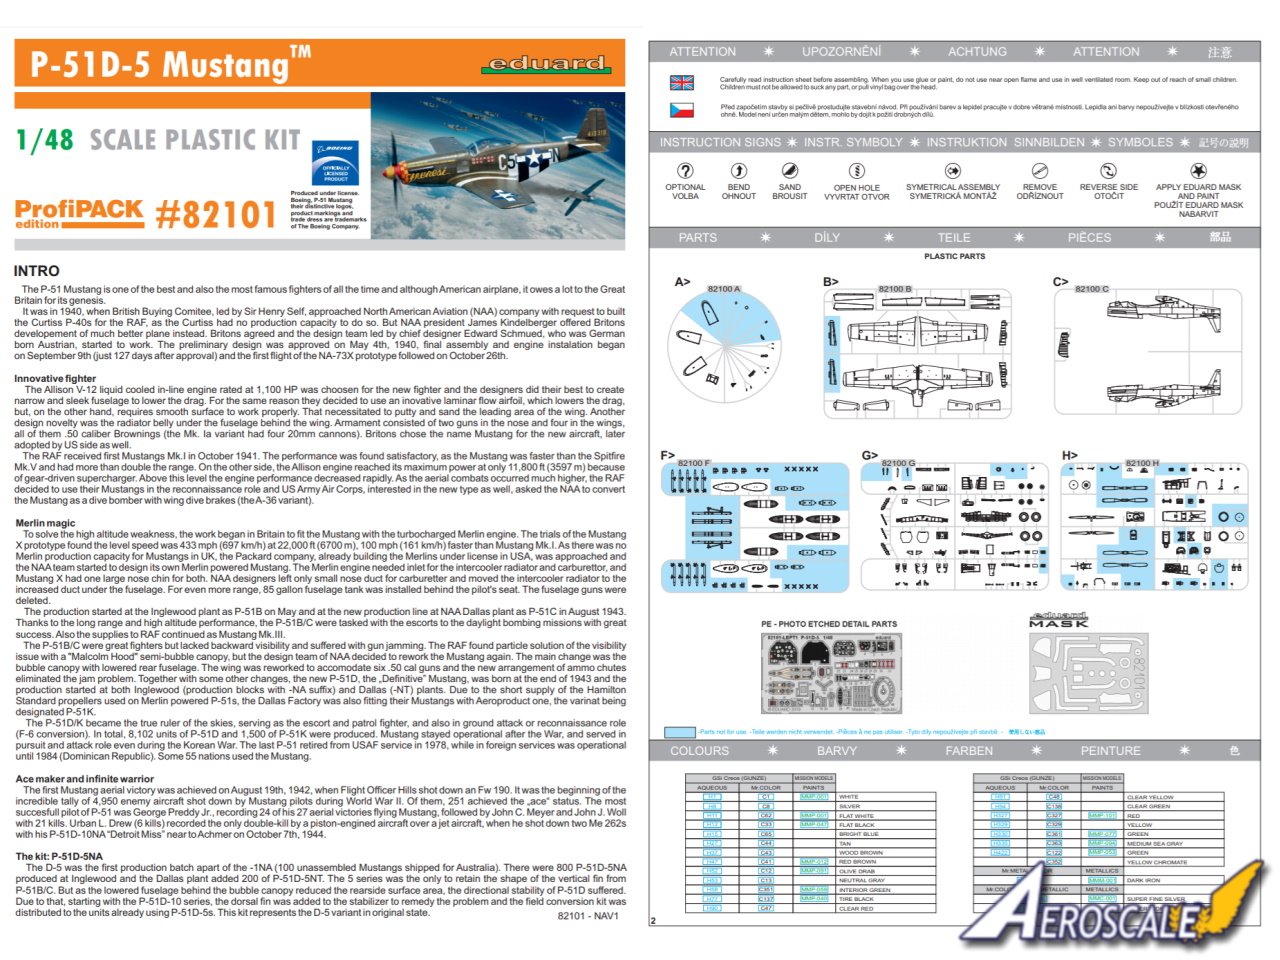
P-51D-5NA was the first production batch apart from the -1NA (100 unassembled Mustangs shipped for Australia). There were 800 P-51D-5NA produced at Inglewood and the Dallas plant added 200 of P-51D-5NT. The introduction of the bubble canopy and the continued use of the P-51B/C vertical stabiliser was not straightforward. The change to the shape of the fuselage behind the newly installed bubble canopy reduced the surface area to the rear, which affected the directional stability of P-51D-5. Tests were carried out into the instability and it was found by installing a dorsal fin/fillet in front of the vertical stabiliser the instability in this area was cured. The modification was adopted on the production line starting with the P-51D-10 series and field conversion kits were distributed to units already using P-51D-5s. This kit represents the D-5 variant without the dorsal fin.
The Kit
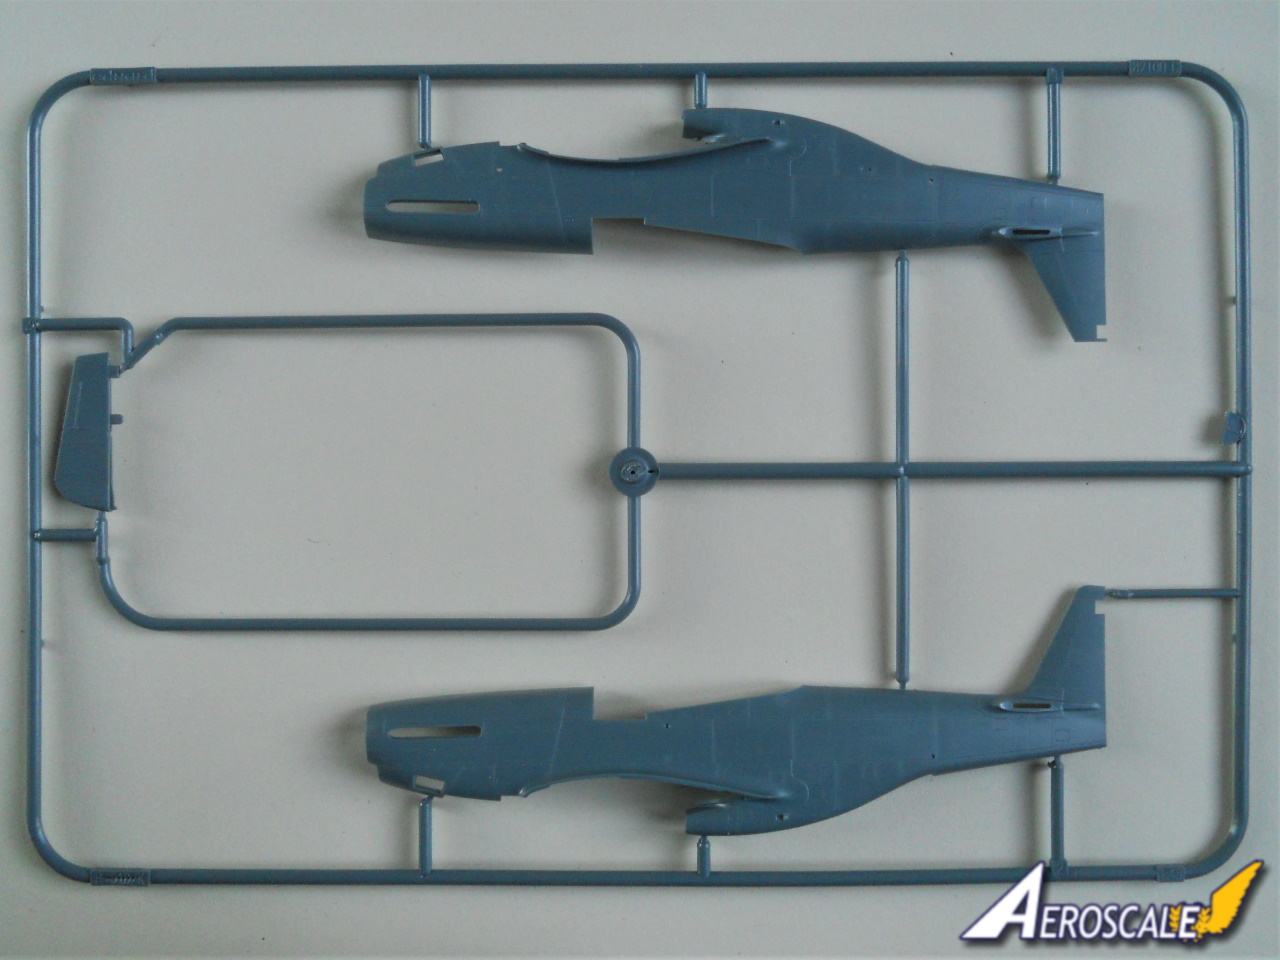
Eduard has taken the laudable step to produce a fuselage specifically for the dorsal less tail of the early P-51D-5 Mustangs. A move that will please modellers and further cements Eduards reputation for their uncompromising philosophy to produce great kits. Overall the surface detail is exquisite with a mix of incredibly fine recessed panel lines and rivet detail. The fabric covered control surfaces on the tail feature finely raised tape.
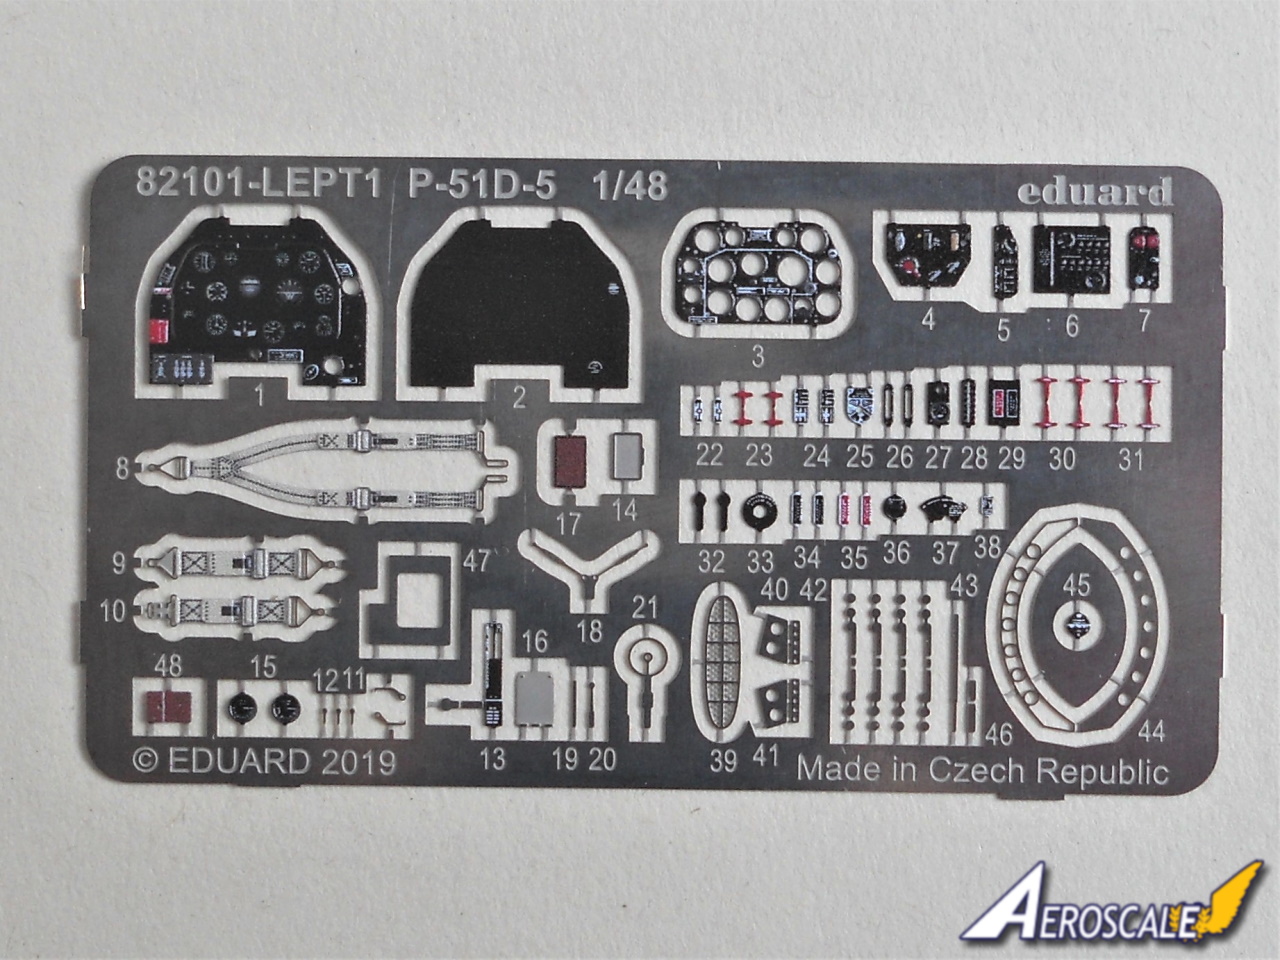
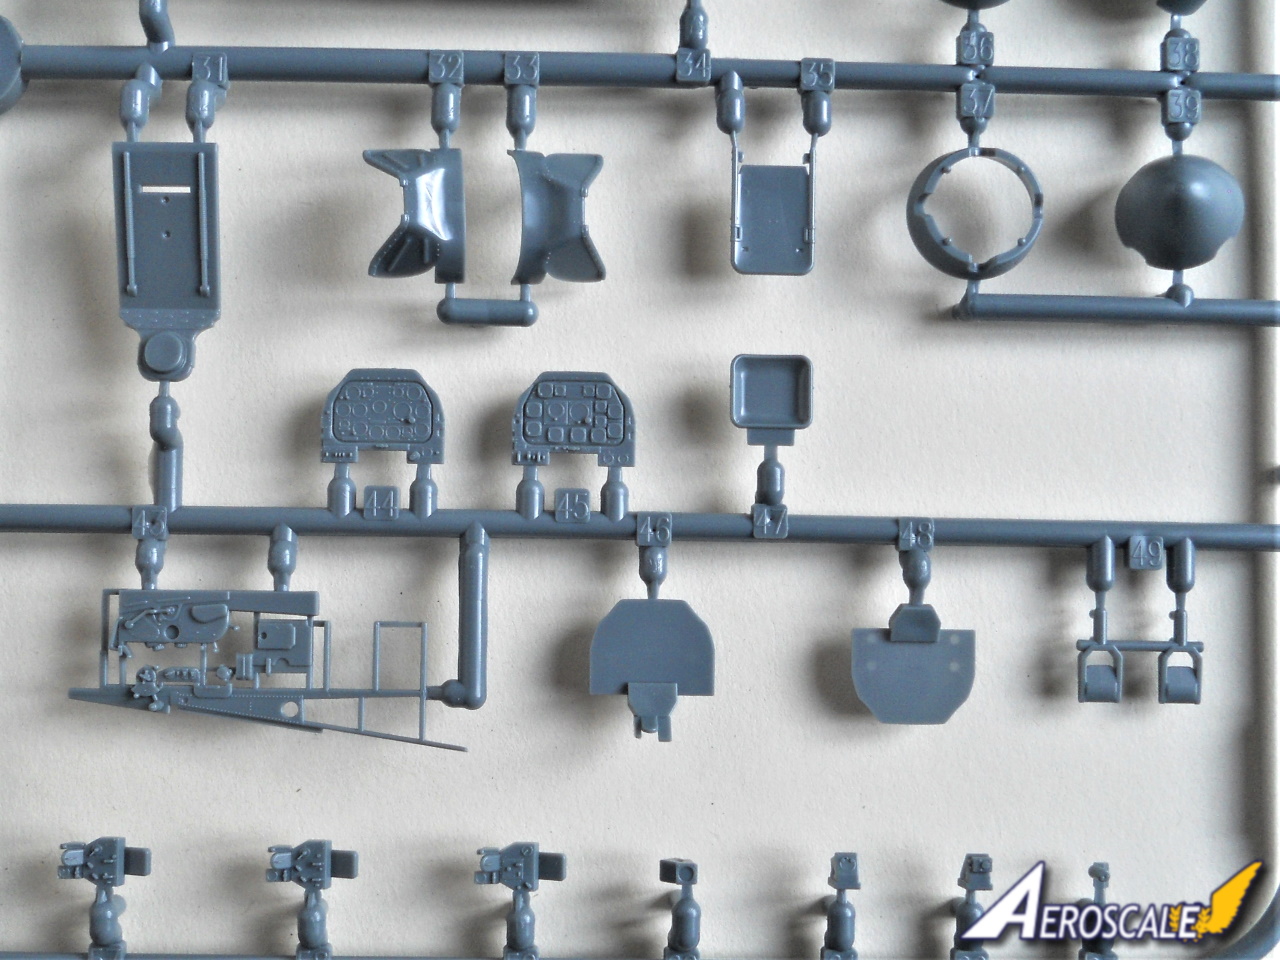
The cockpit has an impressive amount of plastic detail straight out of the box and of course as this is a ProfiPACK Edition there are pre-coloured photo etched parts to add including the instrument panel. Its worth noting that the clear instrument faces have a slight convex curve. There are also decals to detail the instruments if you want to go that route. I counted around thirty plastic parts and thirty-five photo etched parts as well as a clear part for the gun sight. There are two detail packed frames to attach to the sidewall. Then there is the cockpit floorc control stick, pilots seat and all the various electrical boxes behind the seat. The area behind the seat is particularly well detailed. The instrument panel, coaming around the gun sight, the gun sight itself and rudder pedals form a unit that can be attached after the fuselage halves are joined. There is a pre-coloured seat harness included with lap straps.
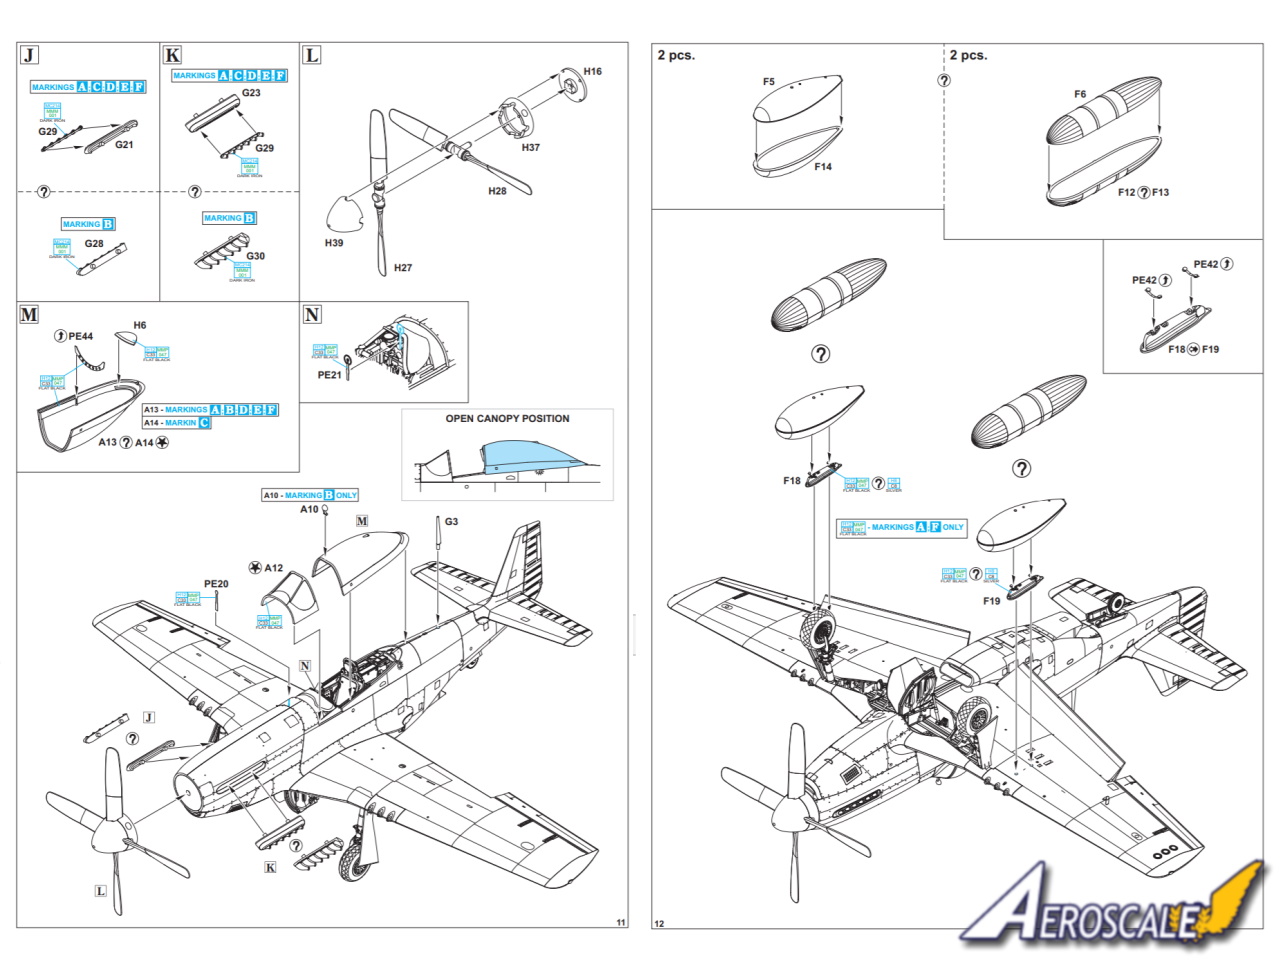
The canopy and windscreen are separate and the parts are crystal clear with little distortion. There is a PE and a plastic part to add carefully to the canopy. There are masks included for both the windscreen and canopy, while there is a placement guide for the masks on the canopy there is oddly not one for the windscreen. Its not difficult to work out which mask goes where because of the shapes.
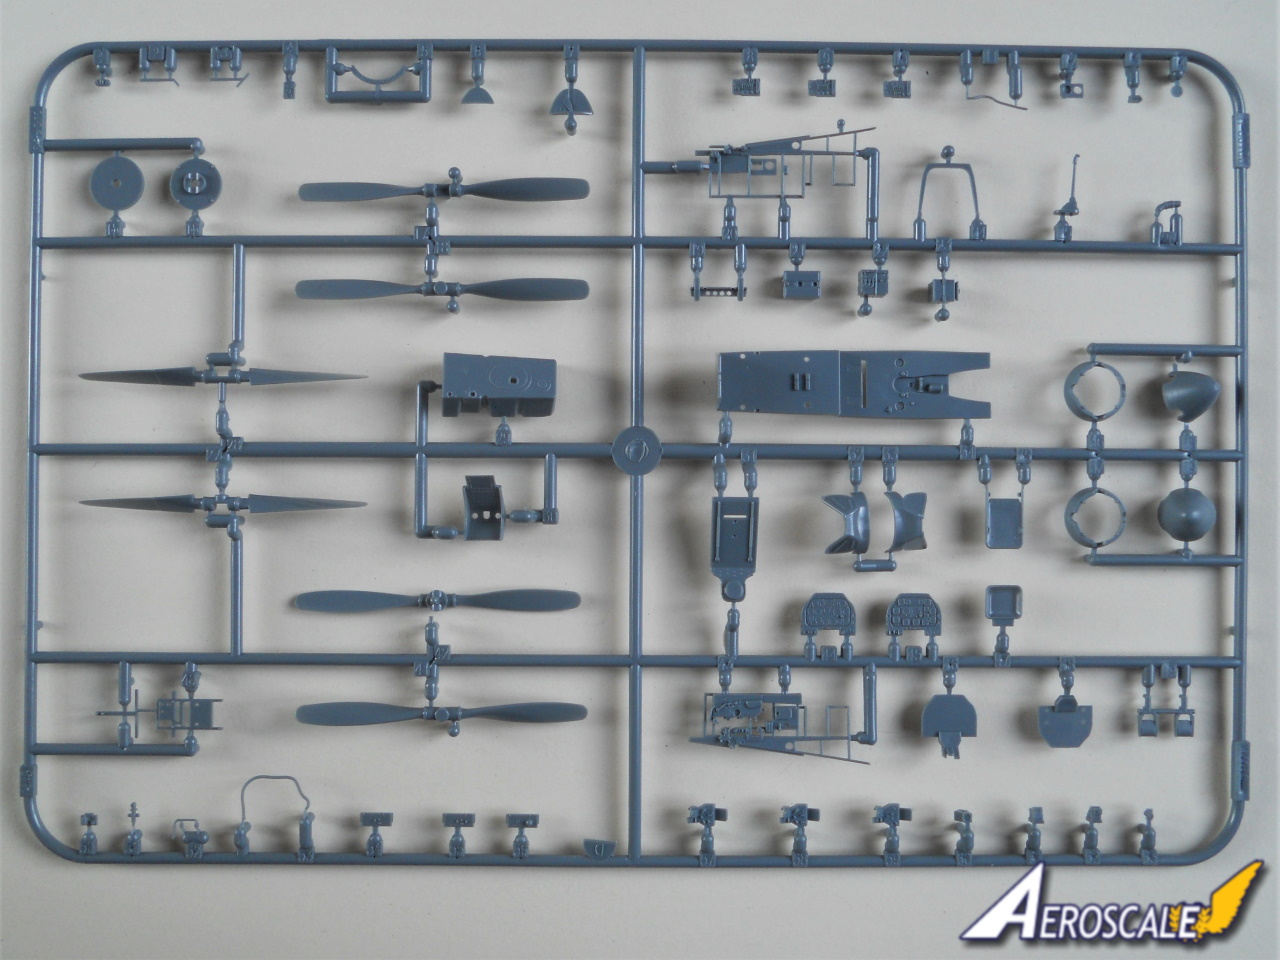
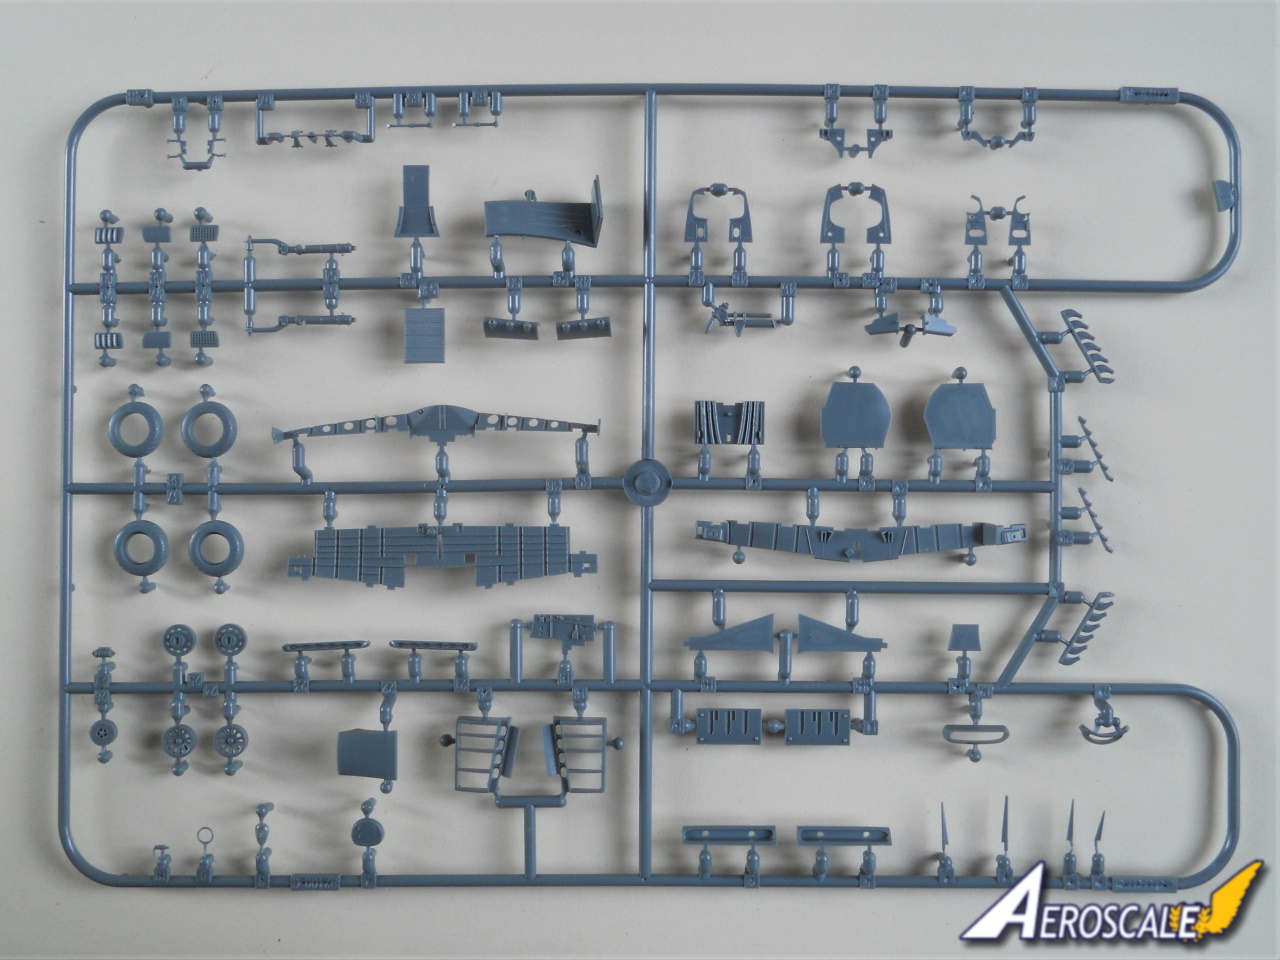
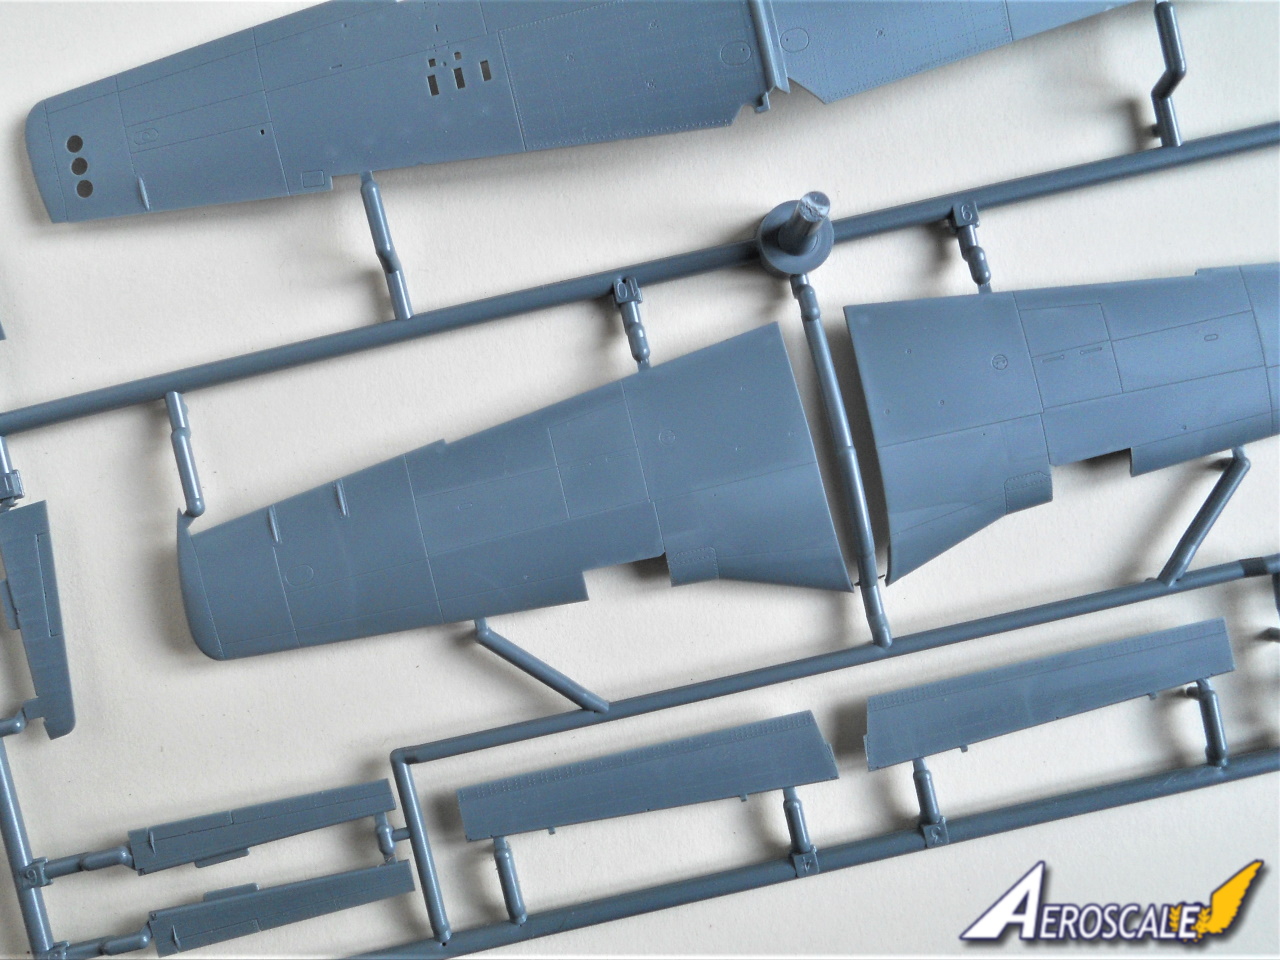
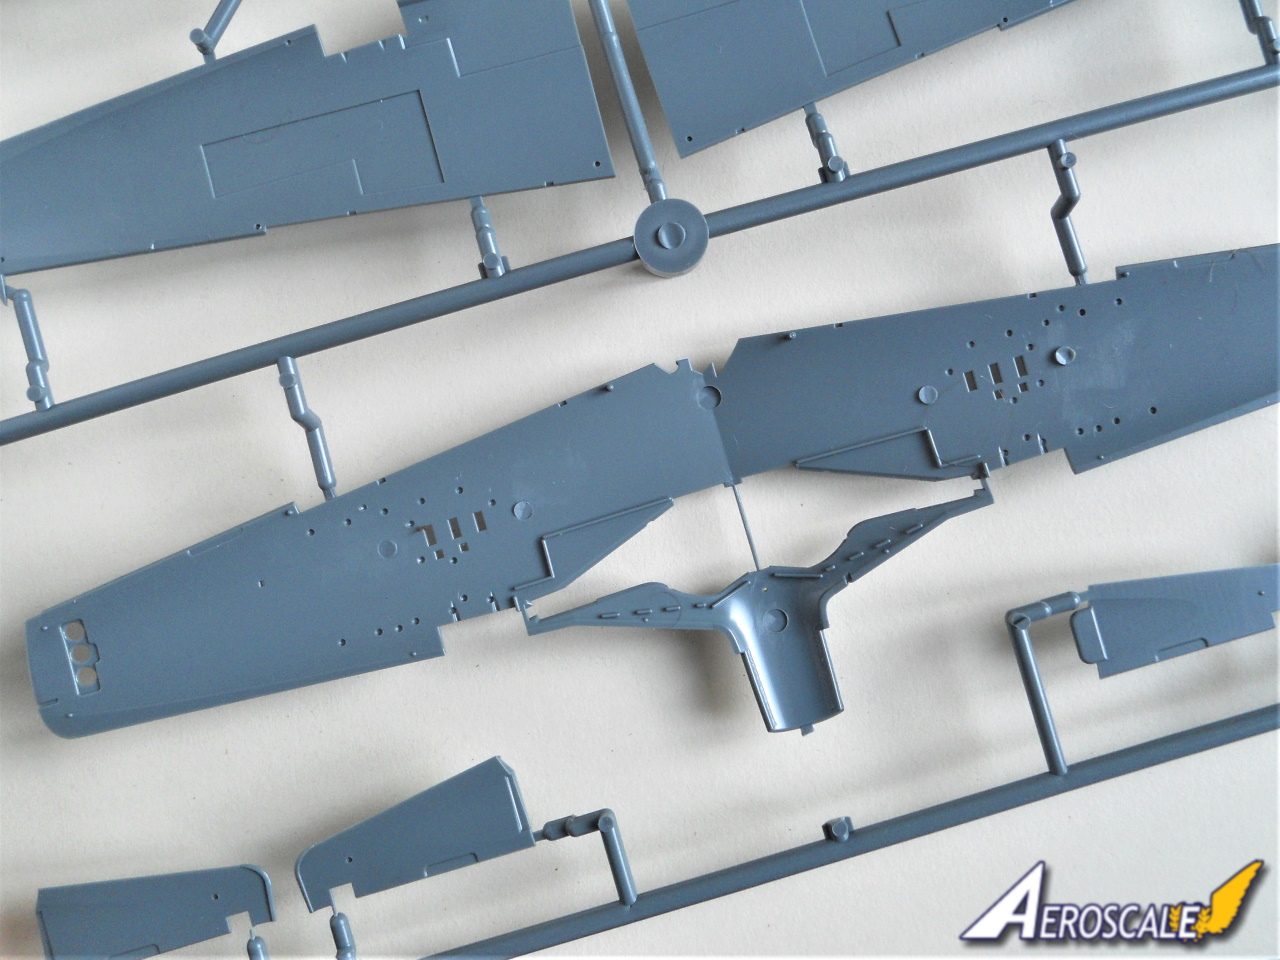
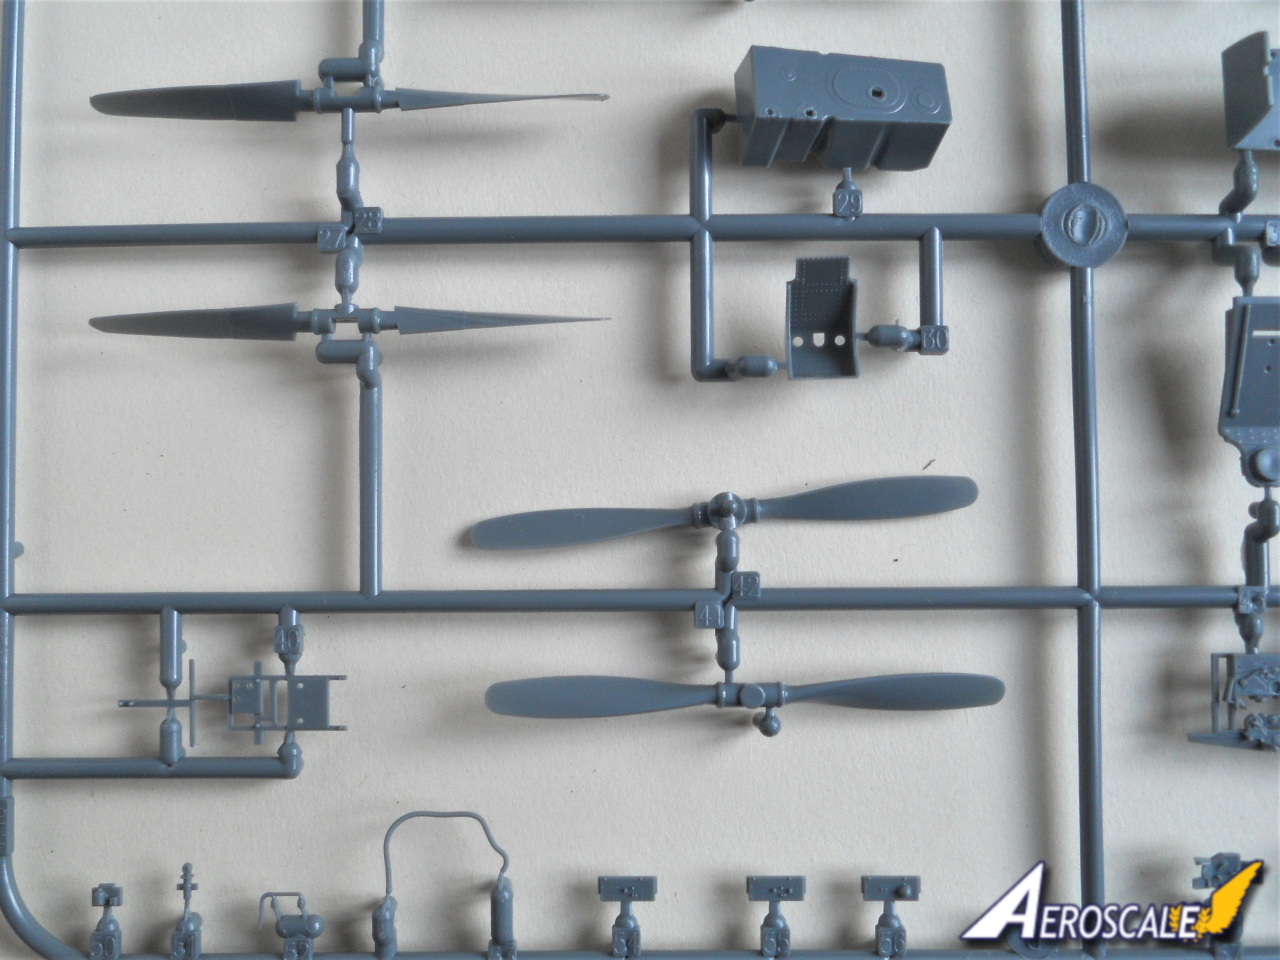
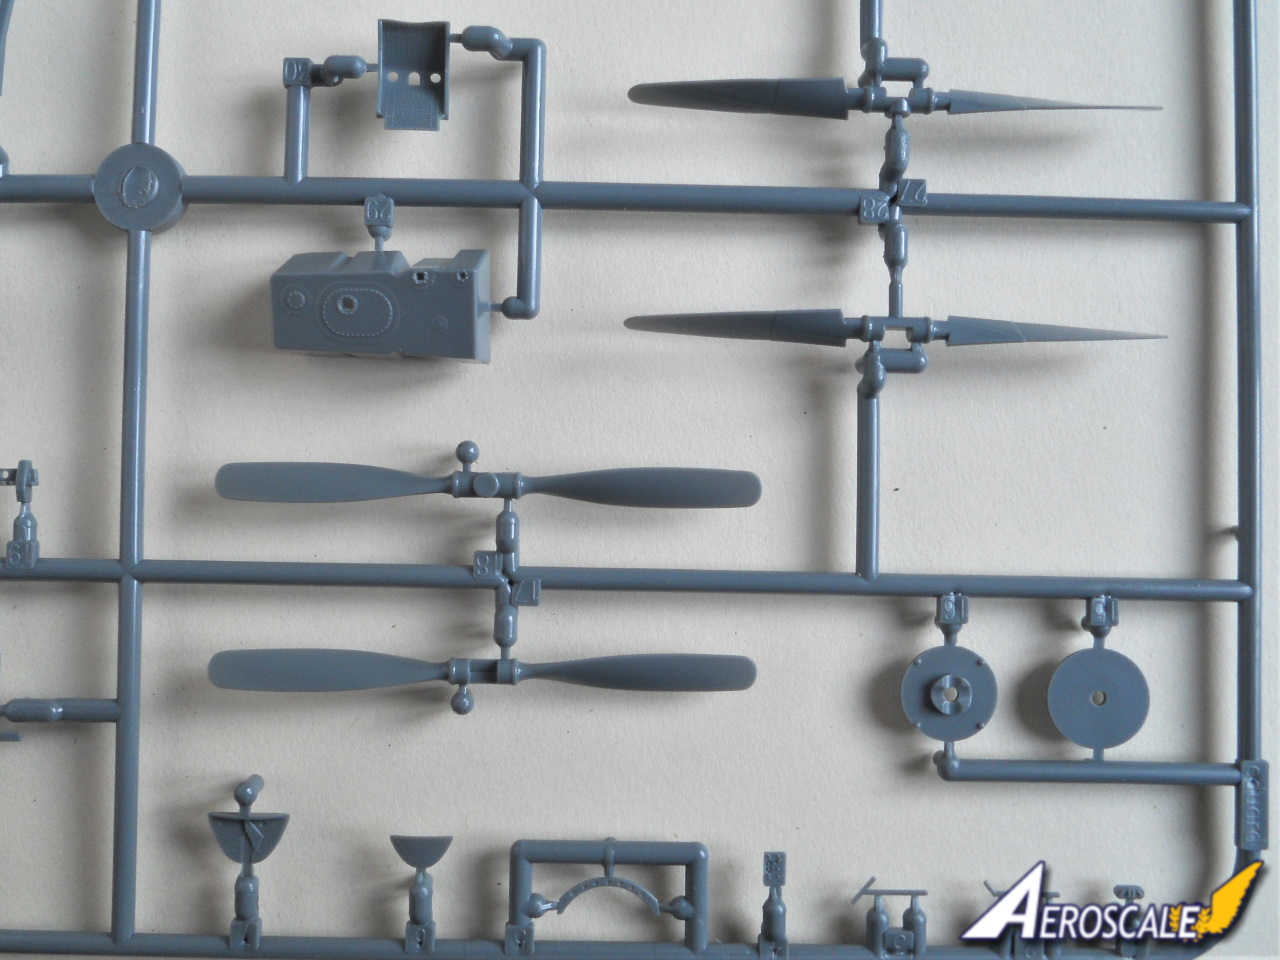
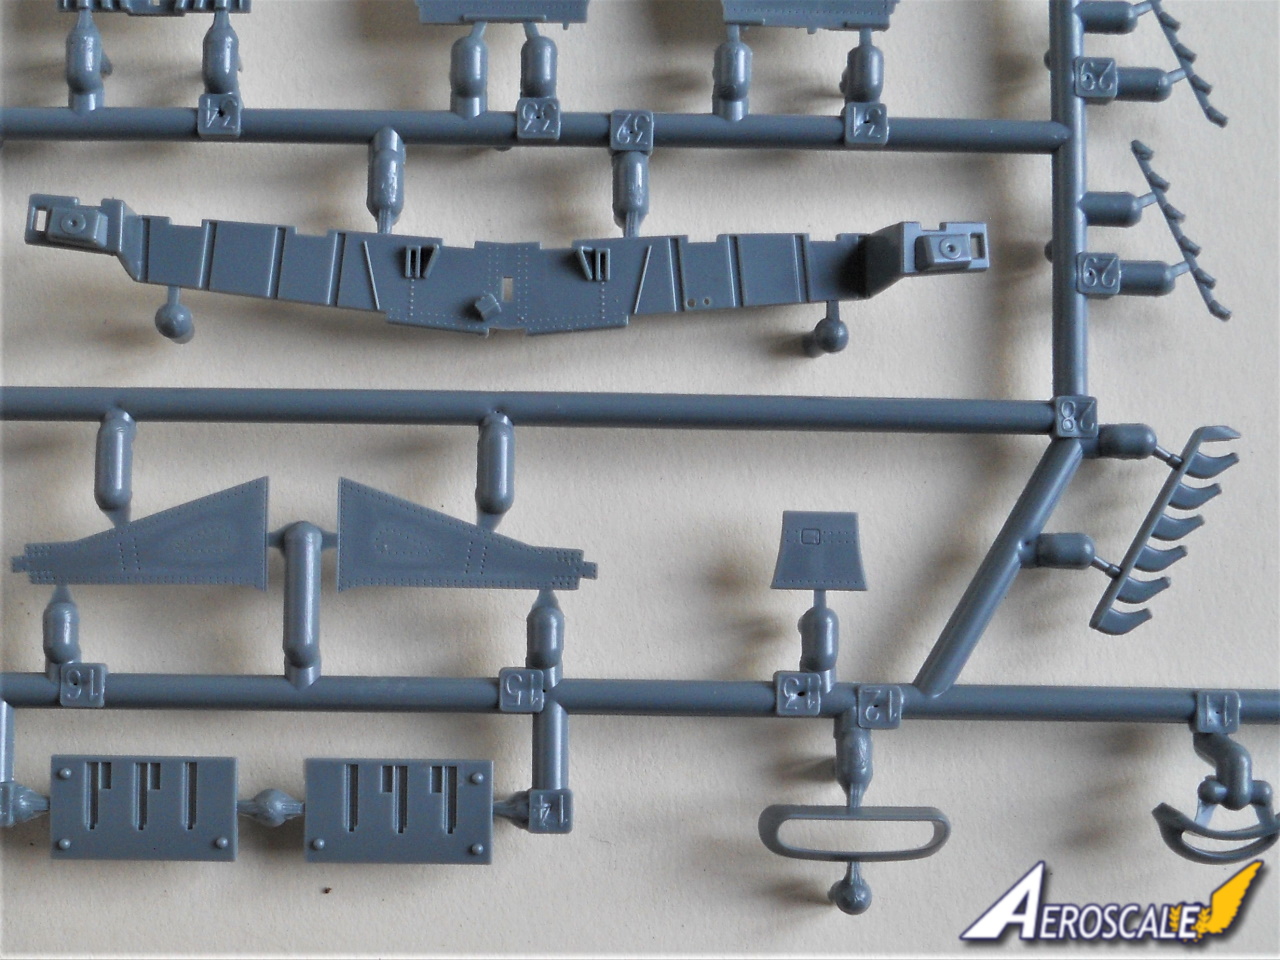
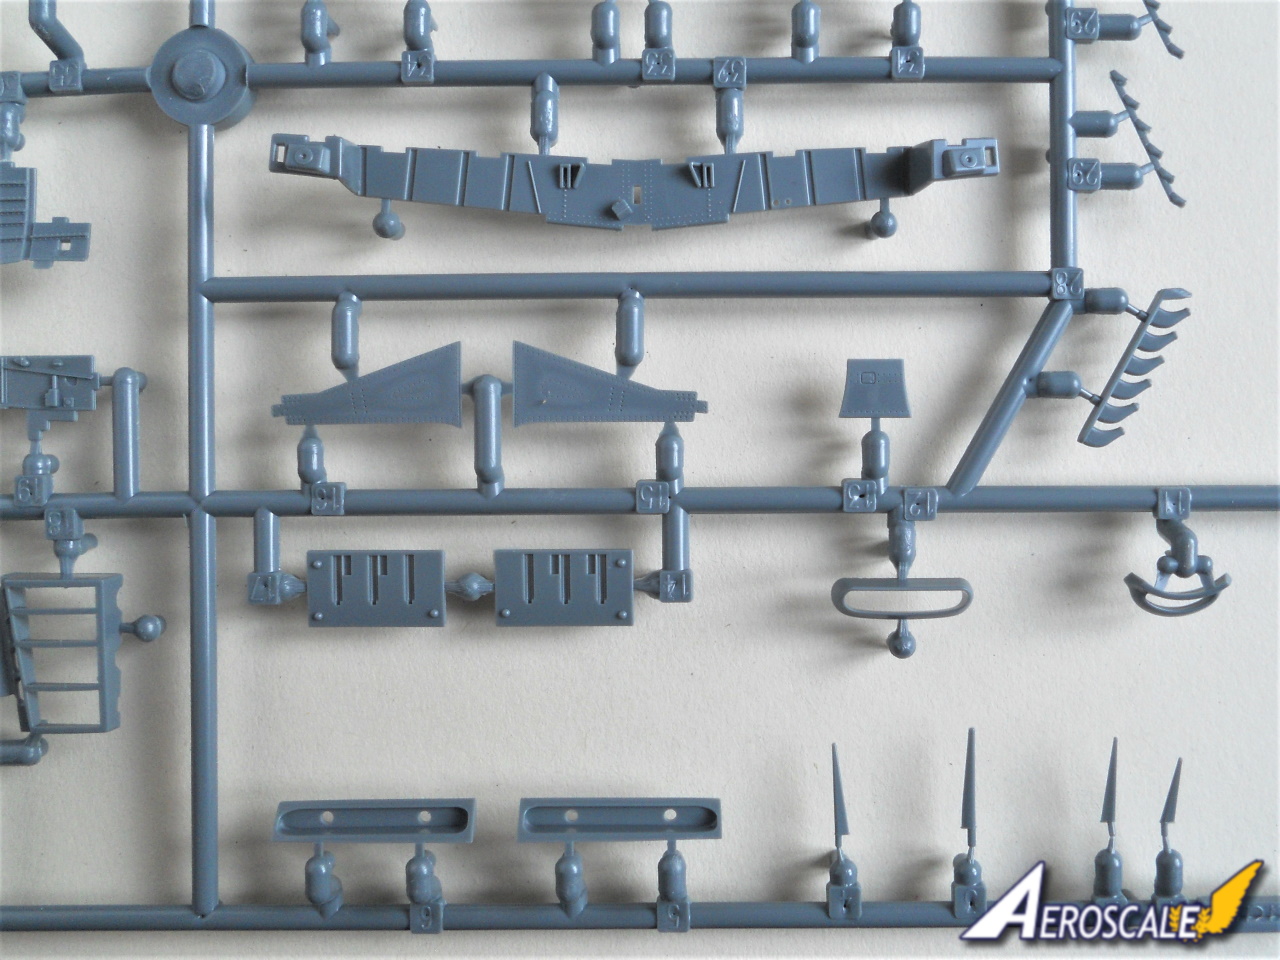
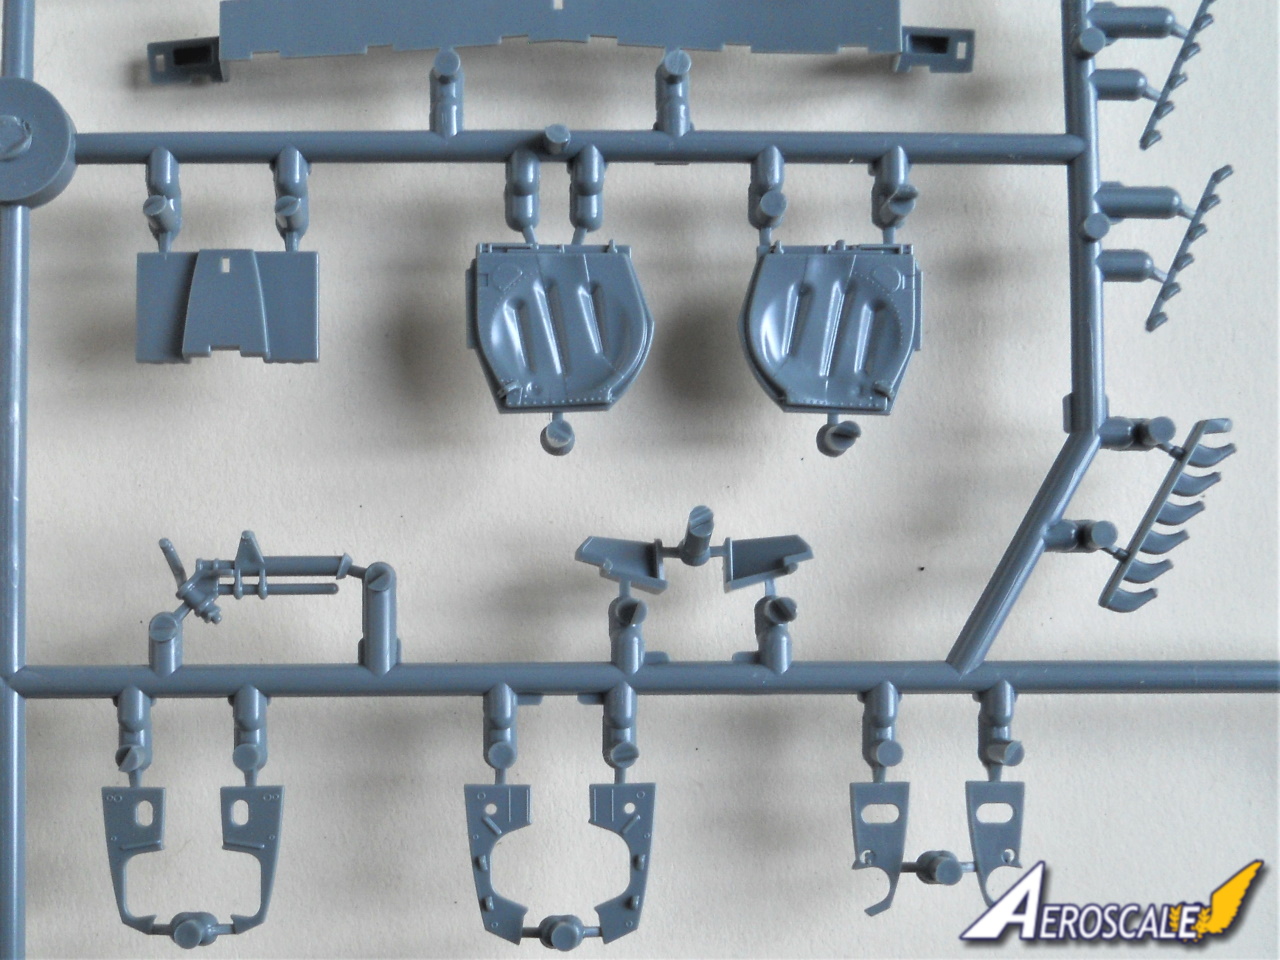
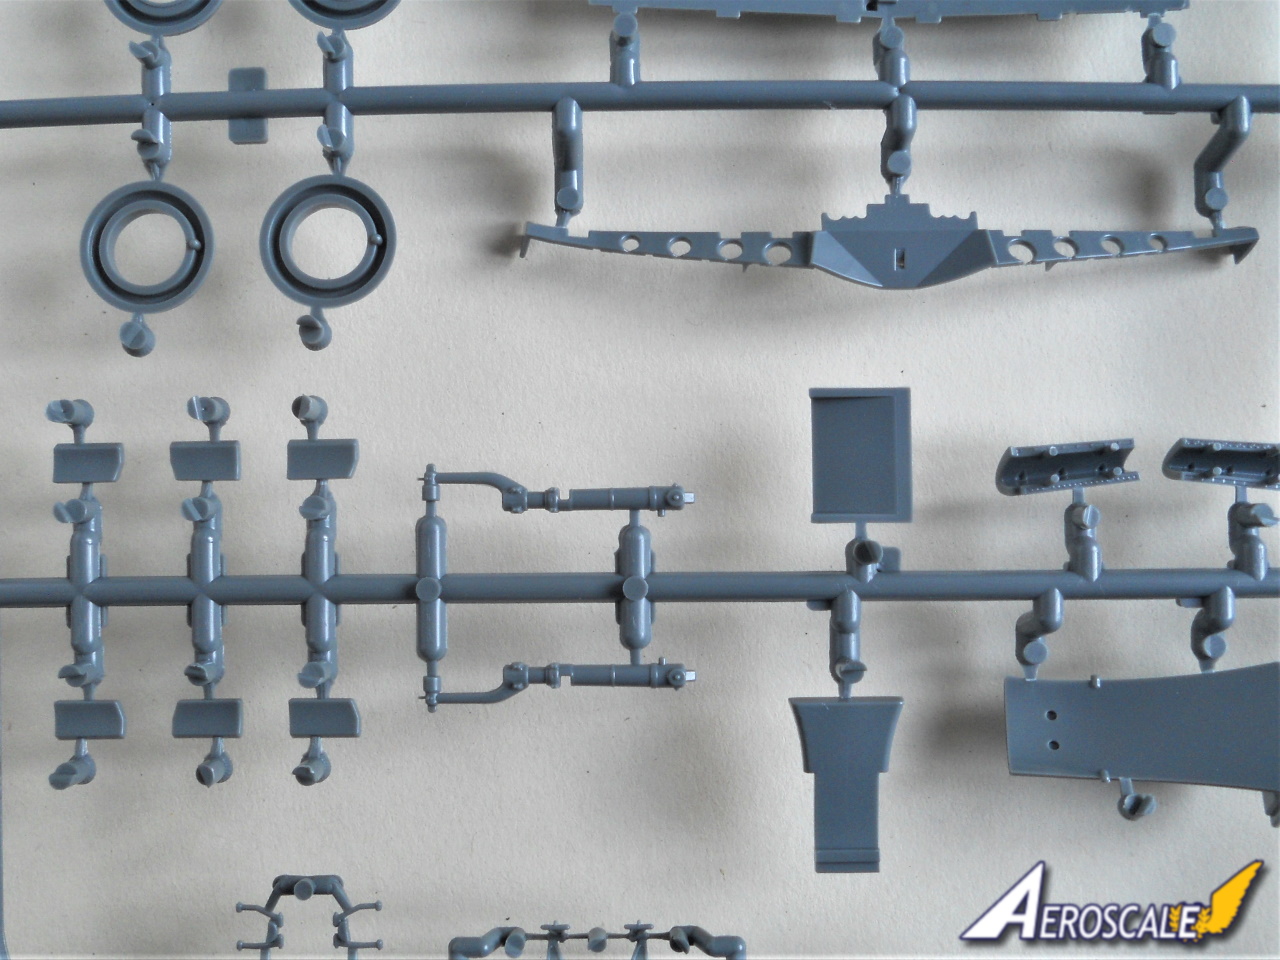
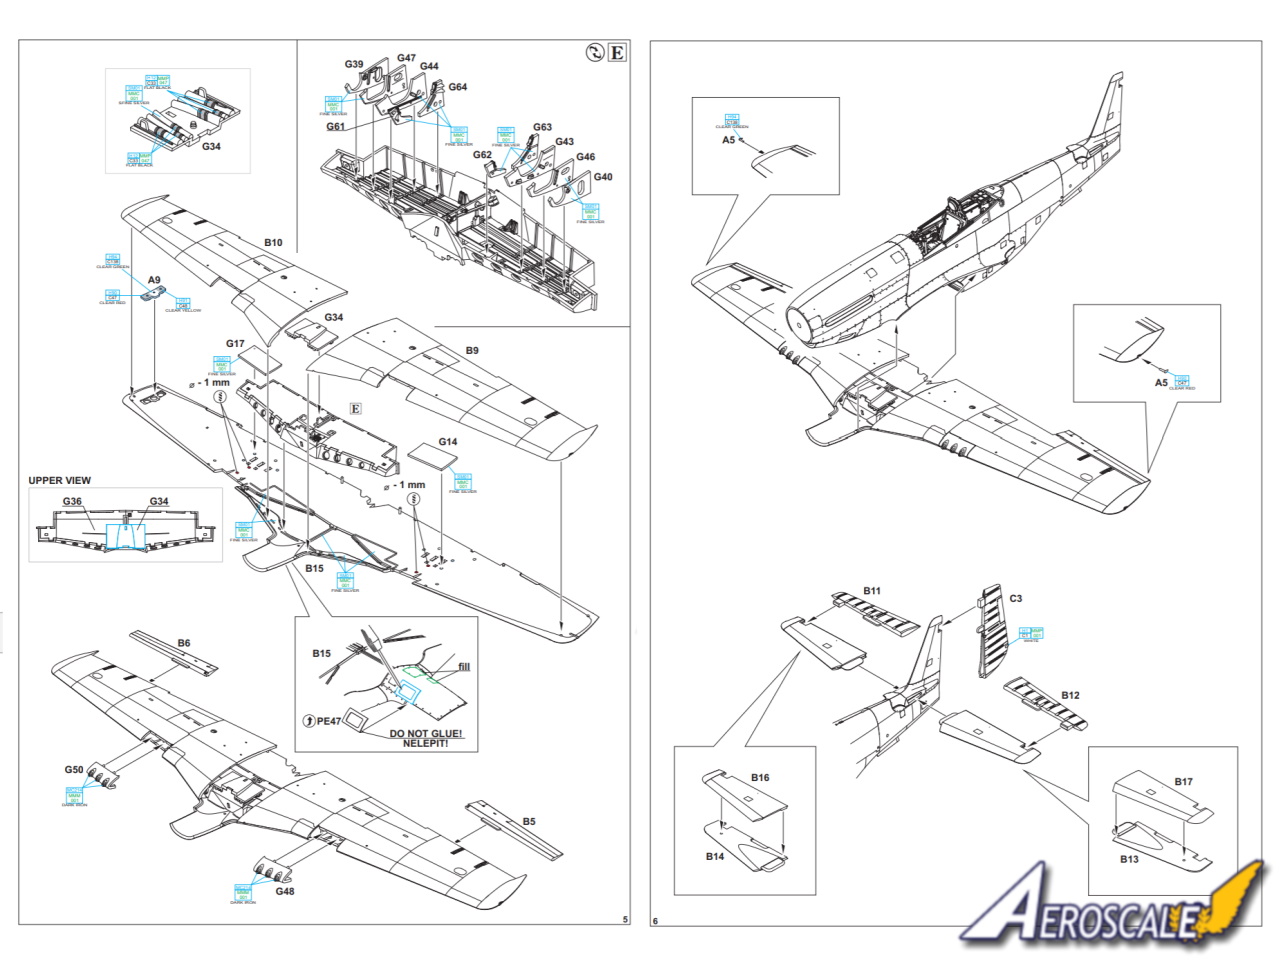
The fuselage is modelled conventionally in left and right halves with no cut outs for revealing bays, which simplifies the build enormously. Internally the raised lip for the cockpit and radiator housing and the recessed area for the tail wheel bay detail provide positive location points for the internal detail. On the nose there is a small gap where the perforated carburettor air vents are located and there are three styles of cover. The release features three styles of airscrew including Hamilton Standard both cuffed and uncuffed as well as the Aeroproducts prop. There are two different spinners for the two different brands of airscrew. The propeller back plate is a separate part as is the lip of the air intake for the carburettor. There are two different styles of exhaust, but the depth of the holes at the end of each pipe is inconsistent and they would benefit from some careful reaming out. The distinctive air intake and vent feature parts to detail the interior and the lip is one piece. There are two impressively detailed parts to form the internal space in the bay where the tail wheel retracts. The tail wheel doors are moulded onto these in the open position.
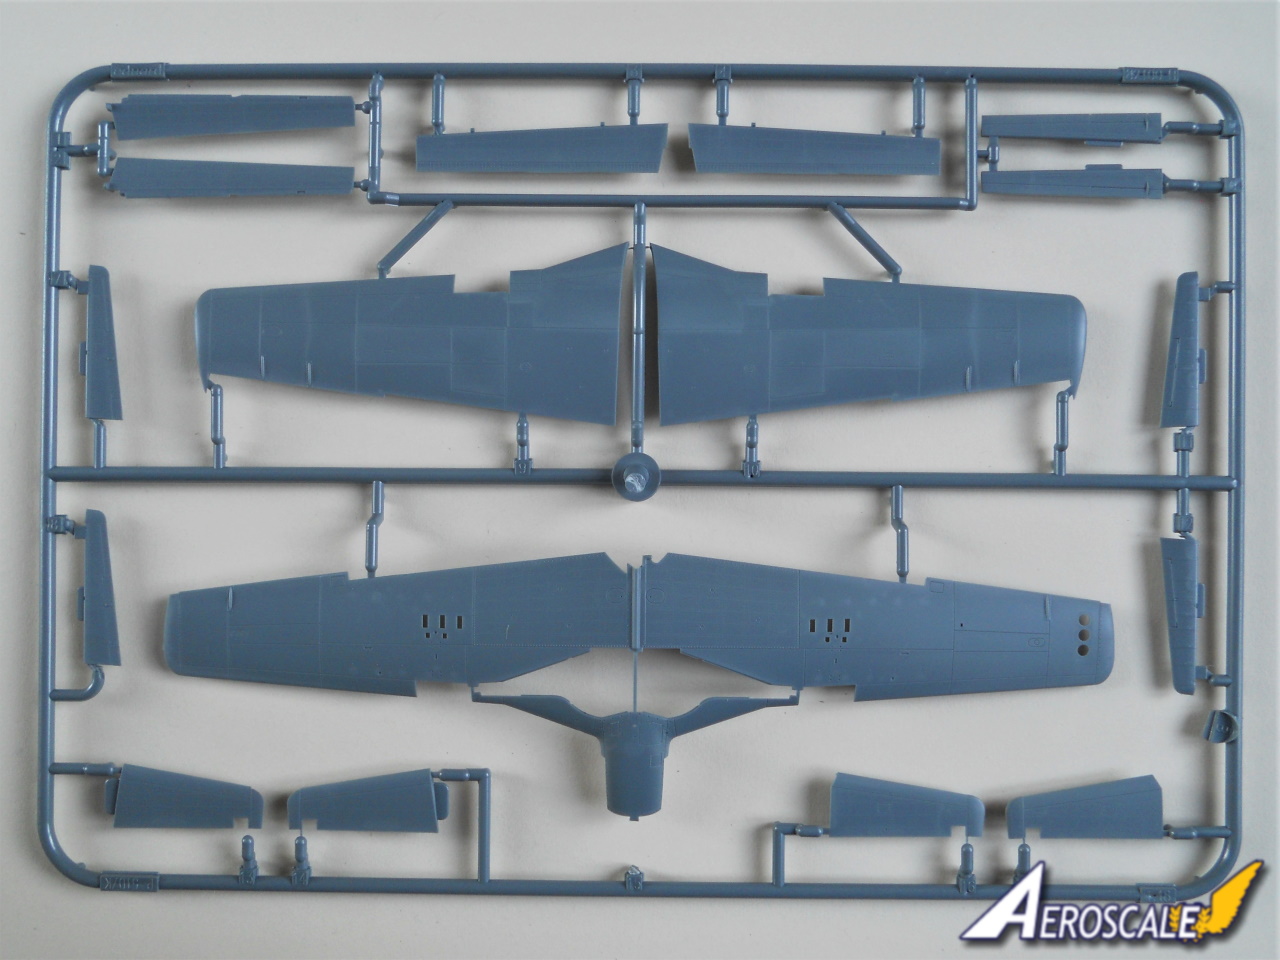
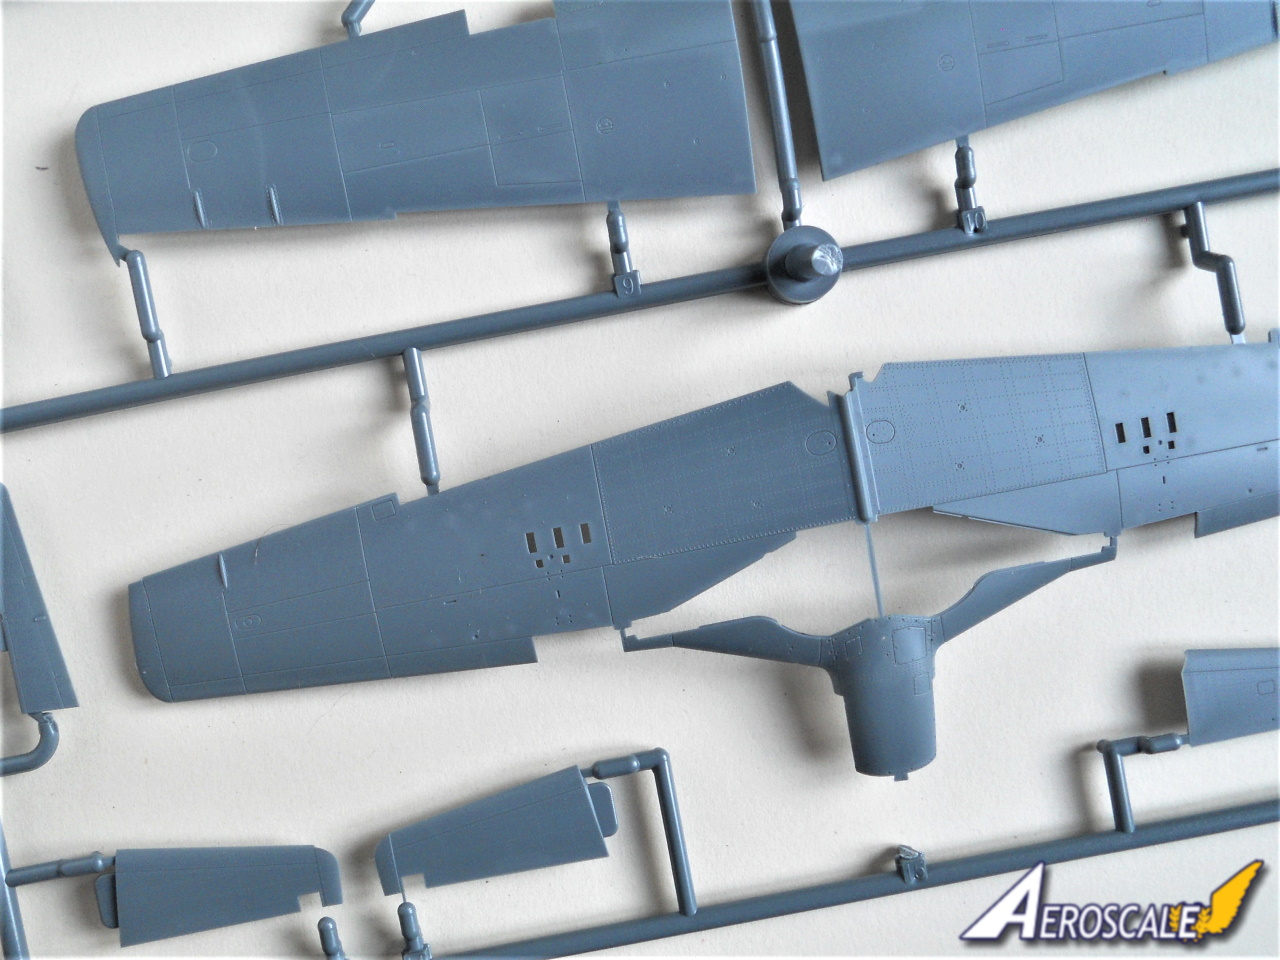
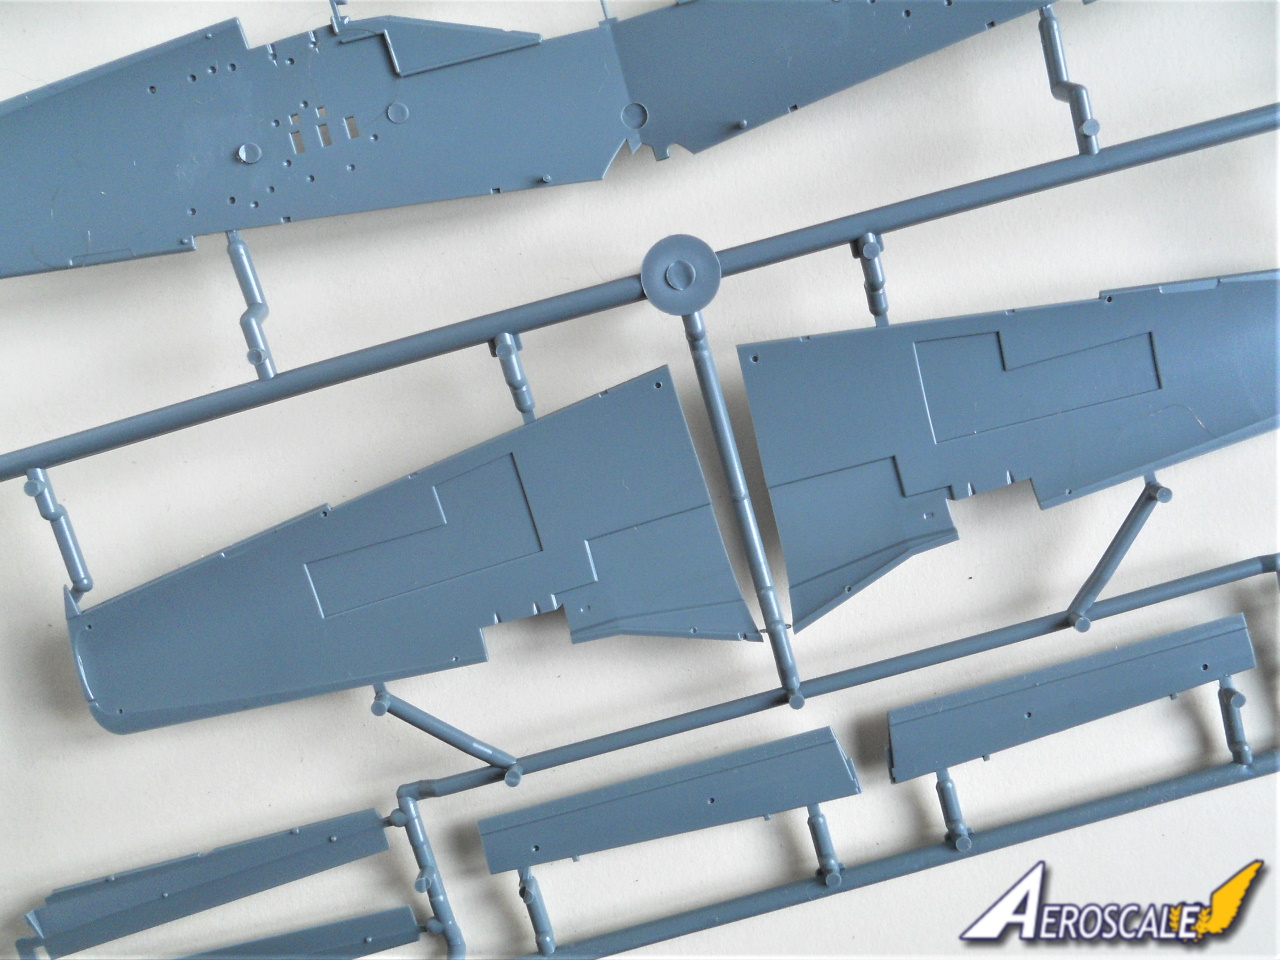
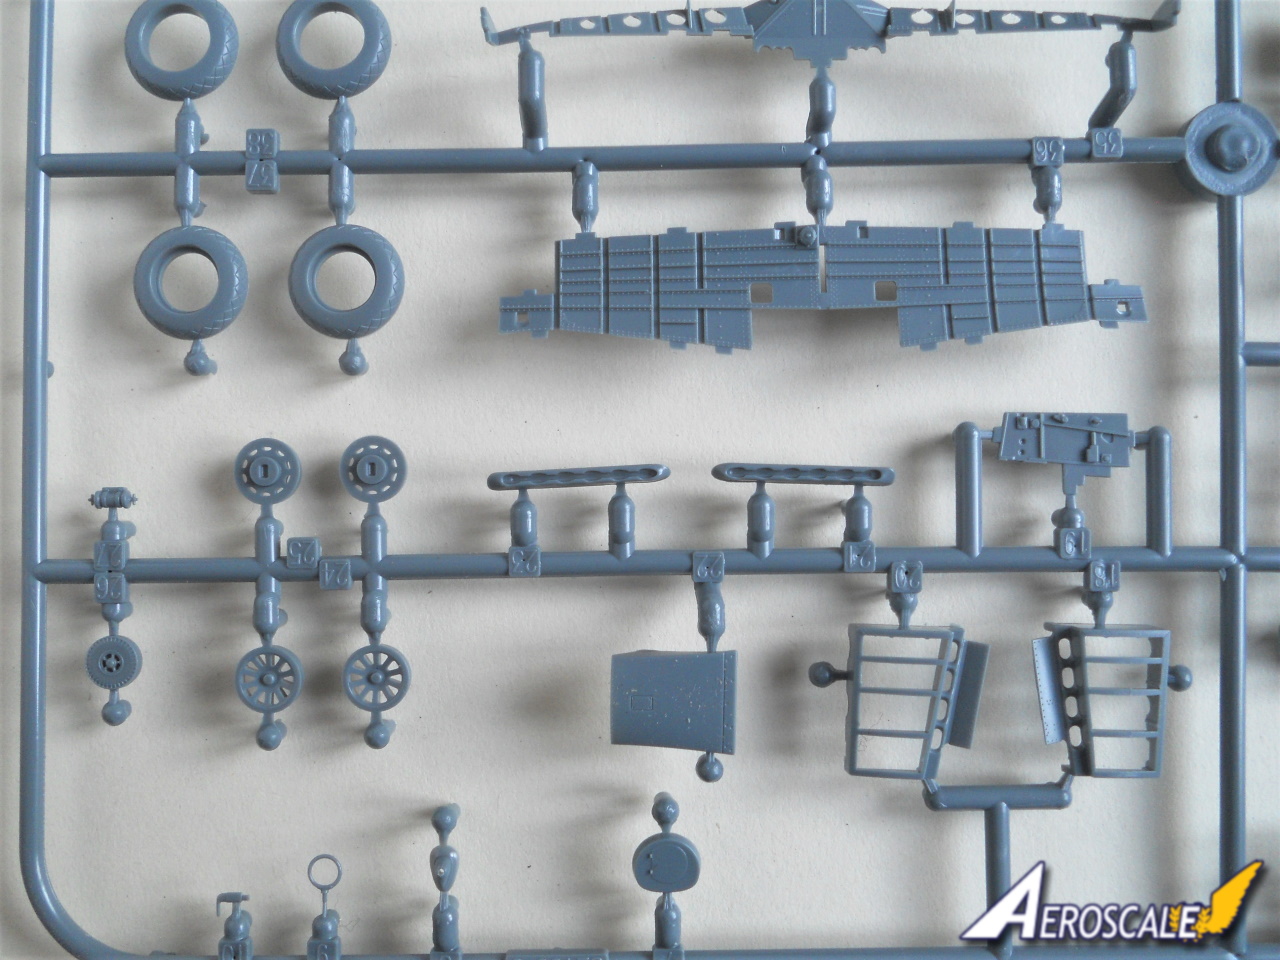
The wings feature a full span lower wing and the flaps and ailerons are separate. Unusually Eduard has decided to have the wing leading edge around the guns as separate parts. The gun barrels are included in the separate section of the leading edge. The look of the gun barrels looks odd to the uneducated eye, but a quick look at reference photos quickly suggest Eduard has captured their look very well. The panel lines around the wing root/belly area requires modification. Panel lines need to be removed and additional ones need to be scribed. There is a photo etched template included to help you with the scribing. There are around fifteen plastic parts that make up what will be a incredibly detailed main wheel bay. The three identification lights under the starboard wing are depicted as a clear plastic part. There are even three paint masks for the individual light covers. There are numerous partial holes in the lower wing for the fitting of rocket projectiles, but these are not applicable to this release. The horizontal stabilers are each made from two pieces. While all the control surfaces are separate single piece items.
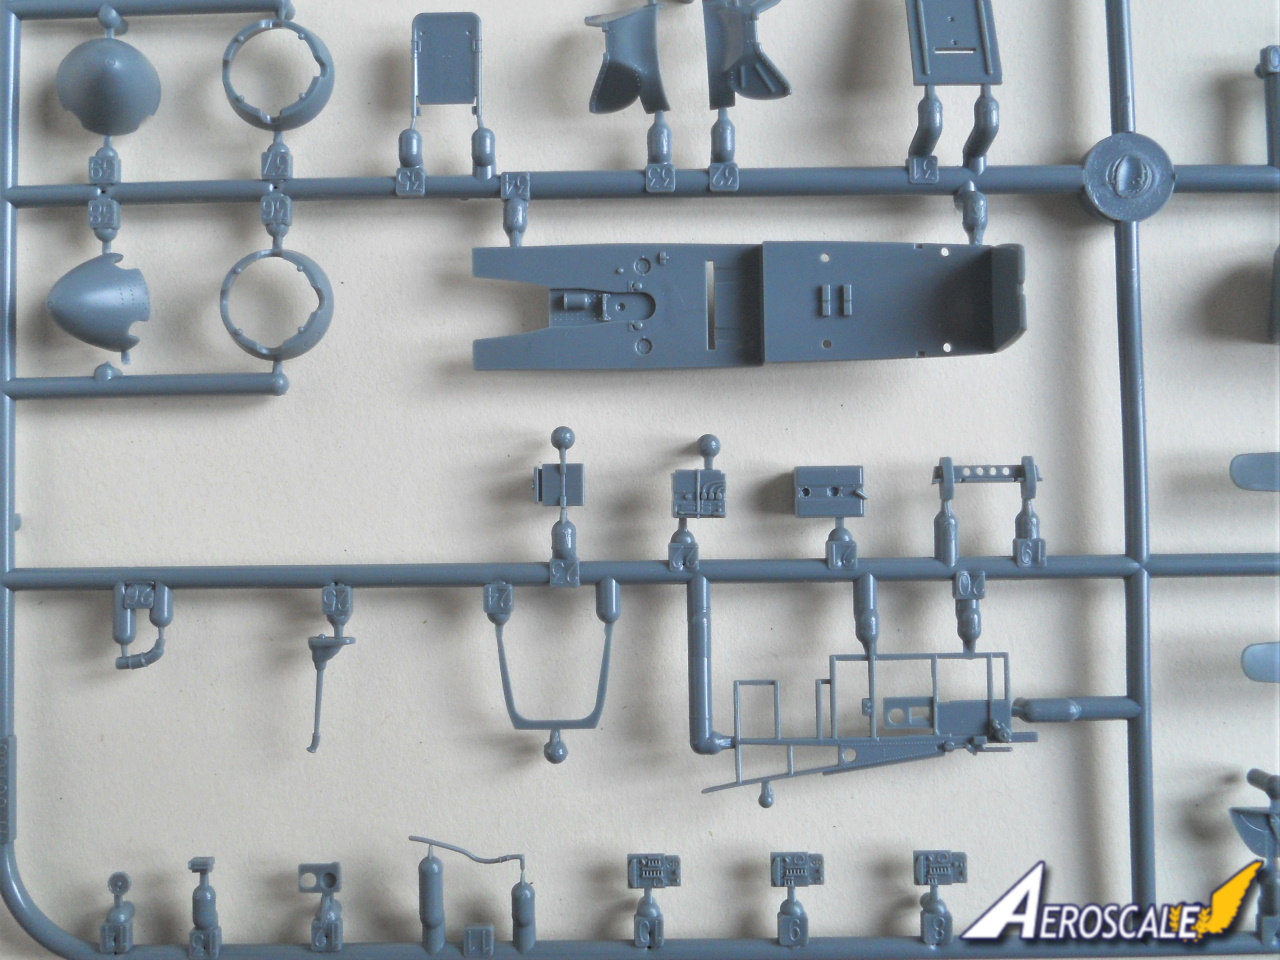
The main undercarriage legs are one piece except for the separate scissor links. The tyres are divided into two parts and feature a cross tread. The hubs are separate, the detail: spokes and nuts give the appearance of high-quality resin in its detail and there is no flash. There is a useful diagram illustrating how the hubs sit against the tyres. Paint masks for the hubs are included, but Im not sure you really need them. The inside of the gear doors is superbly detailed. Another forte of Eduard is their research and this is evident in the masks for the different panel colours on the inside of the main gear doors. The tail wheel may be tiny, but it does not escape the detail police at Eduard. Its one piece and fits onto the separate oleo. The unit can then be fitted post painting.
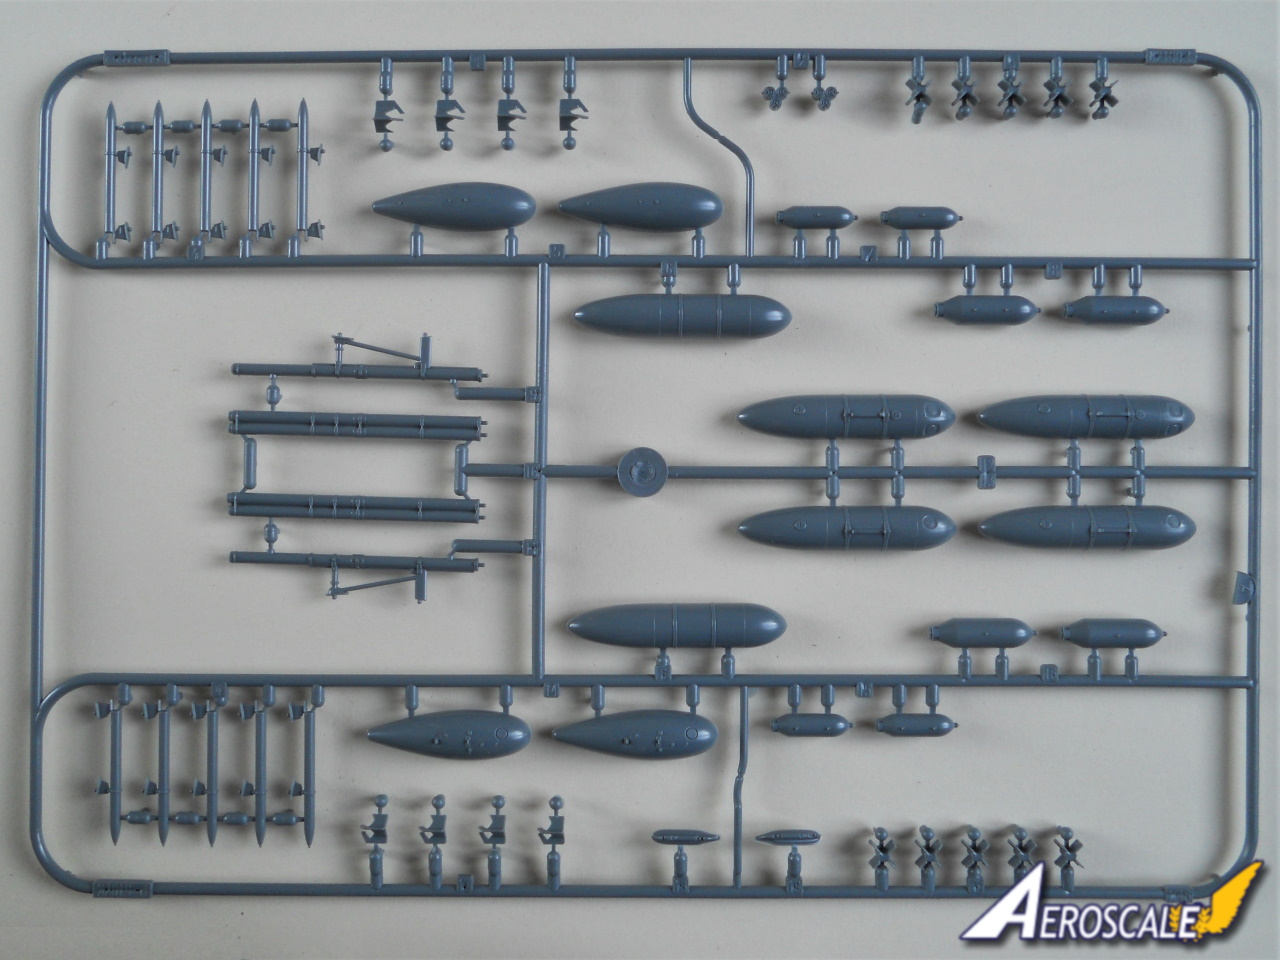
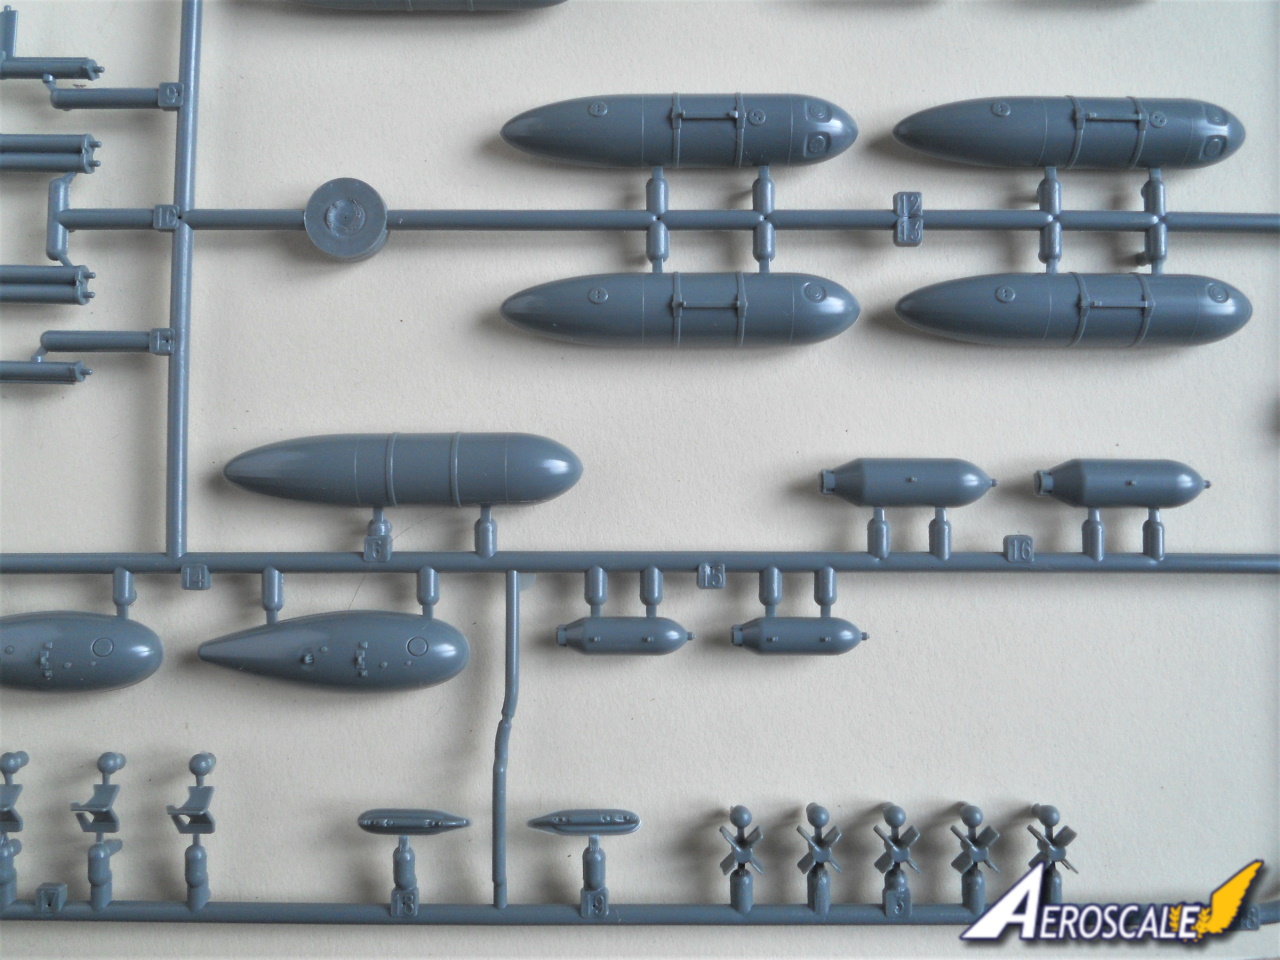
There are two types of fuel tank depicted including the distinctive looking paper 108 Gallon tanks and the 75 gallon tank. If you want to fit these you must drill out holes to fit the pylons. Also included but not used are:
2 x 500lb bombs
2 x 250lb bombs
10 x H.V.A.R rockets
2 x Bazooka Cluster
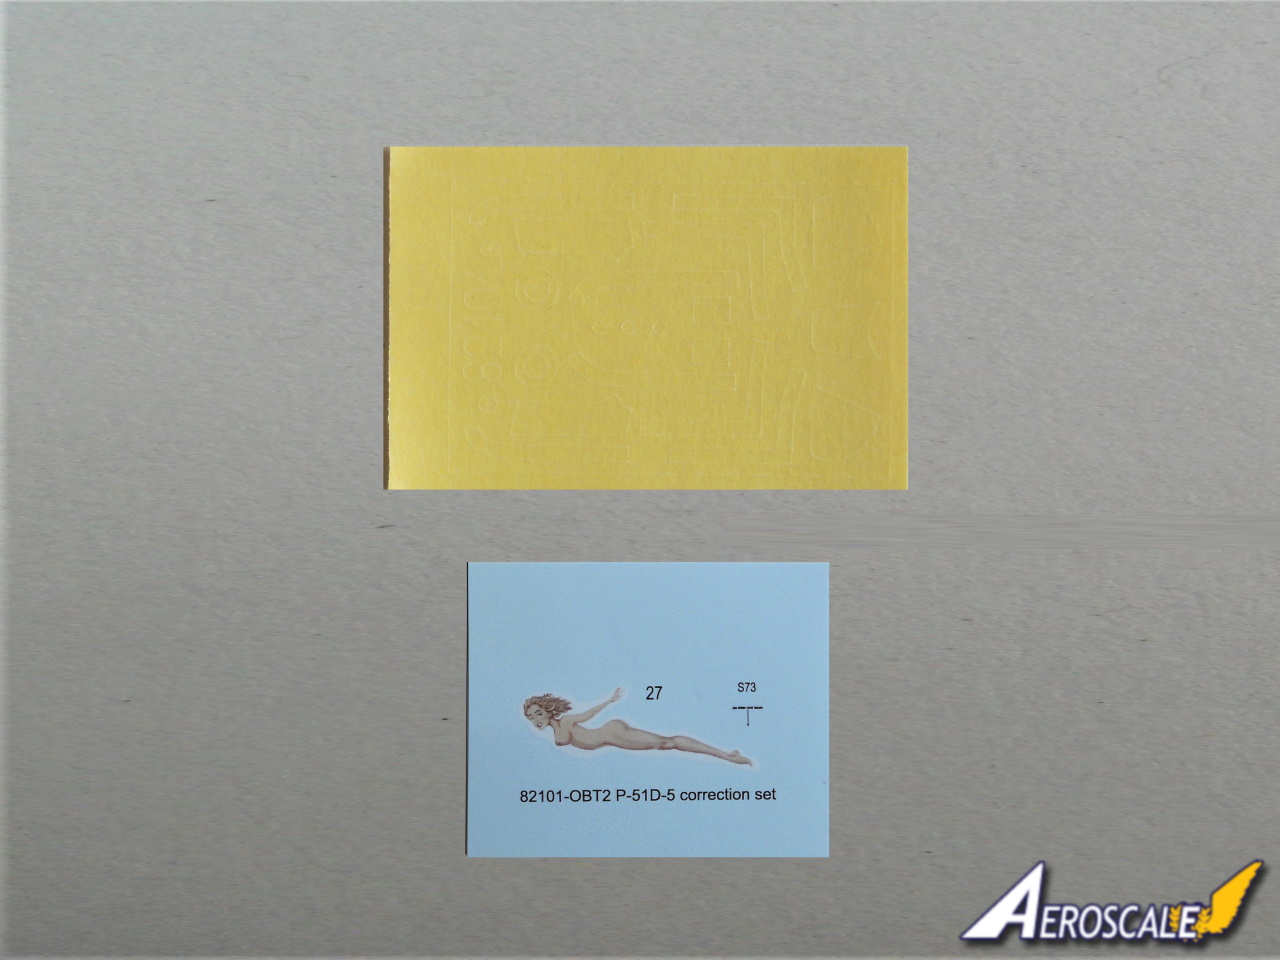
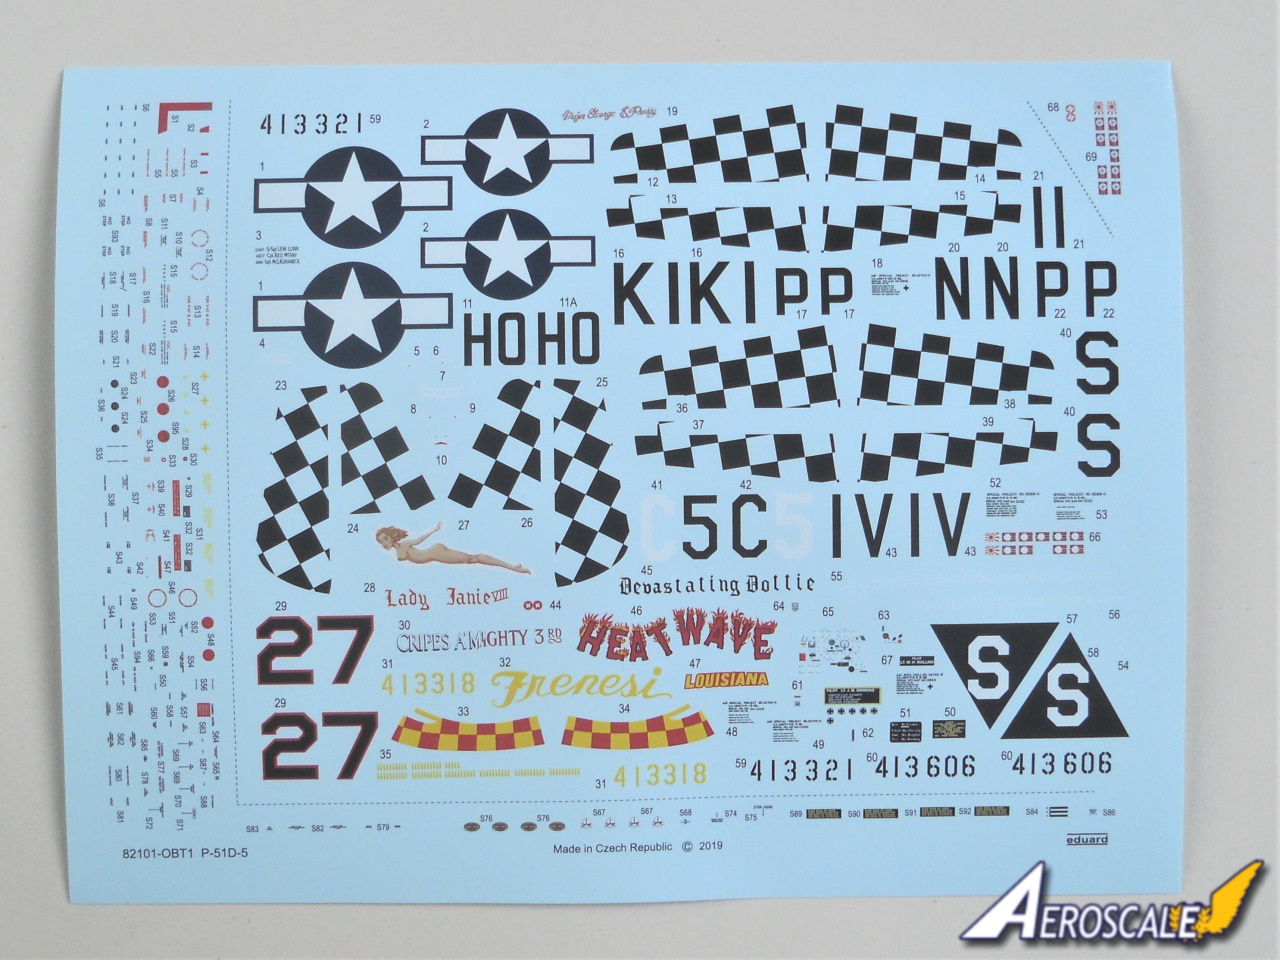
Decals have been produced in collaboration with Fundekalsb and Eduard has printed them. Quality is superb as you would expect. The definition of even the smallest of stencils is outstanding and there are plenty of stencils. Even the oleo has four stencil to apply. There are two chequer board finishes included. Option A has a full colour decal for the nose, while option D which has a full chequer tail just has the chequers in black. You have to paint the surfaces yellow before applying the decals. Four options feature invasion stripes and these are not included on the decal sheet. There is a small correction decal for the pin up girl painted on the nose of option C.
Marking Options
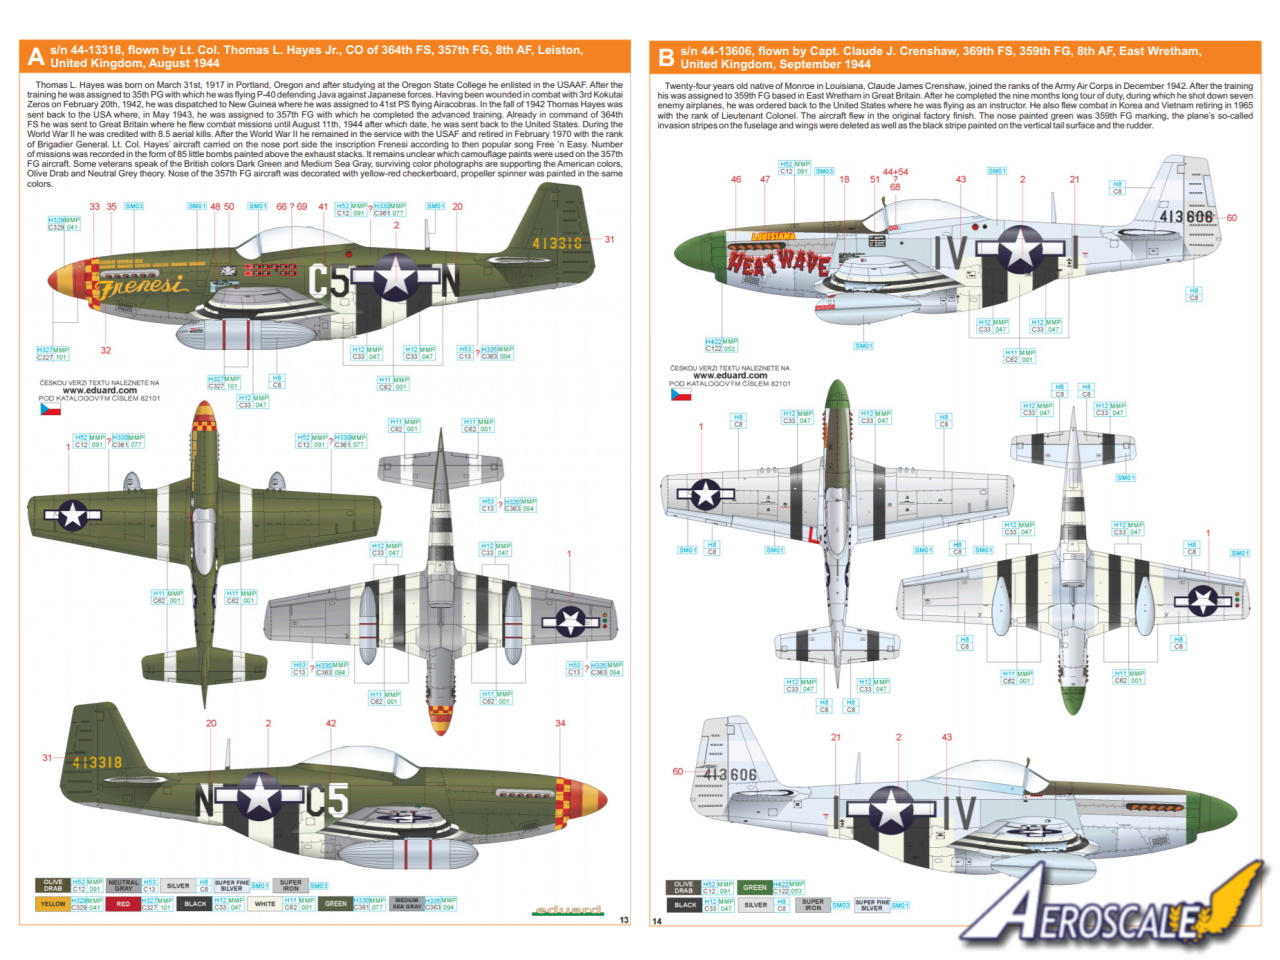
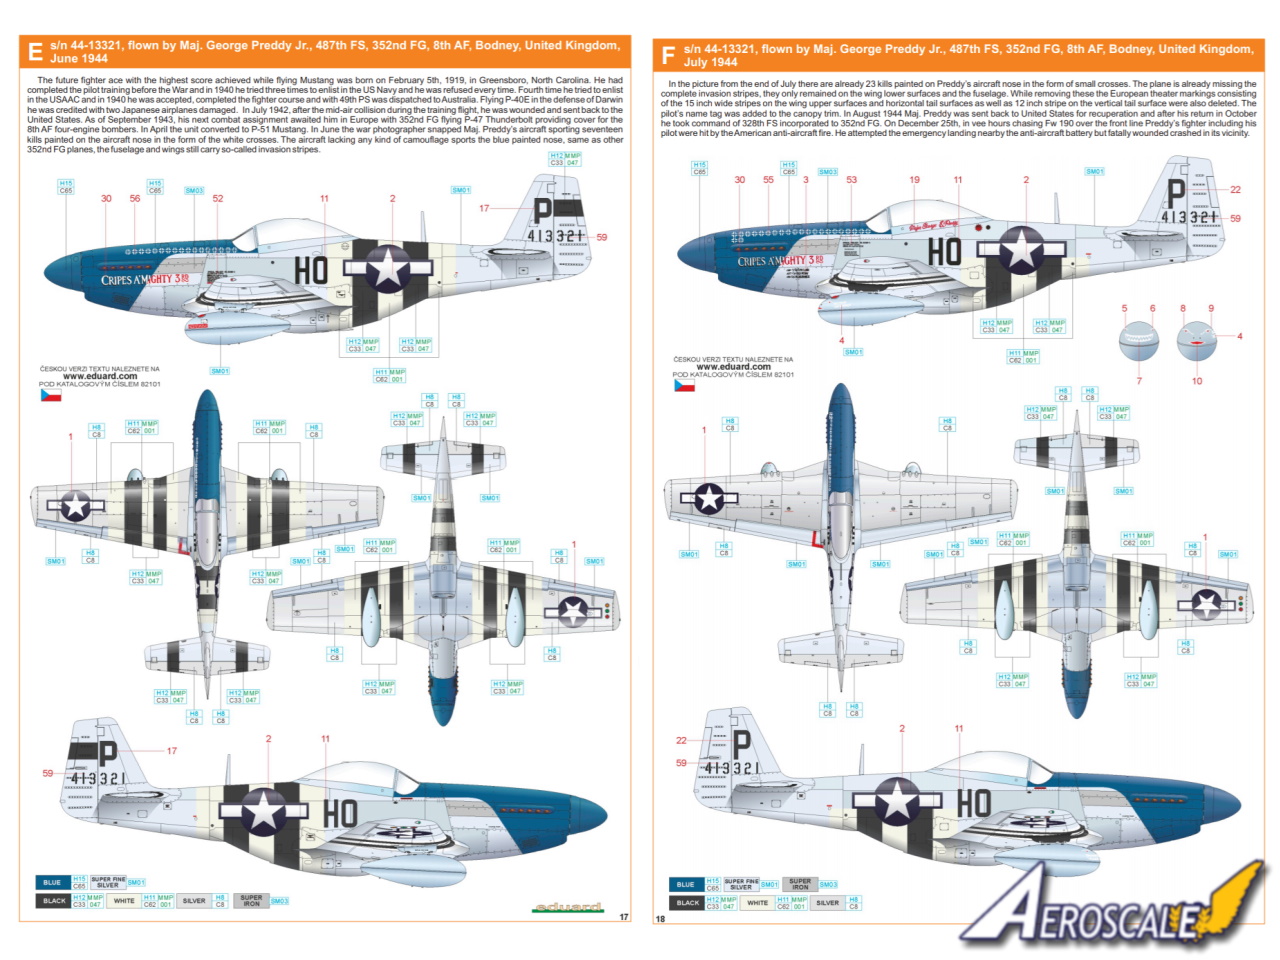
There are six marking option all bar one featuring large areas of natural and painted metal surfaces. Maj. George Preddy Jr. Mustang Cripes Almighty features twice [Option 5 and 6] depicting the aircraft with full and reduced invasion stripes and a different number of kill marks on the fuselage. A 44-13318, flown by Lt. Col. Thomas L. Hayes Jr., CO of 364th FS, 357th FG, 8th AF, Leiston,
United Kingdom, August 1944 B 44-13606, flown by Capt. Claude J. Crenshaw, 369th FS, 359th FG, 8th AF, East Wretham,
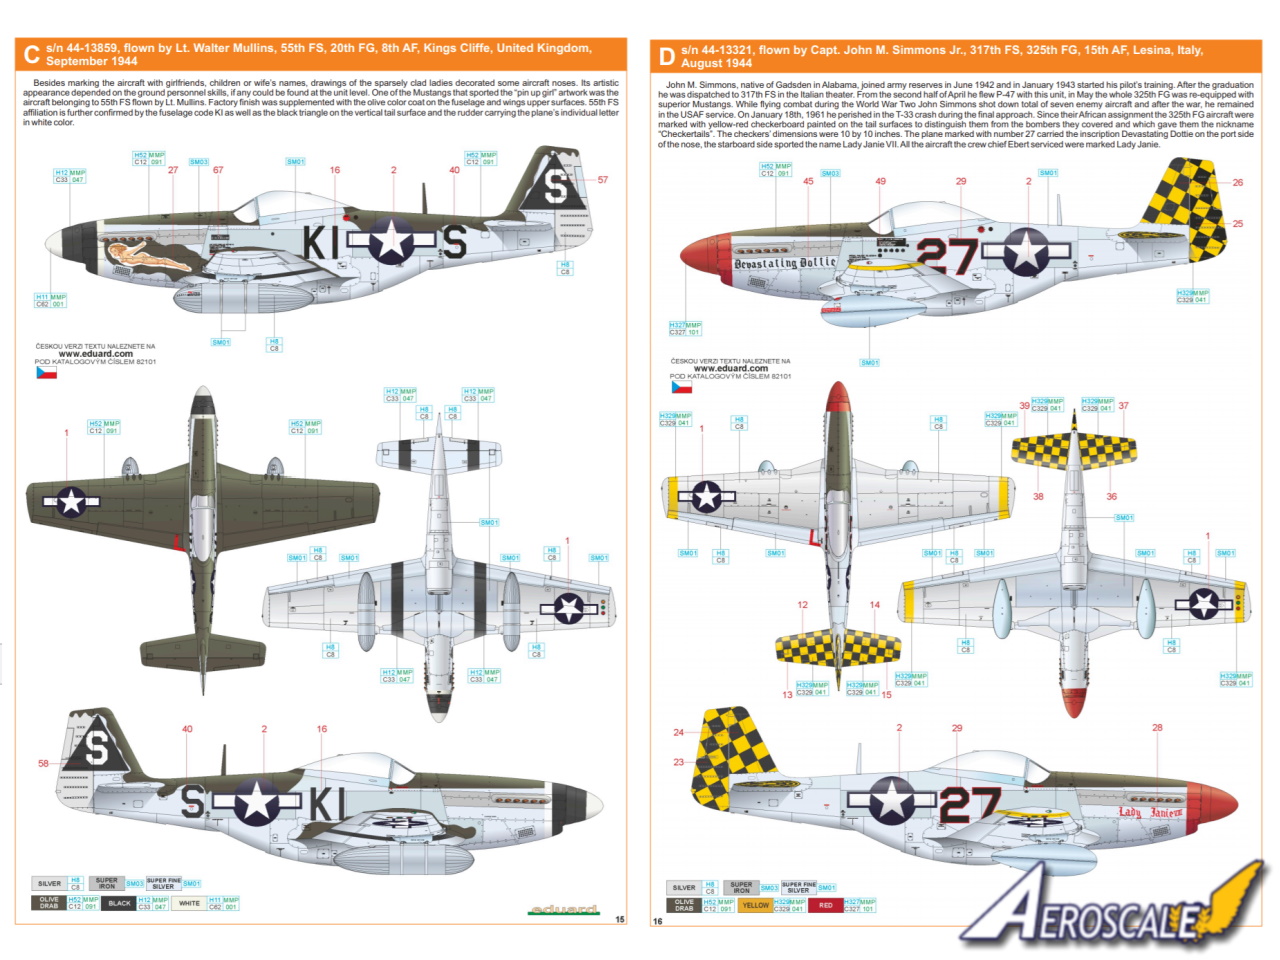
United Kingdom, September 1944 C 44-13859, flown by Lt. Walter Mullins, 55th FS, 20th FG, 8th AF, Kings Cliffe, United Kingdom, September 1944 D 44-13321, flown by Capt. John M. Simmons Jr., 317th FS, 325th FG, 15th AF, Lesina, Italy, August 1944 E 44-13321, flown by Maj. George Preddy Jr., 487th FS, 352nd FG, 8th AF, Bodney, United Kingdom, June 1944 F 44-13321, flown by Maj. George Preddy Jr., 487th FS, 352nd FG, 8th AF, Bodney, United Kingdom, July 1944
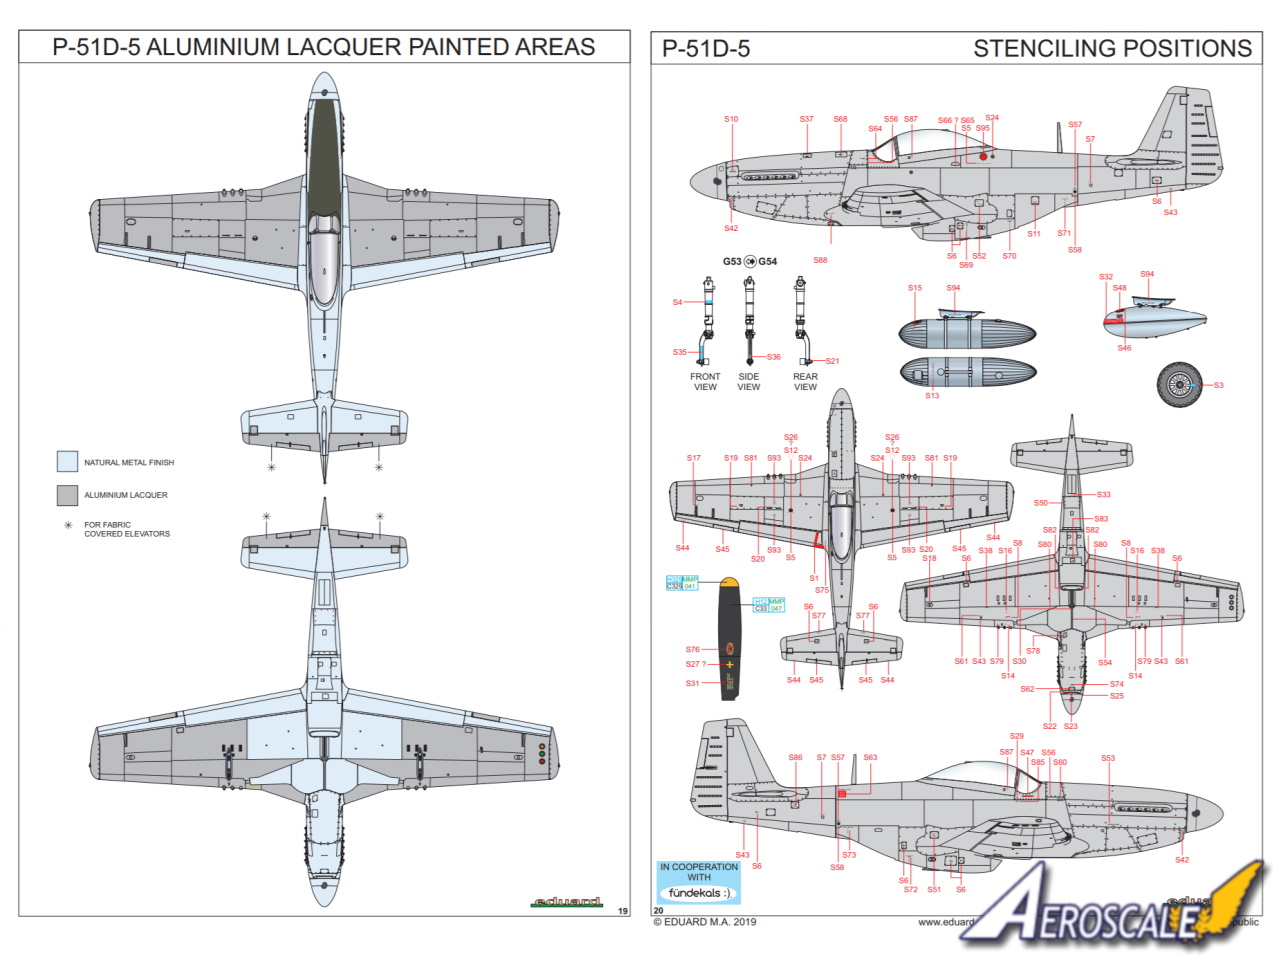
The instructions are printed in colour in a A4 format comprising of twenty pages. The build guide is broken down into many stages so there are no overwhelmingly complex diagrams to pour over. The build guide is logical and well thought out. Im impressed with the guide illustrating where the natural metal and aluminium lacquered skin surface are. This will go a long way to getting the look of your finished Mustang right. The only odd discrepancy is the lack of instruction for placing the paint masks for the wind screen.
Conclusions
I cant say Im a huge fan of the Mustang, more of a Jug man myself. Having said that the quality of this release from Eduard is quite breath taking. Then when you see the marking options well thats just the cream on top of the cake. Whether youre a fan of the Mustang or not, its worth acquiring one of Eduards releases to just enjoy the kit for what it is and not worry too much about the accuracy or the vagaries of missing details. You wont find anything vague or sketchy about this release.
SUMMARY
Highs: So much to admireLows: Picking the marking option.Verdict: Just go out and buy and experience a kit from a manufacturer at the pointy end of the industry we love so much
Our Thanks to Eduard! This item was provided by them for the purpose of having it reviewed on this KitMaker Network site. If you would like your kit, book, or product reviewed, please contact us.
Cheers Tim, great review and what a lovely kit it is. Cannot wait to get started on this lovely mustang, nearly as pretty as a Spitfire. But all those Aluminium panels....quiet a challenge as I have not attempted a "shiny" type before. After much internet research I am using Vallejo metal colours as I am not keen on the Alclad fumes - H & S.


Comments