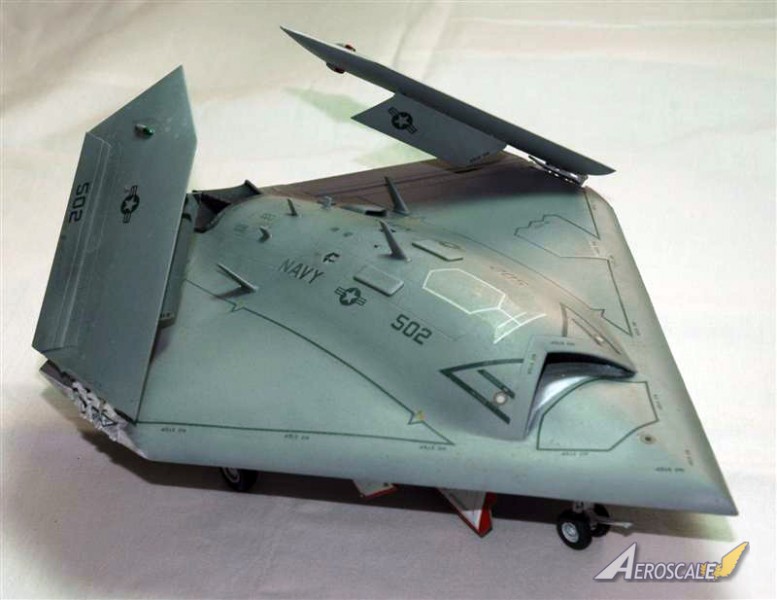
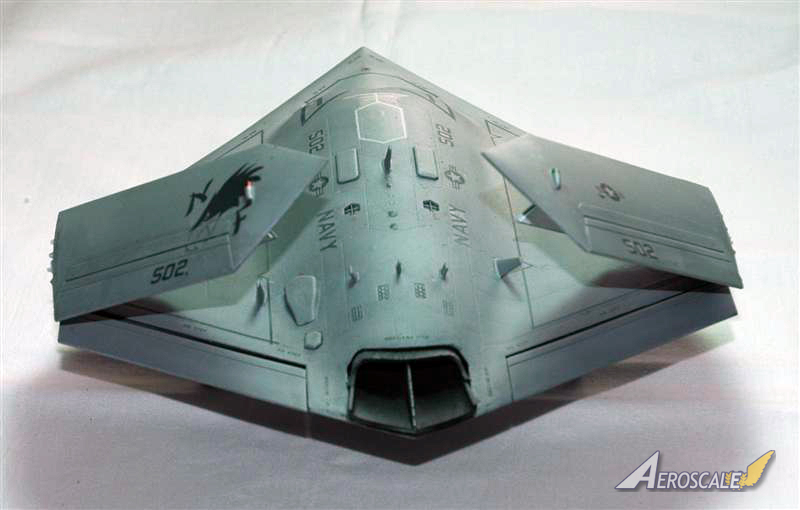
The Northrop Grumman X-47B is a demonstration unmanned combat air vehicle (UCAV) designed for carrier-based operations. Developed by the American defense technology company Northrop Grumman, the X-47 project began as part of DARPA's J-UCAS program, and is now part of the United States Navy's Unmanned Combat Air System Demonstration (UCAS-D) program. The X-47B first flew in 2011, and as of 2014[update], it is undergoing flight and operational integration testing, having successfully performed a series of land- and carrier-based demonstrations.
Northrop Grumman intends to develop the prototype X-47B into a battlefield-ready aircraft, the Unmanned Carrier-Launched Surveillance and Strike (UCLASS) system, which will enter service by 2019. In August, 2014, the US Navy announced that it had integrated the X-47B into carrier operations alongside manned aircraft. Infor from Wikipedia
The build
I decided to tackle this kit as there isn't a cockpit, and after a quick look at the instructions it seemed to be a quick simple build. Oh how wrong I was, and it was all down to me for not paying attention and trying to build it too quick lol.
Intake and fuselage
I decided too tackle the intake construction step first, even though it is step four in the build sequence, as it is the only internal part to add to the kit.
The intake is made up of two intake tunnel halves, a two part compressor fan and the exhaust ring. The internal tunnel is white, so that was sprayed. The compressor fan and exhaust were sprayed with Alclad Steel, then given a black wash.
Care must be taken removing the fan and ring from the sprue as a mounting point is part of the sprue gate, which I ended up cutting off. A few of the parts have this problem so checking the instructions is a must. All the parts fit together well, with little filling needed as the intake tunnel curves downward, so you don't actually see a lot.
Now this is where I made a complete mess of the build due to not paying attention to the instructions.
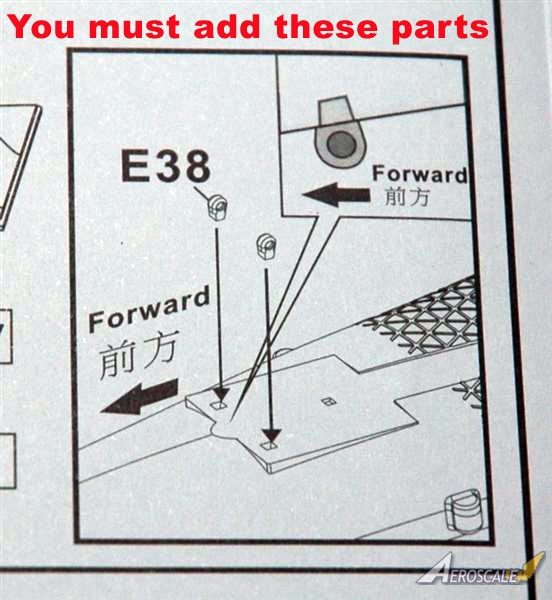
The intake fits into the lower fuselage half, and if you read the instructions there is a small box which states parts E38 fit into the lower fuselage half to raise the intake tunnel up, and guess what idiot boy did, yep I forgot them lol.
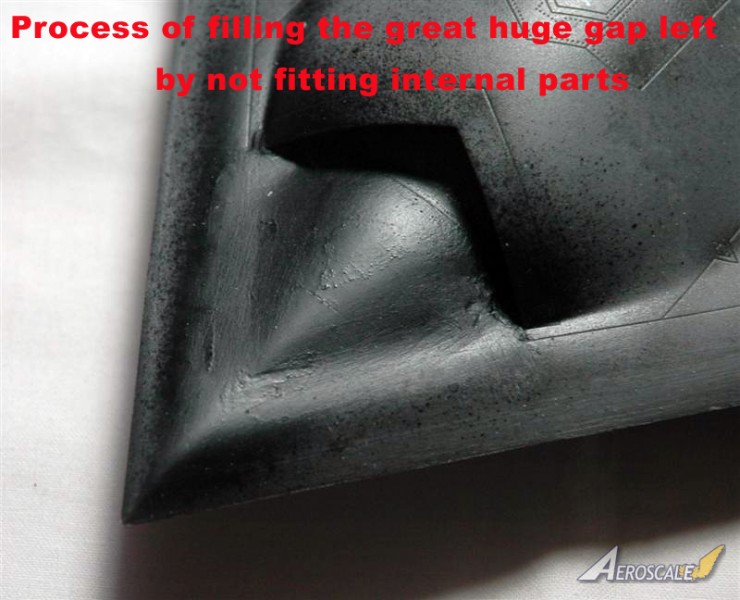
I realised this after gluing the intake and the two fuselage halves together, and thinking to myself "the fit is terrible". Due to forgetting these parts, this caused a gap between the fuselage and intake on the upper fuselage, which then cost me several sessions filling and sanding.
The fit between the fuselage halves is pretty good but I found using clamps to hold the halves together whilst drying is necessary.
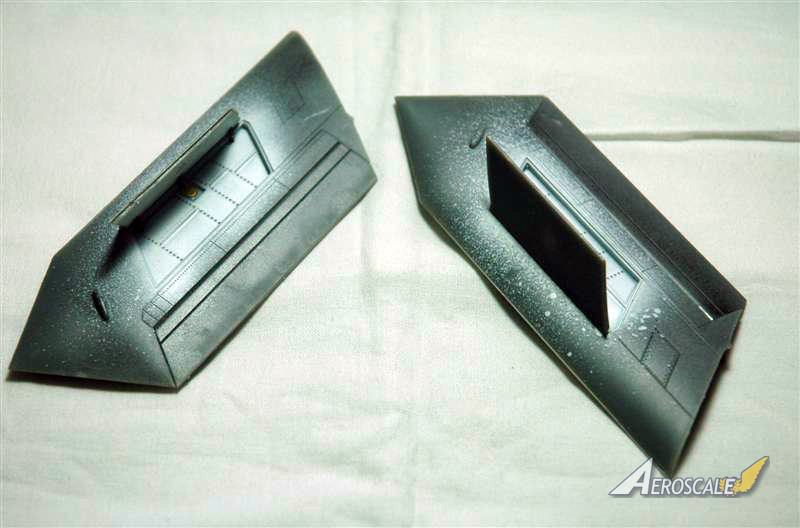
Left and right wings
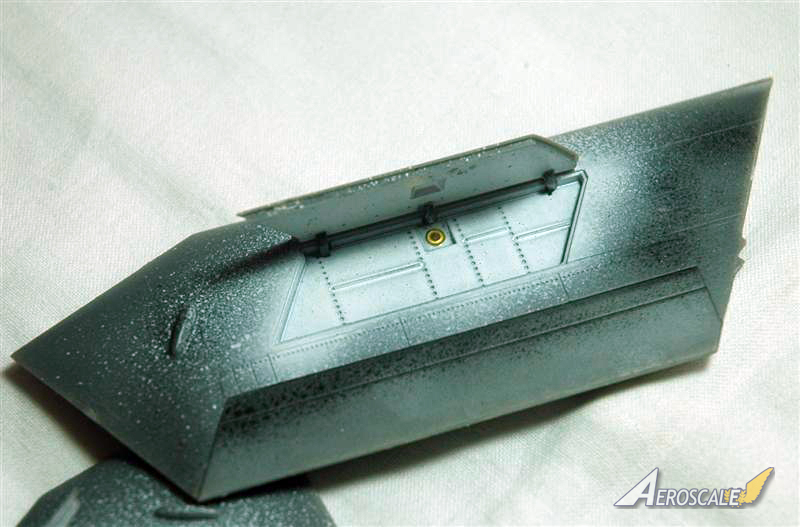
The wing assembly is over two steps one for the left and one sequence for the right. The main wings are made up of two parts with two more parts for the flaps. The flaps can be positioned as they fit into a slot in the back of the wings.
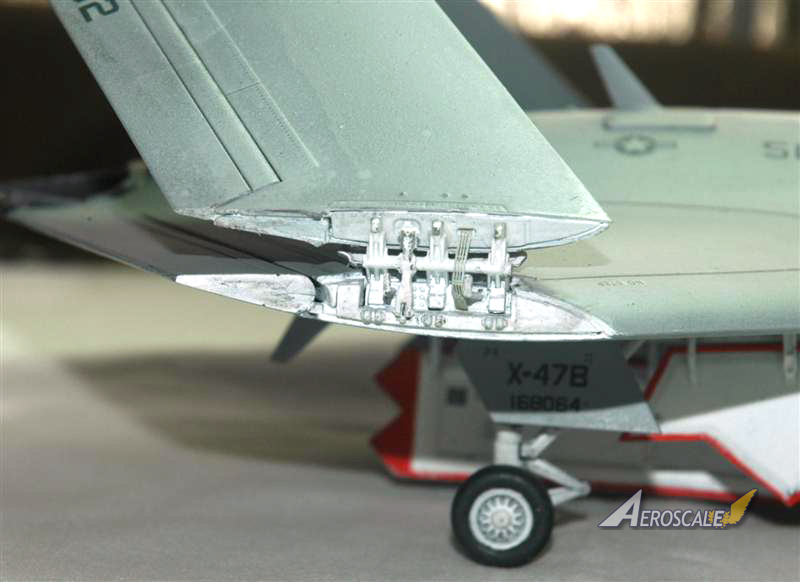
Each step also has the build sequence for deploying the air brakes. These can be positioned opened or closed.
For the closed version, the airbrake door fits straight into the gap. A small piece of the internal sparring does need to be removed.
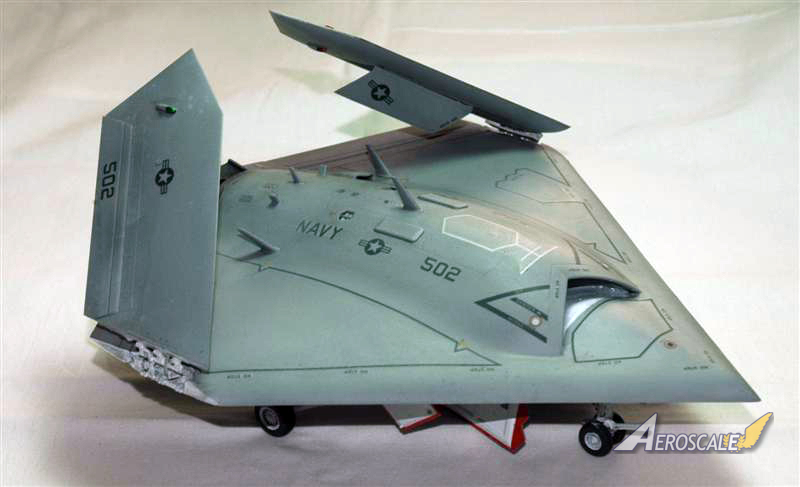
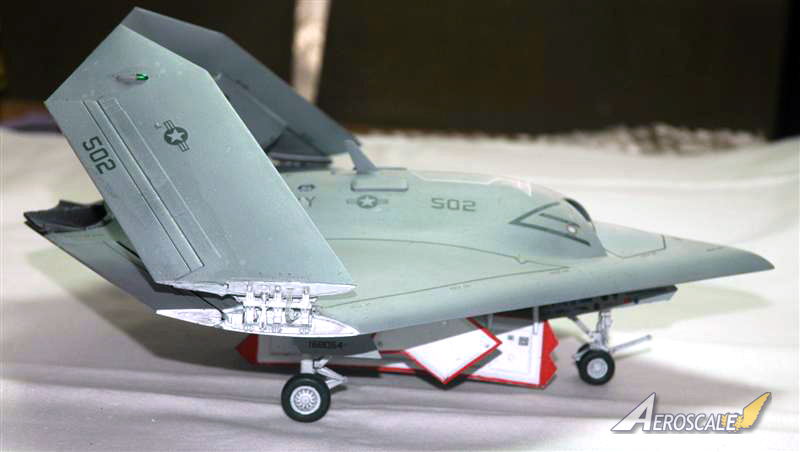
I decided to go with the open option so it adds more interest to the drone, even though i very much doubt the doors would be open when the wings are folded.
For the open option three door actuators need to be fitted as well as a small P.E part for the internal area in the wing. The fit is good and I found by positioning a couple of paint tins under the open doors helps keep the angle right whilst the glue dries.
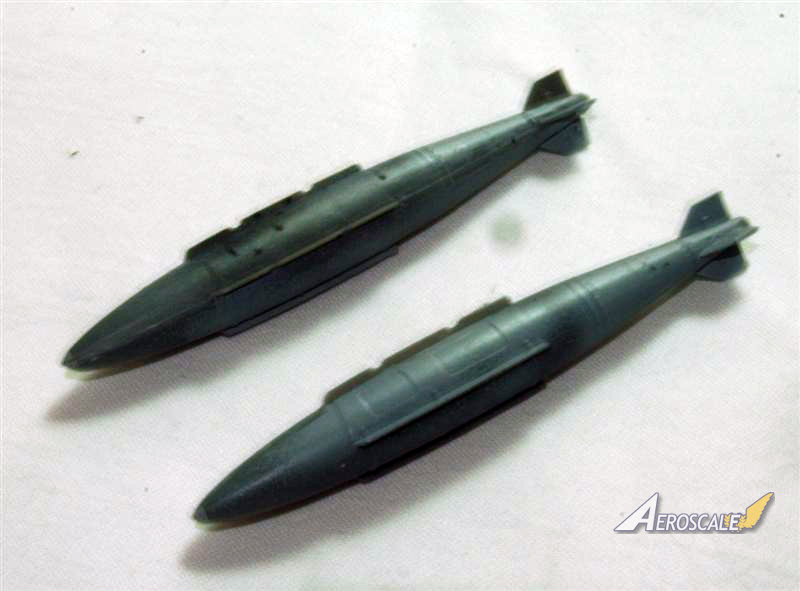
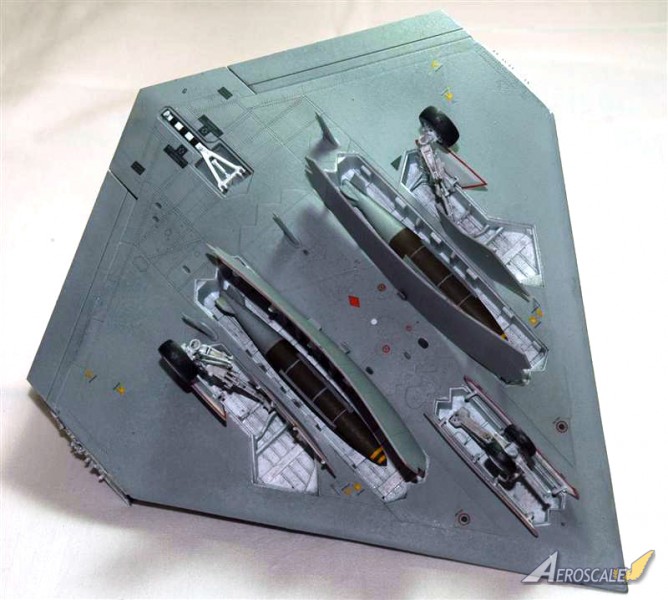
GBU-32
Two GBU-32 bombs are supplied for the kit. Both bs are made up of eight parts each.
Construction is simple and a quick swipe with a sanding stick gets rid of the small seam line.
Decals are supplied for the bombs. The decal placement guide is a little hit and miss as the two views of the bombs are identical, even though one states top, with the other showing the left side. A quick Google search helps with the placement.
Bits and bobs
The main flaps were glued into a neutral position on the drone. These can be positioned if desired.
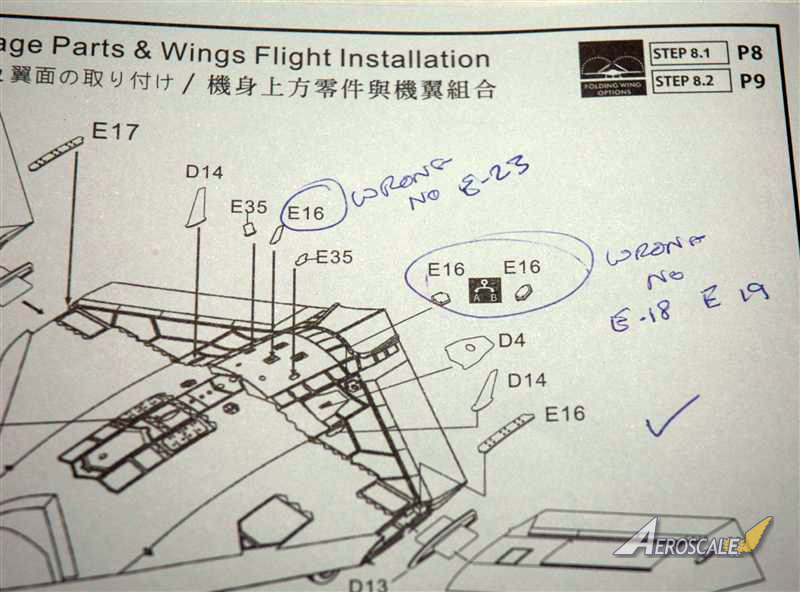
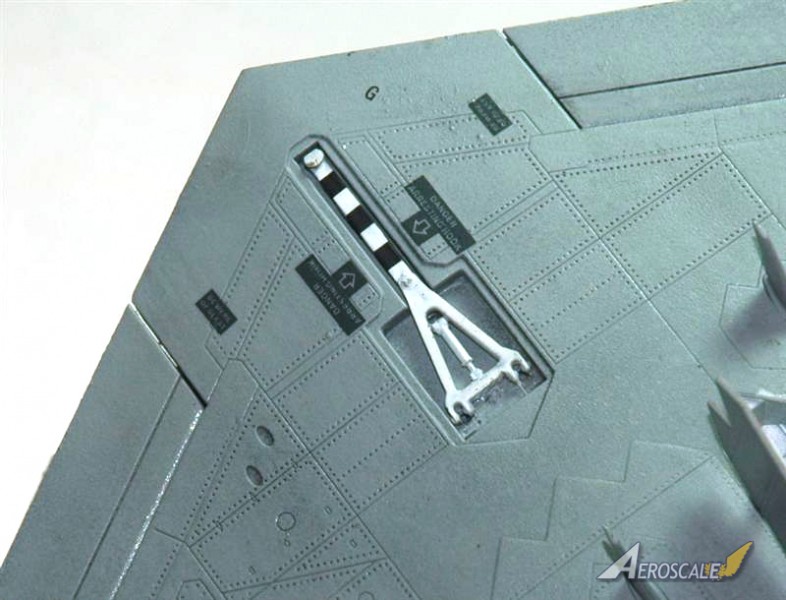
The various ariels and inlet covers were glued into place on the top and underside of the drone in preparation for painting. Normally I would leave these parts off until the last minute but the gluing areas are quite large and the ariels are pretty sturdy.
The instructions do have a couple of the ariels numbered wrong. Three ariels are numbered E16, where in fact the numbers are E18, 19 and 23.
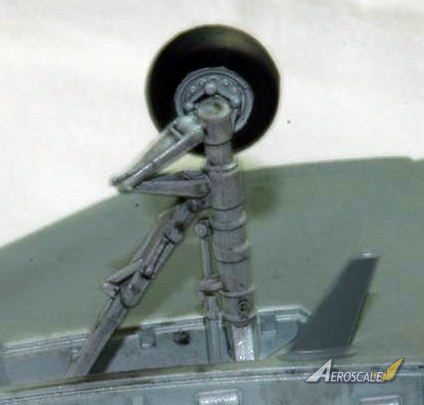
The undercarriage
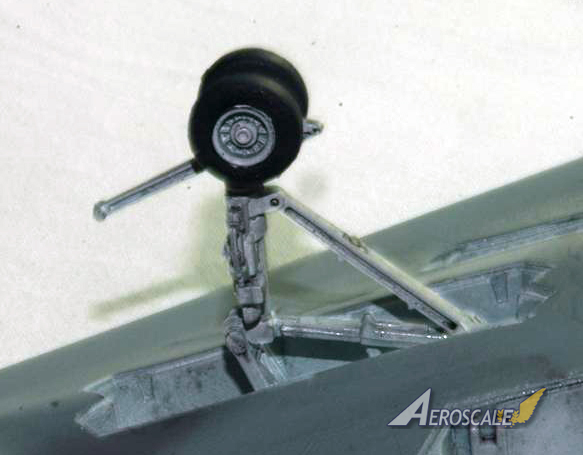
The first step in the assembly process is making up the nose and main gear legs.
You can do this step later on in the build, as I did, as installing the gear legs and wheels is near enough the last thing you do on the build.
Two types of nose gear legs are supplied with one having the catapult bar lowered for an aircraft about to be launched. The other leg has the bar raised.
The nose gear is made up of ten plastic parts including the two piece nose wheels, and three P.E parts.
The trickiest bit of this part is having to get three of the parts lined up straight for insertion into the nose undercarriage bay.
The main legs have thirteen plastic parts and three P.E parts. Construction is pretty easy, but it can get fiddly.
Undercarriage and weapon bay doors were also built at this stage and left to one side.
Painting and decaling
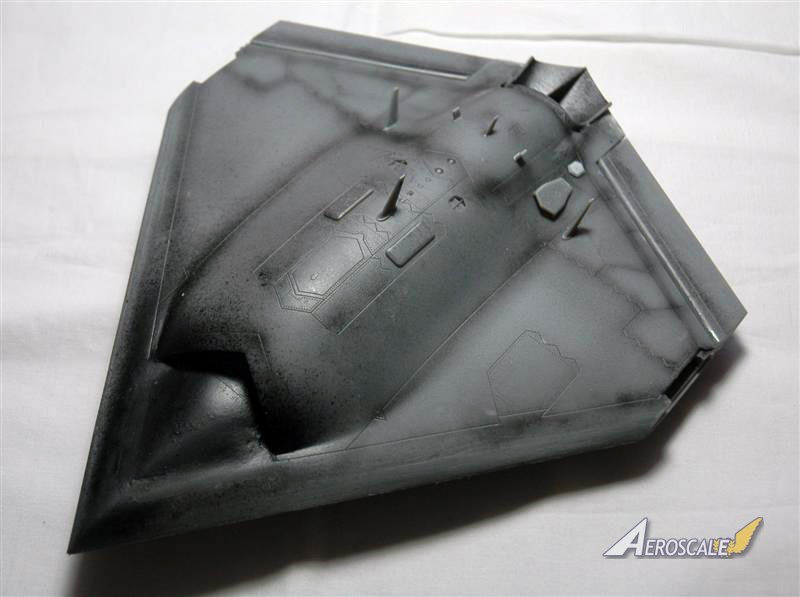
After the drone was primed, I pre-shaded the panel lines with Vallejo black primer.
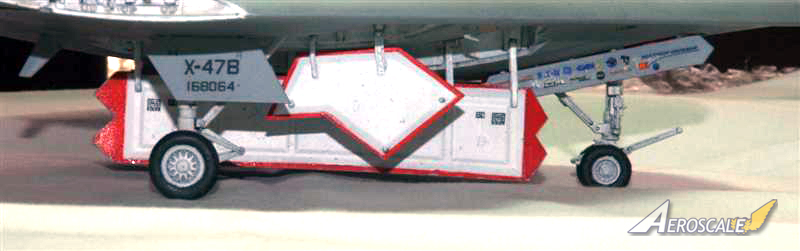
The undercarriage and weapon bays were sprayed white, along with the open airbrakes, inside the undercarriage doors and the undercarriage legs.
The weapon and undercarriage bays were masked off and Vallejo Model Air Light Gray was airbrushed over the drone, the wings and the outside weapon and undercarriage doors.
For the red edge areas for the weapon and undercarriage doors, I masked off the white middle area and sprayed a light coat of Tamiya red. The red manged to bleed over in some areas so reversing the process soon sorted that out.
Looking at photos of the drones doors shows the red areas to only on the internal side of the doors and not on the door edges.
After all the parts were sprayed they were the sprayed with a gloss coat ready for the decals.
The decals are easy to apply with each decal only needing a short dip in warm water.
Carrier film isn't really much of an issue except on some of the larger decals, where I trimmed the carrier film.
The walkway decals are slightly longer then necessary, which is a good thing as they can be trimmed once in place for a smooth join.
One decal on the top of the drone did mange to silver, which is annoying.
Once all the decals were in place and left to dry, another gloss coat was applied.
Finishing the build
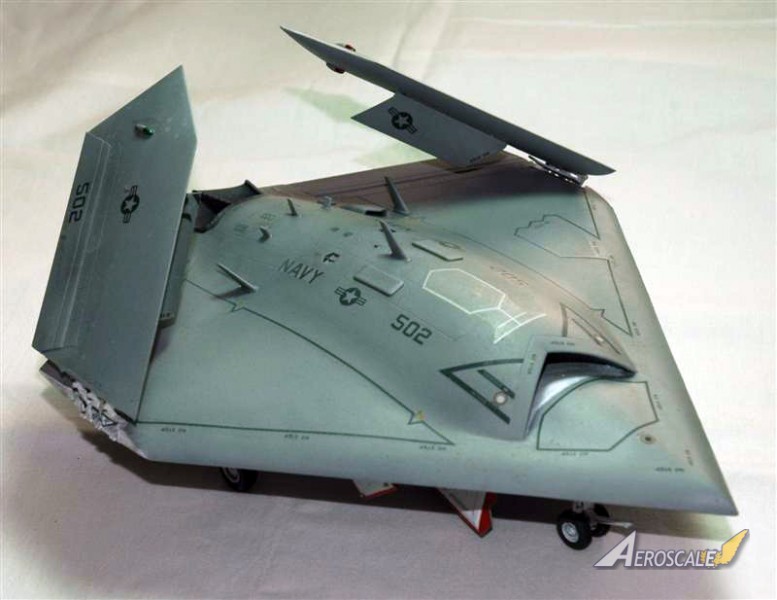
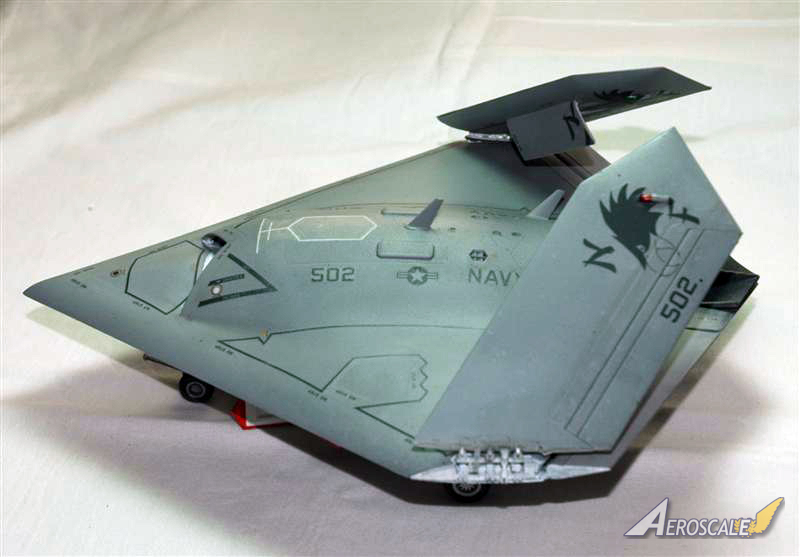
Having decided at the beginning of the build I would have the wings folded, I left these off till last.
The wing and drone body has inserts for the wing fold system. The drone body inserts have several parts added for the hinge. One part E35 needs tabs removed. This part is only used for the folded option, which does beg the question of why they were moulded onto the part in the first place. A couple of P.E parts can be used instead of the plastic equivalent.
The inserts for the body are a pain to fit and I had to trim the plastic down to get them fitted into the inside of the body cavity.I
The wing inserts fit well.
A drawing of the angle of the stowed wings is supplied, and using plastic cement and superglue on the wings they fit well, even if they seem fragile., I used a couple of Vallejo bottles to keep the wings in position until it all dried.
The last part of the build was adding all the gear legs, doors and inserting the bombs, all the parts fit well.
The weapon bay can be modelled closed if desired.
Weathering
A black wash over the airframe and inside the bays and gear legs was applied, then wiped off. The bays being white show the black wash off more then I desired.
conclusion
Well its not my best effort by far, but as its the first aircraft I have finished in about three years, I am fairly happy with the results. if there is one thing I have learnt (other then read the instructions)is how much i have forgotten and how rusty I am during a build. this is something I shall endeavour to improve on by actually building more.
Freedom Models first kit is a great start to hopefully a long and varied production of aircraft kits.
The kit is pretty easy to build, fairly well detailed and has a number of nice options.
My only complaint would be some of the instruction mistakes, but that is really minor as anyone with half a brain can work out what is wrong.
Please remember, when contacting retailers or manufacturers, to mention that you saw their products highlighted here - on AEROSCALE
SUMMARY
Highs: Easy to build, nice detail.Lows: mistakes in the instructionsVerdict: A good kit of the US Navy's UCAS drone. Well recommended for the beginner to the experienced modeller.
Our Thanks to Freedom Model Kits! This item was provided by them for the purpose of having it reviewed on this KitMaker Network site. If you would like your kit, book, or product reviewed, please contact us.
About Andy Brazier (betheyn) FROM: ENGLAND - SOUTH EAST, UNITED KINGDOM
I started modelling in the 70's with my Dad building Airfix aircraft kits. The memory of my Dad and I building and painting a Avro Lancaster on the kitchen table will always be with me. I then found a friend who enjoyed building models, and between us I think we built the entire range of 1/72 Airfi...


Comments