The performance of the prototypes of Roland D.VI were quite good. Their handling characteristics & maneuverability met the current requirements for 1918. The pilot's visibility was excellent. After the trials and modifications were made an order placed for an initial 350 machines (150 of them as D.VIa version). During the speed trials in Second Fighter Competition in May and June 1918, the Rol.D.VIb with the Mercedes D.IIIaü 180hp engine kept up with the BMW powered Fok.D.VIIF and the PfalzD.XV. The later Rol.D.VIb with the Benz motor was as good as the Fok.D.VIIF. Reference: "The Beknighted Rolands", Air Enthusiast Quarterly ,# 2. 1976, by Abbott and Grosz. The German aircraft factory Luftfahrzeug Gesselschaft mbH(L.F.G.), since 1914 known as Roland, designed and produced for German Army Air Service extraordinary airplanes: the two-seater C.II Walfisch and single-seater D.I, D.II, D.IIa and D.III. There were quite advanced constructions with interesting "Wickelrumpf" (semi-monocoque) wooden fuselage.
Roland's ultimate single seat fighter was the Roland D.VI from early 1918 with fuselage constructed in the "Klinkerrumpf" method. In August 1918, 70 Roland D.VI aircraft served on the Western Front. They were not popular, because every German pilot seemed to desire the Fokker D.VII types used on the Western Front in the Summer 1918 year.
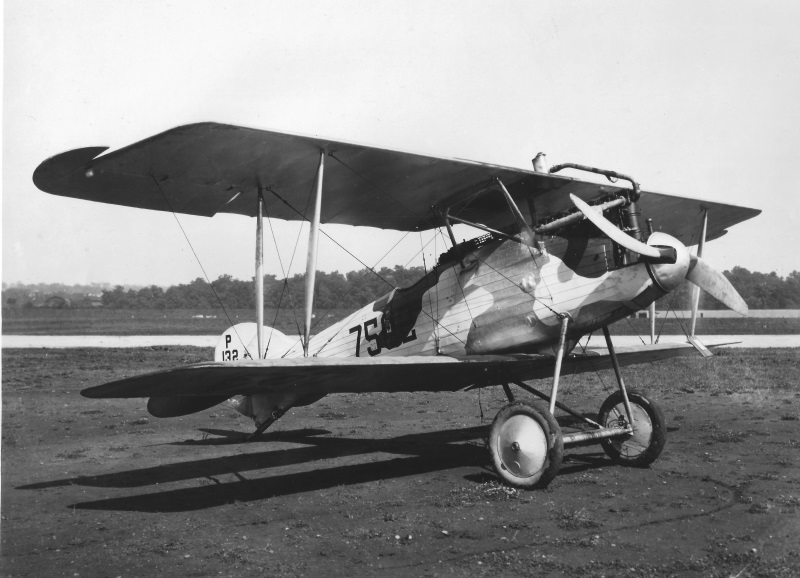
The importance of the Roland D.VI type was marginal but it did fill the gap. The express need for German fighter planes caused the production of this a. Nevertheless the Roland D.VI type was an interesting fighter plane with good maneuverability and pleasant handling characteristics. But it served on after the war into other nations air forces and in the United States was evaluated for its handling characteristics.
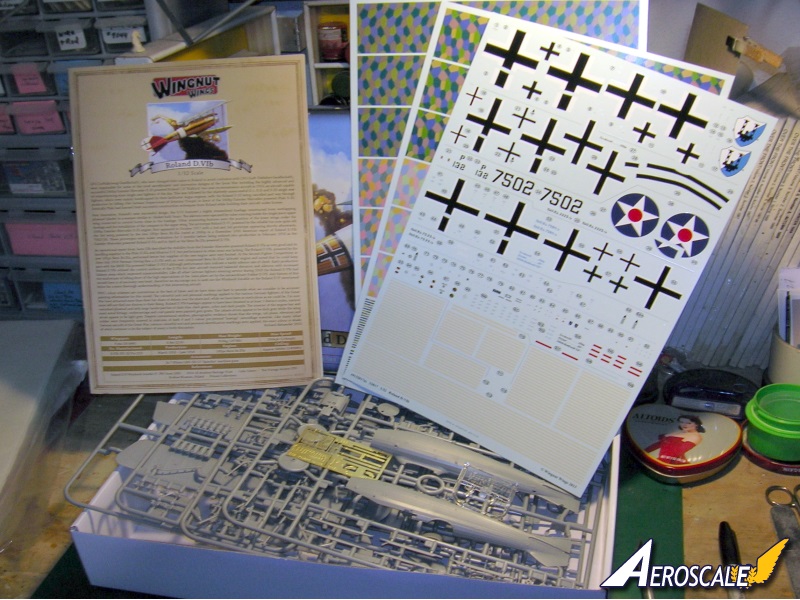
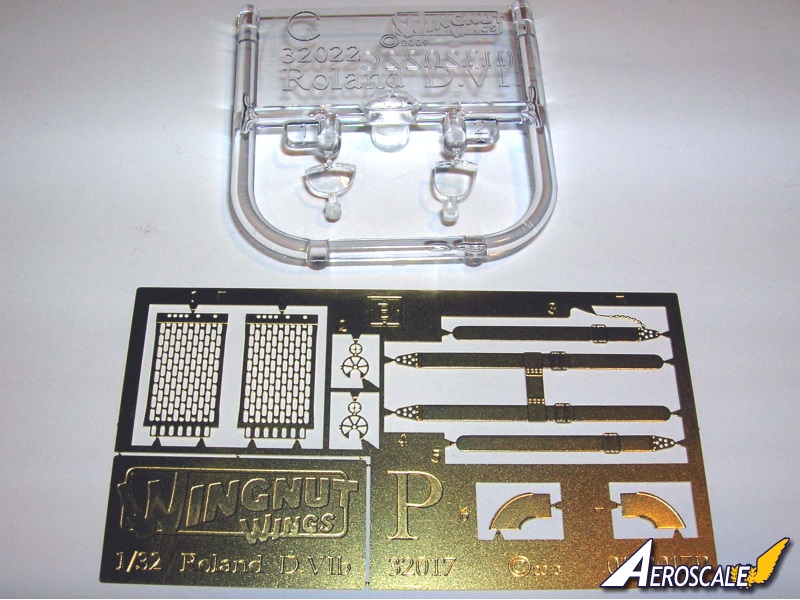
Box Contents
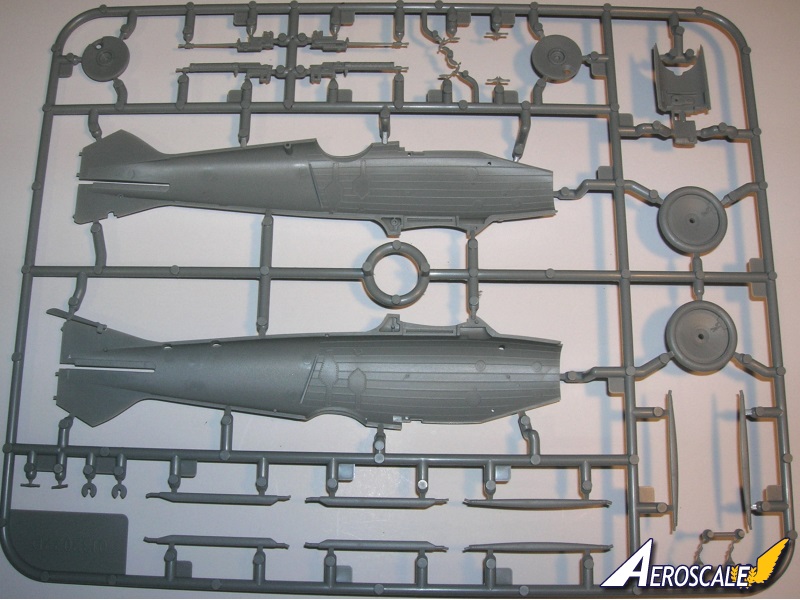
This is a modified release of WNW previous #32022 Roland D.VIa model with all new E and F sprues along with an updated B sprue with additional foot step detail.
Plastic parts 125 pieces (including 48 all new parts). Optional early and late ailerons, tailplane, elevators and rudder. All new 25 part highly detailed 185ps Benz Bz.IIIa engine. Despite what you may have read elsewhere this engine is completely different to the 150ps Benz Bz.III engine from the Hansa-Brandenburg W.29. This includes optional Benz Bz.IIIa and Bz.IIIav intake manifolds.
Photoetch 9 pieces
Lozenge for 2 aircraft (4 or 5 colour type). Plus a bit more.
Decal profiles 5 aircraft, 3 full sheets that include 4 & 5 colour lozenge.
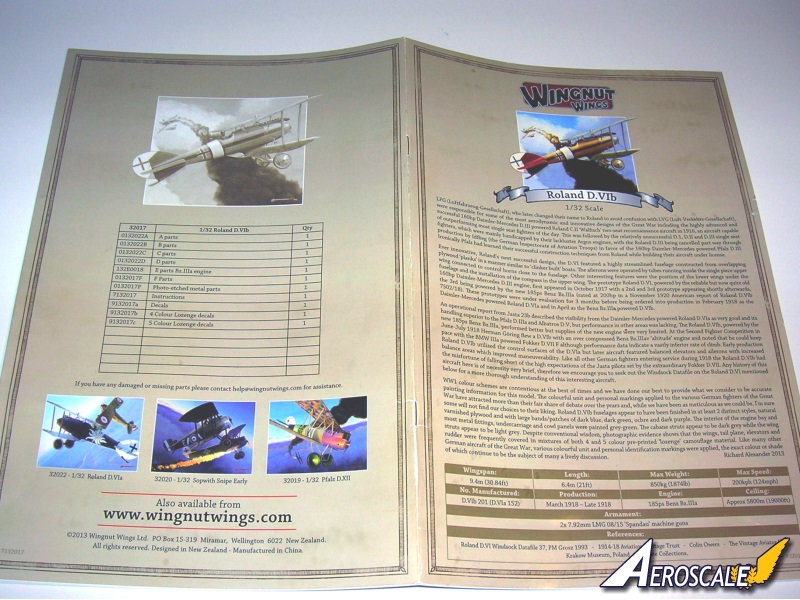
Instructions 28 page colour.
The Build
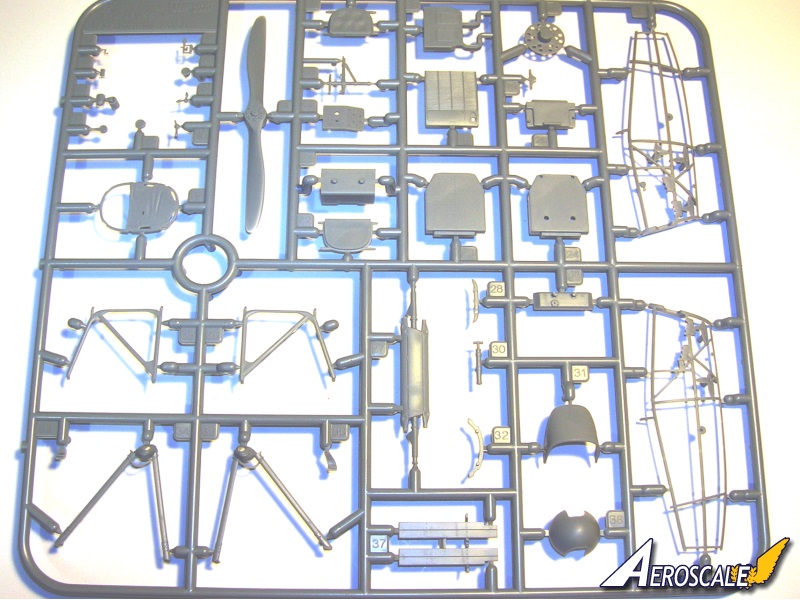
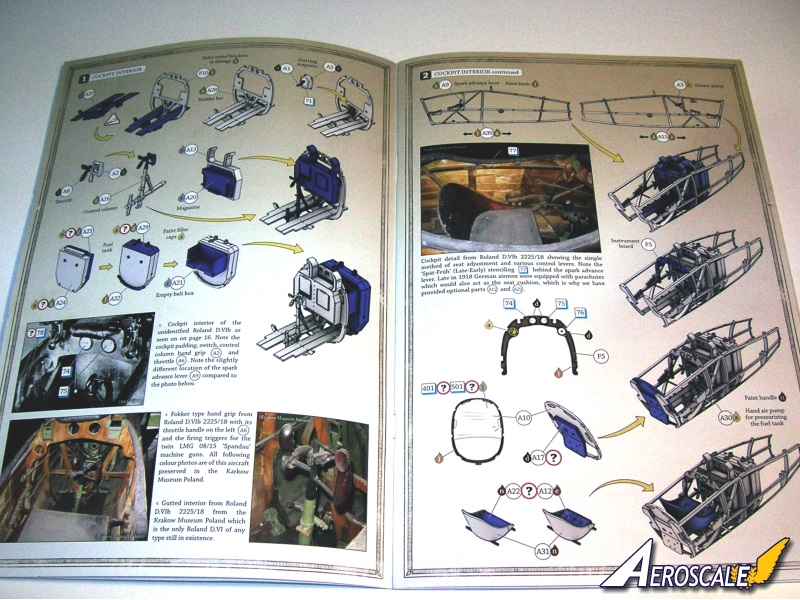
Step 1. Cockpit interior is detailed here. Station former ( F 10 ) is the basis on which you assemble everything else. From floor boards ( A 37 ), rudder bar ( A 28), Bosch starting magneto ( A 1 & 5 ), control column ( A 2, 6 & 16 ), Ammo storage ( A 13 & 20 ), Empty Belt collector box ( A 21 ) and fuel tank ( 23, 24, 29 & 32 ).
Step 2. Cockpit interior continued. The fuselage skeletal structures ( A 15 & 39 ) are next. Note the holes in the center of the instruments on the main control panel ( F 5 ). You will find corresponding holes on the decals for the instruments, These represent embossed face plates for fuel and air selector switches. The rear cockpit station / former ( A 10 ) has a partial fabric screen and a rigging guide plate ( A 17 ) attached. Finally the seat ( A 12 or 22 & 31) is added.
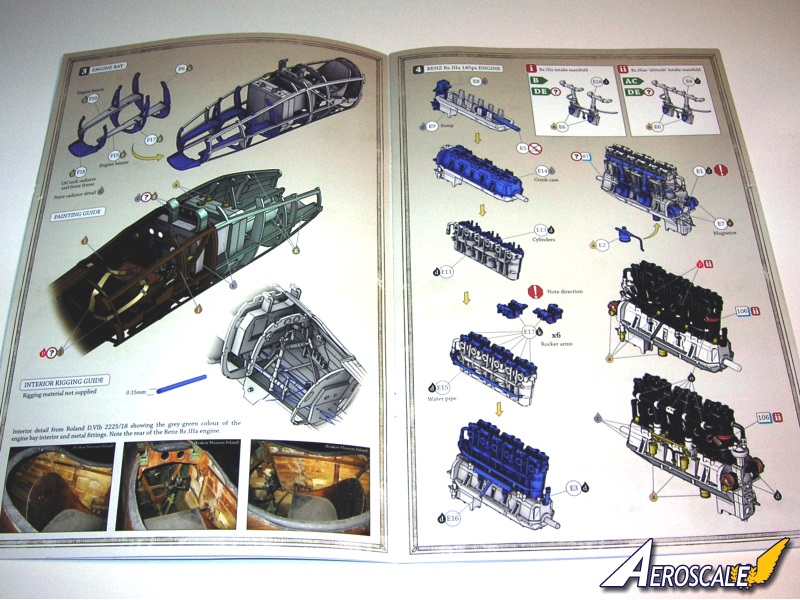
Step 3. Engine bay station formers ( F 6, 10 & 17) are attached to the engine bearer shelves ( F 18 & 19 ). Then you are shown how to integrate this with the cockpit structure from step 1. A paint guide is included at this point.
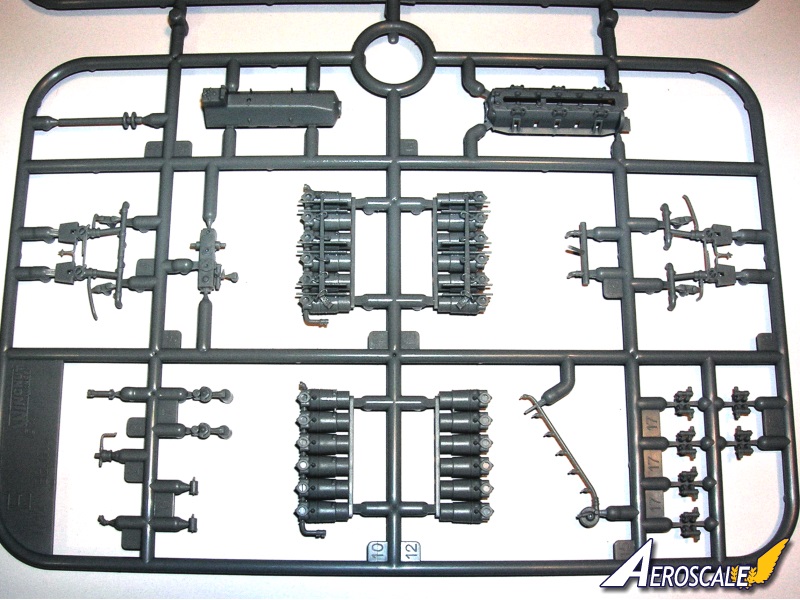
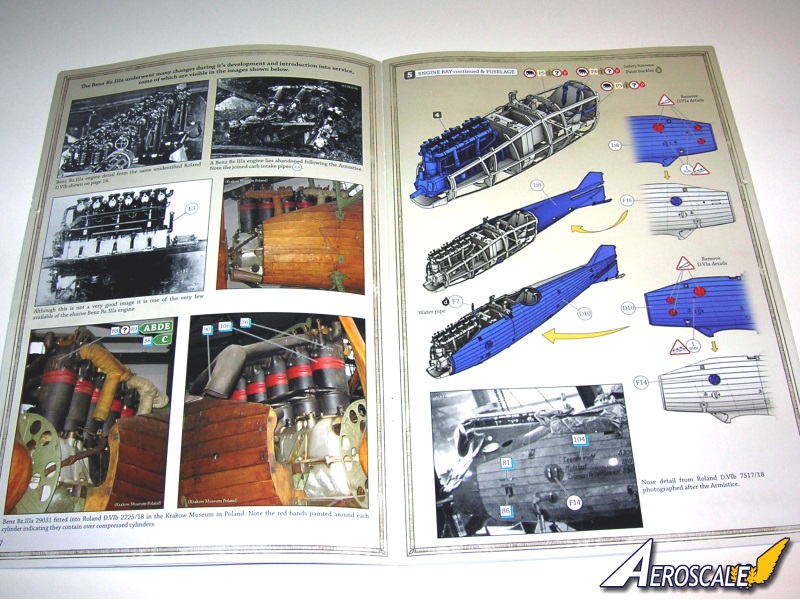
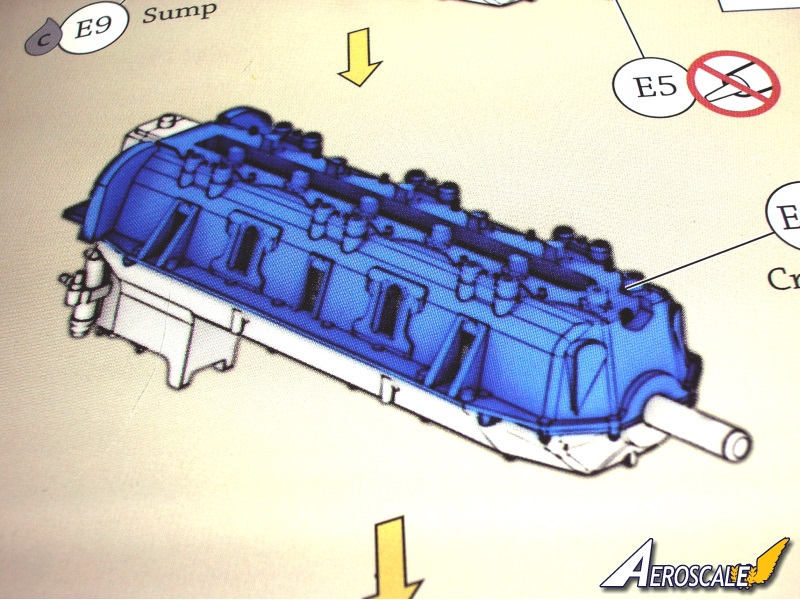
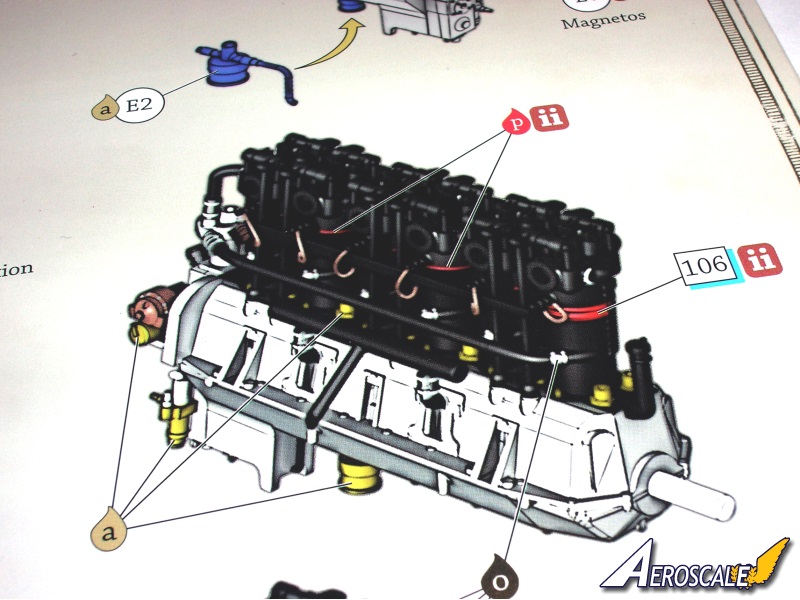
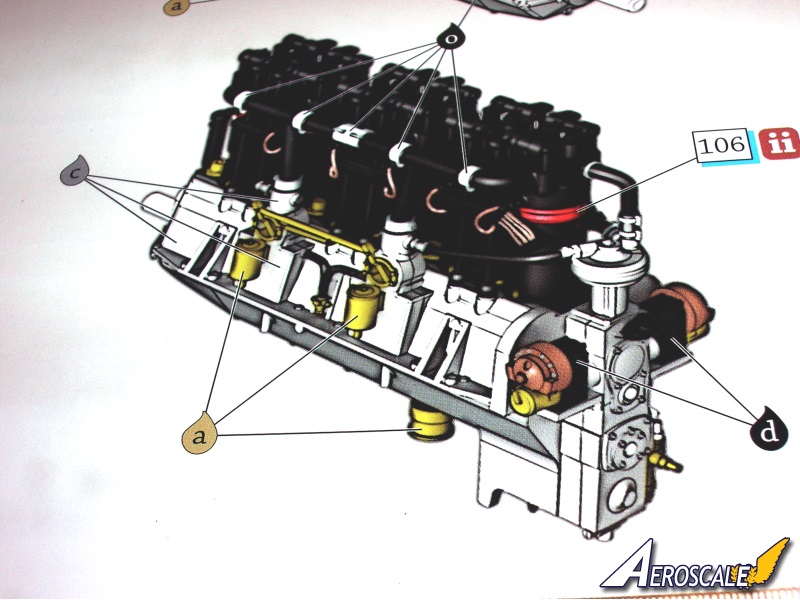
Step 4. Roland D.VIb has a Benz Bz.IIIa that is a six cylinder inline engine ( E 1, - 9, 11, 13 - 17 ). As mentioned previously the rest is below the cowling and not readily visible if the cowls are in place. Primarily the water pump on the is located directly behind the motor on the rear tower (E 8). The oil pump (E 2) is located under the sump ( E 9). Add fine wire painted black or white to make spark plug wires.
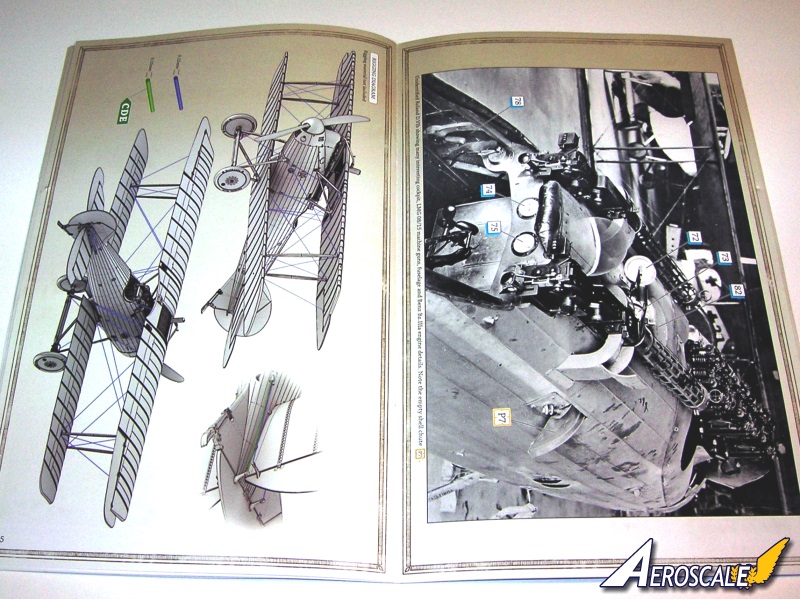
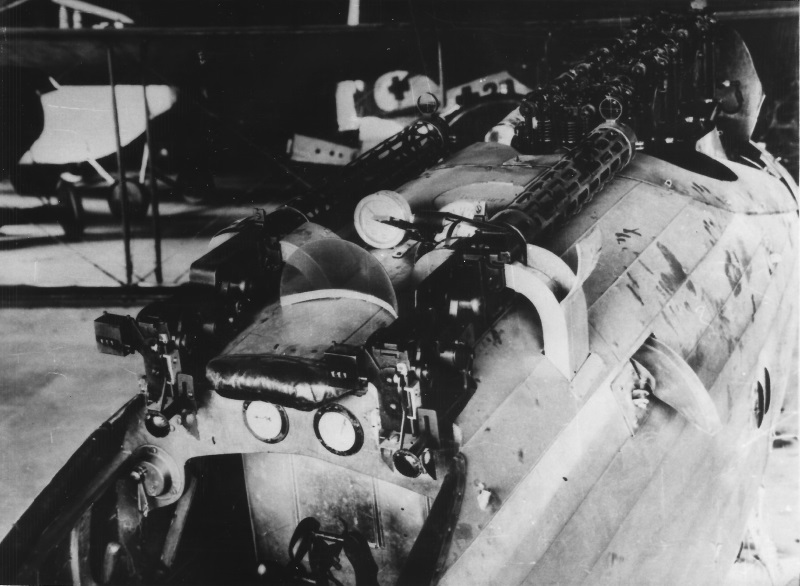
Page 7 displays images in color, black & white of the real Benz Bz.IIIa and its installation.
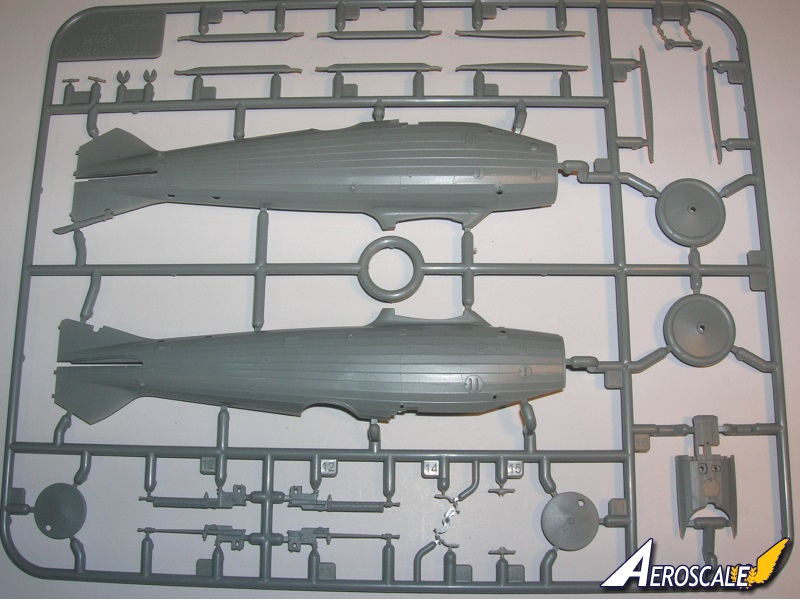
Step 5 Engine installation continued simply shows the final look of the previous assemblies and discusses the alterations to the exterior of the fuselage halves to represent the Roland D.VIb. Fuselage halves ( D 8 & 10 ) united. You will need to use rubber bands for a clamping arrangement for the front nose cowling as the fuselage side tapers inward a little too much and need to be spread to get a good fit. It needs to match the circumference of the base plate of the spinner (A 14).
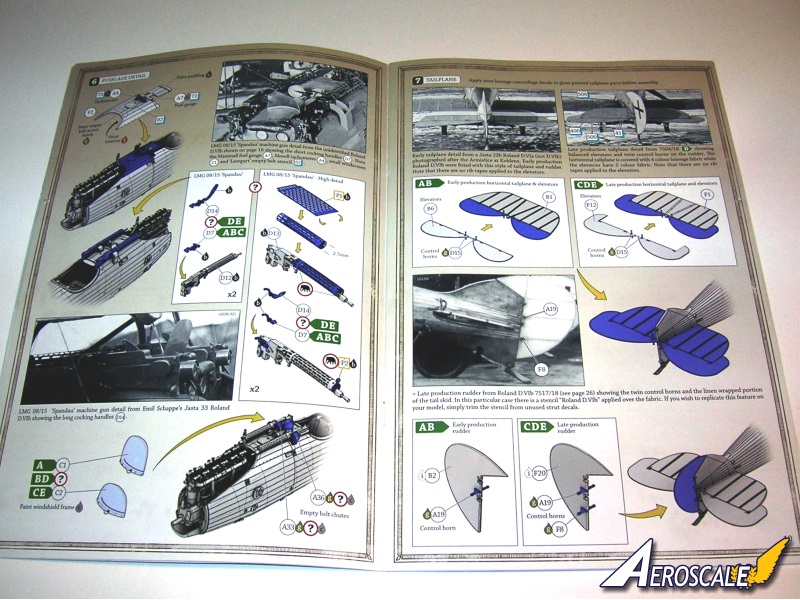
Step 6. Fuselage & twin Spandau machine gun details. PE fret is noticeably thin so take extreme care with the cooling jackets (P 1 X 2). Do not add the windscreens ( C 1 & 2 ) just yet.
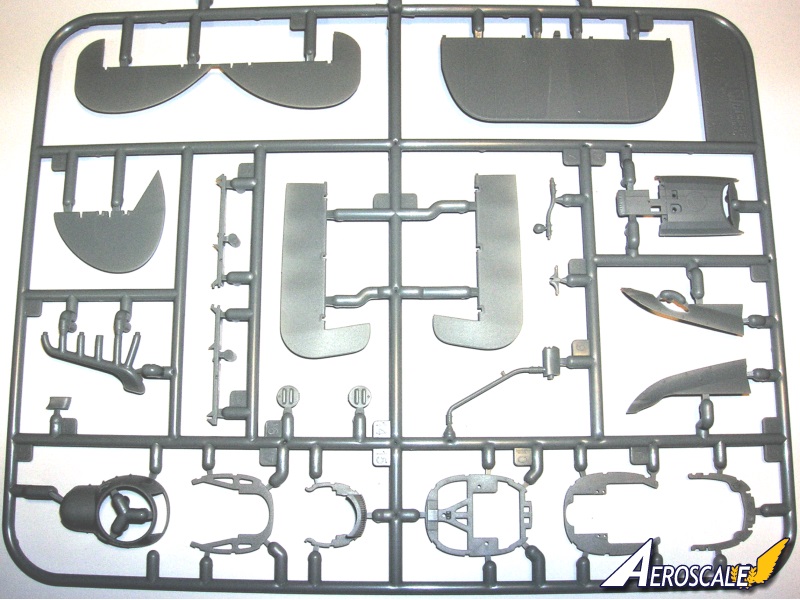
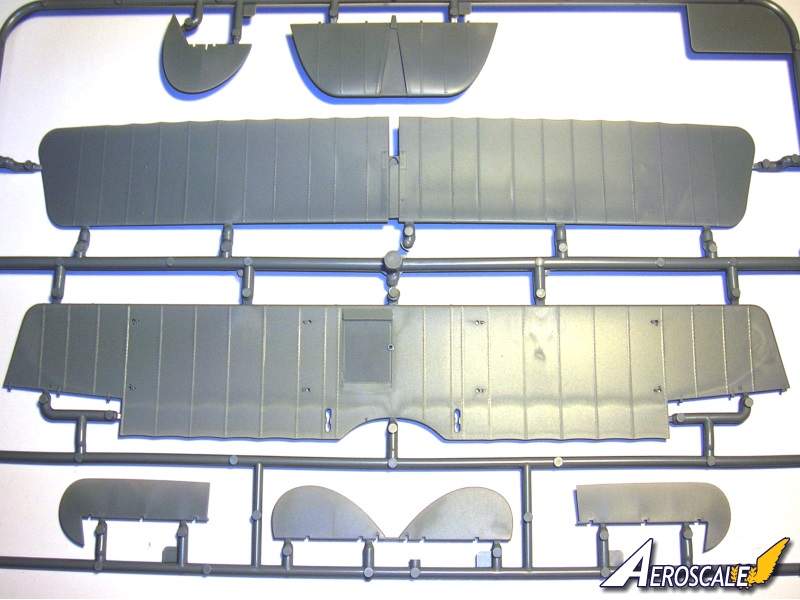
Step 7. Tailplane. The flat side of the horizontal stabilizer (B 1 or F 1) is the upper surface. Note also the different rudders offered (B 2 or F 20).
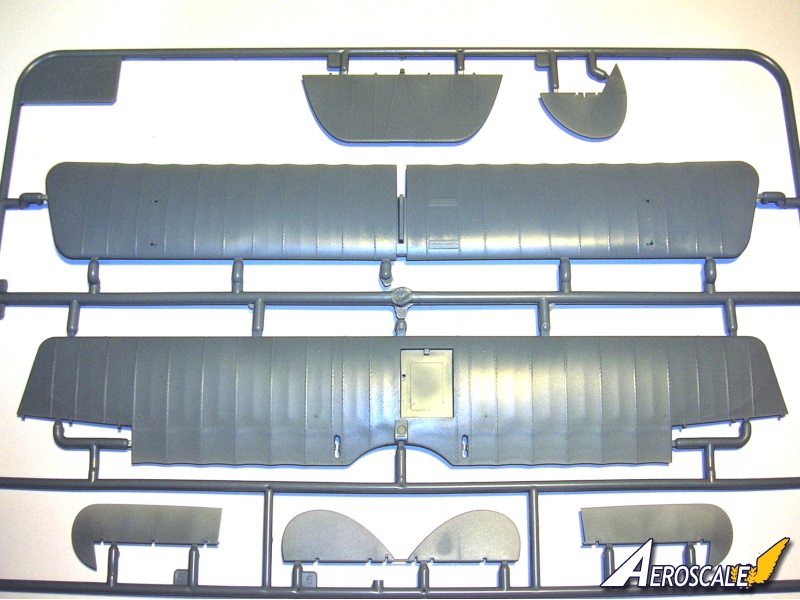
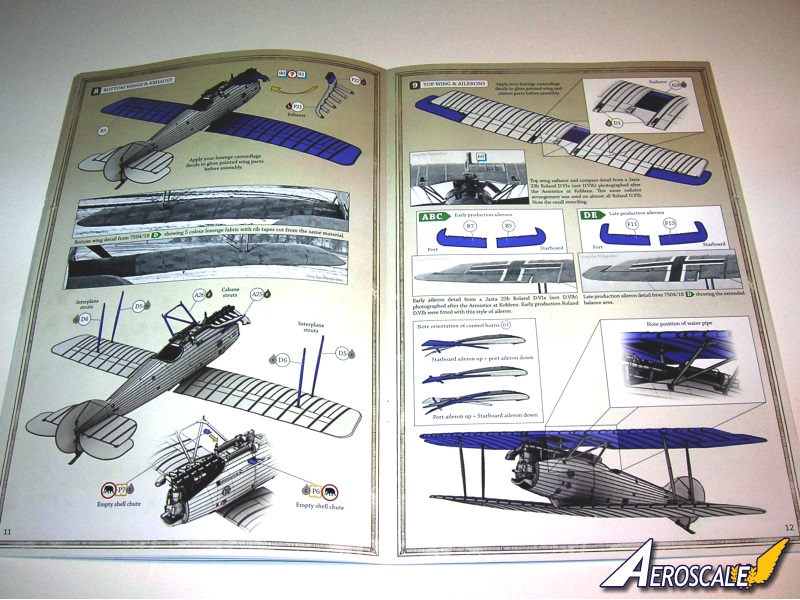
Step 8. Lower wings & exhaust. All Rol.D.VIb wings were covered with four or five color printed fabric, dark pattern on the upper surfaces and the light pattern on the under surfaces. Some used four color printed fabric rib tapes, however many D.VIb machines employed natural color woven linen rib tapes. Concerning the lower wing ( B 3 ) to united fuselage joint. My dry fit shows this is easy with no problematic gaps. That is just good engineering folks. Struts. Only the first twenty Rol.D.VIa machines had round steel tubular interplane struts with wood fairings with parallel edges, D.1200/18 to D.1219/18. All subsequent machines had wood elliptical interplane struts with sheet steel ferrules on each end. Add your windscreen choice at this time.
Step 9. Upper wings & ailerons. All Rol.D.VIb wings were covered with four or five color printed fabric, dark pattern on the upper surfaces and the light pattern on the under surfaces. Some used four color printed fabric rib tapes, tapes however most D.VIb machines employed natural color woven linen rib tapes. Note, the ailerons (B5 & 7 or F 11 & 13), elevators (B 6 or F 12) and rudder (B 2 or F 20) were not taped.
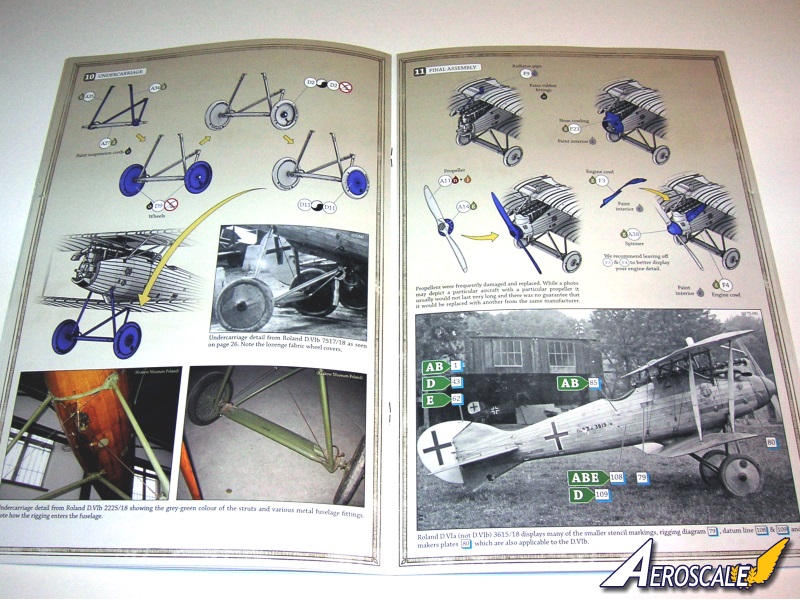
Step 10. Undercarriage / Landing gear (A 27, 34, 35) and (D 2 X 2, 9 X 2, 11 X 2) . Usually I go with brass replacements, but in this case I would use the kit items. The rear union of the Rol. D.VI type undercarriage legs gives the whole affair a more tripod look I am told this gave the aircraft some grater rigidity and strength in landings.
Step 11. Radiator pipe and water tank tower ( F 9 ) are shown for standard installation and the early version where you modify the route of the water pipe. Also placement of the engine cowling panels is discussed here. Propeller and final assembly. The cowling ring ( F 7 ) is added either modified or modified per your profile choice. The upper cowlings ( F 9 & 11 ) edges sit too high off the fuselage & need to be thinned. The propeller profiles are detailed by company type.
Page 15 The rigging diagram is a large help.
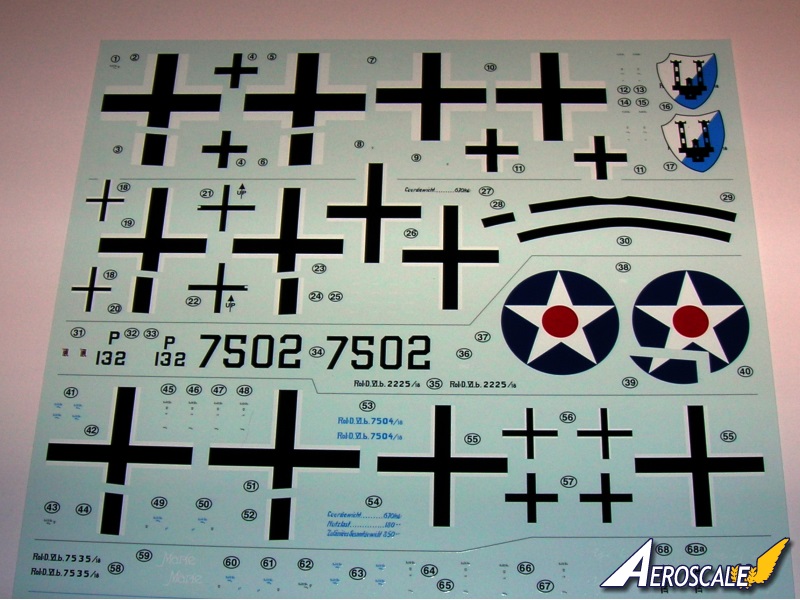
the kit decals
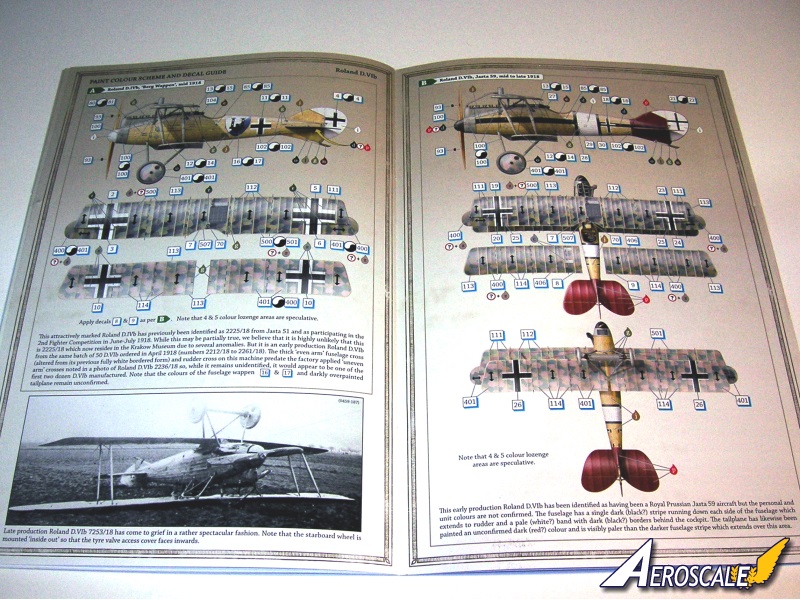
Page 17 A. Roland D.IVb, Berg Wappen, mid 1918.
Page 18 B. Roland D.VIb, Jasta 59, mid to late 1918.
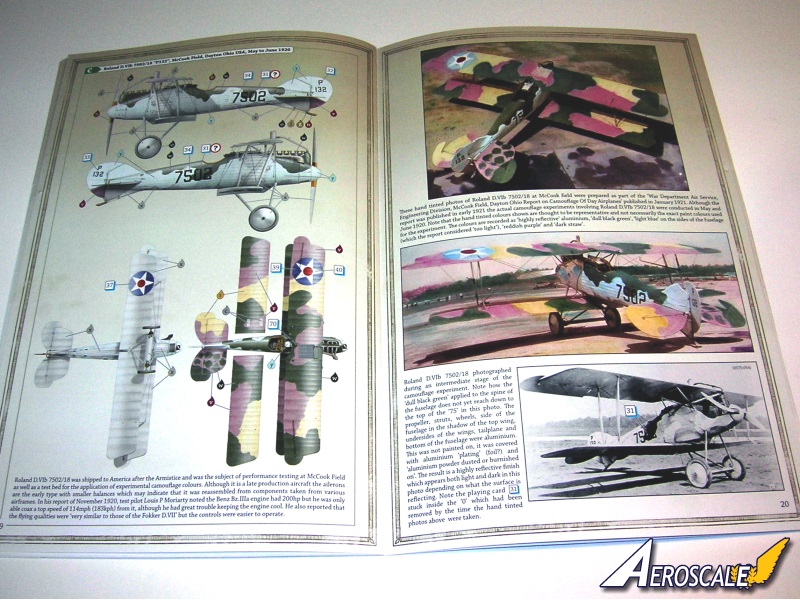
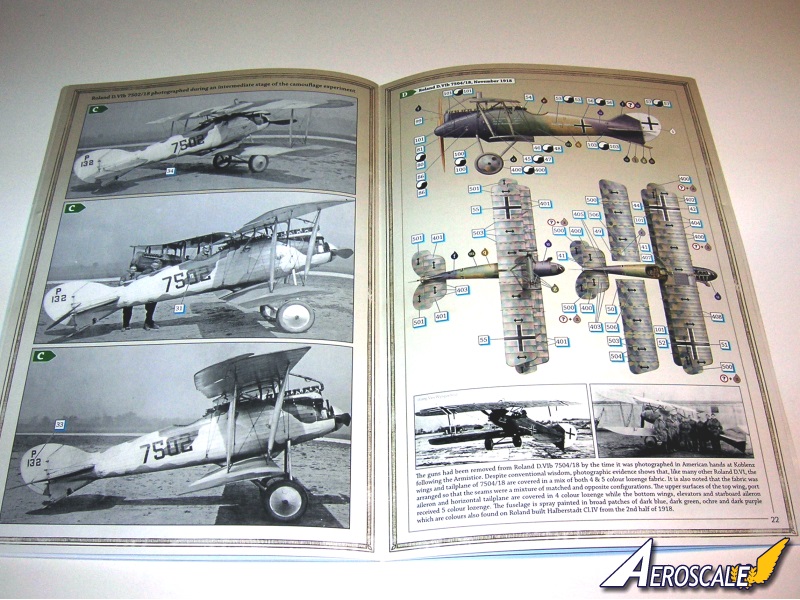
Pages 19 - 21 C. Roland D.VIb 7502/18 P132, McCook Field, Dayton Ohio USA, May to June 1920.
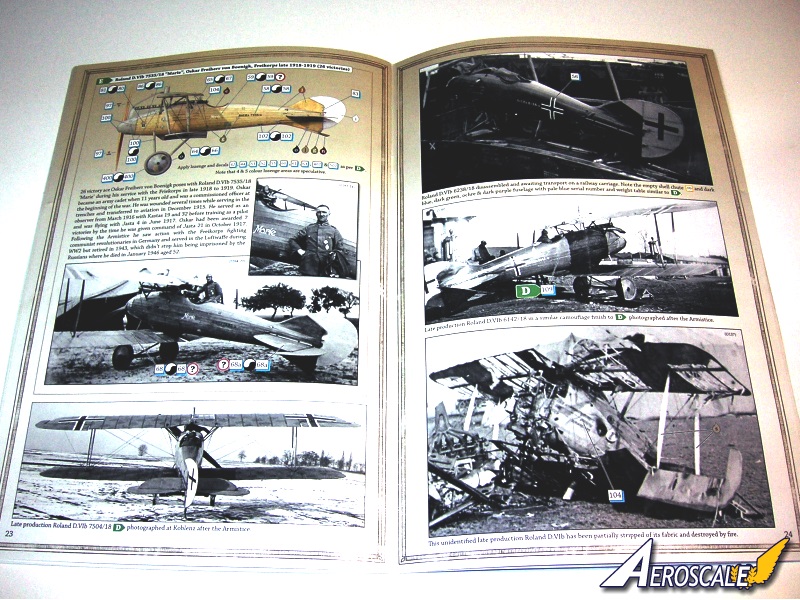
Page 22 D. Roland D.VIb 7504/18, November 1918.
Page 23 E. Roland D.VIb 7535/18 Marie, Oskar Freiherr von Boenigk, Freikorps, late 1918-1919 (26 victories)
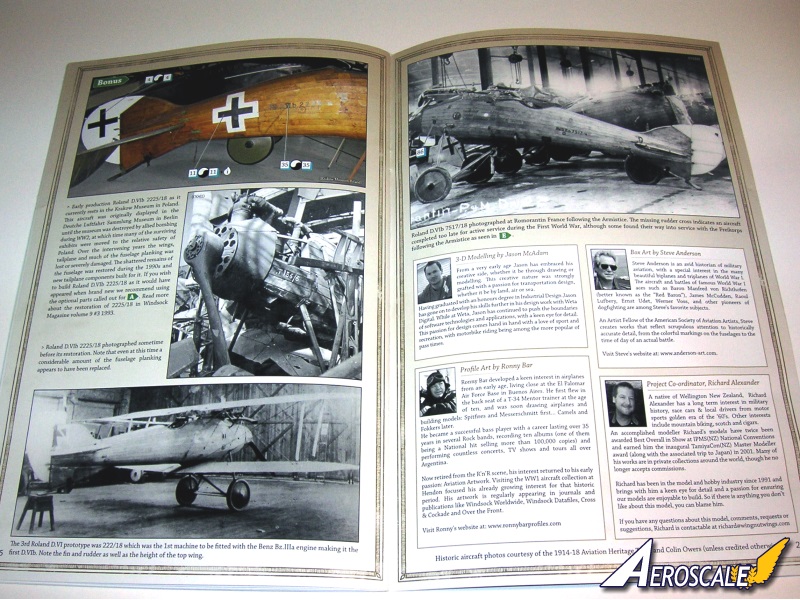
Bonus decals included for Roland D.VIb 2225/18 currently on display at the Krakow Museum in Poland.
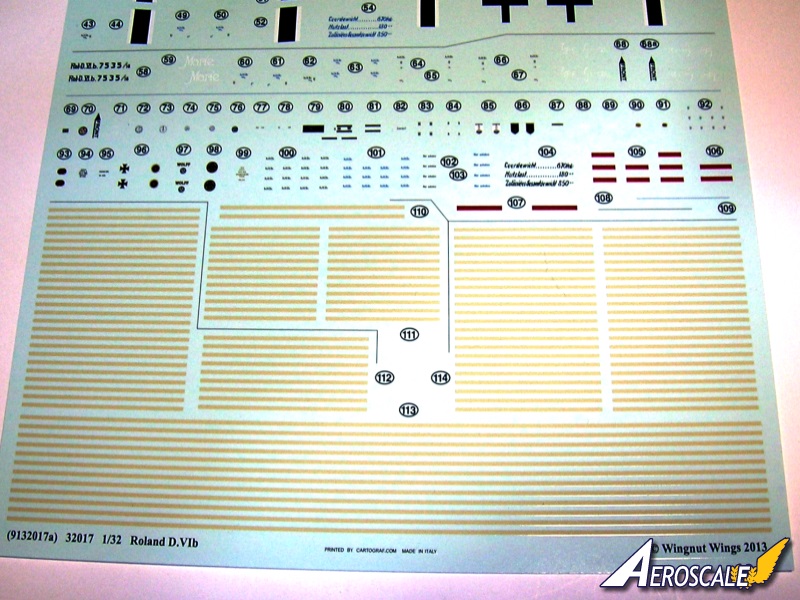
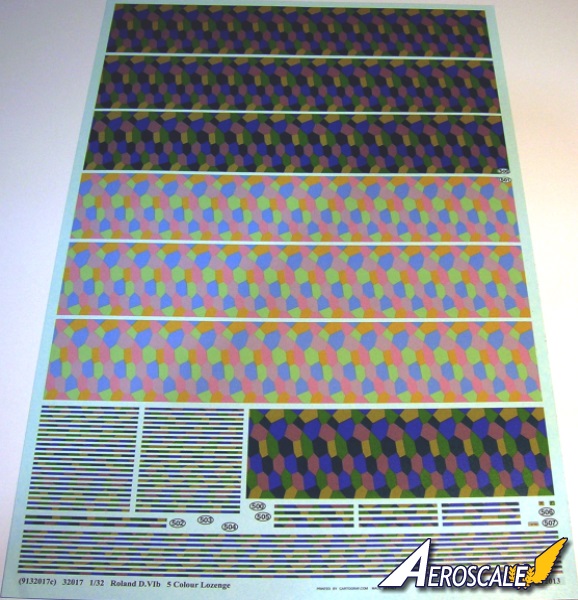
kit lozenge camouflage decals
There is a bit of joy with the lozenge (Flugzeugstoff) decals in these kits. The upper surface 4 & 5 colour is marginally too bright but the colours are very close to the known colour dyes used on the original fabric. The undersurface colours on the other hand are several shades out of tune with what they need to be. The kit recommended lozenge application (chordwise) is accurate in the instructions. The decals behave well with Microset & Microsol, not so great with solvaset.
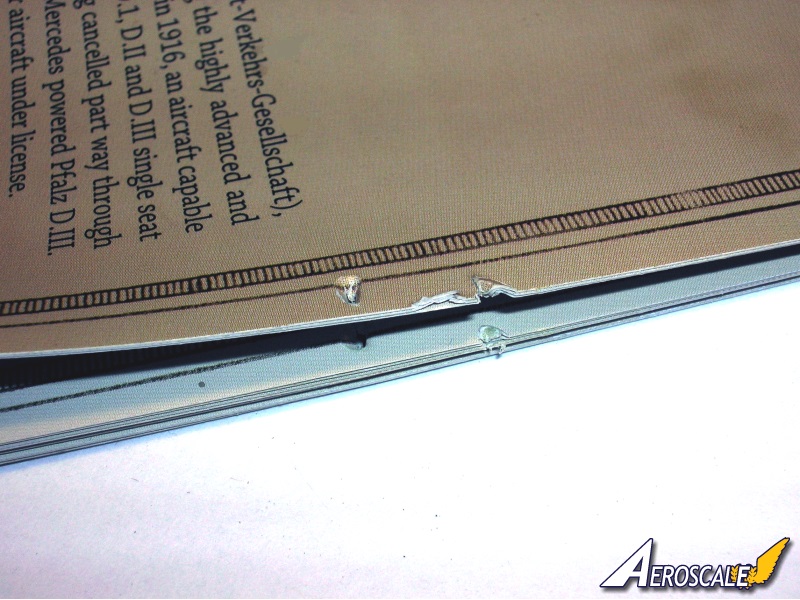
Minor issue
My review sample's instruction booklet arrived with what appears to be punctures from a misspent staple. Also the sections dealing with the Benz engine assembly have some are that are slightly blurred (blue coloured areas and some black line drawings. These are only slightly noticeable.
references
Roland D.VI by P.M. Grosz, Windsock Datafiles #37 Albatros Pub. 1993.
Roland Aircraft of WWI: A Centennial Perspective on Great War Airplanes (Great War Aviation Series) (Volume 9) by J. Herris, 2014
The Benighted Rolands, Air Enthusiast Quarterly #3.by Dan San Abbott with editing by Peter M. Grosz.
When contacting manufacturers and publishers please mention you saw this review at AEROSCALE
SUMMARY
Highs: Sharp details a unique addition to any display. The overall fit is almost perfect. The lower wing joint to the fuselage is impressive.Lows: Separate lever switches for gauges are not included. Some separate instrument gauge bezels would have been great. Weighted tires are something kits this scale should employ.Verdict: Well worth the money spent, especially if you have the earlier D.VIa kit. Having both the a & b versions will make a unique and impressive display.
Our Thanks to Wingnut Wings! This item was provided by them for the purpose of having it reviewed on this KitMaker Network site. If you would like your kit, book, or product reviewed, please contact us.
About Stephen T. Lawson (JackFlash) FROM: COLORADO, UNITED STATES
I was building Off topic jet age kits at the age of 7. I remember building my first WWI kit way back in 1964-5 at the age of 8-9. Hundreds of 1/72 scale Revell and Airfix kits later my eyes started to change and I wanted to do more detail. With the advent of DML / Dragon and Eduard I sold off my ...


Comments