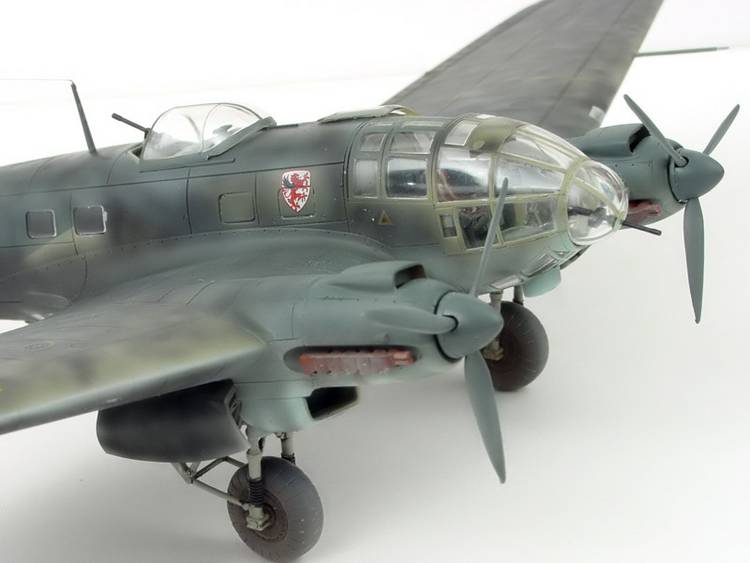
The He-111-P was the result of a hard road of development. After much revision of earlier types the He-111-P was the first He-111 to look like the He-111 with which most people can relate. The P was born out of the He-111V8 prototype and was the first He-111 design to incorporate an entirely new wing design, the characteristic glass nose, and fixed gunners cupola under the fuselage. This was brought about by a 1937 RLM requirement that all bomber crews be able to fit in one compartment in order to allow them to switch positions quickly if the need arose. Daimler Benz DB 601A type engines were used on the P series, the final being the P-6, which used the temperamental DB 601 N rated for 1,175 hp. Once the RLM decided all Daimler engines were to go to fighters, the production of the He-111-P was stopped and The Jumo powered He-111-H was built instead. For awhile both operated together on airfields in France, but it was not long before parts became difficult to get and the He-111-P soon fell out of front line service.
The Kit
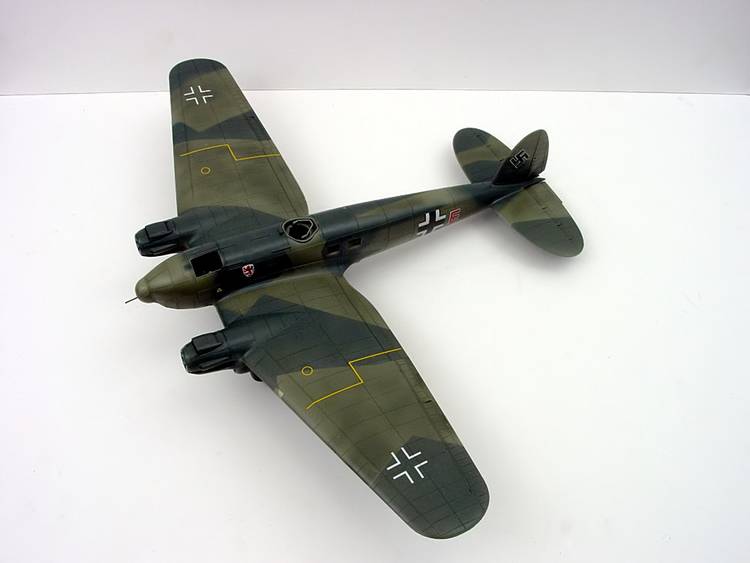
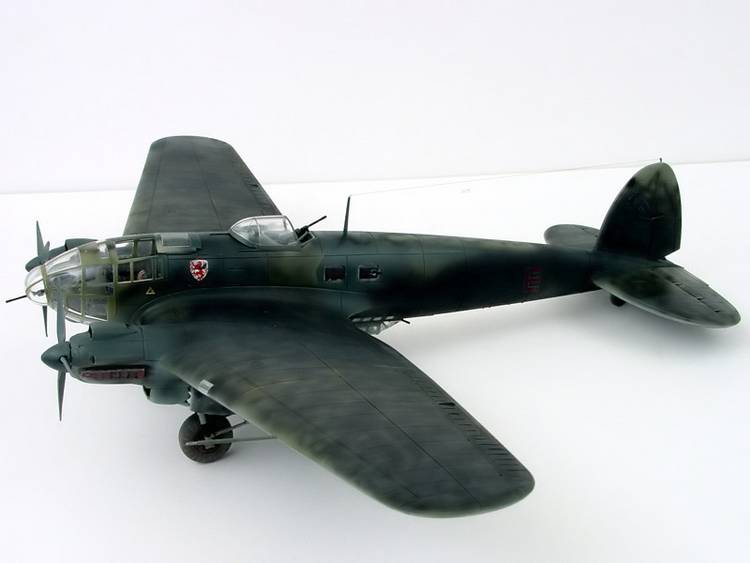
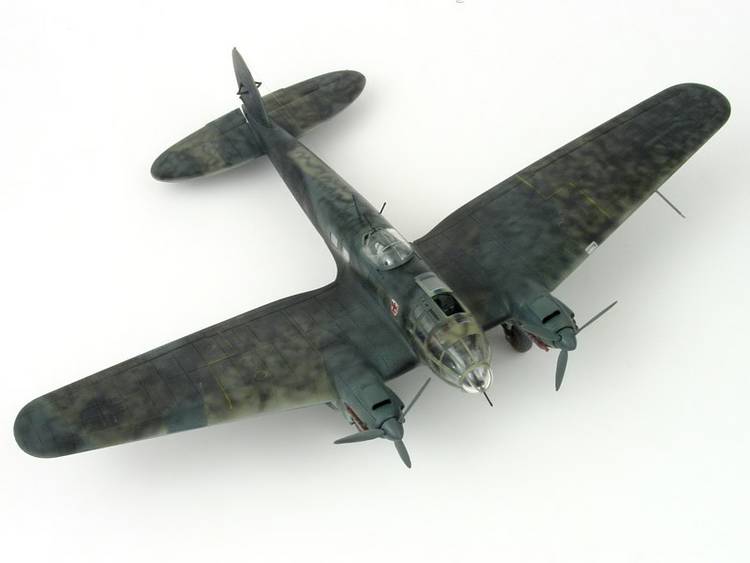
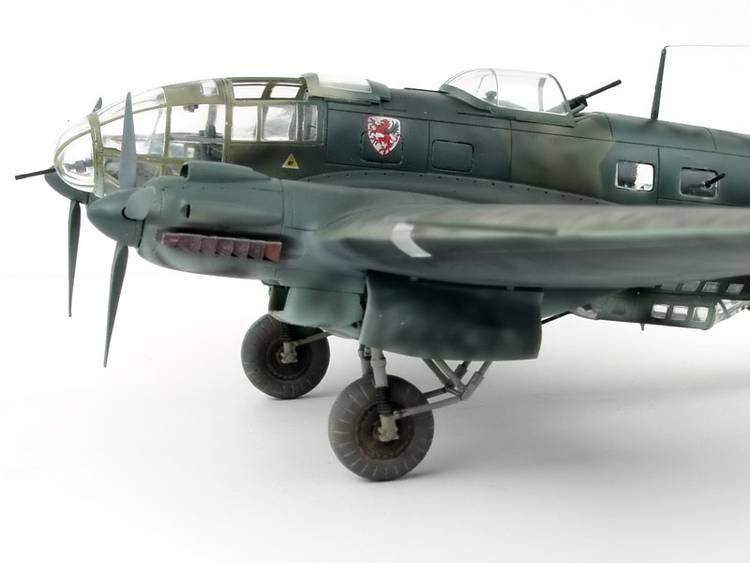
The box contains 16 sprues, 3 of which are for clear bits alone. Four of the others are duplicates and are for landing gear and the bombs/bomb-bay. The parts are molded in typical Hasegawa gray plastic which sands quite easily. Sprue attachment points are nice and small and the detail is very well done. Panel lines are recessed, even on the clear parts, and this is something I especially like because it makes masking this beast very easy indeed. The only thing I would point out is that the panel lines on the wings, fuselage, and tail seem a little large for the scale, but the over scale appearance they have on the sprue almost disappears once painted. The instructions are well printed and with one exception quite clear. 11 steps take you to the finished product. Markings consist of three choices for three different He-111-P versions. Two are night raiders from KG55, France, autumn 1940 and the third option is from III./KG27, May 1940 and is in standard 70/71/65 camouflage. The decals are interesting in that one of the options for Red E has three different sets of code letters, tail markings, and fuselage nationals depending on how much night black over-painting the modeler wishes to depict.
Assembly
The kit goes together very quickly and easily. You will spend most in two places, masking the clear parts and masking the splinter pattern.
Assembly starts with the interior, but I ignored that and masked all the clear bits first using Bare Metal Foil (BMF) and a new #11. Two nights and a couple hours later and this was done. The recessed lines on the clear parts really help a lot here and even though it took some time, the actual cutting is simple since there is a small groove to put the tip of the #11 blade into.
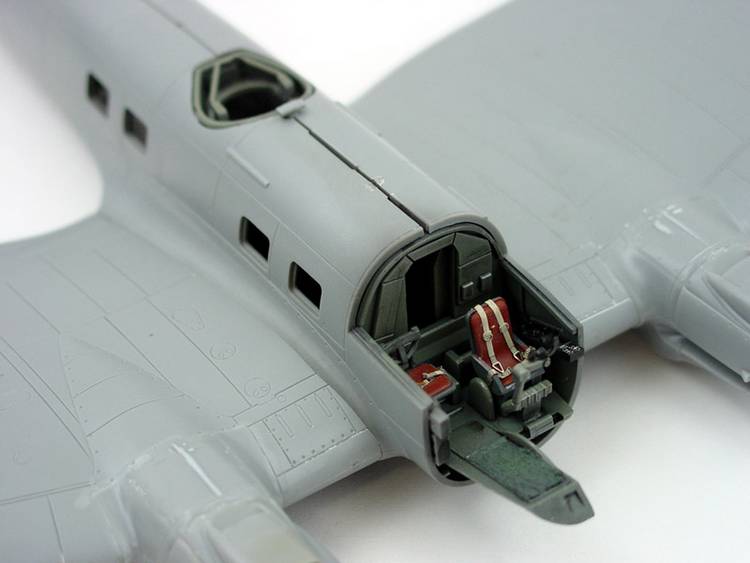
Then I moved on to the interior. This is adequate, but the super detailer could spend a lot of time here. I was going to replace the rudder pedals with a pair of PE ones from the spares box until I looked at a photo from Kagero of the interior and found the kit parts to be quite good. The kit does not come with seatbelts and IMO it is necessary to add in the cockpit area.
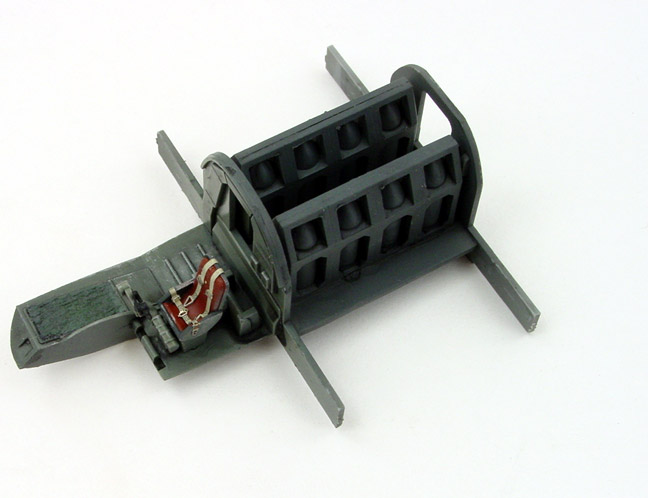
The bomb bay is next and though you get detailed racks and a full bomb load, this will never be seen in the finished model so I quickly assembled it and moved on. Note: the interior of the He-111-P series pre-dates the switch to RLM66 for interior colors so I used RLM02 instead. After painting and a quick wash of the interior and fuselage parts they can be assembled. Two things to note here:
1) It is easier to leave off the rudder pedals (parts J18) until you are ready to attach the greenhouse to avoid breaking them off.
2) On many He-111 shots it seemed I saw a pad or blanket laid in the front gunner/bomb aimers position. I made a blanket from paper towel and white glue. It looks much better than leaving the position empty.
Next up are the engines and wings as well as the horizontal stabilizers. With a little careful dry fitting these parts fit with no need of filler and very little sanding. Attachment of these parts to the fuselage is simple since Hasegawa provides wing spars to not only make a strong bond but assure proper dihedral to the wings. The same is true for the horizontal stabs, they mate using interlocking tabs and it is impossible to get these parts together without them being aligned properly. This is a huge plus for an aircraft model.
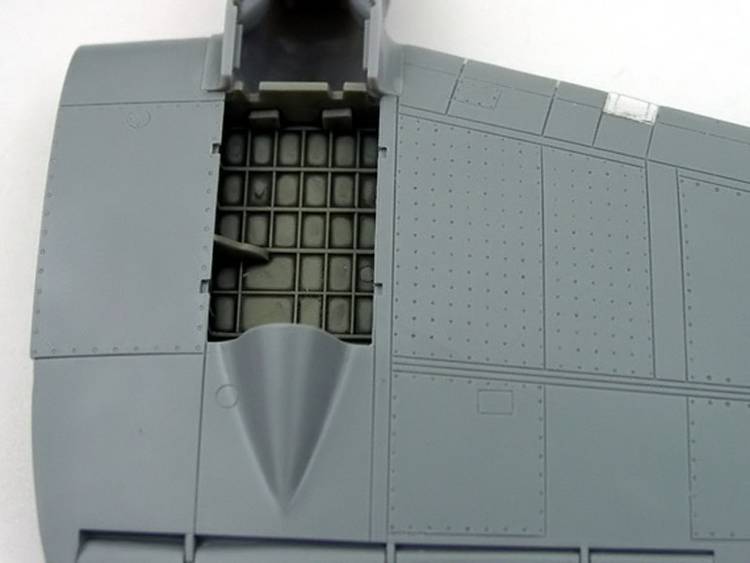
Attaching the clear bits and Bombay comes next and here is where the assembly gets tricky for a moment. All the clear parts fit perfectly, which is good, but some effort is required to get the lower bomb bay (C9) and the doors (C8, C7) to fit properly. Note: the doors themselves should be left closed. Hasegawa gives instructions for opening them, but they were spring loaded so unless a ground crew was actively loading the bombs you would not see them open ever (except for the brief second it took for the bombs weight to open the door as it was dropped).
IMO the trickiest part of the build is next, the landing gear, and this is the only time I wish Hasegawa was clearer in their instructions. The landing gear on the He-111 is complicated and in the kit consists of five parts per side. Hasegawa would have you assemble these first and then mount them to the wheel bays. I would recommend against doing this. In order to insure a stable landing gear the most important part is the alignment and fit of the front and rear struts (K15, K13). Glue these into the wheel bay first. Then when they are dry join the arms from K13 to the alignment holes on K15. This is not shown clearly in the instructions so take care and look at a picture of a real He-111 when building the landing gear. After all this has set up and is strong add the center section (J2). It is not a part necessary for support and adding it last makes for easy assembly of this tricky gear configuration. Repeat for the other side.
Little details are all that remain at this point and the only trouble spot left is the landing light cover. This part does not fit flush with the wing leading edge and will require either cutting or sanding to make it fit. I glued mine and sanded it flush and then used 1200-1500 grit paper and mirror glaze to bring it back to life.
Painting and Decaling
I chose to paint my model in a scheme used by KG55 for night raids. This was a squiggle/mottle pattern of RLM22 night black applied over the standard day scheme. These aircraft were painted with water soluble black paint and repainted every couple of months or depending on mission requirements. As a result there was a lot of paint removal and reapplication in the field. This left me wide open for artist license since these planes never looked exactly alike. First I applied the standard day scheme as this would show through the night black application. I also applied decals at this stage, including stencils, because they would only be partially painted over later. The decals settled nicely and I used a #11 knife and Solvaset to get them to truly snuggle into the panel lines. At this point it was time to begin the coverage with RLM22 night black. I actually used a very thinned, about 70-30 mix of flat black and airbrush cleaner, and began the squiggles and mottles. Once dry I removed my masking on the clear parts, polished them, added final details and was finished.
Comments on accuracy
(e.g. by comparison to scale diagrams or photos).
I compared the kit parts to plans and photos from Kageros He-111 series. The kit parts scale out great and Hasegawa did a wonderful job getting the dihedral correct as well as the odd gear to engine alignment so telling on the He-111. One other thing that I personally thought was a nice touch is the exhaust stacks. They appear to have small sink marks of each stack, but these are actually really there and its just another example of Hasegawas fine detail on this model.
Recommendation
The He-111 is a kit that modelers have wanted for some time. With Hasegawas release of the P, this offers the modeler the chance to do some early versions of this famous bomber. Considering the superb engineering of this kit and its ease of construction I would highly recommend it to anyone.
Many thanks to Dragon Models USA, via Saúl García, for the review sample.
Please remember, when contacting retailers or manufacturers, to mention that you saw their products highlighted here - on ARMORAMA