_GOTOBOTTOM
Pre-Flight Check
Constructive critique of your finished or in-progress photos.
Henschel Hs 129 B-2
Holdfast
Staff MemberPresident
IPMS-UK KITMAKER BRANCH
#056
_VISITCOMMUNITY
England - South West, United Kingdom
Joined: September 30, 2002
KitMaker: 8,581 posts
AeroScale: 4,913 posts
Posted: Monday, April 19, 2004 - 07:31 AM UTC
Here are a few pics of my Henschel Hs 129 B-2. Before I start on the decals I would like some comments on the painting. Please say what you think, I'm looking for your impressions of what I have done, as I have tried something out. I wont say what I think, yet. I really do want you to be honest, but, if you can, reasons why, will also be useful .


Mal
Part-timer
_VISITCOMMUNITY
Georgia, United States
Joined: April 11, 2003
KitMaker: 361 posts
AeroScale: 0 posts
Posted: Monday, April 19, 2004 - 07:56 AM UTC
Looks quite impressive, as usual for you. However, it does seem that there's more shading visible under the darker color - just the opposite of what I'm used to seeing. This apparent effect is variable in intensity from one photo to the next, so maybe it's all a photgraphic artifact. Can't wait to hear what new trick you've employed.
Delbert
#073
_VISITCOMMUNITY
Pennsylvania, United States
Joined: October 05, 2002
KitMaker: 2,659 posts
AeroScale: 209 posts
Posted: Monday, April 19, 2004 - 09:06 AM UTC
I know I can see the preshading a lot better through the darker color than the lighter color.

It looks ok but i can't say I like the effect.

i'll bite and take a chance.. did you by chance preshad it then paint the plane with the darker color.. then after that dried painted the lighter color.. waited till that dried and then removed part of the ligher coat so the darker one would show through.

just a guess prob wrong but when i look at the pics i kinda get the impression i'm looking at 3 seperate layers.


by the way i have one of these sitting in my build pile and will be watching this with interest.. :>
OllieC-FWOL
_VISITCOMMUNITY
Quebec, Canada
Joined: March 31, 2004
KitMaker: 446 posts
AeroScale: 0 posts
Posted: Monday, April 19, 2004 - 12:00 PM UTC
Looking good, but I think your camo should be hard eged.

Luftwaffe paint jobs were usually so.

#:-)
Major_Goose
_VISITCOMMUNITY
Kikladhes, Greece / Ελλάδα
Joined: September 30, 2003
KitMaker: 6,871 posts
AeroScale: 0 posts
Posted: Monday, April 19, 2004 - 09:02 PM UTC
i d go with Delbert as a guess, some new style of preshading maybe , but isee it varying too much from spot to spot. Uncover and say to us
Merlin
Staff MemberSenior Editor
AEROSCALE
#017
_VISITCOMMUNITY
United Kingdom
Joined: June 11, 2003
KitMaker: 17,582 posts
AeroScale: 12,795 posts
Posted: Tuesday, April 20, 2004 - 09:54 AM UTC
Hi Mal

Just to be different from the others, I'll say that looks like post-shading in a darker shade of the base colour. To be honest, I'm not sure what to make of it yet - it differs from one pic to the next and looks a bit overdone in some.

I've tried post-shading with ultra-diluted Tamiya Smoke and been able to get some quite subtle effects.

I'm intrigued by the camouflage colours - I'd expect RLM 70 & 71 in a splinter pattern, but the lighter colour looks more like RLM 02. Looking forward to seeing more.

All the best

Rowan
Holdfast
Staff MemberPresident
IPMS-UK KITMAKER BRANCH
#056
_VISITCOMMUNITY
England - South West, United Kingdom
Joined: September 30, 2002
KitMaker: 8,581 posts
AeroScale: 4,913 posts
Posted: Wednesday, April 21, 2004 - 07:18 AM UTC
Those of you who have read my article on pre-shading may know may thoughts on this subject and that I have proved, to myself at least, that it is possible to pre-shade under the, generally darker, uppersurface colours on aircraft. The problem with pre-shading under darker colours is, when sprying these colours it's very difficult to see when to stop (in my spry booth anyway) and the time to stop can all to easily be passed. Because of this I have been thinking of ways in which to overcome the problem.
First of all I'll answer one of the queries;

Quoted Text

Looking good, but I think your camo should be hard eged.
Luftwaffe paint jobs were usually so.OllieC-FWOL


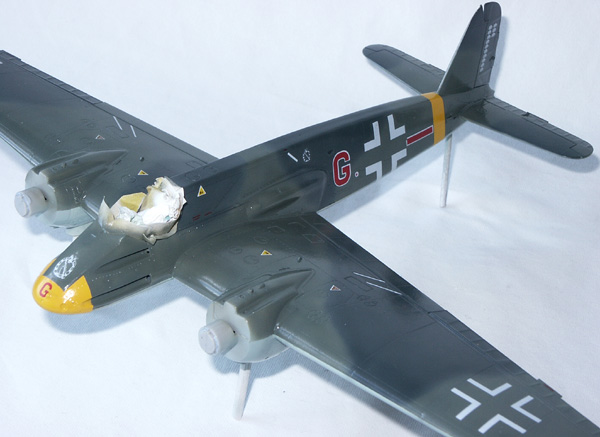
Yep, on Hs 129's they usually were, but I chose to do this, kit, scheme because of what I'm trying to do. Until I get it right I don't want to be masking splinter camo, and what's coming next will make this immaterial.
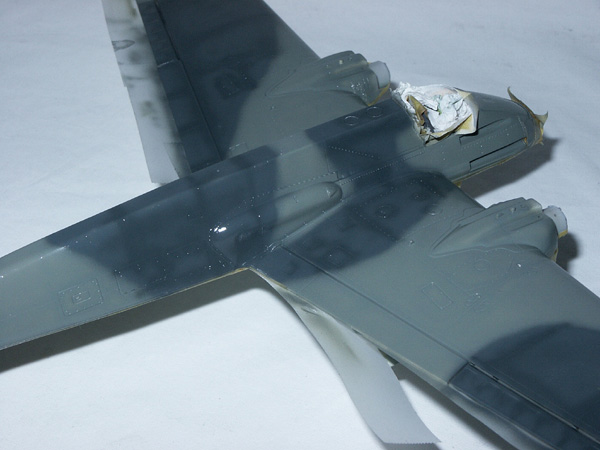
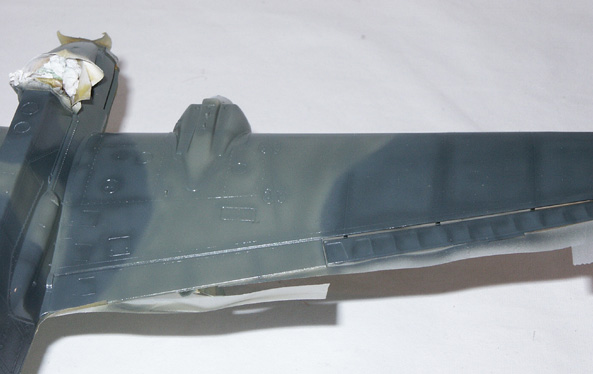
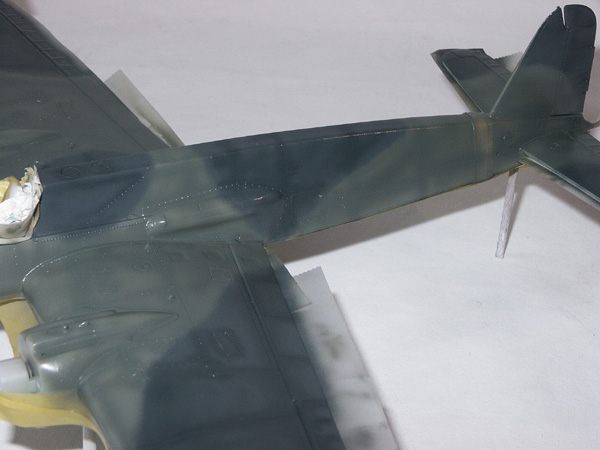
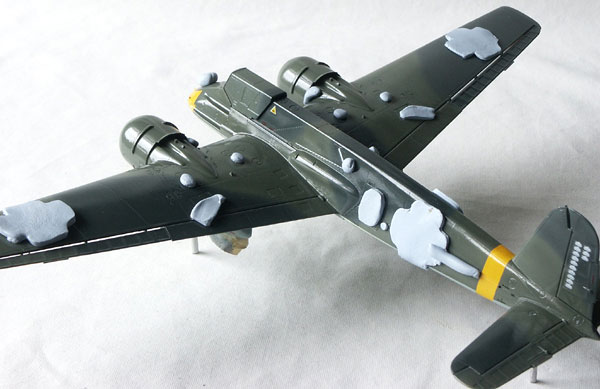
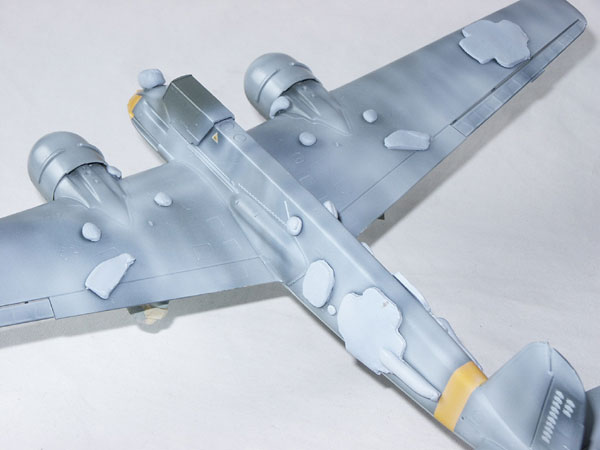
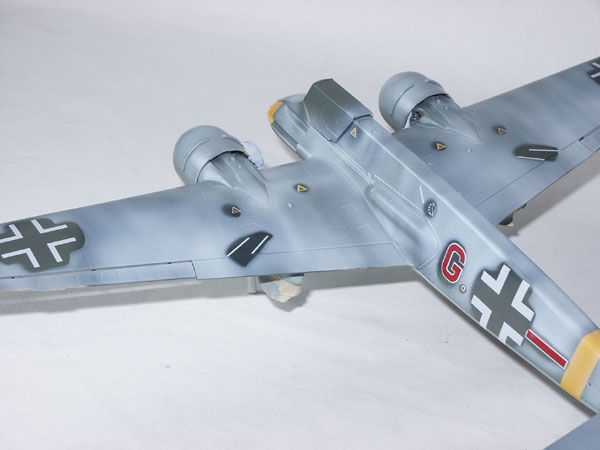
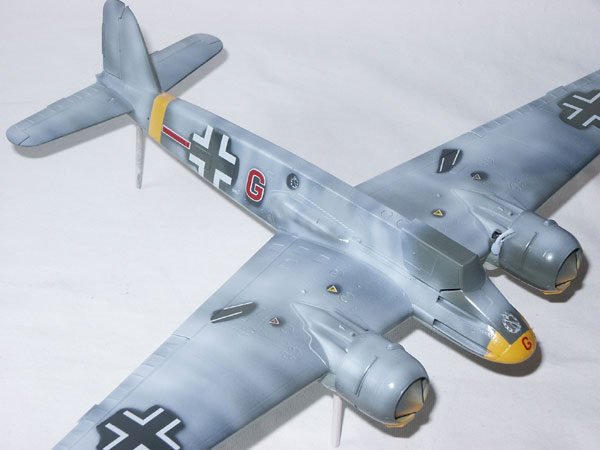
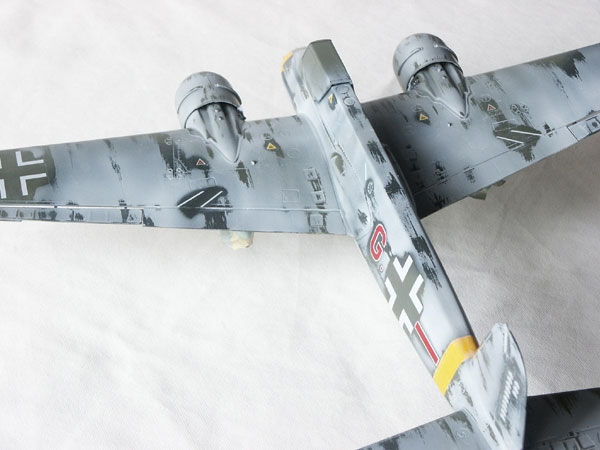
What I did
I'm not a total advocate of the "scale colour" brigade, but a lighter colour does make for easier pre-shading. So, in the first 4 pics is my first attempt (imagine it without the RLM 70 Black Green). I took neat Xtracolor RLM 71Dark Green and sprayed it along panel lines, and around deatail (just in the areas to be Dark Green), ala pre-shading. I then lightened it with white and sprayed over the Dark Green areas. You can just about see the darker areas in some places. However the effect acheived is not good, looking more like RLM 02, as Rowan suggests.
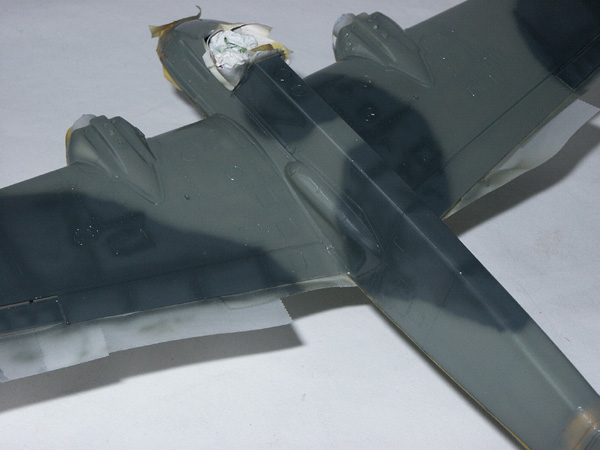
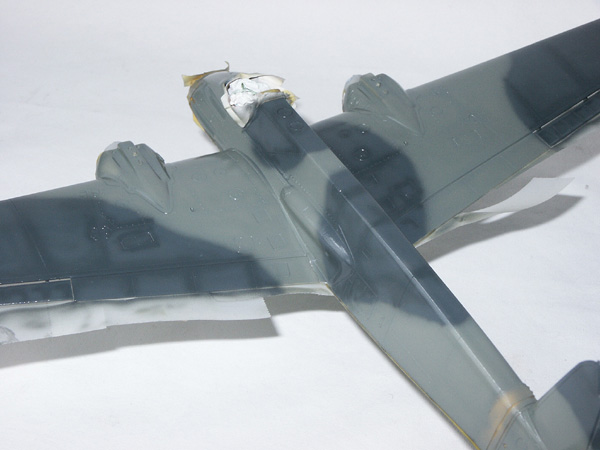
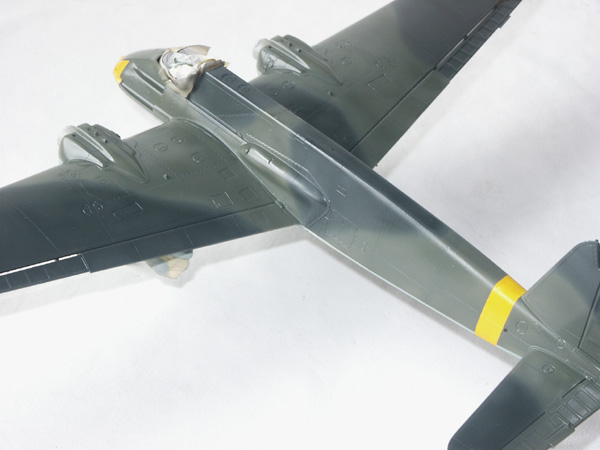
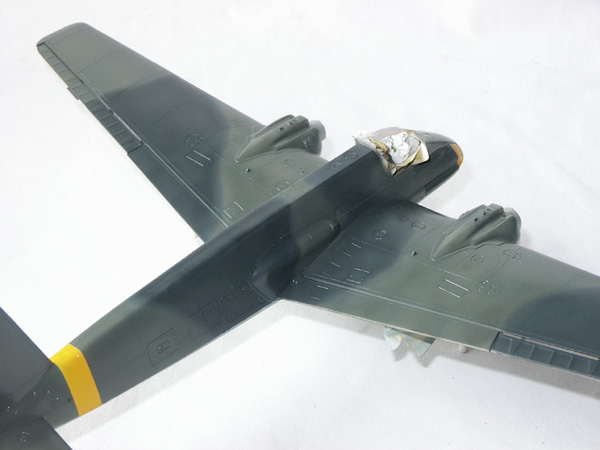
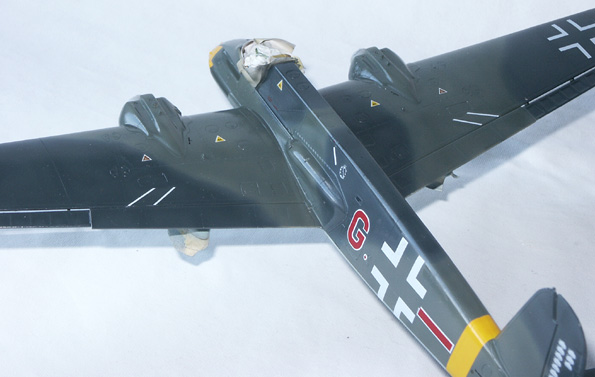
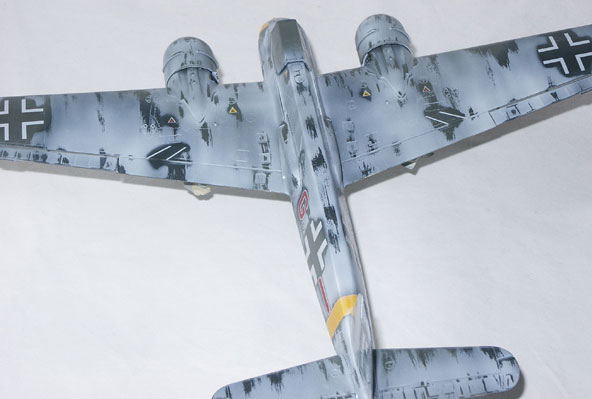
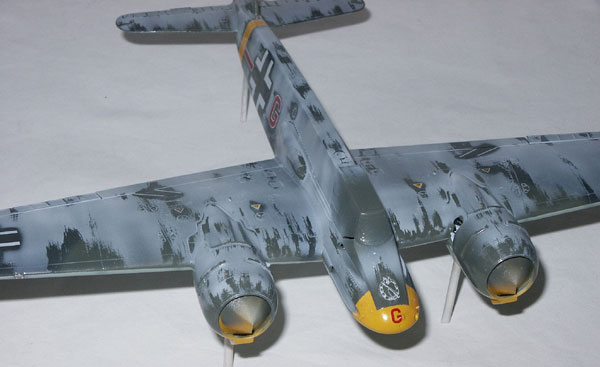
For the RLM 70 I used a slightly different approach. This time I lightend the colour first, covering the areas to be RLM 70. I then used neat RLM 70 to spray along panel lines and around detail, just in the RLM 70 areas. This time, however, I sprayed a wider area than I normally would when pre-shading. Next I backed off, opened the spray pattern and misted on the RLM 70. The idea was to blend the lighter and darker shades. I then went back to the RLM 71 areas and used this technique on them. This is why pics 5 & 6 are different. The second method a sort of post/pre-shading has merits, but has not been totally succesful. The effect is not subtle enough, but I think I lightened the colour to much, and/or didn't cover/blend with the straight colour enough.
My plan is to go over the relevant areas with neat RLM 70/71 and see if I can blend them better. What do you think?
The beauty of this method, over regular pre-shading, is that it's done all in one spray session, no waiting for the black/dark grey to dry. I believe this technique has some miles in it and will be experimenting some more.

Quoted Text

by the way i have one of these sitting in my build pile and will be watching this with interest. Delbert


There are some pics of the cockpit and a discussion of the same on the aircraft board. A filter search under Luftwaffe WWII should find it/them
Thoughts comments on the above please.
Mal
OllieC-FWOL
_VISITCOMMUNITY
Quebec, Canada
Joined: March 31, 2004
KitMaker: 446 posts
AeroScale: 0 posts
Posted: Wednesday, April 21, 2004 - 08:50 AM UTC
Oh ok, can't wait to see the results!!

Holdfast
Staff MemberPresident
IPMS-UK KITMAKER BRANCH
#056
_VISITCOMMUNITY
England - South West, United Kingdom
Joined: September 30, 2002
KitMaker: 8,581 posts
AeroScale: 4,913 posts
Posted: Thursday, April 22, 2004 - 07:11 AM UTC
Oops, sorry filter for the threads about the Hs 129 cockpit should be WWII-Germany
Mal
jw73
_VISITCOMMUNITY
Wojewodztwo Zachodniopomorskie, Poland
Joined: April 08, 2002
KitMaker: 148 posts
AeroScale: 0 posts
Posted: Tuesday, May 25, 2004 - 02:26 PM UTC
Sorry but panel lines are almost invisible for me.
Holdfast
Staff MemberPresident
IPMS-UK KITMAKER BRANCH
#056
_VISITCOMMUNITY
England - South West, United Kingdom
Joined: September 30, 2002
KitMaker: 8,581 posts
AeroScale: 4,913 posts
Posted: Monday, June 14, 2004 - 08:37 AM UTC
Finally got around to doing a bit more to this. I have got rid of the "over dramatic" affect by over spraying with diluted straight colour. It was a nice experiment, but I think I'll stick to simple pre-shading, for now.


Klear was brush painted on and the kit decals applied. These are actually quite good apart from being matt, which appears like "silvering". I've tried to capture the affect in the pics but failed, which probably bodes well. I have since brush painted a cot of Klear over the decals and the "silvering" affect has almost gone. Another coat should see it off completely


Comments welcome, as usual
Mal
didiumus
_VISITCOMMUNITY
Utah, United States
Joined: March 18, 2003
KitMaker: 564 posts
AeroScale: 0 posts
Posted: Monday, June 14, 2004 - 09:18 AM UTC
Hi Mal,

Wish I had popped on to this one earlier. The Post shading was beautiful. It still looks good, but I have used this technique before and you had really nailed it. Once you gloss and dull coat, particularly dull coat, it starts to blend the work together. A wash of burnt or raw umber in all of the panel lines will also blend it all together.

At any rate, beautiful job! Dont give up on the post shade technique, you were getting it right! Maybe use a shade slightly closer (just a smidgeon less contrast) and then leave it for the blending.

Smashing work. Keep it up.

Scott Gentry
Holdfast
Staff MemberPresident
IPMS-UK KITMAKER BRANCH
#056
_VISITCOMMUNITY
England - South West, United Kingdom
Joined: September 30, 2002
KitMaker: 8,581 posts
AeroScale: 4,913 posts
Posted: Thursday, July 15, 2004 - 11:27 PM UTC
Well I finally managed to get the winter "white wash" done.

I used Blue-Tack to roughly mask of areas that I believe wouldn't be painted over, such as the insignia and the bomb aiming lines.


I added a few drops of medium sea grey to gloss white, to tone it down and help to make it look worn. I then sprayed it on thinly, over the upper surfaces, building it up a little more in places. Hopefully this has helped to give it a worn used look.


Blue-Tack masking removed,gives the effect I was after


I gave the "white wash" about a day to dry then, using a cotton bud dampend in white spirit, removed some of it in selected areas. I made sure that I wiped in the direction of the air flow.


This is my first attempt at a winter "white wash" scheme, I'm quite pleased with it, so far. What do you think?
The next stage will be another coat of Klear followed by washes.
Mal
Merlin
Staff MemberSenior Editor
AEROSCALE
#017
_VISITCOMMUNITY
United Kingdom
Joined: June 11, 2003
KitMaker: 17,582 posts
AeroScale: 12,795 posts
Posted: Friday, July 16, 2004 - 04:53 AM UTC
Hi Mal

The cotton-bud trick is really neat. It could also hold a lot of promise for heavily weathered finishes where bare-metal is showing through...

Nice one!

Rowan
Holdfast
Staff MemberPresident
IPMS-UK KITMAKER BRANCH
#056
_VISITCOMMUNITY
England - South West, United Kingdom
Joined: September 30, 2002
KitMaker: 8,581 posts
AeroScale: 4,913 posts
Posted: Saturday, July 17, 2004 - 07:04 PM UTC
Yes Rowan, I had similar thoughts as I was doing it, its very controlable, which I think will be the key to obtaining a heavily weatherd, paint peeling Japanese paint scheme. This bodes well for my "ultimate" winter "white wash" scheme, Rudels Ju 87G-2 of which I have pics

Mal
 _GOTOTOP