_GOTOBOTTOM
World War II: USA
Aircraft of the United States in WWII.
Hosted by Rowan Baylis
Curtiss SO3C-3 "Seamew": A "Repair" Story
Redhand
#522
_VISITCOMMUNITY
New Jersey, United States
Joined: January 20, 2013
KitMaker: 1,460 posts
AeroScale: 1,443 posts
Posted: Sunday, September 22, 2019 - 02:44 AM UTC
THE CURTISS SO3C-3 "SEAMEW": A MAGNIFICENT FAILURE

As I have told other modeling friends, I love aviation failures such as the Brewster Buffalo. And, when the failure comes from my former employer of two decades, Curtiss-Wright Corporation, the temptation to document it is well nigh irresistible.

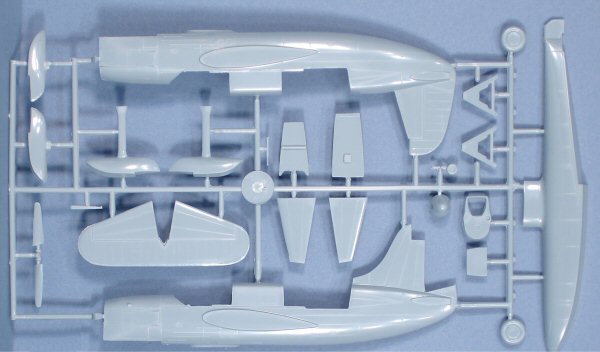
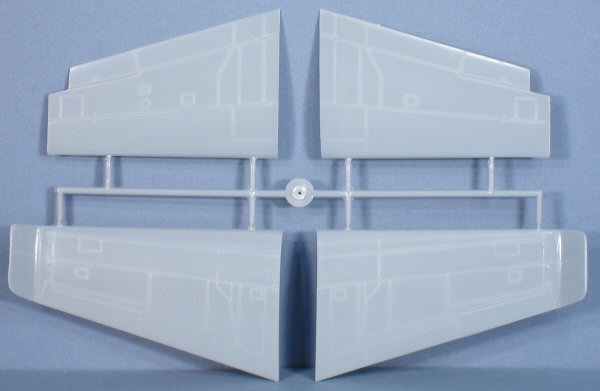
So, it was inevitable when the Czech Model 1/48 Curtiss SO3C kit came out in 2005 that I would build it. The Seamew is justly regarded as one of the Company's worst wartime failures, see this video at 6:01 for a taste. For those who prefer the written word, this Wikipedia summary is apt.


Quoted Text

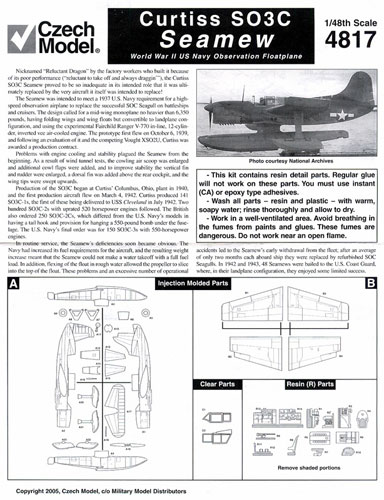
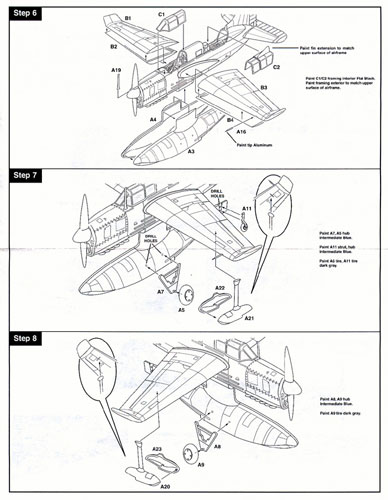
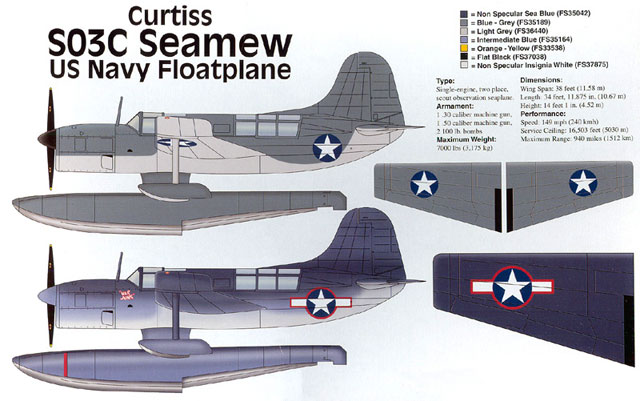
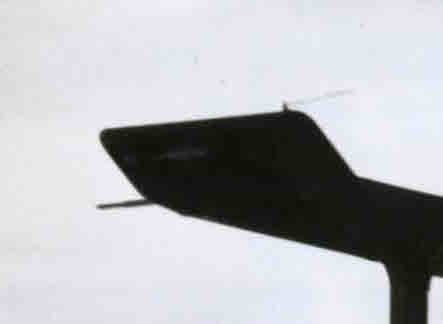
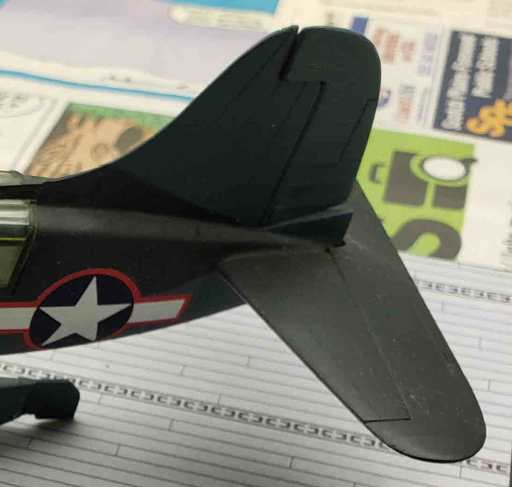
From the time it entered service the SO3C suffered two serious flaws: inflight stability problems and problems with the unique Ranger air-cooled, inverted V-shaped inline engine. The stability problem was mostly resolved with the introduction of upturned wingtips and a larger rear tail surface that extended over the rear observer's cockpit. The additional tail surface was attached to the rear observer's sliding canopy and pilots claimed there were still stability problems when the canopy was open; the canopy was often open because the aircraft's main role was spotting. While the in-flight stability problem was eventually addressed (although not fully solved), the Ranger XV-770 engine proved a dismal failure even after many attempted modifications. Poor flight performance and a poor maintenance record led to the SO3C being withdrawn from US Navy first line units by 1944. The older biplane SOC was taken from stateside training units and restored to first-line service on many US Navy warships until the end of World War II.


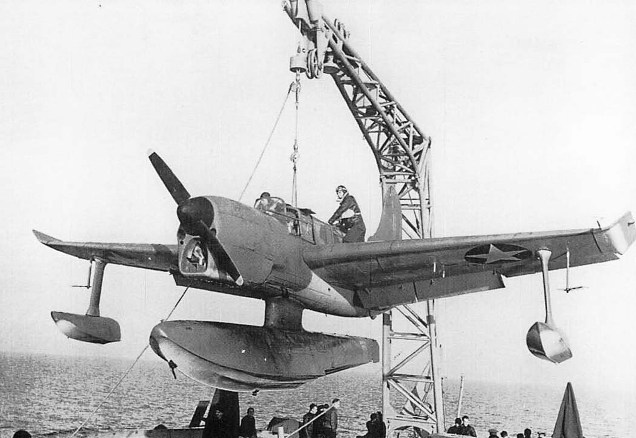
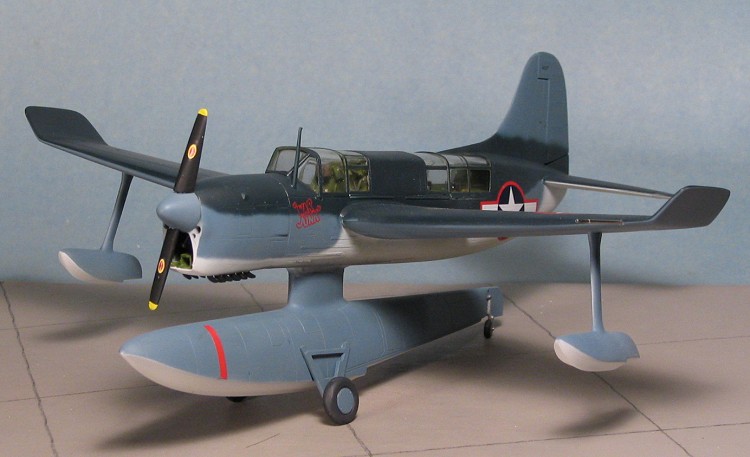
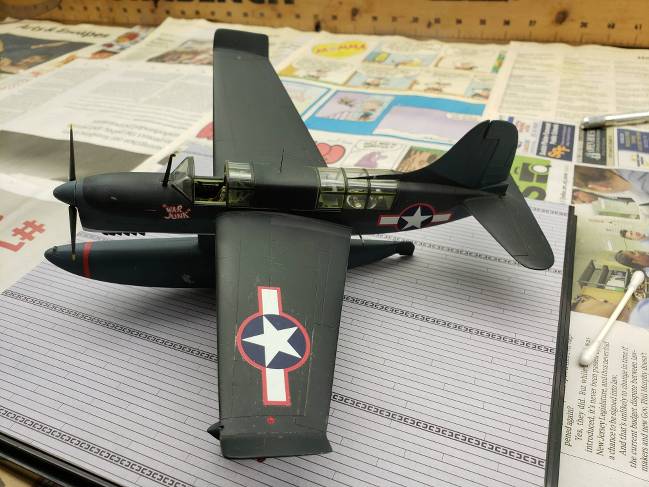
When I saw the Czech Model box art, there was no question I had found my modeling subject.


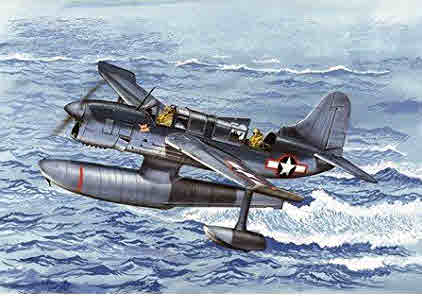
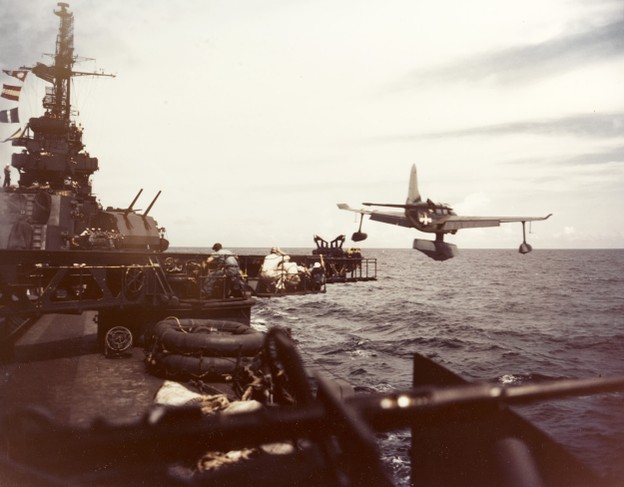
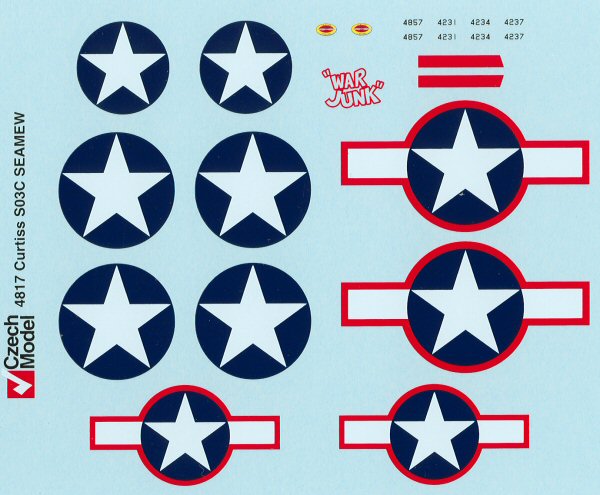
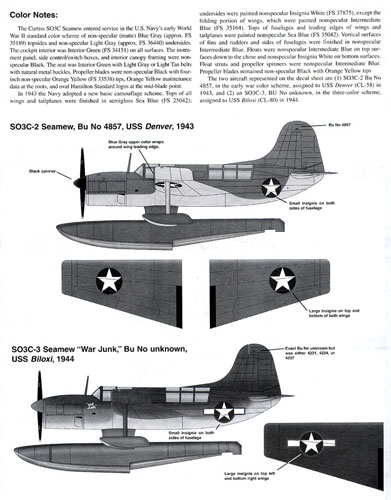
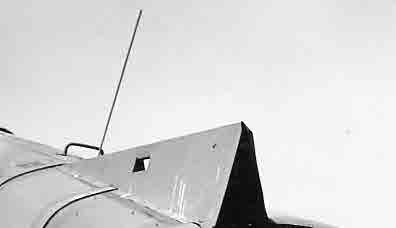
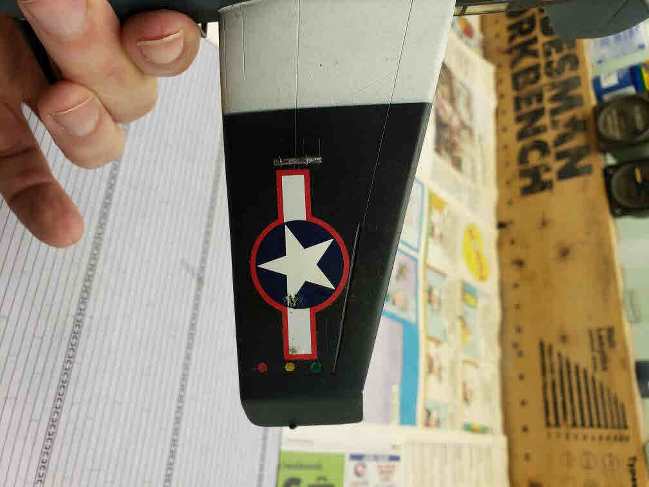
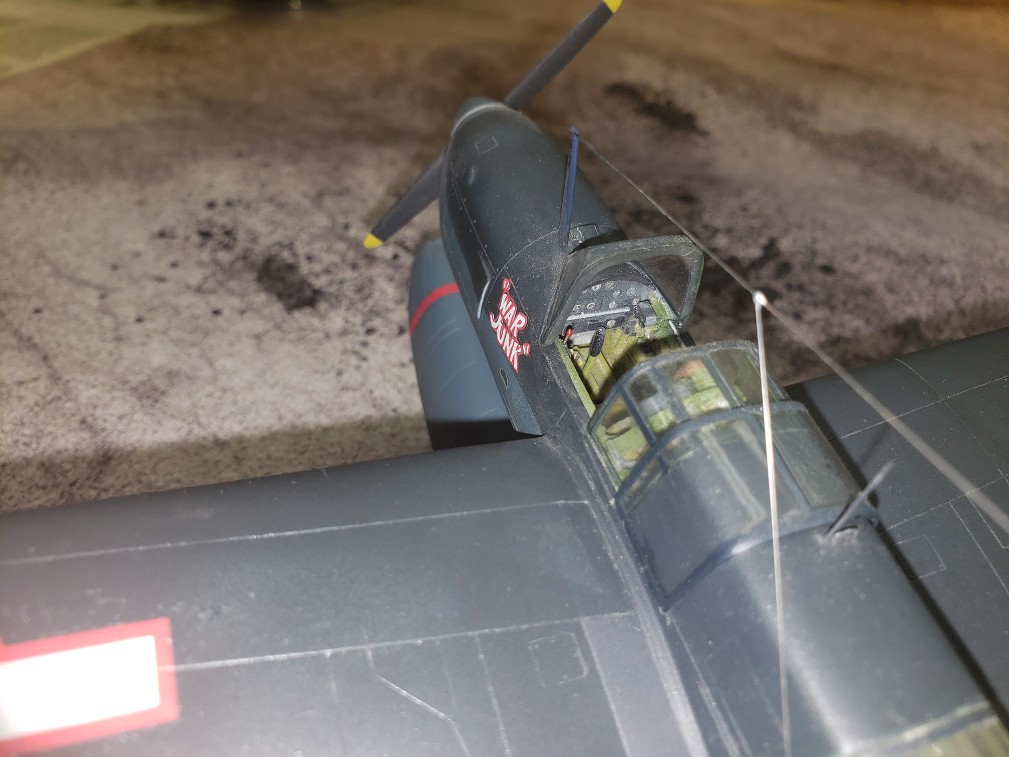
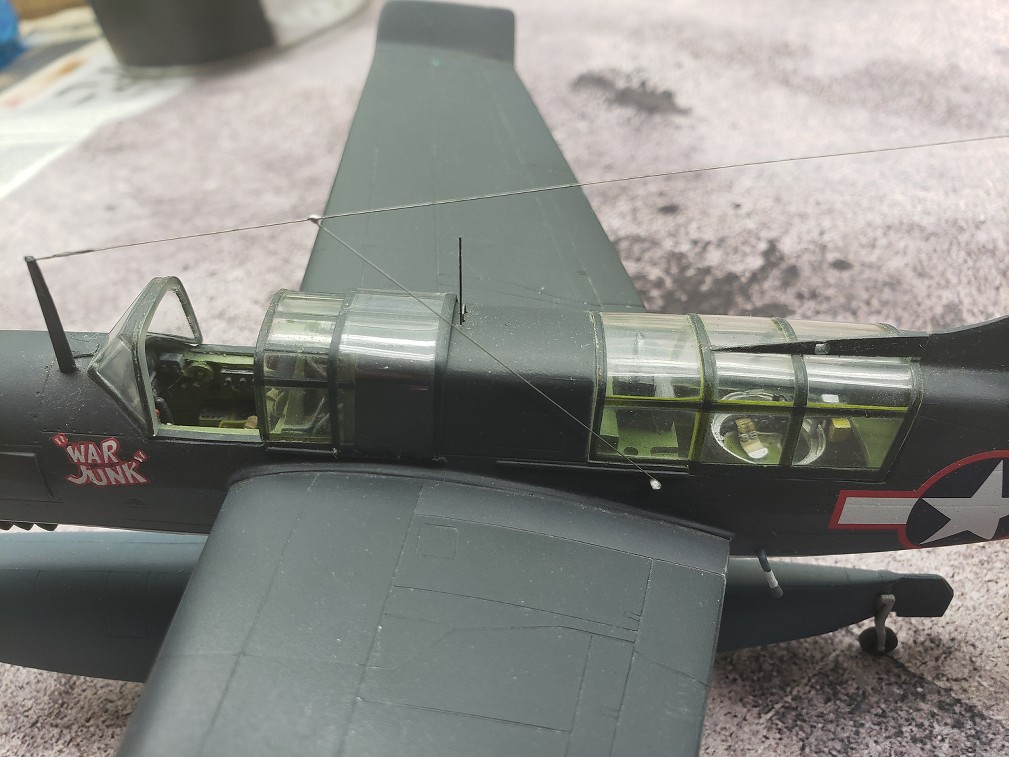
The aircraft had the striking tri-color scheme with wonderful mid-1943 red-bordered national insignia, a red prop warning stripe on the float and last but not least, that magnificent name in red and white under the cockpit - "WAR JUNK".

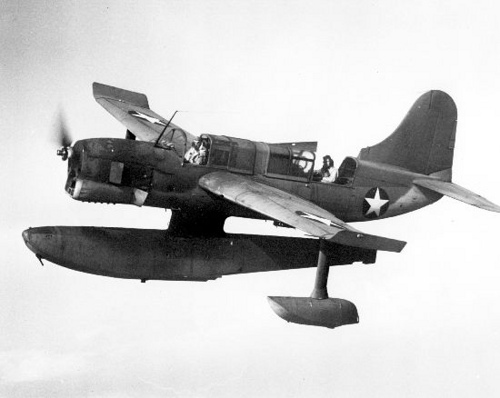
How I wished I knew who came up with it! And, there was good photographic evidence of the real thing.


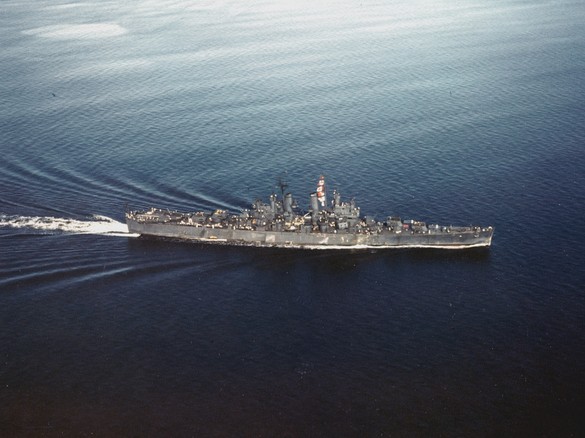
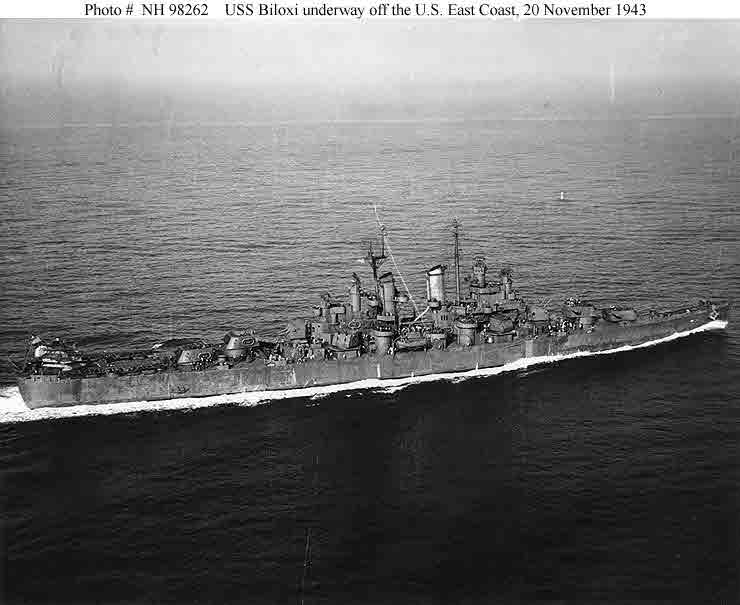
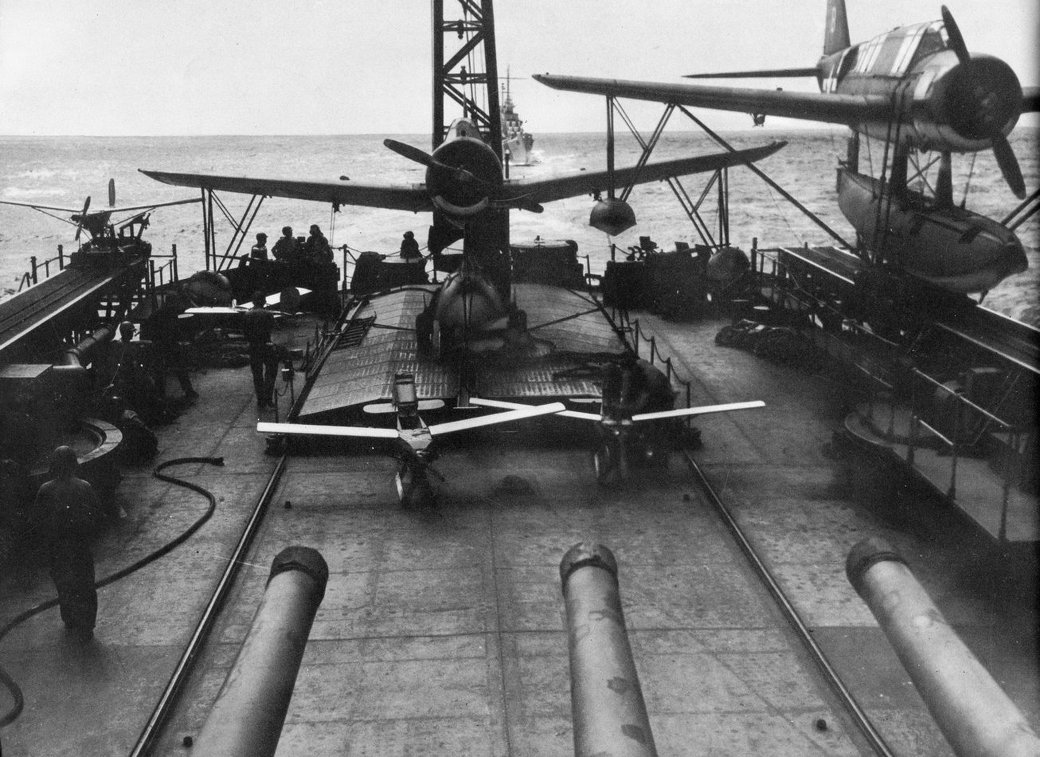
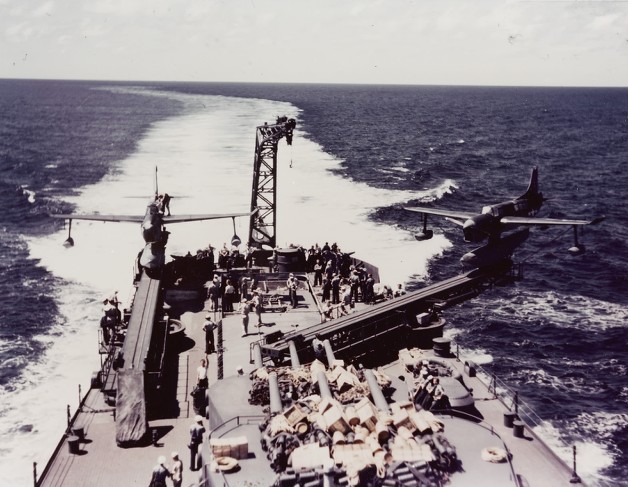
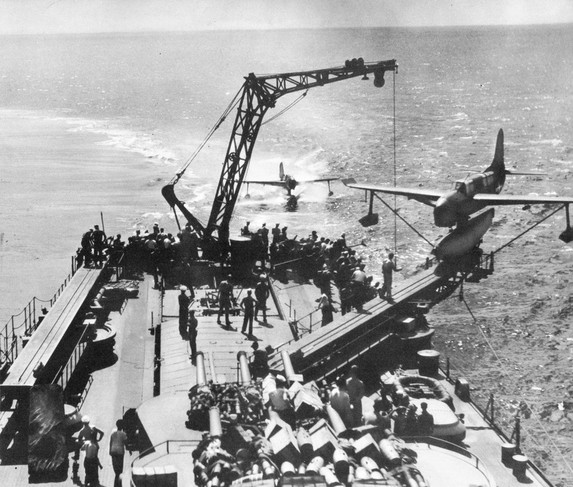
In the next installment, I'll discuss the wartime service of "War Junk" and its fantail twin


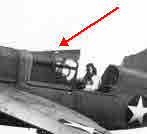
aboard USS Biloxi (CL-80). Note: I believe we see "War Junk" on the left in the above photo. Look at the "white" lettering below the cockpit.

md72
#439
_VISITCOMMUNITY
Washington, United States
Joined: November 05, 2005
KitMaker: 4,950 posts
AeroScale: 3,192 posts
Posted: Sunday, September 22, 2019 - 03:08 AM UTC
I almost built the 1/72 flavor for the Seaplane Campaign. Actually I never got past the missing instructions. I'd love to see how you build this beast.
Redhand
#522
_VISITCOMMUNITY
New Jersey, United States
Joined: January 20, 2013
KitMaker: 1,460 posts
AeroScale: 1,443 posts
Posted: Sunday, September 22, 2019 - 06:21 AM UTC
THE SEAMEW'S "COMBAT CAREER" ABOARD USS BILOXI (CL-80)

Picking up where I left off, below is a photo of "USS Biloxi underway off the U.S. East Coast, 20 November 1943."


You can see two Seamews on the catapults on the fantail. What I didn't realize until I read the ship's history on Wiki was just how shockingly short the Seamew's "deployment" on board ship was.


Quoted Text

Preparation for war, September 1943–January 1944

The light cruiser fitted out at Norfolk until 17 September when she began shakedown training in Chesapeake Bay. This included aircraft launch and recovery drills, structural test gun firing, day spotting practice and anti-aircraft drills. The crew also conducted an unplanned but successful man overboard drill when S2c Scott was knocked overboard by a training gun mount.

On 29 September, Biloxi and the destroyer Sproston (DD-577) departed for Trinidad. While en route, one of Biloxi's four Curtiss SO3C Seamew floatplanes crashed during a landing attempt off the port beam. Both the pilot and passenger, Ensign H. Jolly and ACMM J. Phagan, were rescued and the wreck was destroyed by gunfire as a hazard to navigation.

After arriving at Trinidad on 3 October, Biloxi conducted two weeks of battle drills and other exercises. These included radar calibration tests, night and day battle practice, fueling at sea exercises, and fighter (CAP) director drills. Departing Trinidad on the 18th, the light cruiser entered the Norfolk Navy Yard on 26 October for post-shakedown overhaul. Following these repairs, and a short trip north to Rockland, Maine, for gyro and compass standardization trials, Biloxi sailed south for the Canal Zone on 20 November.

Passing through the Panama Canal on 24 November, Biloxi arrived in San Francisco on 4 December. There, the crew loaded provisions and, in the words of the war diary, exchanged four SO3C's and spare parts for two Vought OS2U Kingfishers and no spare parts, before getting underway for Hawaii on the 7th. (My emphasis)

.

Wow! The Navy decided not to take the aircraft anywhere near an actual war zone. The proof of that also resides in this shot of Biloxi's fantail with two Kingfishers (and some drones) in 1944.


What this means is that the "in action" photos we do have of the Seamews on Biloxi were taken either in the Chesapeake Bay, off the East Coast, or less probably in the Pacific near San Francisco.


Rare pictures of a rare bird!

Next time I'll start discussing the kit, the initial build, and the recent repair.
Redhand
#522
_VISITCOMMUNITY
New Jersey, United States
Joined: January 20, 2013
KitMaker: 1,460 posts
AeroScale: 1,443 posts
Posted: Monday, September 23, 2019 - 03:36 PM UTC
BUILDING THE CZECH MODEL KIT

I can't really give the reader a blow-by-blow description with build pictures etc. of my work on this kit because I completed it at least 10 years ago if not longer. So, what I will do is give you a verbal description, with some photographs of modifications made during the build, so a prospective builder knows what he or she is up against tackling it.

I'm going to use "for educational purposes" some pictures of the kit's sprues, resin parts and decals courtesy of
Cybermodeler's excellent inbox review.


And here are the instructions, courtesy Hyperscale.


Finally, here's the artwork on the bottom of the box.


You can see right away that this is definitely a limited run kit. I was rather taken aback by the huge butt join for the wings but will discuss the solution I came up with later. For all the parts on the sprue, I can say that generally speaking, "fit is good."

There are, however, a few missing details. Take a look at these pictures of the central float on the real thing and you'll see what I mean.


There's a hook that engages a retrieval net in the water that the aircraft is supposed to taxi over after landing, and some kind of rectangular metal slab (with a hole drilled in the center) extending from the bottom of the float just forward of the fuselage mounting post. (I think it has something to do with catapult launching). There's also a bullnose (a metal half-ring) on top of the float at the front, and bomb racks underneath the wings. You'll have to add these items and some others I'll mention.

[TO BE CONTINUED]


md72
#439
_VISITCOMMUNITY
Washington, United States
Joined: November 05, 2005
KitMaker: 4,950 posts
AeroScale: 3,192 posts
Posted: Monday, September 23, 2019 - 05:10 PM UTC
Lucky you, you have the instructions! My 1/72 kit has about 1/4 the resin, no instructions and a vac canopy. Looking forward to the details on this build.
Redhand
#522
_VISITCOMMUNITY
New Jersey, United States
Joined: January 20, 2013
KitMaker: 1,460 posts
AeroScale: 1,443 posts
Posted: Thursday, September 26, 2019 - 02:04 PM UTC
FLAWS IN THE CZECH MODEL SEAMEW

Before describing the actual build and subsequent repair, I think it's important to point out four significant flaws in this model.

The first is the worst and is all-too-visible in the second sprue containing the wings.

Compare the wingtip fillet on the model


With these detailed photos of the real thing.


It's painfully obvious that the fillet was rectangular in shape on the real aircraft and that Czech Model got this detail completely wrong by having the rear of the fillet follow the curve of the trailing edge.

To make an accurate model of this aircraft, this error simply must be fixed. These horribly ugly rectangular fillets were a key external feature of the aircraft, and anybody who knows anything about the Seamew will immediately detect the flaw.

I fixed this with the help of a former modeling friend but more on that later.

The other three errors are also quite noticeable if left un-remedied. Two are contained in the below picture. Look at the red arrows.


The first can be seen on the after canopy. The canopy is missing that extremely visible oblong opening in the tail fillet that extended over the canopy. Check out these pictures.


Again, anyone familiar with the aircraft will notice this. The opening was for the handhold to push the canopy forward and is a key omission. Here again, I chickened out and had my former modeling friend fix this problem by drilling out the hole. The results were positive.

The third flaw is the least obvious but still should be fixed. The resin instrument panel lacks instruments, and there are none provided with the kit by brass fret, decal, or transparent styrene sheet with instruments printed on a panel.

This problem I remedied myself by punching out those marvelous Mike Grant instrument face decals. They fit beautifully in the instrument apertures in the resin instrument panel, as you will see later.

The final major flaw is in the decal sheet. Look closely At the "War Junk" decal and you will notice to your horror (or at least to my horror) that the damn decal does not have a white backing to the letters. It is transparent!

Again I confess I chickened out and had my former modeling friend cut out the white base from decal stock. I suppose I could have done it myself but it was ridiculously fiddly and he did me a favor.


Just how bad the uncorrected decal looks on a finished model can be seen below. This model also shows the cumulative effect of not fixing the other external flaws that I pointed out. The aircraft looks like a Seamew, but not quite.


Let me be clear that I'm not trying to trash the other modeler who built this, but I would want anyone attempting this kit in the future – they are still out there on eBay and other aftermarket locations – to be aware of what needs to be fixed to have a decent replica of the real aircraft to put on the shelf.

In the next exciting chapter, I will take pictures of my assisted build, and point out some additional improvements I made to the build during the repair.
md72
#439
_VISITCOMMUNITY
Washington, United States
Joined: November 05, 2005
KitMaker: 4,950 posts
AeroScale: 3,192 posts
Posted: Thursday, September 26, 2019 - 02:13 PM UTC
I still say this site needs a like button, to encourage you to tell us more.
Redhand
#522
_VISITCOMMUNITY
New Jersey, United States
Joined: January 20, 2013
KitMaker: 1,460 posts
AeroScale: 1,443 posts
Posted: Thursday, September 26, 2019 - 02:19 PM UTC
Thanks! I just did a minor edit to the post.

Next will have more meat to it.
Redhand
#522
_VISITCOMMUNITY
New Jersey, United States
Joined: January 20, 2013
KitMaker: 1,460 posts
AeroScale: 1,443 posts
Posted: Friday, October 04, 2019 - 12:16 PM UTC
TIME TO WRAP THIS UP - THE BUILD AND THE REPAIR

I'll start with the repair, as this is what motivated this piece, to begin with.

After sitting in my display case for years, one day I noticed that the port side beaching gear had separated from the main float and I took it downstairs to my boneyard of models to modify or repair. There it lay for three freaking years or so.


The spirit just didn't move me, but as it began to accumulate a fine patina of dust and the gremlins (not me!) broke other things off my enthusiasm for fixing it waned.


Finally, I said it was time.

[To be continued]
Redhand
#522
_VISITCOMMUNITY
New Jersey, United States
Joined: January 20, 2013
KitMaker: 1,460 posts
AeroScale: 1,443 posts
Posted: Sunday, October 06, 2019 - 12:39 PM UTC
THE BUILD AND THE REPAIR

It's a bit hard to describe the sequence of a build that is completed and over 10 years old without contemporary build photographs. So you'll just have to rely on my verbal descriptions with brief photographic aids.

Let me start with the resin parts again


and simply say that they fit extremely well into the starboard fuselage half.


I painted the front and rear resin parts of the cockpit, and the cockpit walls themselves, interior green and used appropriate detailing colors for black boxes etc. Everything really fit fine and there were no problems at all. The engine was equally easy to paint and install.

Here is an overhead shot of the cockpit and while there is some shelf grime present it has stood the test of time reasonably well so far as I'm concerned.


If you look immediately ahead of the windshield next to the antenna wire you will see a retractable air scoop that I scratch built and installed. I saw it in a number of photos and thought it was a nice addition.

The seatbelts did not come with the kit and are instead Eduard brass. You can get a nicer view of it in the front in this pre-repair photo. You can tell it is pre-repair from all the dust that's accumulated on the model.


There a few extra things I should point out. First, a former modeling friend vacu-formed the front canopy and cut the retractable main section out. You don't see it in this picture but it will appear later.

That same former friend put the white in the "War Junk" decal and it adds a real bit of authenticity to the final build. The radio antenna and the handhold next to it between the front and rear cockpits are my own additions. One does see them in a number of photos of the real thing and I thought they were worth adding.

I mentioned before that the resin instrument panel didn't have instruments. You can see how I added them in this photo. It also shows the sliding forward cockpit opening pushed back to the fully extended position.


If you look to the right of the cockpit instrument panel you will see a black box. If memory serves that's supposed to represent the stock of the single 30 caliber machine gun firing forward that this aircraft carried.

If we swing around to the nose you will see in the below picture


the metal tube I installed to show the 30 caliber blast tube. Also note the little grill on the front of the engine intake. That may be artistic license. I simply can't recall. This picture also shows off the bullnose I installed in the front of the main float on the top and the retrieval hook on the front bottom of the float, which is also scratch-built.

Something else to take note of in the photo is the leading edge of the prop. You'll see that it's a metallic color. Why? Well, as I view this image of War Junk's propeller it has wear along the forward blade edges. I've seen this wear pattern on other propellers too. So I added it.


[TO BE CONTINUED]
Redhand
#522
_VISITCOMMUNITY
New Jersey, United States
Joined: January 20, 2013
KitMaker: 1,460 posts
AeroScale: 1,443 posts
Posted: Sunday, October 06, 2019 - 12:56 PM UTC
THE BUILD AND REPAIR (CONTINUED)

Moving aft to the rear cockpit you can see how that is finished, including added Eduard seatbelts.


You can also see the handhold on the forward spine of the rear cockpit that was drilled out by my former friend. It makes for a very nice touch.

Being a short run kit this model did not have locator pens on the fuselage tabs. (Or anywhere else for that matter). In gluing the fuselage together I drilled holes in the ample joining surfaces and stuck in brass pins. I glued them on the starboard side and then they fit into parallel holes in the port fuselage side. It worked just fine.

Since every launch photo of this aircraft that I have seen shows the rudder moved to the starboard side I detached it from the completed fuselage and glued it in at an angle.

You can see that detail here.

 _GOTOTOP