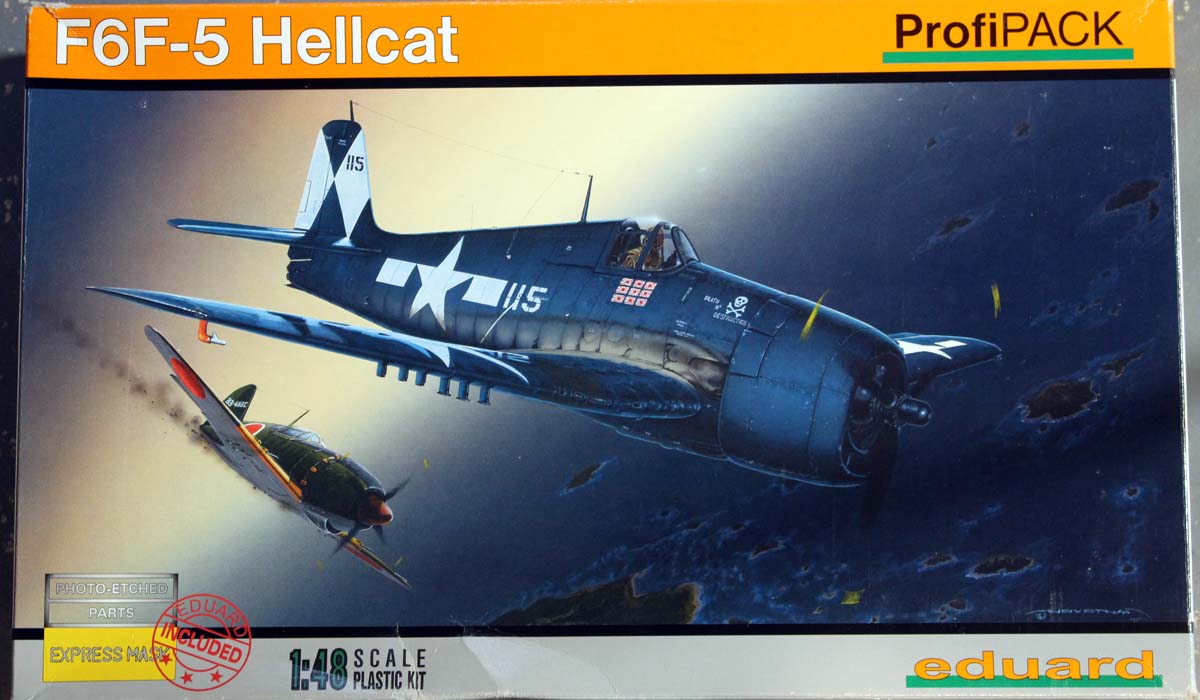
Eduard 1/48 F6F-5 Hellcat
ColinEdm
 Associate Editor
Alberta, Canada
Joined: October 15, 2013
KitMaker: 1,355 posts
AeroScale: 107 posts
Posted: Wednesday, October 10, 2018 - 11:05 AM UTC
Hi all, up until now I have been a dedicated armour guy, with a definite slant towards WWII German subjects and have been active on the Armorama forum since late 2013. Well, at our last IPMS meeting, some of the airplane guys convinced me to join their Hellcat group build, so here I am building a wing thing! They are all doing Eduard Hellcat kits, so I picked up Eduards F6F-5 1/48 scale ProfiPACK Hellcat kit and we'll seeehow it goes...

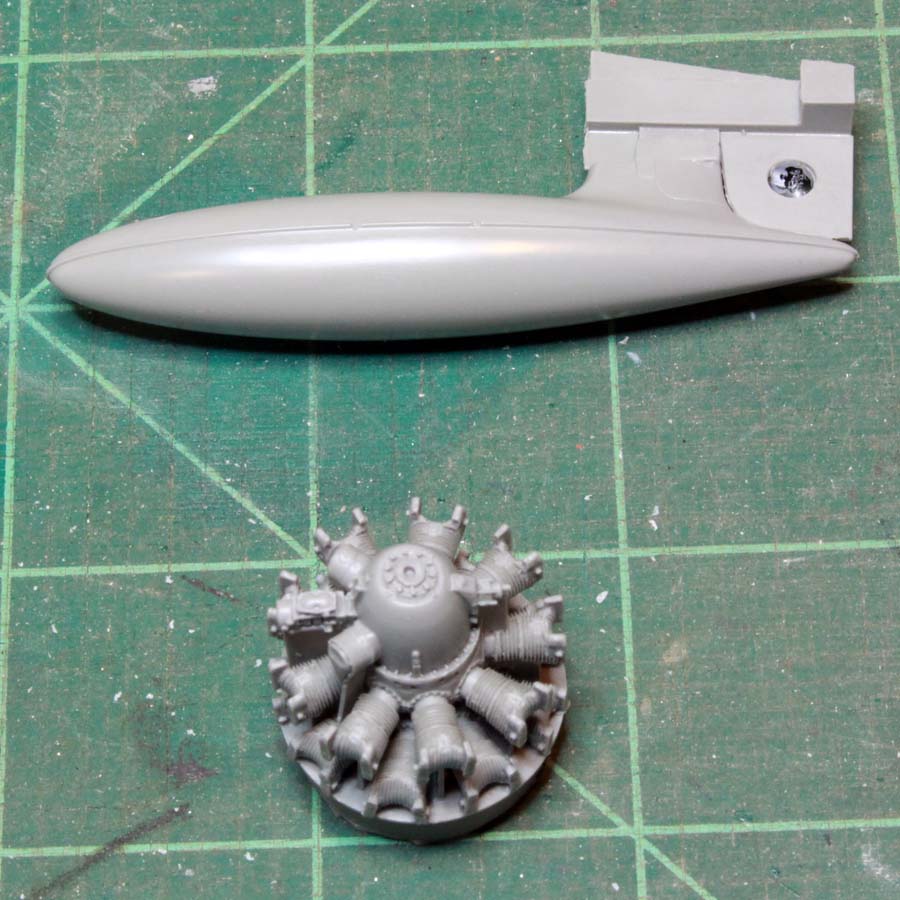
It came with the Quickboost resin engine and drop tank:
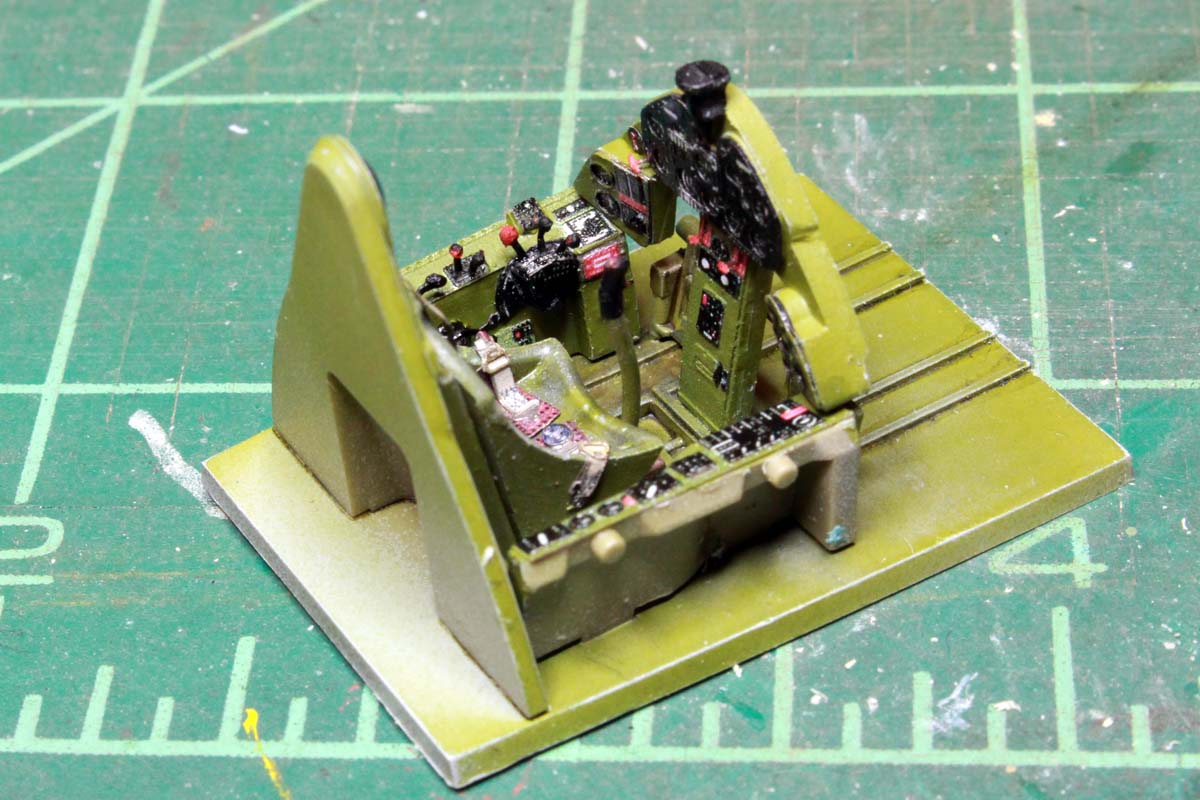
Got started on the cockpit. The kit comes with PE instrument panels, so I scraped off the molded on detail and masked off the areas the PE will be glued to with blu-tac prior to painting.

Cheers

The voices are back.....excellent....

#305
Christchurch, New Zealand
Joined: February 01, 2006
KitMaker: 1,673 posts
AeroScale: 1,517 posts
Posted: Wednesday, October 10, 2018 - 11:47 AM UTC
Great start and welcome to the darkside! This now opens up whole possibilities to build things that kill armour from the air! You know just saying.
Ontario, Canada
Joined: July 22, 2012
KitMaker: 771 posts
AeroScale: 763 posts
Posted: Wednesday, October 10, 2018 - 12:13 PM UTC
An excellent kit to start with. I think it's the world's only accurate looking Hellcat IIRC. I have one on the go, but life, stuff and things.
Matt Odom
I've been known to build a few things
Alberta, Canada
Joined: January 19, 2008
KitMaker: 6,743 posts
AeroScale: 6,151 posts
Posted: Wednesday, October 10, 2018 - 12:50 PM UTC
Hi Colin , will follow along on your build .

What part of Alberta do you hail in ?
Terri
ColinEdm
Associate Editor Alberta, Canada
Joined: October 15, 2013
KitMaker: 1,355 posts
AeroScale: 107 posts
Posted: Wednesday, October 10, 2018 - 01:31 PM UTC
Hi Terri, I am in Edmonton, beautiful Zero you just finished!
The voices are back.....excellent....
California, United States
Joined: November 28, 2007
KitMaker: 817 posts
AeroScale: 729 posts
Posted: Thursday, October 11, 2018 - 04:28 AM UTC
"The kit comes with PE instrument panels, so I scraped off the molded on detail and masked off the areas the PE will be glued to with blu-tac prior to painting."
I am so stealing this. Cheers, Colin, and enjoy the build!
[url]http://chukw.blogspot.com/[/url]
Alberta, Canada
Joined: January 19, 2008
KitMaker: 6,743 posts
AeroScale: 6,151 posts
Posted: Friday, October 12, 2018 - 03:39 PM UTC
Quoted Text
Hi Terri, I am in Edmonton, beautiful Zero you just finished!
I'm in Edmonton as well . Thank -you
Terri
ColinEdm
Associate Editor Alberta, Canada
Joined: October 15, 2013
KitMaker: 1,355 posts
AeroScale: 107 posts
Posted: Friday, October 12, 2018 - 03:46 PM UTC
Terri, you should come out to some of the IPMS meetings and show off some of your work!
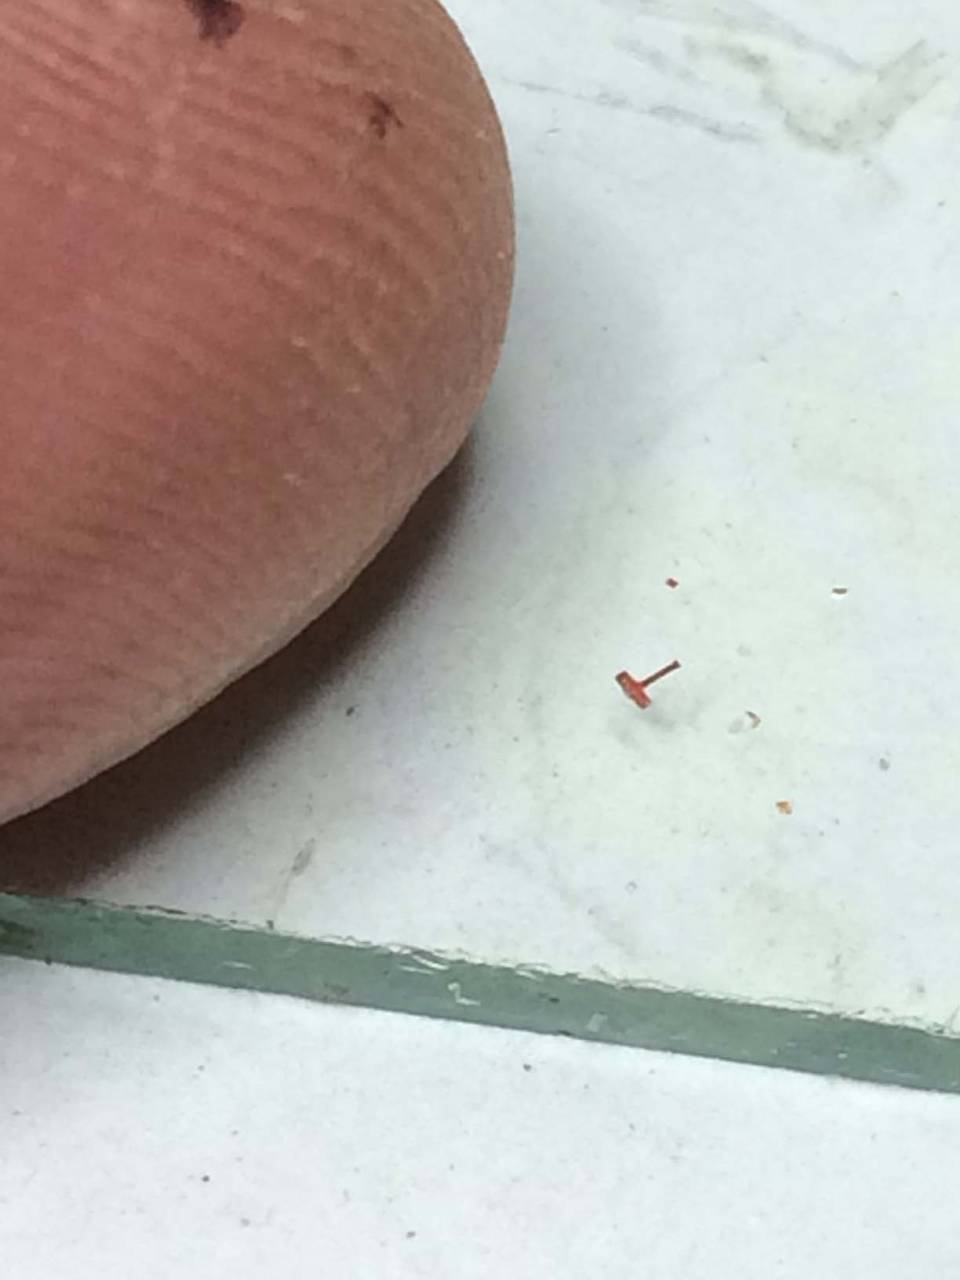
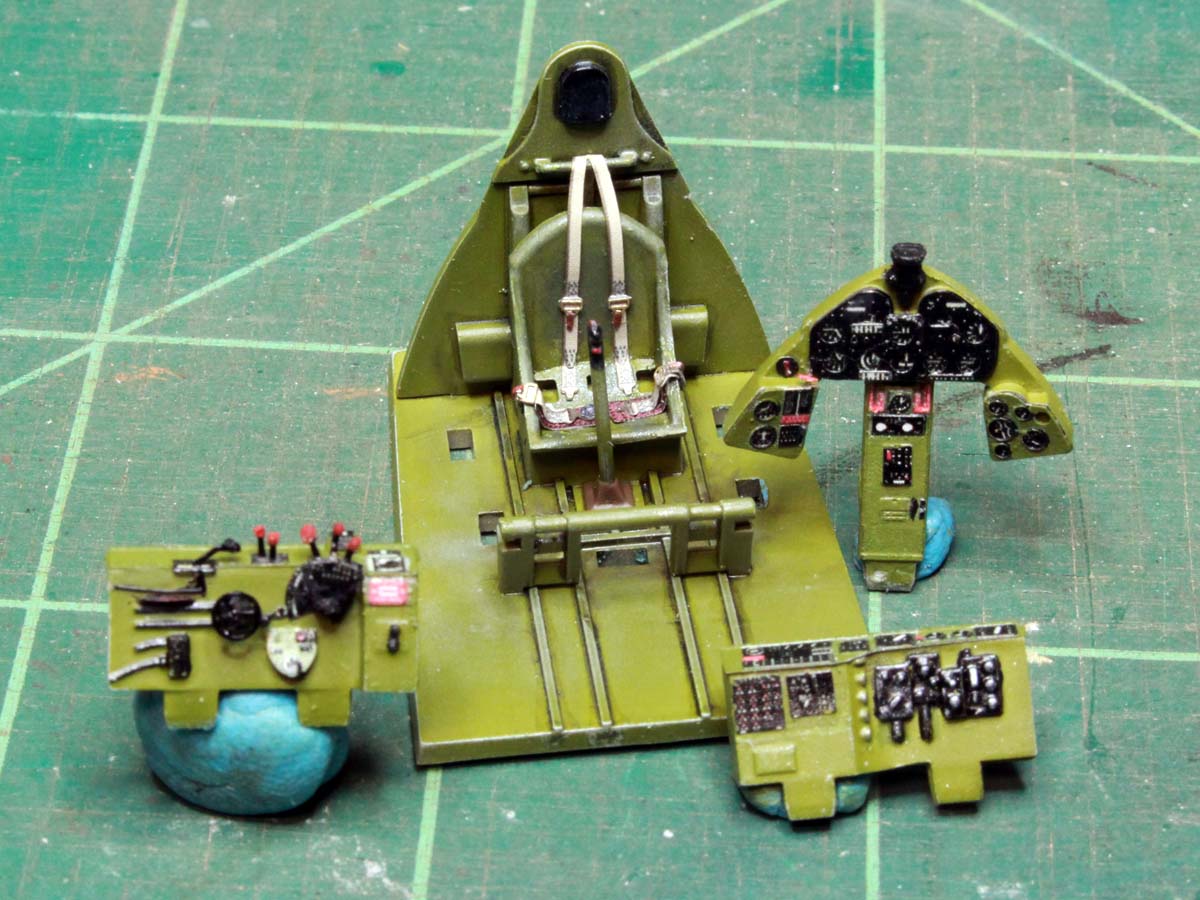
Finished off the cockpit bits, some of the PE is diabolically tiny!
And everything ready to go together:
Cheers
The voices are back.....excellent....
#305
Christchurch, New Zealand
Joined: February 01, 2006
KitMaker: 1,673 posts
AeroScale: 1,517 posts
Posted: Saturday, October 13, 2018 - 08:51 AM UTC
Great cockpit so far Colin! It's really coming together well and it looks like Eduards interior green is close to the colour you've painted the pit. Just how close is the match? Eduard's prepainted etch previously has had some large differences in colour.
ColinEdm
Associate Editor Alberta, Canada
Joined: October 15, 2013
KitMaker: 1,355 posts
AeroScale: 107 posts
Posted: Saturday, October 13, 2018 - 09:10 AM UTC
Thanks Chris! I used Testors Model Master interior green laquer, it is a pretty close match, but i ended up repainting the green parts of the PE anyway.
The voices are back.....excellent....
Alberta, Canada
Joined: January 19, 2008
KitMaker: 6,743 posts
AeroScale: 6,151 posts
Posted: Sunday, October 14, 2018 - 09:55 AM UTC
Nice start in the pit Colin .
Terri
ColinEdm
Associate Editor Alberta, Canada
Joined: October 15, 2013
KitMaker: 1,355 posts
AeroScale: 107 posts
Posted: Sunday, October 14, 2018 - 03:06 PM UTC
Thanks, here it is assembled, and I have assembled it with the main fuselage halves, taped up and drying now.

Cheers
The voices are back.....excellent....
#424
Queensland, Australia
Joined: April 23, 2015
KitMaker: 4,648 posts
AeroScale: 1,938 posts
Posted: Sunday, October 14, 2018 - 03:18 PM UTC
Colin,
That interior is excellent!
Gaz
"Artillery adds dignity, to what would otherwise be an ugly brawl."
Frederick The Great
ColinEdm
Associate Editor Alberta, Canada
Joined: October 15, 2013
KitMaker: 1,355 posts
AeroScale: 107 posts
Posted: Monday, October 15, 2018 - 01:47 AM UTC
The voices are back.....excellent....
ColinEdm
Associate Editor Alberta, Canada
Joined: October 15, 2013
KitMaker: 1,355 posts
AeroScale: 107 posts
Posted: Tuesday, October 16, 2018 - 03:13 PM UTC
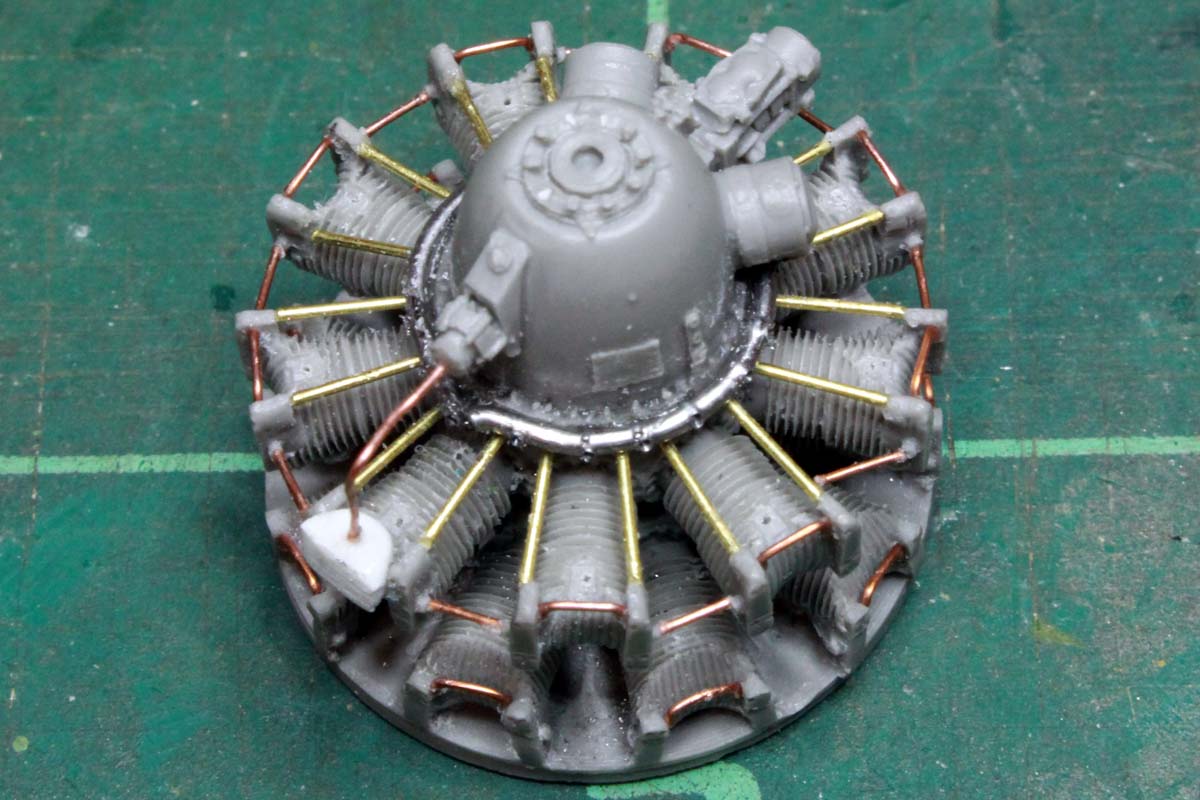
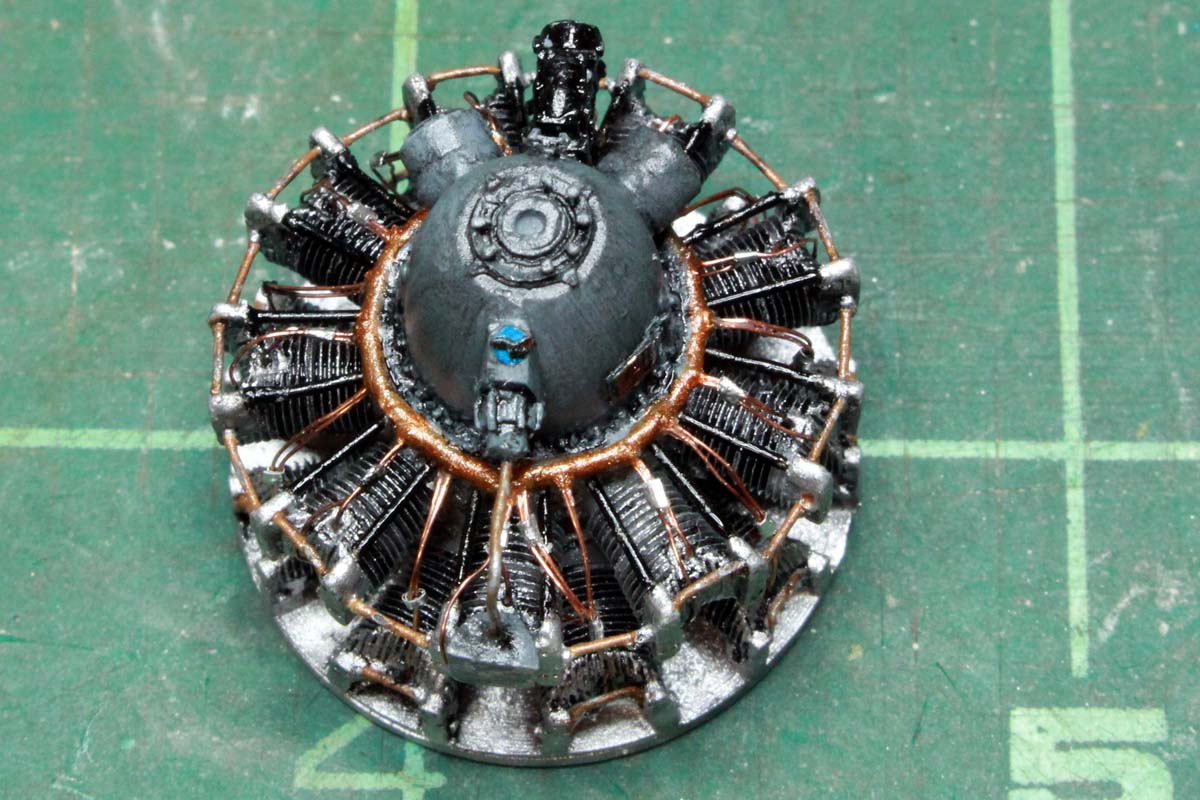
So, I ordered a set of wing guns from Quickboost to replace the kit ones which are a tad soft in the detail department. so while I wait for those I decided to tackle the resin Quickboost engine that cam with the kit. Cleaned off the casting blocks and added pushrods from brass rod, ignition ring from 0.3mm solder, inter-ear drain tubes amd rocker drain suction line from copper wire. I have drilled out holes for the ignition lines on the ignition ring and on the individual cylinders. I will run these with copper wire after painting.
Cheers
The voices are back.....excellent....
#424
Queensland, Australia
Joined: April 23, 2015
KitMaker: 4,648 posts
AeroScale: 1,938 posts
Posted: Tuesday, October 16, 2018 - 04:05 PM UTC
Some nice detail to the engine, Colin. Must have good eyes to drill that bit of solder.
Gaz
"Artillery adds dignity, to what would otherwise be an ugly brawl."
Frederick The Great
ColinEdm
Associate Editor Alberta, Canada
Joined: October 15, 2013
KitMaker: 1,355 posts
AeroScale: 107 posts
Posted: Wednesday, October 17, 2018 - 01:31 AM UTC
Quoted Text
Some nice detail to the engine, Colin. Must have good eyes to drill that bit of solder.
Gaz
Bad eyes, good magnifying lamp
The voices are back.....excellent....
Alberta, Canada
Joined: January 19, 2008
KitMaker: 6,743 posts
AeroScale: 6,151 posts
Posted: Wednesday, October 17, 2018 - 01:44 PM UTC
Nice detail work so far Colin

Terri
#424
Queensland, Australia
Joined: April 23, 2015
KitMaker: 4,648 posts
AeroScale: 1,938 posts
Posted: Wednesday, October 17, 2018 - 02:16 PM UTC
Quoted Text
Quoted Text
Some nice detail to the engine, Colin. Must have good eyes to drill that bit of solder.
Gaz
Bad eyes, good magnifying lamp
I have custom made reading glasses 4.82X. The working distance is 20cm. They enable to thread .5mm brass tube. I still find some tasks to challenging dexterously.
"Artillery adds dignity, to what would otherwise be an ugly brawl."
Frederick The Great
ColinEdm
Associate Editor Alberta, Canada
Joined: October 15, 2013
KitMaker: 1,355 posts
AeroScale: 107 posts
Posted: Friday, October 19, 2018 - 02:57 AM UTC
Painted and worked on the engine ignition lines. For the ignition lines I used fine copper wire and bundled 2 lines per cylinder together with aluminum tape:
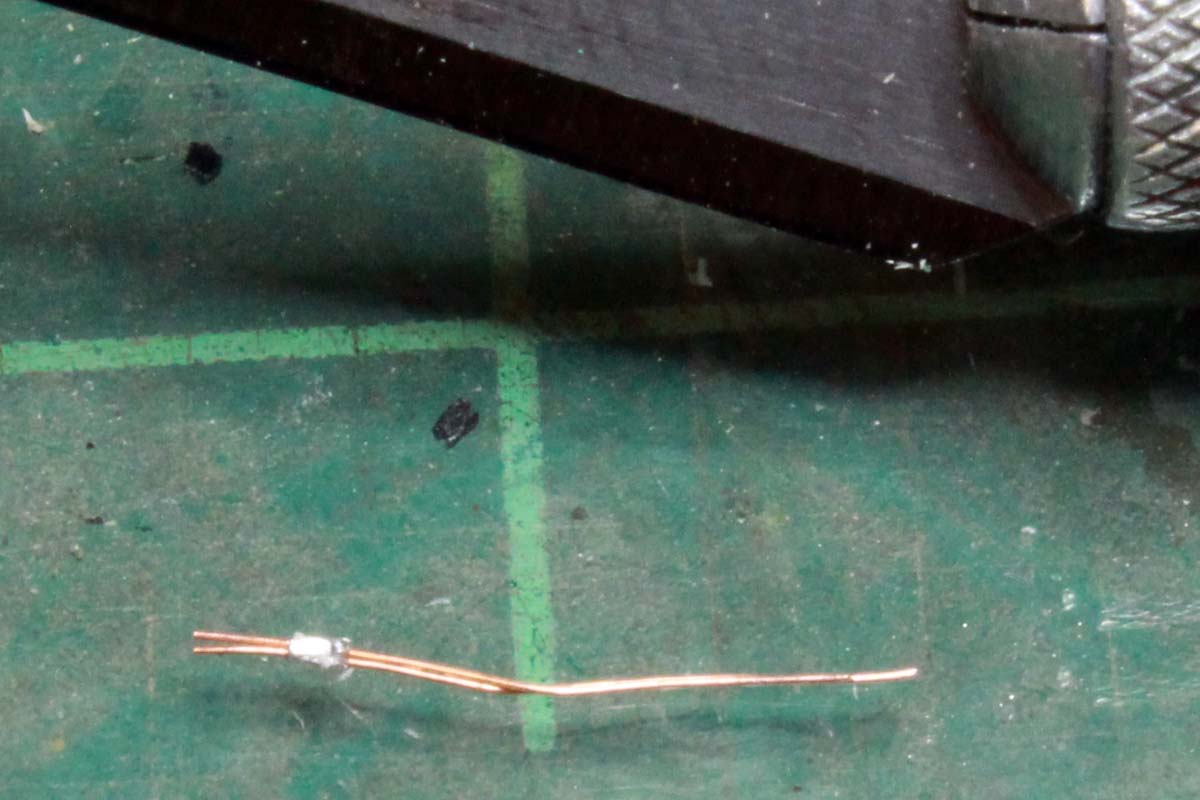
I then insert and glue these into the pre-drilled holes in the ignition ring and then into the ignition points on the cylinder heads:
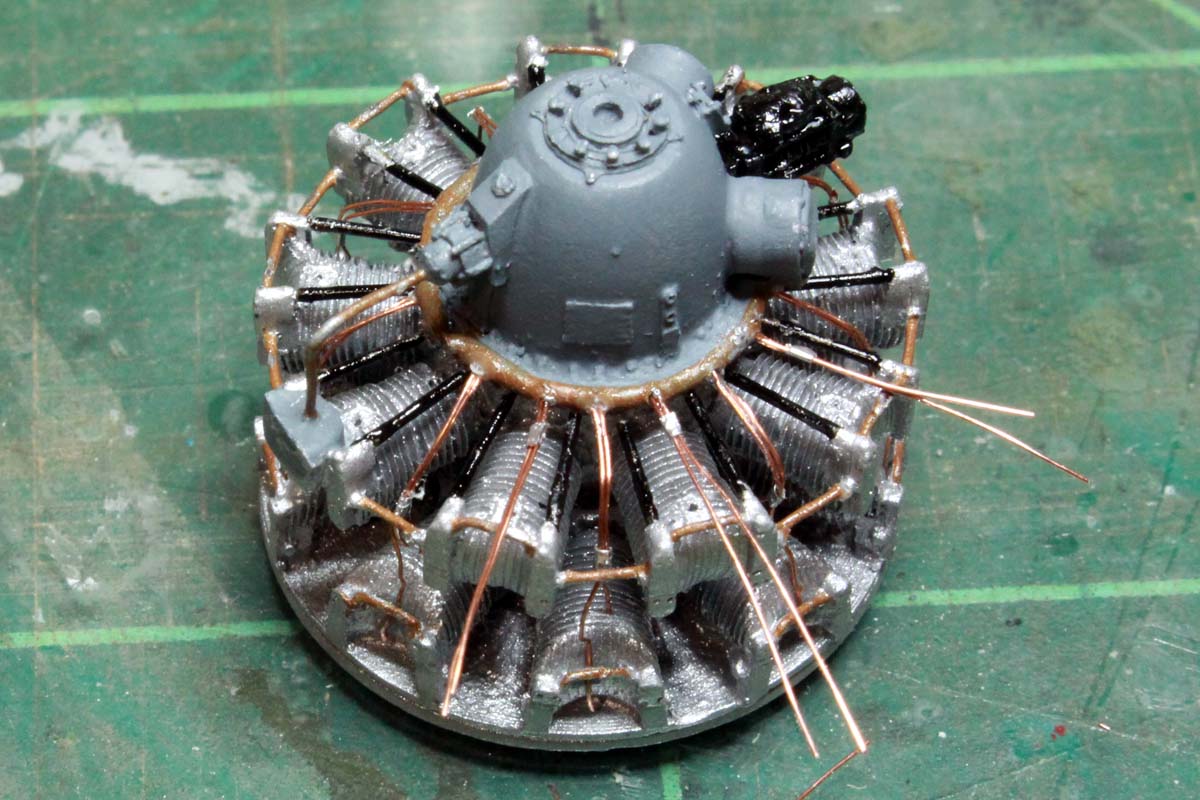
Once all that was done I touched up the paint and added some oil washes to bring out the details and calling the engine done (still need to drill out and add a rod for the prop hub):
Going to work on some other small bits while I wait for the wing guns. The control surfaces are molded separately but fixed position so I think I may modify them to show some droop.
Cheers
The voices are back.....excellent....
#424
Queensland, Australia
Joined: April 23, 2015
KitMaker: 4,648 posts
AeroScale: 1,938 posts
Posted: Friday, October 19, 2018 - 08:43 AM UTC
Engine looks nice and busy, now.
Gaz
"Artillery adds dignity, to what would otherwise be an ugly brawl."
Frederick The Great
Alberta, Canada
Joined: January 19, 2008
KitMaker: 6,743 posts
AeroScale: 6,151 posts
Posted: Friday, October 19, 2018 - 11:43 AM UTC
Quoted Text
Engine looks nice and busy, now.
Gaz
Second this , nice job on the detailing Colin .
Terri
ColinEdm
Associate Editor Alberta, Canada
Joined: October 15, 2013
KitMaker: 1,355 posts
AeroScale: 107 posts
Posted: Friday, October 19, 2018 - 01:40 PM UTC
Thanks, I think the hard bits are done now!
The voices are back.....excellent....
ColinEdm
Associate Editor Alberta, Canada
Joined: October 15, 2013
KitMaker: 1,355 posts
AeroScale: 107 posts
Posted: Thursday, October 25, 2018 - 04:43 PM UTC
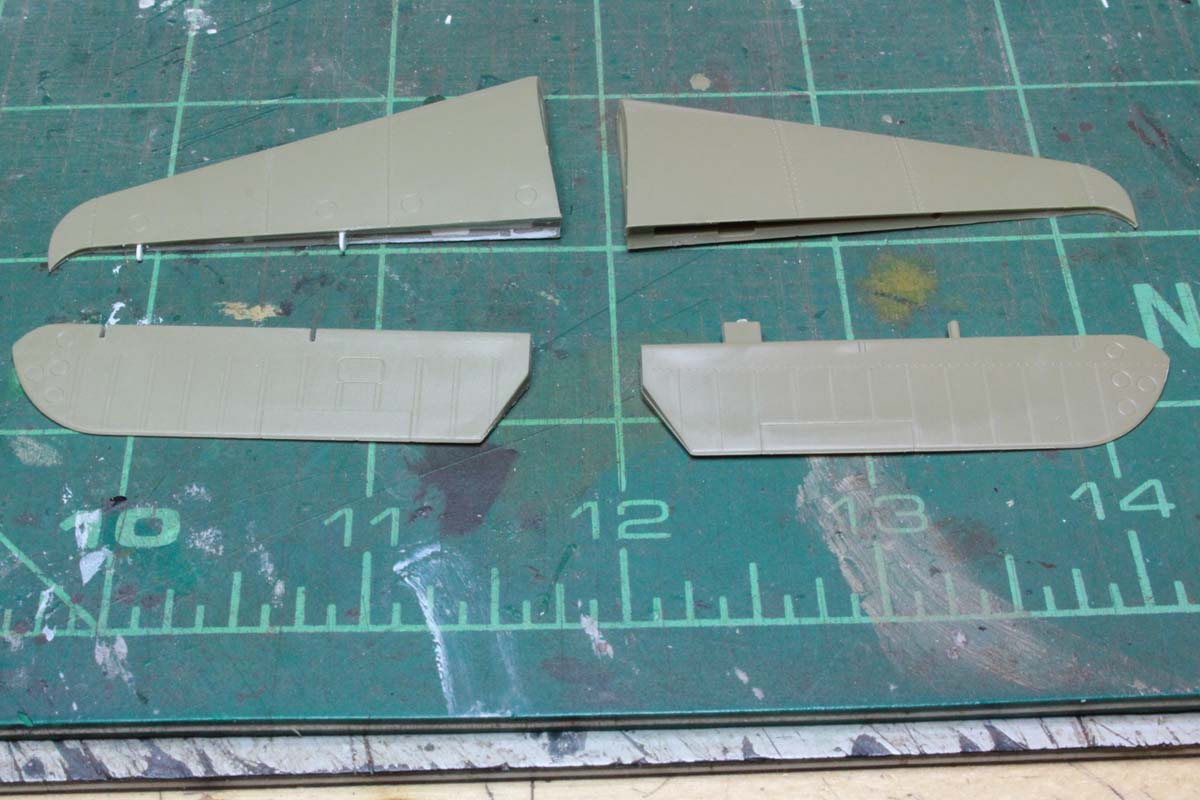
A little bit more done, have been preoccupied with a tracked thing and a wheeled thing. The kit comes with separate elevator control surfaces, but they come with a locating tab and pin so there is no option for assembling them in anything but the zero position.
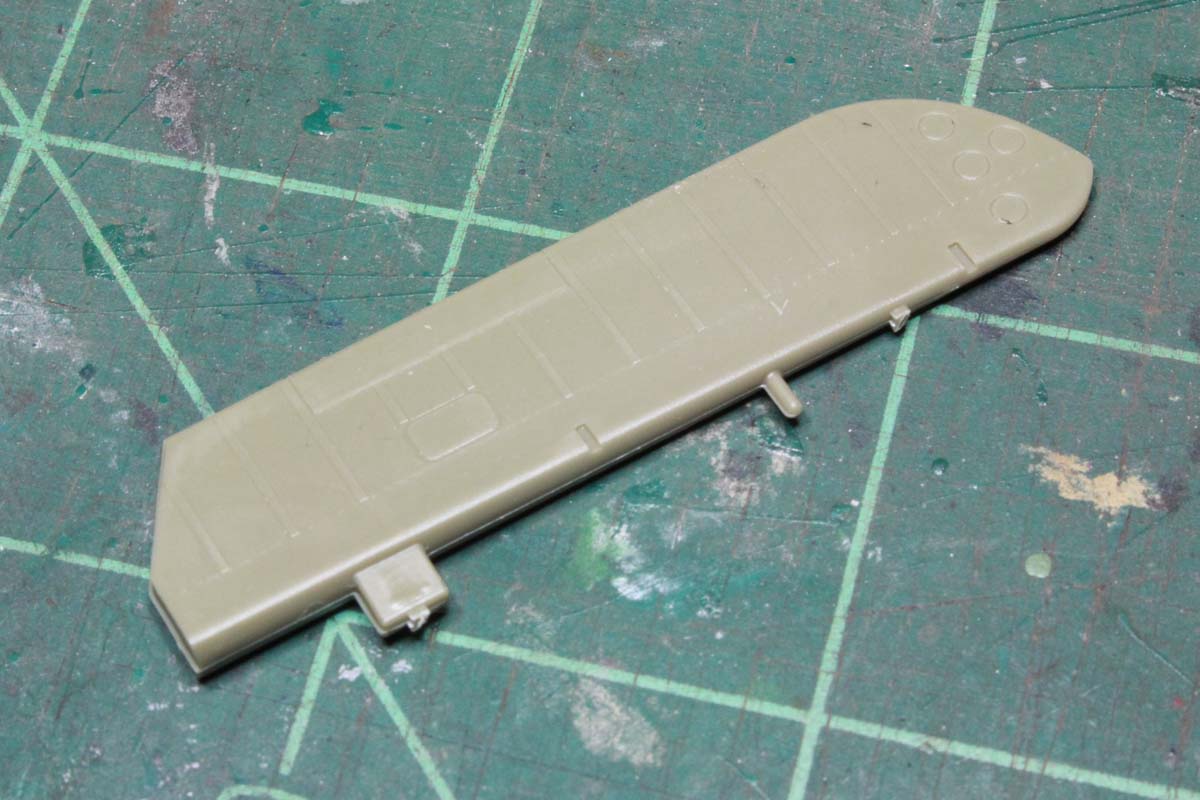
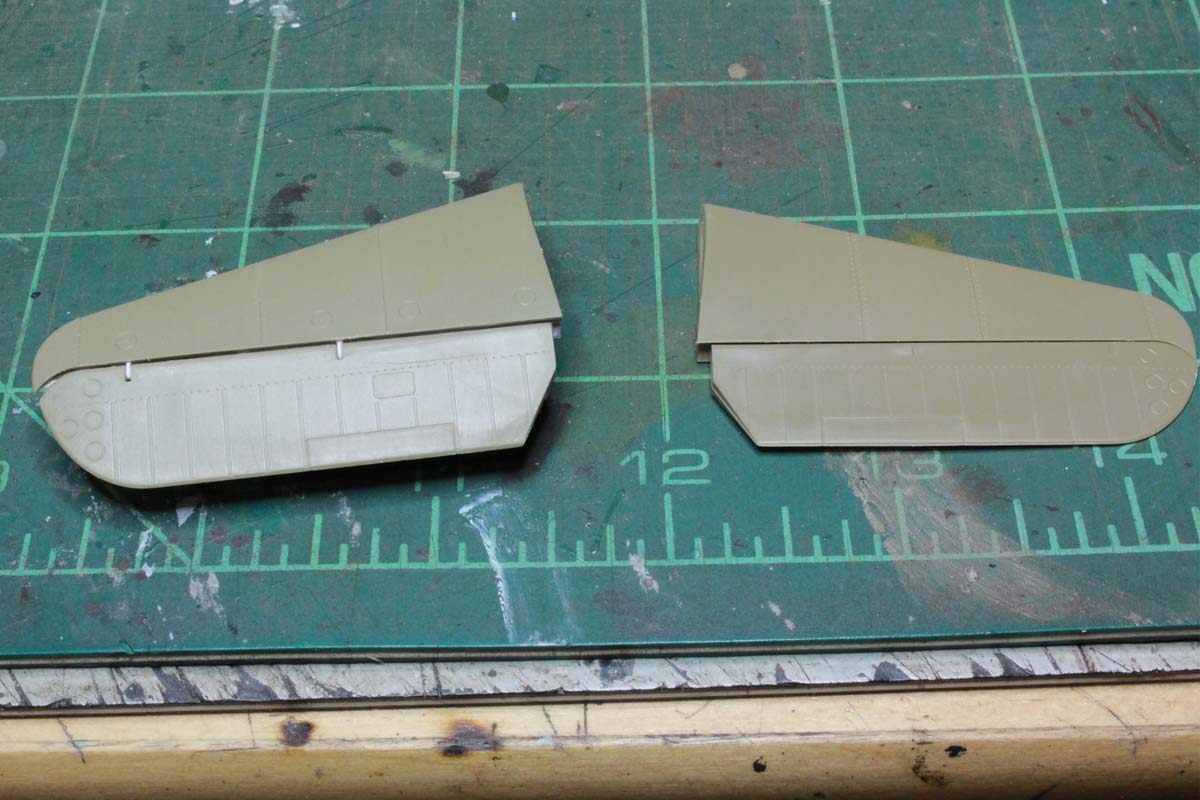
I want to build this with some of the 'droop' that is normally seen on parked Hellcats, so time for some minor day surgery...I cut the locating tab and pin off the elevator and cut out the slots for the hinges. New hinges were made and now I can add the proper amount of droop.
More to come...
The voices are back.....excellent....
#424
Queensland, Australia
Joined: April 23, 2015
KitMaker: 4,648 posts
AeroScale: 1,938 posts
Posted: Thursday, October 25, 2018 - 05:34 PM UTC
Your hinge line looks great!
"Artillery adds dignity, to what would otherwise be an ugly brawl."
Frederick The Great


