_GOTOBOTTOM
Cold War (1950-1974)
Discuss the aircraft modeling subjects during the Cold War period.
Hosted by Tim Hatton
Trumpeter's 1/32 Skyhawk A-4
Cosimodo
#335
_VISITCOMMUNITY
Auckland, New Zealand
Joined: September 03, 2013
KitMaker: 1,808 posts
AeroScale: 195 posts
Posted: Tuesday, January 24, 2017 - 02:00 PM UTC
I have wanted to build a Skyhawk for some time and have had this kit for a while. The RNZAF flew Skyhawks for a long time and they were based about hour north of Wellington where I lived. We used to go up to the open days at Ohakea and as a kid I had always thought they pretty impressive, until I saw some F-15’s the USAF sent over for an joint exercise.

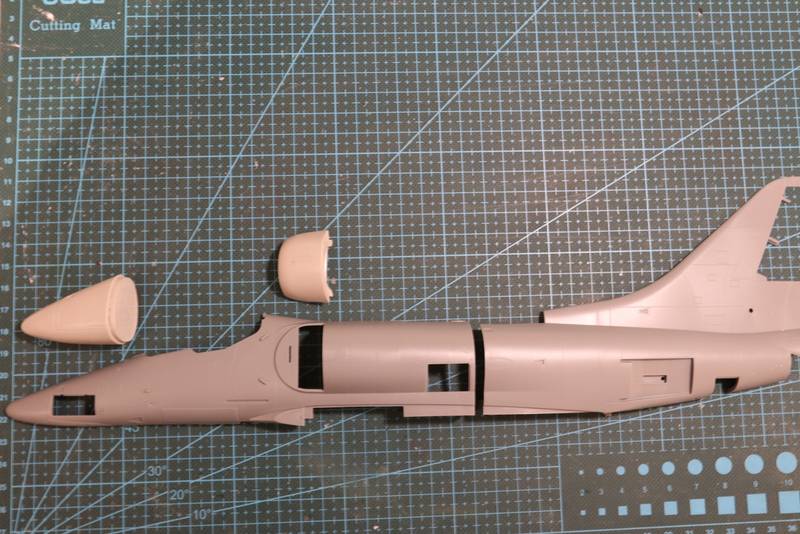
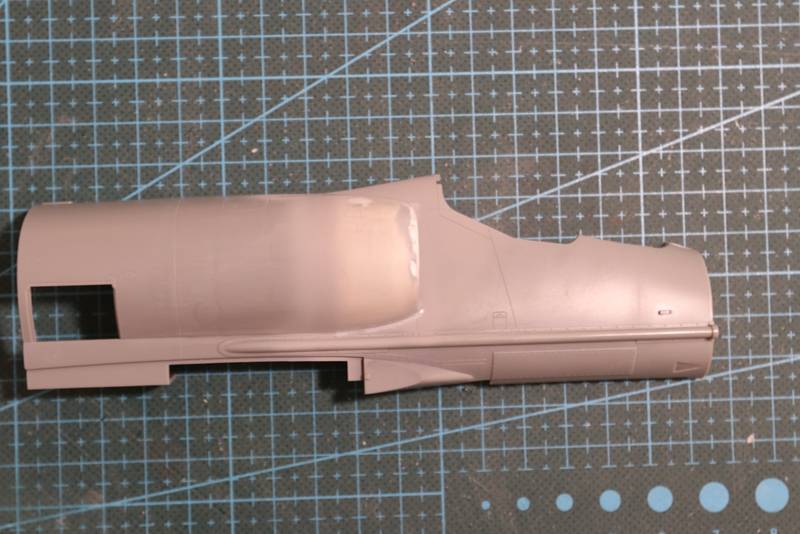
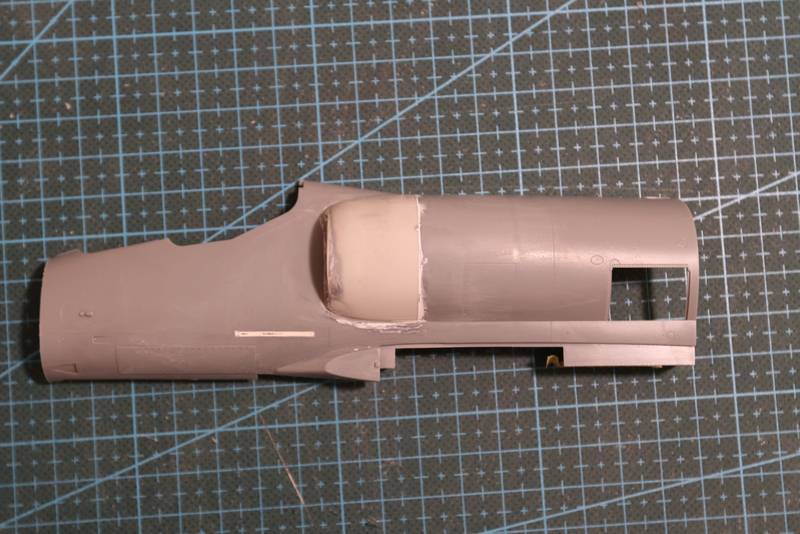
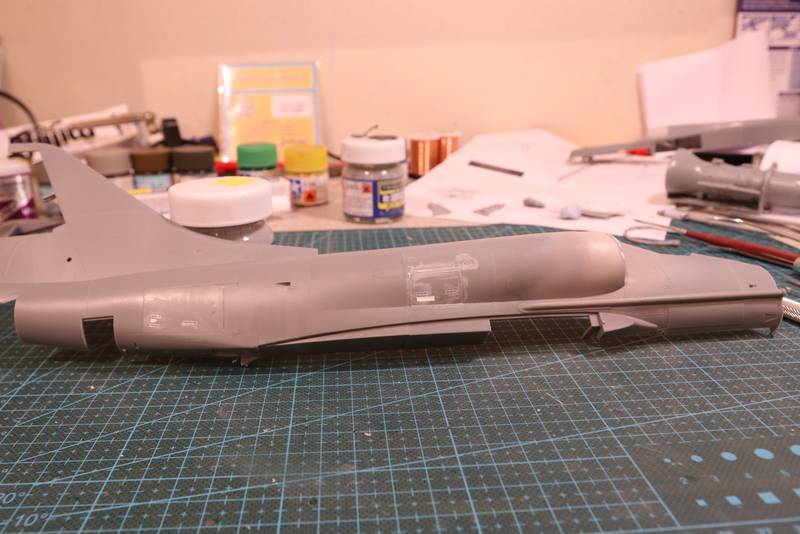
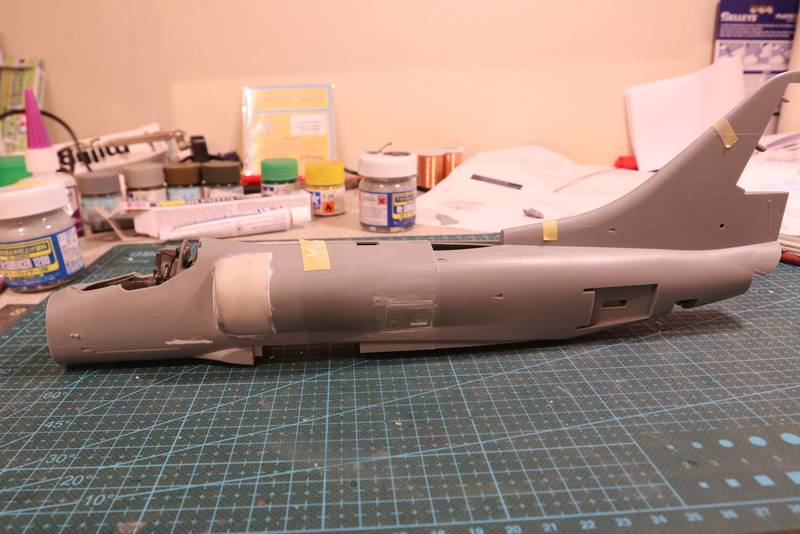
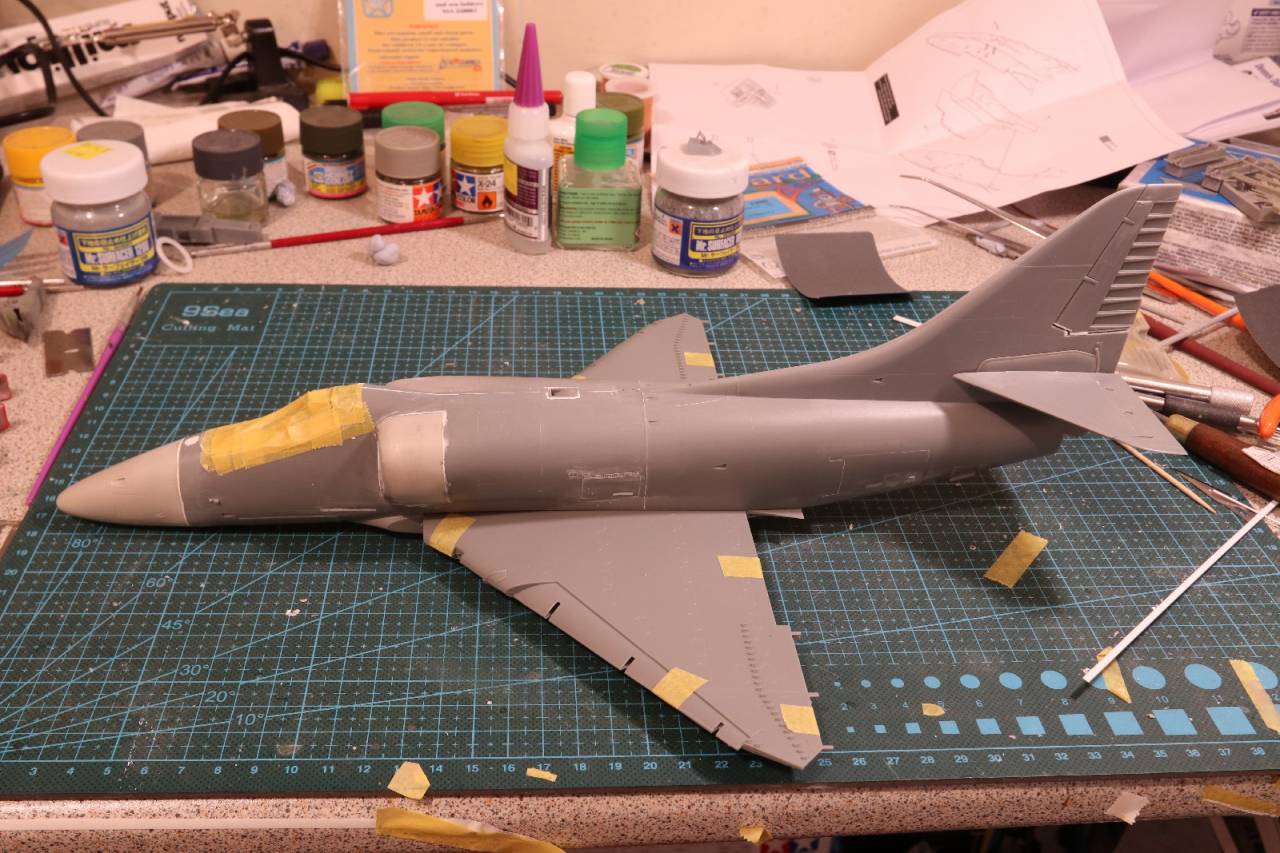
So this is the kit, the A-4E version.
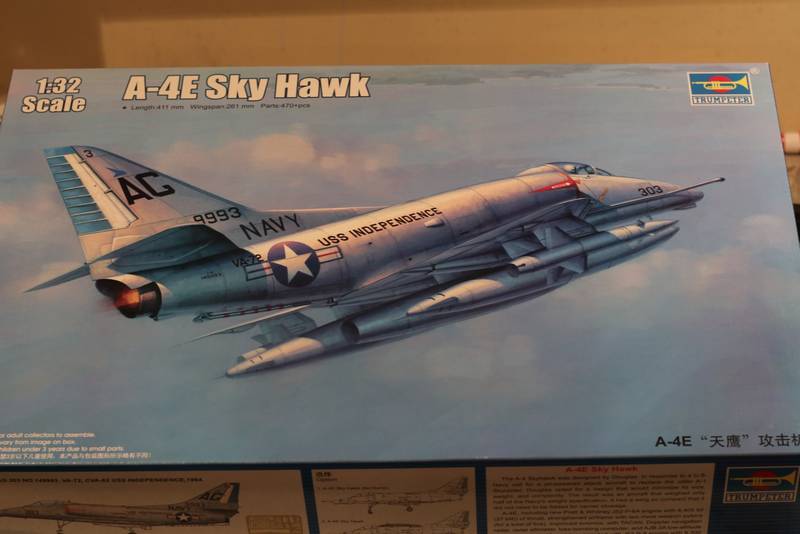

I wasn’t sure how I would depict it though I wanted to do one without the avionics hump but last year with the release of some decal options from AOA for Vietnam Skyhawks I decided on a Marine bird, an A-4C based out of Chu Lai. The squadron is VMA-214, the Blacksheep.


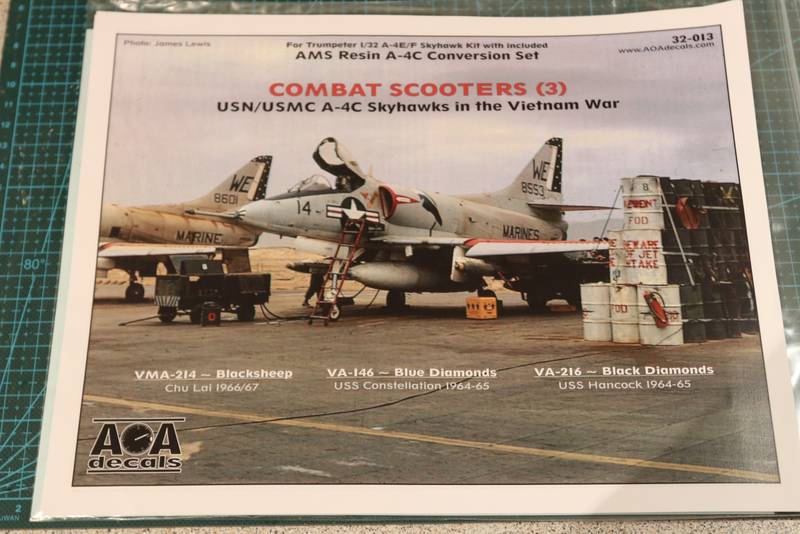
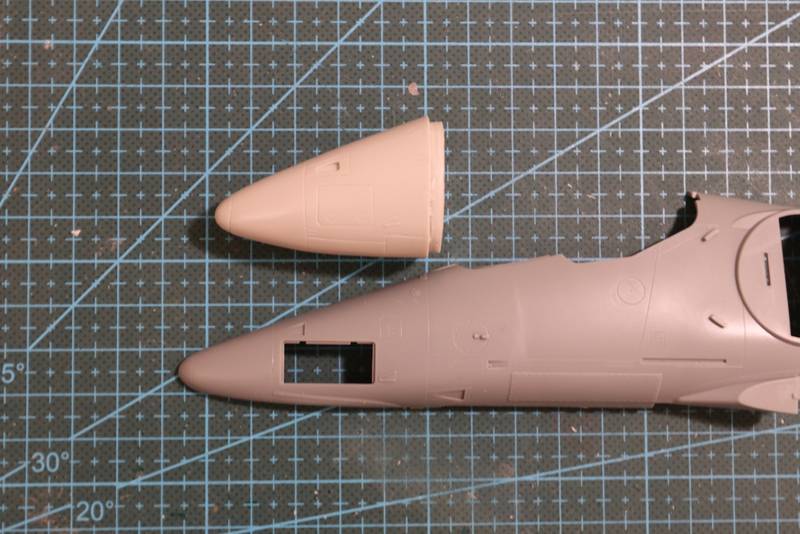
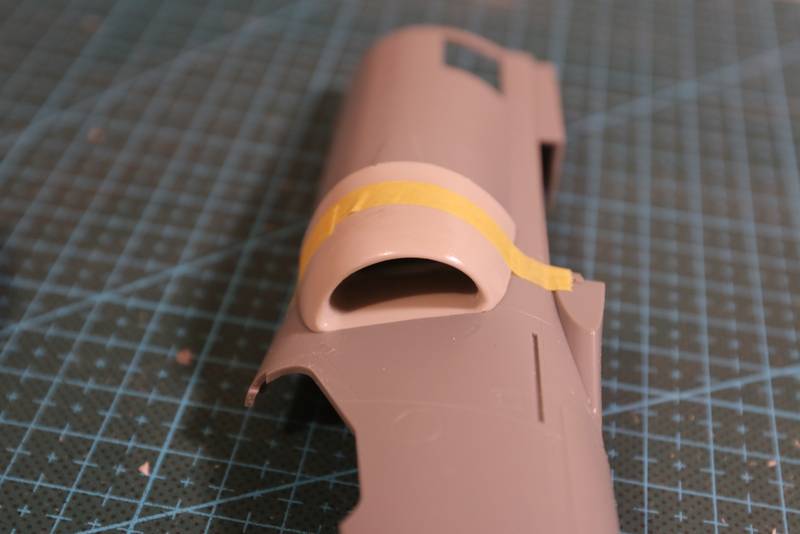
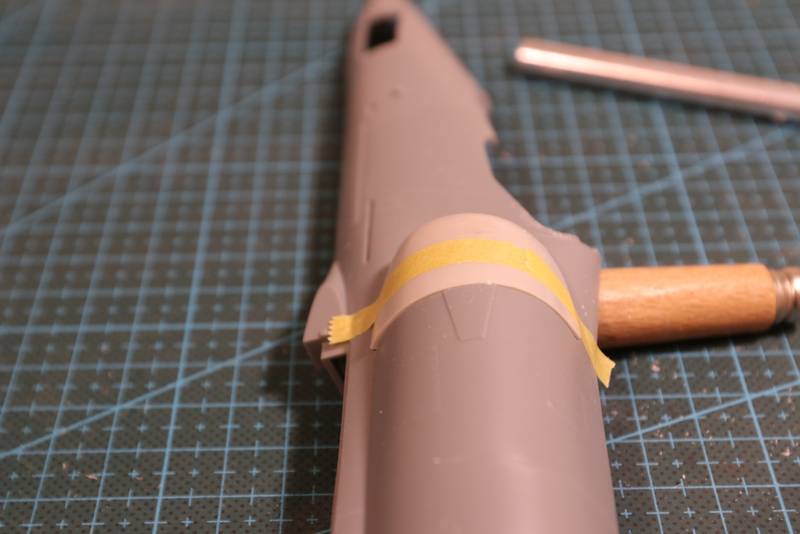
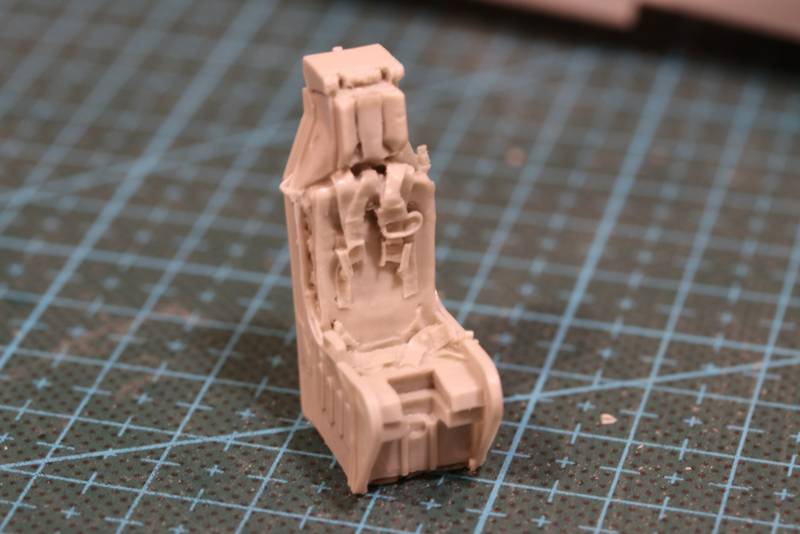
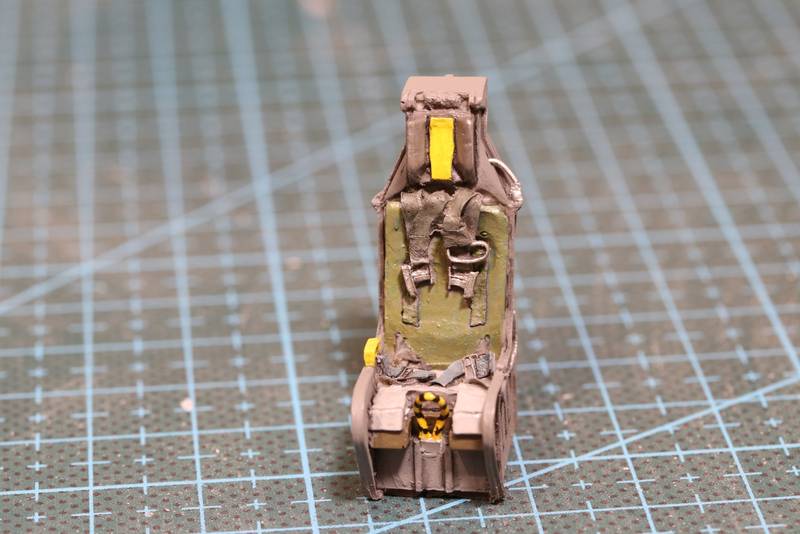
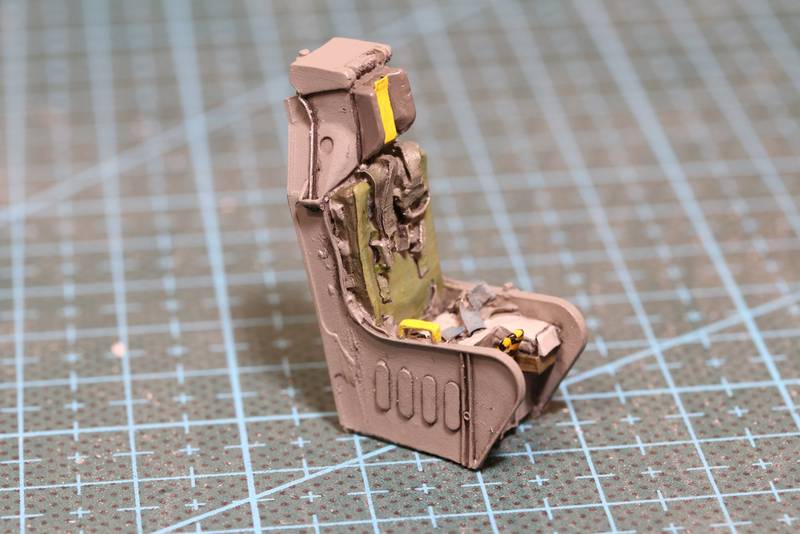
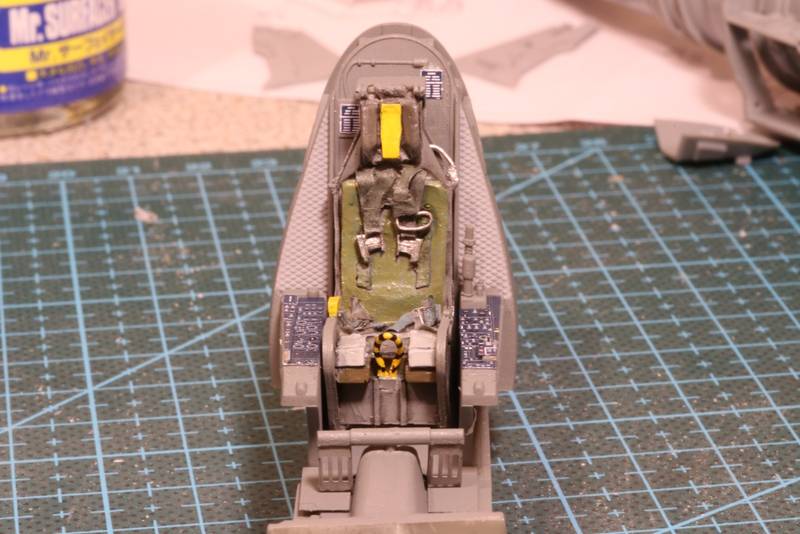
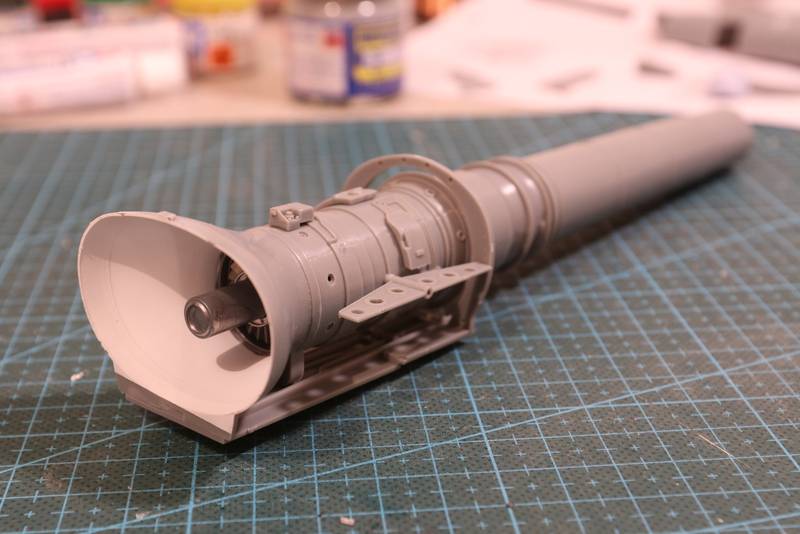
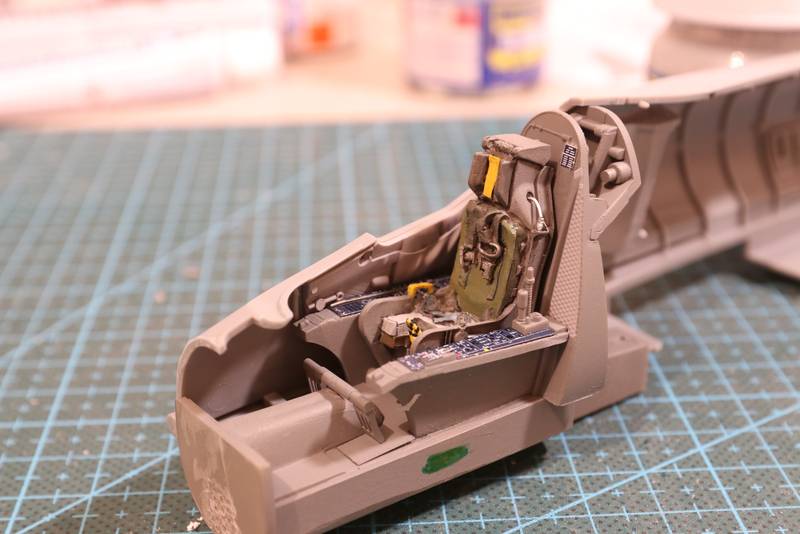
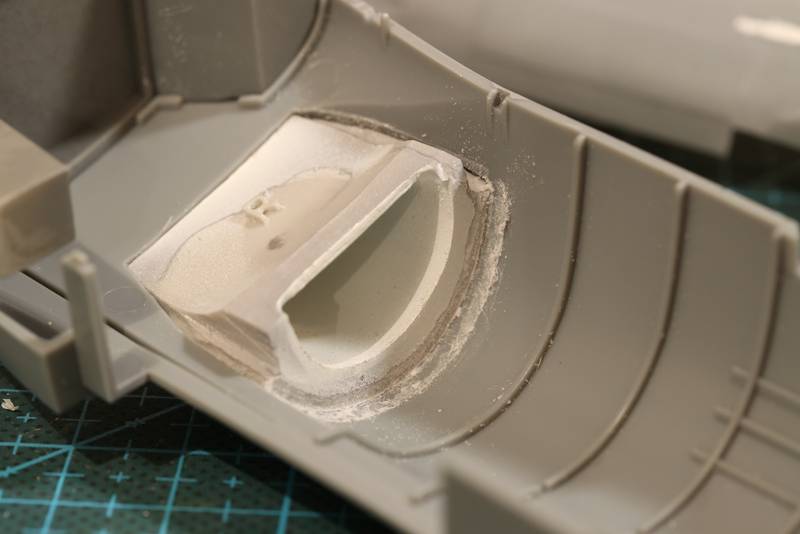
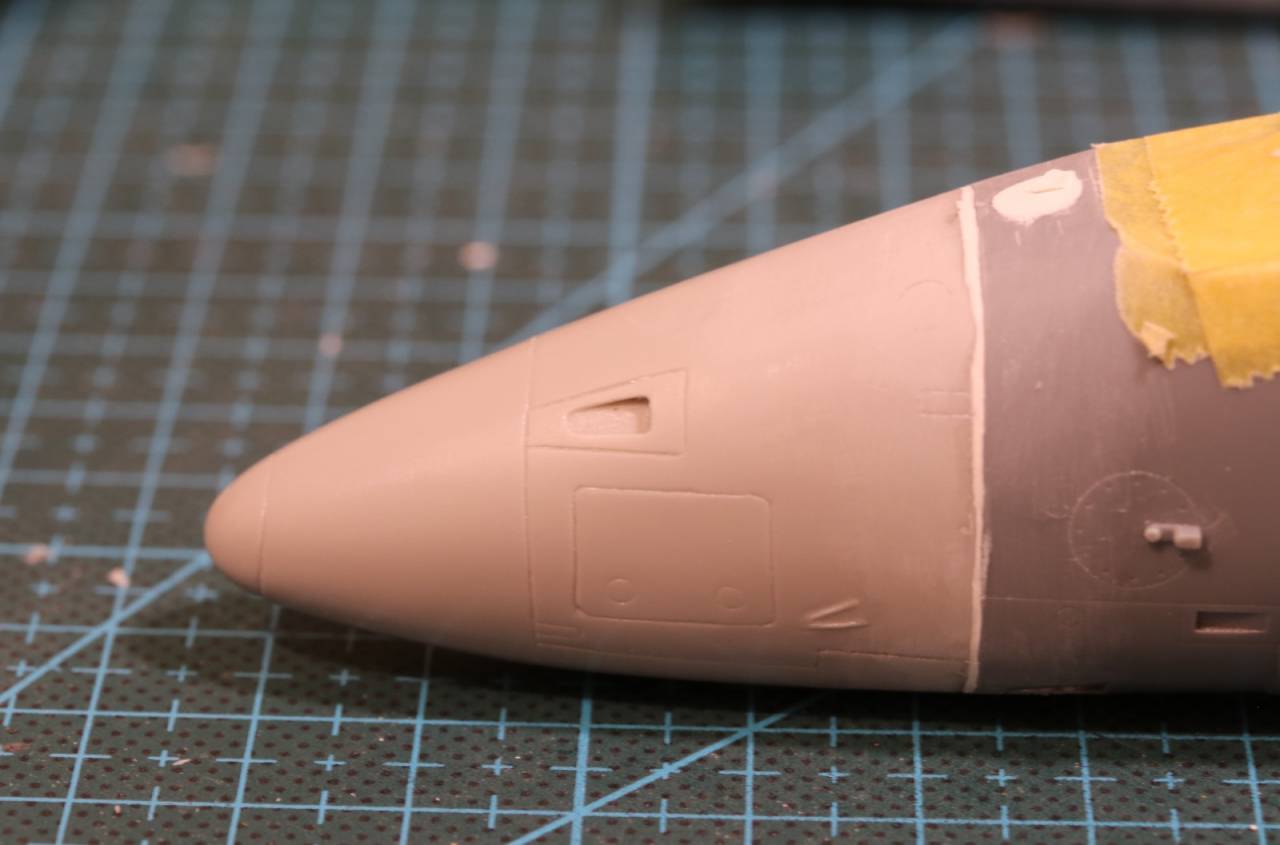
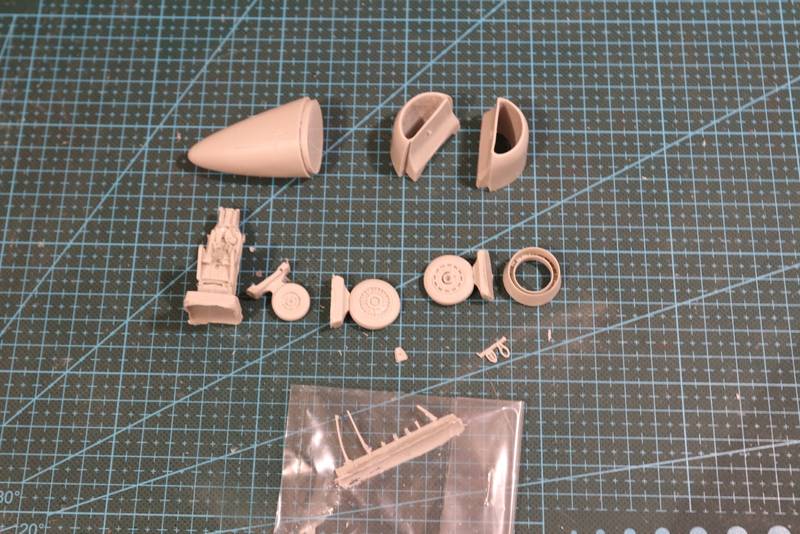
What is great about the AOA offering it also provided a resin set from AMS to provide some key details to backdate the kit from an E to a C Skyhawk. You get a short nose, intakes, a seat, wheels and a windscreen wiper.


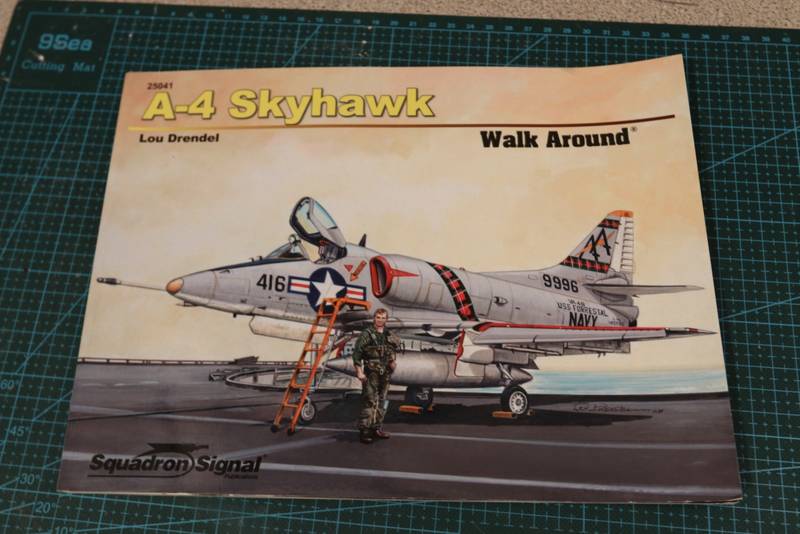
Over the last year I have added some other AM bits to aid with the build and probably most helpfully, the Squadron Walk Around, for the pictures.


If you have any thoughts about improvements to the base kit feel free to chip in. I am certainly not going for a definitive A-4C but I will do what I can. The AOA information sheet has a number of recommended changes for the conversion and I will start there.

cheers
Michael
Joel_W
Staff MemberAssociate Editor
AUTOMODELER
_VISITCOMMUNITY
New York, United States
Joined: December 04, 2010
KitMaker: 11,666 posts
AeroScale: 7,410 posts
Posted: Wednesday, January 25, 2017 - 02:53 AM UTC
Michael,
I'm pulling up my chair and taking notes on your build, as I've been planning a few Trumpeter Scooter builds over then next 2 years, and the little work horse is a personal favorite. I'm also looking at the AOA decals or Zotz decals, but with the extra goodies that come with AOA decals, that's how I will most likely go as well.

Joel
BigfootV
_VISITCOMMUNITY
Colorado, United States
Joined: December 24, 2005
KitMaker: 1,624 posts
AeroScale: 385 posts
Posted: Wednesday, January 25, 2017 - 03:56 AM UTC
Hello Michael,

My Dad was an A-4 air wing plane captain, brown shirt, on the Tico, (CV-14) and the Connie (CV-64) aircraft carriers during the 60's. Rumor has it he was there for the Gulf of Tonkin incidents. He told me he lost the pilot and plane shortly after launching one day. The only thing found was the ejection seat still armed. (They didn't know this until they had it the briefing room below decks. )

I'll be taking notes as well, one of these days I'd like to get one.

See ya in the funnies............
Cosimodo
#335
_VISITCOMMUNITY
Auckland, New Zealand
Joined: September 03, 2013
KitMaker: 1,808 posts
AeroScale: 195 posts
Posted: Wednesday, January 25, 2017 - 02:12 PM UTC

Quoted Text

Michael,
I'm pulling up my chair and taking notes on your build, as I've been planning a few Trumpeter Scooter builds over then next 2 years, and the little work horse is a personal favorite. I'm also looking at the AOA decals or Zotz decals, but with the extra goodies that come with AOA decals, that's how I will most likely go as well.

Joel


Glad to have you at the table Joel. I have to say I am not sure who should be taking the notes. I have read your build from a couple of years ago a few times when I was thinking of what to do. There are some pretty good tips in there a Skyhawk newbie like me.

cheers

Michael
Cosimodo
#335
_VISITCOMMUNITY
Auckland, New Zealand
Joined: September 03, 2013
KitMaker: 1,808 posts
AeroScale: 195 posts
Posted: Wednesday, January 25, 2017 - 02:21 PM UTC

Quoted Text

Hello Michael,

My Dad was an A-4 air wing plane captain, brown shirt, on the Tico, (CV-14) and the Connie (CV-64) aircraft carriers during the 60's. Rumor has it he was there for the Gulf of Tonkin incidents. He told me he lost the pilot and plane shortly after launching one day. The only thing found was the ejection seat still armed. (They didn't know this until they had it the briefing room below decks. )

I'll be taking notes as well, one of these days I'd like to get one.

See ya in the funnies............


Hi Brian,
There were a lot of Skyhawk pilots lost in that conflict. It's why I finally chose the Marine version. I think there contribution gets a bit overlooked.
But I am happy to have you following along and see how this plays out.

cheers
Michael
Cosimodo
#335
_VISITCOMMUNITY
Auckland, New Zealand
Joined: September 03, 2013
KitMaker: 1,808 posts
AeroScale: 195 posts
Posted: Wednesday, January 25, 2017 - 02:34 PM UTC
So the conversion to the C. These are the two key visible changes


The nose is shorter and I will cut off the existing nose when the fuselage is in one piece.


The other, the jet intakes, on a C are flat to the fuselage. You can see here the raised lip that separates the intake from the fuselage.

No going back after this piece of surgery


And you can see how the earlier version has the intake flat to the fuselage


Now I have had a bit to do with limited run resin in my ship building and you always hope for the best and but expect to do some work. So no surprises here, the intake has been cast wider at the rear that the kit allows for. Some blending in is required.


Before I attach it though I will try Joel's tip to paint the inside of the intake white and tape it up ahead of applying the red edge.

cheers
Michael

Joel_W
Staff MemberAssociate Editor
AUTOMODELER
_VISITCOMMUNITY
New York, United States
Joined: December 04, 2010
KitMaker: 11,666 posts
AeroScale: 7,410 posts
Posted: Thursday, January 26, 2017 - 01:36 AM UTC
Michael,
Sure does seem that resin parts usually aren't an exact fit.

I'm sure you'll find my method a little easier then the usual way of painting the red on the intakes.

Joel
litespeed
Staff MemberNews Reporter
AEROSCALE
_VISITCOMMUNITY
England - North West, United Kingdom
Joined: October 15, 2009
KitMaker: 1,976 posts
AeroScale: 1,789 posts
Posted: Wednesday, February 01, 2017 - 06:14 PM UTC
I will be following along Michael. I have always liked the A4 and have often been tempted to build the Trumpeter 1/32.
All the best.
tim
SHAKY962
_VISITCOMMUNITY
Buenos Aires, Argentina
Joined: May 21, 2012
KitMaker: 765 posts
AeroScale: 316 posts
Posted: Thursday, February 02, 2017 - 12:13 AM UTC
Excelent!!!!
I follow your work
berndm
_VISITCOMMUNITY
Niedersachsen, Germany
Joined: March 26, 2014
KitMaker: 844 posts
AeroScale: 630 posts
Posted: Saturday, February 04, 2017 - 01:42 AM UTC
Thats a good start, Michael and thanks for pointing out all the differences of this aircraft.
Cosimodo
#335
_VISITCOMMUNITY
Auckland, New Zealand
Joined: September 03, 2013
KitMaker: 1,808 posts
AeroScale: 195 posts
Posted: Saturday, February 04, 2017 - 01:48 PM UTC

Quoted Text

Michael,
Sure does seem that resin parts usually aren't an exact fit.

I'm sure you'll find my method a little easier then the usual way of painting the red on the intakes.

Joel


Ah Joel, I went back to check how you had done the intakes. I forgotten the intakes were in 4 pieces and you had a natural split to align the masking. With a single resin piece is wasn't so easy and much trial and error followed. I have used a plug to try and achieve the outcome. Time will tell.

cheers
Michael
Cosimodo
#335
_VISITCOMMUNITY
Auckland, New Zealand
Joined: September 03, 2013
KitMaker: 1,808 posts
AeroScale: 195 posts
Posted: Saturday, February 04, 2017 - 01:51 PM UTC

Quoted Text

I will be following along Michael. I have always liked the A4 and have often been tempted to build the Trumpeter 1/32.
All the best.
tim


Glad to have along Tim
Actually the kit I think is fairly straightforward, bit like the plane itself, not too many parts. I think I would go back and build a later version OOB once I have finished with all this modification malarkey.

cheers
Michael
Cosimodo
#335
_VISITCOMMUNITY
Auckland, New Zealand
Joined: September 03, 2013
KitMaker: 1,808 posts
AeroScale: 195 posts
Posted: Saturday, February 04, 2017 - 02:00 PM UTC

Quoted Text

Excelent!!!!
I follow your work


Gracias Jose! I hope the work stays excellent


cheers
Michael
Cosimodo
#335
_VISITCOMMUNITY
Auckland, New Zealand
Joined: September 03, 2013
KitMaker: 1,808 posts
AeroScale: 195 posts
Posted: Saturday, February 04, 2017 - 02:01 PM UTC

Quoted Text

Thats a good start, Michael and thanks for pointing out all the differences of this aircraft.


You're welcome Bernd. My knowledge is small but growing by the day which is part of the fun of building a plane for the first time.

cheers
Michael
Cosimodo
#335
_VISITCOMMUNITY
Auckland, New Zealand
Joined: September 03, 2013
KitMaker: 1,808 posts
AeroScale: 195 posts
Posted: Saturday, February 04, 2017 - 02:14 PM UTC
Well small progress but lengthy time wise.
The intakes are just about complete. It has taken three iterations of shaving, sanding, filling and painting to get there. It is difficult to mate resin to plastic, with resin much harder so easier to sand while the plastic deteriorates faster. I have used Tamiya white filler and Mr Surfacer for the job.

The paint is to confirm the joint is seamless. A small amount more work required here.


You may have noticed I have severed the nose. The instructions suggested mating the two halves first but after dry fitting the front wheel well I decided that would be difficult. Also I figured it would be much easier to cut the plastic while the each fuselage half is lying flat on the mat. I wouldn't have liked to try and do a straight cut on an uneven cone of a nose.

Once the intakes are finished next up is the cockpit which from Trumpeter is very plain for a jet. I will use Eduard's pre-coloured interior and attempt to paint this Escapac seat which came with the conversion set.


cheers
Michael
Joel_W
Staff MemberAssociate Editor
AUTOMODELER
_VISITCOMMUNITY
New York, United States
Joined: December 04, 2010
KitMaker: 11,666 posts
AeroScale: 7,410 posts
Posted: Sunday, February 05, 2017 - 12:18 AM UTC
Michael,
I know 1st hand the difficulties of matting resin to plastic. You've done a excellent job of it.

that seat is really quite impressive, especially those belts. Just no way to duplicate that with fabric or PE at my skill level.

Joel
Cosimodo
#335
_VISITCOMMUNITY
Auckland, New Zealand
Joined: September 03, 2013
KitMaker: 1,808 posts
AeroScale: 195 posts
Posted: Sunday, February 12, 2017 - 11:32 AM UTC

Quoted Text

Michael,
I know 1st hand the difficulties of matting resin to plastic. You've done a excellent job of it.

that seat is really quite impressive, especially those belts. Just no way to duplicate that with fabric or PE at my skill level.

Joel


Thanks Joel,
Yes, the resin seat looks the part, a bit rough and ready under close examination but it will pass the test without a macro lens magnifying it's faults. None of us would stand up to that test

cheers
Michael
Cosimodo
#335
_VISITCOMMUNITY
Auckland, New Zealand
Joined: September 03, 2013
KitMaker: 1,808 posts
AeroScale: 195 posts
Posted: Sunday, February 12, 2017 - 11:51 AM UTC
Well, I will start the update with where I left off, the seat. I haven't detailed a resin seat before but using some A-4C cockpit photos I played around with it some. It looks the part for me.


It was painted a medium grey then given a pin wash to see where all the detail was. That part was pretty essential in picking out the parts to paint.
Sitting in place I see the rest of the cockpit still needs a wash and a matt coat of clear.


While waiting for various paints to dry I assembled the engine. As Joel noted in his build you only need to paint the front as it is the only part visible through the intakes.


Then an assembly problem. The fuselage comes in quarters. trumpeter would have you assemble the front quarters and the rear quarters in too halves, then join. After much dry fitting, taping of bits etc I decided that just wasn't going to work as the rear half was at least 1mm narrower and you wouldn't be able to widen to get the two pieces too mate. So front and rear quarters joined instead.

The white is Tamiya putty filling the engine access hatch. On the "C" it was further forward. Not looking forward to rescribing that. The rear is the JATO attachments filled as this bird didn't use them.

So did it all fit. The cockpit did which is good. I don't think I mentioned that this an Aires wheel well as the base and that took a little adjustment.

The engine didn't quite fit. A rogue resin intake was about 0.5mm too long so a Dremel adjustment was made.

And it does all go together in the end, so not a bad week in the end.


I hope nobody notices the nose missing. A future challenge

cheers
Michael
KelticKnot
_VISITCOMMUNITY
Scotland, United Kingdom
Joined: May 11, 2015
KitMaker: 768 posts
AeroScale: 656 posts
Posted: Sunday, February 12, 2017 - 04:16 PM UTC
Michael, your modifications are looking really great thus far. Looks like a lot of work was needed on the intakes but they've come out nicely.
The seat and the cockpit overall are nicely done too
berndm
_VISITCOMMUNITY
Niedersachsen, Germany
Joined: March 26, 2014
KitMaker: 844 posts
AeroScale: 630 posts
Posted: Sunday, February 12, 2017 - 05:11 PM UTC
Lots of good work !
The paint work in the cockpit and on the jet engine looks great.
The painted seat is lovely !

Mating resin and plastic is mostly difficult and needs much work to blend the parts in, your Skyhawk is not a exception from this rule.

Good work with the fuselage ! Guess many of the designers of kit instructions don t have much experience with real modelling, its not only Trumpeter. Its way better to fill a seam on top of the fuselage ( and on the underside ) than to fill a kink on the side.

Bernd
Joel_W
Staff MemberAssociate Editor
AUTOMODELER
_VISITCOMMUNITY
New York, United States
Joined: December 04, 2010
KitMaker: 11,666 posts
AeroScale: 7,410 posts
Posted: Sunday, February 12, 2017 - 11:12 PM UTC
Michael,
A most impressive amount of work for sure. As you mentioned nothing really looks that great in close up images, especially greater then 1:1. Every little flaw just jumps out at you, but in real life none of it will ever be seen.

The seat really looks great, especially once it's glued into the cockpit.

I'm not a fan by any means of multi section fuselage halves as there is always a fit, or alignment issue. For my money you handled it the right way. worry about any joining issues after you have two correct halves.

Nice bit of surgery on that intake. Unfortunately, it's just the nature of resin.

Congrats on getting the two fuselage halves joined, now that's a major step in any build.

Joel
Cosimodo
#335
_VISITCOMMUNITY
Auckland, New Zealand
Joined: September 03, 2013
KitMaker: 1,808 posts
AeroScale: 195 posts
Posted: Monday, February 13, 2017 - 01:49 PM UTC

Quoted Text

Michael, your modifications are looking really great thus far. Looks like a lot of work was needed on the intakes but they've come out nicely.
The seat and the cockpit overall are nicely done too


Thanks Paul,
The intakes have been a challenge and the source of much dust. They are about the tip of a small finger in width and the challenge is to mask them for the red lip. I had tried to pre-mask but the need to smooth the lip to the fuselage sent that on its way. So a future job to look forward to.

cheers
Michael
Cosimodo
#335
_VISITCOMMUNITY
Auckland, New Zealand
Joined: September 03, 2013
KitMaker: 1,808 posts
AeroScale: 195 posts
Posted: Monday, February 13, 2017 - 01:55 PM UTC

Quoted Text

Lots of good work !
The paint work in the cockpit and on the jet engine looks great.
The painted seat is lovely !

Mating resin and plastic is mostly difficult and needs much work to blend the parts in, your Skyhawk is not a exception from this rule.

Good work with the fuselage ! Guess many of the designers of kit instructions don t have much experience with real modelling, its not only Trumpeter. Its way better to fill a seam on top of the fuselage ( and on the underside ) than to fill a kink on the side.

Bernd


Hi Bernd,
It would be good to know how many modellers display jets with back half off to show off the engine compared to those who want two halves in traditional nose to tail split.
I must admit I have only previously attempted one post war jet which came in quarters which I assembled the alternative way of front and back and sadly didn't check. The width difference between the two means it a current and long term hangar queen. One of only two planes that I have failed to finished but a lesson for the Skyhawk.

cheers
Michael
Cosimodo
#335
_VISITCOMMUNITY
Auckland, New Zealand
Joined: September 03, 2013
KitMaker: 1,808 posts
AeroScale: 195 posts
Posted: Monday, February 13, 2017 - 02:01 PM UTC

Quoted Text

Michael,
A most impressive amount of work for sure. As you mentioned nothing really looks that great in close up images, especially greater then 1:1. Every little flaw just jumps out at you, but in real life none of it will ever be seen.

The seat really looks great, especially once it's glued into the cockpit.

I'm not a fan by any means of multi section fuselage halves as there is always a fit, or alignment issue. For my money you handled it the right way. worry about any joining issues after you have two correct halves.

Nice bit of surgery on that intake. Unfortunately, it's just the nature of resin.

Congrats on getting the two fuselage halves joined, now that's a major step in any build.

Joel


Thanks Joel,
Yes, resin is the price you pay for doing something different.
I agree that the halves will go together much more easily and in the dry fit it looks pretty good with minimal gaps.

cheers

Michael
Cosimodo
#335
_VISITCOMMUNITY
Auckland, New Zealand
Joined: September 03, 2013
KitMaker: 1,808 posts
AeroScale: 195 posts
Posted: Friday, March 03, 2017 - 09:37 AM UTC
Three weeks since the last update though I have been tinkering away I am fighting the great weather here and the long list of house jobs to clear. Never rains when you want to model on.

Any way, rhinoplasty completed and the nose installed. It took a bit of work first of all to hollow out the back of the nose due to the wheel well extending into it. The resin was spot on but the fuselage needed a squeeze on the sides to bring it in a fraction. An industrial size clamp was used to hold it all together while the glue dried. The final fit was great with little filler required.


The need to squeeze the front has it's payback in the spine behind the cockpit where there was a gap that required filling. For the rest of the fuselage the fit was great.


One of the drawbacks with providing two options i.e. with or without avionics hump means inserts. Trumpeter never quite get this right and both inserts required work. The exhaust vent was too narrow and the tail piece too wide and high requiring filling and sanding.


The tail itself I knew would need fixing.

The top of the rudder is moulded as part of the fuselage. circled in blue it needs to be cut off and attached to the rudder. However the rudder itself can not be assembled and attached as the red circle indicates the rudder needs to be assembled around the hinge points.
The third issue is when the rudder is dry fitted the large gap at its base. The rudder needs to be lengthened to fill the gap.

The corrections are made and some tidy up required.


The wings were dry fitted and needed trimming to fit. The only pieces to date out of the box to go on without issue, the rear stabilisers.
Beginning to look the business though.


cheers
Michael
 _GOTOTOP