_GOTOBOTTOM
Cold War (1950-1974)
Discuss the aircraft modeling subjects during the Cold War period.
Hosted by Tim Hatton
Rhodesian Spitfire F Mk.22 | Revell 1:32
Kendzior
_VISITCOMMUNITY
Krakow, Poland
Joined: January 29, 2016
KitMaker: 96 posts
AeroScale: 91 posts
Posted: Saturday, January 21, 2017 - 10:07 PM UTC
Hi All,

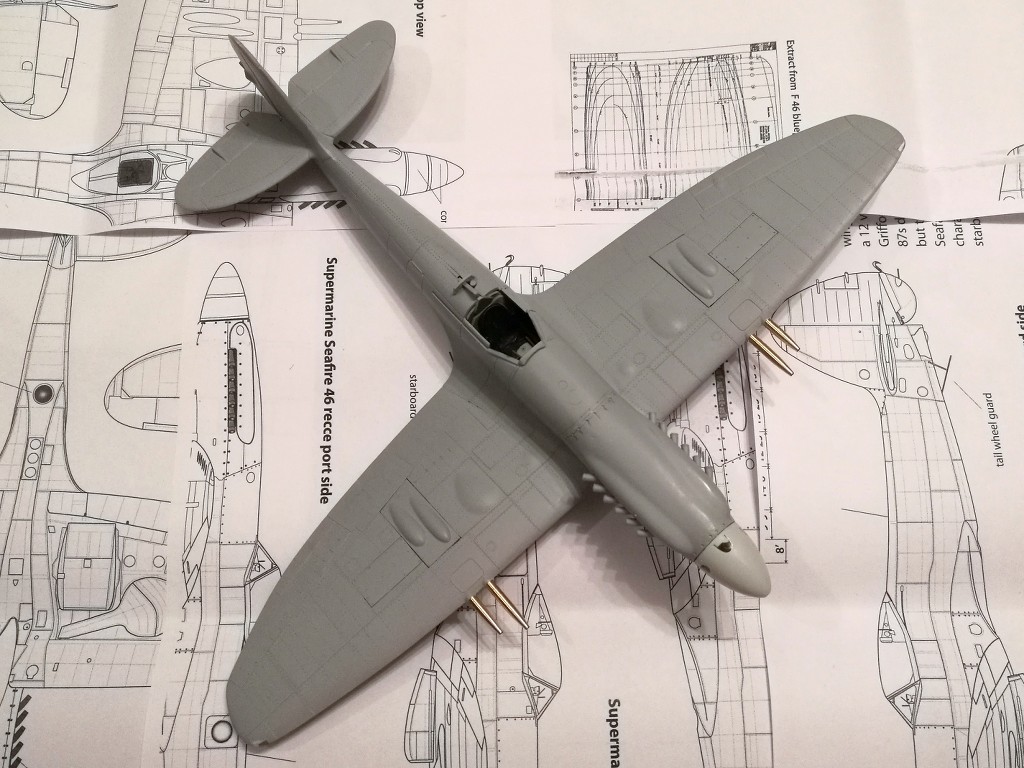
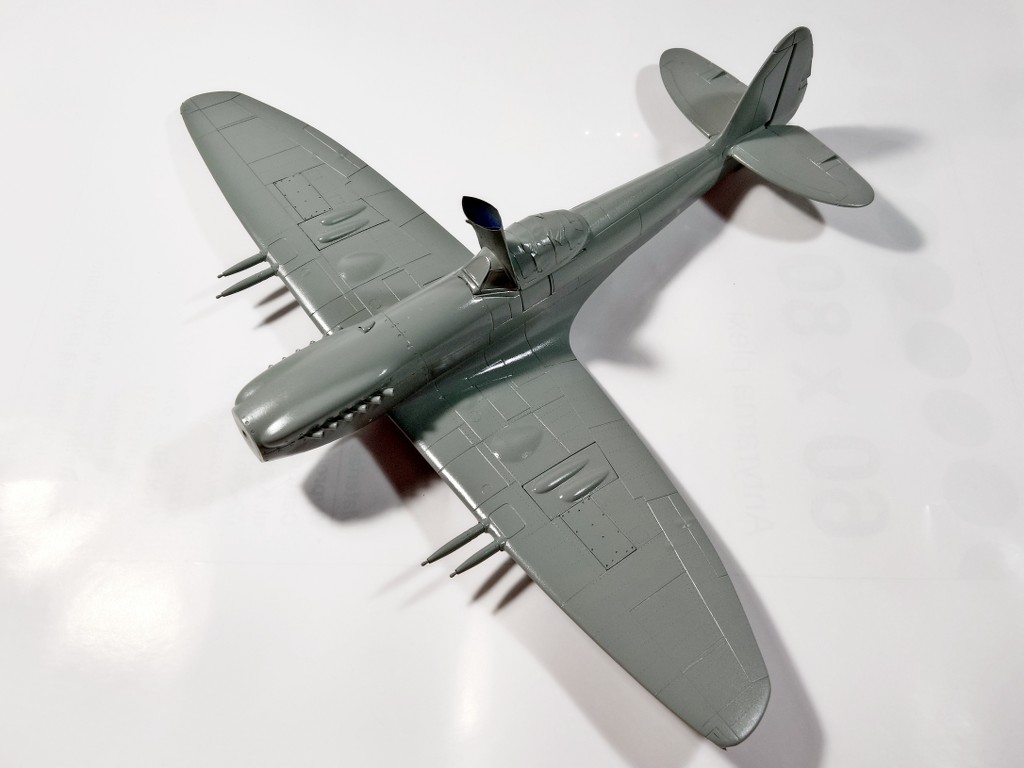
I started this around a year ago, but gave up temporarily due to its poor fit and lack of detail - and the most important, lack of idea, how to paint it.

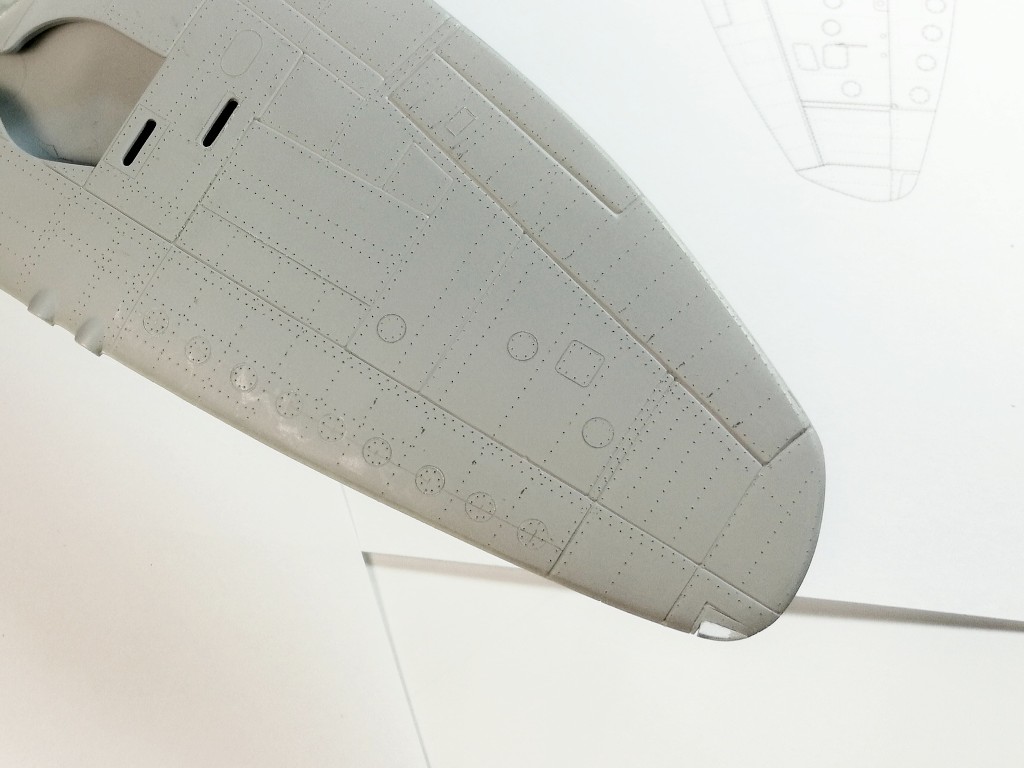
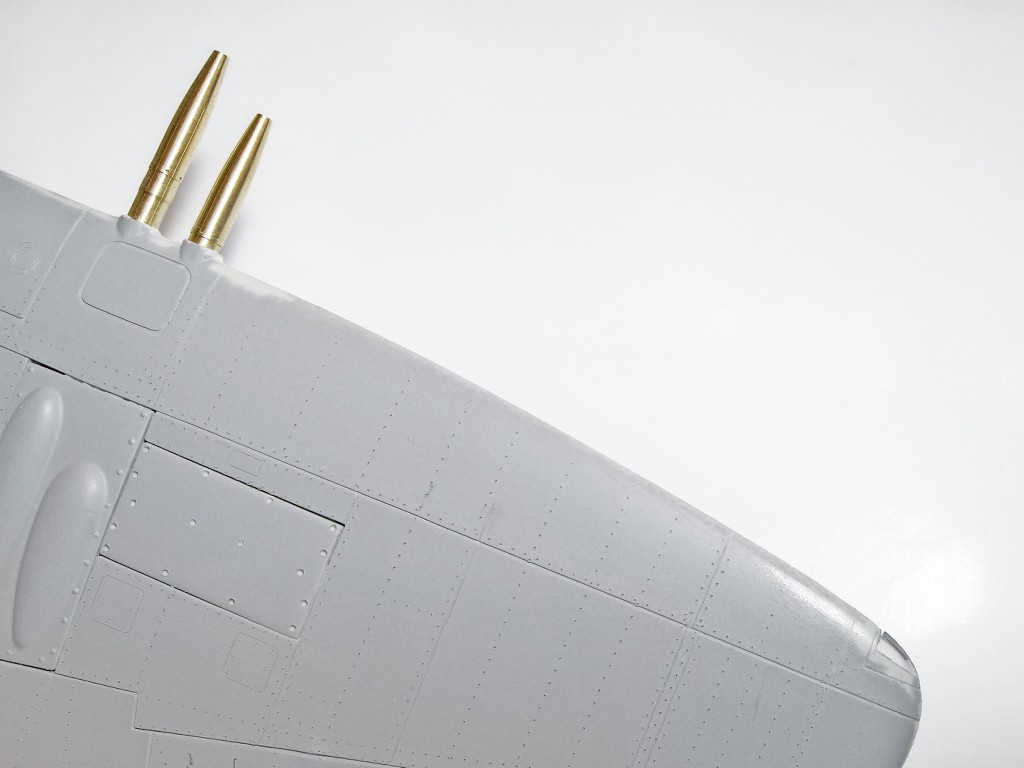
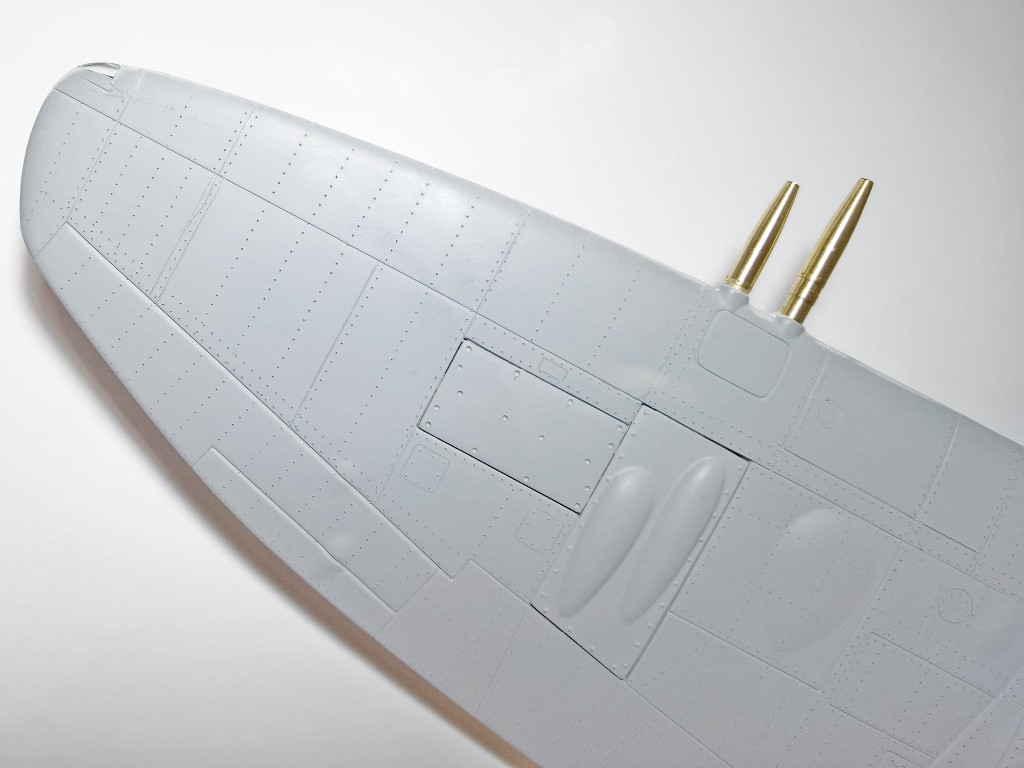
This time it is most of all an exercise in riveting (using RB tool and must say it is fun) - doing this for the very first time, so didn't want to spoil any better or more expensive kit.
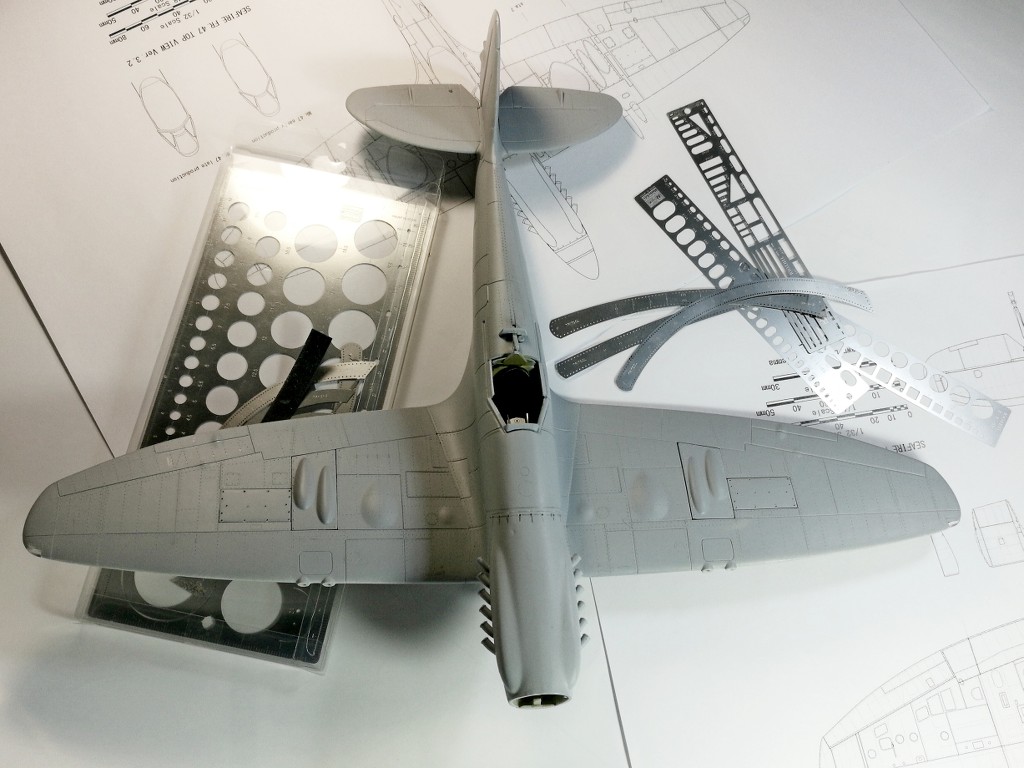
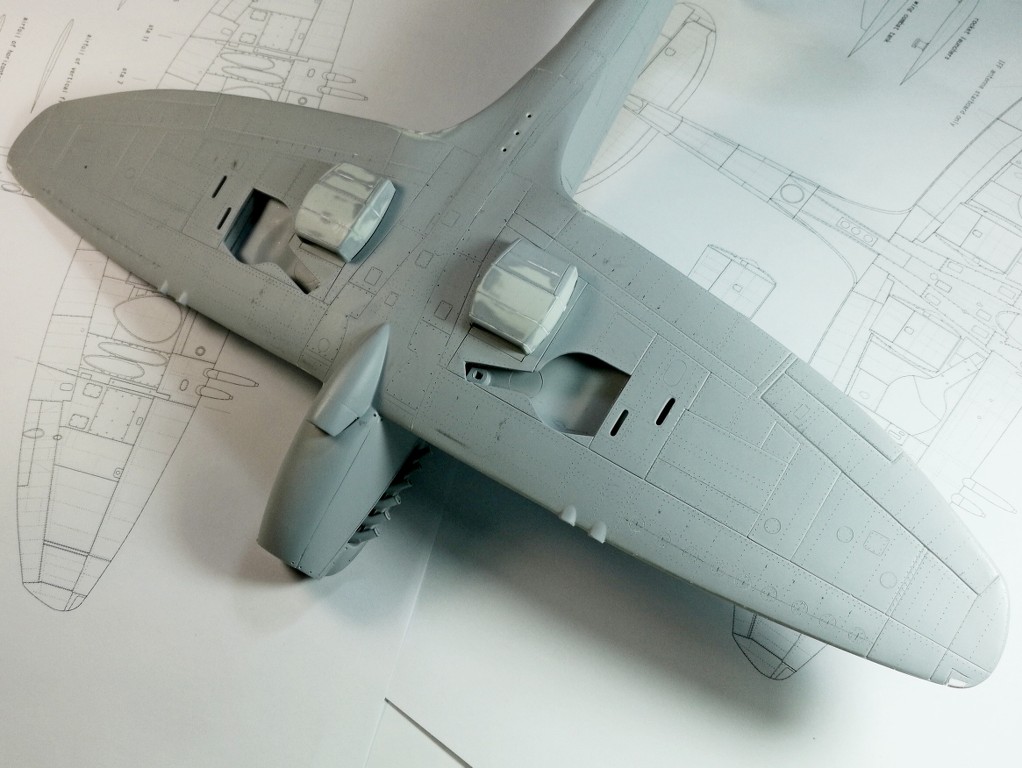
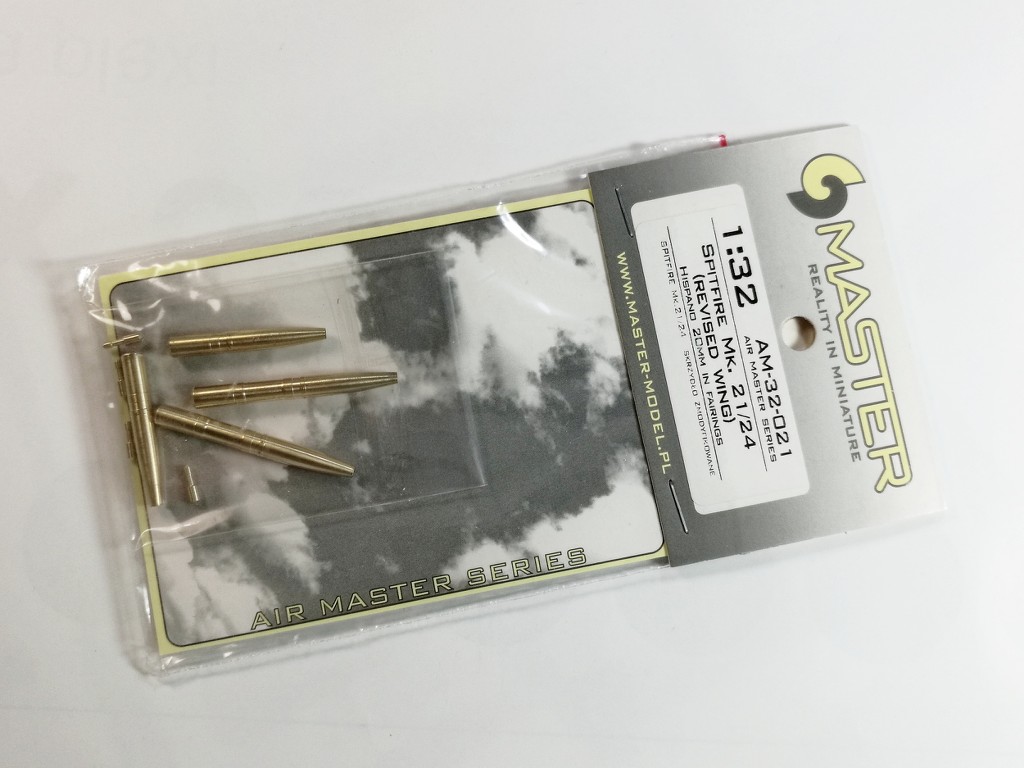
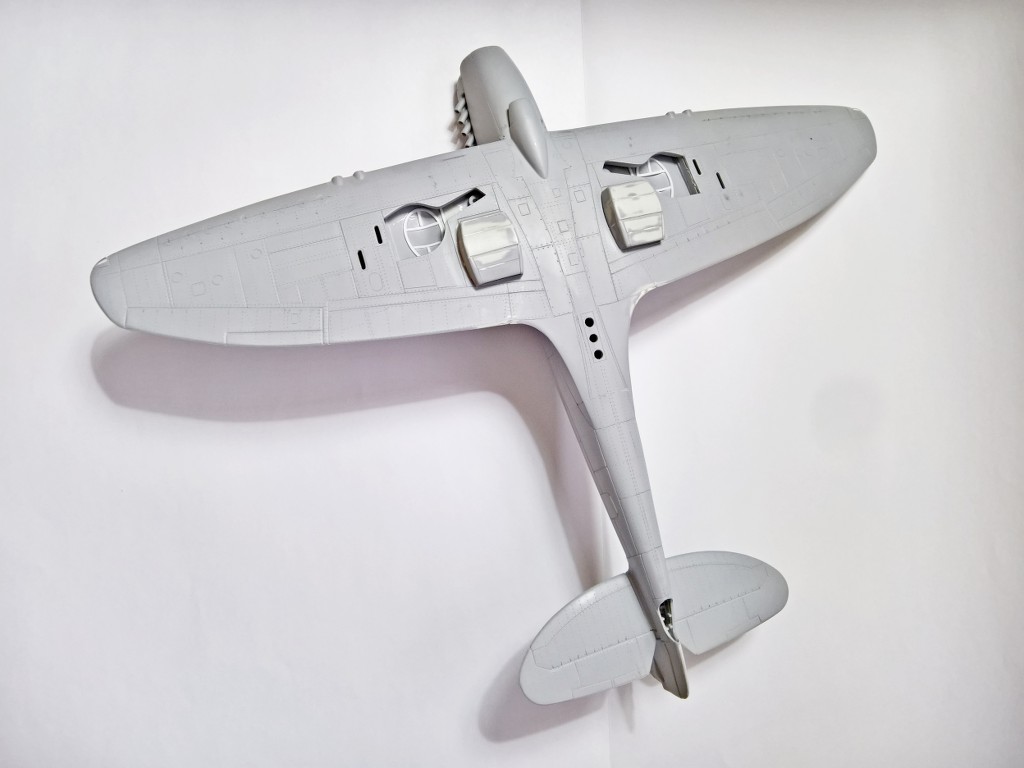
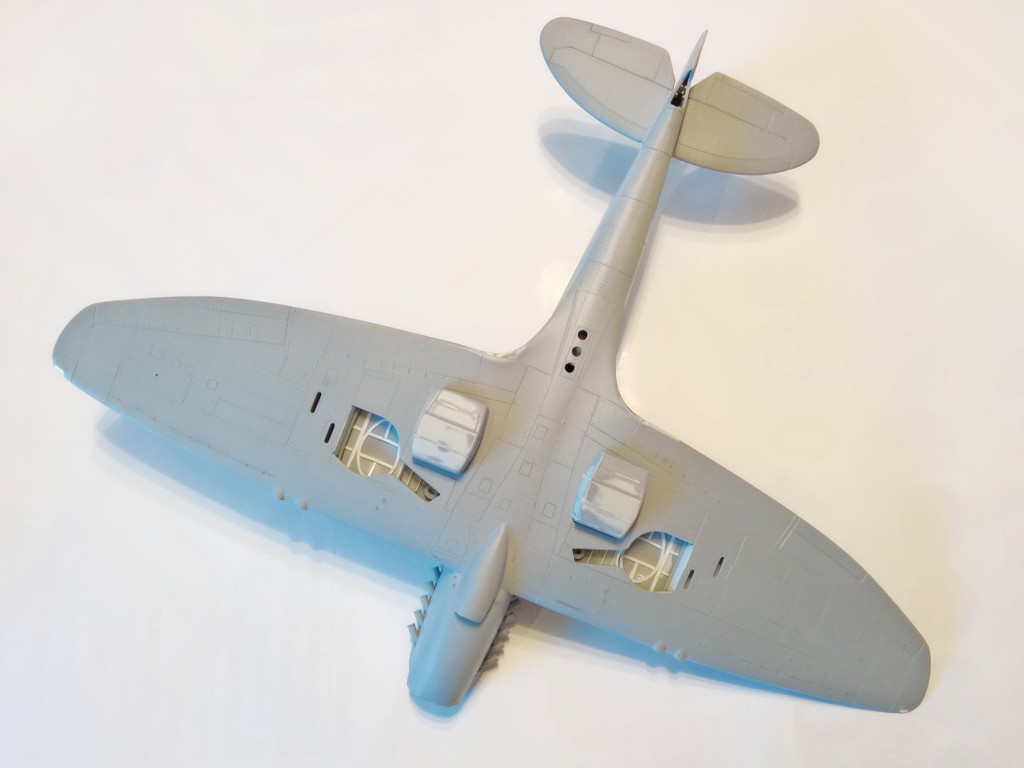
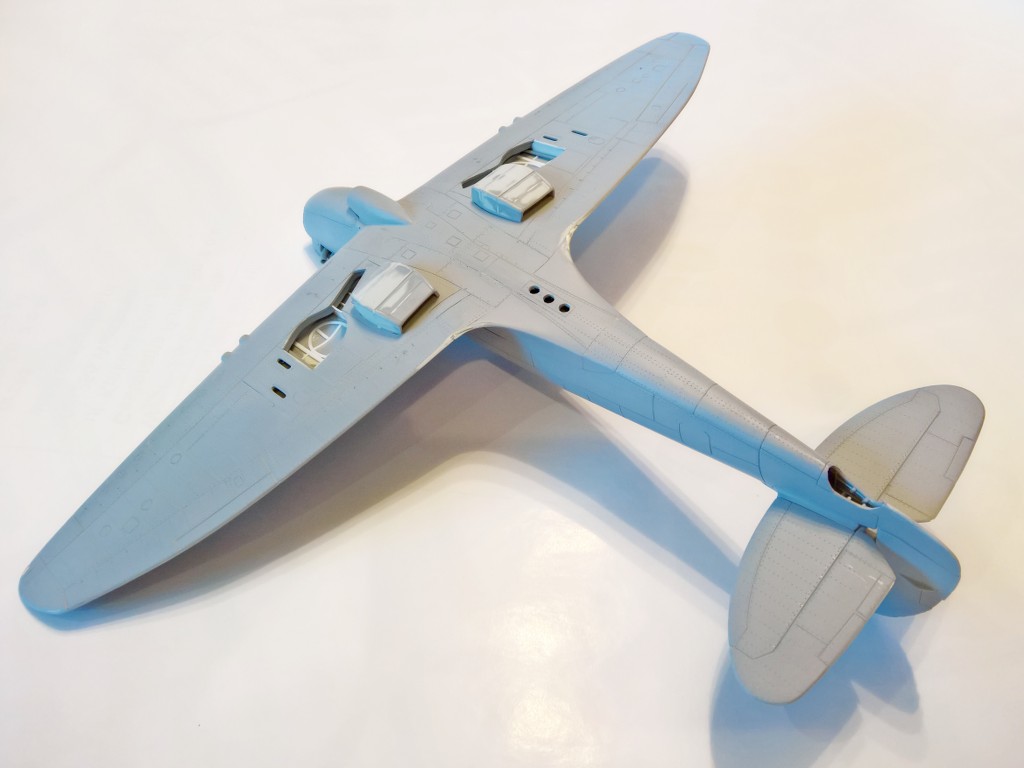
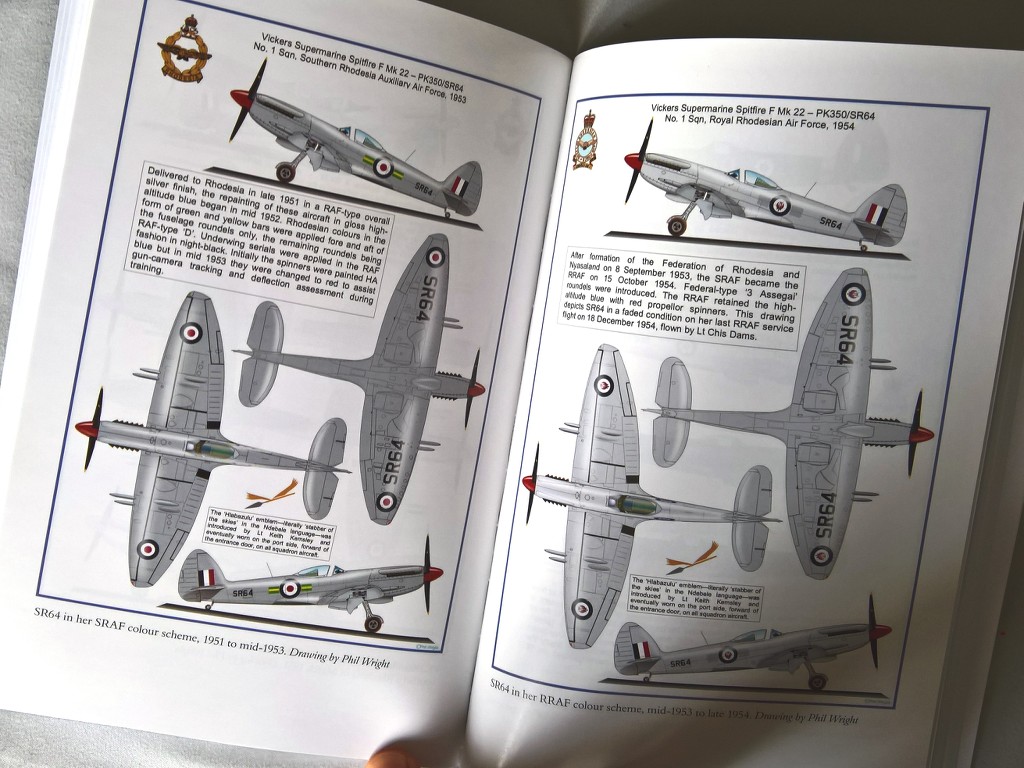
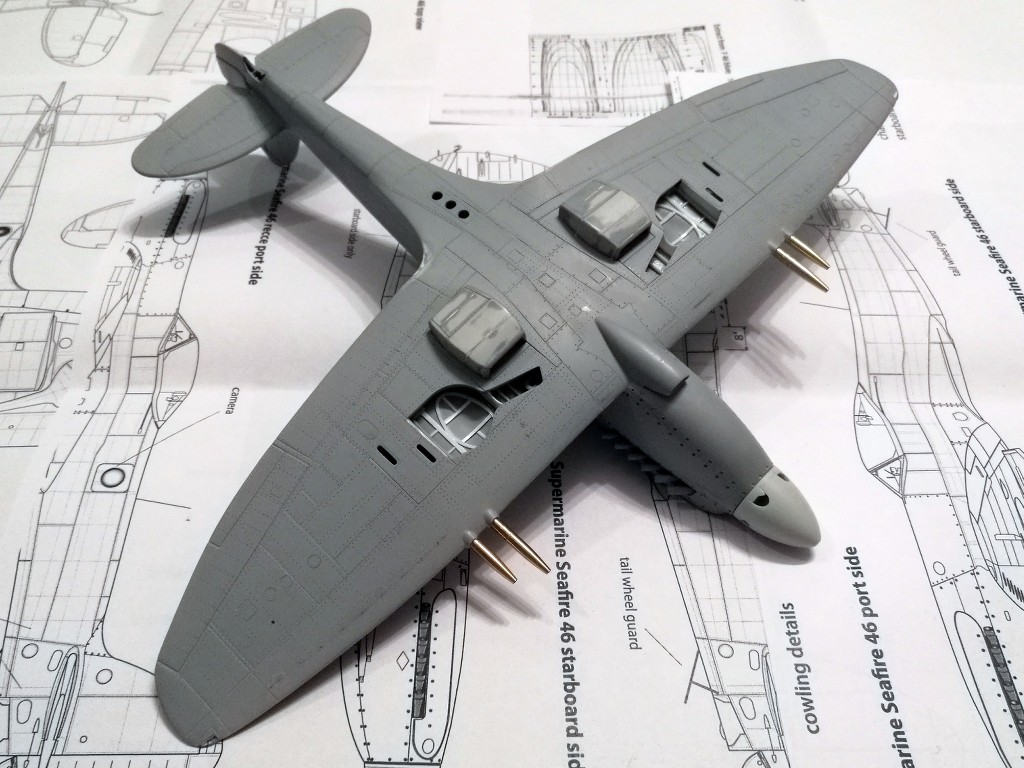
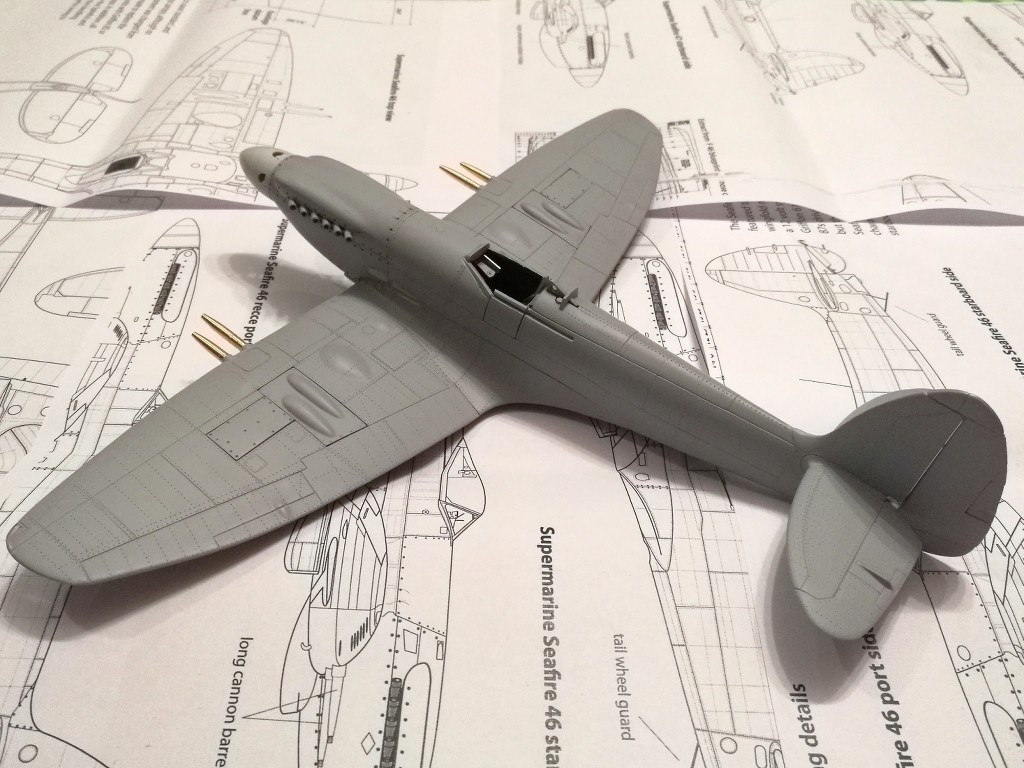
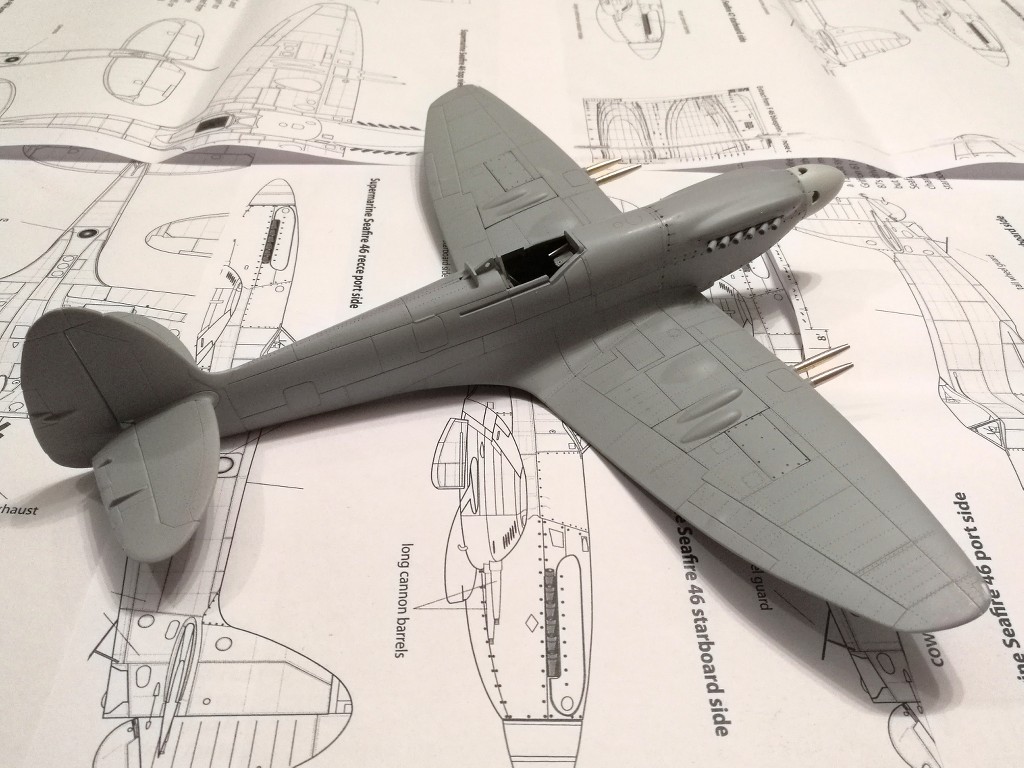
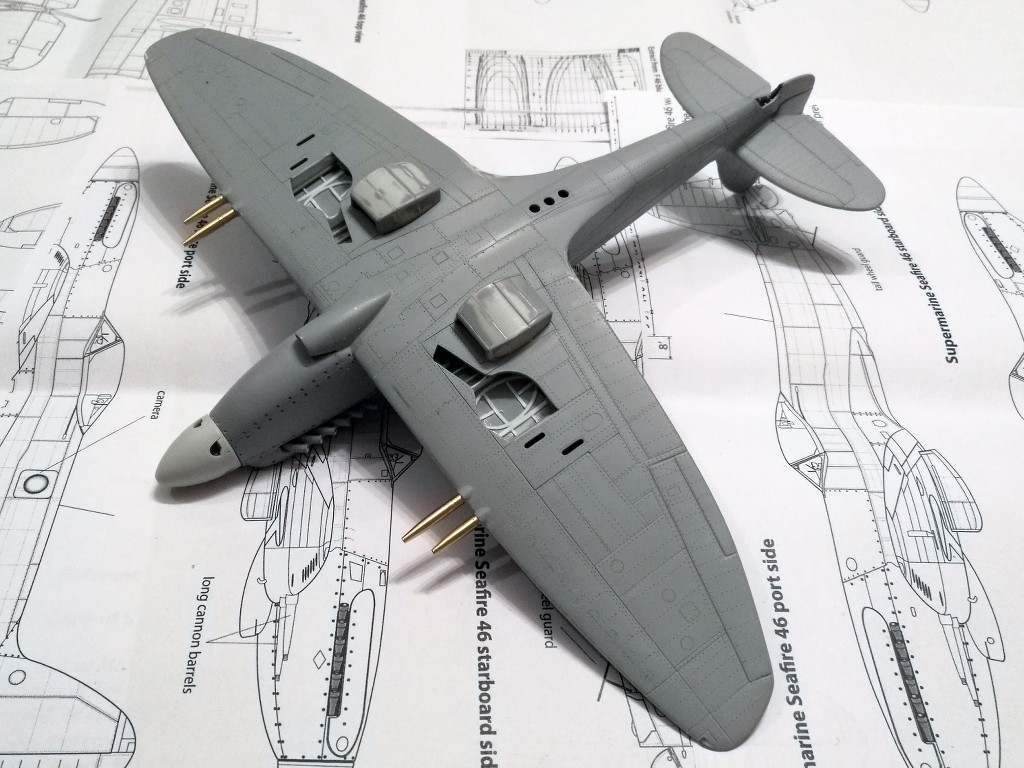
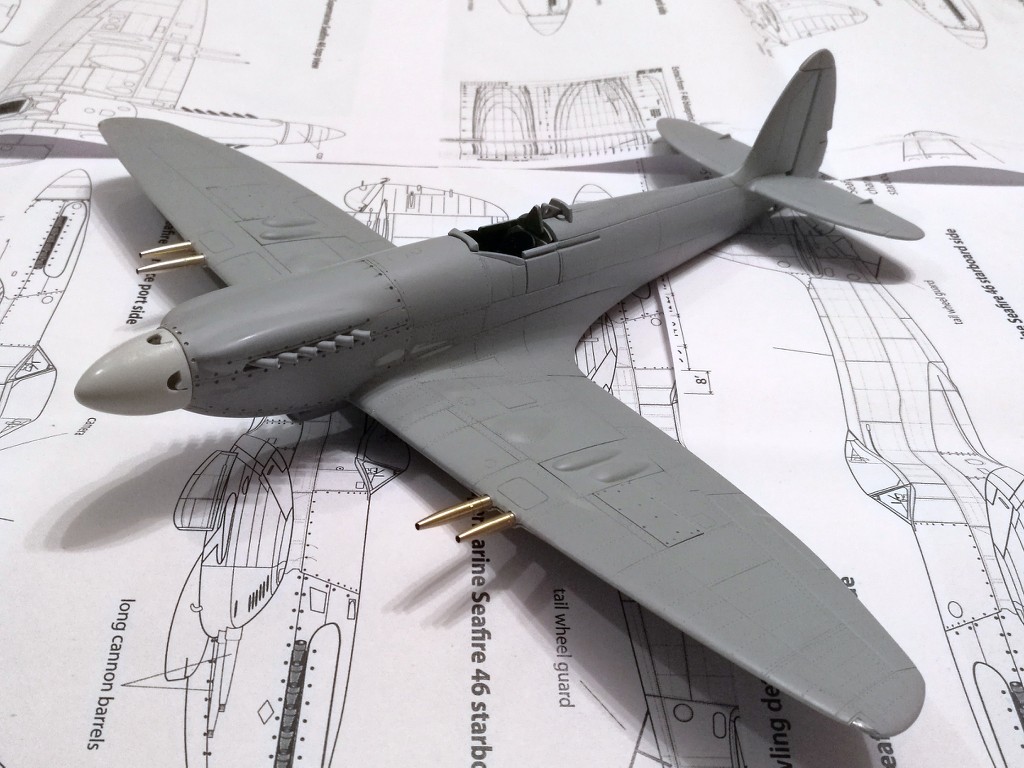
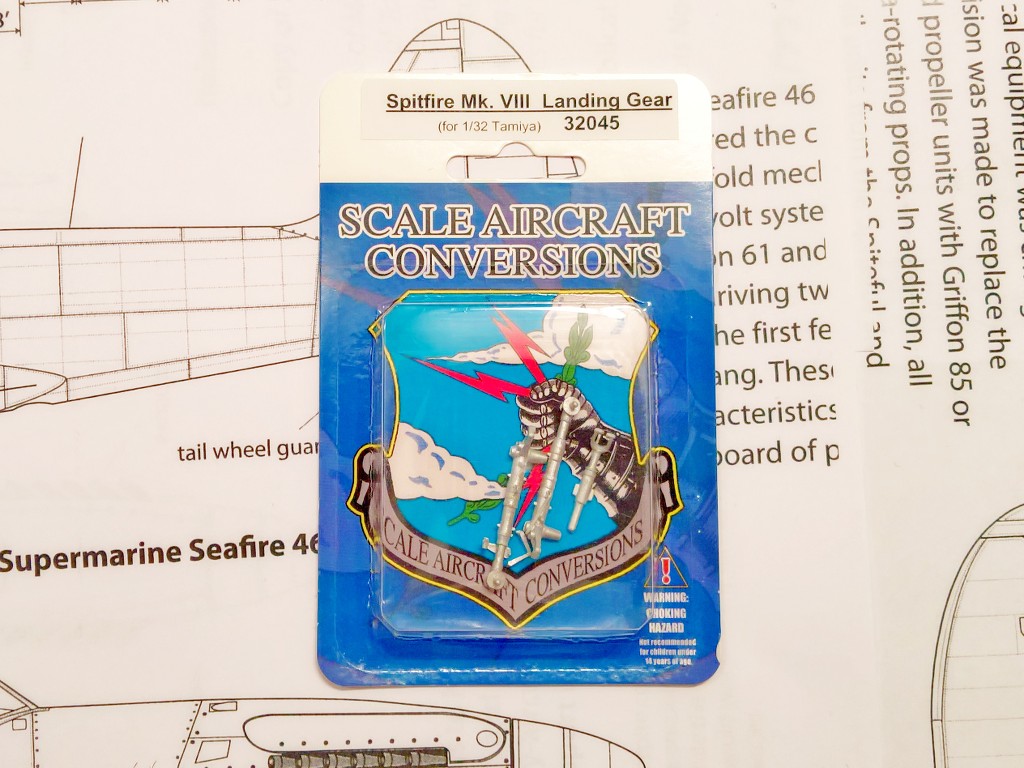
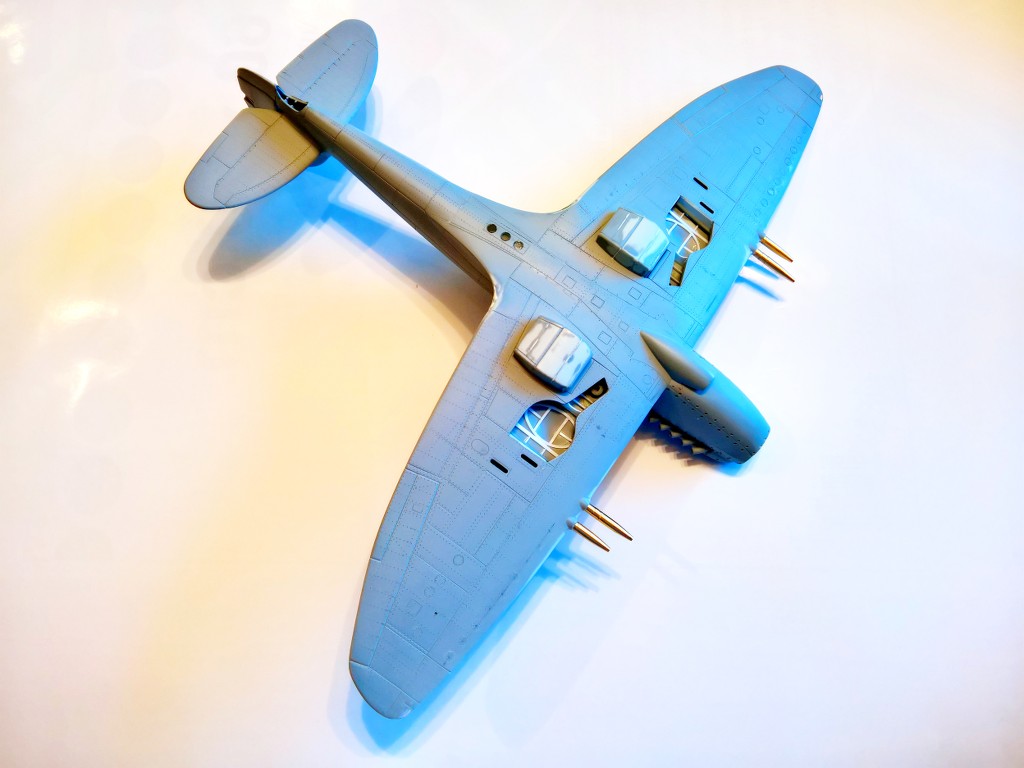
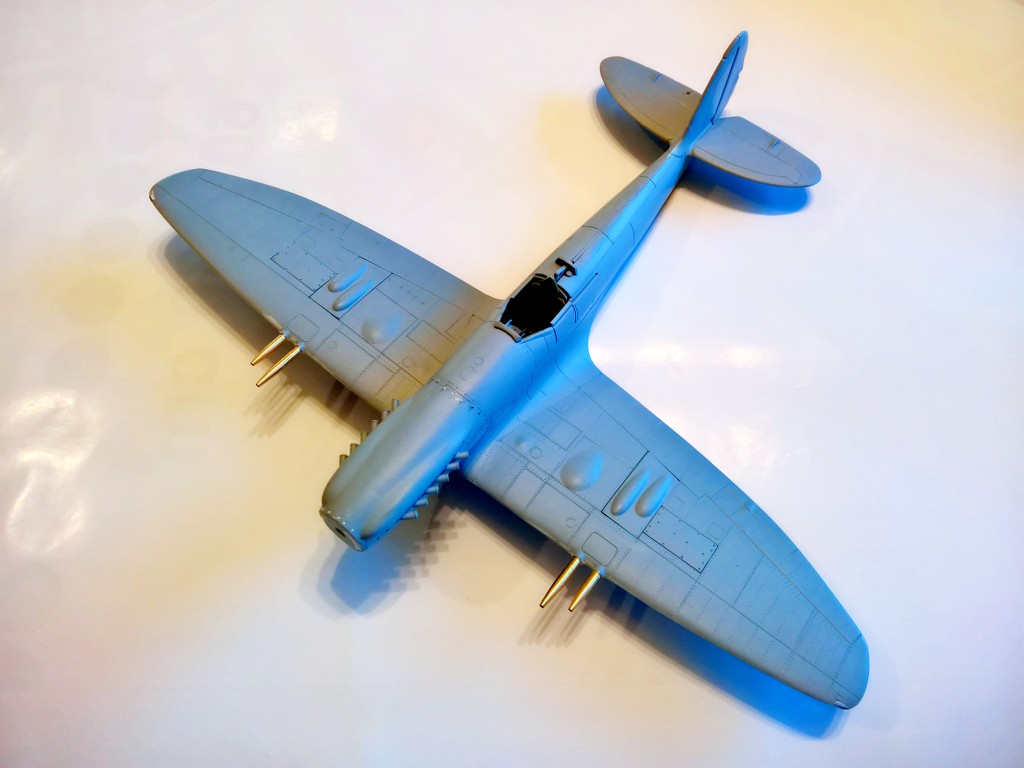
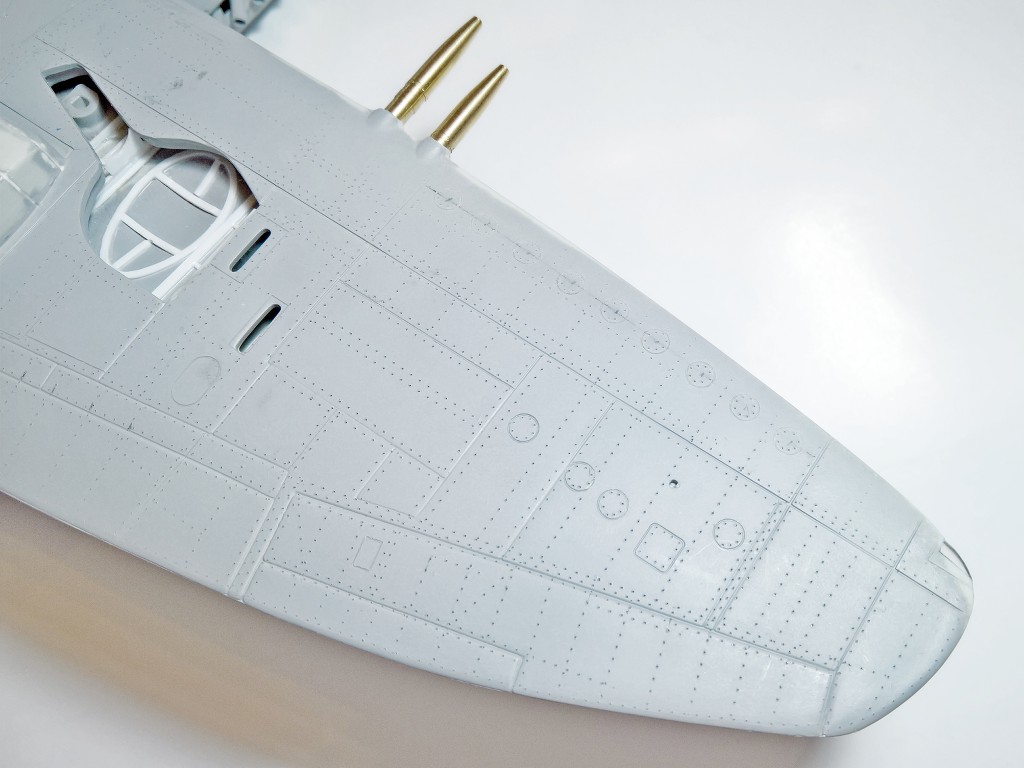
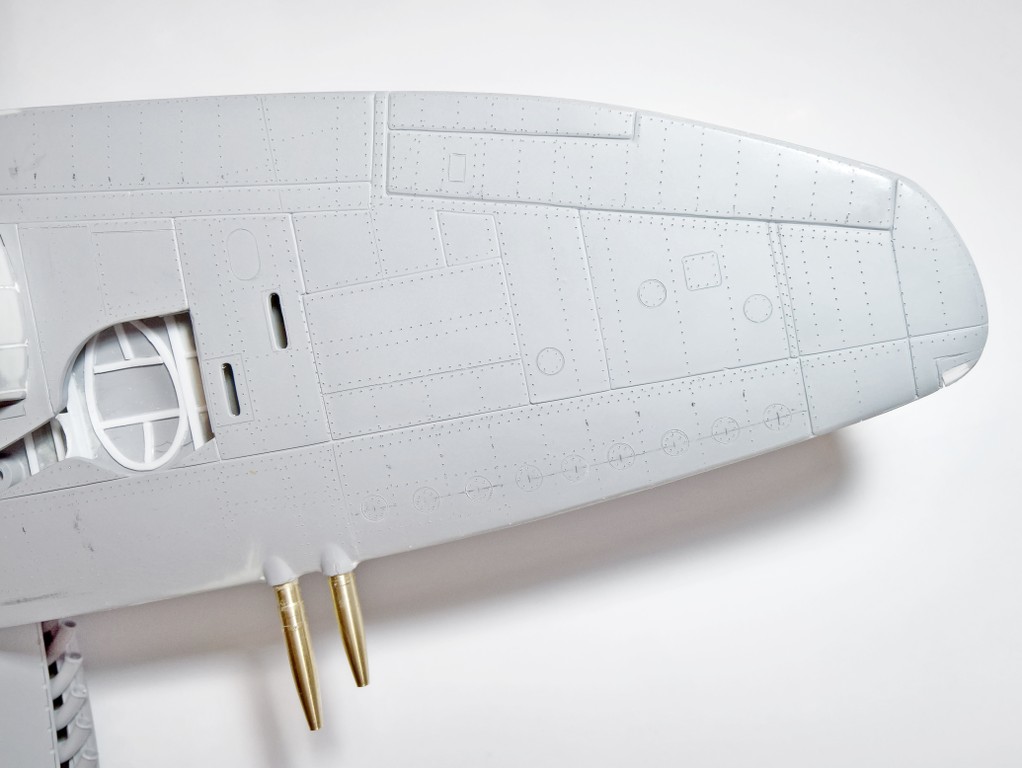
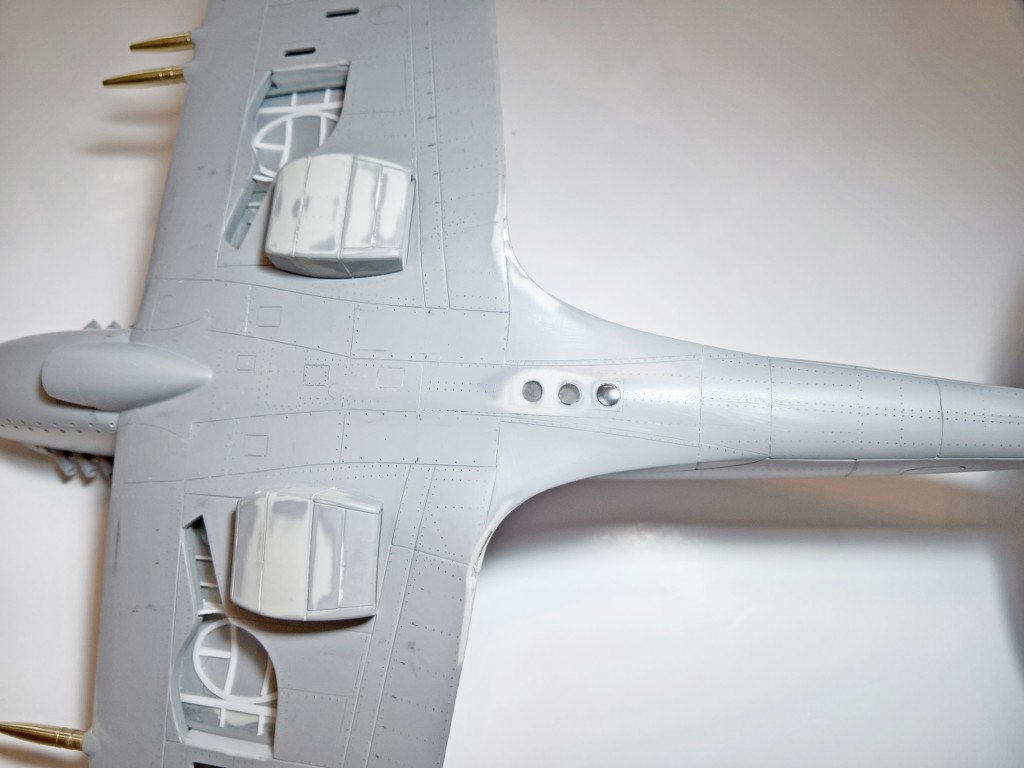
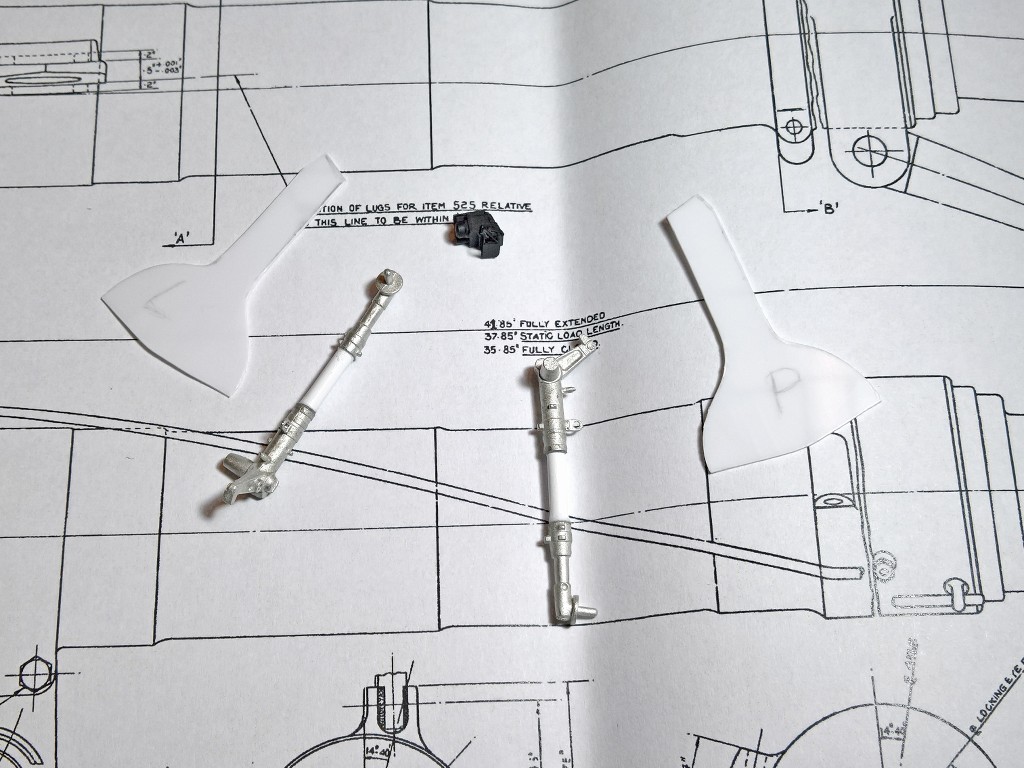
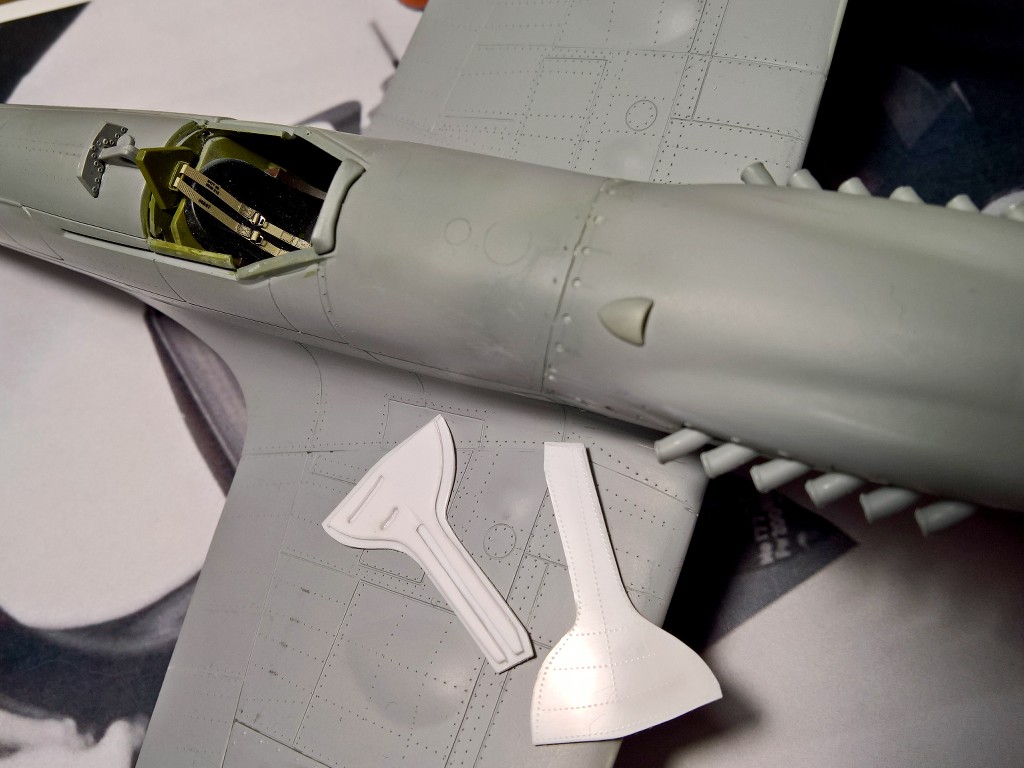
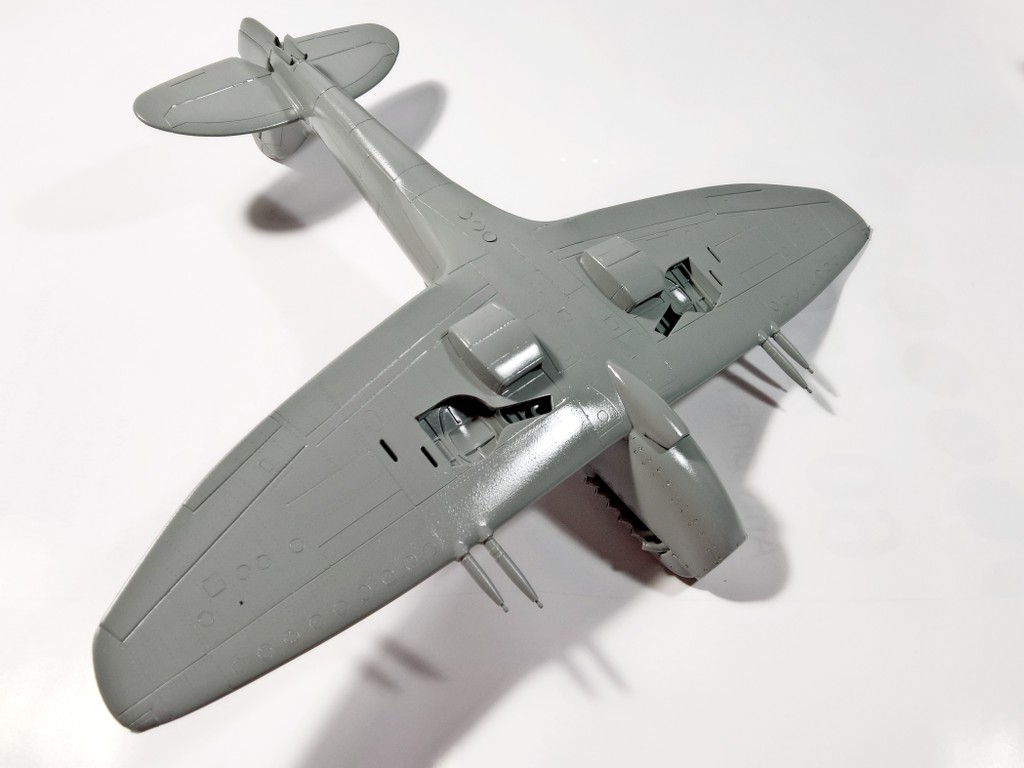
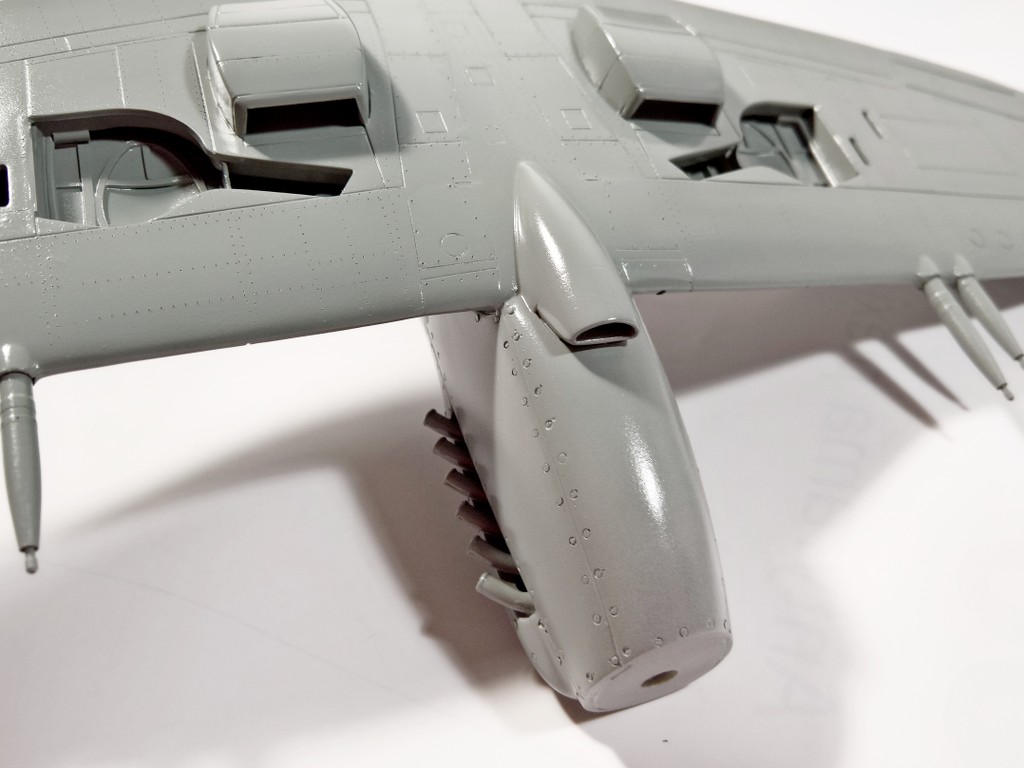
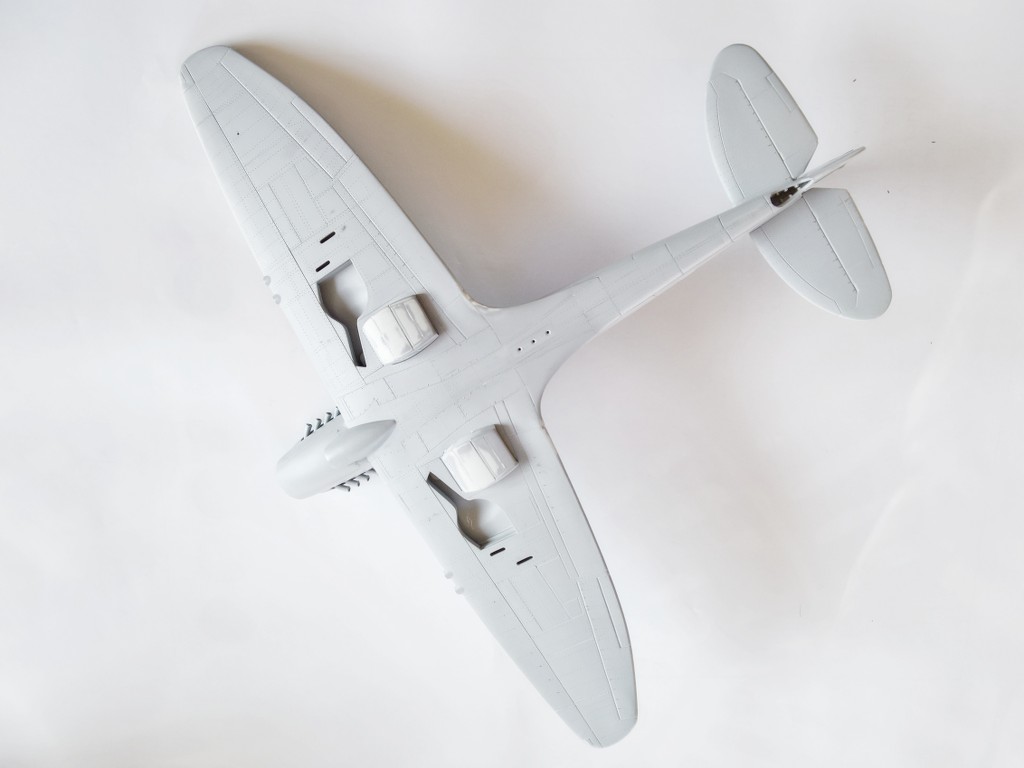
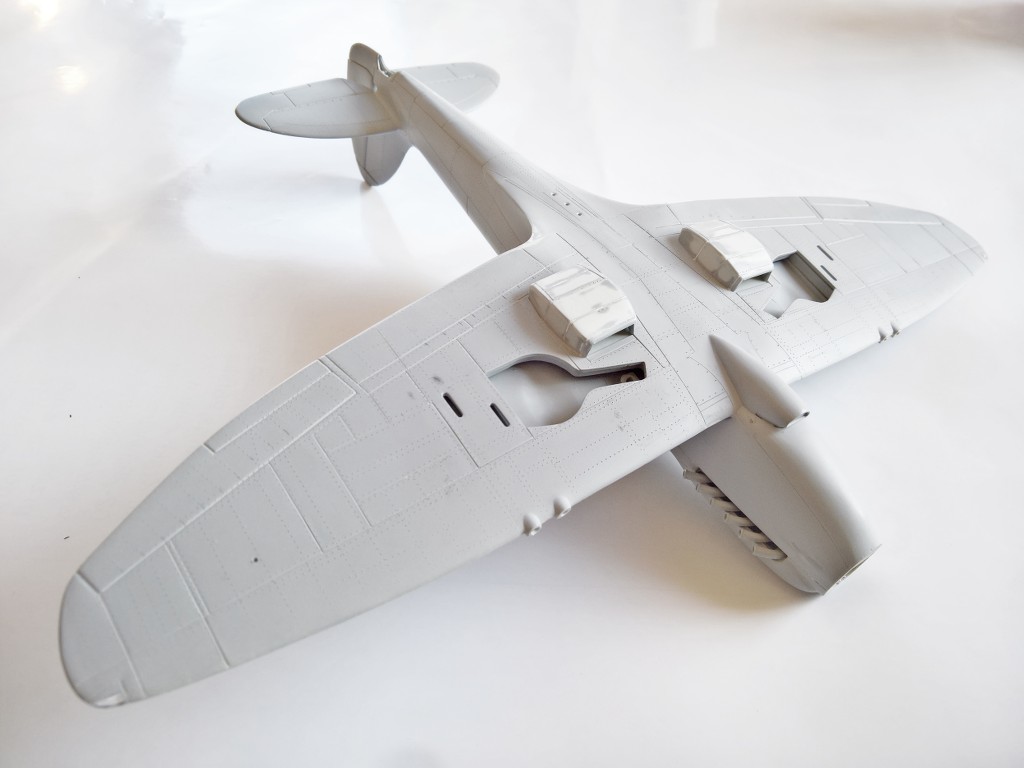
Anyway, going to add here some more details from the scratch: upgrade wheel wells and gear covers, add formation lights - this is really a vintage kit and it shows. In the end I hope to get a result, which will look nice in the second row on my shelf in Southern Rhodesian markings.

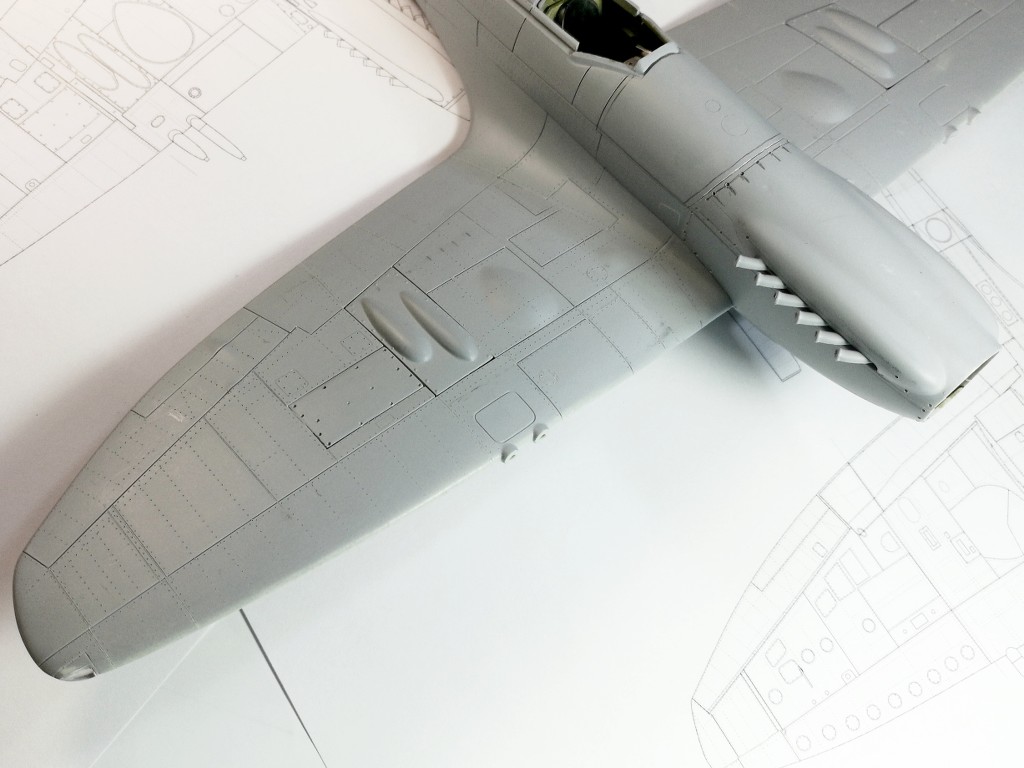
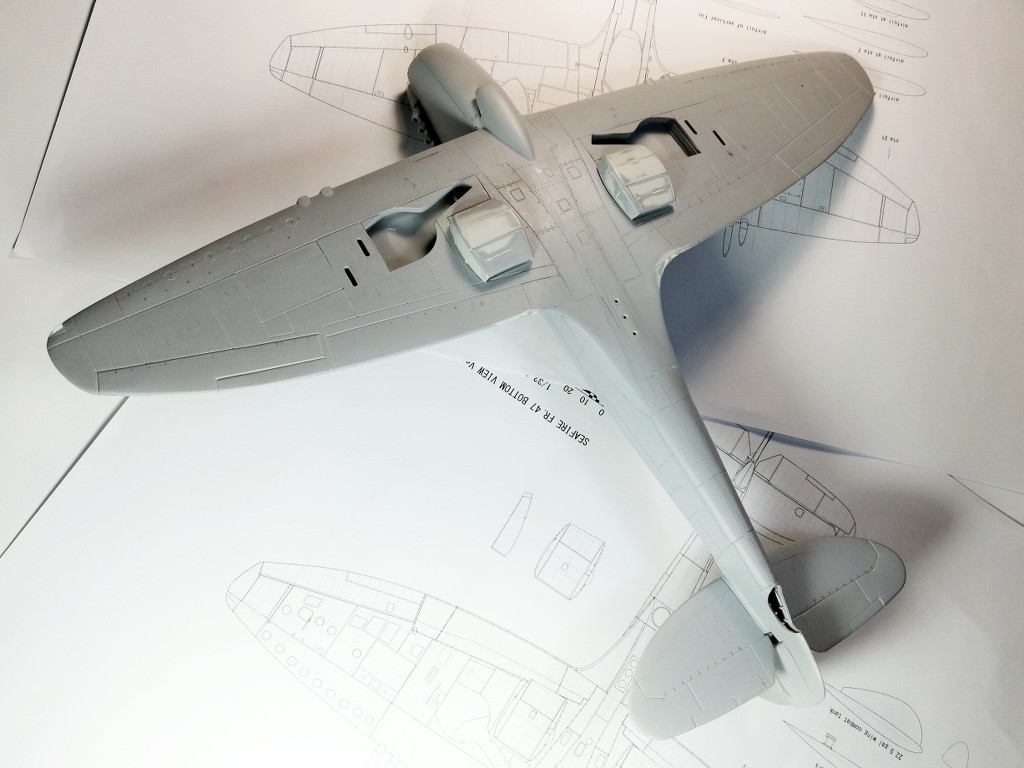
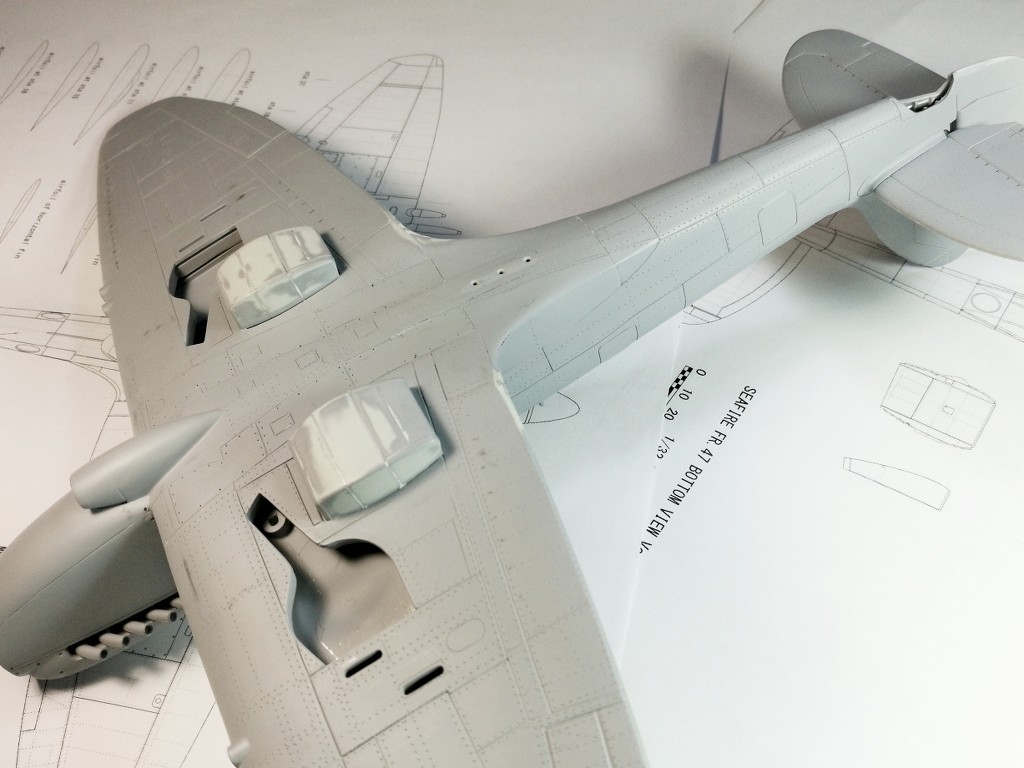
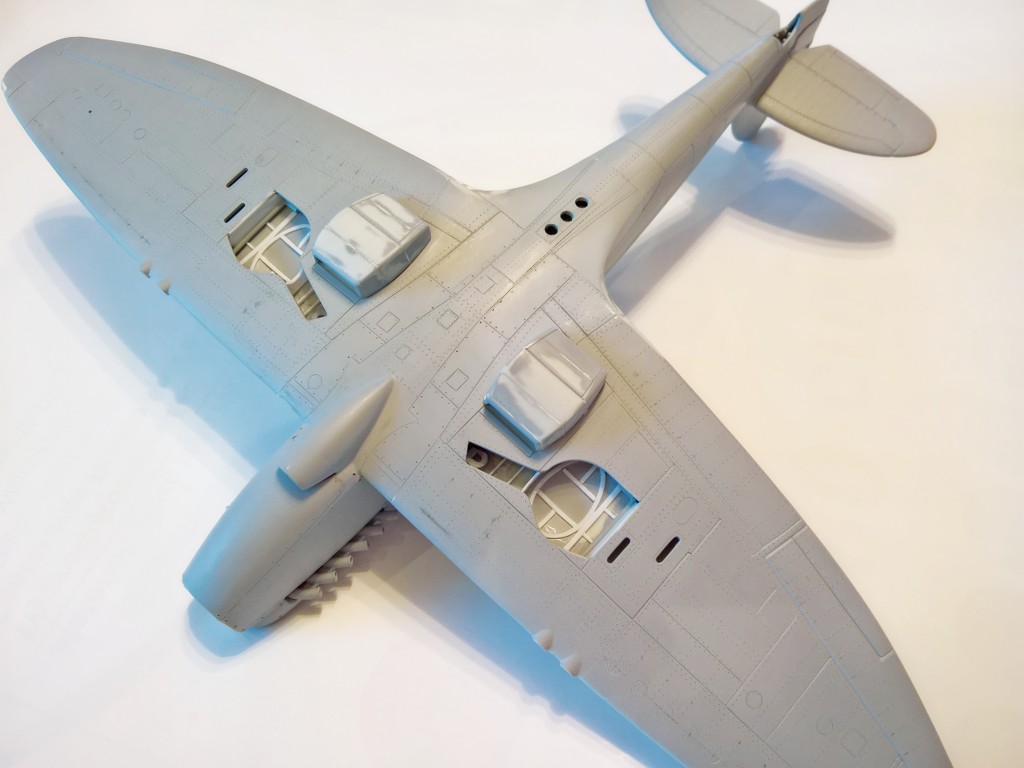
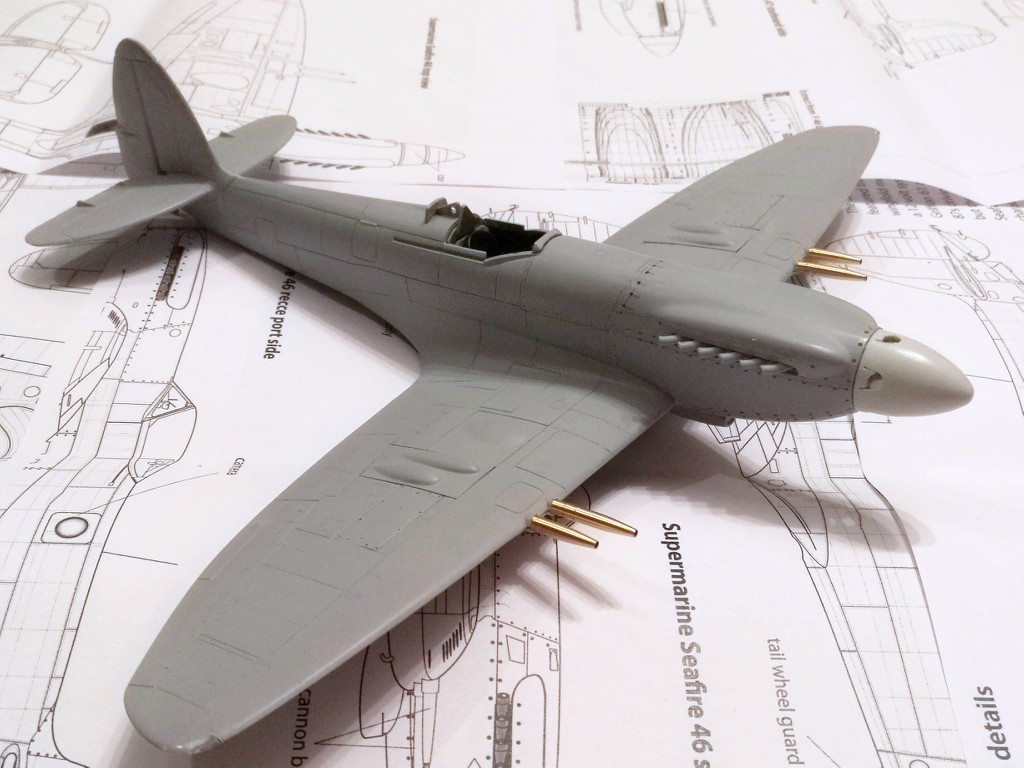
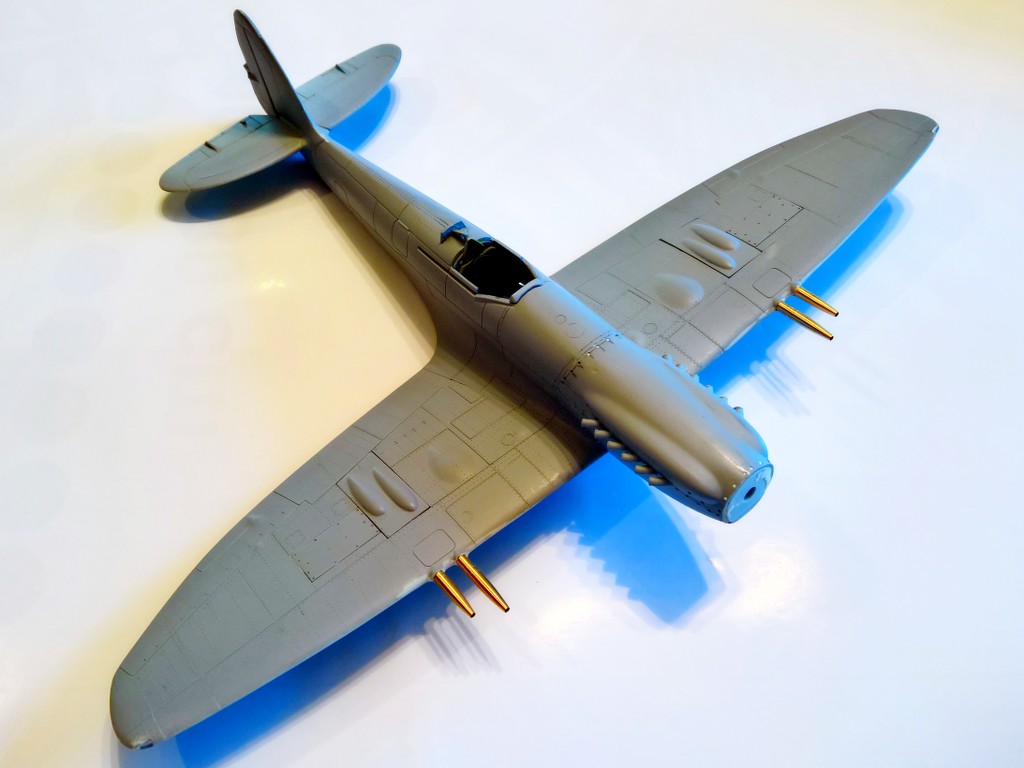
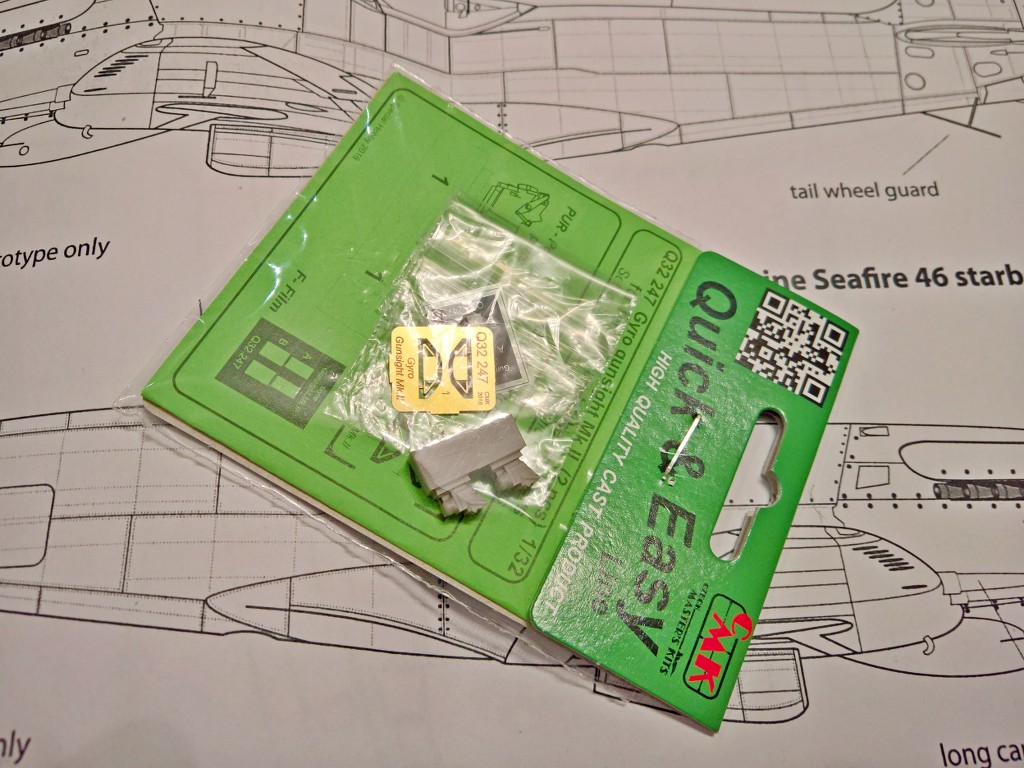
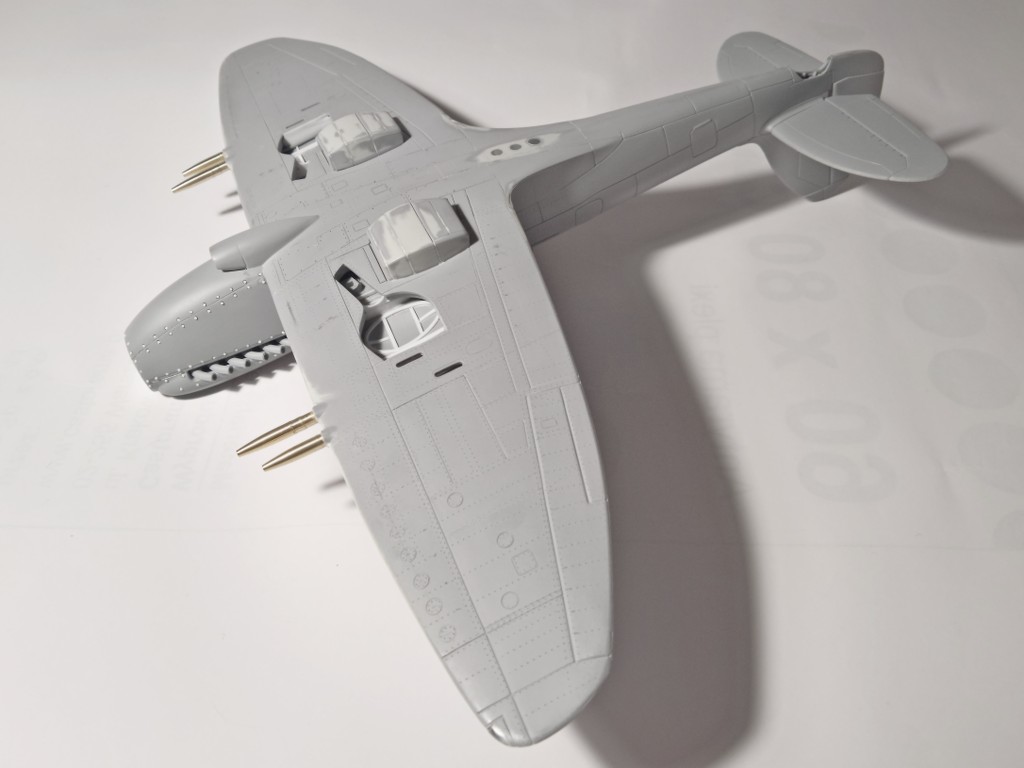
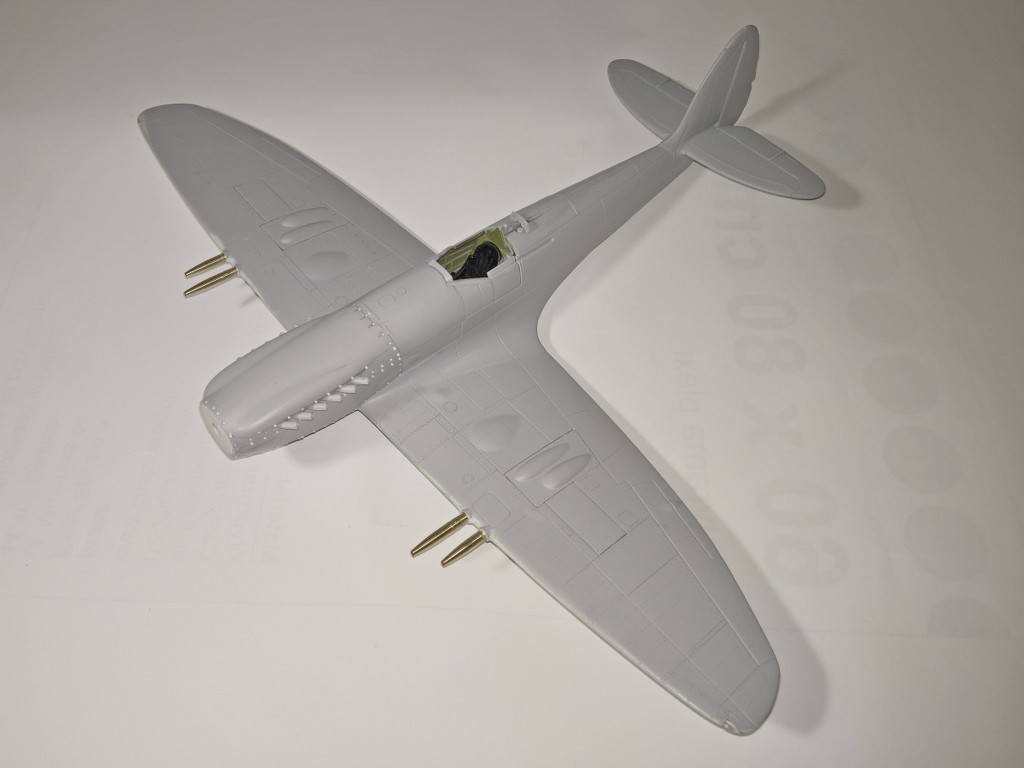
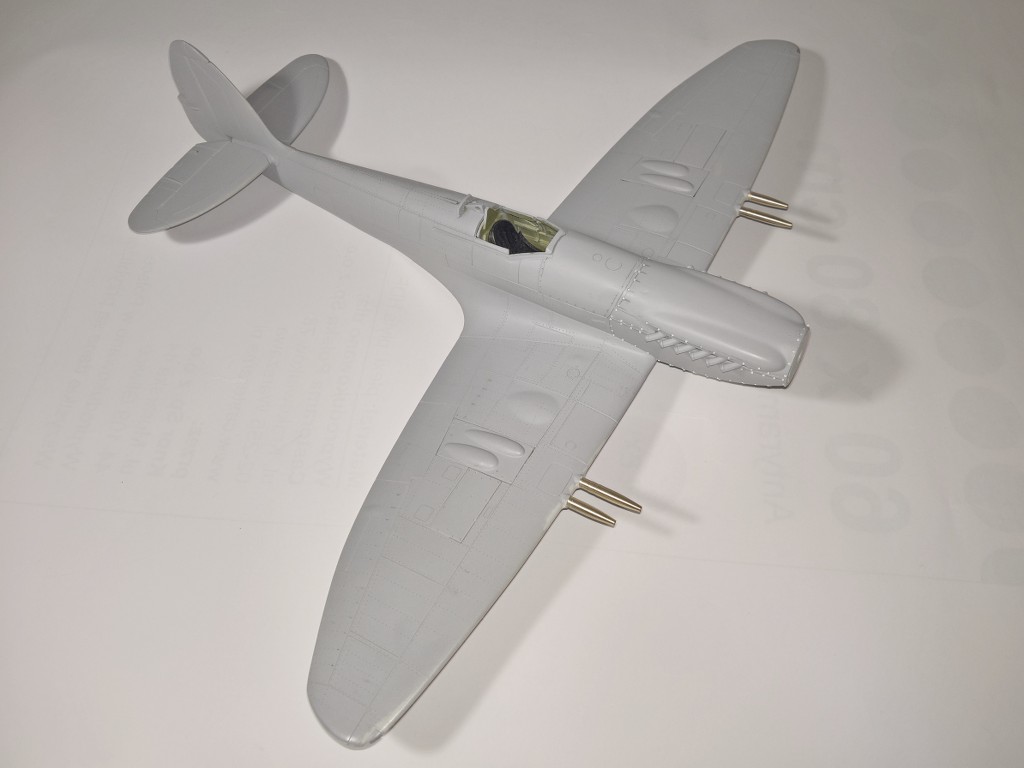
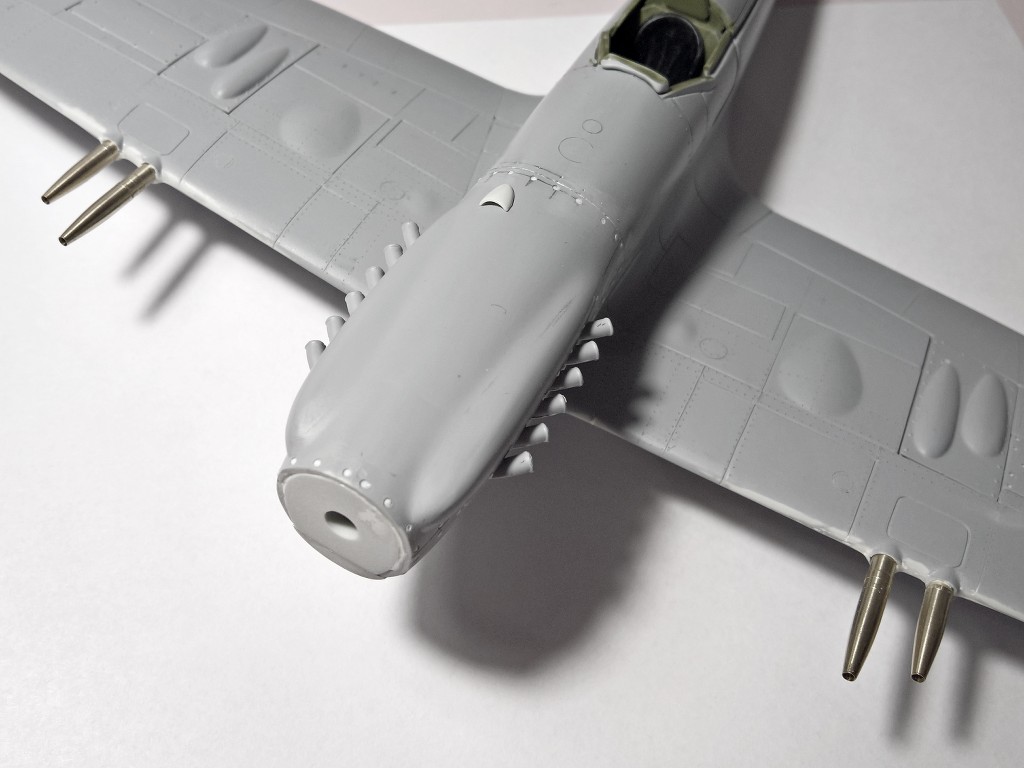
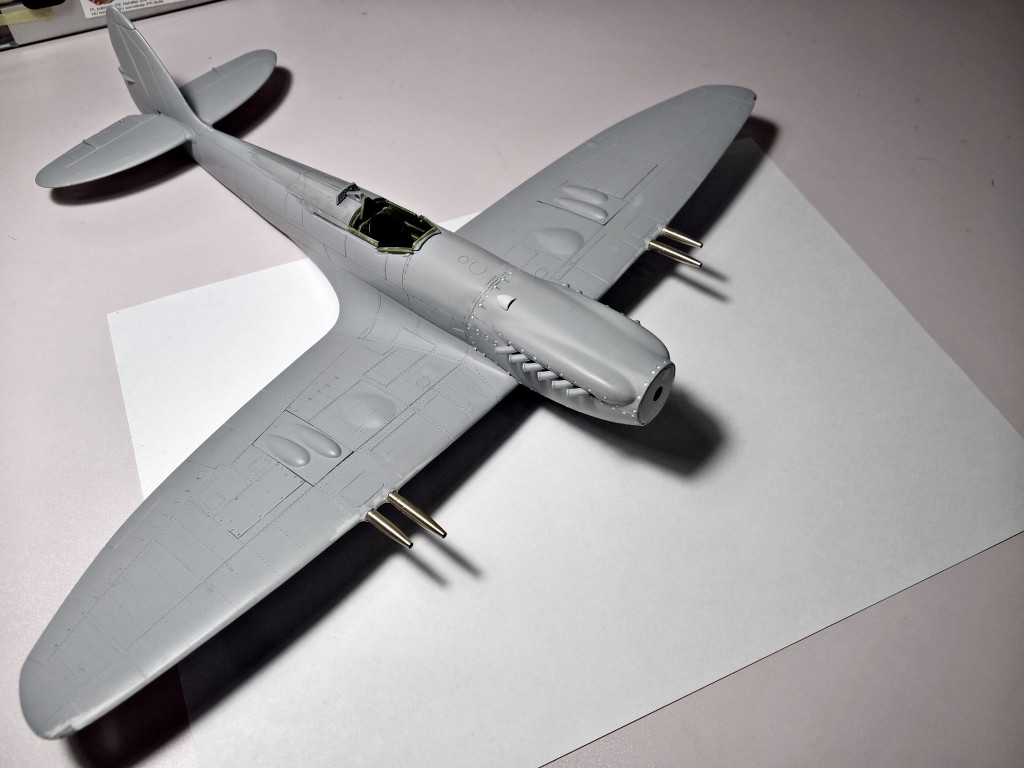
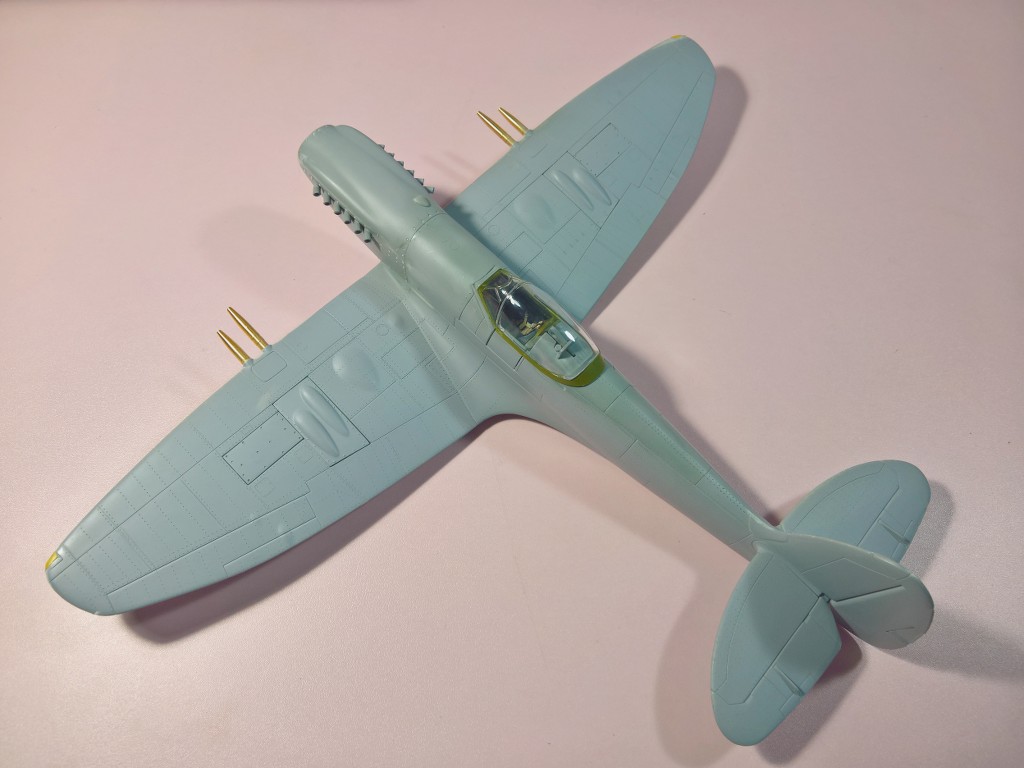
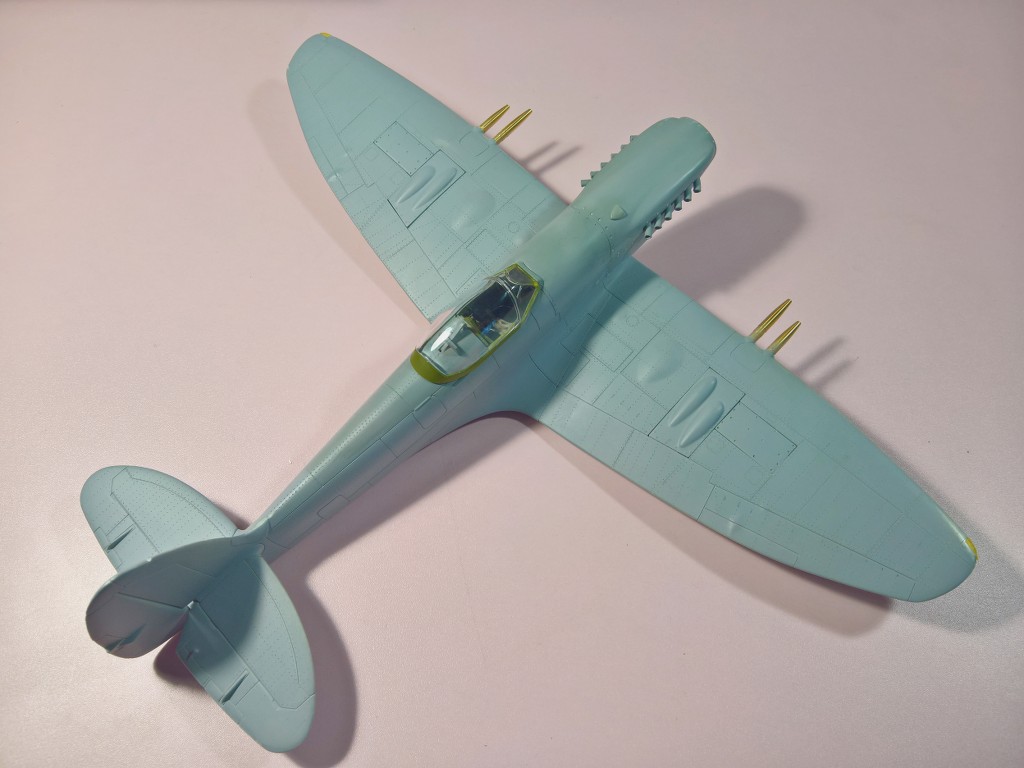
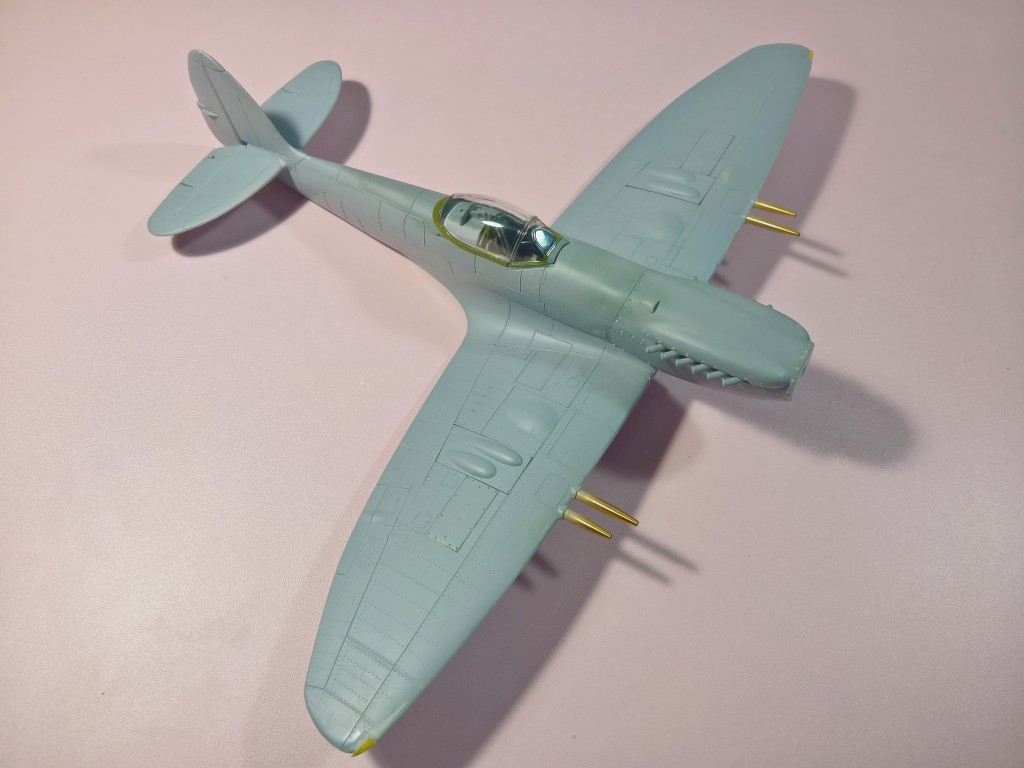
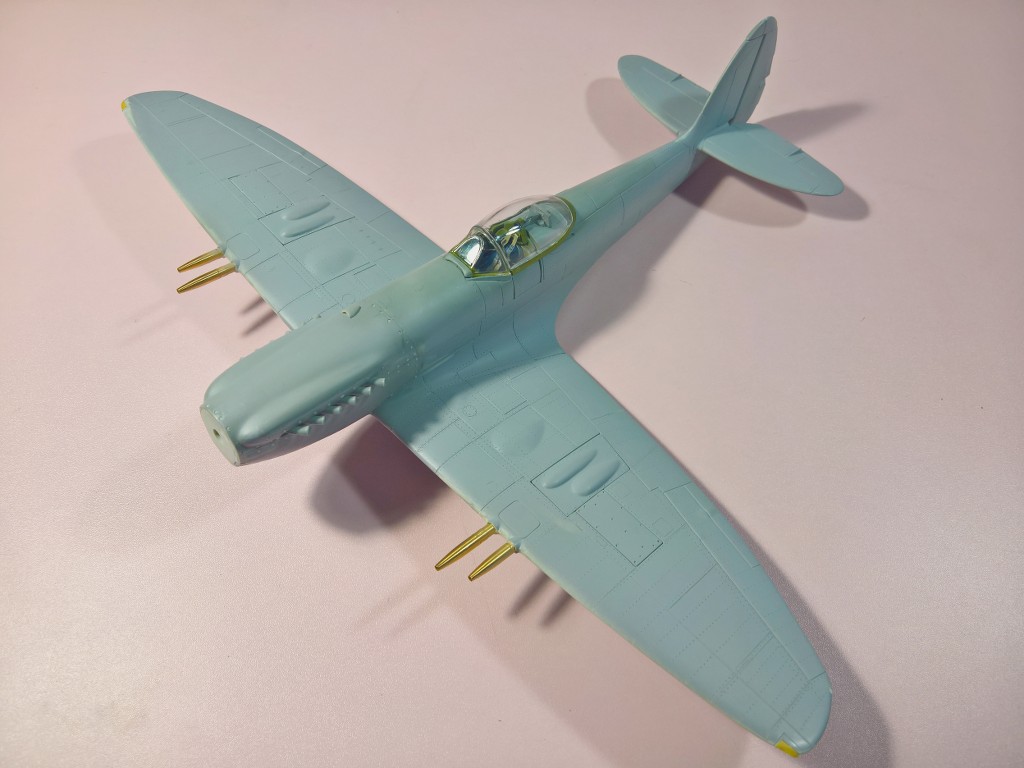
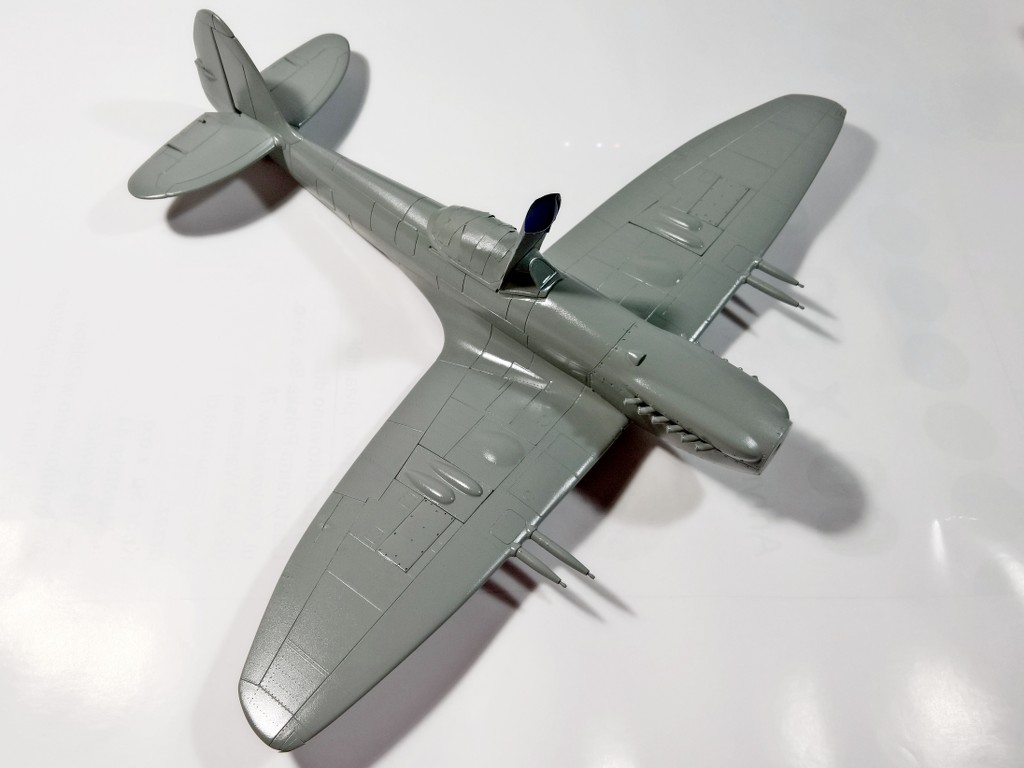
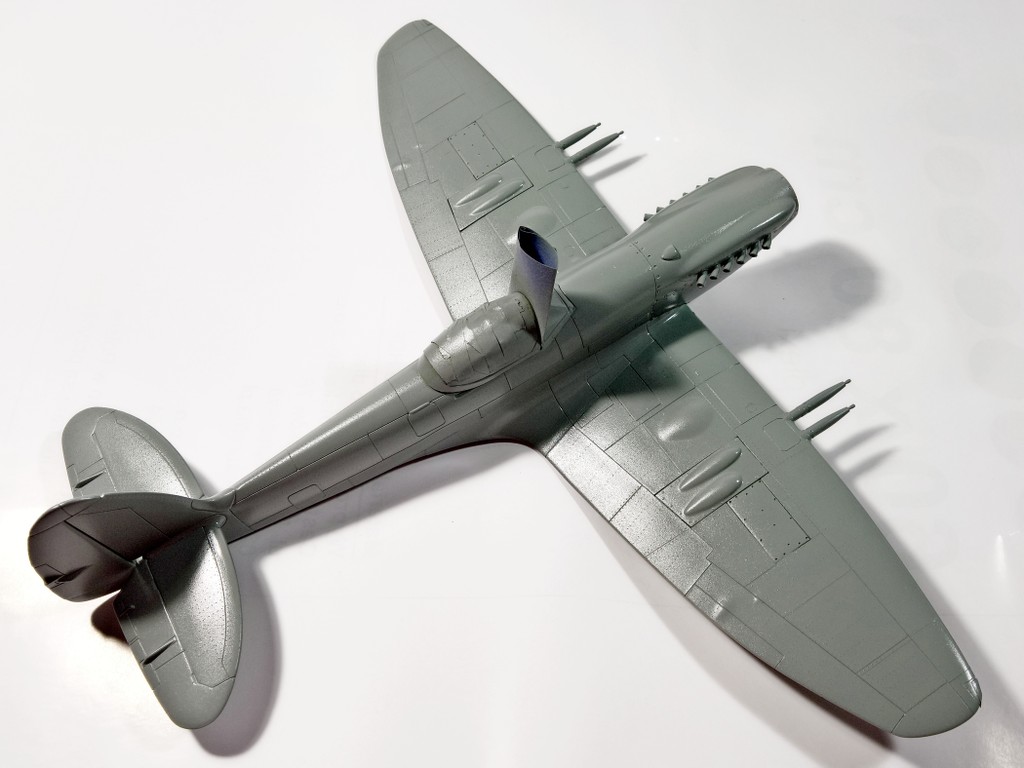
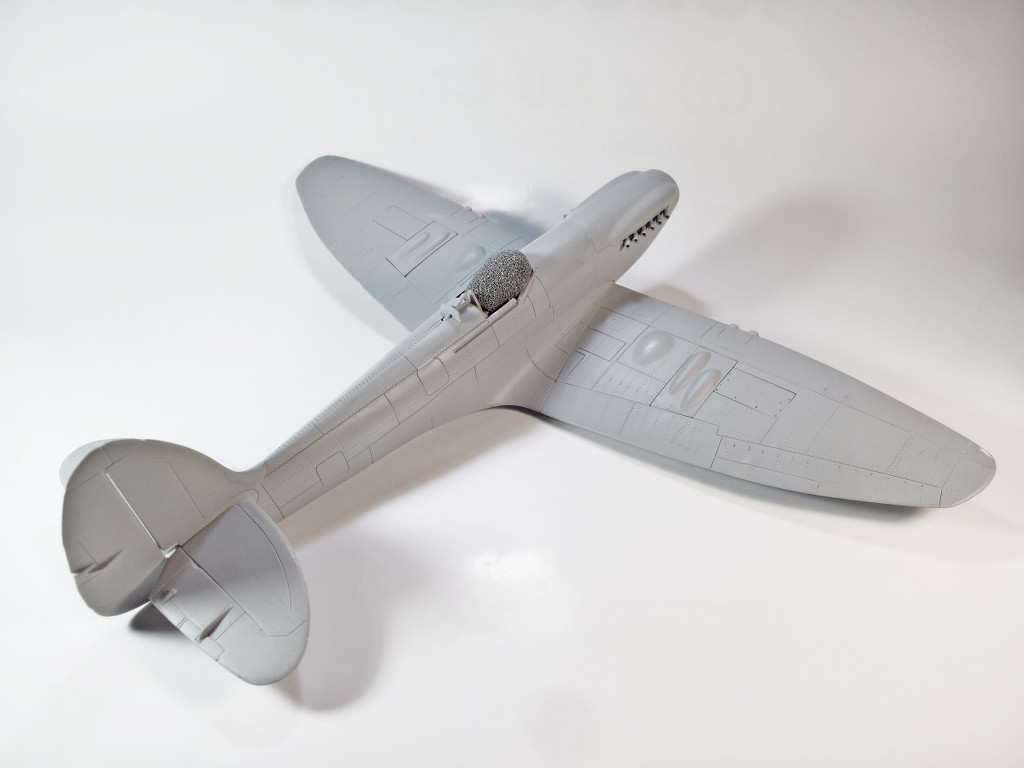
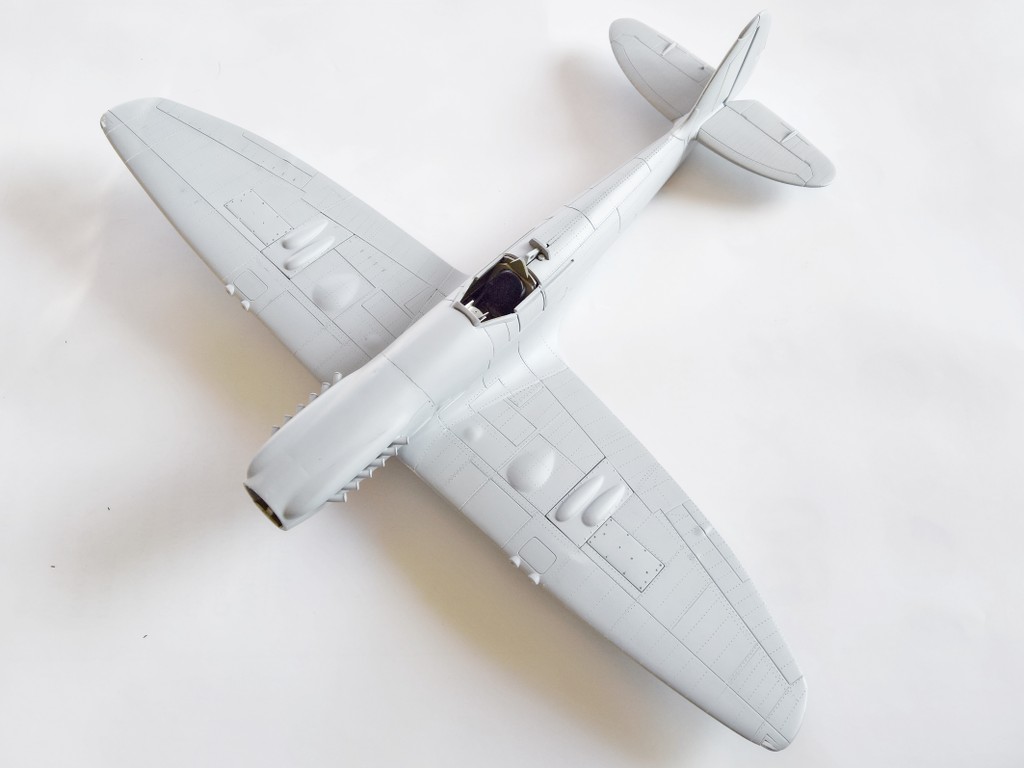
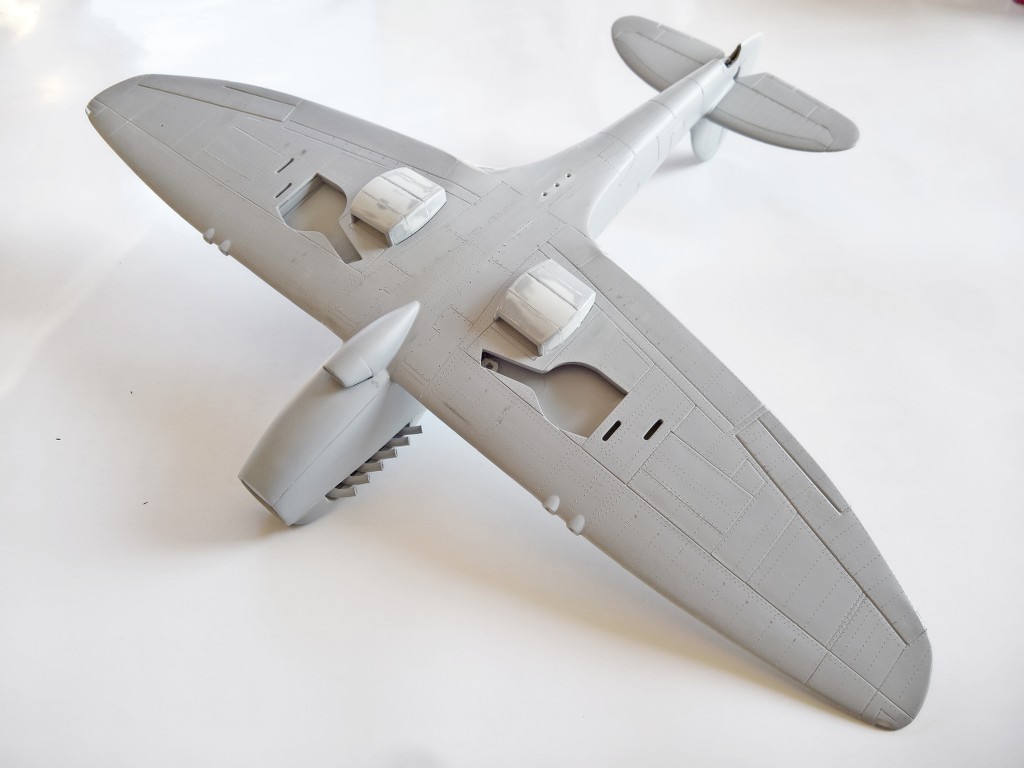
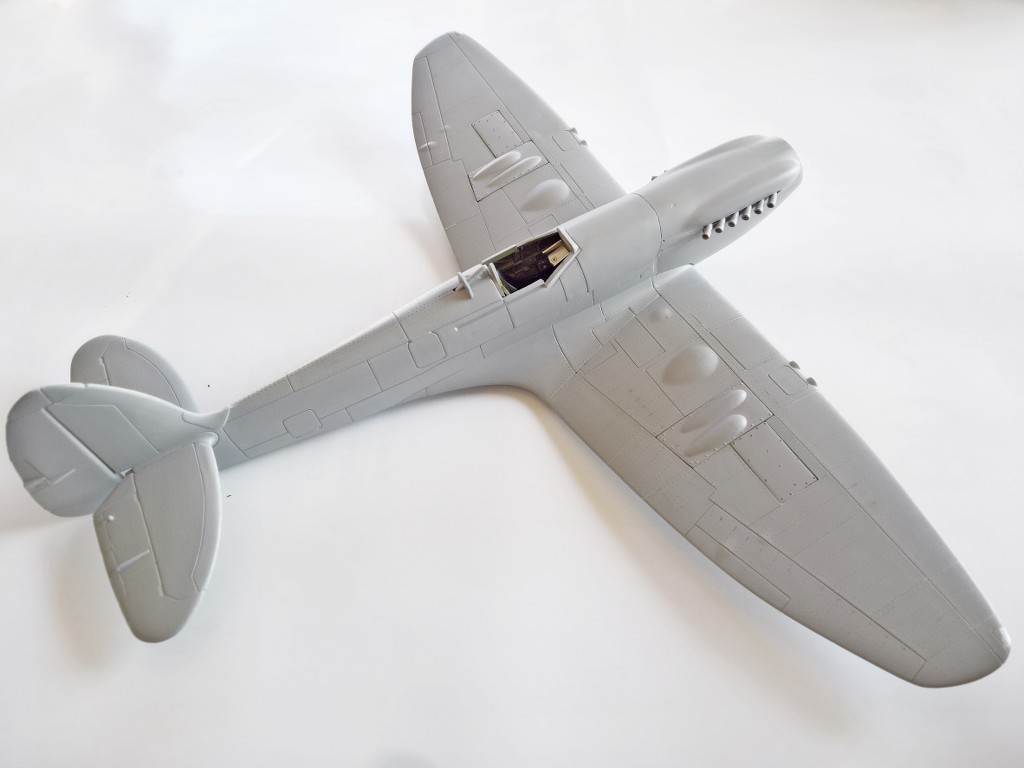
That's how it looks like now: filed almost smooth, riveted, with some new panel lines (and some more to be scribed on), new position lights, drilled out exhaust stacks, upgraded cockpit....

Feel free to comment and stay tuned.


Best regards
Hubert
SGTJKJ
#041
_VISITCOMMUNITY
Kobenhavn, Denmark
Joined: July 20, 2006
KitMaker: 10,069 posts
AeroScale: 3,788 posts
Posted: Sunday, January 22, 2017 - 10:34 AM UTC
Looks nice. A lot of fine rivets there.

looking forward to see more.
Joel_W
Staff MemberAssociate Editor
AUTOMODELER
_VISITCOMMUNITY
New York, United States
Joined: December 04, 2010
KitMaker: 11,666 posts
AeroScale: 7,410 posts
Posted: Tuesday, January 24, 2017 - 12:18 AM UTC
Hubert,
From what I can see, you did a fine job on the riveting. I'm really looking forward to the Rhodesian camo paint scheme, as I've never seen one.

Joel
Kendzior
_VISITCOMMUNITY
Krakow, Poland
Joined: January 29, 2016
KitMaker: 96 posts
AeroScale: 91 posts
Posted: Thursday, January 26, 2017 - 02:22 PM UTC
Thanks for your nice comments .
As for the Rhodesian markings, they look almost like those of RAF, the main difference is that the whole airframe was painted glossy light grey (I'm going to build SR60).


Yesterday I managed to scribe some circles and oblongs.

Viewed up close you can see that it is not perfect, but do not demand much

Started also to drill holes for fasteners of the engine and oil tank covers. The idea is to insert into these holes flat slices made of plastic rod (0,8 mm), so that it will not be just a hole or protruding "pimple" (as proposed by Revell/Matchbox), but something more or less similar to actual fasteners. Will see.


Best regards
Hubert
Joel_W
Staff MemberAssociate Editor
AUTOMODELER
_VISITCOMMUNITY
New York, United States
Joined: December 04, 2010
KitMaker: 11,666 posts
AeroScale: 7,410 posts
Posted: Thursday, January 26, 2017 - 09:36 PM UTC
Hubert,
You're making nice progress for sure. I'm looking forward to seeing how those fasteners turn out.

Joel
litespeed
Staff MemberNews Reporter
AEROSCALE
_VISITCOMMUNITY
England - North West, United Kingdom
Joined: October 15, 2009
KitMaker: 1,976 posts
AeroScale: 1,789 posts
Posted: Wednesday, February 01, 2017 - 06:09 PM UTC
I have built this kit a few times when Matchbox originally released it. I know how bad those trenches are between the panels so I know from experience you are doing a fantastic job Hubert.
keep the updates coming.
tim
Kendzior
_VISITCOMMUNITY
Krakow, Poland
Joined: January 29, 2016
KitMaker: 96 posts
AeroScale: 91 posts
Posted: Sunday, February 05, 2017 - 03:18 PM UTC

Hi, All
Thanks for your nice comments

Having came back from my short winter holidays, yesterday I begun to add details in the wheel wells - just to avoid empty holes effect. Of course, this is not the end.
I'm fully aware, that this will never look perfect (I glued the wings' halves together too early), but hope it will anyway be better, than out of box.


Best regards
Hubert
Kendzior
_VISITCOMMUNITY
Krakow, Poland
Joined: January 29, 2016
KitMaker: 96 posts
AeroScale: 91 posts
Posted: Thursday, February 16, 2017 - 01:49 PM UTC
Hi All

Some more work in the wheel wells. I think now they look busy enough, maybe will add some pipes and wires.


In search of references I decided to buy a book about Rhodesian late mark Spitfires (Malloch's Spitfire: The Story and Restoration of PK350, by Nick Meikle), describing the restoration of Malloch's Spitfire F Mk.22. What a wonderful book, I tell you.

There are several photos and drawings showing the camouflage of Rhodesian Spitfires after the delivery in 1951.
They have been repainted from High Speed Silver to something, what is called here as High Altitude Blue.


What do you think, Mates - will glossy light ghost grey be a good match?

Best regards
Hubert
Kendzior
_VISITCOMMUNITY
Krakow, Poland
Joined: January 29, 2016
KitMaker: 96 posts
AeroScale: 91 posts
Posted: Sunday, February 19, 2017 - 01:47 PM UTC
The works continue. Added the guns, some more work will be necessary, as the fit is poor - the wing mounts for the guns are a little bit flat, so the guns, which are circular in cross-section are just pushing the wings' halves apart - despite my efforts to make the holes wider.
Have also drilled the 1 mm wide holes in the engine covers, which will be used to make the "fasteners" of the sliced plastic 0,8 mm rod.


As for the camouflage, using two articles found in Model Airplane International as "references" I decided to paint the airframe in RAF medium sea grey. Looks blue enough to call it High Altitude Blue.

Best regards
Hubert
Joel_W
Staff MemberAssociate Editor
AUTOMODELER
_VISITCOMMUNITY
New York, United States
Joined: December 04, 2010
KitMaker: 11,666 posts
AeroScale: 7,410 posts
Posted: Sunday, February 19, 2017 - 08:02 PM UTC
Hubert,
Very nice job adding the detail ribbing to the wheel wells, as they look 100% better now. I just love those turned barrels from Master, nothing comes close to them.

Joel
Kendzior
_VISITCOMMUNITY
Krakow, Poland
Joined: January 29, 2016
KitMaker: 96 posts
AeroScale: 91 posts
Posted: Monday, February 20, 2017 - 02:36 PM UTC

Quoted Text

Hubert,
Very nice job adding the detail ribbing to the wheel wells, as they look 100% better now. I just love those turned barrels from Master, nothing comes close to them.

Joel


Thanks for your comment, Joel.
I fully agree, that those turned barrels are indeed beautiful and very well detailed. The guns' outlets still to be inserted, will add even more to this.

The next poor thing in this kit is the landing gear, which is too thin and lacks detail.
Couldn't find anything designed for Mk. 22/24, but... last Friday the postman delivered this small item:


With some adjustments I think it will do the job. By the way, delivery from US to Poland took only 4 days from the date of order! Thank you, SAC
And on top of that, resin 3 spoke wheels from MasterCasters are on their way to me from Hannants.

Best regards
Hubert
Kendzior
_VISITCOMMUNITY
Krakow, Poland
Joined: January 29, 2016
KitMaker: 96 posts
AeroScale: 91 posts
Posted: Tuesday, February 21, 2017 - 01:23 PM UTC
A quick update.

Formation lights installed (used a part of the clear sprue out of the kit's box, had to reduce its diameter slightly), started to add the engine covers' fasteners, and the gaps in the leading edge of wings after installation of the guns filled and filed smooth.


Best regards
Hubert
Joel_W
Staff MemberAssociate Editor
AUTOMODELER
_VISITCOMMUNITY
New York, United States
Joined: December 04, 2010
KitMaker: 11,666 posts
AeroScale: 7,410 posts
Posted: Wednesday, February 22, 2017 - 01:41 AM UTC
Hubert,
The formation lights look pretty good as far as I can tell. Can you post a close up of both of them?
Thanks,
Joel
Kendzior
_VISITCOMMUNITY
Krakow, Poland
Joined: January 29, 2016
KitMaker: 96 posts
AeroScale: 91 posts
Posted: Wednesday, February 22, 2017 - 02:02 PM UTC
Hi, Joel

Sue I can, here you are:


Nothing spectacular, as you can see.
The lights under the fuselage still need attention,as well as the panel lines and rivets around them, after blending and polishing the lights.

Best regards
Hubert
Joel_W
Staff MemberAssociate Editor
AUTOMODELER
_VISITCOMMUNITY
New York, United States
Joined: December 04, 2010
KitMaker: 11,666 posts
AeroScale: 7,410 posts
Posted: Thursday, February 23, 2017 - 02:11 AM UTC
Hubert,
Those wing tip lenses really are blended in quite well. Half the time I end up making my own ID lights. For lenses I use good old Micro Krystal Kleer. When dry I apply a drop or two of Pledge to fill the concave shape and even it out to the fuselage surface.

Joel
Kendzior
_VISITCOMMUNITY
Krakow, Poland
Joined: January 29, 2016
KitMaker: 96 posts
AeroScale: 91 posts
Posted: Thursday, February 23, 2017 - 12:30 PM UTC

Quoted Text

Hubert,
Those wing tip lenses really are blended in quite well. Half the time I end up making my own ID lights. For lenses I use good old Micro Krystal Kleer. When dry I apply a drop or two of Pledge to fill the concave shape and even it out to the fuselage surface.

Joel


Thanks, Joel.
That's also a very good idea and I'm using similar method in case of small windows in the models, however in this case I wanted to go other way. These pieces of sprue are painted silver on the underside, so that there's an effect of light reflection at some angles. I also thought it will be easier to mask these lenses for painting, being less fragile.

And here is the beautiful CMK resin Mk. II gyro gunsight miniature, which will replace "nothing", as Revell/Matchbox didn't provide any gunsight on the sprues.


Best regards
Hubert
Kendzior
_VISITCOMMUNITY
Krakow, Poland
Joined: January 29, 2016
KitMaker: 96 posts
AeroScale: 91 posts
Posted: Thursday, March 09, 2017 - 12:33 AM UTC
The landing gear... Probably will not use even a single bit of the plastic from the box.
SAC's Mk. VIII legs had to be slightly reworked. According to my calculations, the difference between 1:32 Mk. VIII leg from SAC and scaled down F. Mk.22 leg is equal to only 6,6 mm.
Therefore had to prepare an insert 9,6 mm long and remove 3 mm of the metal leg.

I am aware, that the actual difference was 4,5", which in scale is not exactly equal to 6,6 mm, but about 3 mm less... but that's the actual difference between the SAC legs and the 1:32nd scale legs, at least I think so , and what's more important, it matches the size of the gear covers, according to the plans I have.

That's how it looks like, together with new landing gear covers.


This small black item is the CMK's Mk. II gyro gunsight. Beautiful.

Best regards
Hubert
litespeed
Staff MemberNews Reporter
AEROSCALE
_VISITCOMMUNITY
England - North West, United Kingdom
Joined: October 15, 2009
KitMaker: 1,976 posts
AeroScale: 1,789 posts
Posted: Saturday, March 11, 2017 - 01:06 AM UTC
Nice work on the undercarriage legs Hubert. The turned cannon covers look superb also. keep up the good work.
tim
Kendzior
_VISITCOMMUNITY
Krakow, Poland
Joined: January 29, 2016
KitMaker: 96 posts
AeroScale: 91 posts
Posted: Sunday, March 12, 2017 - 01:35 PM UTC
Thanks, Tim.
These turned metal pieces from Master are indeed beautiful.

Slowly going forward with the fasteners of engine covers. Pieces of plastic 0,8 mm rod have been inserted into the holes drilled in the covers, now all will be cut to get the hopefully similar size of each fastener.


Best regards
Hubert
Kendzior
_VISITCOMMUNITY
Krakow, Poland
Joined: January 29, 2016
KitMaker: 96 posts
AeroScale: 91 posts
Posted: Monday, March 20, 2017 - 02:02 PM UTC
Small things, but necessary: added a small air intake on top of the engine cover. This is slightly reworked part from the box.
Most of the engine cover fasteners have been already trimmed.


Best regards
Hubert
Kendzior
_VISITCOMMUNITY
Krakow, Poland
Joined: January 29, 2016
KitMaker: 96 posts
AeroScale: 91 posts
Posted: Tuesday, April 18, 2017 - 04:23 PM UTC
Slowly approaching the moment, when will be able to close the canopy and start painting. 
Have just to get the seat-belts done, for now I have made the fastening of the belts on the headrest and installed the seatback belts. The belts mounted to the seat cushion still under construction - must say that Eduard's seat belts are very well detailed, but need a lot of patience to get them done properly.
Anyway, I'm glad that the cockpit will be closed, so not much of this all will be visible .


As you can see, I managed also to make the gear legs' covers, both have been rivetted outside, still some more work on the inner sides to be done.


Best regards
Hubert
Kendzior
_VISITCOMMUNITY
Krakow, Poland
Joined: January 29, 2016
KitMaker: 96 posts
AeroScale: 91 posts
Posted: Friday, April 21, 2017 - 11:40 PM UTC
Hi, All
Next thing was attaching the movable canopy. The fit is ... well, challenging, to say the least and stay polite.

Anyway, now masking, priming and painting, at last!


Best regards
Hubert
zvezdah1
_VISITCOMMUNITY
United States
Joined: February 21, 2015
KitMaker: 36 posts
AeroScale: 5 posts
Posted: Friday, April 21, 2017 - 11:57 PM UTC
thought you might like this video, that was done ca. 1982. A very prominent figure during the Rhodesian war Jack Malloch who was a pilot, acquired a mk. 22 and restored it in zimbabwe. Tragically he was killed when the plane crashed.

https://www.youtube.com/watch?v=1WLxrePTYp0
Kendzior
_VISITCOMMUNITY
Krakow, Poland
Joined: January 29, 2016
KitMaker: 96 posts
AeroScale: 91 posts
Posted: Saturday, April 22, 2017 - 12:42 AM UTC

Quoted Text

thought you might like this video, that was done ca. 1982. A very prominent figure during the Rhodesian war Jack Malloch who was a pilot, acquired a mk. 22 and restored it in zimbabwe. Tragically he was killed when the plane crashed.

https://www.youtube.com/watch?v=1WLxrePTYp0


Thanks, Chris.
Sure I know this movie and the story of the Malloch's Spitfire, got the book about its restoration and tragic crash too.

Fantastic man and plane.

Best regards
Hubert
Kendzior
_VISITCOMMUNITY
Krakow, Poland
Joined: January 29, 2016
KitMaker: 96 posts
AeroScale: 91 posts
Posted: Thursday, April 27, 2017 - 01:39 PM UTC
Hi, Mates

Spitfire has received some paint. Used Tamiya's RAF Medium Sea Grey, covered with Gunze's Gloss Clear from the can.
Everything is pretty solid and clear, but that's how it actually looked like. Of course, some washes and post-shading will brake the color a bit, so it is not going to be so solid at the end of the day.


As you can see, I decided to open the air intake to the oil cooler. Looks much better now.
The canopy will require some additional work too, as the canopy frame does not fit well.

Next thing are the decals. I'm going to build SR60, therefore there's a chance to use the decals from the box or Montex masks, which will require some adjustments (for example making "R" out of "P" is very easy).

Best regards
Hubert
 _GOTOTOP