Illinois, United States
Joined: January 12, 2015
KitMaker: 292 posts
AeroScale: 292 posts
Posted: Friday, November 25, 2016 - 09:59 PM UTC
I had some input into the new Airfix B-17G (not all of which was taken to heart

) so I received one ahead of most of the rest of the US. Naturally it was released first in the UK. But it is a nice little kit so I am going to build it out of the box...well, I have good intentions anyway! This is just an experiment to see if the images work as I am going to try ImageShack that I saw recommended here.
Illinois, United States
Joined: January 12, 2015
KitMaker: 292 posts
AeroScale: 292 posts
Posted: Friday, November 25, 2016 - 10:10 PM UTC
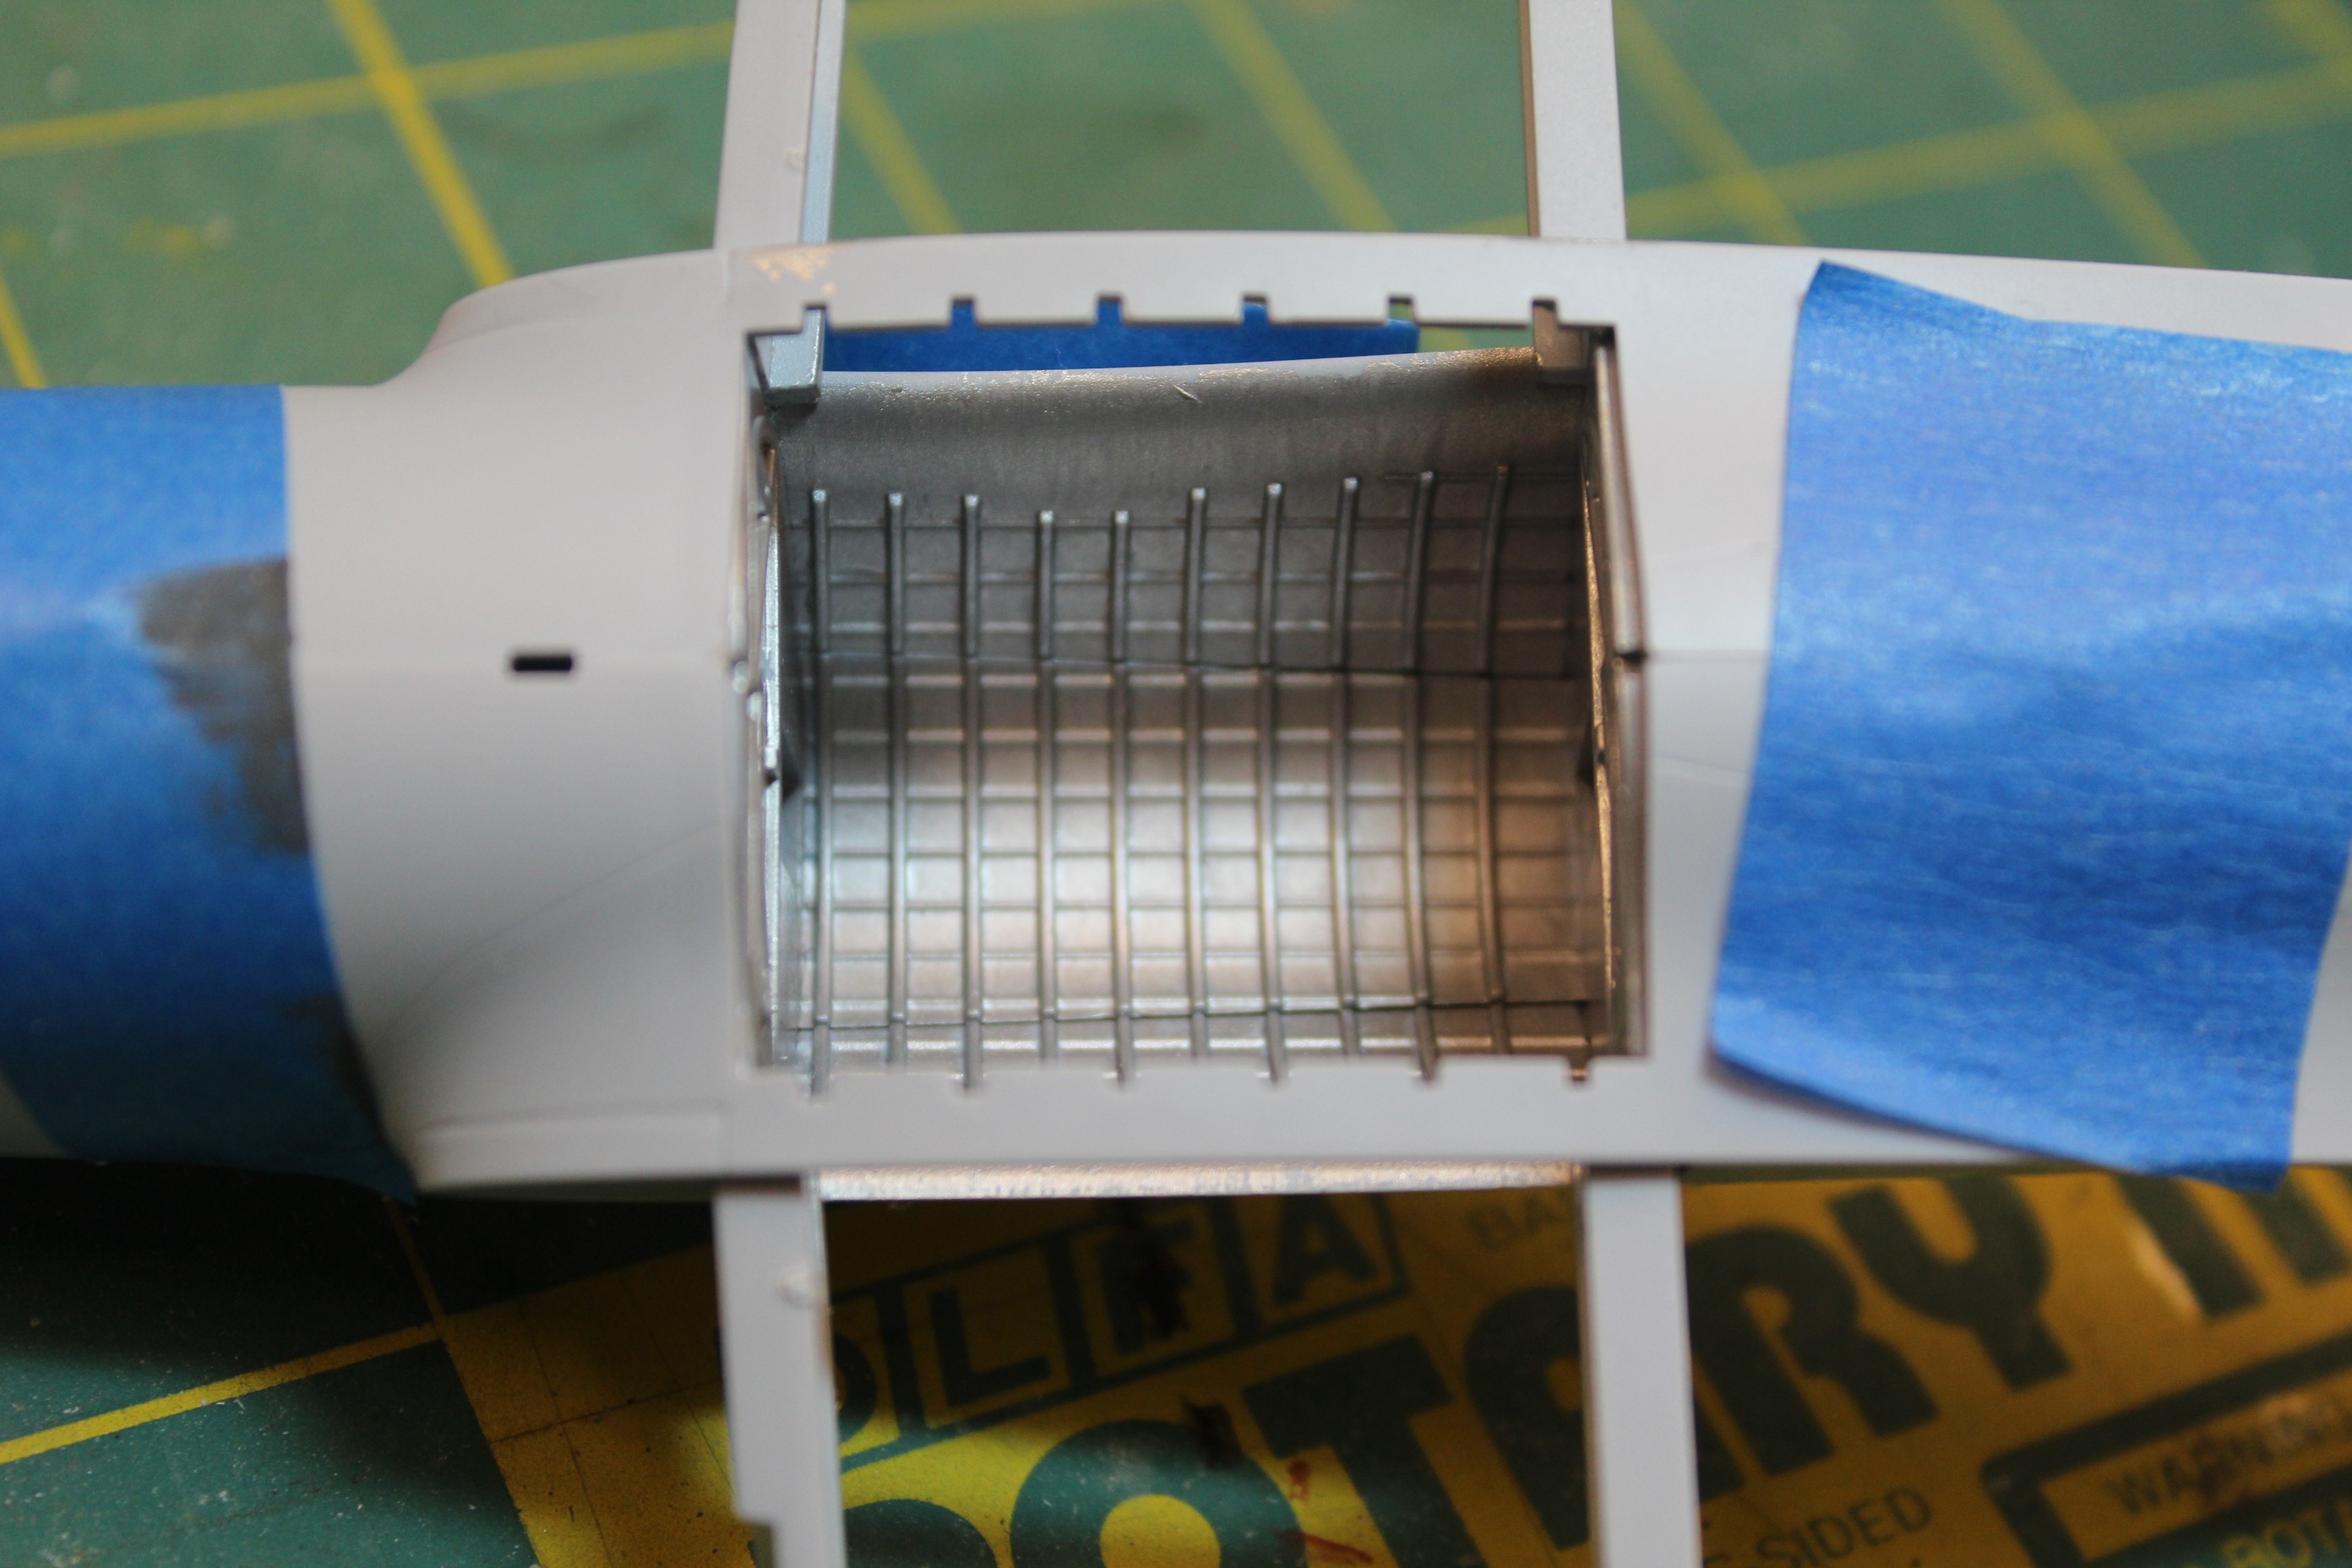
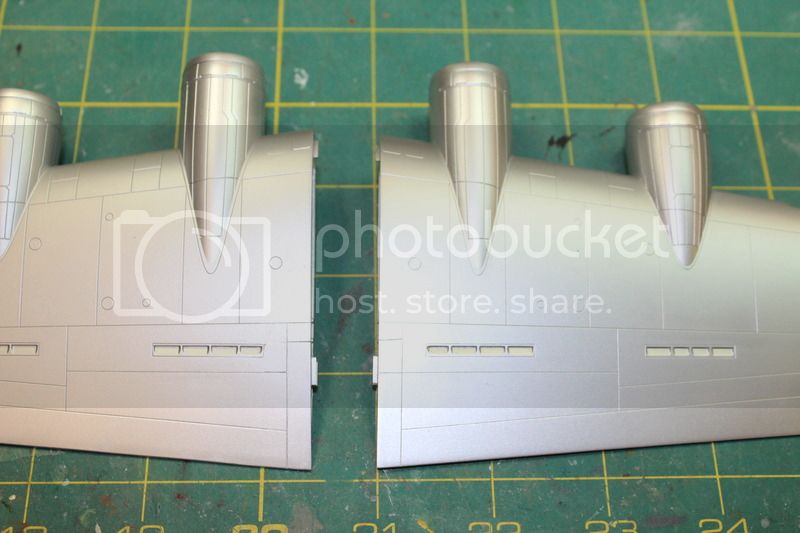
Started with the wings, adding the wheel well components, the intakes and oil cooler faces. The detail is fine for an out of the box kit. They have the oil tank, the interior of the nacelle as it goes around the exhaust is fairly accurate, and the intake going to the carb (not shown in this photo).

New Jersey, United States
Joined: February 06, 2015
KitMaker: 1,098 posts
AeroScale: 900 posts
Posted: Friday, November 25, 2016 - 10:16 PM UTC
Karl - I'll be following this with great interest considering your encyclopedic knowledge of the subject. Betcha can't build it straight out of the box.
Also, I believe modeler Brian does some lawyering - he may be able to help you legally change the spelling of your last name to Beseventien . I'm guessing the thought has crossed your mind .
Cheers ! Richard
Joel_W
 Associate Editor
New York, United States
Joined: December 04, 2010
KitMaker: 11,666 posts
AeroScale: 7,410 posts
Posted: Friday, November 25, 2016 - 10:20 PM UTC
Karl,
Airfix was certainly smart in using your input where ever they thought it would be of benefit. I'll be following your build as I would be interested in building a few 1/72 scale bombers as a change of pace, and as space savers.
Joel
On my Workbench:
Monogram 1/24 scale 427 Shelby Cobra
Just Completed:
Beemax 1/24 scale BMW M3 E30 1992 Evolution II
Illinois, United States
Joined: January 12, 2015
KitMaker: 292 posts
AeroScale: 292 posts
Posted: Friday, November 25, 2016 - 10:37 PM UTC
Wow, just got it posted and some positive comments, thank you! It is not a perfect kit but it is still quite nice. I will point out some odds and ends, good and not so good.
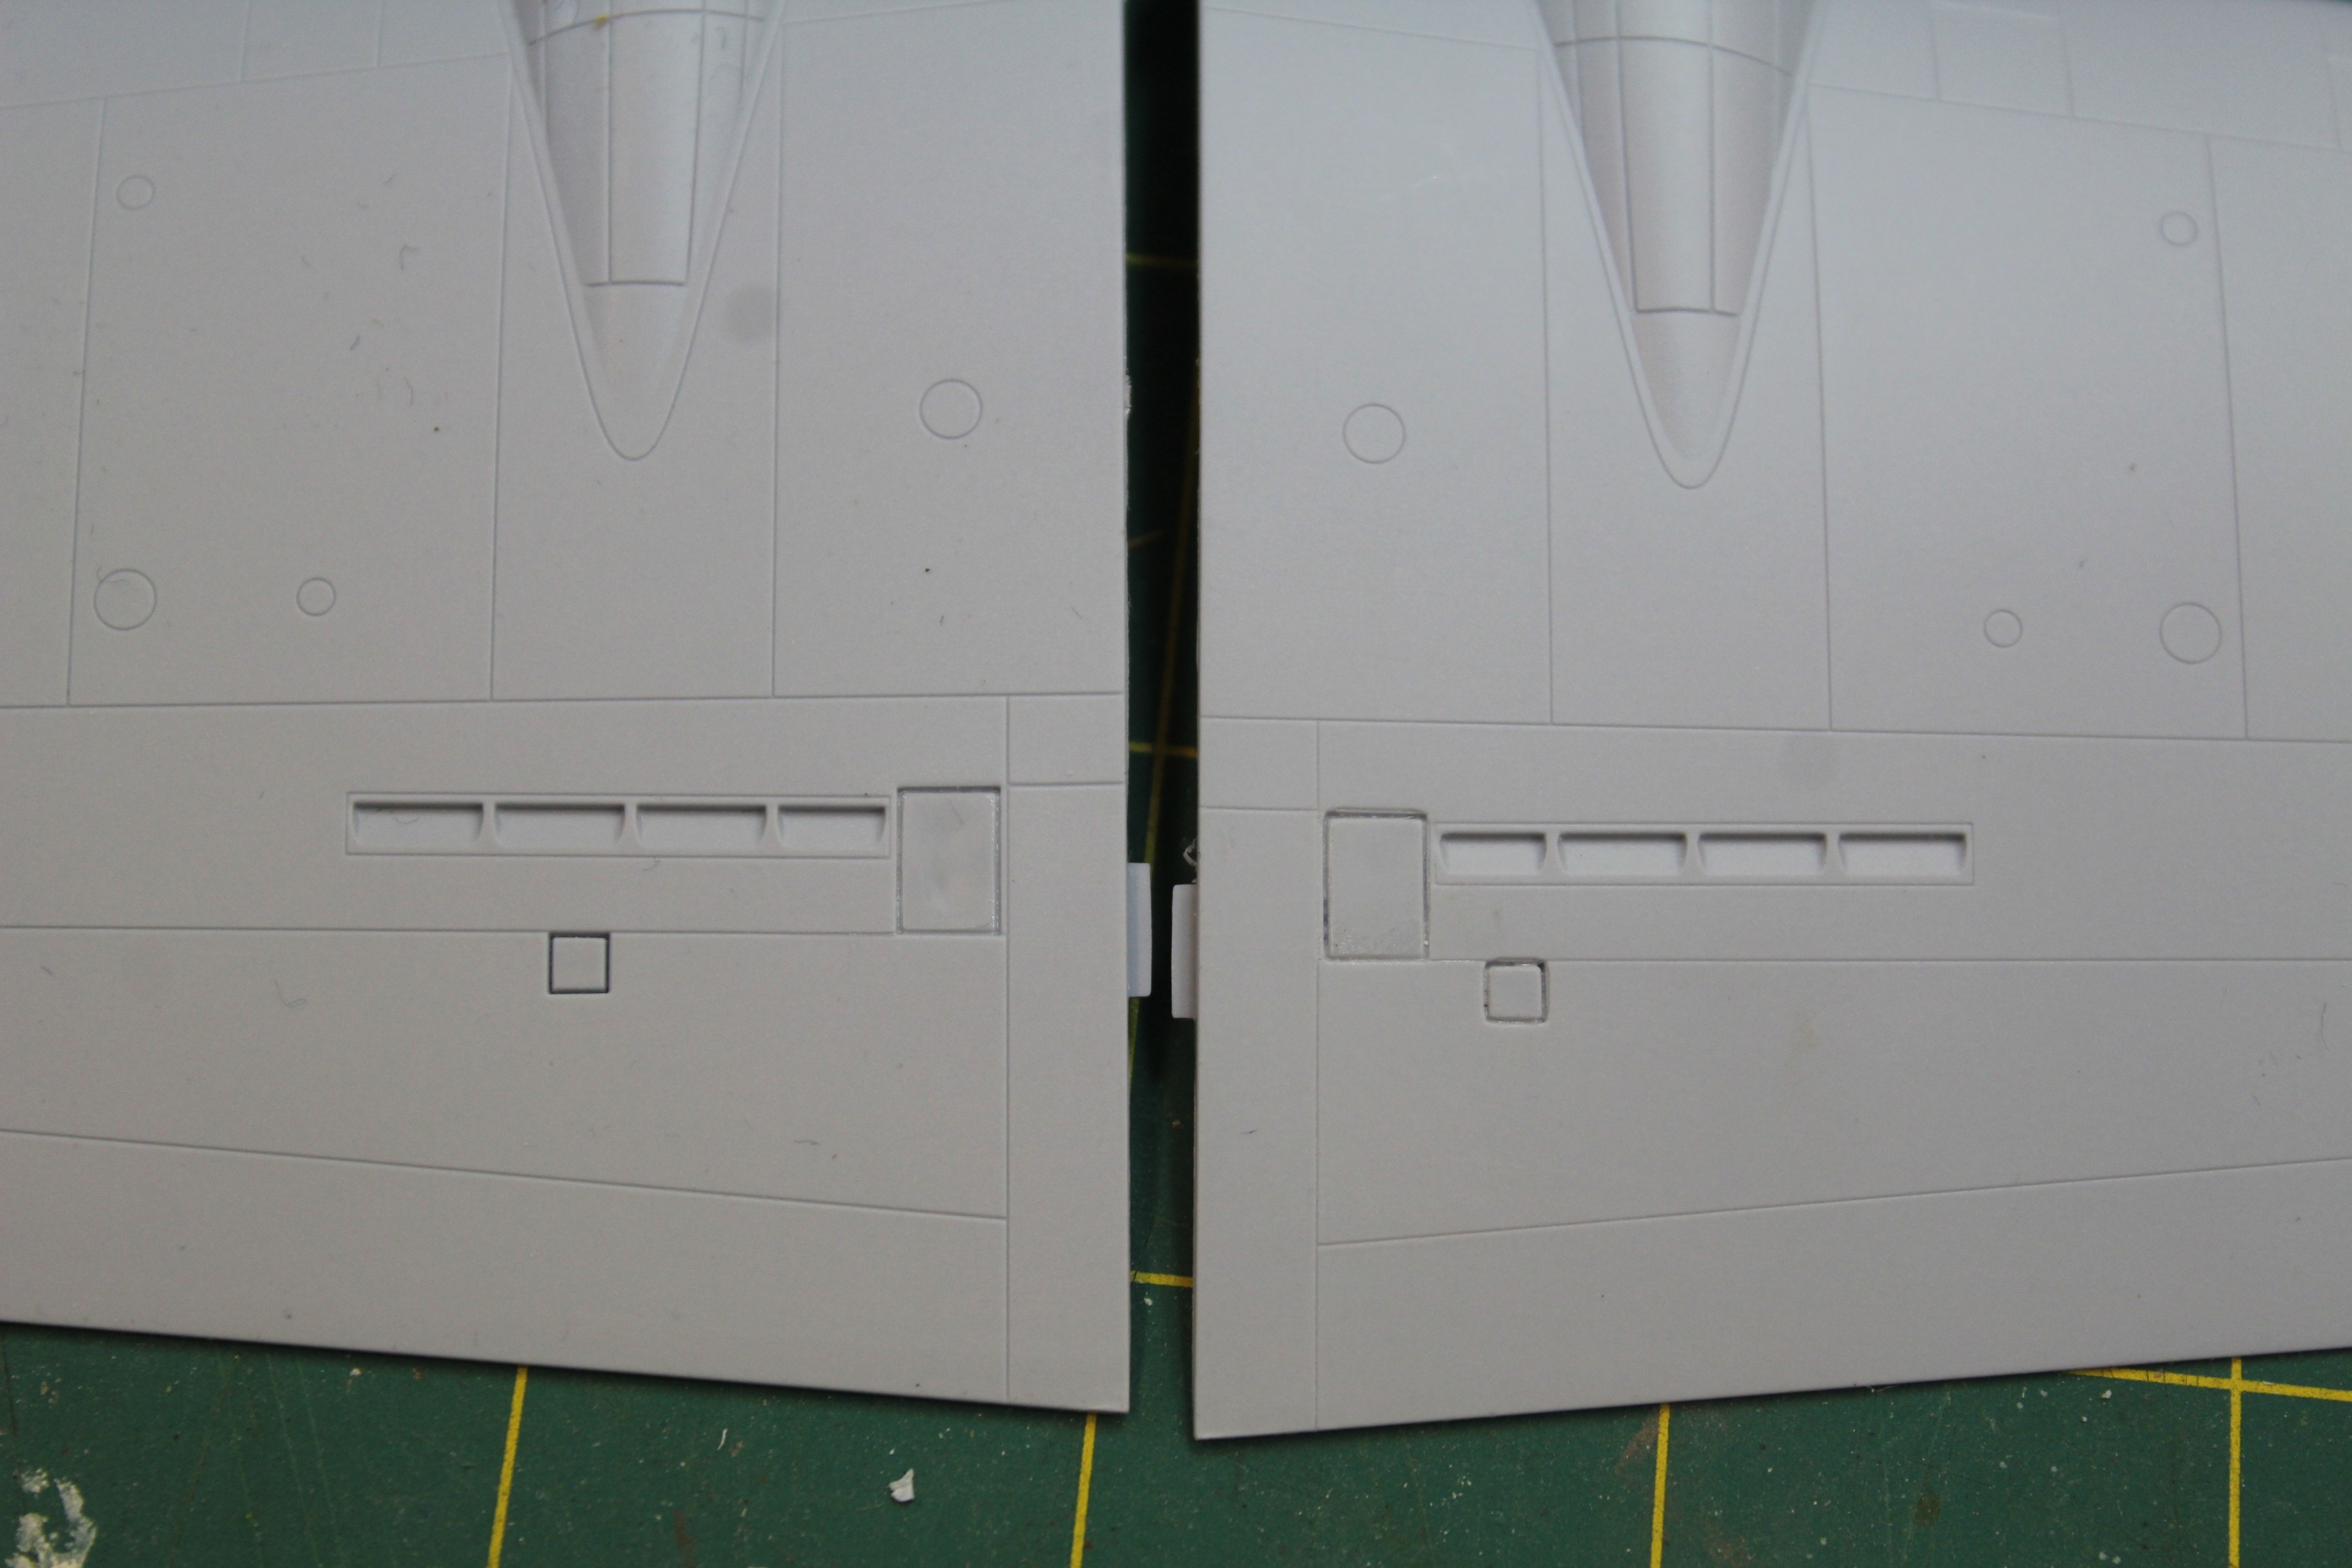
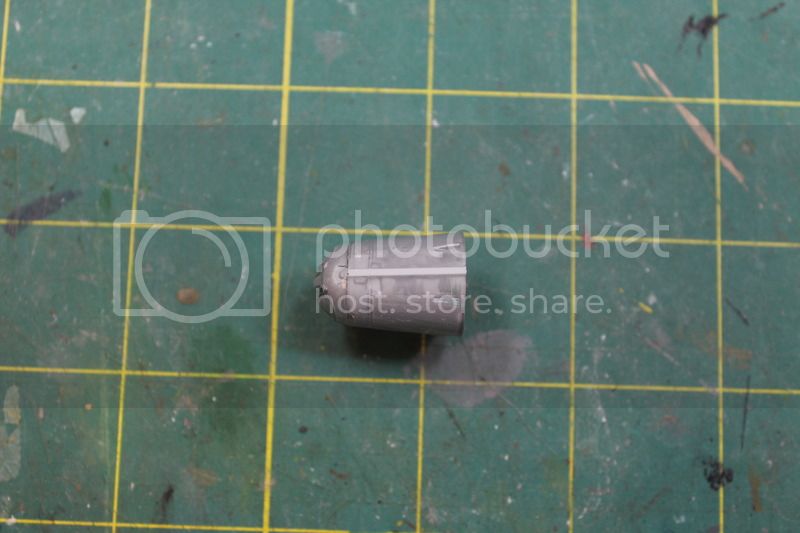
Airfix has provided the parts for the hot air heating system which was on late B-17G's. Late meaning G-80-BO, G-50-VE, and G-50-DL. Now, this is a first in a B-17 kit. However, both sets of markings are for earlier aircraft. What Airfix doesn't tell you is they have provided the parts to do the earlier glycol system. So I will leave off these parts starting in the wheel well where the overboard dump is not needed. You can see in the earlier photo where these were mounted on the back of the wheel well. Then in the upper wings, the exhaust grills will be replaced by blanking plates. Those will need to be made invisible as there were no panels there prior to the hot air system.
Unused parts:
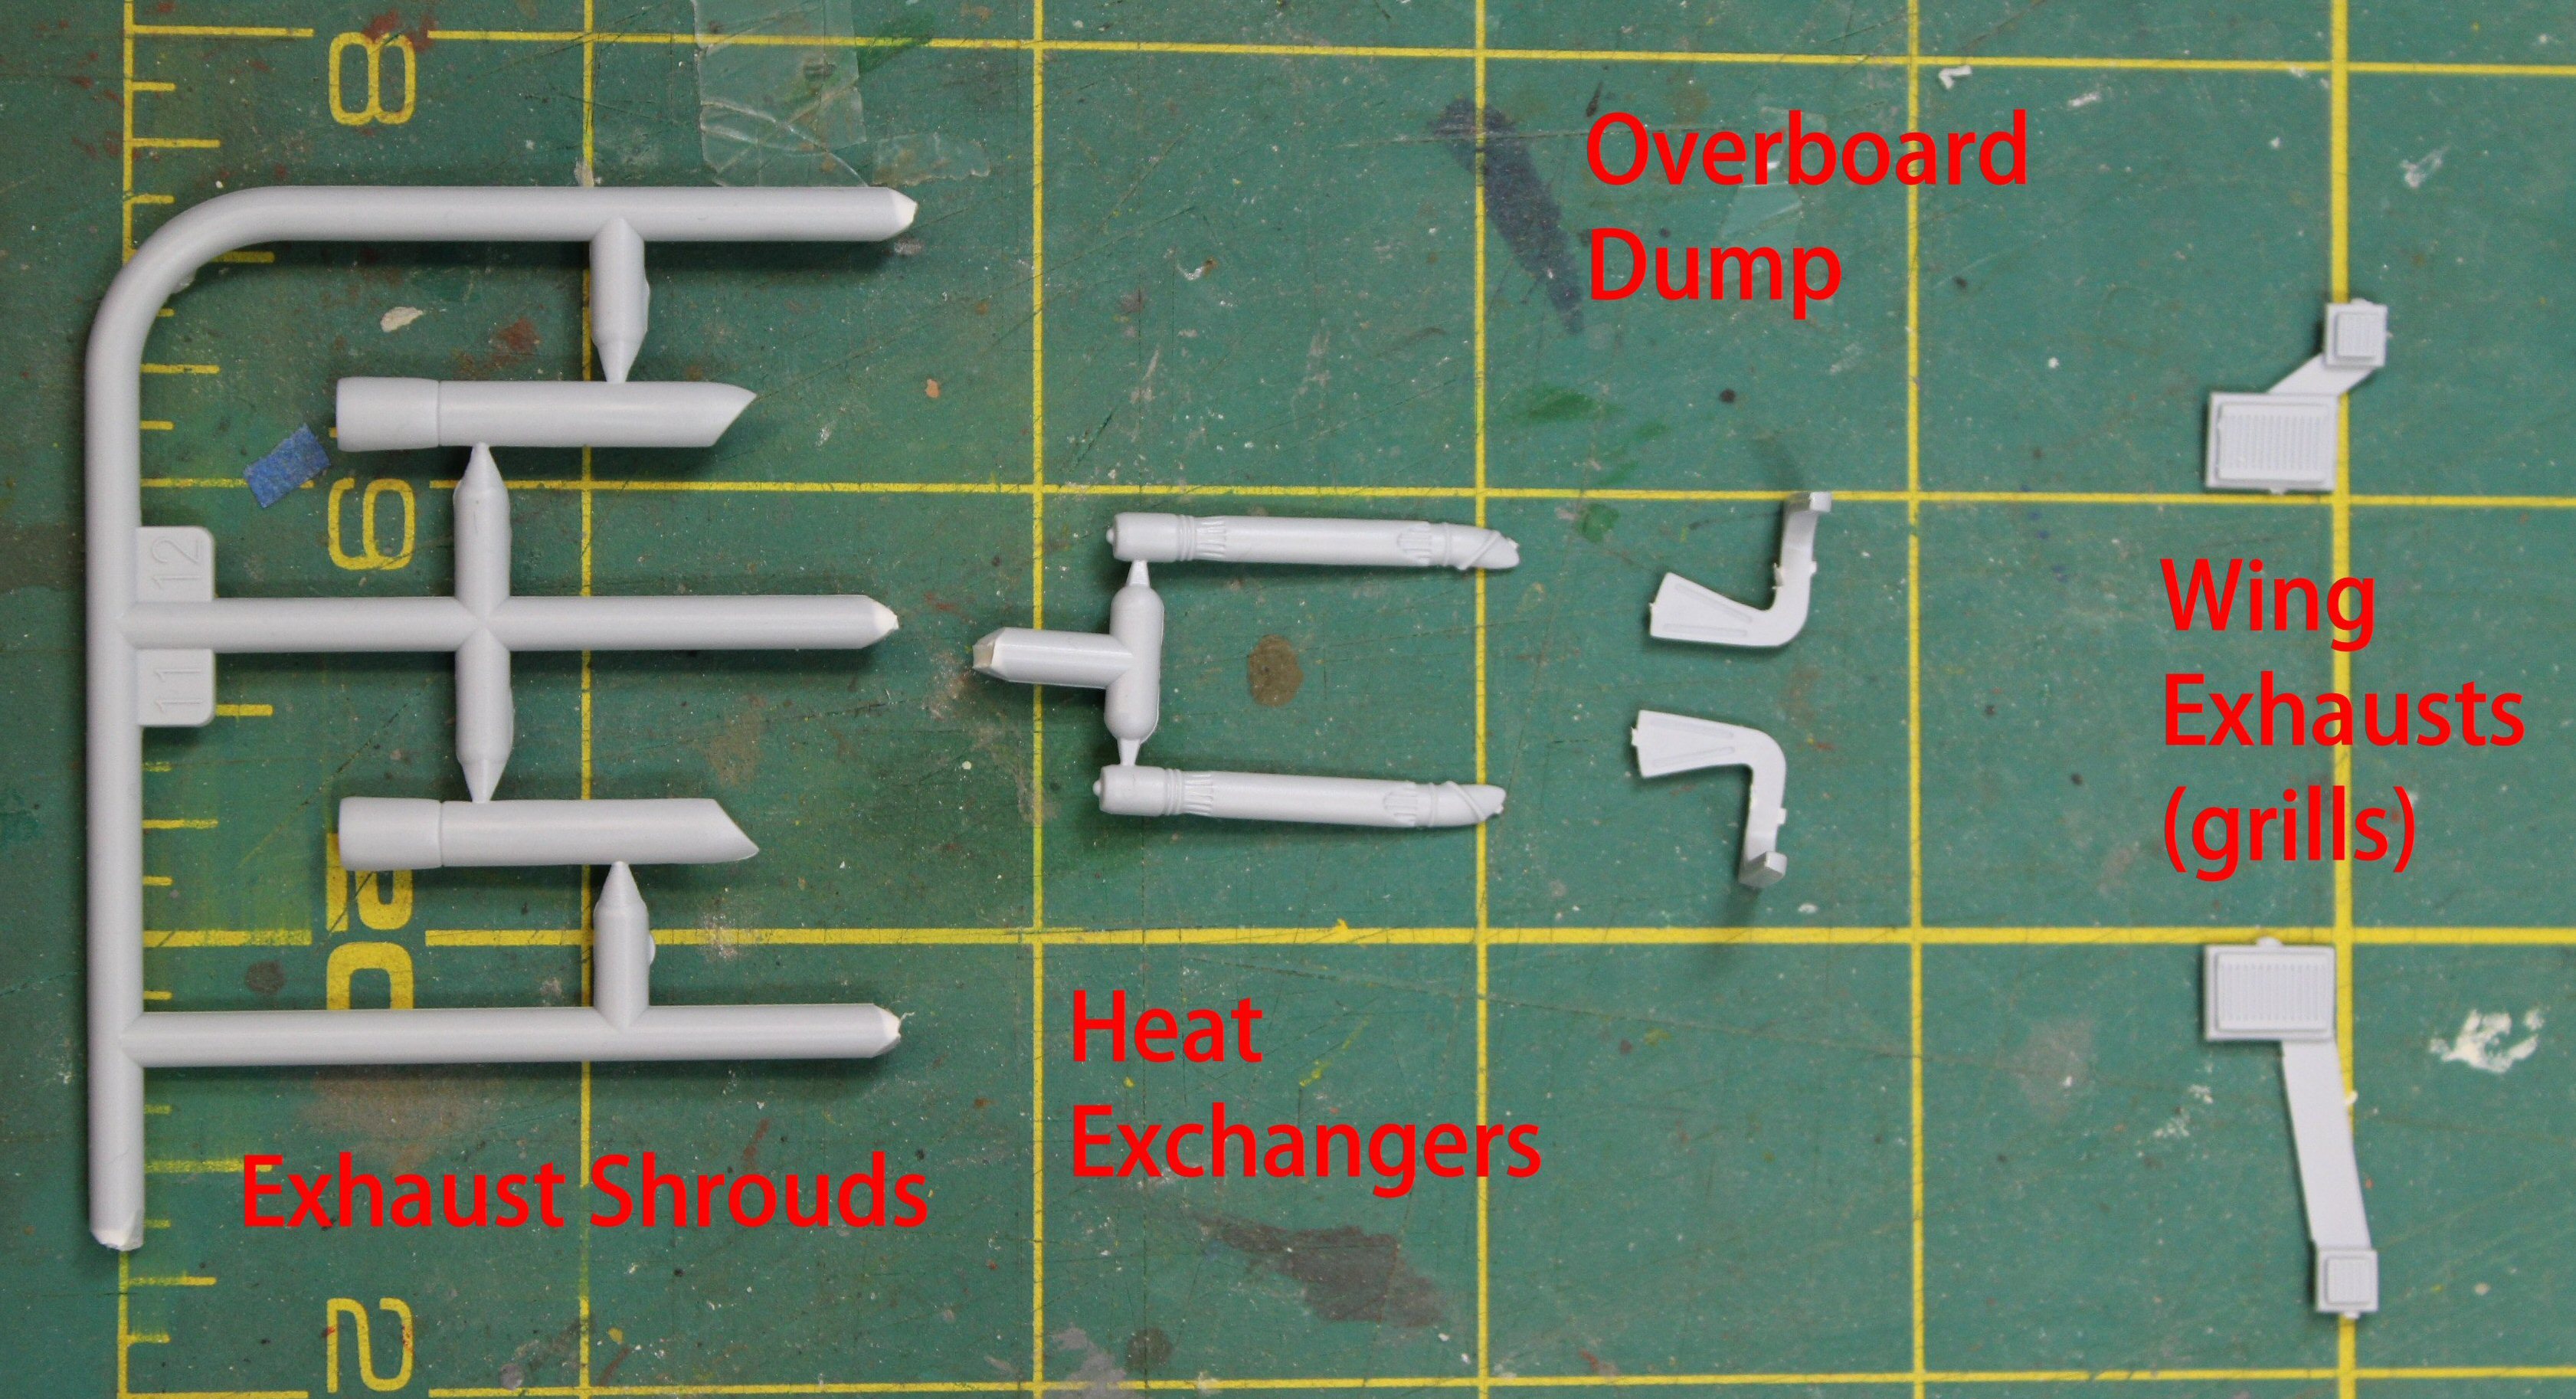
The exhausts will be different but we will deal with that another day.
Here are the blanking plates in place. Looking forward to filling those in

!
Joel_W
Associate Editor New York, United States
Joined: December 04, 2010
KitMaker: 11,666 posts
AeroScale: 7,410 posts
Posted: Friday, November 25, 2016 - 10:53 PM UTC
Karl,
that's a detail that the ordinary modeler like me would have never known. So if one wanted to use the later hot air heating system, then AMM decals would be needed. I'm wondering if the decals already out there denote what block they're for? Took a quick look and the Kit World decals do indeed call out the block designations.
Joel
On my Workbench:
Monogram 1/24 scale 427 Shelby Cobra
Just Completed:
Beemax 1/24 scale BMW M3 E30 1992 Evolution II
Illinois, United States
Joined: January 12, 2015
KitMaker: 292 posts
AeroScale: 292 posts
Posted: Friday, November 25, 2016 - 11:01 PM UTC
It is a detail that most won't even care about, just one of those little things I have learned. There are lists showing the Serial Number ranges and Blocks by manufacturer in various places. Here is a handy one that I use:
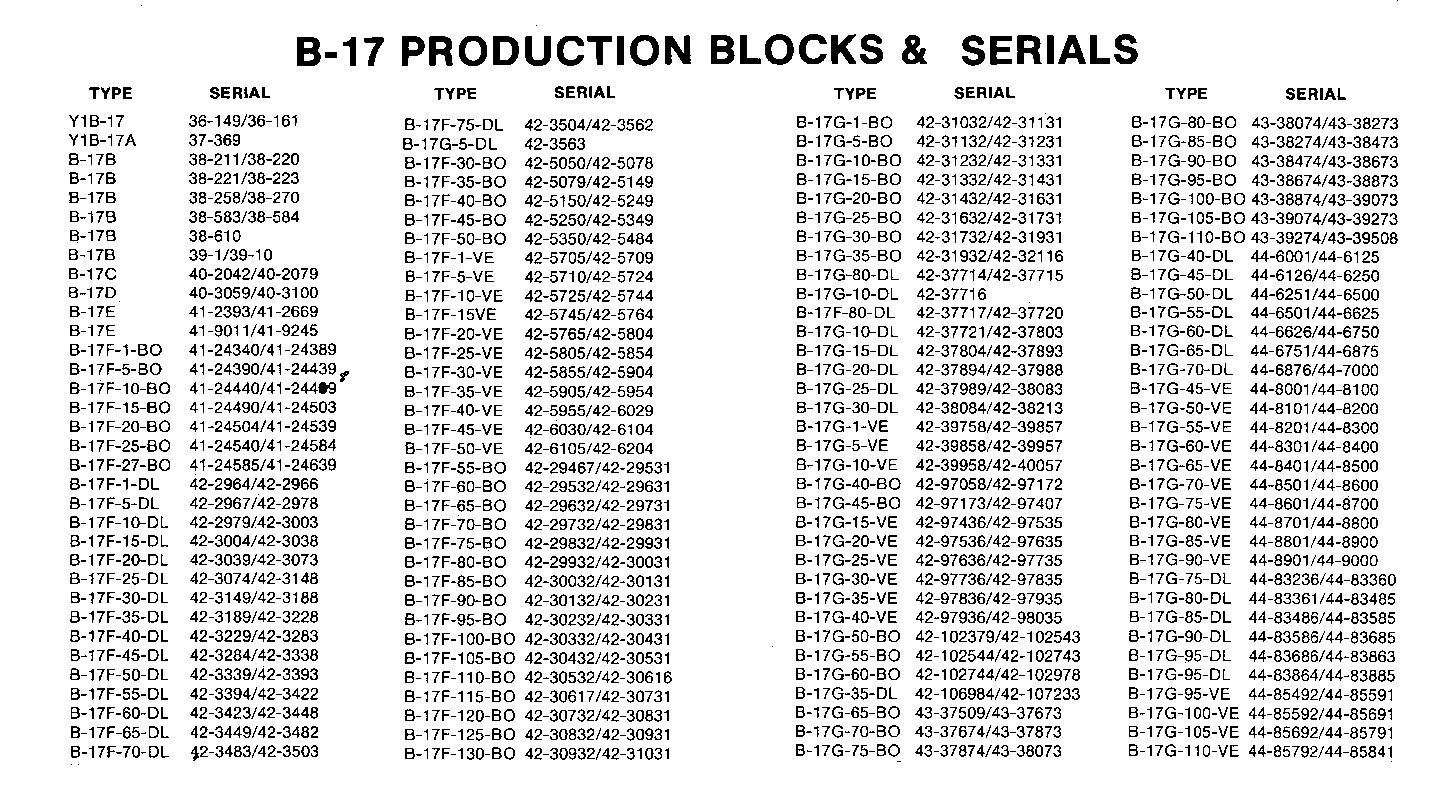
I guess I refer to it so much , I just assume everyone has one which I know is not the case

Merlin
Senior Editor 
#017
United Kingdom
Joined: June 11, 2003
KitMaker: 17,582 posts
AeroScale: 12,795 posts
Posted: Saturday, November 26, 2016 - 01:13 AM UTC
Hi Karl
Great stuff! Can you write us a review? It'd be superb to cover this important release early with your depth of knowledge.
I know only too well the frustration of advising manufacturers on kits, only to see that same advice ignored (I won't name names, but I've actually got a credit on one kit that I said wasn't fit for release

). The sad thing is, the buying public assume manufacturers always take on board and act on the input they receive. I remember how frustrated Edgar Brooks was about Trumpeter's shocking Supermarine Spiteful, where they invited feedback after the first pattern model - and then ignored it all...
All the best
Rowan

BEWARE OF THE FEW...
As I grow older, I regret to say that a detestable habit of thinking seems to be getting a hold of me. - H. Rider Haggard
Illinois, United States
Joined: January 12, 2015
KitMaker: 292 posts
AeroScale: 292 posts
Posted: Saturday, November 26, 2016 - 08:17 PM UTC
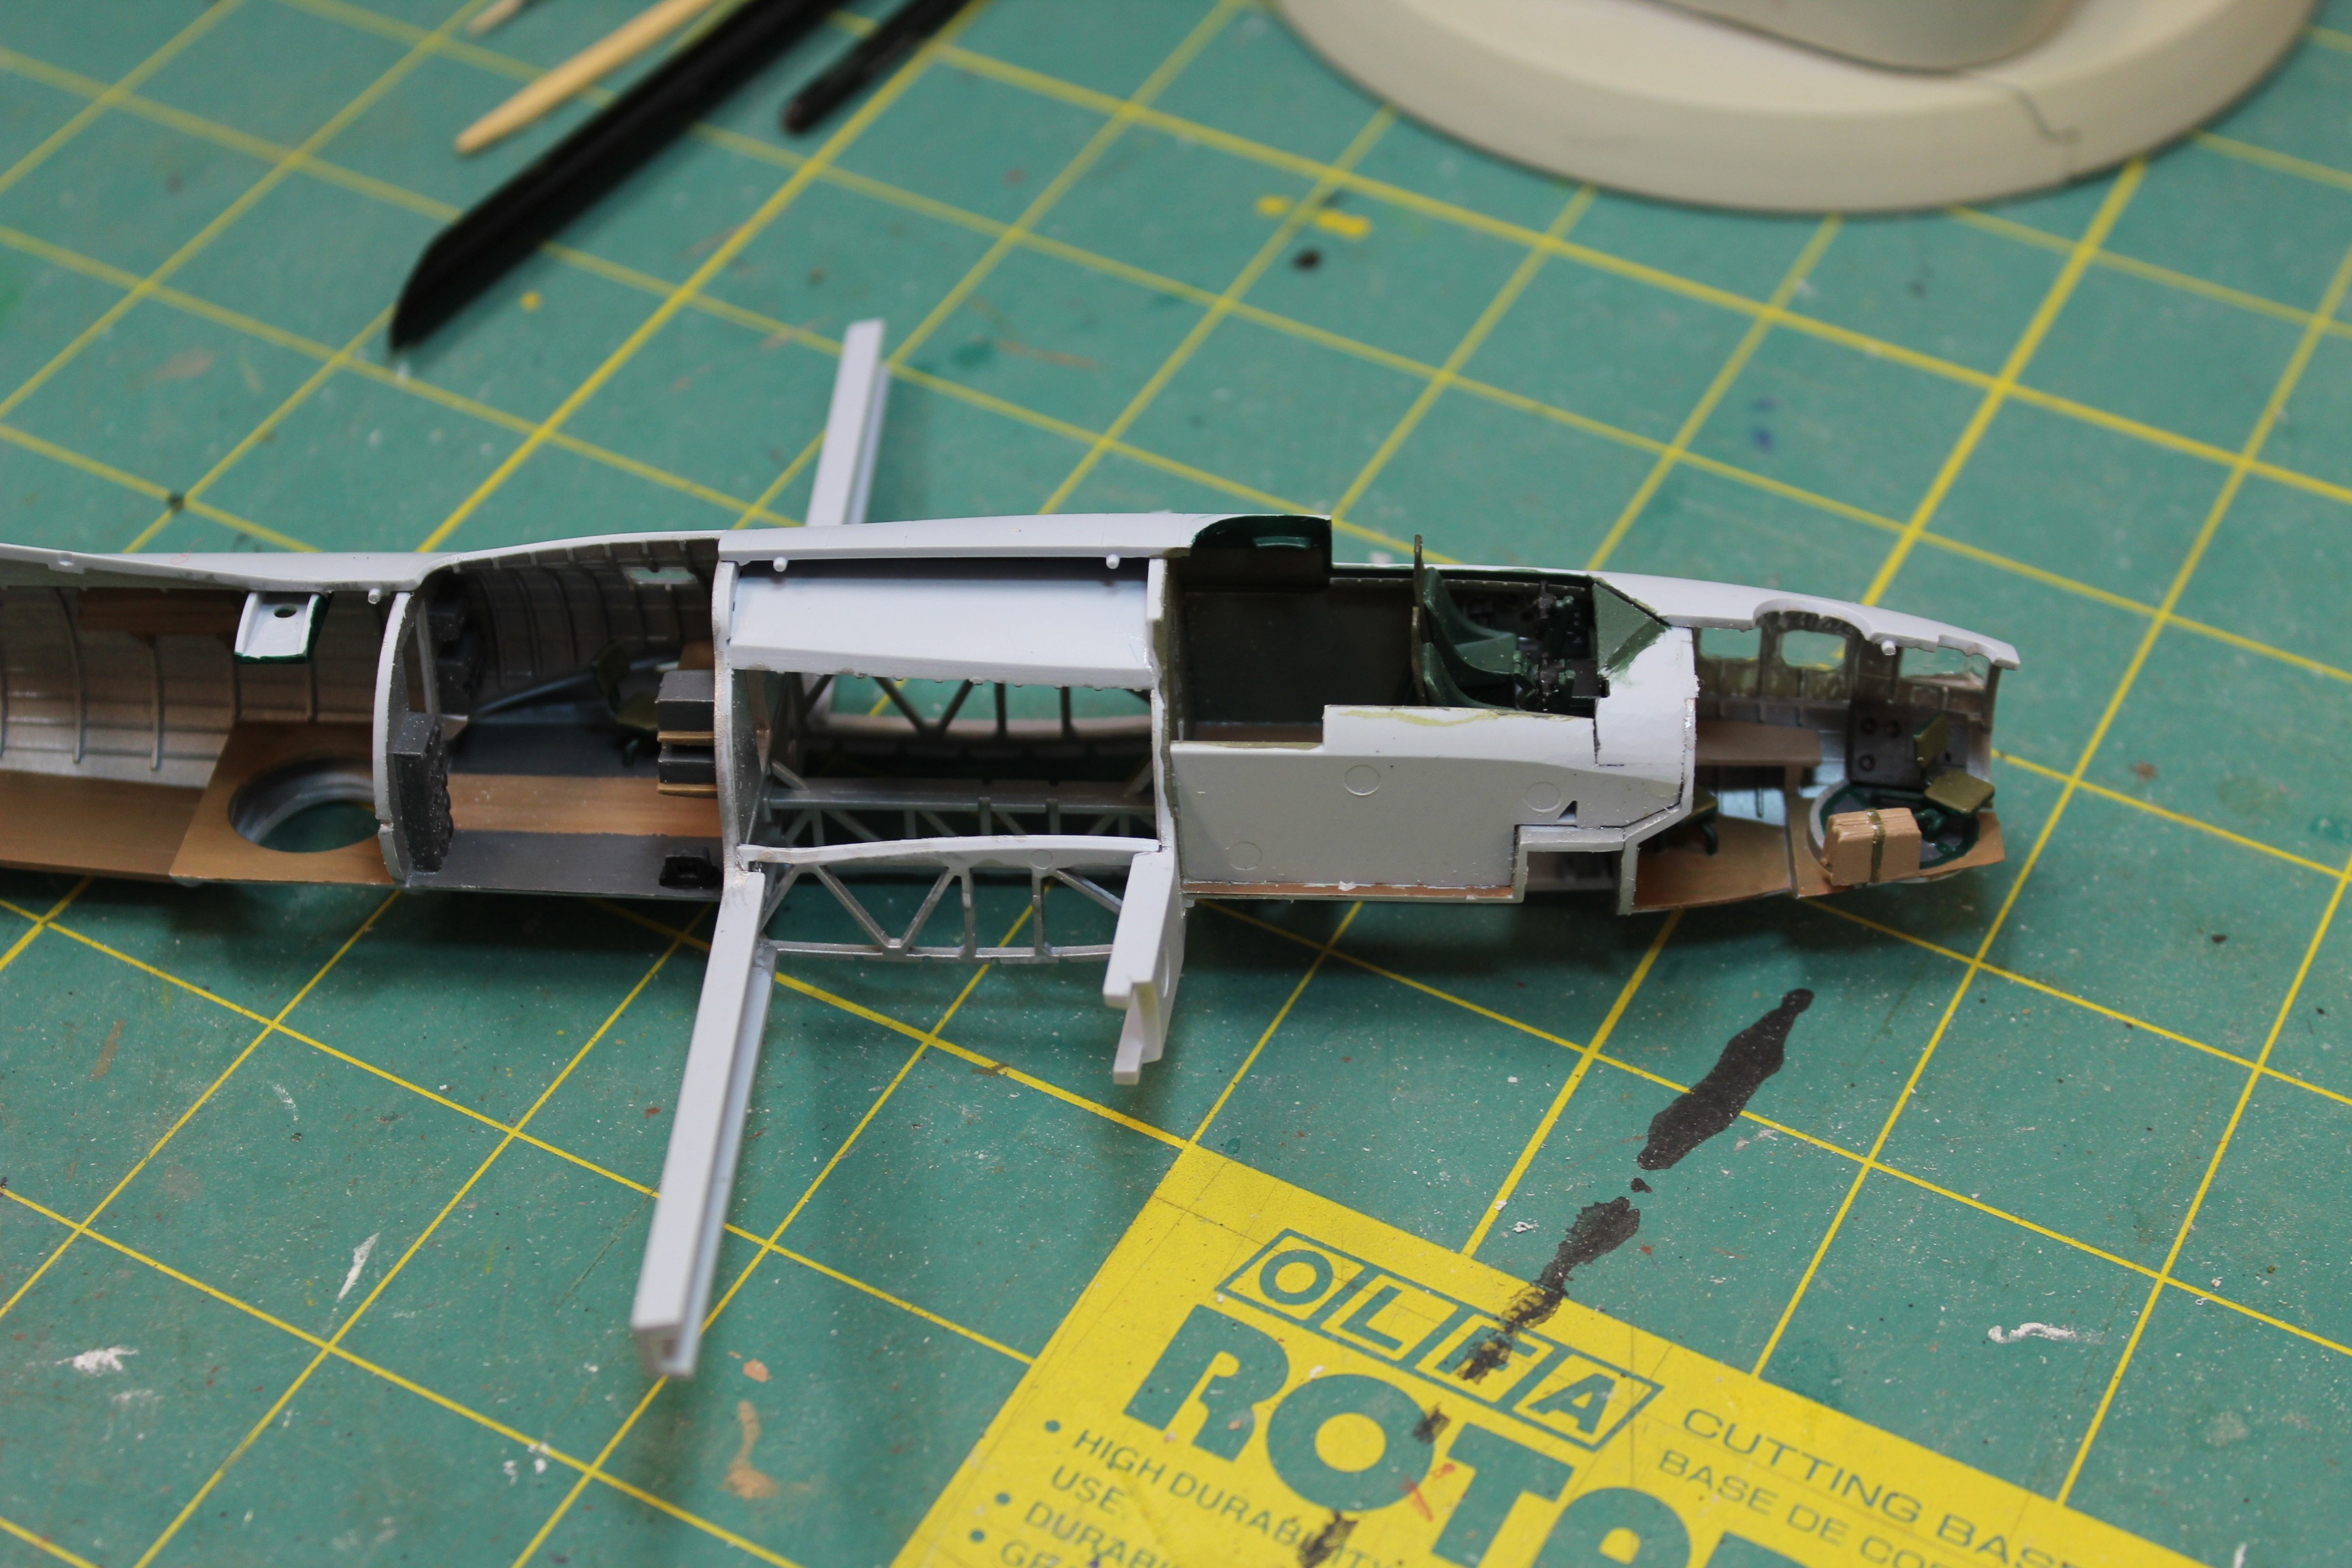
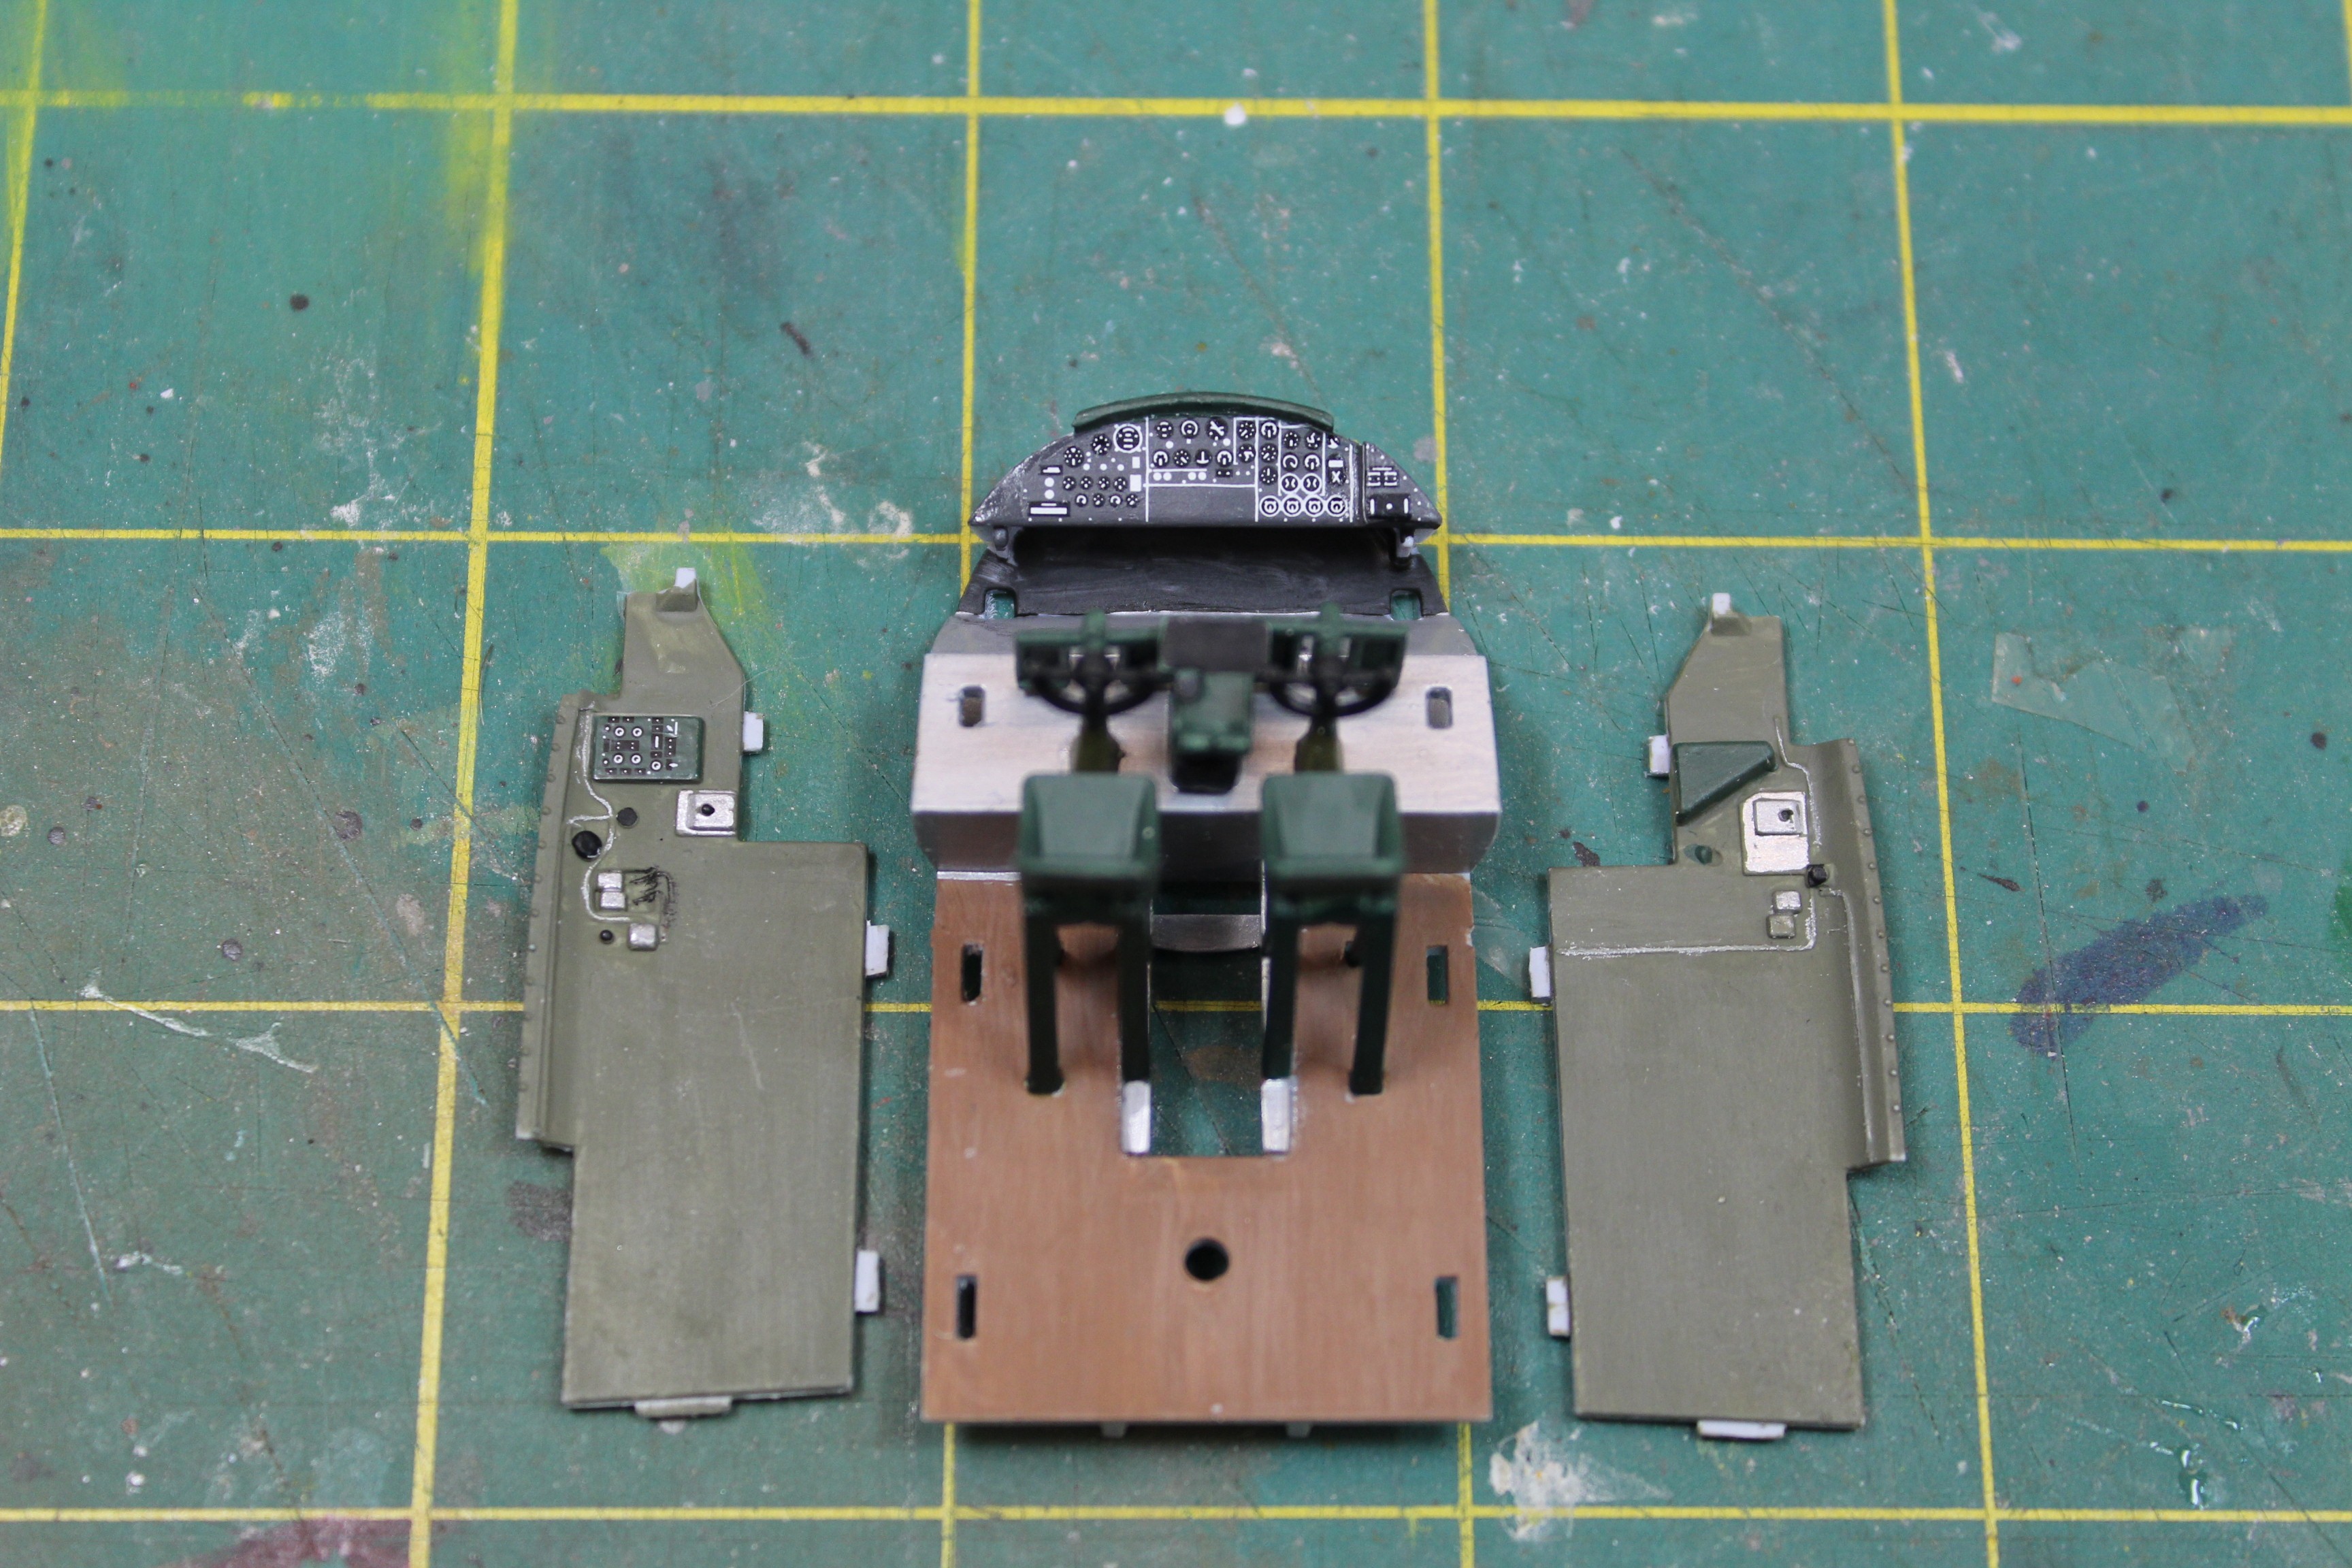
This kit is going together rather nicely. No big issues so far. Here is the cockpit:
England - South West, United Kingdom
Joined: January 06, 2007
KitMaker: 3,661 posts
AeroScale: 369 posts
Posted: Saturday, November 26, 2016 - 09:04 PM UTC
Good work Karl, is there only an option for a decal for the panel?
Support Our Troops! Hit the Yes button If you find reviews or features helpful.
Illinois, United States
Joined: January 12, 2015
KitMaker: 292 posts
AeroScale: 292 posts
Posted: Saturday, November 26, 2016 - 09:35 PM UTC
It is the standard flat bit of plastic for the panel with a decal. I believe Eduard has a cockpit set out but I am sticking to out of the box. One thing that will frustrate less experienced builders is there are NO paint call outs. There are some numbers which I presume are meant for paint colors but there is no listing for what those numbers mean. They probably call for interior green anyway so one might be better off without!
Joel_W
Associate Editor New York, United States
Joined: December 04, 2010
KitMaker: 11,666 posts
AeroScale: 7,410 posts
Posted: Saturday, November 26, 2016 - 10:08 PM UTC
Karl,
Nice start to the pit. Is yours a pre-production kit or from the 1st run? I'm only asking because if there is no color callouts, maybe that will be added to the final corrections.
Joel
On my Workbench:
Monogram 1/24 scale 427 Shelby Cobra
Just Completed:
Beemax 1/24 scale BMW M3 E30 1992 Evolution II
Illinois, United States
Joined: January 12, 2015
KitMaker: 292 posts
AeroScale: 292 posts
Posted: Saturday, November 26, 2016 - 10:26 PM UTC
This is the first run. I have a pre-production version and it had no instructions or decals and was just loose in a cardboard box. Has a nice sheet for external painting but the instruction sheet has nothing along those lines. Something that Airfix does that maybe longtime AIrfix builders can tell us about?
Illinois, United States
Joined: January 12, 2015
KitMaker: 292 posts
AeroScale: 292 posts
Posted: Saturday, November 26, 2016 - 11:24 PM UTC
The upper portion of the bomb bay fits very well:
But for reasons known only to Airfix, they have left the sides of the bay open. The detail is nice but you are not supposed to be able to see through here:
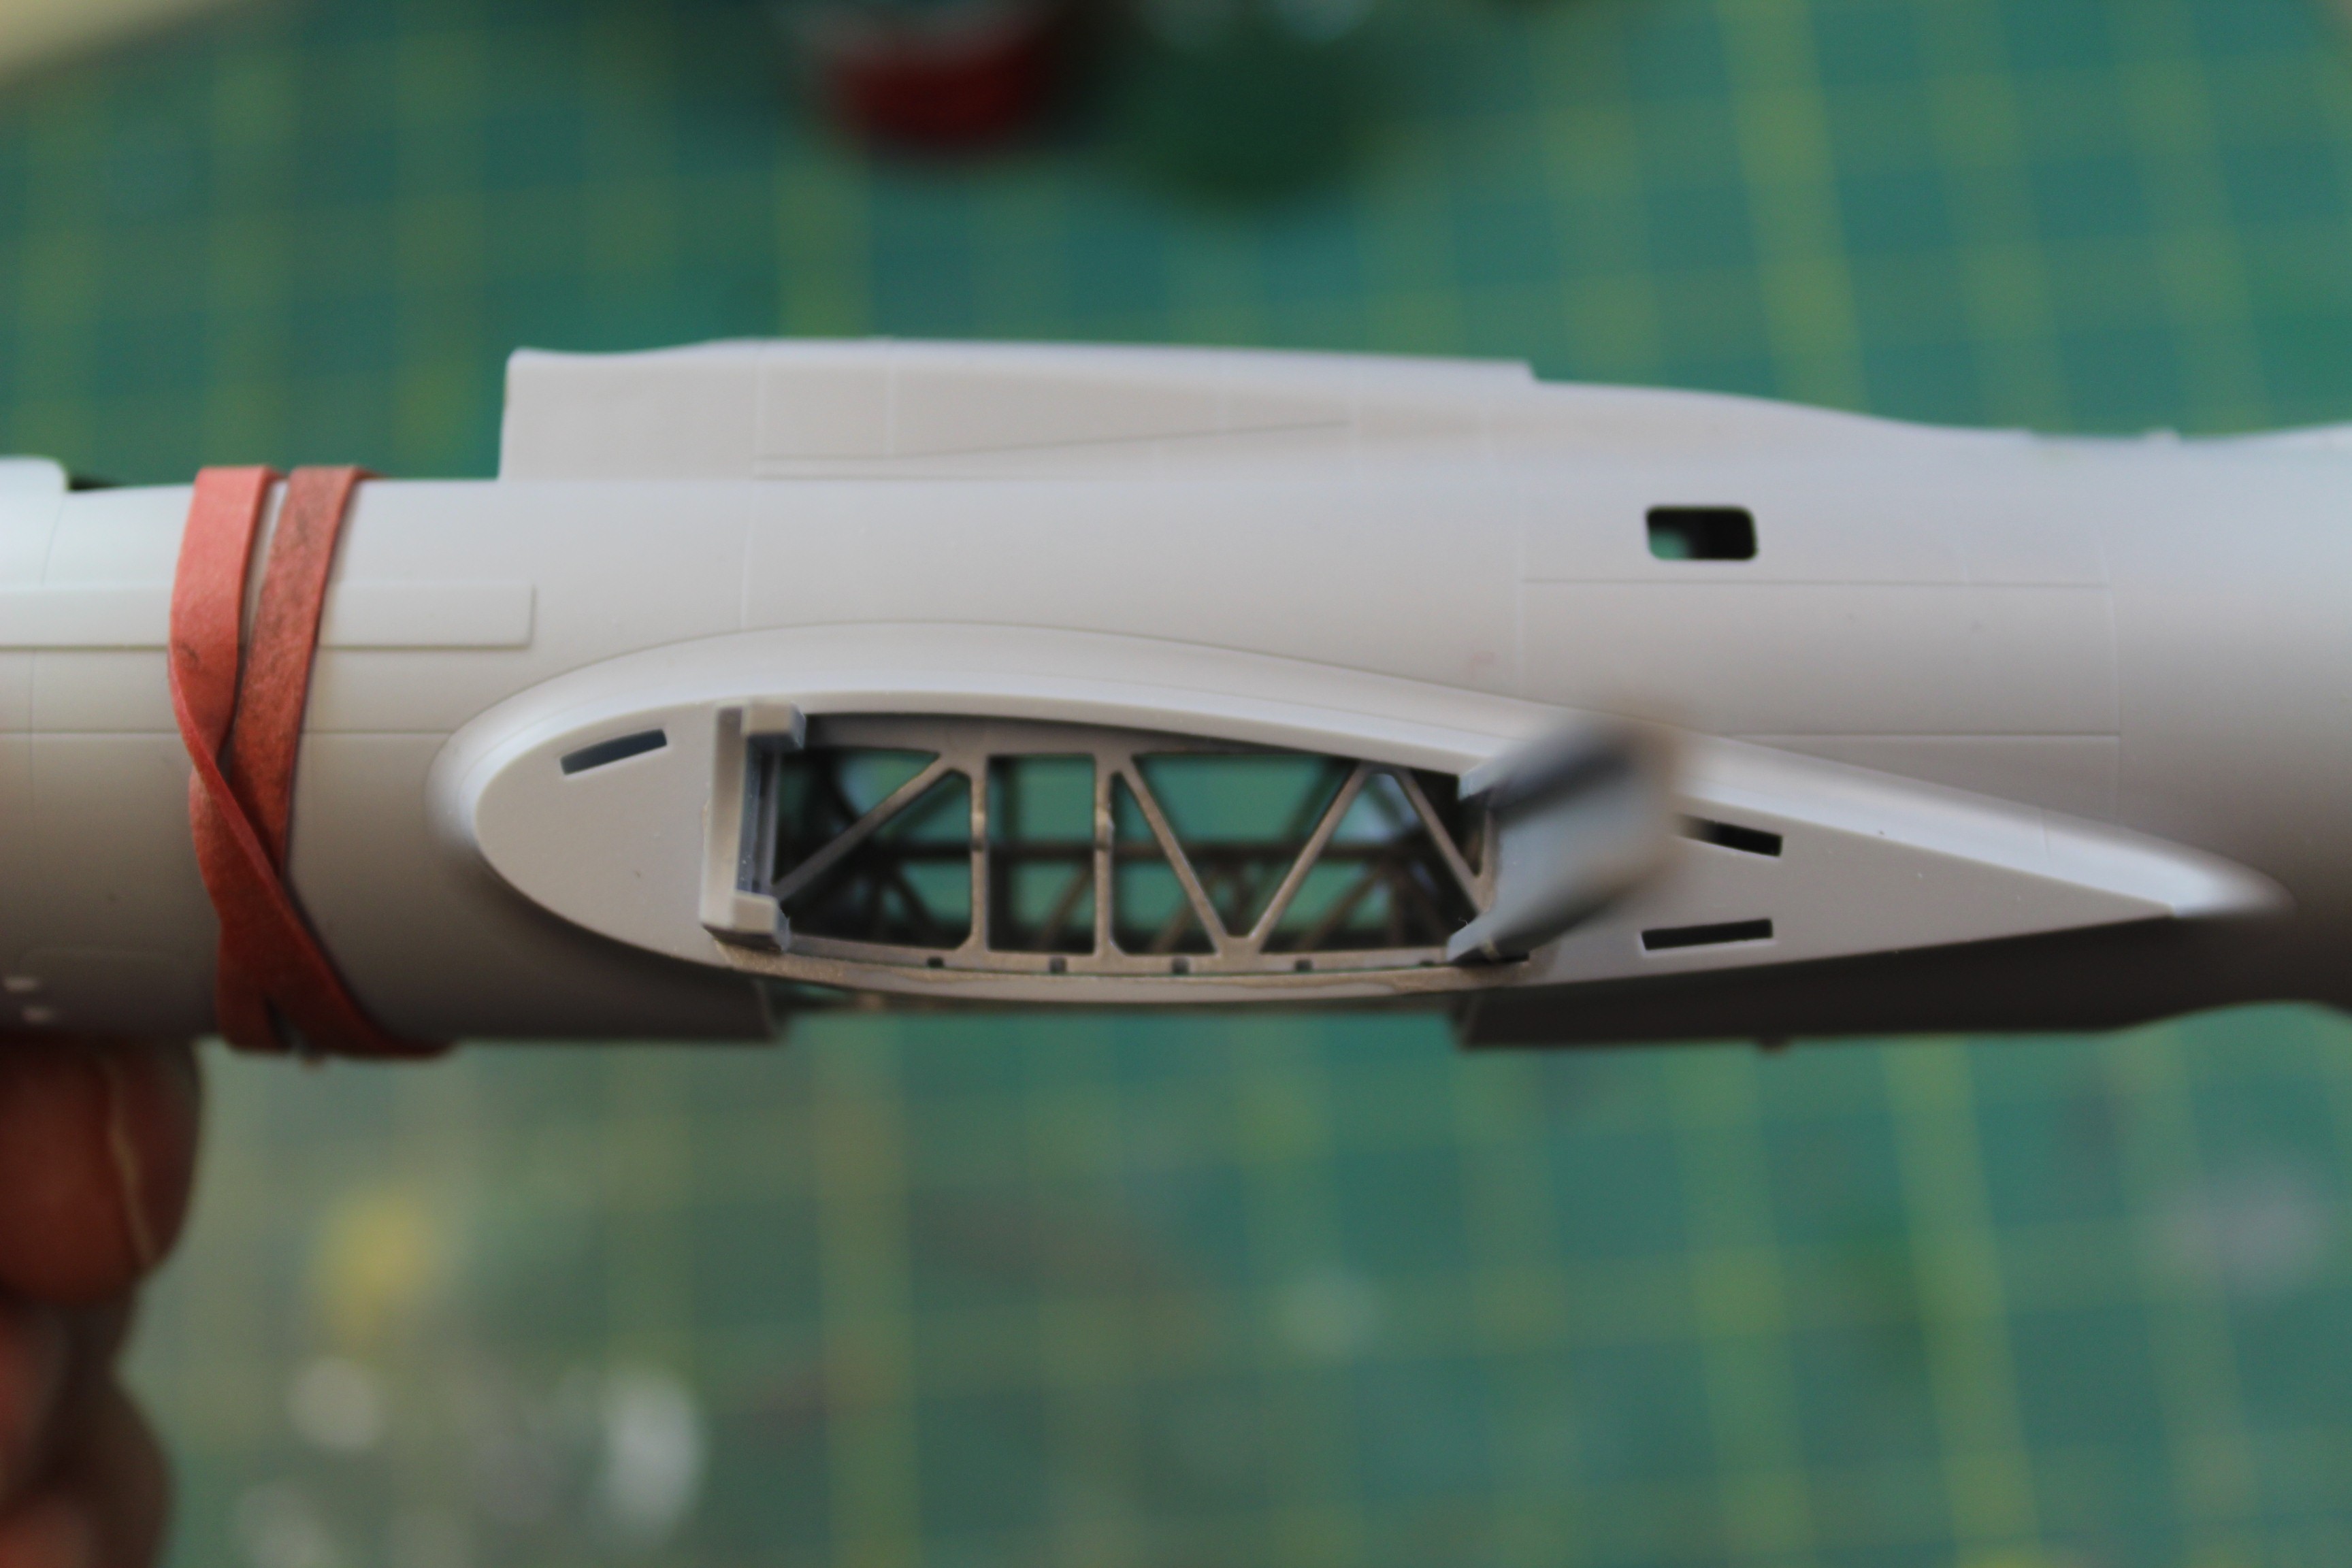
Easy to fix with a bit of .010 styrene.
#306
Victoria, Australia
Joined: June 27, 2010
KitMaker: 3,959 posts
AeroScale: 598 posts
Posted: Sunday, November 27, 2016 - 04:36 AM UTC
Watching with interest Karl

Stay home and build models!
In 1/72
Gloster Gladiator MkII for the Bi-planes Campaign
In 1/350
Airfix 1:350 Type 45 Destroyer
Illinois, United States
Joined: January 12, 2015
KitMaker: 292 posts
AeroScale: 292 posts
Posted: Tuesday, November 29, 2016 - 04:32 PM UTC
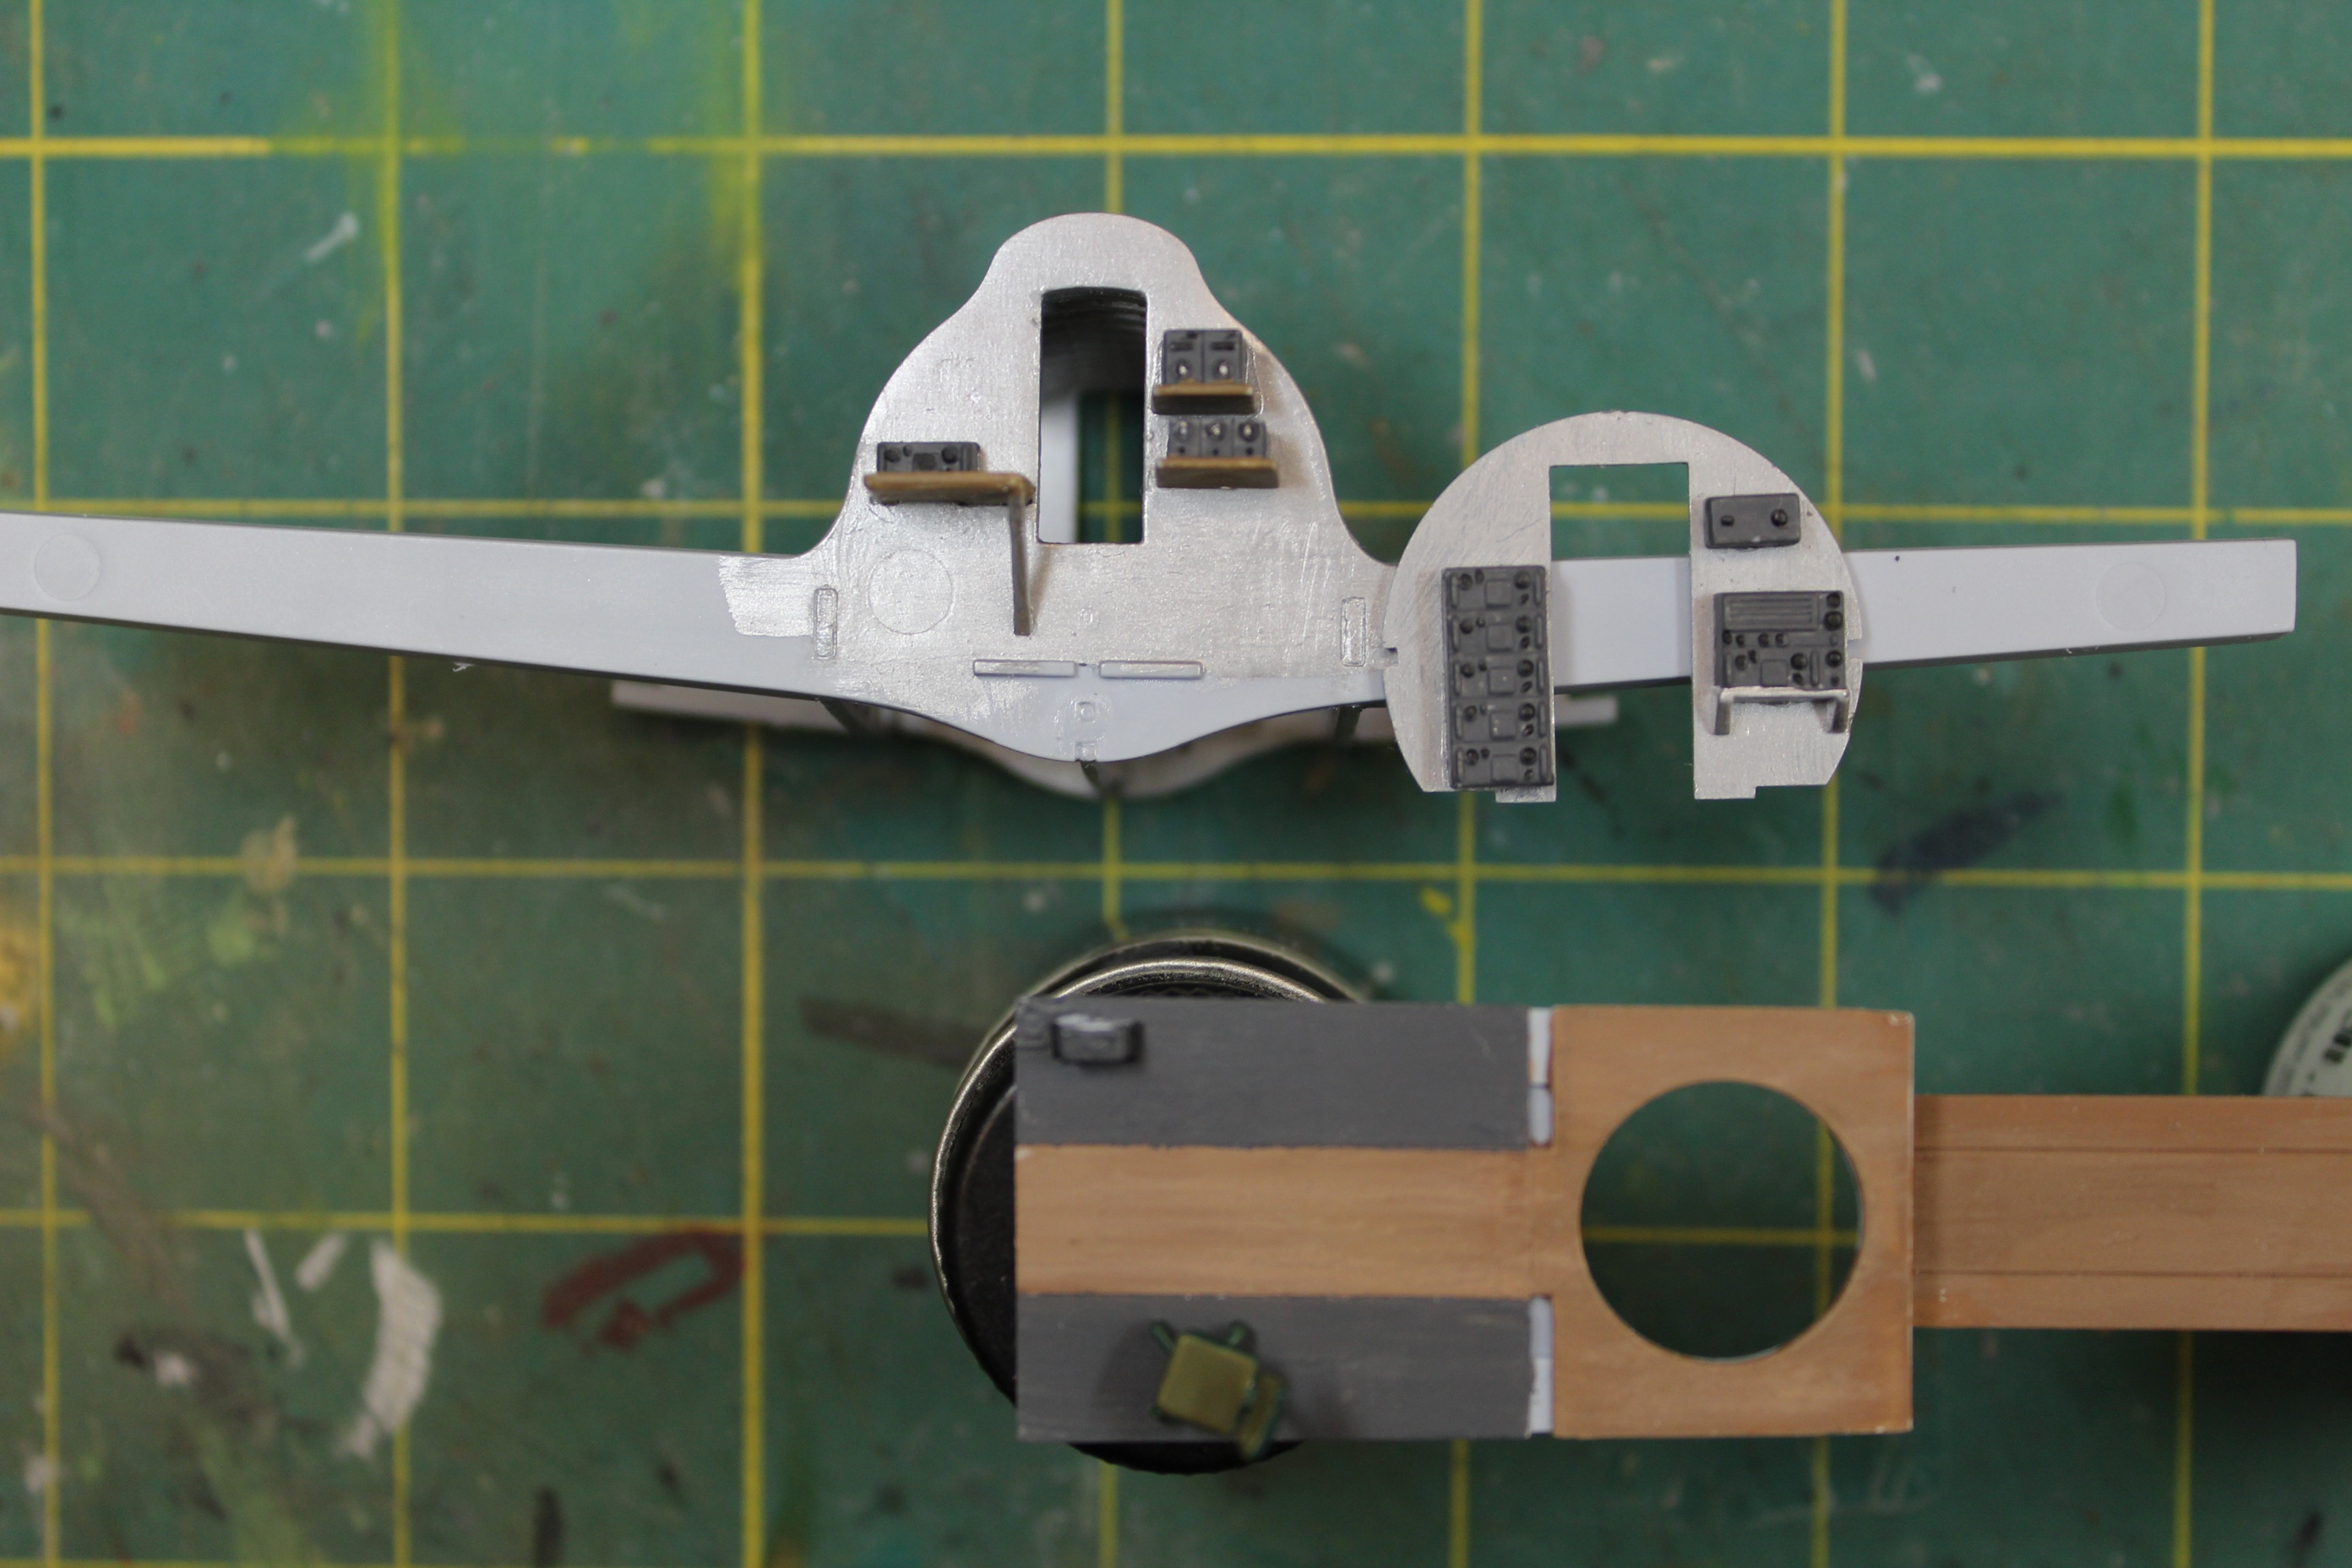
Continuing on, here are the bits that make up the radio compartment. Useless information bit: Part G9, which they would have you install above the radio operators table represents the Command radio dynamotor. This was installed in that position in later aircraft. In earlier aircraft (including the ones Airfix has provided markings for) it was mounted on the right forward floor. So I moved mine there. Irrelevant to 99.99% of folks but just one of those little things that was no big deal to change
. Also, there was no seat on the right side so I left that out.
Joel_W
Associate Editor New York, United States
Joined: December 04, 2010
KitMaker: 11,666 posts
AeroScale: 7,410 posts
Posted: Wednesday, November 30, 2016 - 04:50 AM UTC
Karl,
it's never useless information when your knowledge base allows you to make corrections to enhance ones build.
Joel
On my Workbench:
Monogram 1/24 scale 427 Shelby Cobra
Just Completed:
Beemax 1/24 scale BMW M3 E30 1992 Evolution II
Illinois, United States
Joined: January 12, 2015
KitMaker: 292 posts
AeroScale: 292 posts
Posted: Friday, December 02, 2016 - 10:01 PM UTC
Joel_W
Associate Editor New York, United States
Joined: December 04, 2010
KitMaker: 11,666 posts
AeroScale: 7,410 posts
Posted: Friday, December 02, 2016 - 11:35 PM UTC
Karl,
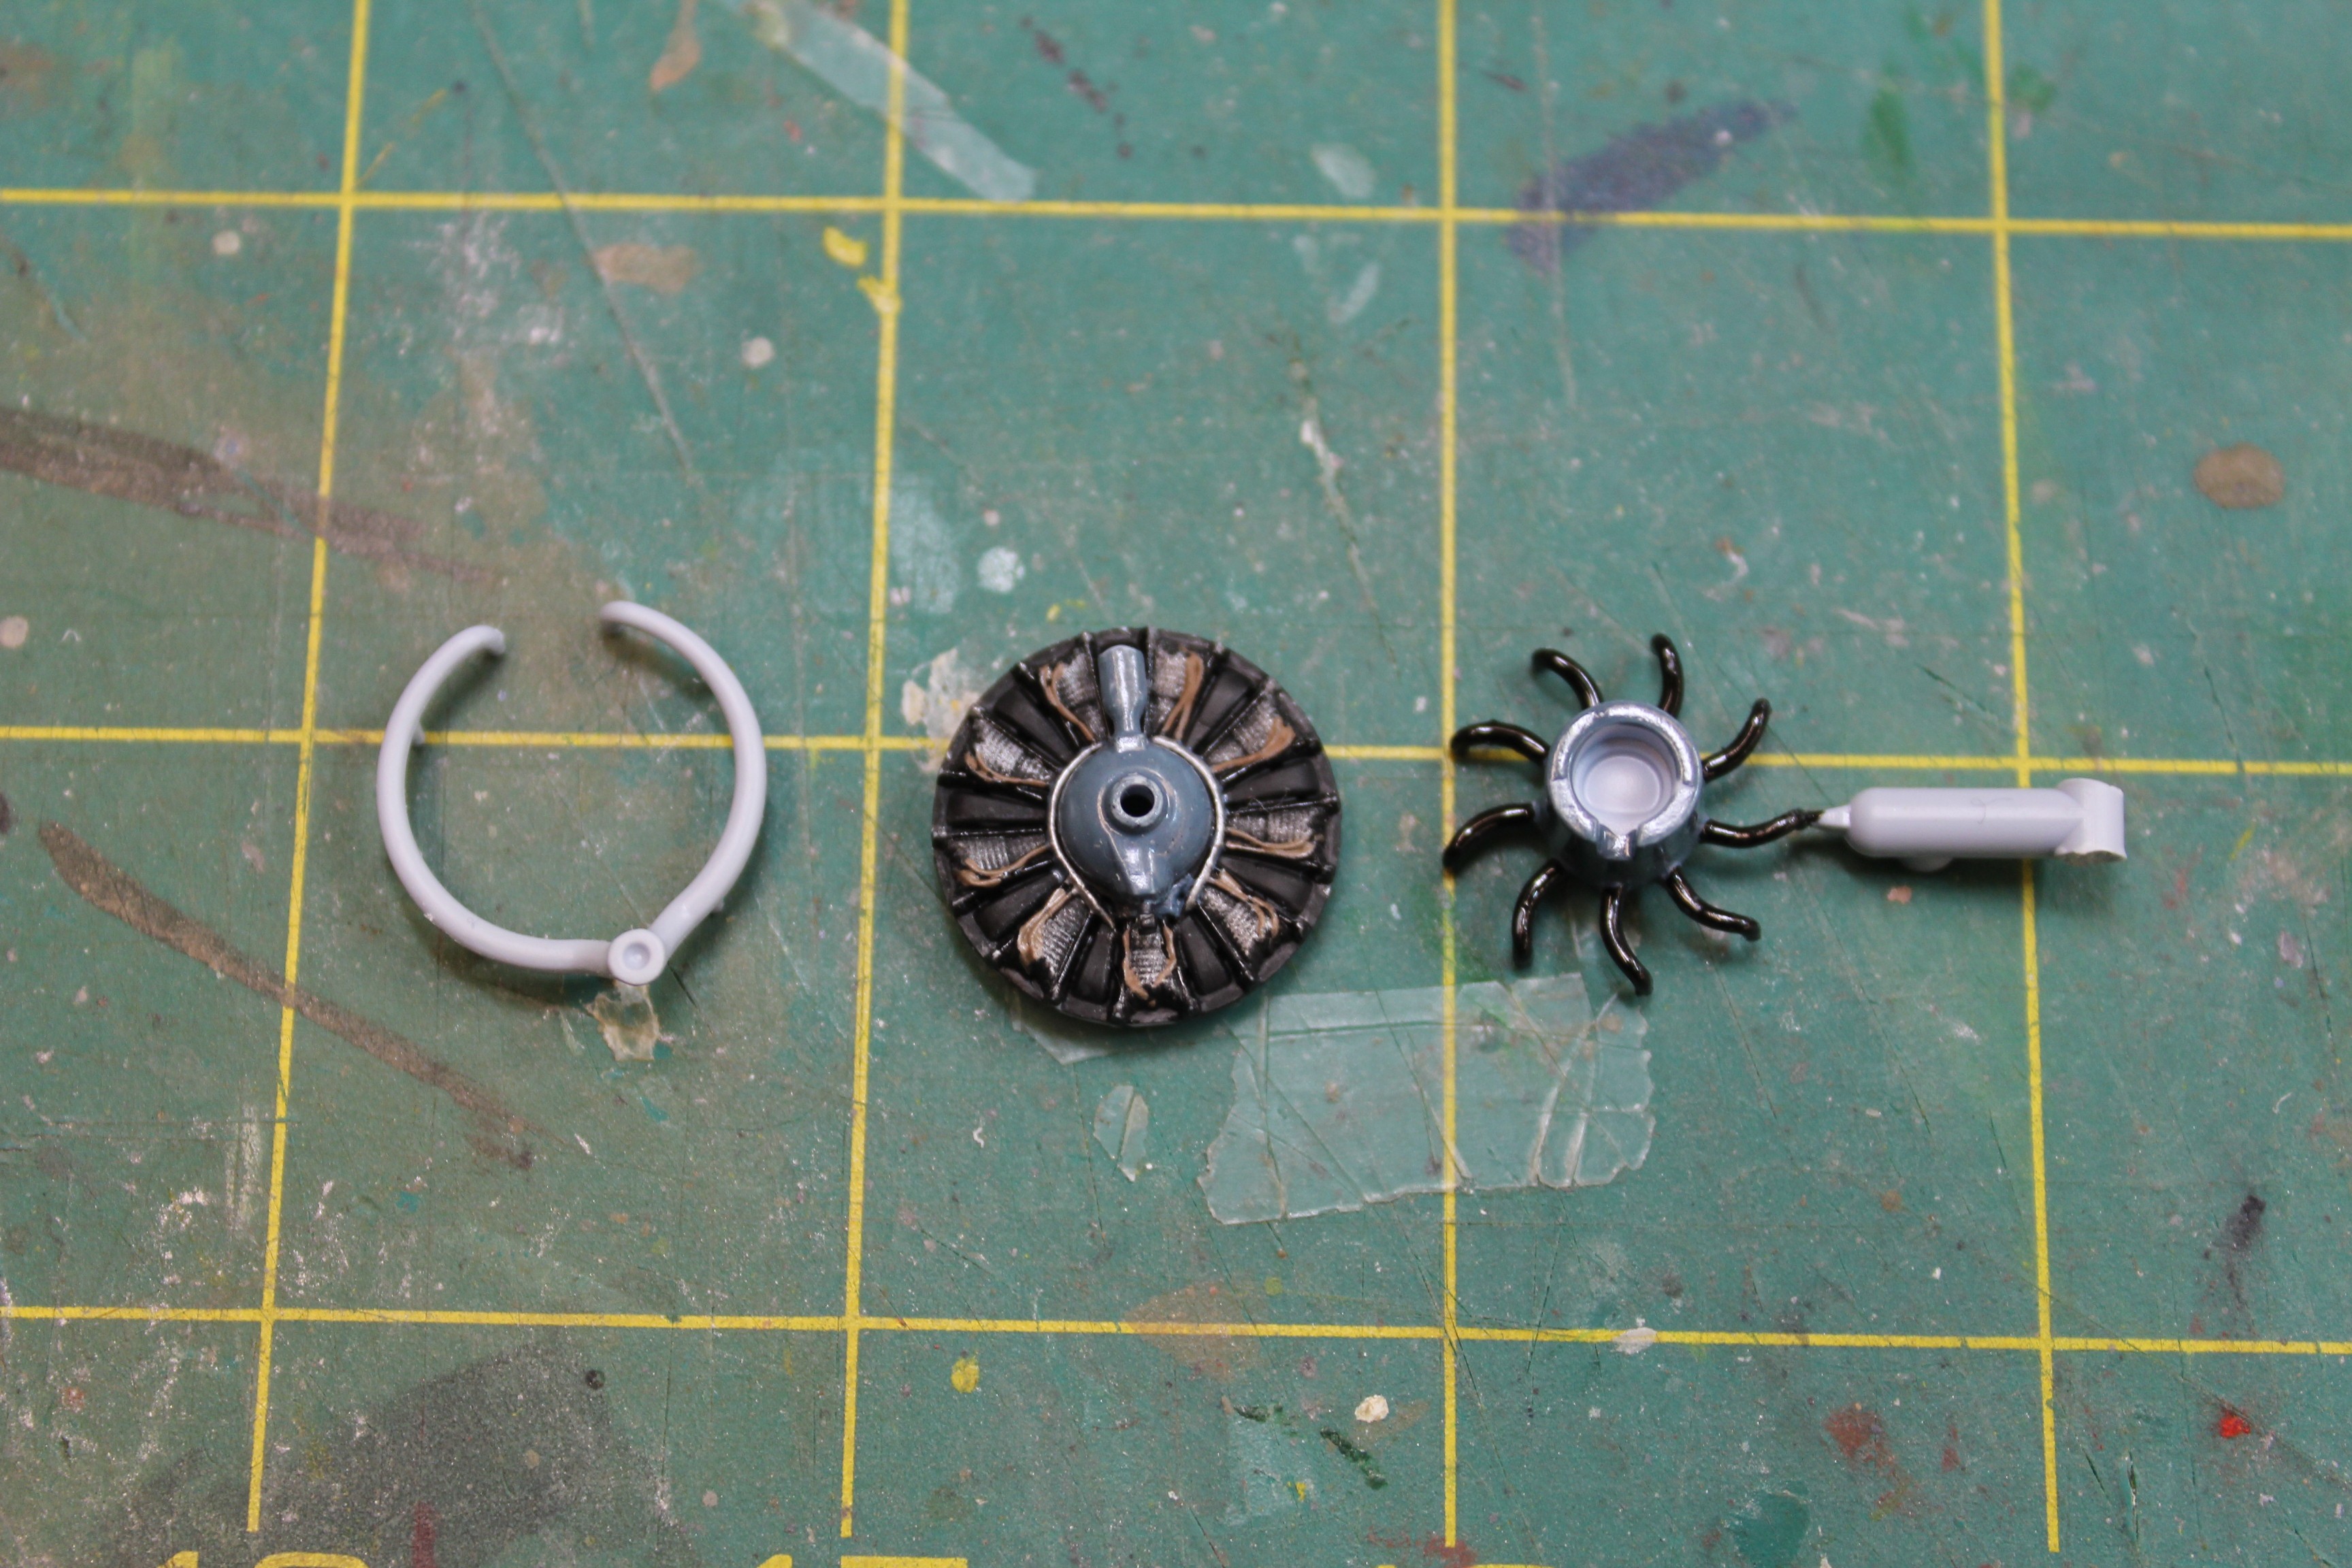
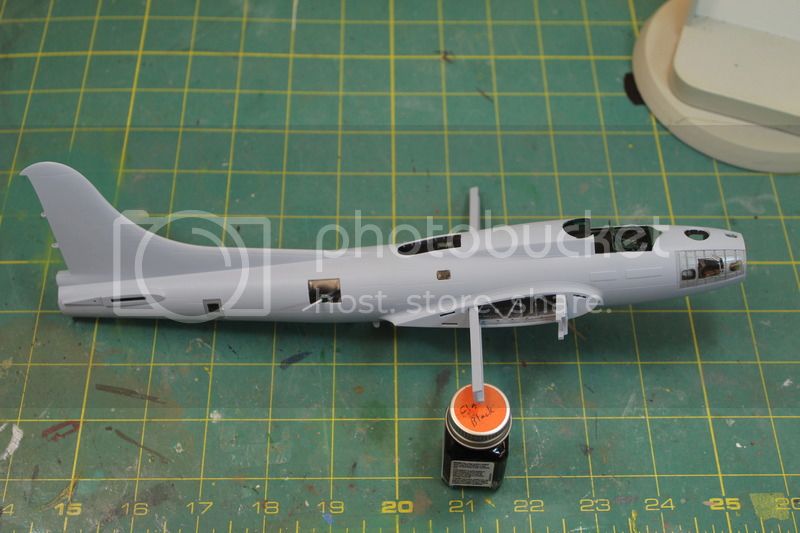
The full fuselage interior really looks good and seems to fill up the space nicely. One needs to remember that is 1/72.
Nice job on the engine. One question on your choice of color for the sparkplug wires. I've been doing quite a bite of research on the Pratt & Whitney R-1830 Wasp for a 1/32 F4F-3 build, and I've seen both that brownish/bronze color and black split about 50/50 on restorations. Is there a definitive answer to what the color and material used was during the war?
Joel
On my Workbench:
Monogram 1/24 scale 427 Shelby Cobra
Just Completed:
Beemax 1/24 scale BMW M3 E30 1992 Evolution II
Illinois, United States
Joined: January 12, 2015
KitMaker: 292 posts
AeroScale: 292 posts
Posted: Saturday, December 03, 2016 - 12:42 AM UTC
It was a bronze braid. Or at least it was through most of the war. Not sure when the black ones came about.
Holdfast
President #056
England - South West, United Kingdom
Joined: September 30, 2002
KitMaker: 8,581 posts
AeroScale: 4,913 posts
Posted: Saturday, December 03, 2016 - 01:52 PM UTC
I really like the fact that you have in depth knowledge of the B-17
This kit has been blasted by a certain group of Americans on Face Book, based on the shocking build that was done for Airfix! It'll be nice to see what it is really like
I don't build in 1/72 scale but the Airfix new releases have got me revisiting that scale and 1/48th
I aim to build this as "A Bit O' Lace" (I fondly remember Airfix's original kit in this scheme). But I will have to check out the block number; which I can do thanks to your post
I have the nose art work and will paint all other main markings, I might even paint on the nose art
MAL the MASK
BULLDOG # 6 (President)
BEWARE OF THE FEW
Sappers: First in, last out. (UBIQUE)
It's not the same, better, but not the same.
Illinois, United States
Joined: January 12, 2015
KitMaker: 292 posts
AeroScale: 292 posts
Posted: Saturday, December 03, 2016 - 04:29 PM UTC
"A Bit O' Lace" was G-40-VE and did not have the staggered waist. The well known photo of her in flight shows that they did install the Cheyenne turret. Probably your best bet would be to get the Monogram (now Revell) 1/48th kit and get an aftermarket Cheyenne tail. A company called Resin2Details makes one that looks nice.
Holdfast
President #056
England - South West, United Kingdom
Joined: September 30, 2002
KitMaker: 8,581 posts
AeroScale: 4,913 posts
Posted: Sunday, December 04, 2016 - 12:16 PM UTC
Thanks for the info Karl, I have the Monogram kit but I want to build this Airfix one. I will look at doing some mods? It shouldn't be beyond someones skills to un-stagger the waist guns
MAL the MASK
BULLDOG # 6 (President)
BEWARE OF THE FEW
Sappers: First in, last out. (UBIQUE)
It's not the same, better, but not the same.
Illinois, United States
Joined: January 12, 2015
KitMaker: 292 posts
AeroScale: 292 posts
Posted: Wednesday, December 14, 2016 - 03:45 AM UTC
Not a lot of progress, seems like life gets in the way of our hobbies! Fuselage is together with no issues.
The wings have had the bits filled in where the blocking panels were installed:
Before
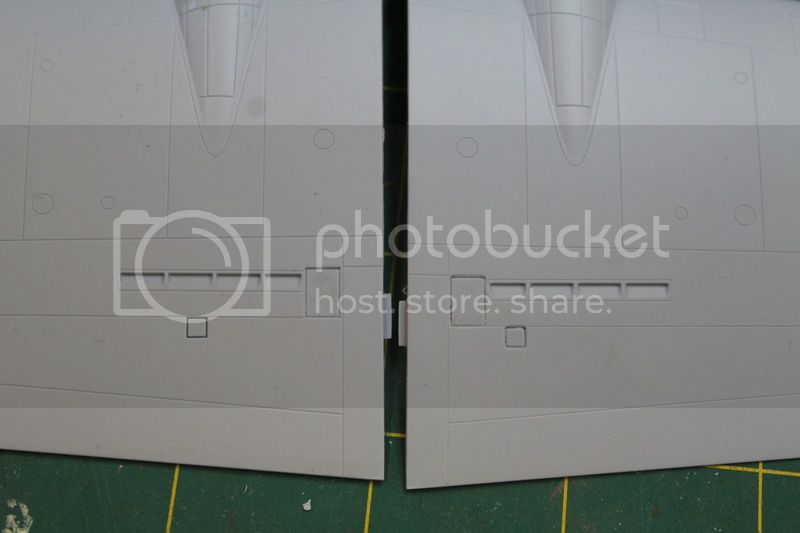
After
The tail cone has a few issues. First off it is too small and leaves a noticeable step where it meets the fuselage. I glued in a .040 styrene shim in the bottom. I had some concerns that this would cause a problem with end bit, but it is working out.
Because of the way Airfix designed the tail, it has a couple of seams on the top. As it is a bit hard to see in the original photo, I marked the seams in the next one.


Unfortunately, there was a clear panel over the gunners head. Not too difficult to get some clear plastic and make the panel but...
Joel_W
Associate Editor New York, United States
Joined: December 04, 2010
KitMaker: 11,666 posts
AeroScale: 7,410 posts
Posted: Wednesday, December 14, 2016 - 04:08 AM UTC
Karl,
You're making slow but steady progress. Looking forward to seeing the Fortress ready for some primer.
Joel
On my Workbench:
Monogram 1/24 scale 427 Shelby Cobra
Just Completed:
Beemax 1/24 scale BMW M3 E30 1992 Evolution II