_GOTOBOTTOM
World War II
Discuss WWII and the era directly before and after the war from 1935-1949.
Hosted by Rowan Baylis
1/48 Airfix BP Defiant
kahunaminor
_VISITCOMMUNITY
New South Wales, Australia
Joined: April 06, 2008
KitMaker: 151 posts
AeroScale: 141 posts
Posted: Friday, April 08, 2016 - 09:52 AM UTC
Hello fellow modellers,
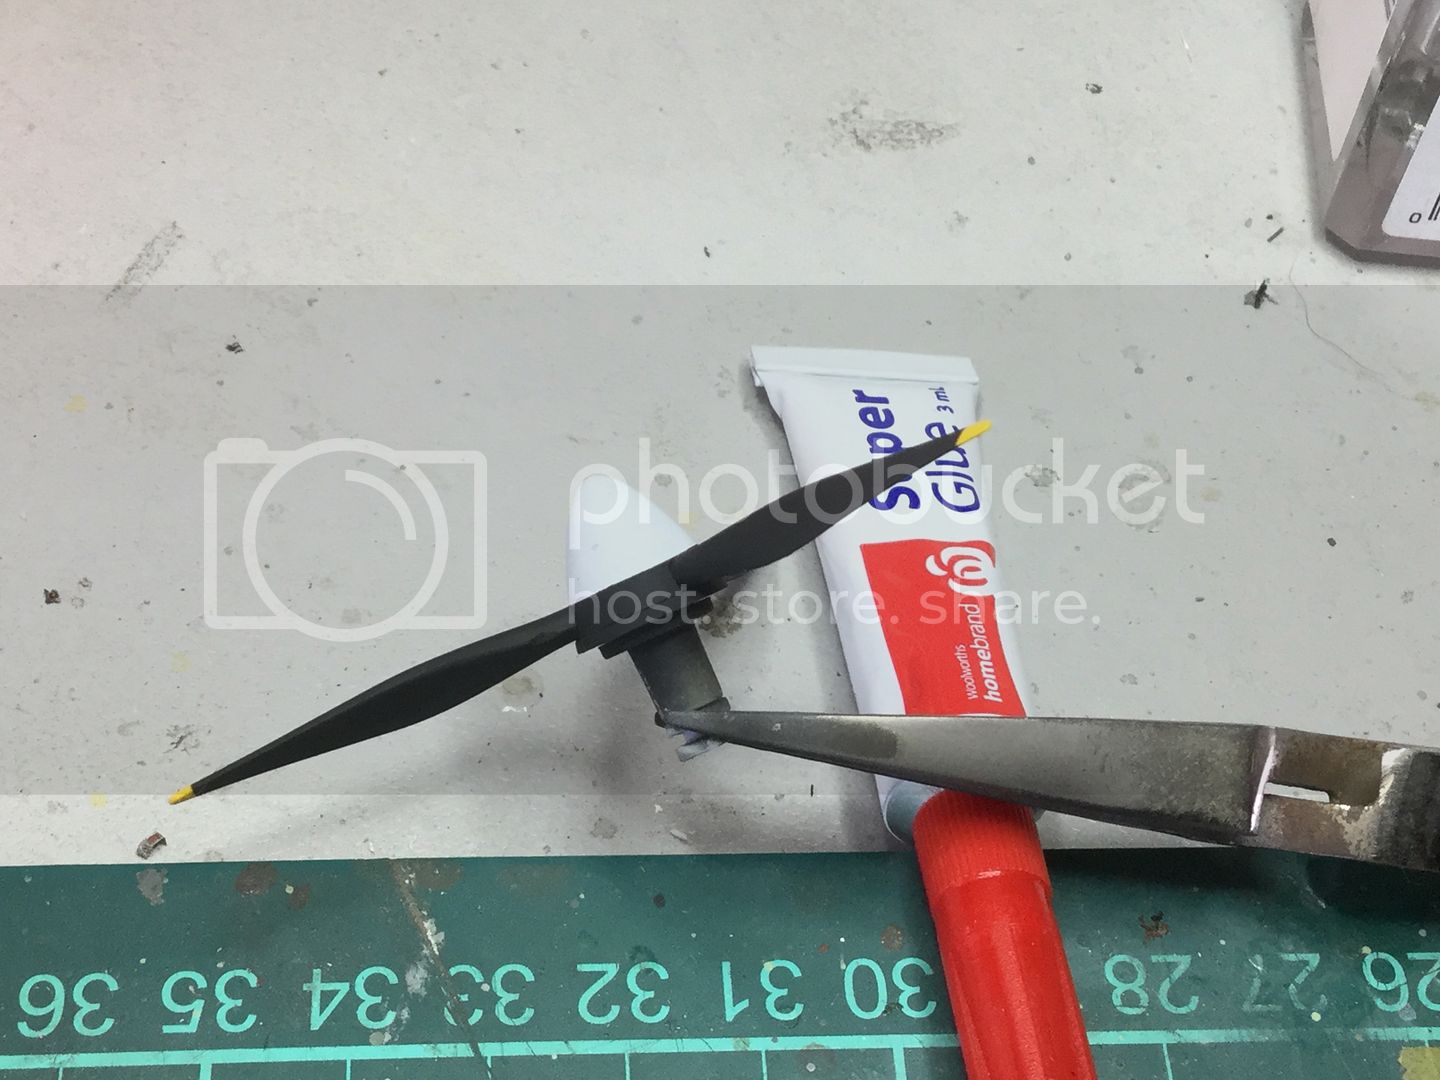
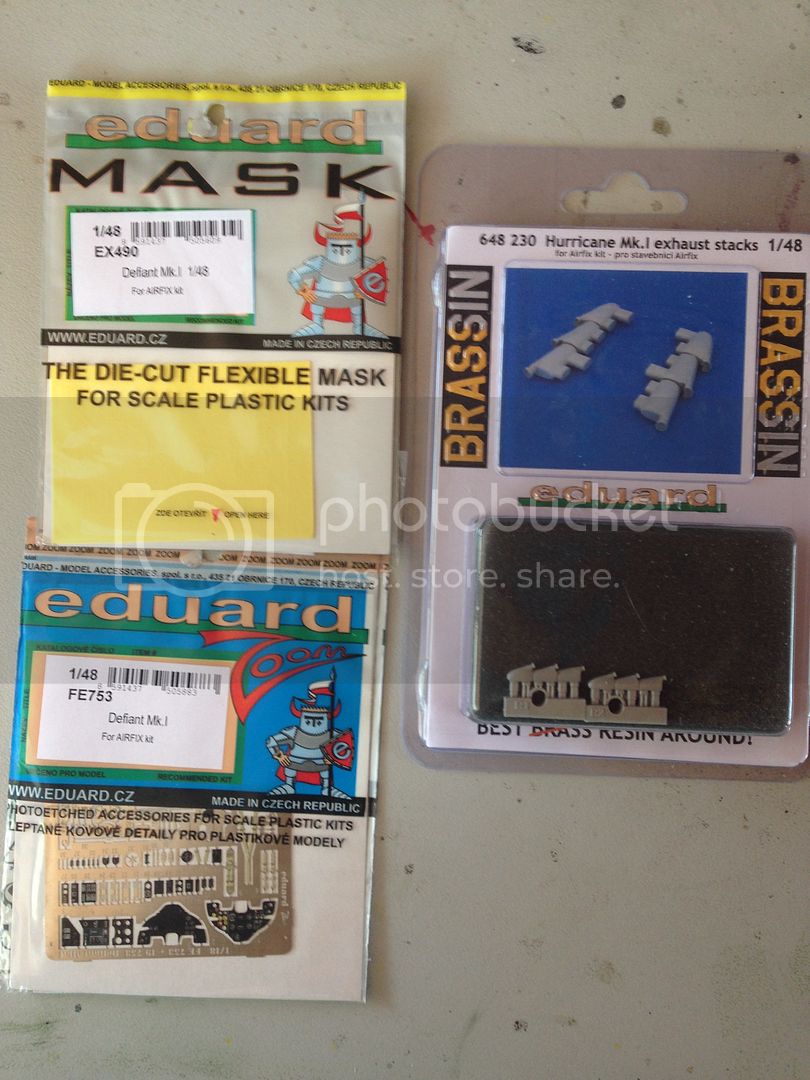
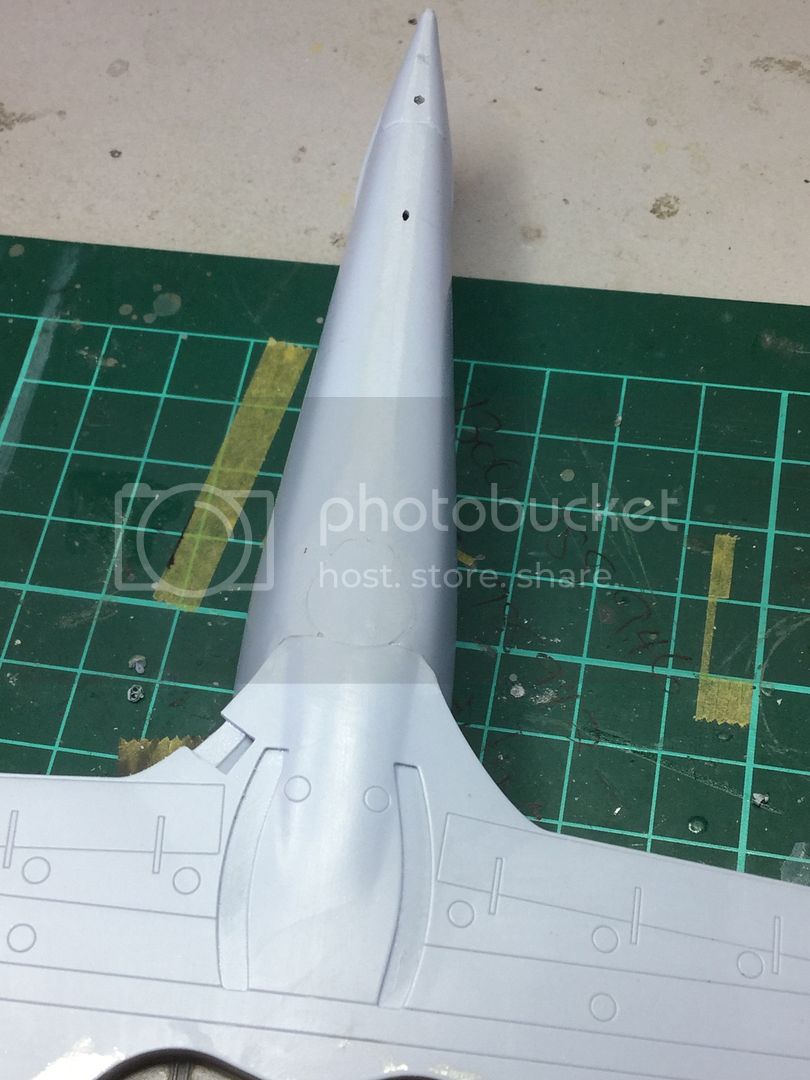
I present my WIP of the new Airfix BP Defiant in 48 scale. Lots of words abound the internet concerning the quality of the kit and I, for one, am very pleased with this rendition. I am awaiting the arrival of Eduard's Zoom PE set, mask and Hurricane Mk I exhausts to go with the build, so I am limited to how far I can progress.

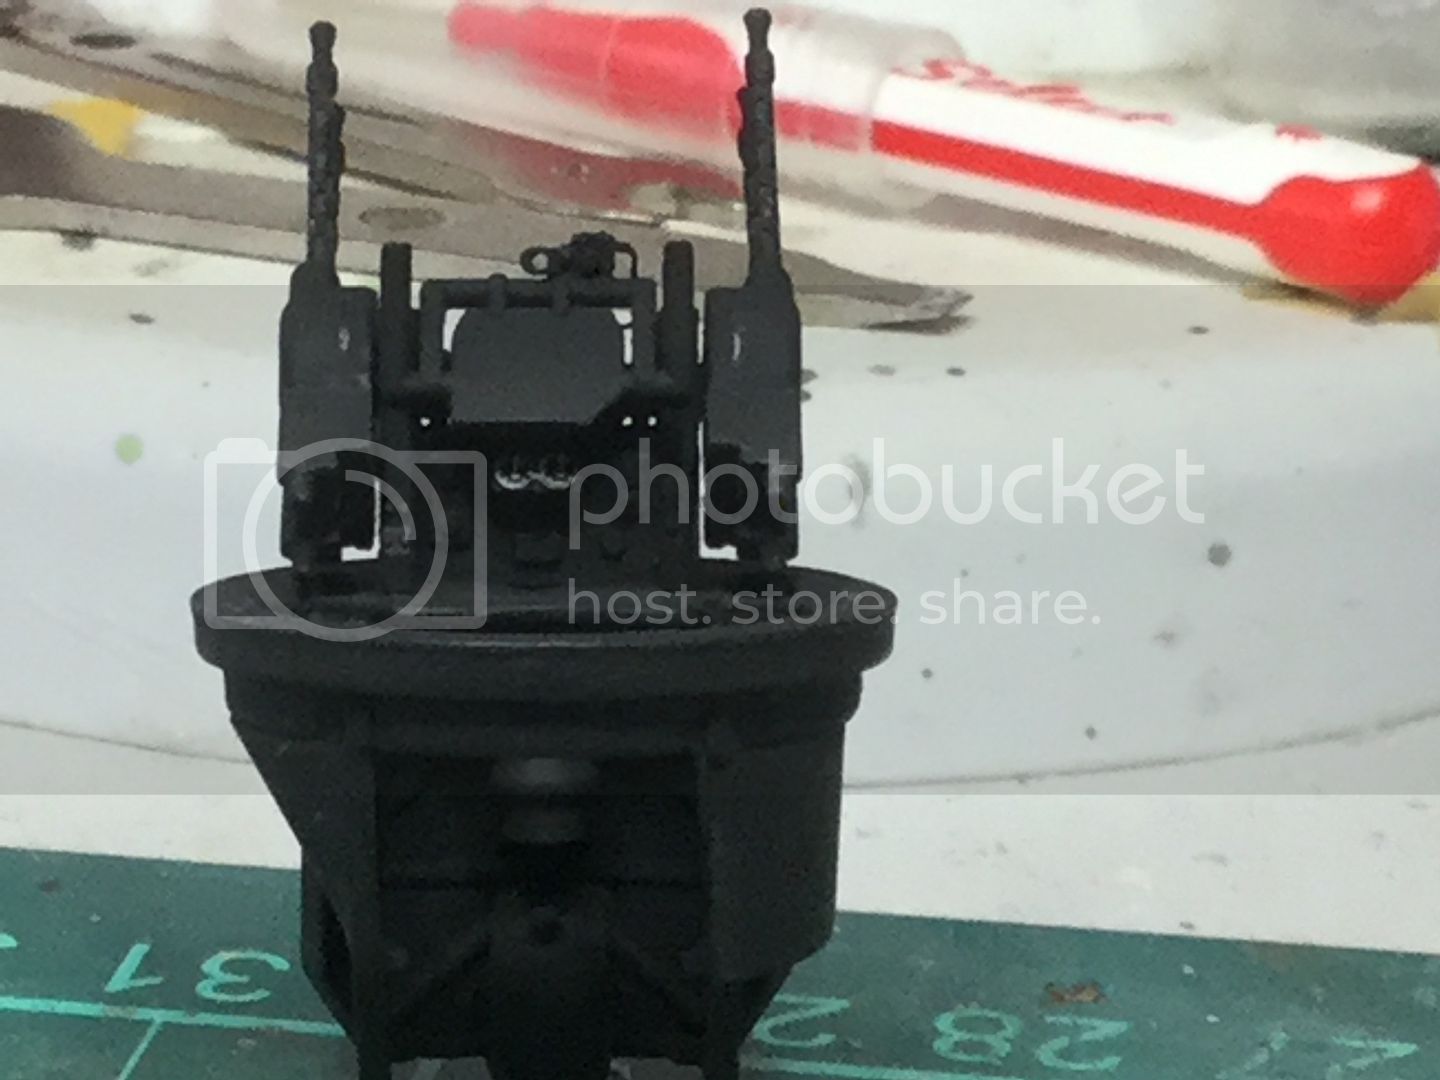
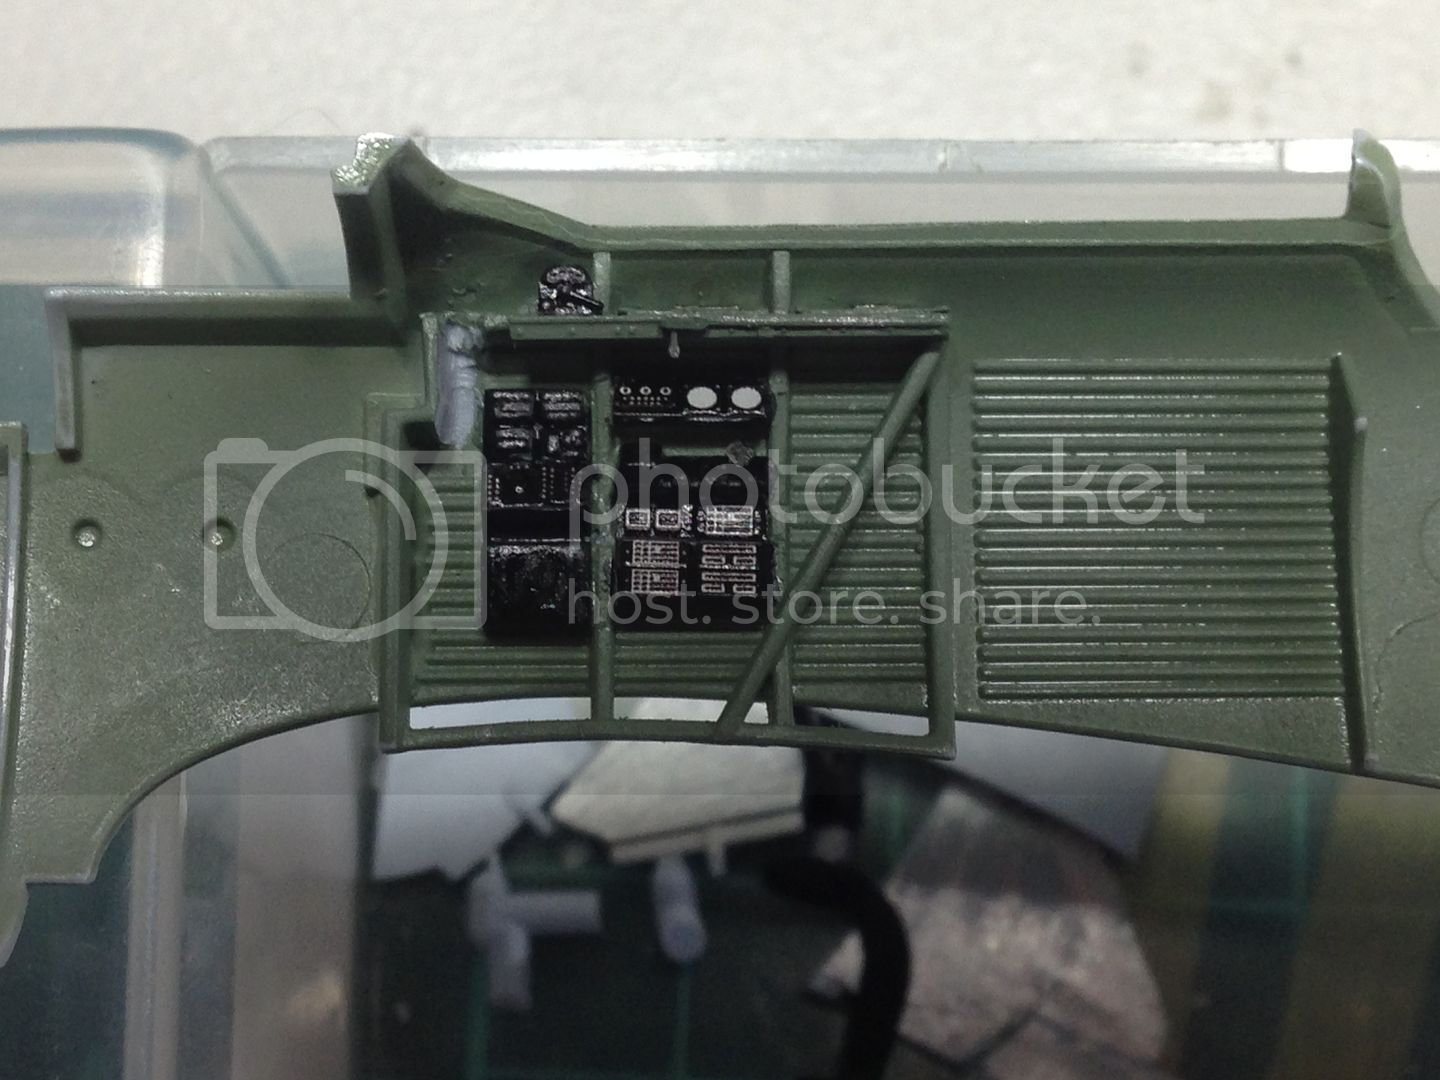
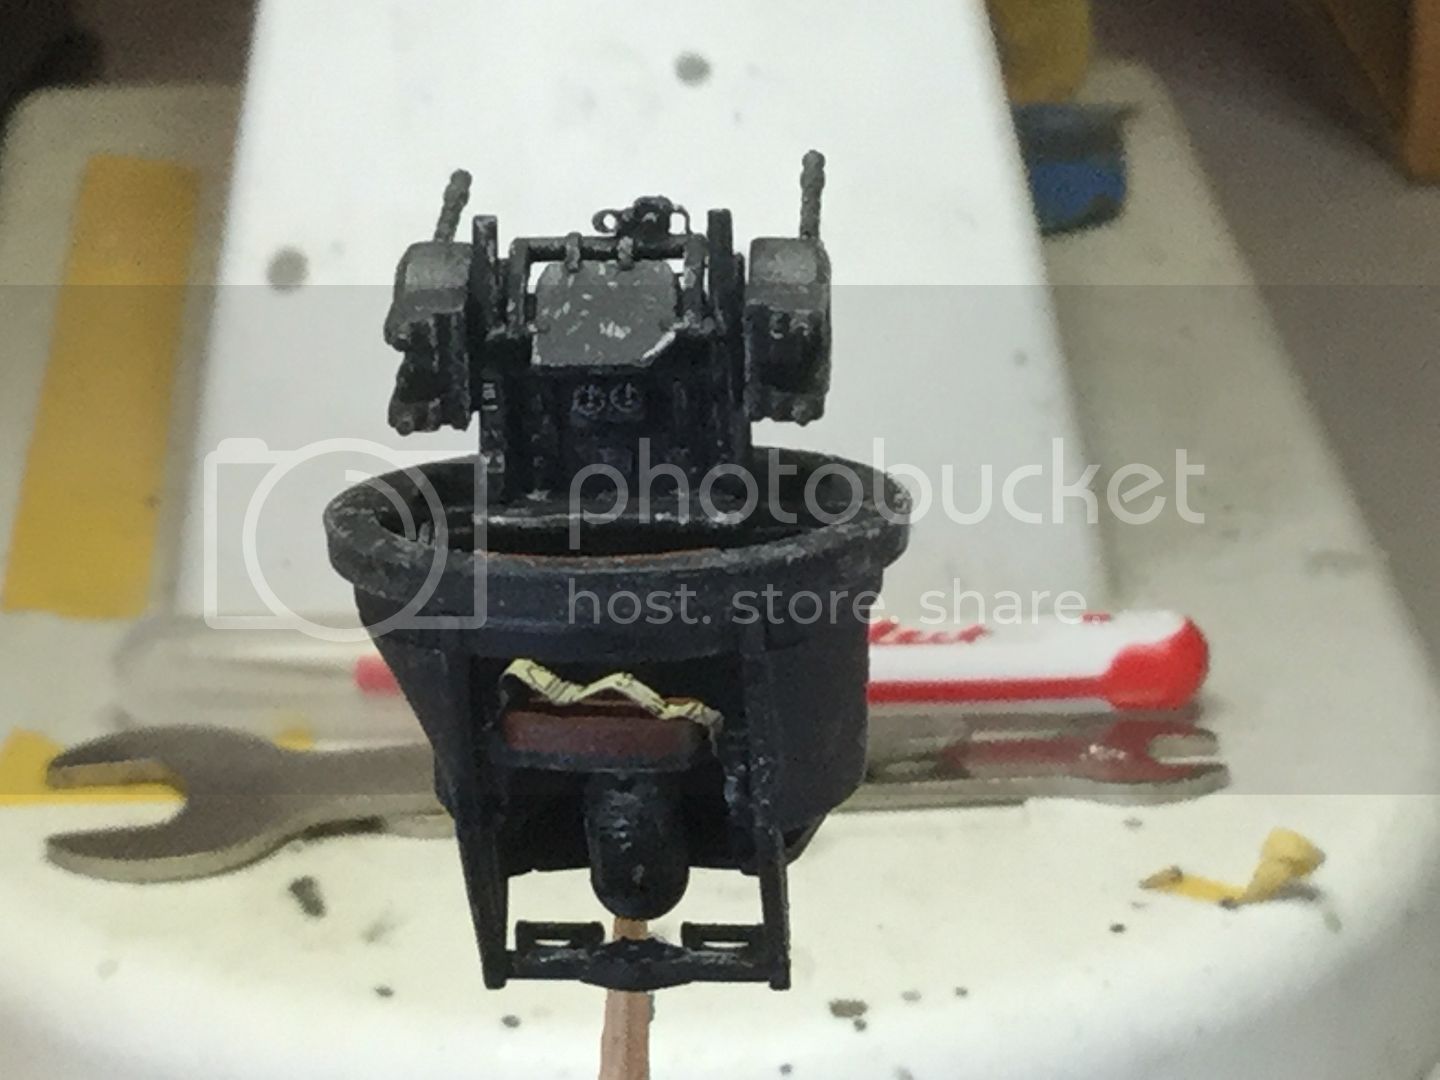
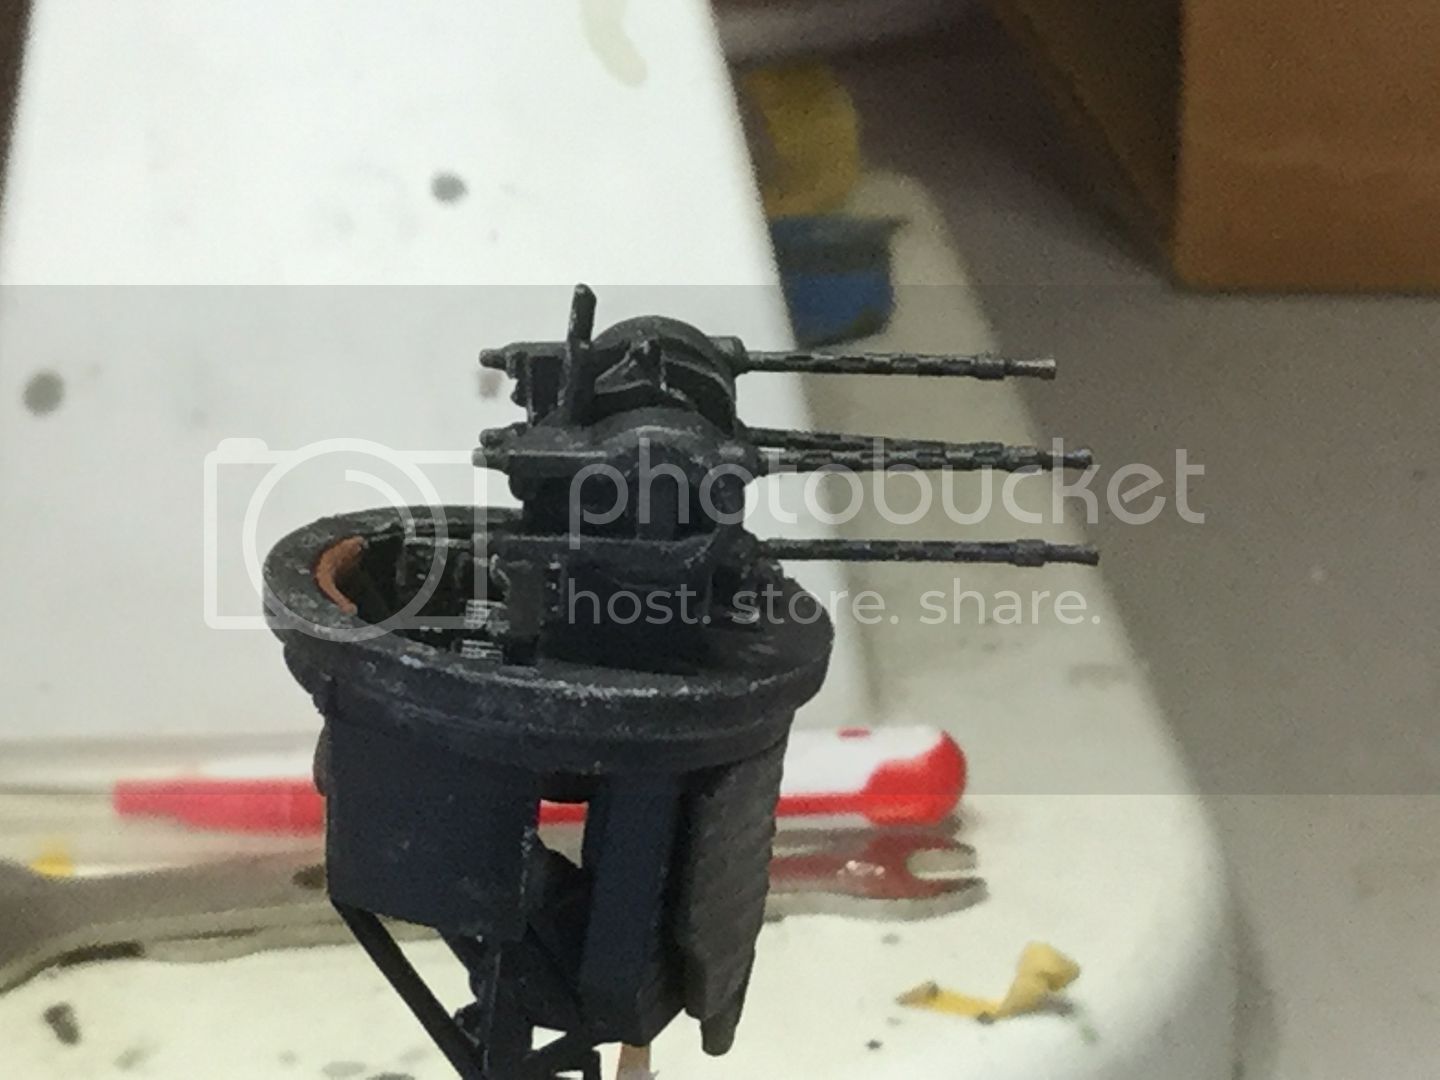
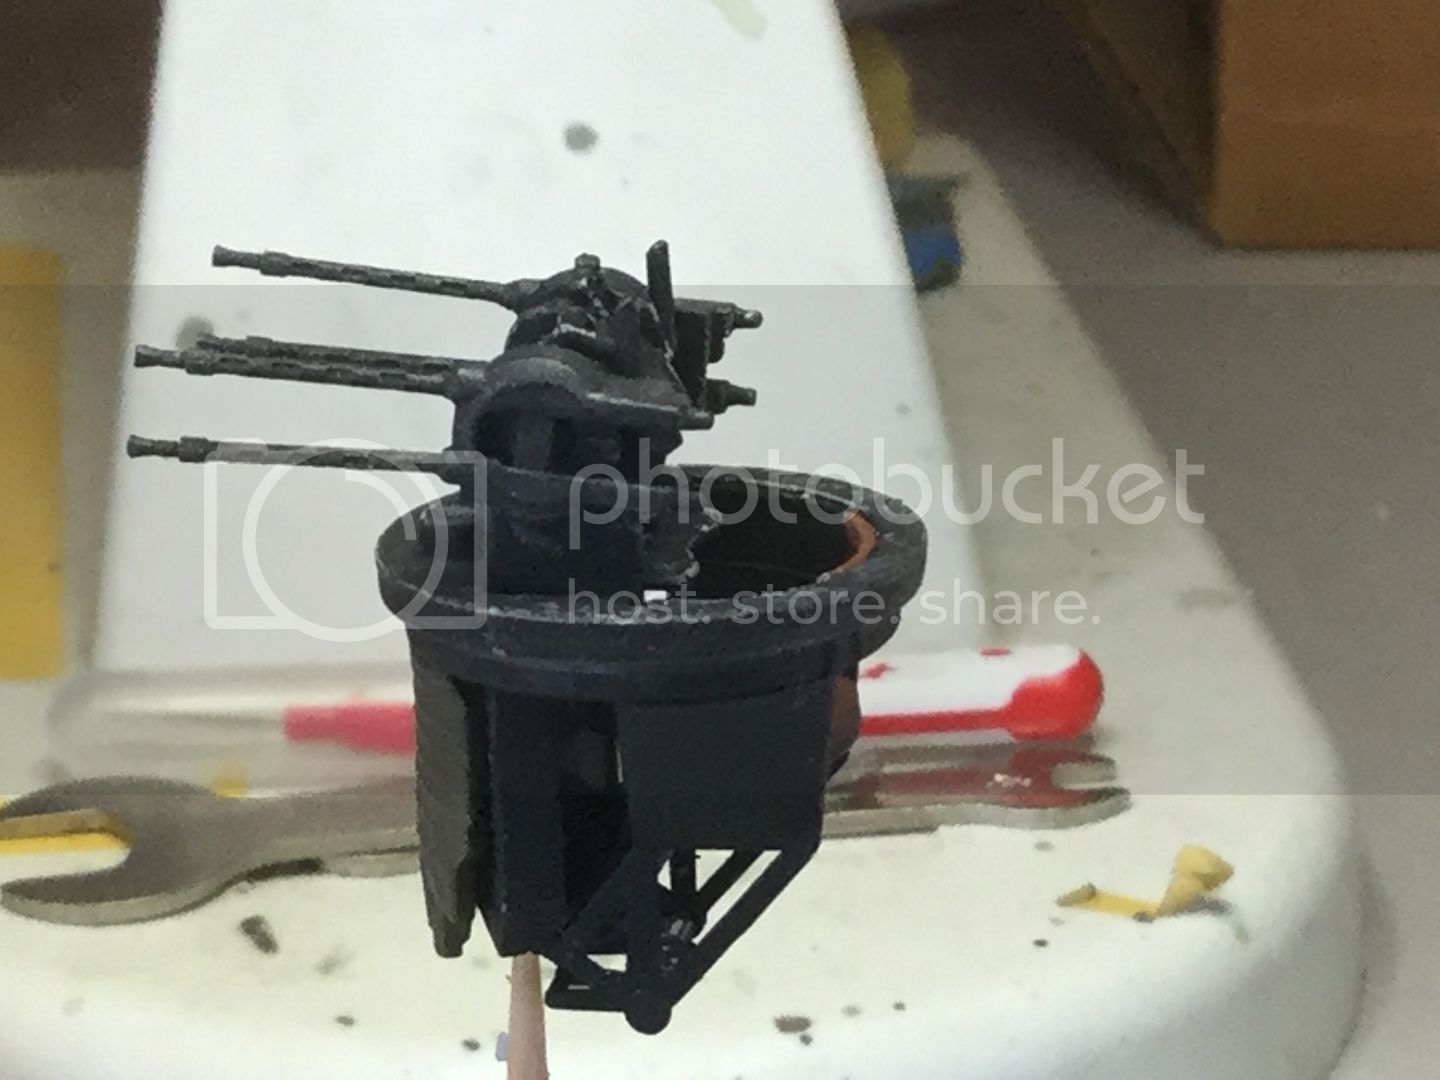
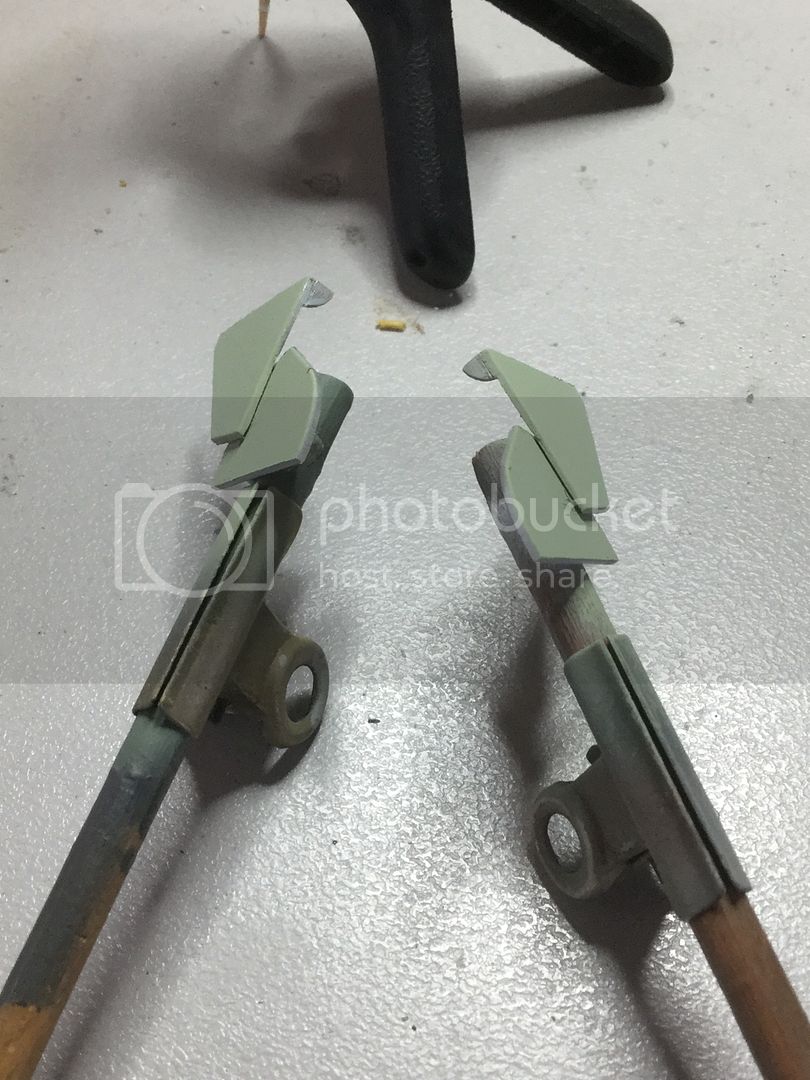
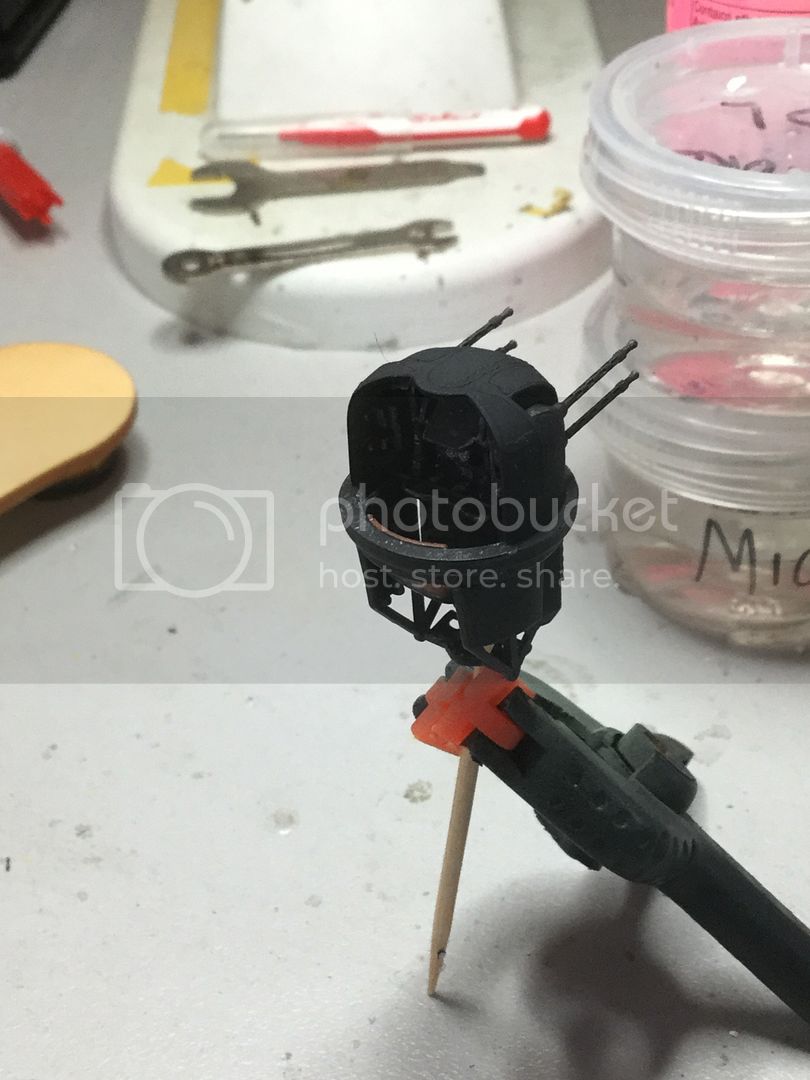
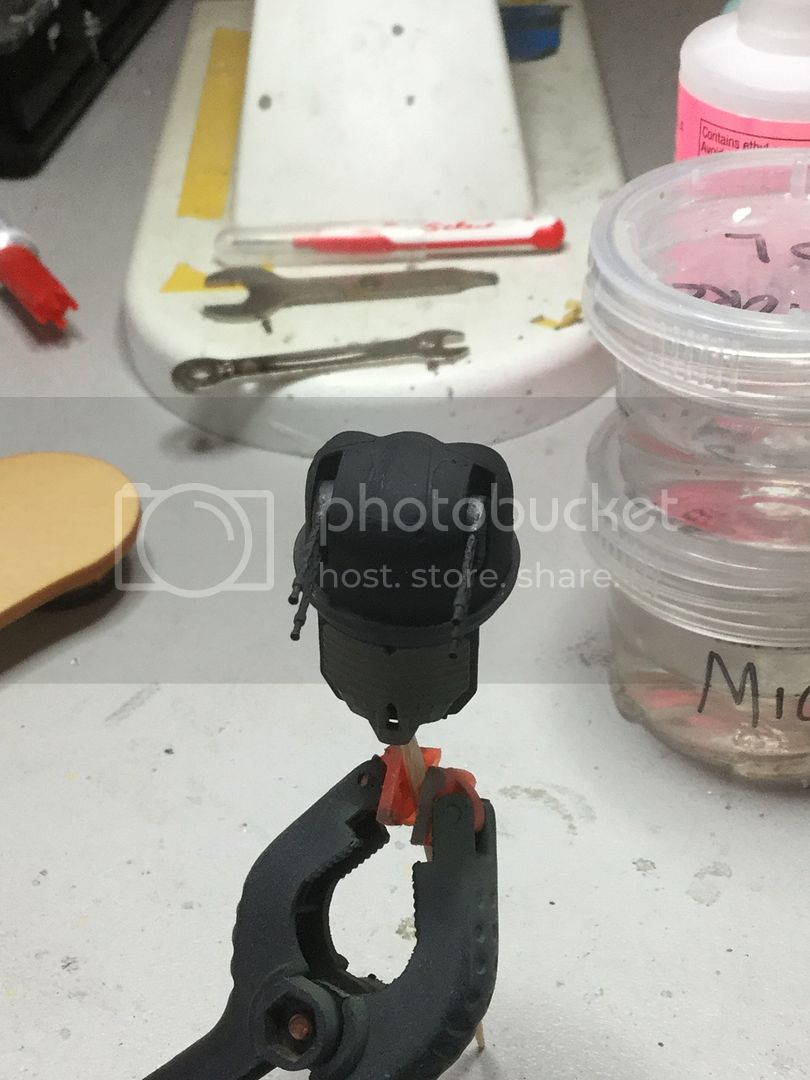
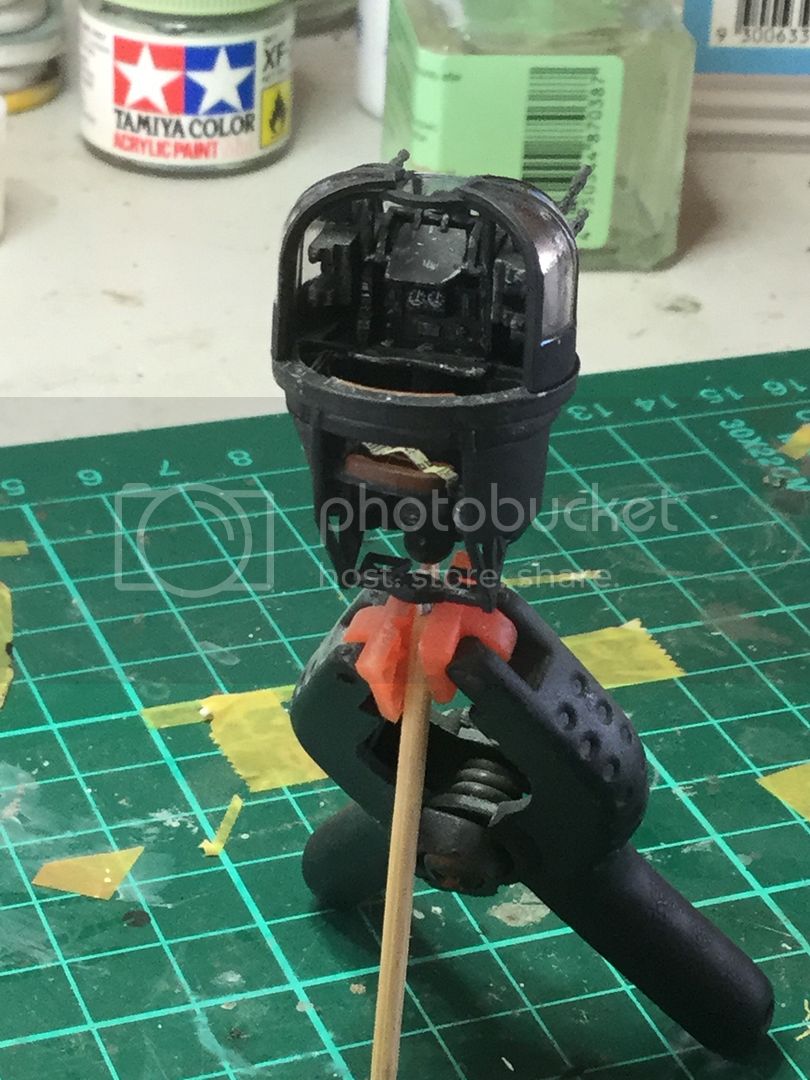
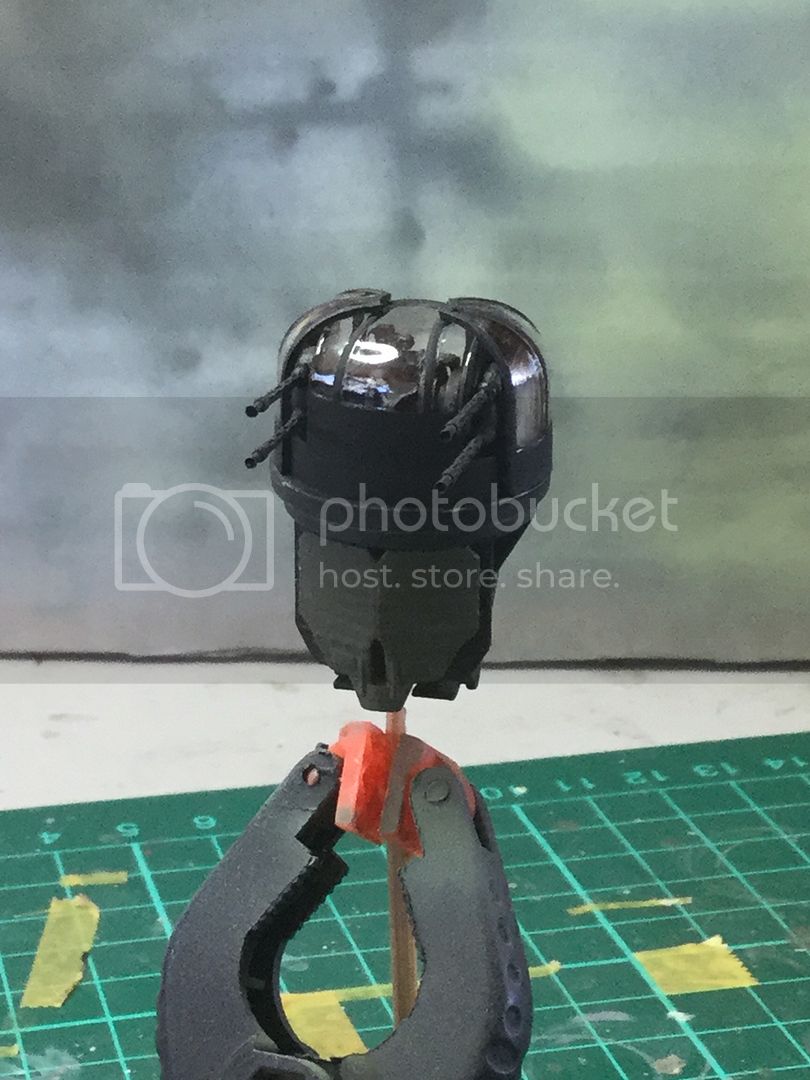
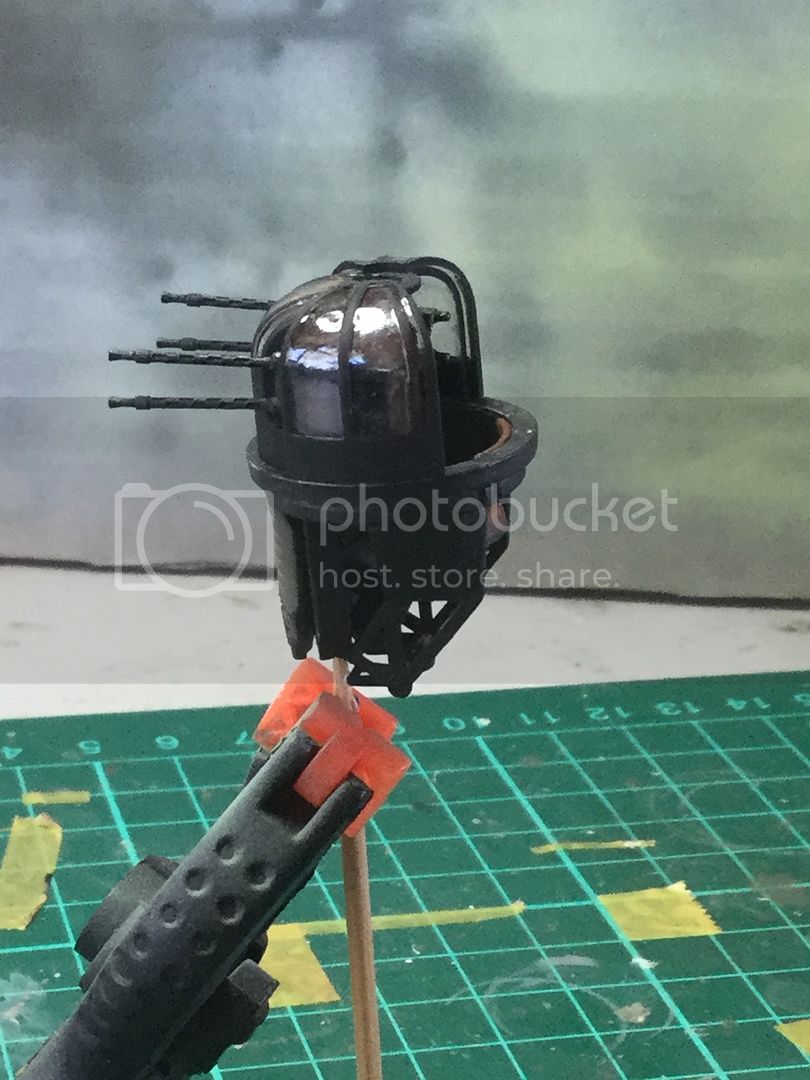
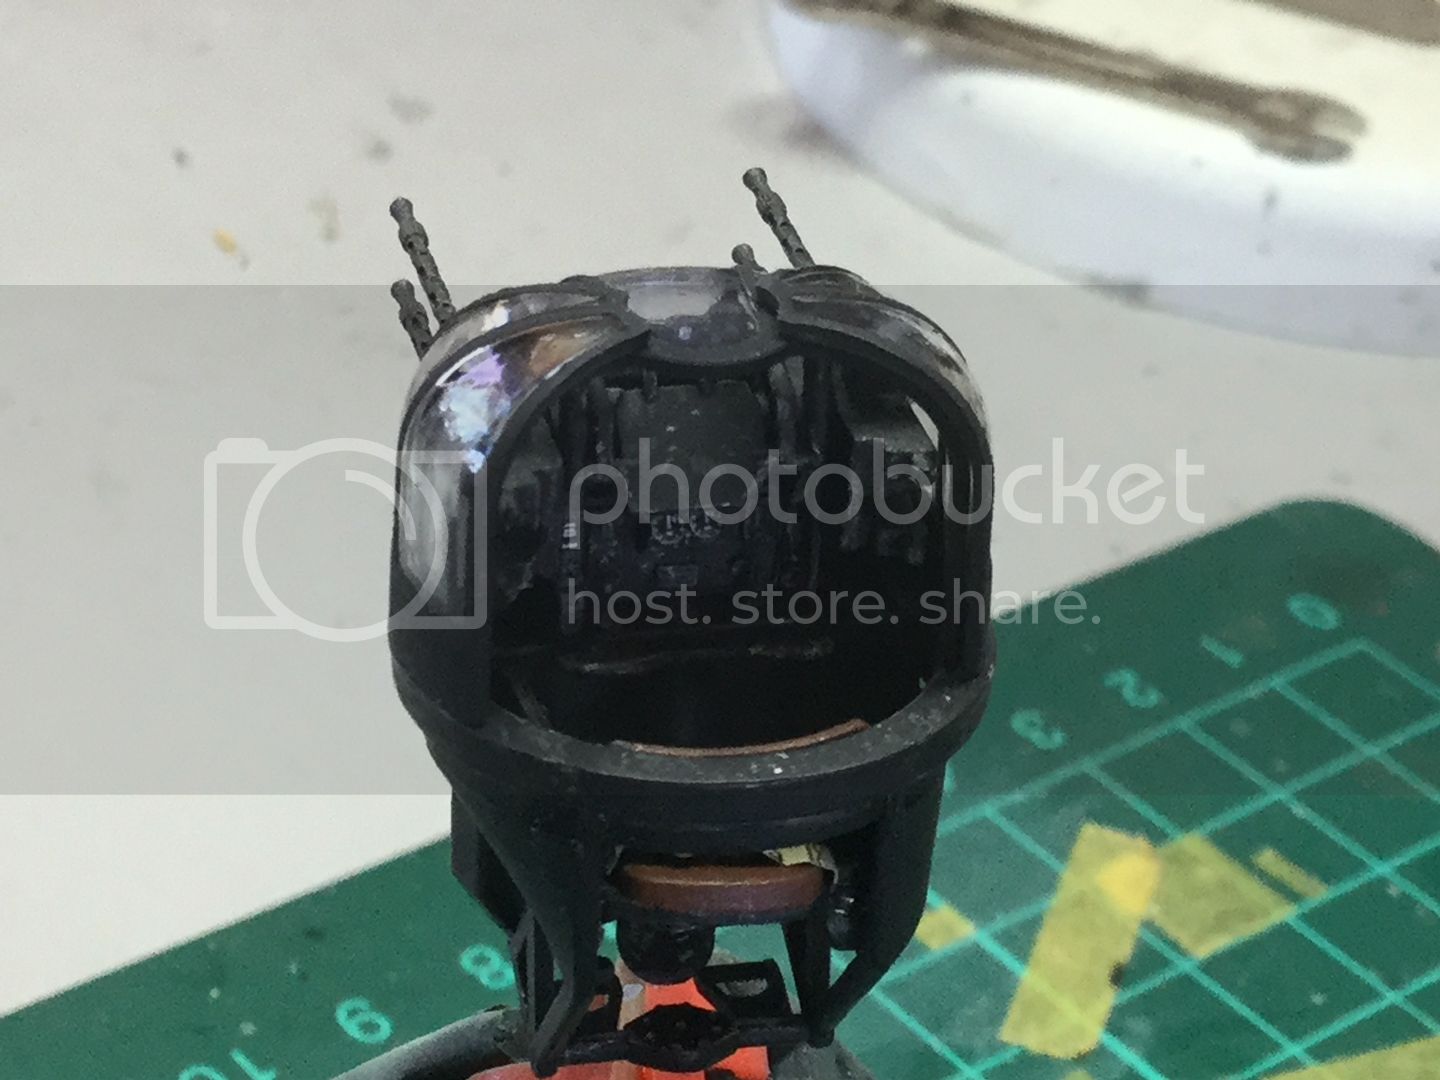
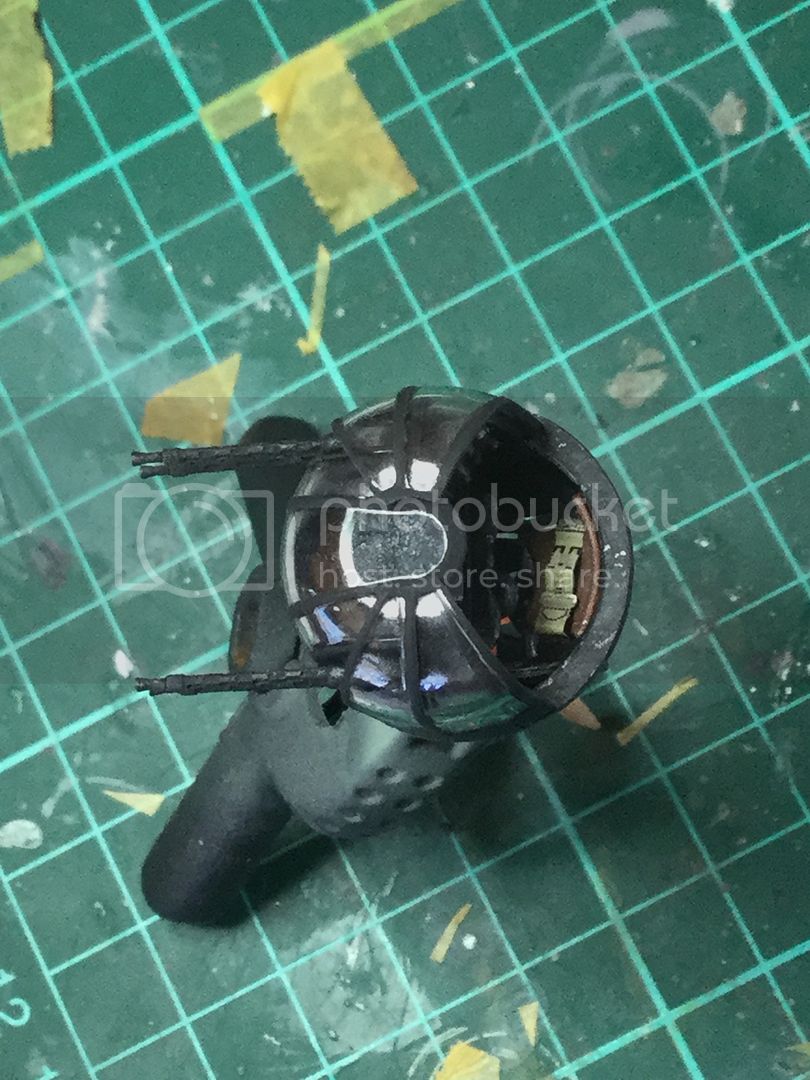
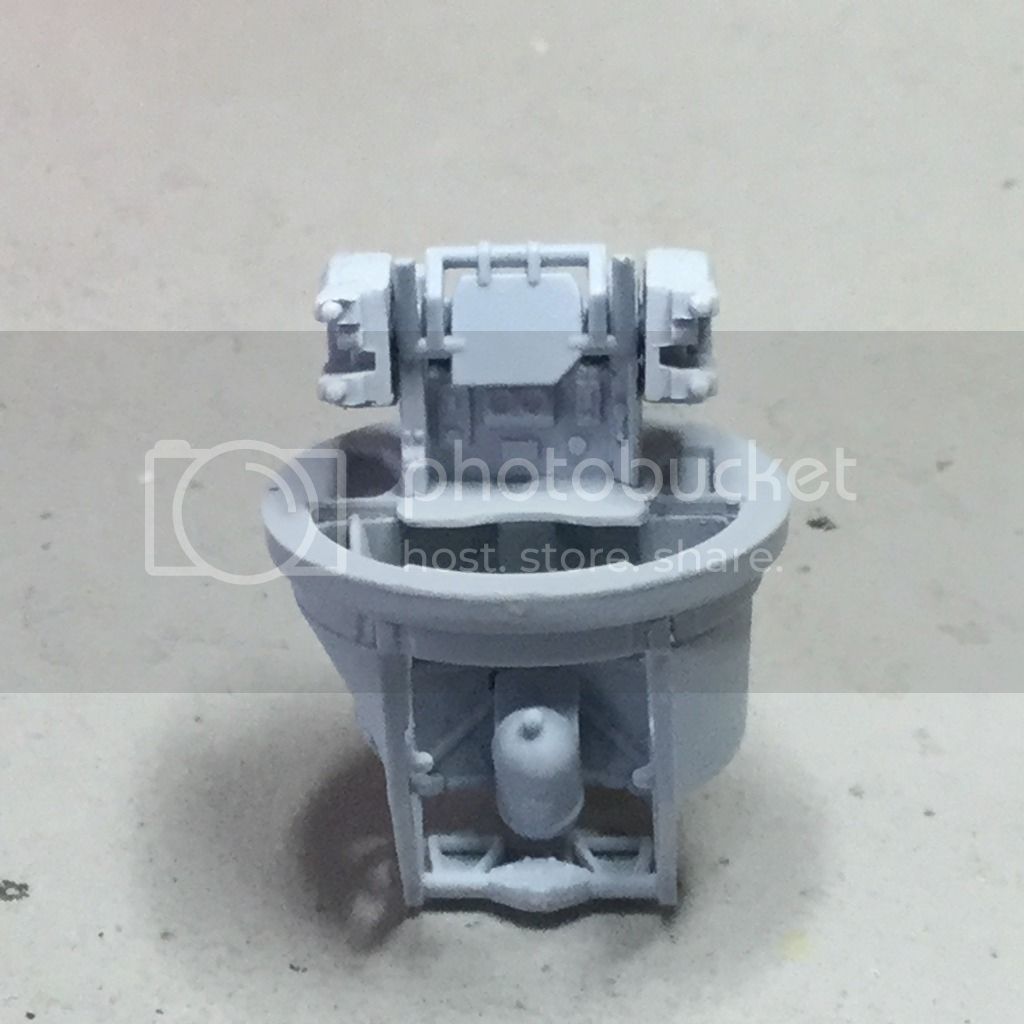
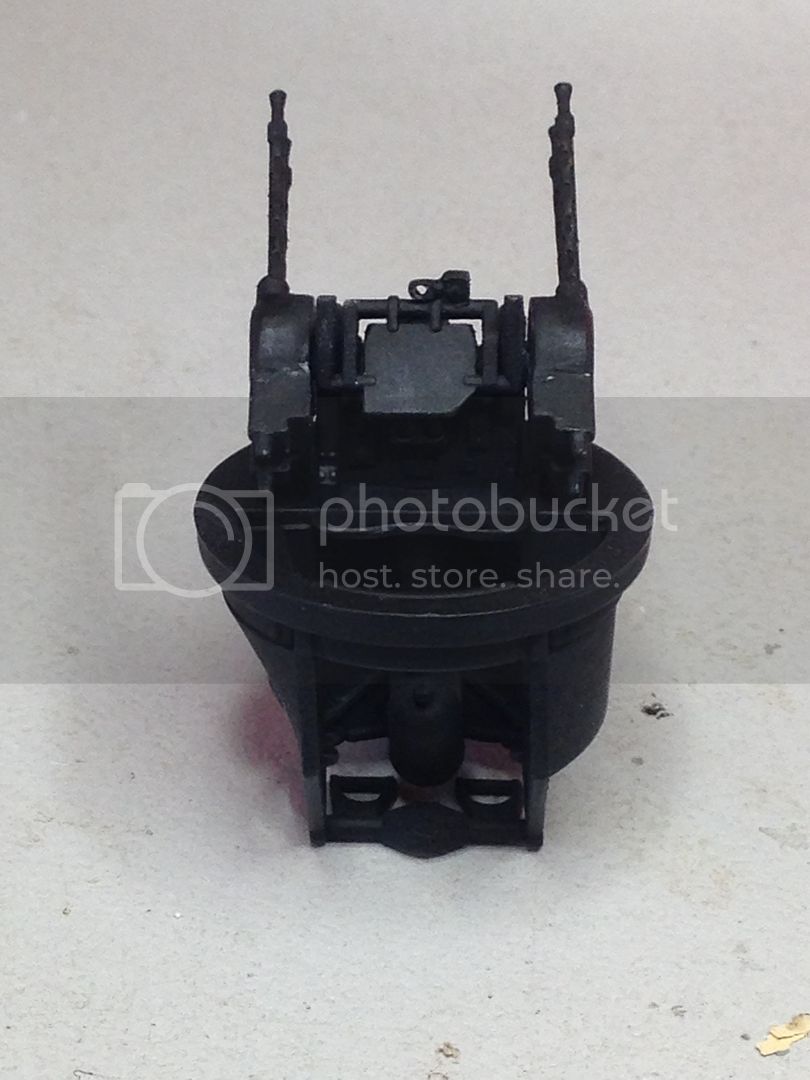
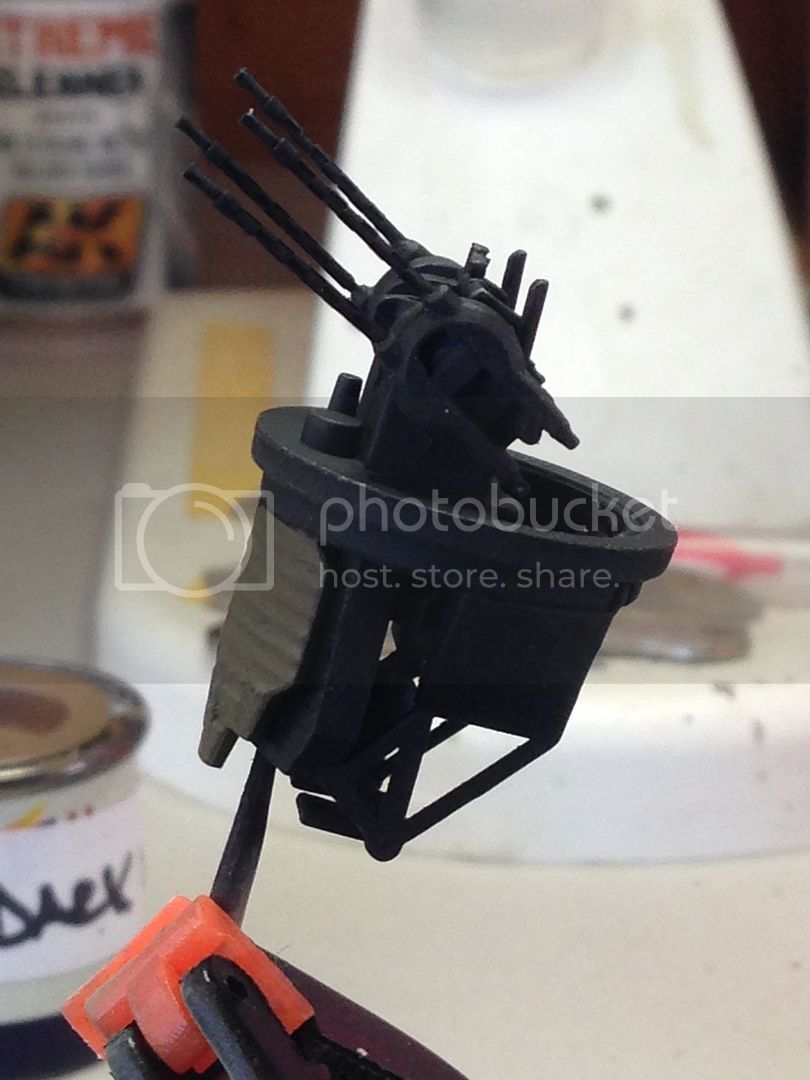
I started with the turret which includes a wealth of detail and excellent clear pieces including a choice of closed or open turret glazing. I left the vertical detail in place and will only use the PE on the gunner's horizontal controls. I replaced the barrels with Master .303 Brownings:


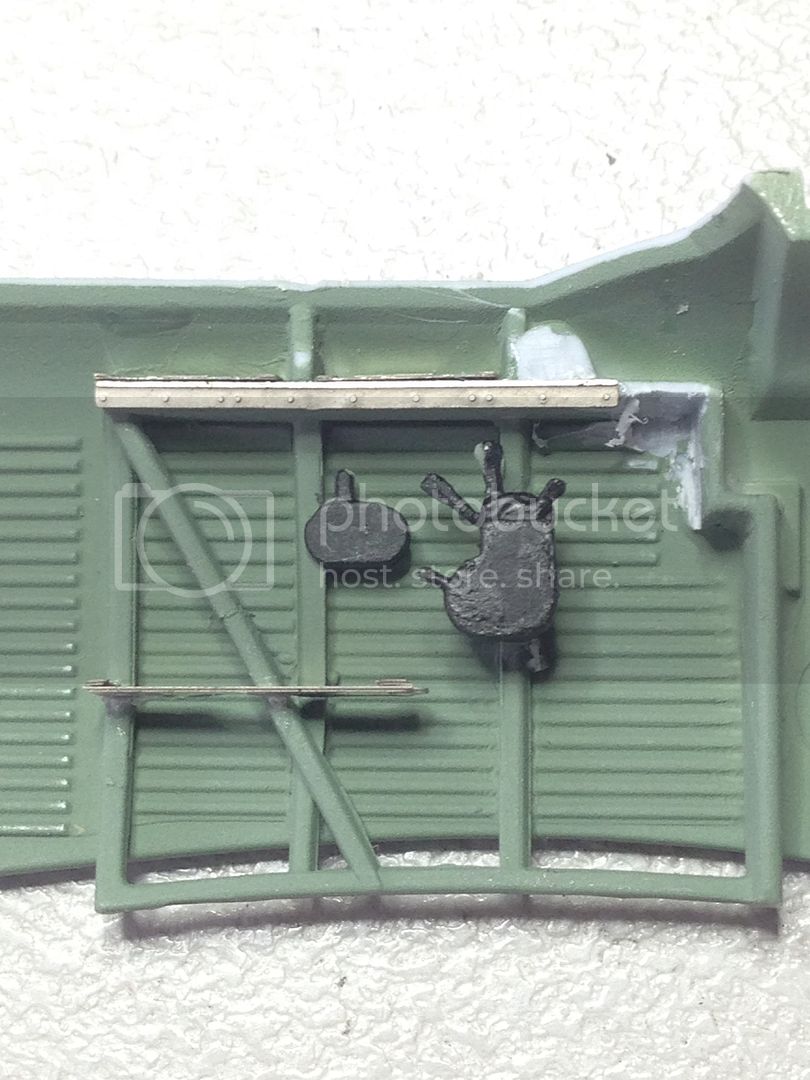
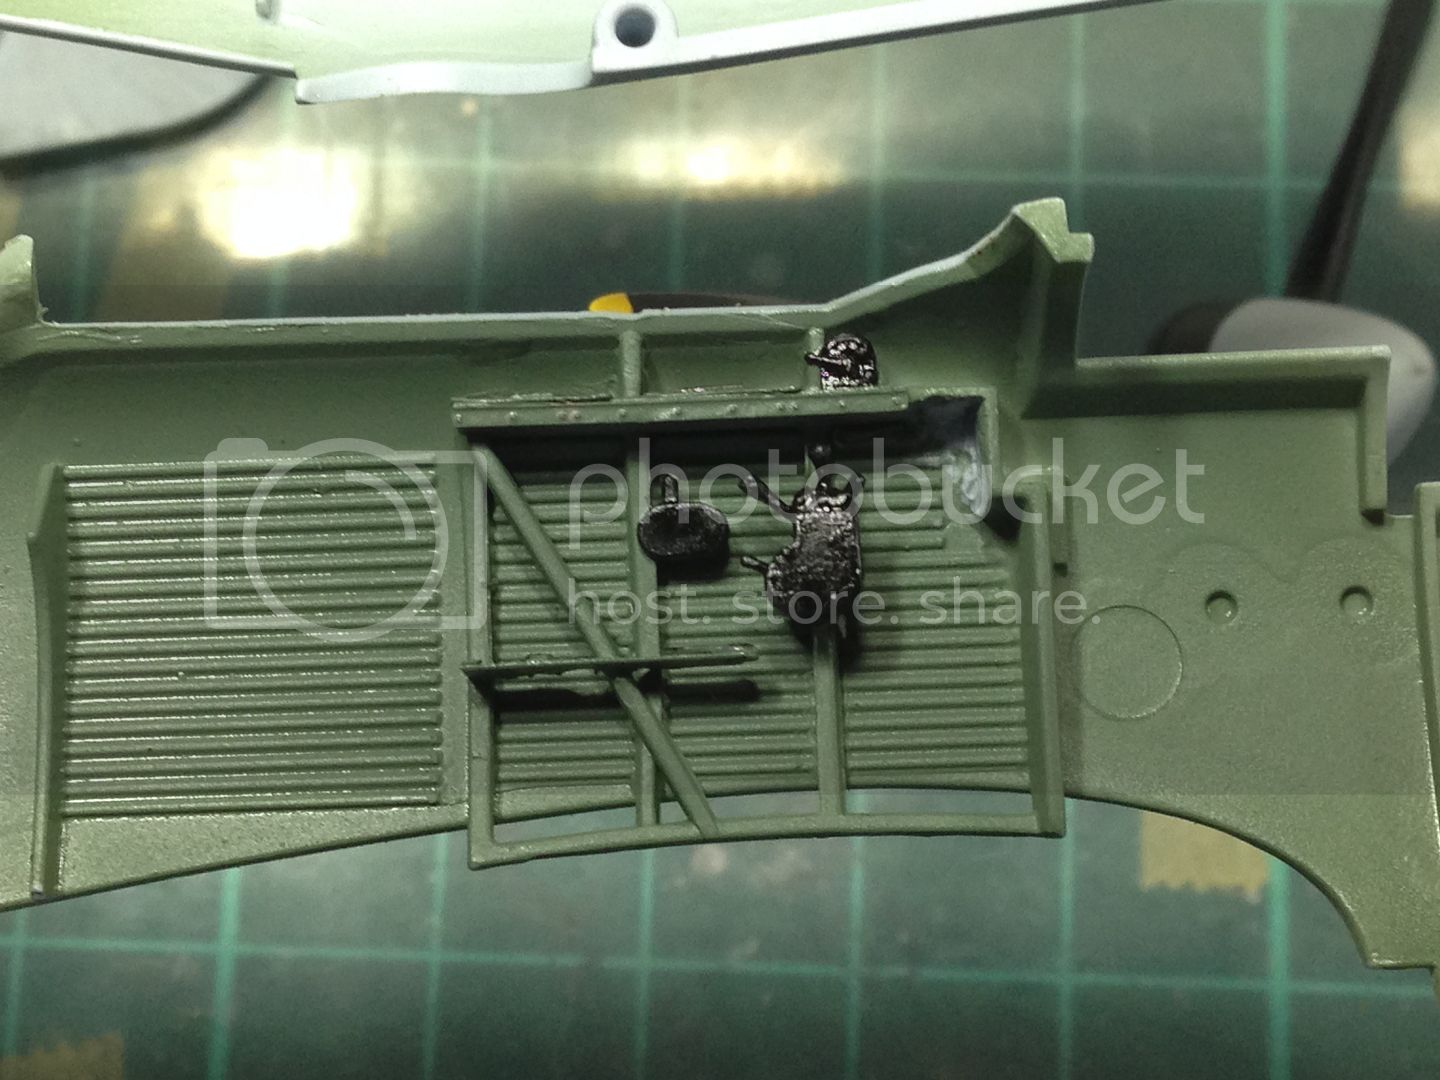
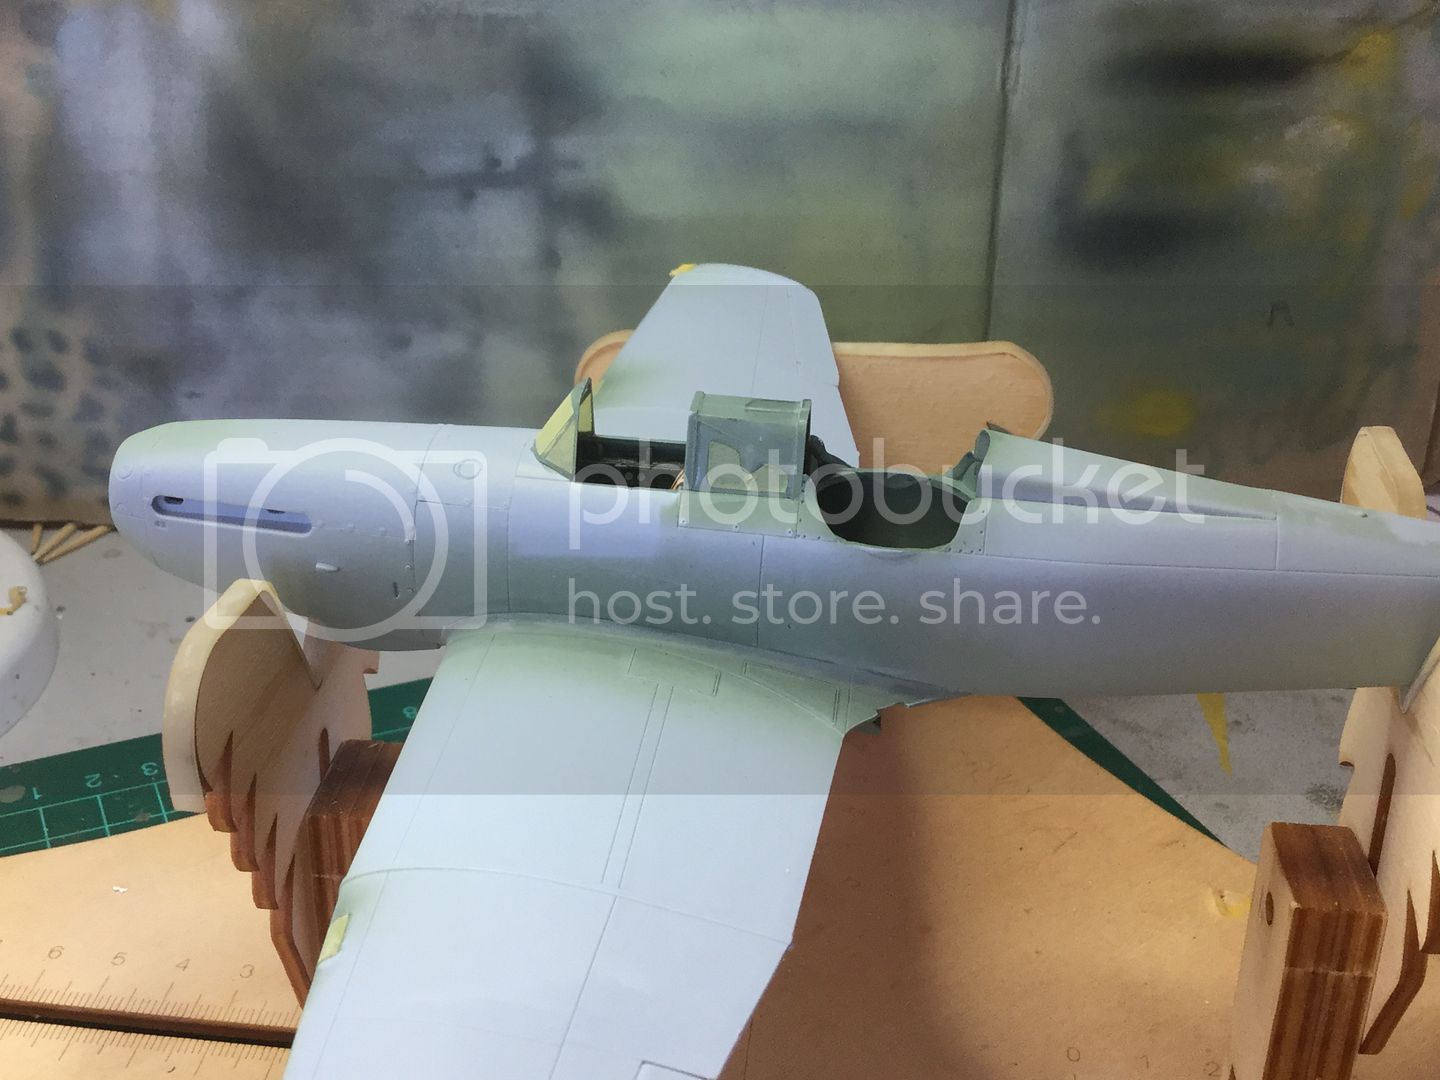
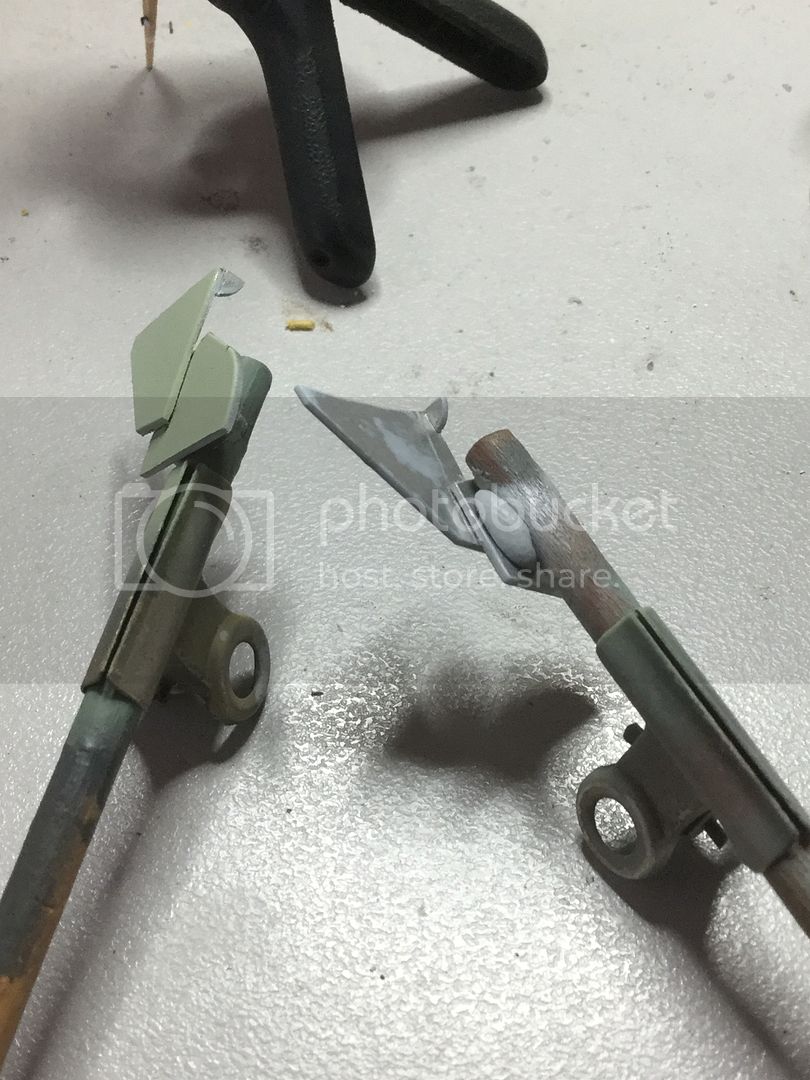
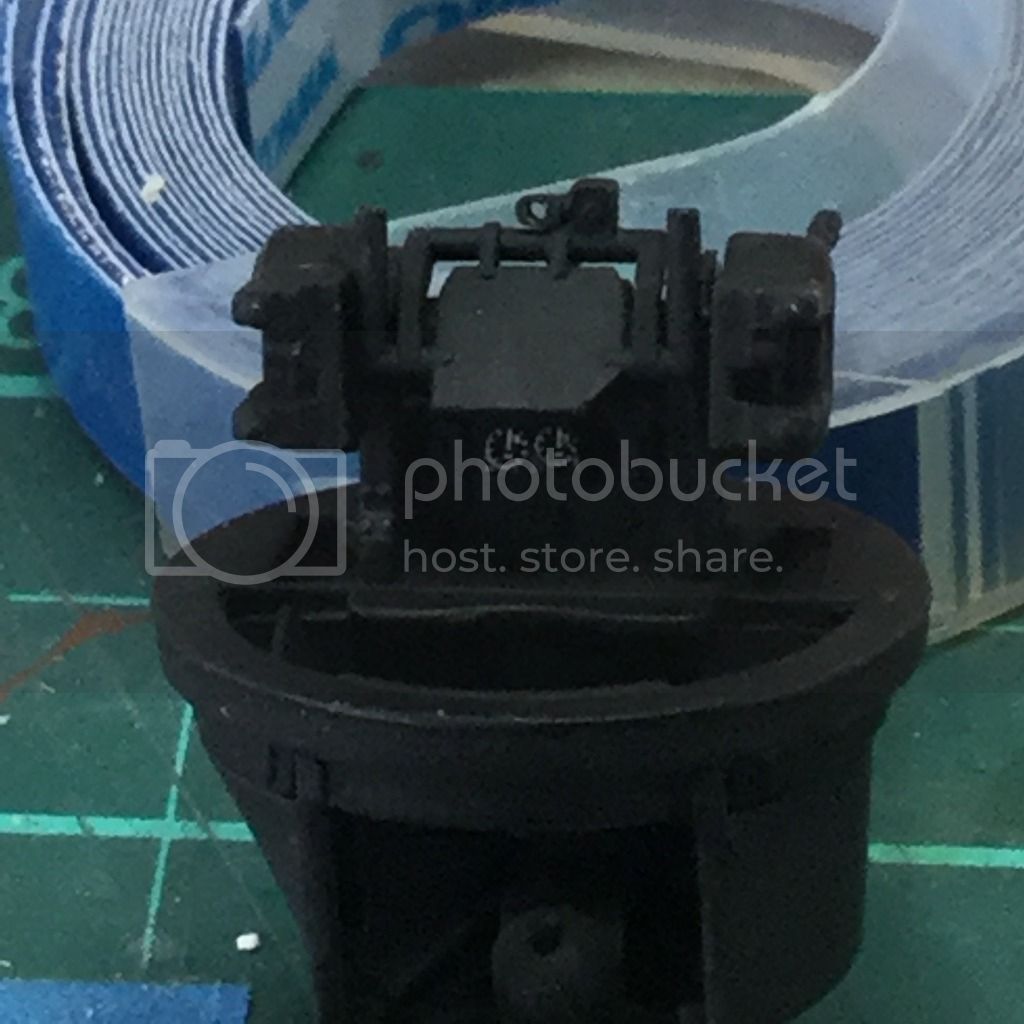
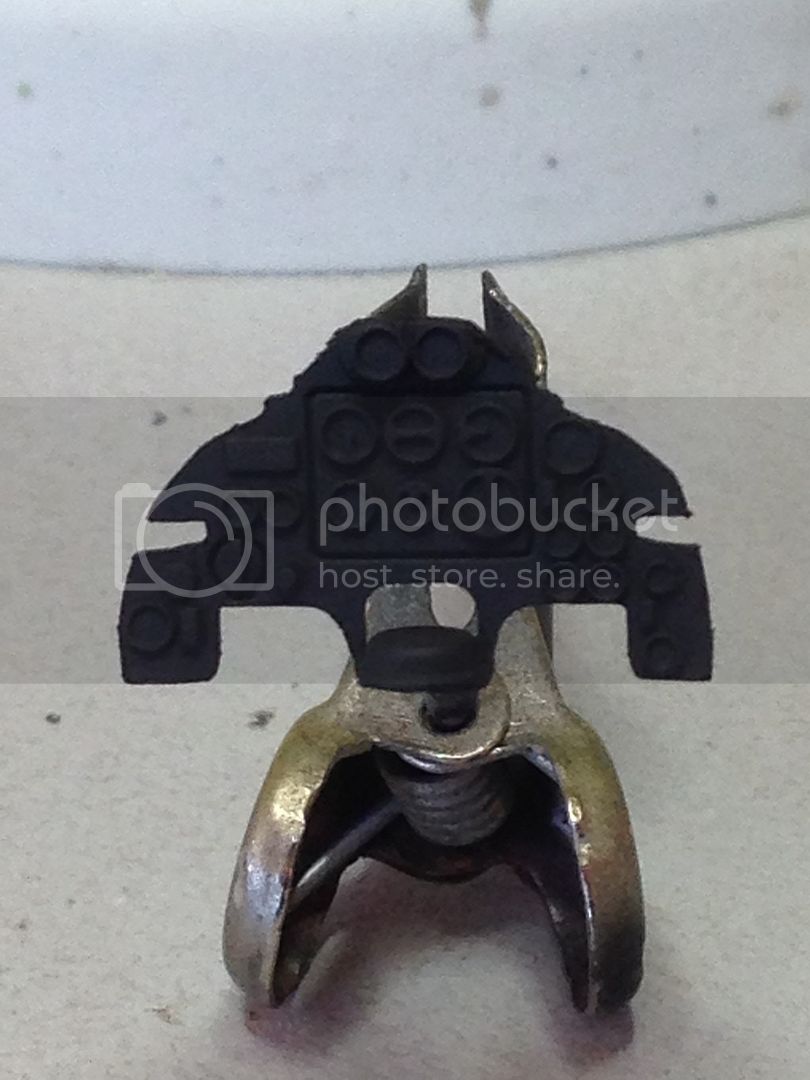
There is no gun sight included, so after a search of the web, I scratch built a simple Mk IIIA gun sight and mounted it accordingly (sideways):


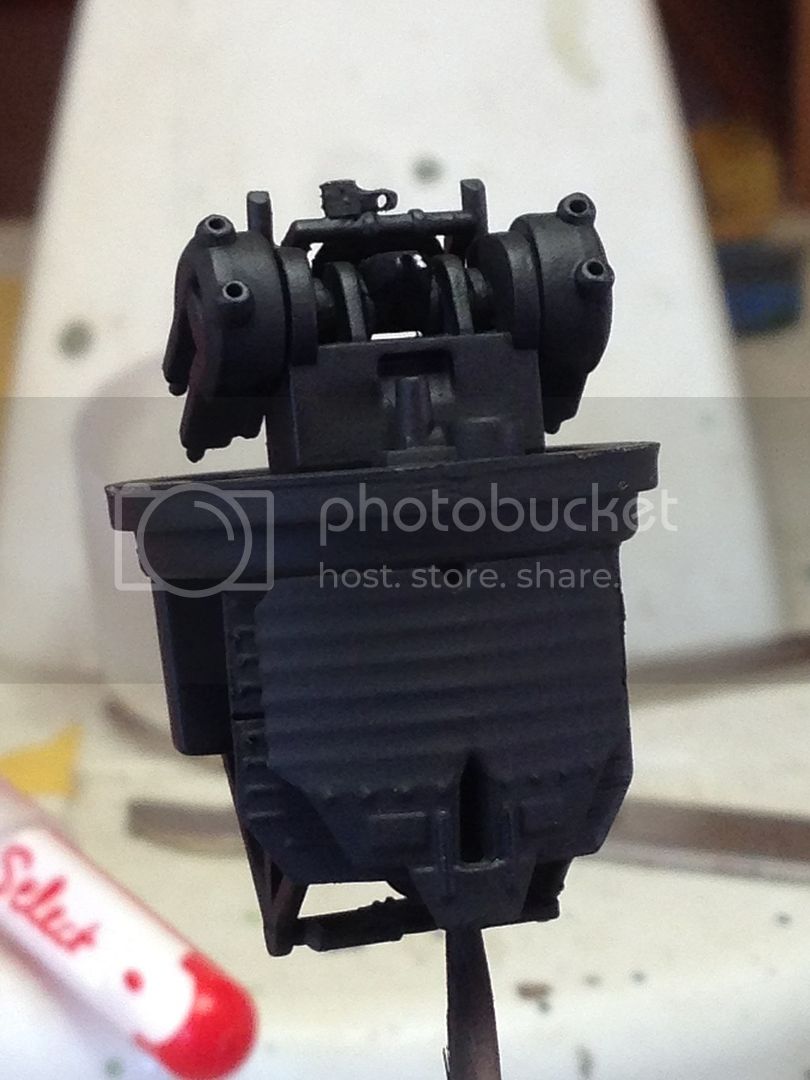
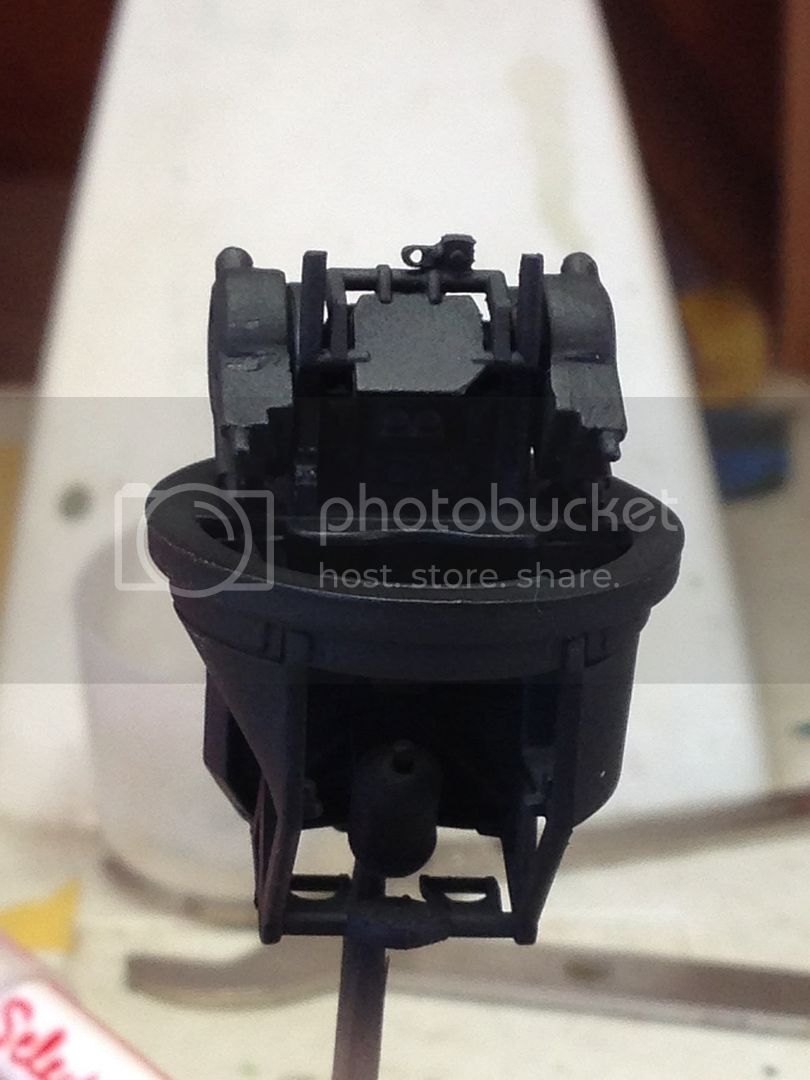
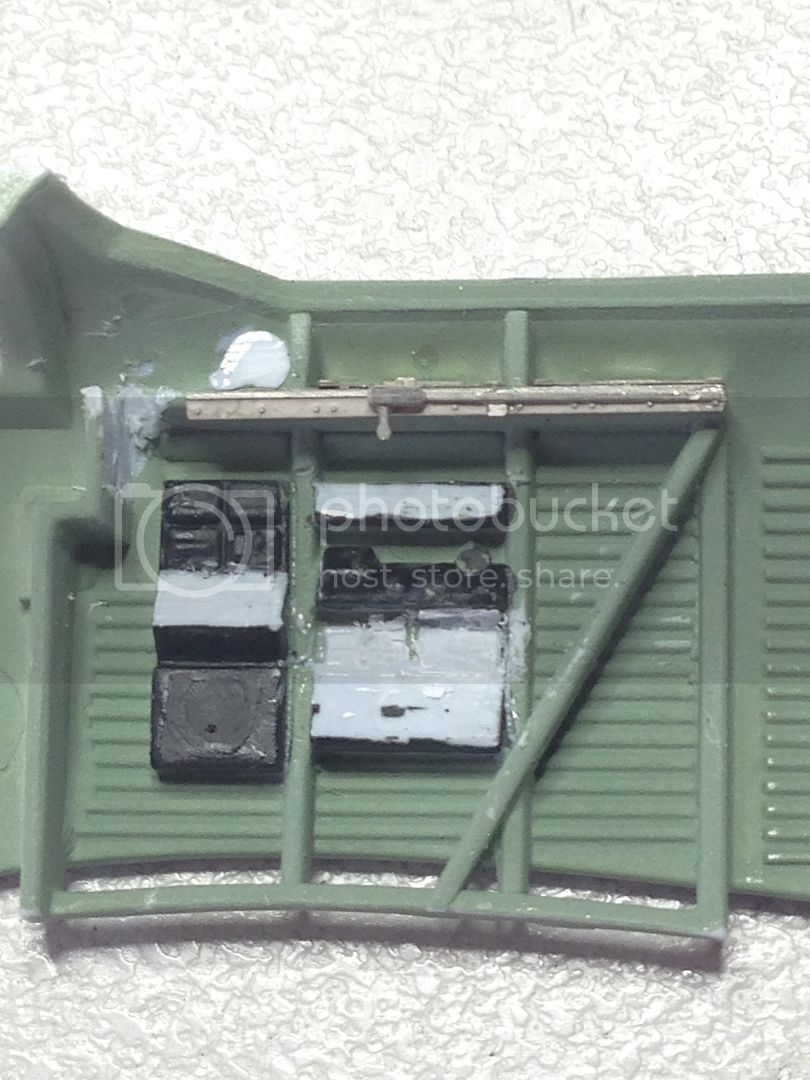
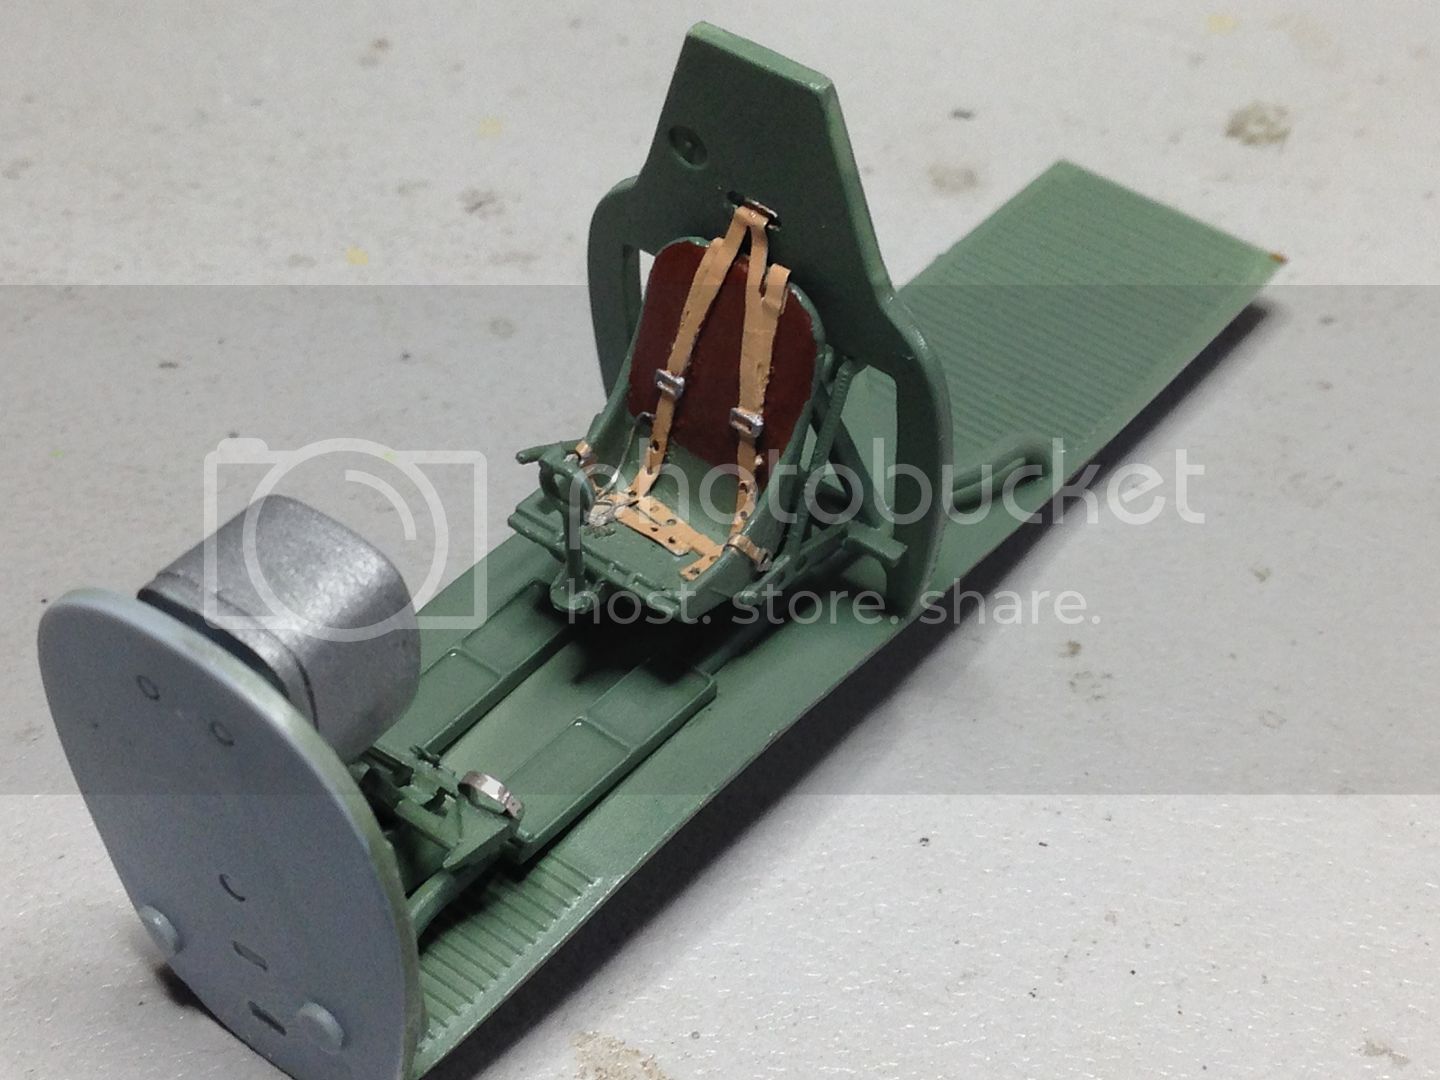
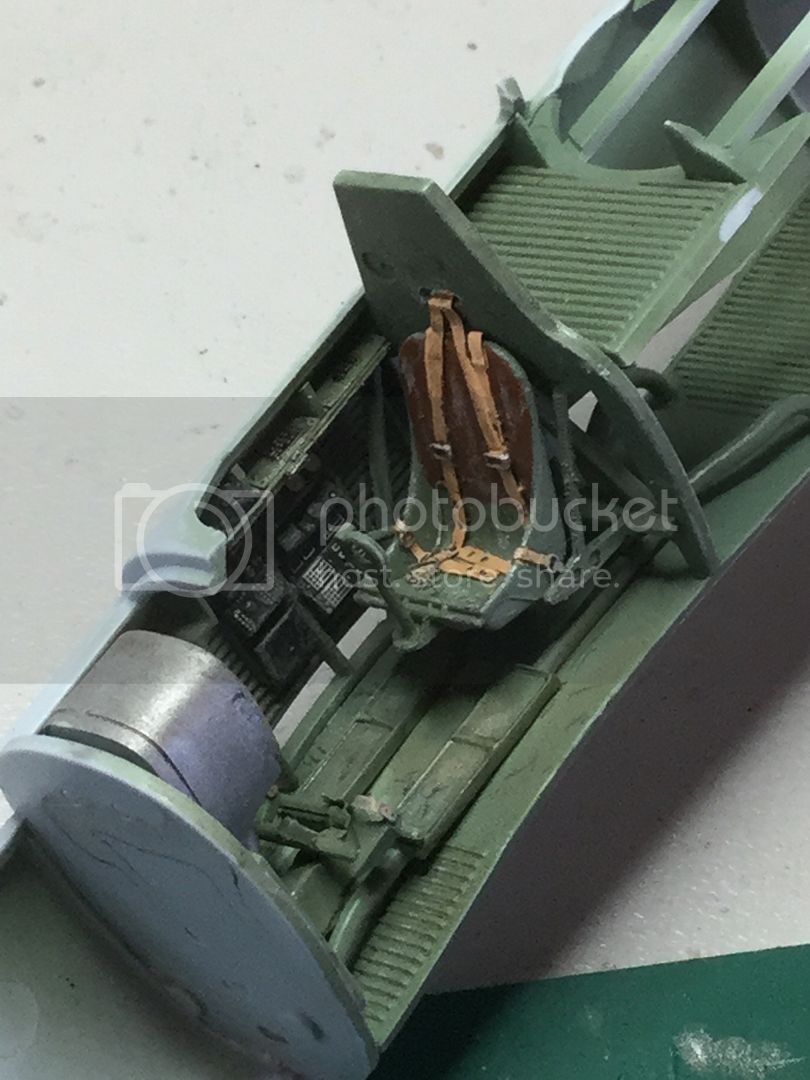
The barrels were added and the whole thing received a coat of MM Aircraft Interior Black. The spent gun casing bags were painted OD, not sure if this is correct but once installed they will never be seen:


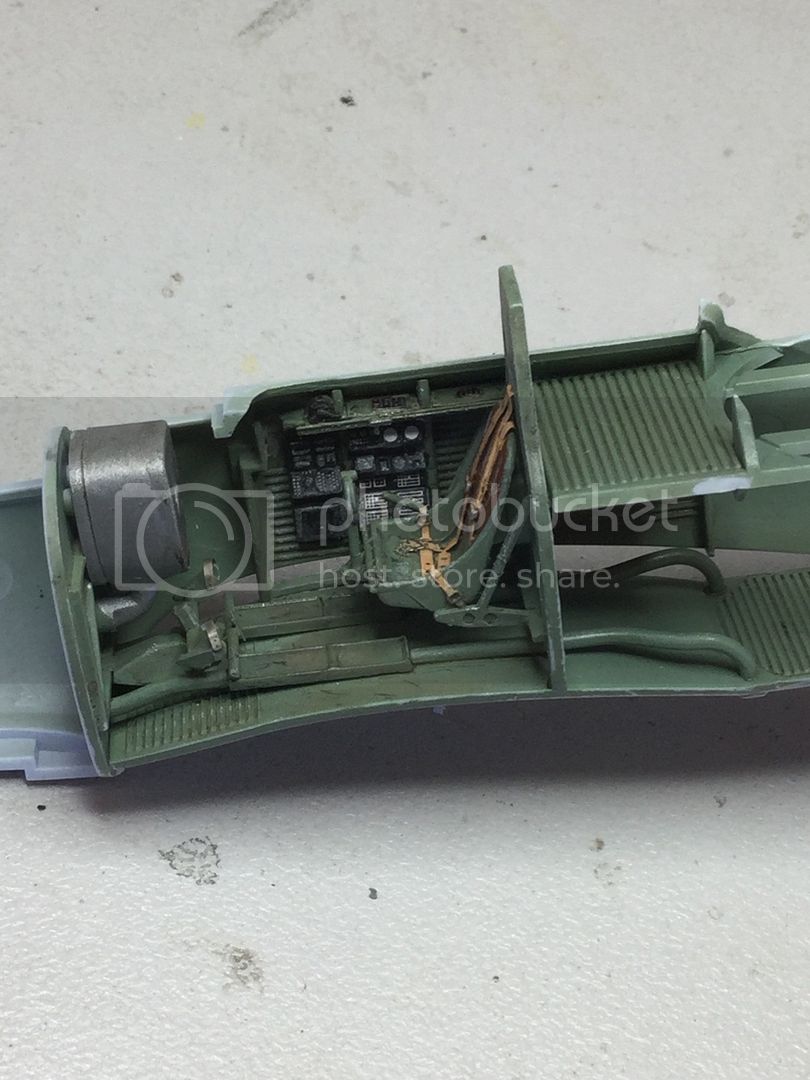
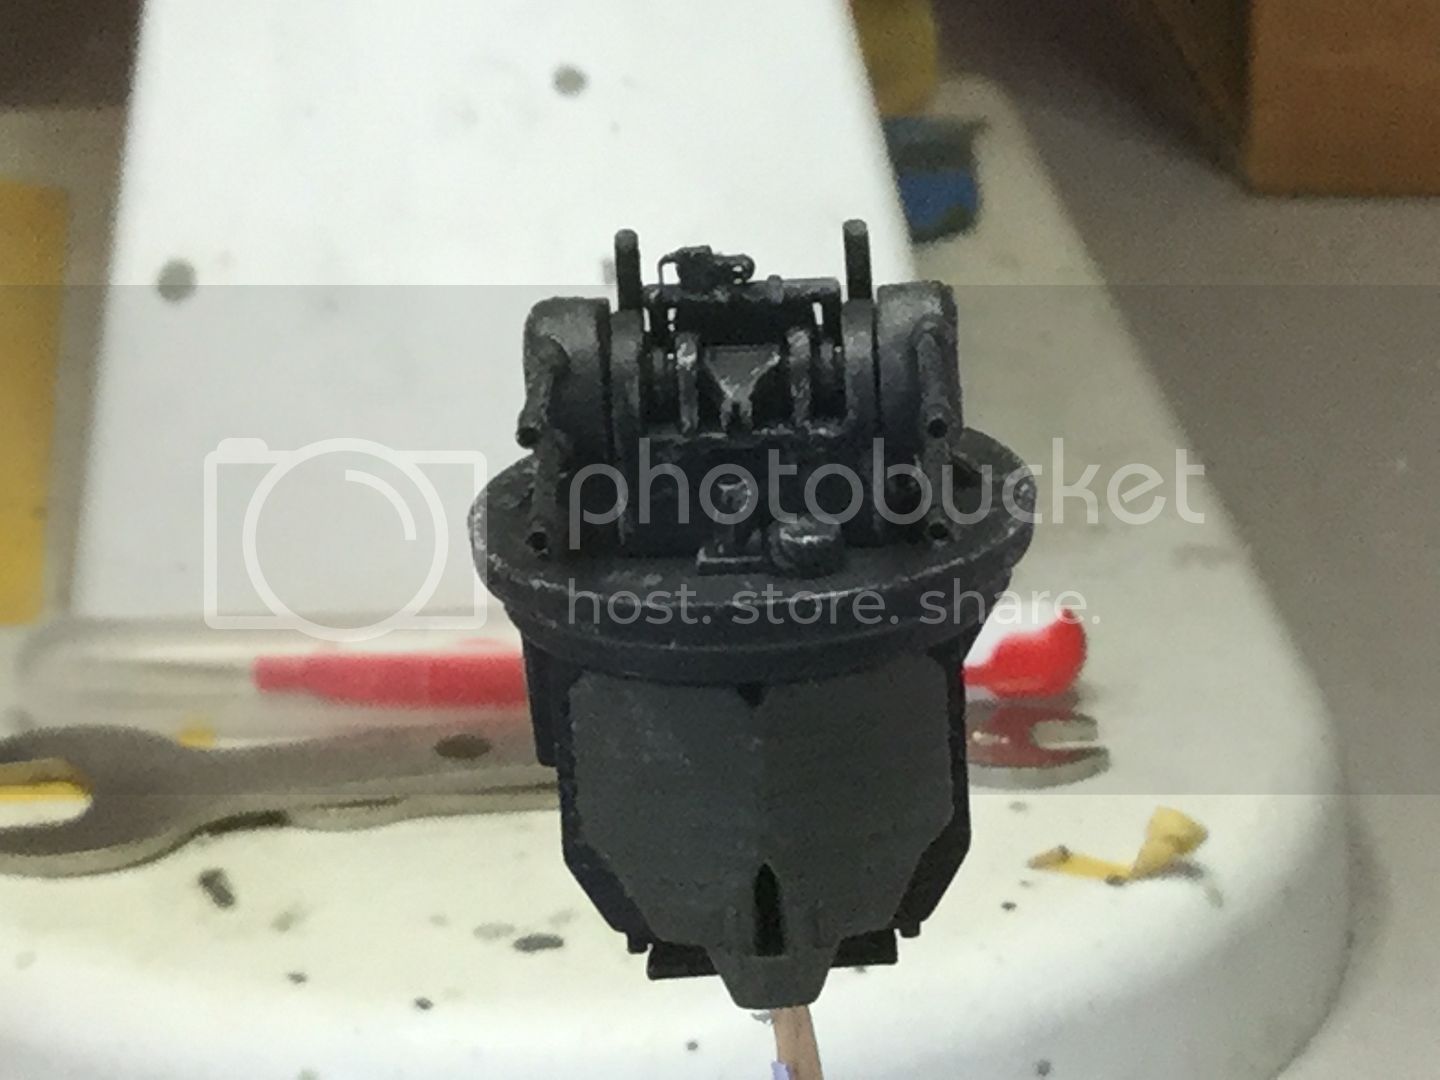
The two central gauges are related to the oxygen system so two of the smallest airscale "RAF gauges" set were installed, using copious amounts of Microsol:


Once the PE arrives and is installed, I will be able to continue with the turret construction.

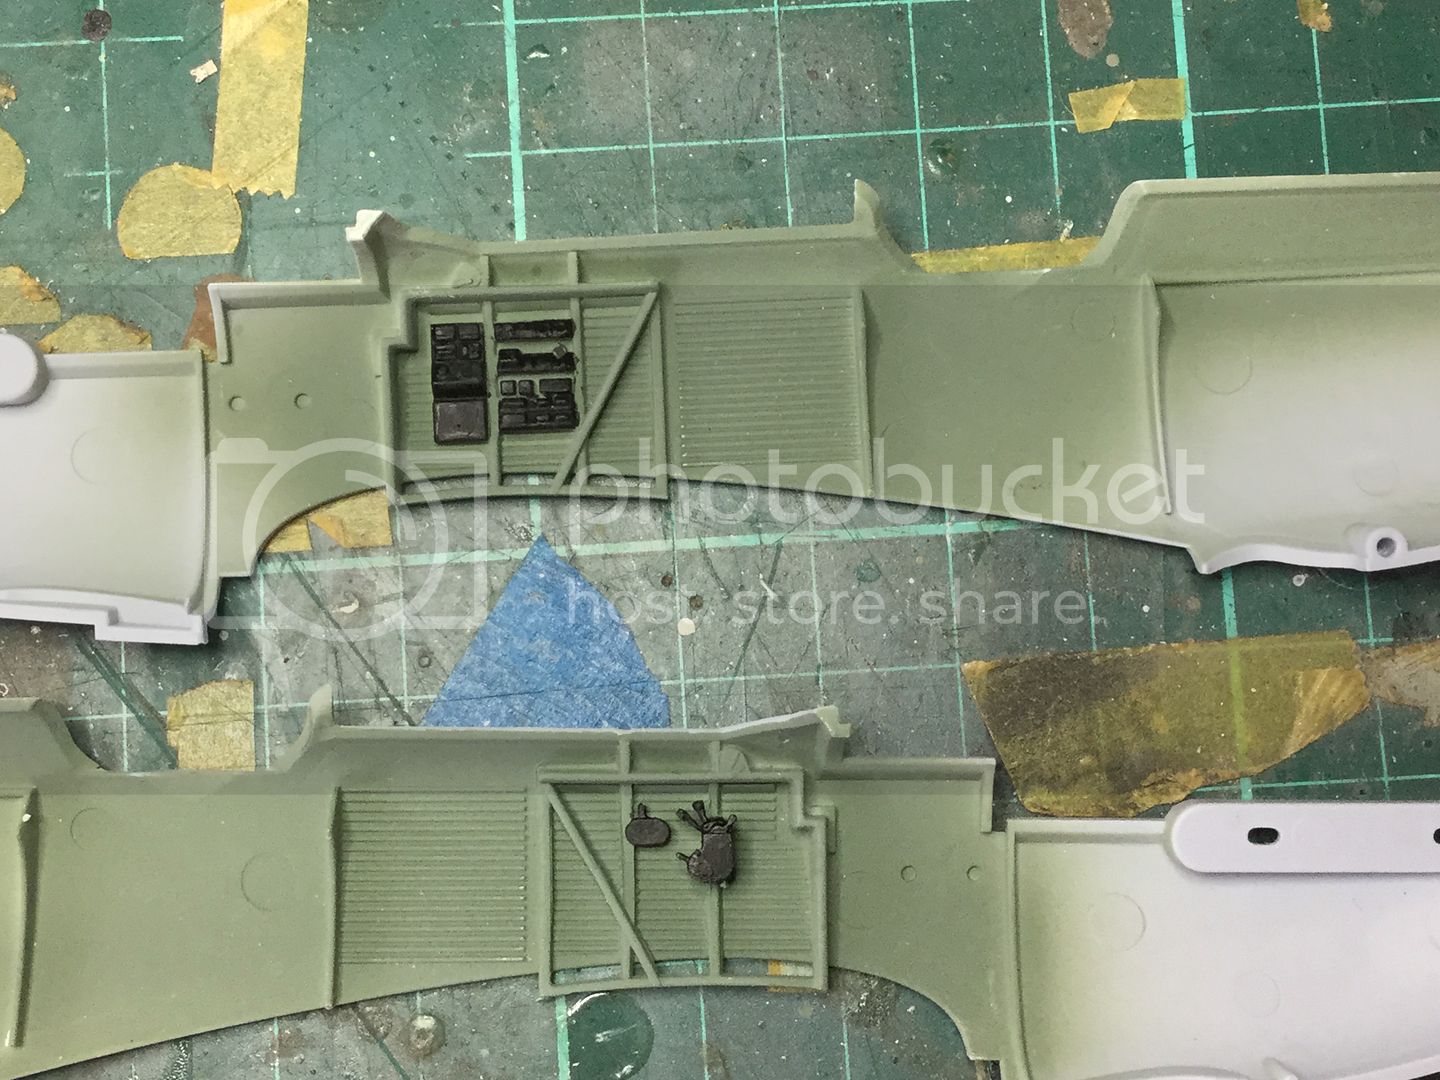
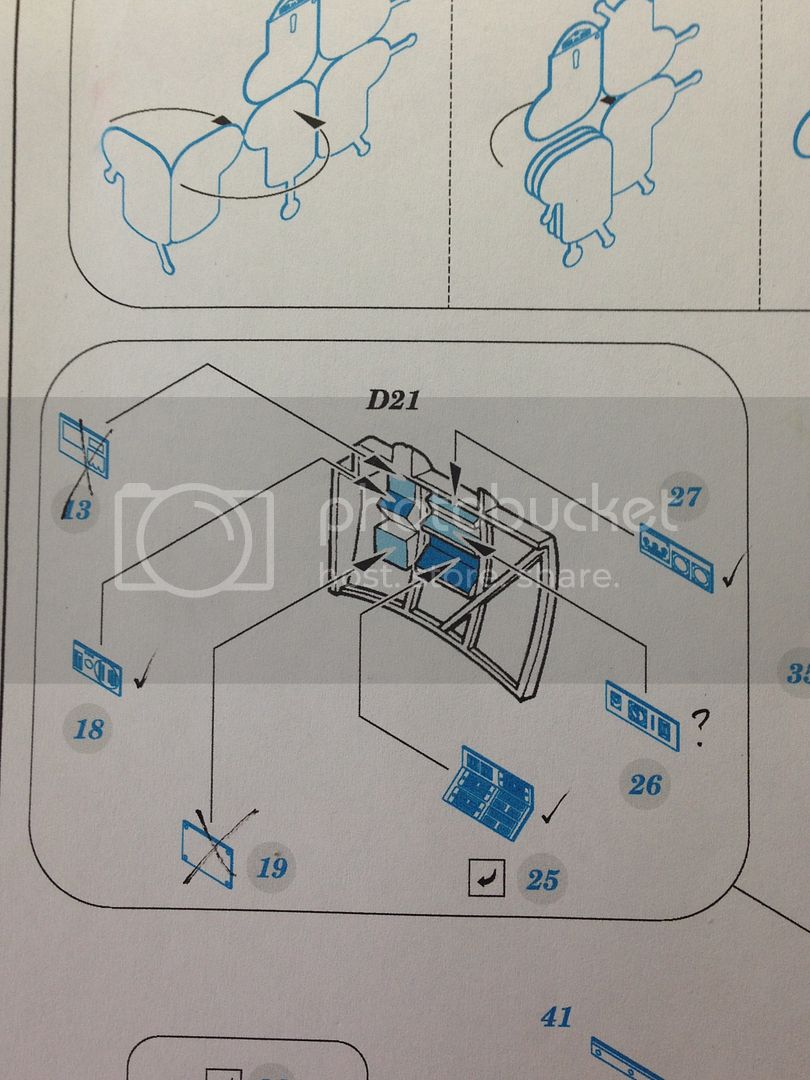
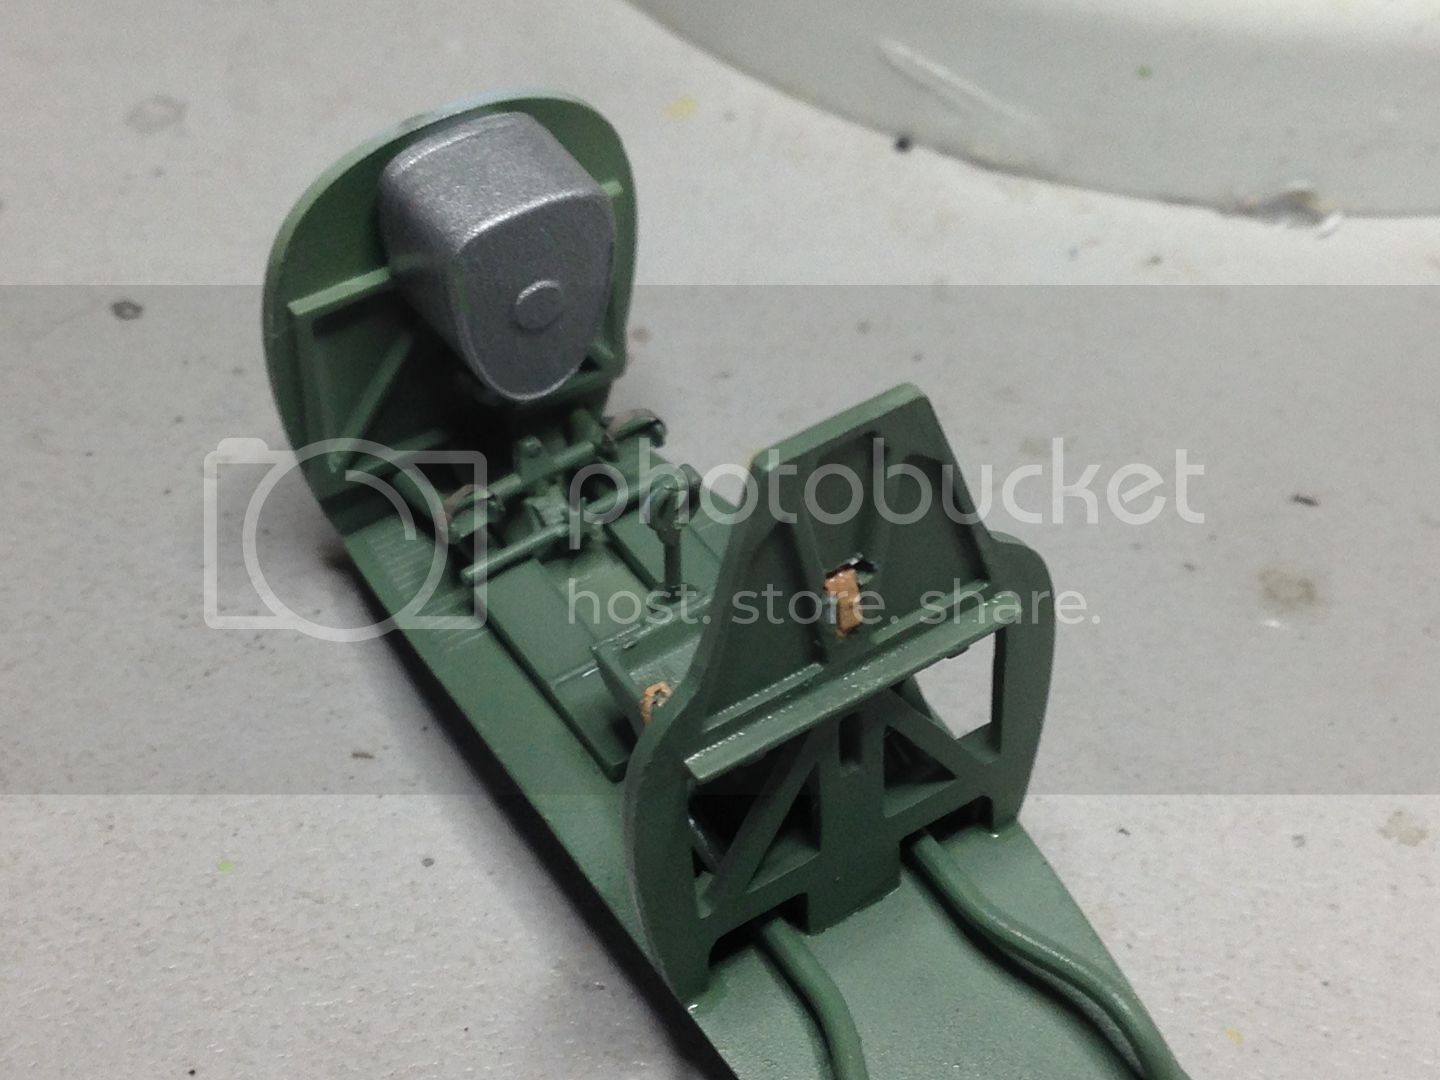
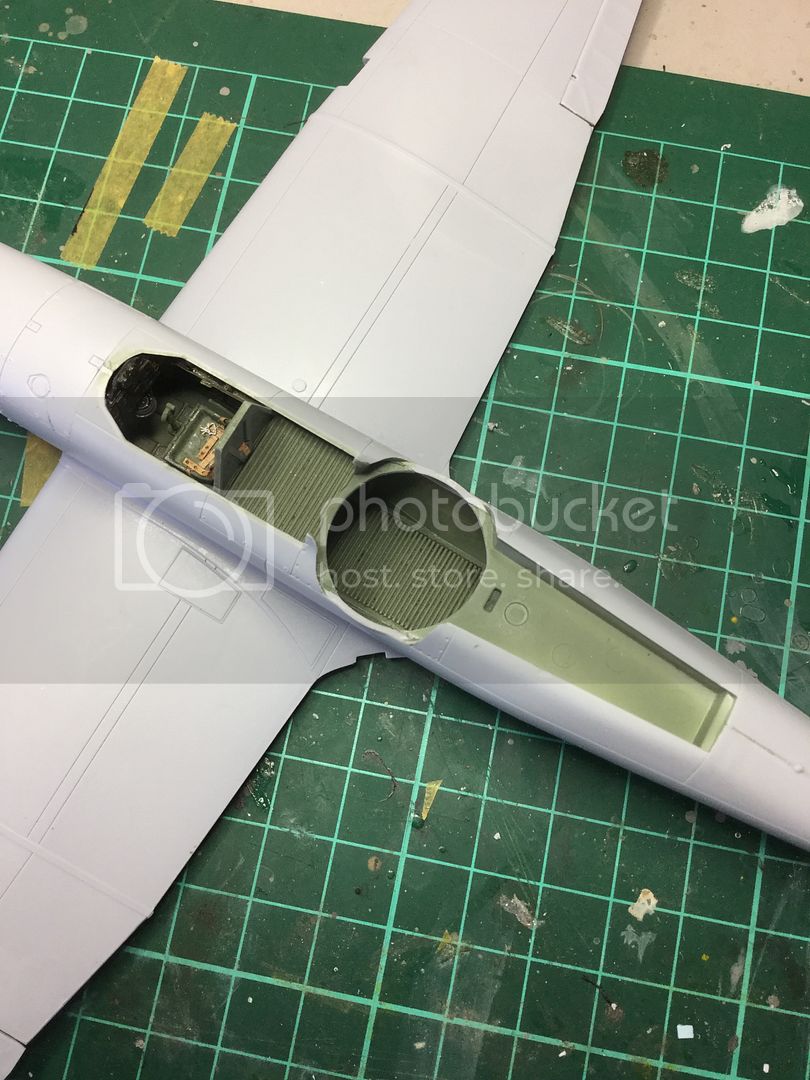
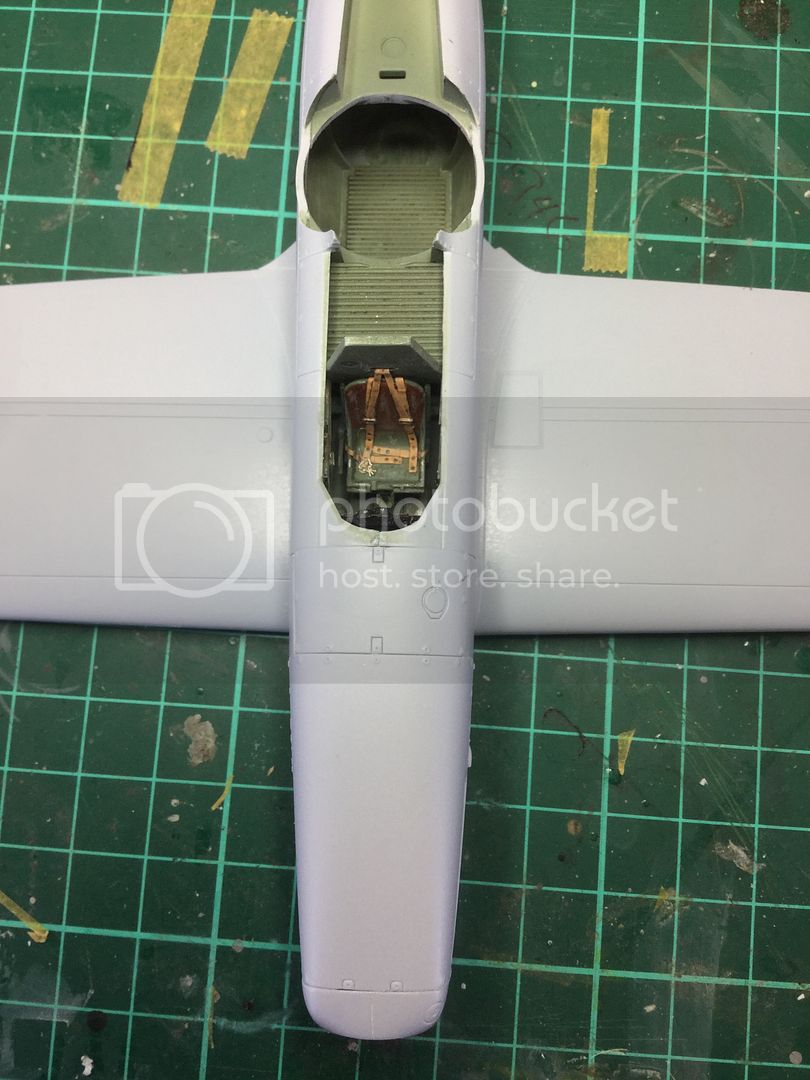
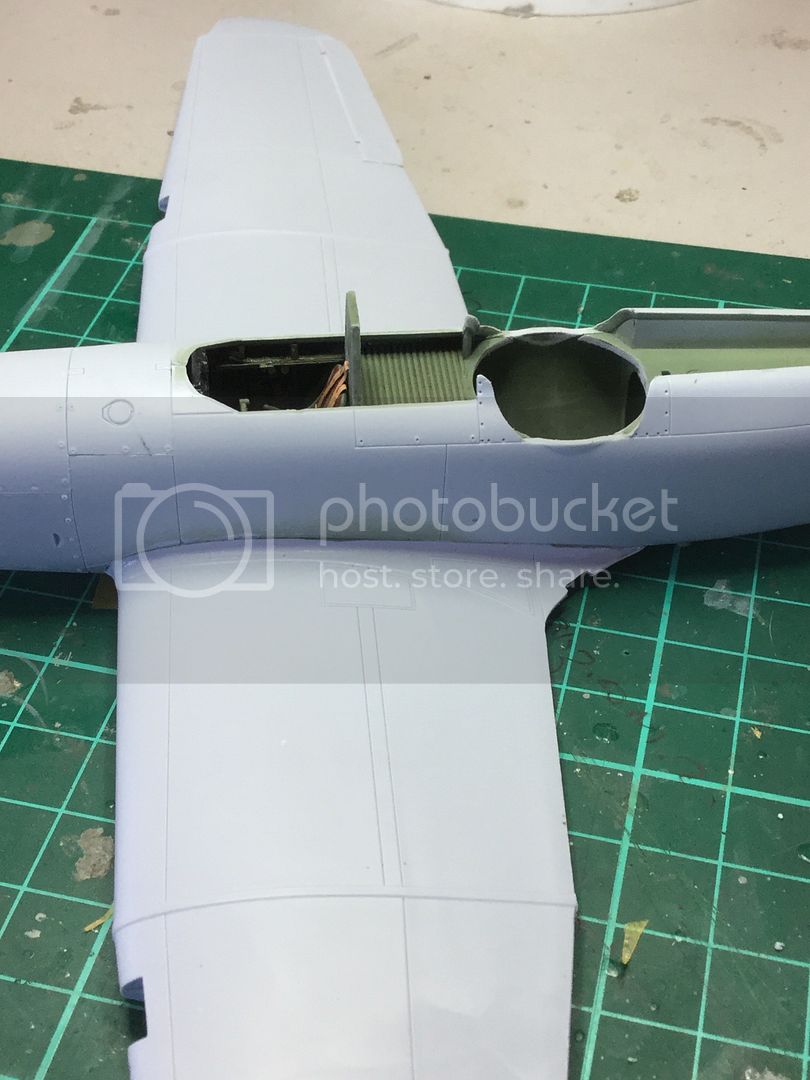
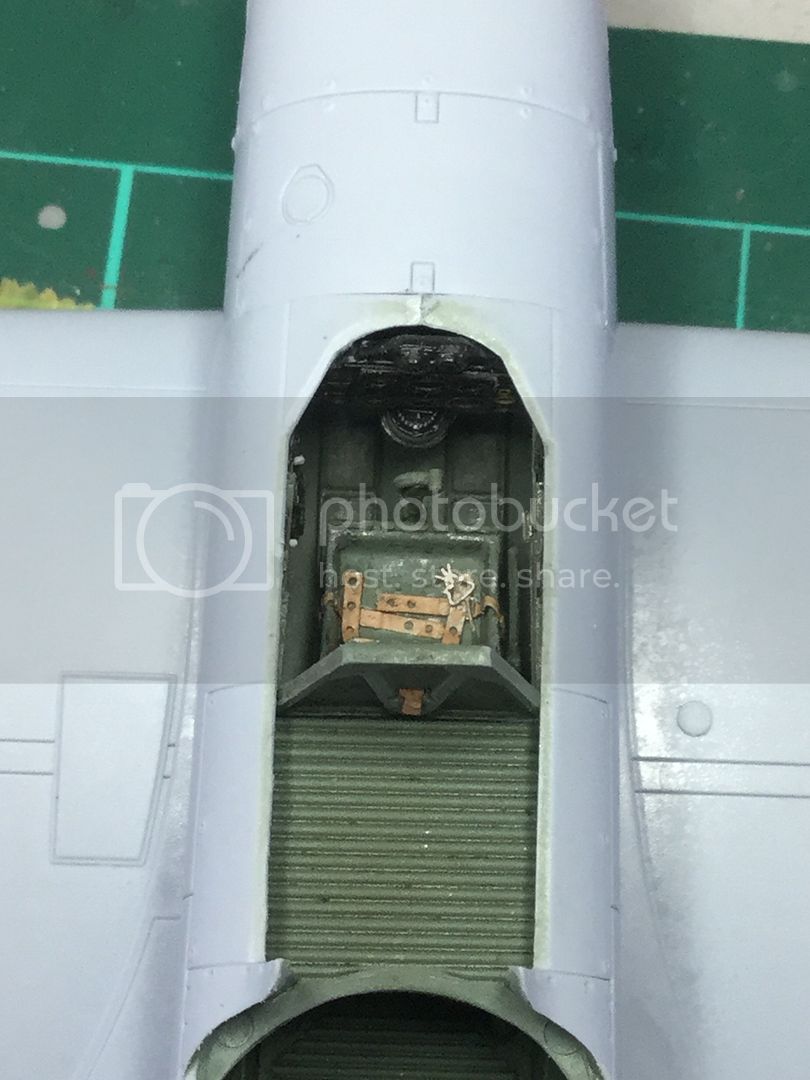
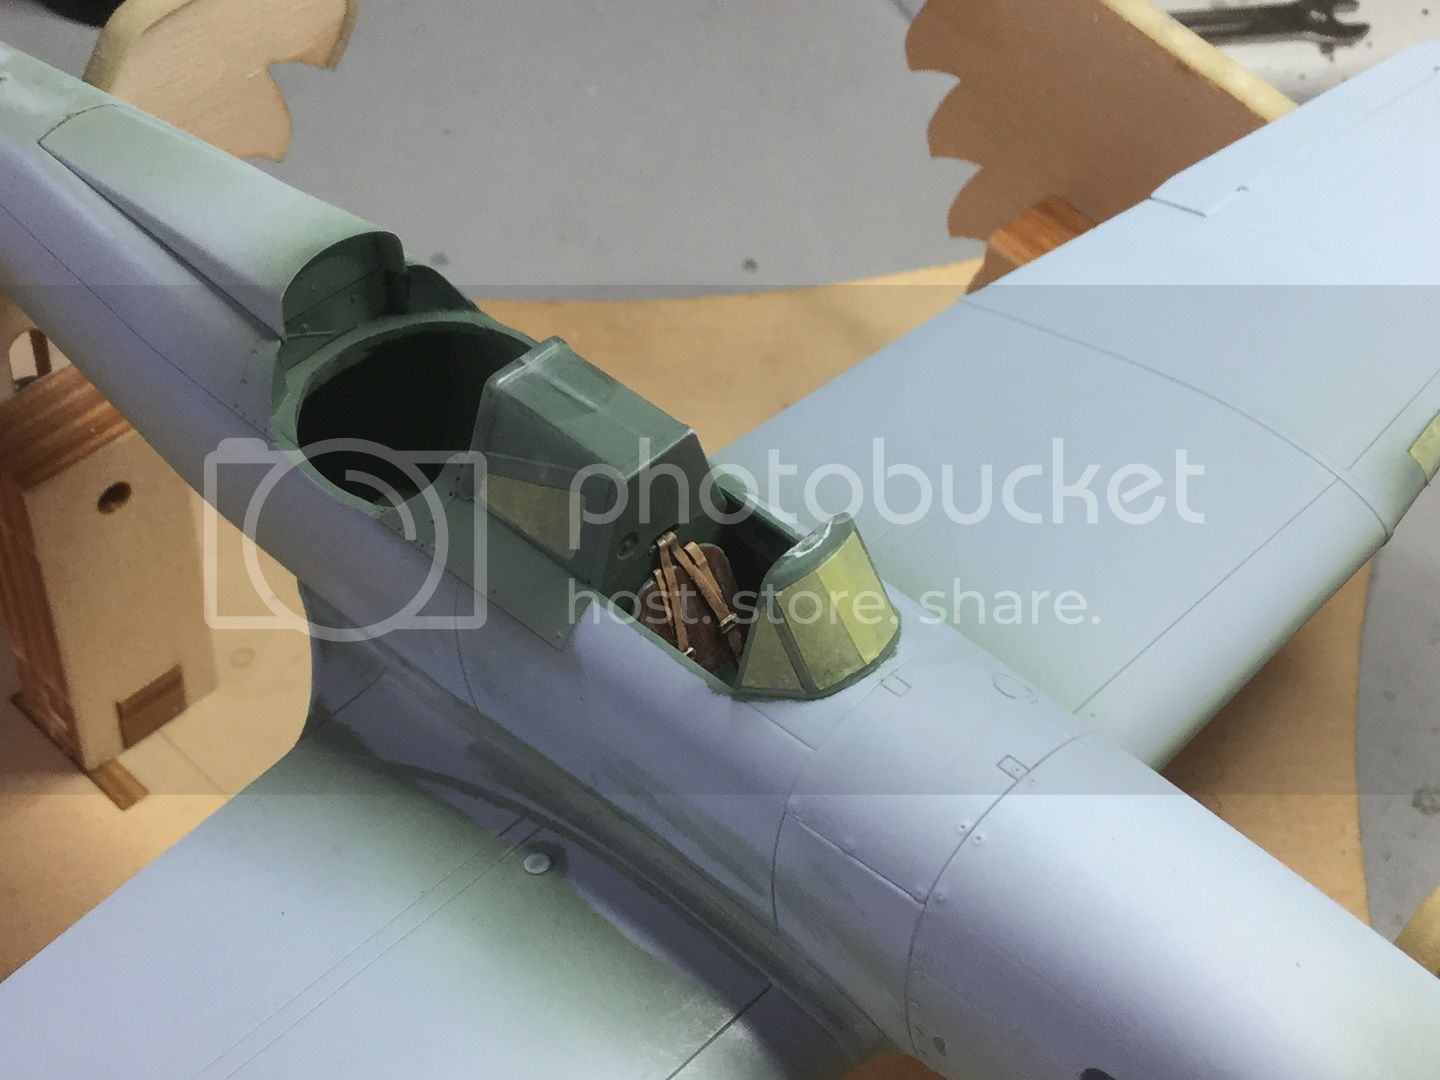
So next up we turn to the fuselage and cockpit area. Basic assembly skills required to fit the sidewalls to each fuselage side. There is a nasty ejector pin mark on both the throttle quadrant and the fuse box (?) on either side. These were filled with punched discs and sanded smooth:


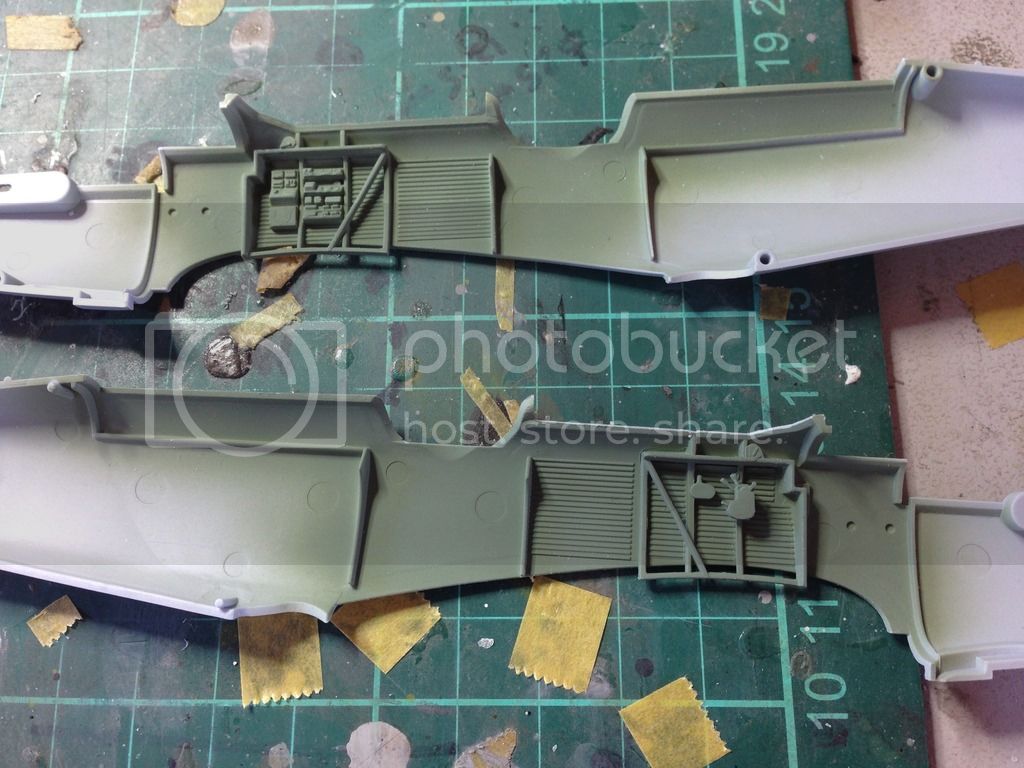
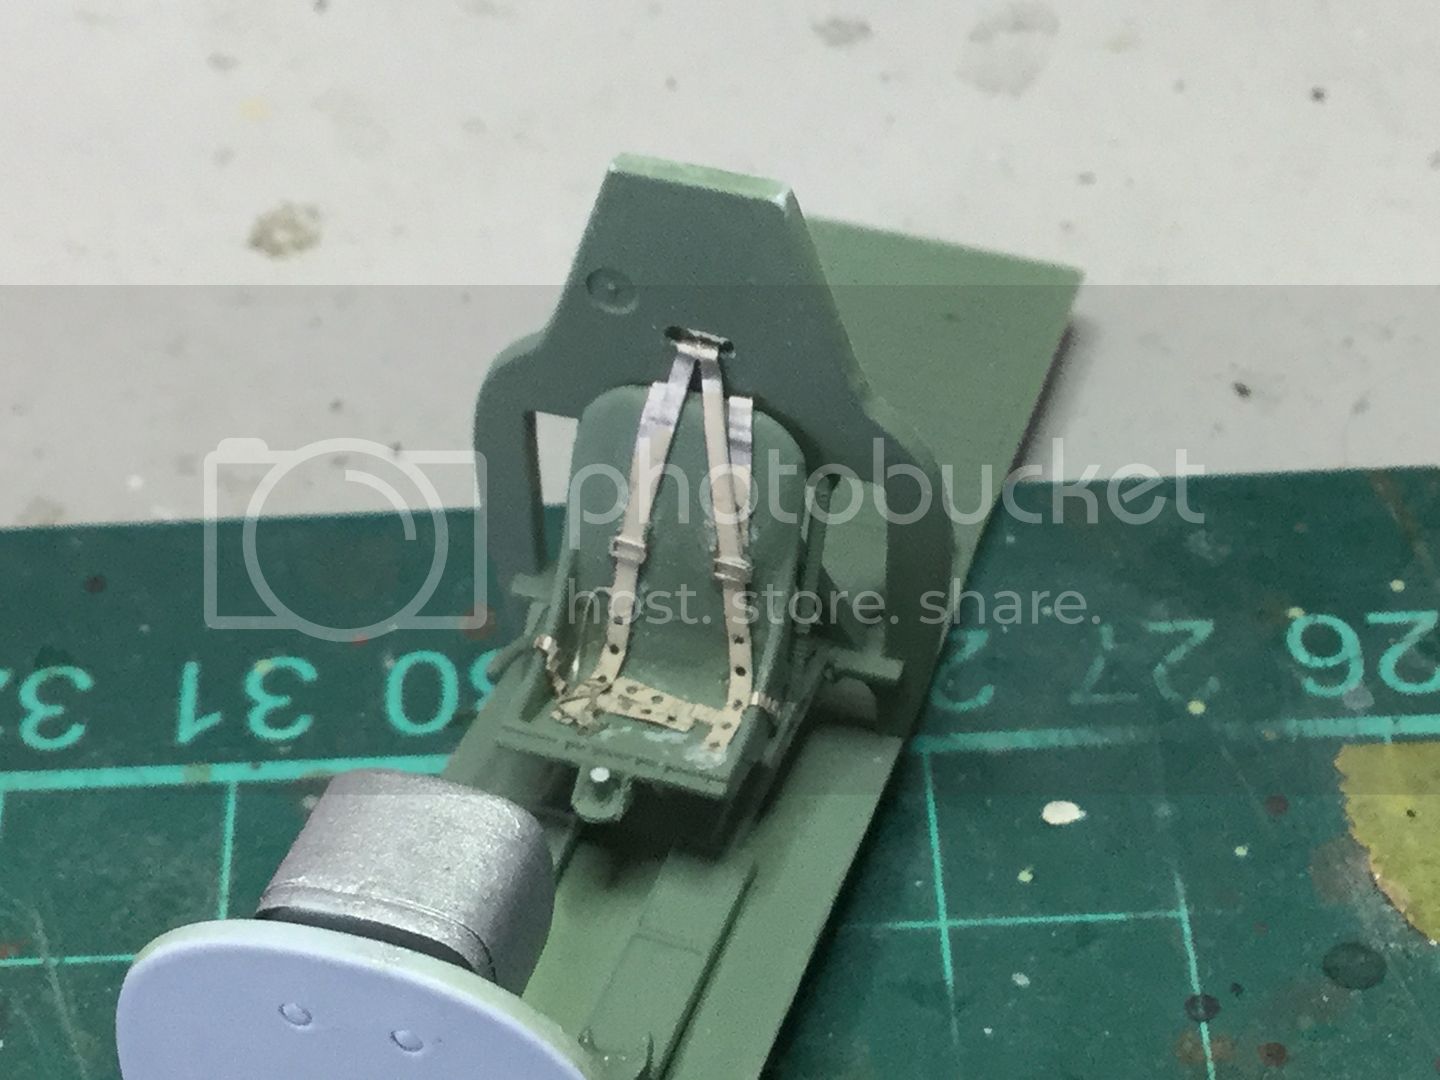
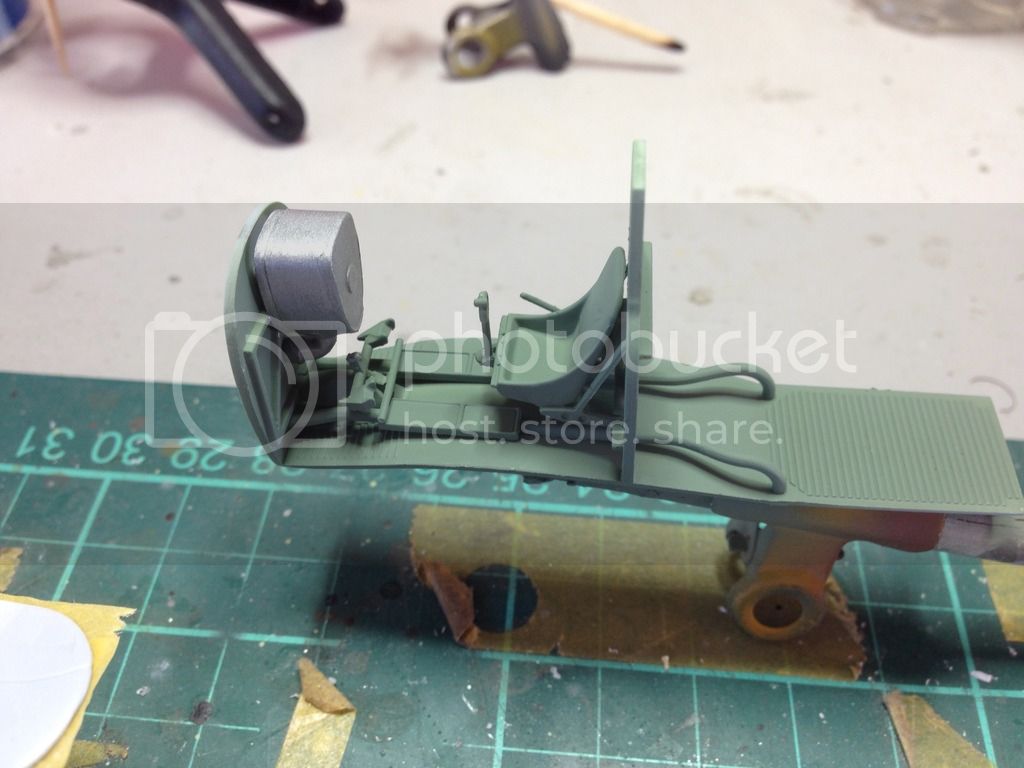
The cockpit floor forward cockpit area consists of 11 pieces. The fine detail in the seat supports reveals springs moulded (which are fragile) and the unique control column which attaches to the seat:


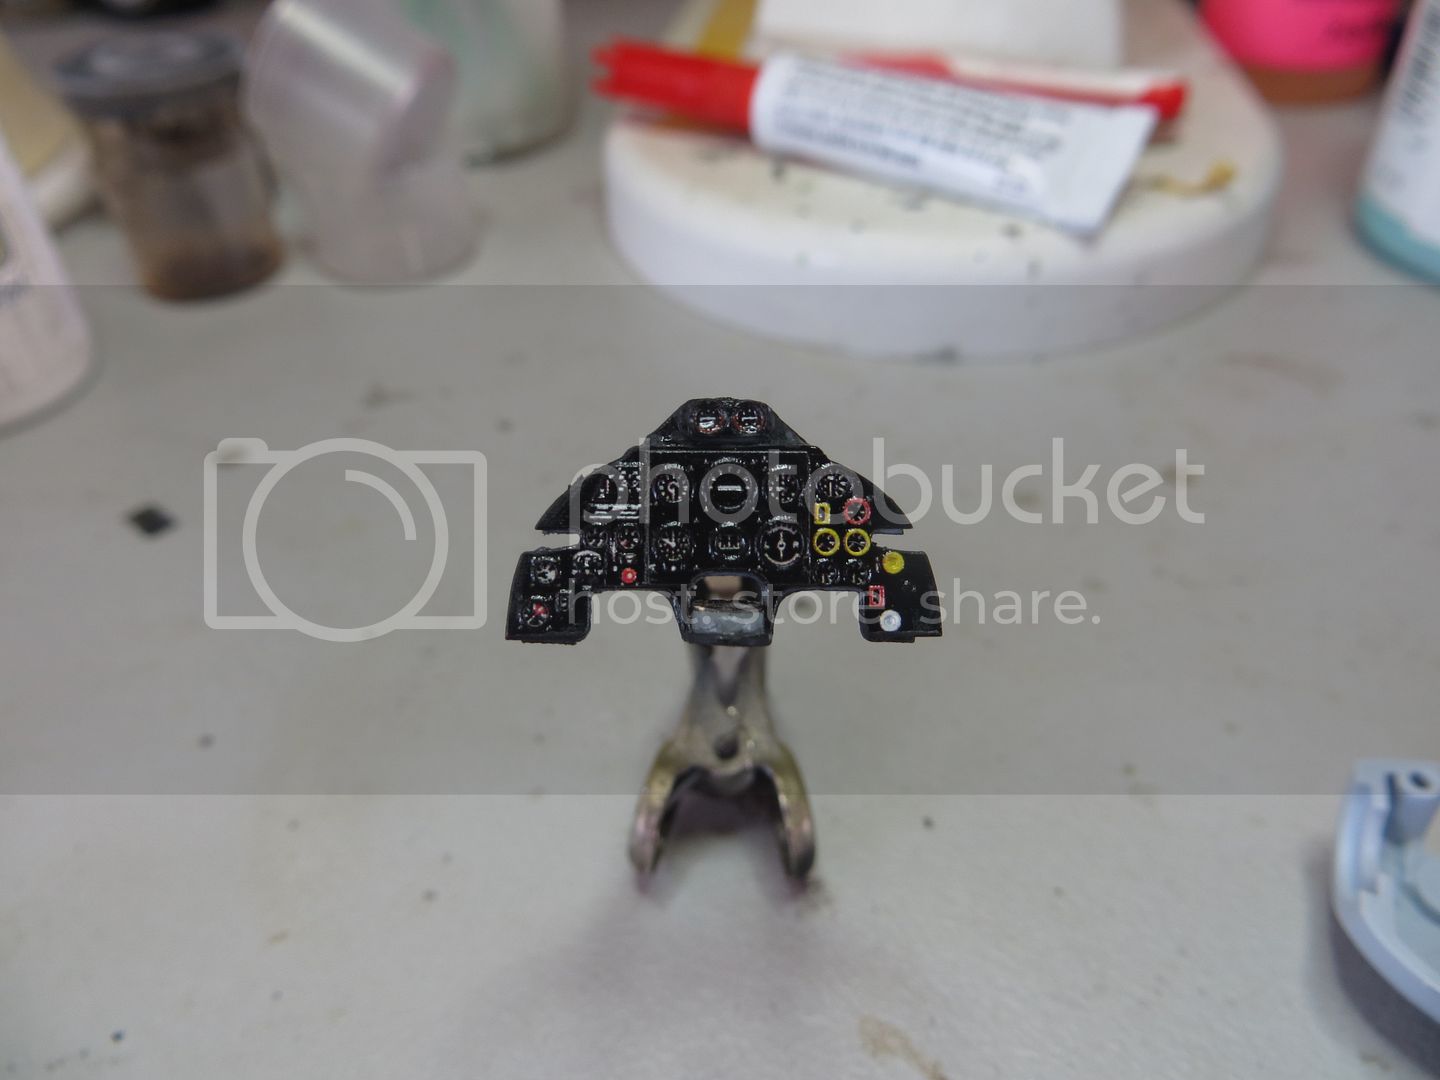
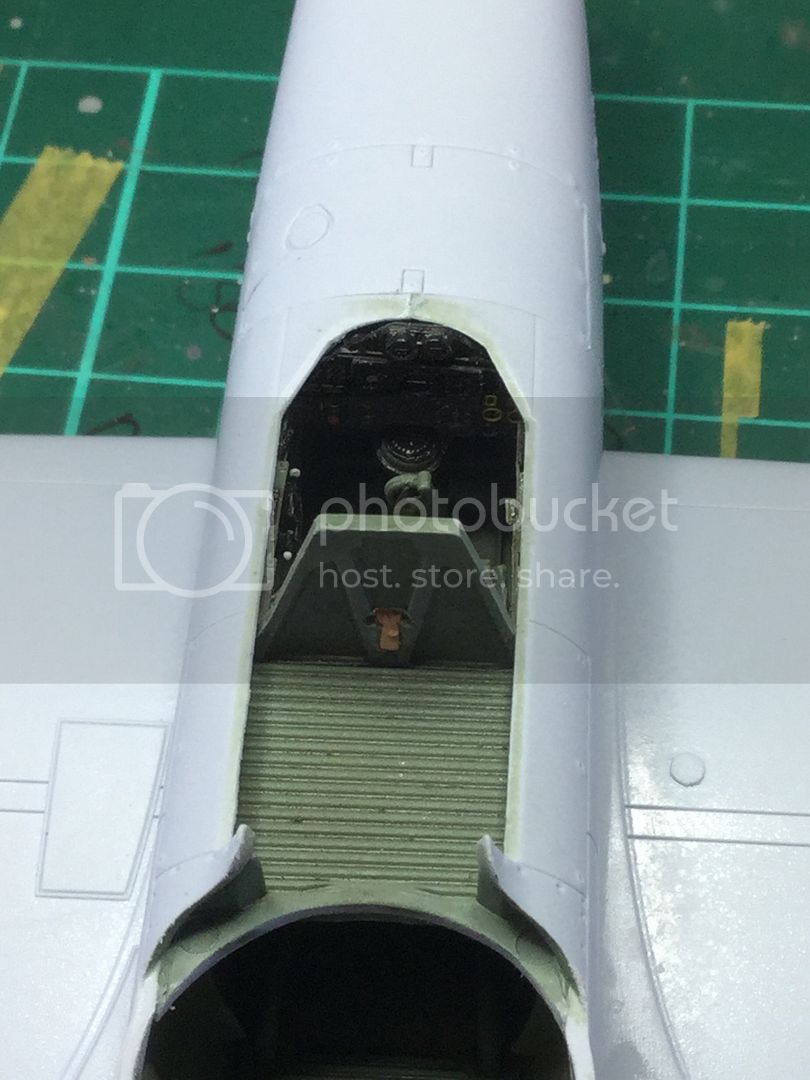
Turning to the IP, it is a little clunky by modern standards, so the Eduard PE one may be better. However to compare, I painted it up and used the kit IP decal with lots of Micro Sol. I also cut the decal where the gap above the compass housing and between the two compass housing supports, to enable a better fit:


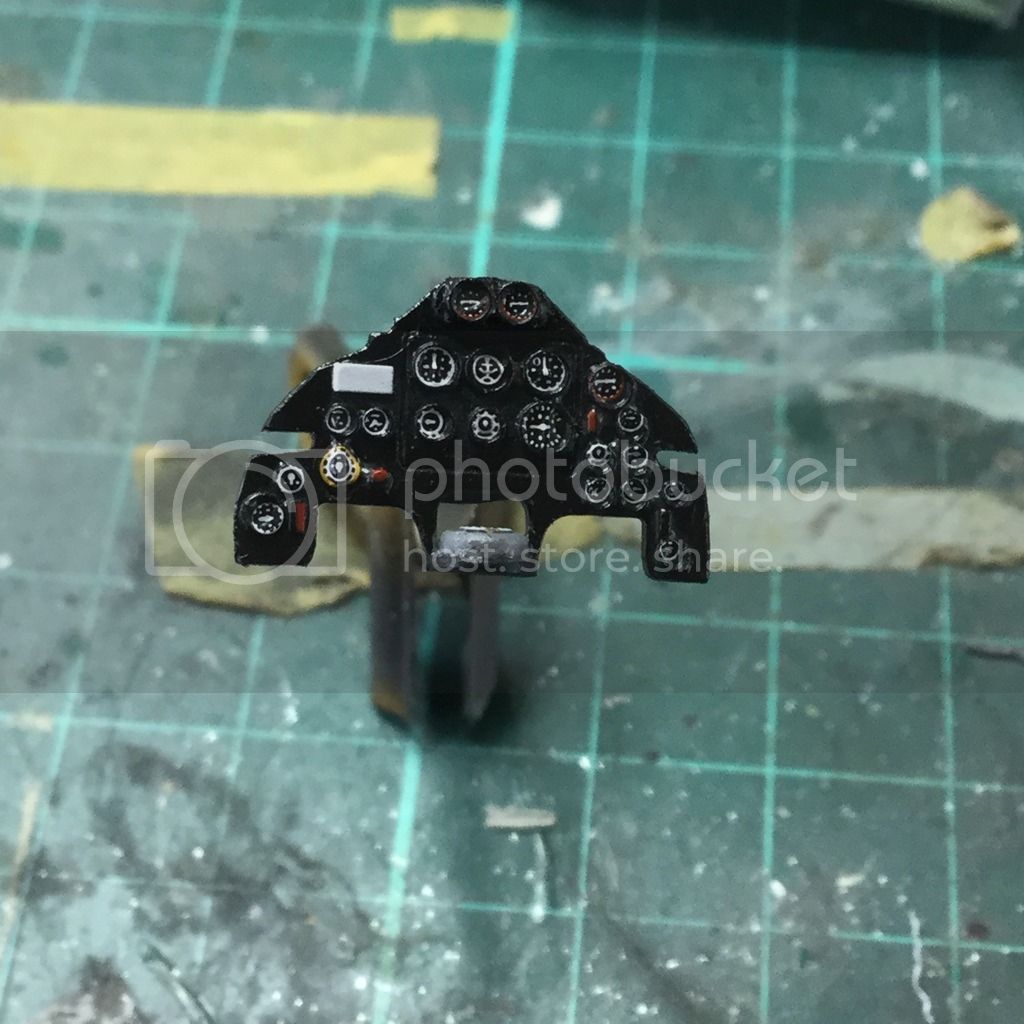
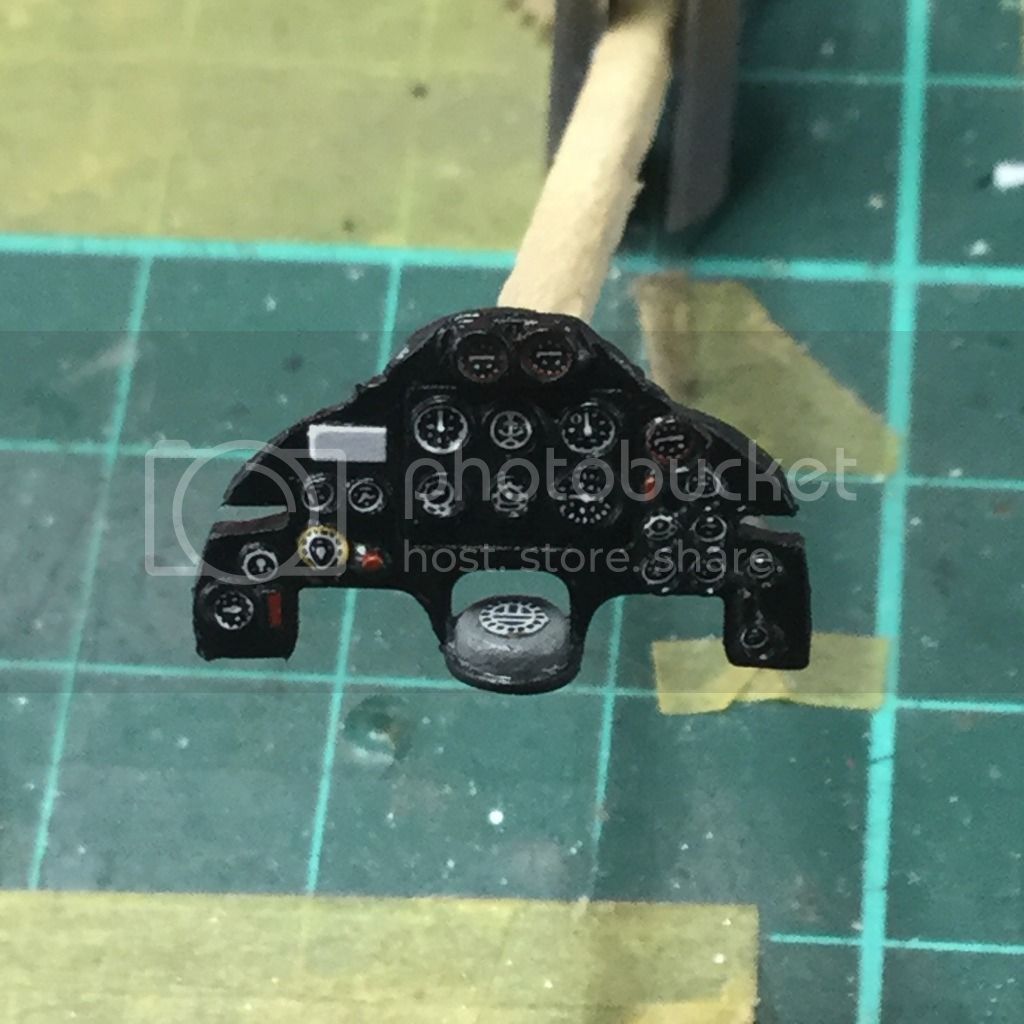
The result is not too bad but I will have to replace the PE compass face as it looks ludicrously small in the current housing. I will have a look how the PE set for the IP looks when it arrives and decide to keep the kit one or replace it. For those of you who are building this and decide to use the decal, it may also be advisable to cut the two uppermost dials from the IP decal and attach them as a separate item into their respective dials. It will make the settling a little easier.

Regards and thanks for looking,

Kent in Oz
kahunaminor
_VISITCOMMUNITY
New South Wales, Australia
Joined: April 06, 2008
KitMaker: 151 posts
AeroScale: 141 posts
Posted: Friday, April 08, 2016 - 09:58 AM UTC
I have had a bit of an ongoing discussion re riveting this build and the discovery that 456 SGN RAAF flew Defiants in late 1941 to possibly early 1942 when they converted to Beaufughters. The full thread can be found here:

http://www.britmodeller.com/forums/index.php?/topic/235000323-148-airfix-bp-defiant/
 
With the 456 SQN information, I will probably need those drawings for the other kit and luckily the kit has the antennas.
 
Still debating the rivet question. I have the MDC rivet tool so I am going to try that out on some spare plastic, so I have been faffing around the peripheries. I had a spare set of PE belts for the pilot's seat, so they went in and will need some touch ups (I will have to reattach the control column too):


MM Aircraft Interior Black for the sidewalls:


Wiring of the gun sight and touched up the overall blackness of the turret:


And the prop completed:


News in the Eduard stuff has been despatched so that should be here in a week or so.
 
Regards,

Kent in Oz
Joel_W
Staff MemberAssociate Editor
AUTOMODELER
_VISITCOMMUNITY
New York, United States
Joined: December 04, 2010
KitMaker: 11,666 posts
AeroScale: 7,410 posts
Posted: Friday, April 08, 2016 - 06:05 PM UTC
Kent,
You're certainly off to quite a nice start. I particularly like how you finished the kit IP if you do decide to go with it over the Eduard PE one. Your choice of Seat Belts and Harness is quite convincing.

Looking forward to your next update as I'll be following your build right to the finish line.

Joel
goodn8
_VISITCOMMUNITY
Berlin, Germany
Joined: October 12, 2008
KitMaker: 709 posts
AeroScale: 651 posts
Posted: Friday, April 08, 2016 - 07:24 PM UTC
Very nice Kent!
Especially the turret is well done and the change into the .303 Brownings works great. Cockpit and panel are very nice too!
Thomas
Merlin
Staff MemberSenior Editor
AEROSCALE
#017
_VISITCOMMUNITY
United Kingdom
Joined: June 11, 2003
KitMaker: 17,582 posts
AeroScale: 12,795 posts
Posted: Saturday, April 09, 2016 - 12:38 AM UTC
Hi Kent

Lovely start. The kit's instrument decals really look pretty good - although, as you say, the compass face doesn't quite work. Perhaps an etched bezel would help.

All the best

Rowan
BlackWidow
_VISITCOMMUNITY
European Union
Joined: August 09, 2009
KitMaker: 1,732 posts
AeroScale: 1,336 posts
Posted: Saturday, April 09, 2016 - 02:18 AM UTC
Nice progress, Kent. I'm waiting for my Defiant to arrive at my assembly line probably next weekend at our club meeting. Until then I read your thread (and Steffen's) to get some hints for the build.

Happy modelling!
Torsten

PS: With all the BP Defiants flying around the work benches at the moment, I guess Airfix has come up with the aircraft model of the year ....
kahunaminor
_VISITCOMMUNITY
New South Wales, Australia
Joined: April 06, 2008
KitMaker: 151 posts
AeroScale: 141 posts
Posted: Saturday, April 09, 2016 - 06:57 AM UTC

Quoted Text

Nice progress, Kent. I'm waiting for my Defiant to arrive at my assembly line probably next weekend at our club meeting. Until then I read your thread (and Steffen's) to get some hints for the build.

Happy modelling!
Torsten

PS: With all the BP Defiants flying around the work benches at the moment, I guess Airfix has come up with the aircraft model of the year ....


Thanks muchly,
I agree this and the Meteor may have scooped the pool for Airfix in 48 scale this year.

Regards
kahunaminor
_VISITCOMMUNITY
New South Wales, Australia
Joined: April 06, 2008
KitMaker: 151 posts
AeroScale: 141 posts
Posted: Thursday, April 14, 2016 - 09:26 AM UTC
Not much to report, apart from the arrival of these items today:


Even at first glance, the IP is superior to the kit plus decals. So there will probably be some reworking. I may try and keep the two upper dials as they protrude and just fit the panel and blind flying panel in. The compass face in the Zoom is much larger and should look much better!

Regards,
kahunaminor
_VISITCOMMUNITY
New South Wales, Australia
Joined: April 06, 2008
KitMaker: 151 posts
AeroScale: 141 posts
Posted: Friday, April 15, 2016 - 09:10 AM UTC
With the arrival of the Eduard PE, which comes as a three part laminate system, I set about removing the kit IP face. However I did not remove it all, as I liked the look of the two upper dials (they add depth), so they were left in place. After some judicious filing and using Pledge aka Future as an adhesive assembly was left overnight to set up. A small touch up with MM A/C Interior black around the edges left me with this:


Which is a tad better than this:


That's all for now, thanks for looking.
Joel_W
Staff MemberAssociate Editor
AUTOMODELER
_VISITCOMMUNITY
New York, United States
Joined: December 04, 2010
KitMaker: 11,666 posts
AeroScale: 7,410 posts
Posted: Friday, April 15, 2016 - 06:43 PM UTC
Kent,
What a huge difference in IPs, especially after you modification.

Joel
Szmann
_VISITCOMMUNITY
Netherlands Antilles
Joined: September 02, 2014
KitMaker: 1,977 posts
AeroScale: 295 posts
Posted: Friday, April 15, 2016 - 07:54 PM UTC

Quoted Text

Kent,
What a huge difference in IPs, especially after you modification.

Joel


Agreed!
Watching and learning. Thanks for sharing.

Cheers!
Gabriel
kahunaminor
_VISITCOMMUNITY
New South Wales, Australia
Joined: April 06, 2008
KitMaker: 151 posts
AeroScale: 141 posts
Posted: Monday, April 18, 2016 - 02:27 PM UTC
Thanks all,

Still working on the cockpit sidewalls. The PE is great but some pieces add nothing so I am not using all of it. To help me recall, I have marked the instructions for the port sidewall:


And prepared the areas to be replaced:


The starboard sidewall is a bit easier:


I have also prepared the sidewalls to accept the new IP. The PE brings it back to its original size and will need reducing to eliminate a gap in the upper fuselage just forward of the IP. I have thinned the starboard side and removed a chunk from the port side to accept it. I am not sure which way was better. More test fitting!

Regards,
berndm
_VISITCOMMUNITY
Niedersachsen, Germany
Joined: March 26, 2014
KitMaker: 844 posts
AeroScale: 630 posts
Posted: Thursday, April 21, 2016 - 10:53 PM UTC
Thats a very nice start. Your take a lot of care, adding all these fine details, looks fantastic.
kahunaminor
_VISITCOMMUNITY
New South Wales, Australia
Joined: April 06, 2008
KitMaker: 151 posts
AeroScale: 141 posts
Posted: Friday, April 22, 2016 - 03:27 PM UTC
Thanks Chris,
 
The work continues with the sidewalls. PE parts attached and sidewalls touched up:


The harness was touched up with MM Tan and the wash will darken it, making it a more natural colour. Some more PE attached to the rudder pedal assembly and the control column reattached:


The interiors of the wing roots are visible in the cockpit so it has to be painted:


A word of warning when masking. The clear pieces are very thin and can snap under pressure. Luckily this break occurred on what is actually the forward panel and once dry can be sanded and painted:


All the assemblies have been given a cost of Pledge in preparation for an oil wash.
Joel_W
Staff MemberAssociate Editor
AUTOMODELER
_VISITCOMMUNITY
New York, United States
Joined: December 04, 2010
KitMaker: 11,666 posts
AeroScale: 7,410 posts
Posted: Friday, April 22, 2016 - 08:39 PM UTC
Kent,
Your interior detailing is really looking quite good. I'm really interested to see how your canopy repair turns out. I've never had much luck gluing a crack, then sanding and polishing to a clear gloss finish.
Joel
kahunaminor
_VISITCOMMUNITY
New South Wales, Australia
Joined: April 06, 2008
KitMaker: 151 posts
AeroScale: 141 posts
Posted: Saturday, April 23, 2016 - 02:32 AM UTC
Thanks Joel,

To be honest me either. When it first happened I was pretty cranky. However as I looked at it, I realised the break was along the part that represents the forward movable ram section. This is a solid piece that raises and lowers as the turret rotates to allow the guns to be fully forward. In this case, Airfix has moulded it with the clear piece in the raised position. Once repaired, it will be a solid colour, RAF IG on the interior and camouflage colour on the outside., so a repair is viable. If that fails, I have the other middle canopy section with the lowered ram as a back up (thankfully).

Regards,
Removed by original poster on 04/27/16 - 01:16:30 (GMT).
Removed by original poster on 04/27/16 - 01:17:56 (GMT).
kahunaminor
_VISITCOMMUNITY
New South Wales, Australia
Joined: April 06, 2008
KitMaker: 151 posts
AeroScale: 141 posts
Posted: Tuesday, April 26, 2016 - 09:37 AM UTC
Welcome back!
 
Progress has been good. The cockpit has been completed, the fuselage halves joined and the wings attached. Firstly, the cockpit, washed with a brown shadow oil wash and then over coated with Vallejo Ultra Matte Acrylic coat (the first time I have used it). Highlights added with a mixture of artists pencils (warm greys/cool greys and silver). The cockpit section and the rear air-foil housing were then affixed to the starboard side, the IP to the port:


I had some trouble getting the PE panel in the port side-wall to stay, so I cut a small notch in the plastic framework with an RB Productions ultra fine saw, jammed it in and CA the joint from underneath.
 
Next the fuselage halves were lined up and Tamiya Extra Thin used to seal them, starting from the front and working backwards a small section at a time, to ensure as good a join as I could get. The clamped until dry. The join just forward of the cockpit did not present the problem I had envisioned and will require a small scrape to finish the join:


The wings had already been assembled and were now added to the fuselage. A small scrape with a sanding stick eliminated a possible step at the forward edge. Clamps were used to secure the wing sections front and rear and this resulted with possibly the best join I have seen in a long while. A couple of small areas to fix but in the main a well engineered aspect:


Regards and more to follow.
kahunaminor
_VISITCOMMUNITY
New South Wales, Australia
Joined: April 06, 2008
KitMaker: 151 posts
AeroScale: 141 posts
Posted: Tuesday, April 26, 2016 - 09:44 AM UTC
Onward!
 
The turret support pieces were removed and the hole cleaned up to ensure a good fit of the turret when test fitted. The one piece front upper cowling was attached and also fit perfectly. Kudos Airfix and pay attention you other manufacturers:


The rear turret was then detailed again using artists pencils, a HB pencil for the graphite look and a wash:


Until next time,
 
Regards,
GazzaS
#424
_VISITCOMMUNITY
Queensland, Australia
Joined: April 23, 2015
KitMaker: 4,648 posts
AeroScale: 1,938 posts
Posted: Tuesday, April 26, 2016 - 01:11 PM UTC
Very nice detailing, Kent.
SGTJKJ
#041
_VISITCOMMUNITY
Kobenhavn, Denmark
Joined: July 20, 2006
KitMaker: 10,069 posts
AeroScale: 3,788 posts
Posted: Tuesday, April 26, 2016 - 06:46 PM UTC
Kent, looks nice. You have some really good details added.

It is nice to see some of the new Airfix kits being build and follow the quality of the kits in detail. Very tempted by some of the subjects, but better clean out the stash first.

Thanks for sharing your build.
kahunaminor
_VISITCOMMUNITY
New South Wales, Australia
Joined: April 06, 2008
KitMaker: 151 posts
AeroScale: 141 posts
Posted: Tuesday, May 03, 2016 - 07:53 AM UTC
There is very little information about the actual mechanism that raised and lowered the forward airfoil. What can be seen through photos I have are diagonal support arms on each side. There also appears to be a single pneumatic ram attached to a horizontal cross piece on the ram. Once the canopy piece goes on, you will not see much so here is my representation out of plastic rod:


The pneumatic rod will be trimmed to size after painting and when the canopy is attached:


The rear airfoil has been tacked in place with Micro liquid tape, which holds the piece in place solidly but temporarily. The horizontal cross piece in place and interior masked for RAF IG:


Regards,
kahunaminor
_VISITCOMMUNITY
New South Wales, Australia
Joined: April 06, 2008
KitMaker: 151 posts
AeroScale: 141 posts
Posted: Thursday, May 05, 2016 - 06:27 AM UTC
Work continued on the forward airfoil mechanism. The strut was trimmed and the area touched up with MM RAF IG. I will have to re weather the area as it looks too clean. Whilst I had the airbrush loaded, I also did the landing and ID light housings. I also masked and sprayed the canopy interiors and checked some seams:


The central canopy then had the interior masks removed and I added the two vertical supports that appear (to me anyway) to originate at the horizontal support and can be seen in most pictures:


The rear of the landing lights were painted MM Chrome Silver, leaving the fronts as clear plastic. I will overcoat the silver with matt black at a later time. You could probably just paint the interiors silver and the rear black but I want to see how my way looks. If it isn't suitable, I can redo it:


Regards,
kahunaminor
_VISITCOMMUNITY
New South Wales, Australia
Joined: April 06, 2008
KitMaker: 151 posts
AeroScale: 141 posts
Posted: Thursday, May 12, 2016 - 11:44 AM UTC

Welcome back,
Progress has been steady. The central canopy was attached without incident. The mechanics will just be seen through the glazing so at least it will give an impression of workings, even if it isn't 100% correct. The front canopy, landing lights, covers and the ID lights have been affixed and masked. The ID lights had small holes drilled on the inboard faces and red/green paint added in the holes:


 The underside has been sprayed Tamiya XF21 Sky. The lower escape hatch and flare chute doors (missed by Airfix) were scribed using the 48 scale plans in the MMP book. I used the retracted wheel covers as masks for the painted wheel well interiors:


The MLG covers are two piece but are moulded as a single unit. I took an ultra fine saw to the joins and deepened them to better reflect the original:


The turret main canopy and doors were masked inside and out and painted MM Flat Black. Once these were dry, I shot a protective coat of Testors Dullcote out of a rattle can over them. Then the interior maskings were removed and the main canopy clipped into place over the MG mechanisms. Tamiya Extra Thin was run around the base and this was left to dry overnight. The exterior masks were removed from all glazings and the doors placed in the open position, with Tamiya Extra Thin again run just around the bottom joins:


It is all starting to fall into place as the masks arrived in the post this morning:


Regards,
 _GOTOTOP