_GOTOBOTTOM
World War II
Discuss WWII and the era directly before and after the war from 1935-1949.
Hosted by Rowan Baylis
1/72 Airfix P-51D Big Beautiful Doll
ArmouredSprue
_VISITCOMMUNITY
South Australia, Australia
Joined: January 09, 2002
KitMaker: 1,958 posts
AeroScale: 116 posts
Posted: Sunday, November 15, 2015 - 05:24 AM UTC
Hi all

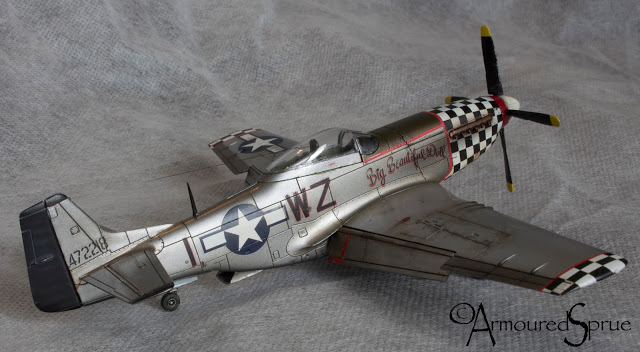
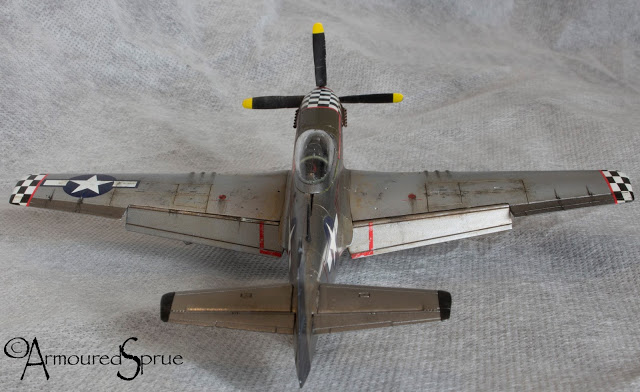
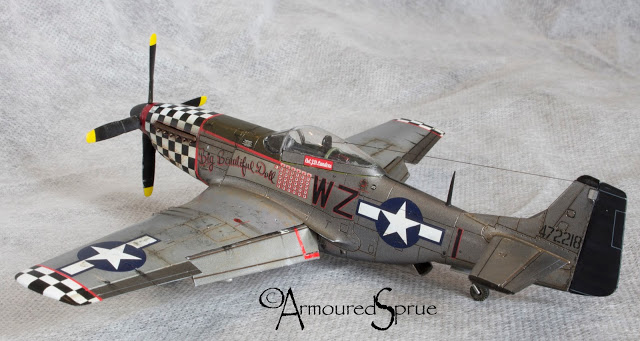
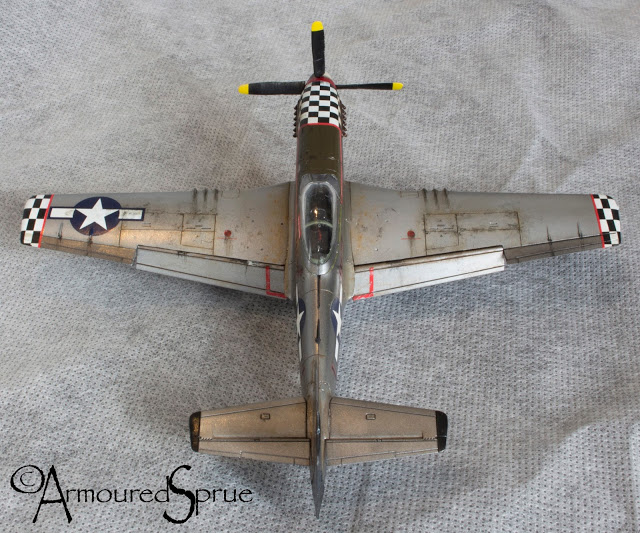
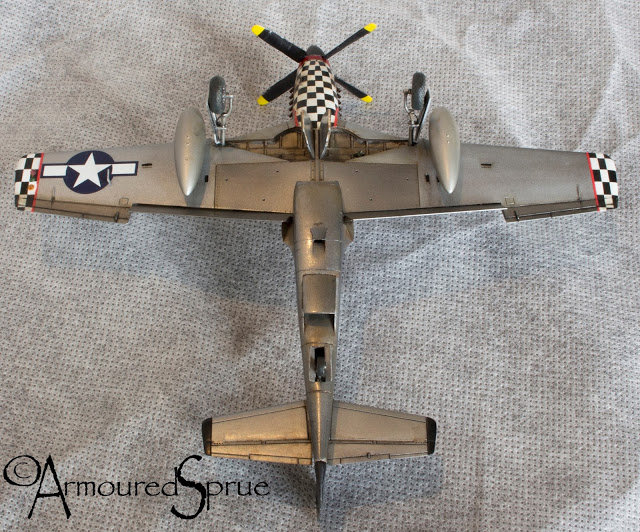
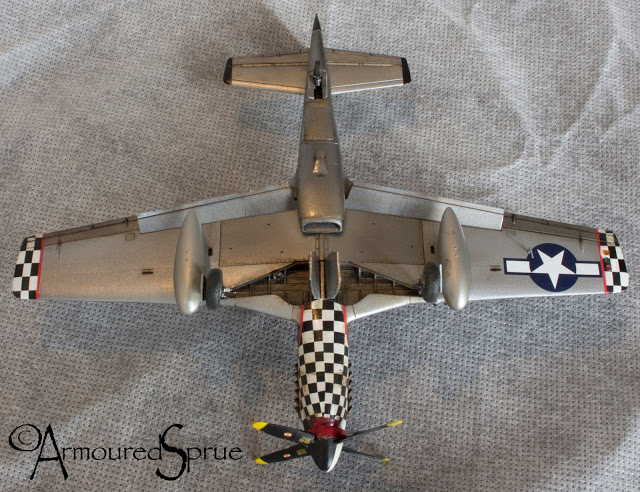
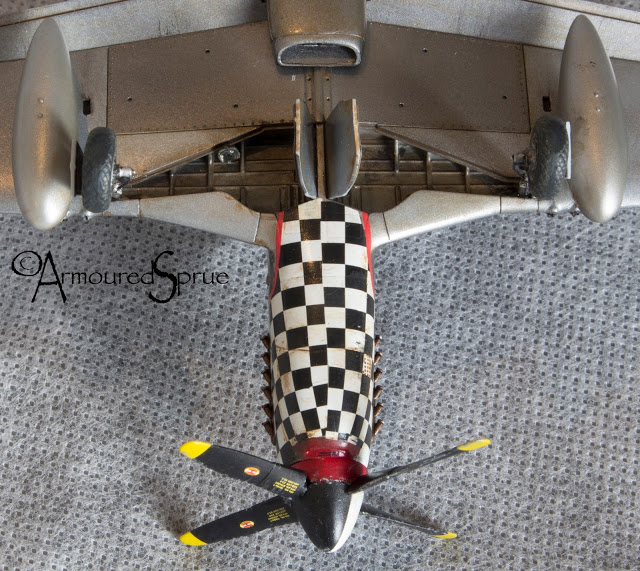
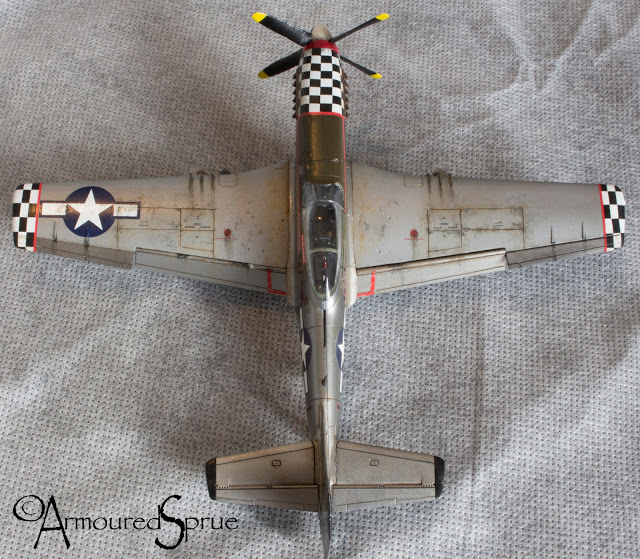
I haven't been around here for a while, so decided to show my latest build.

Airfix 1/72 straight from the box except for Eduard's seat belts and decals by Eagle Cals.

Entirely airbrushed using Tamiya acrylics + Future.


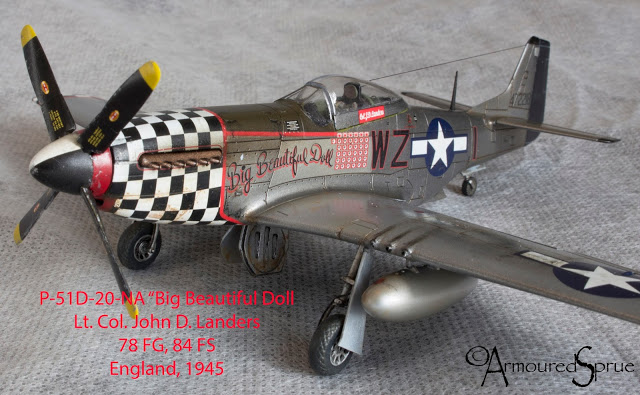
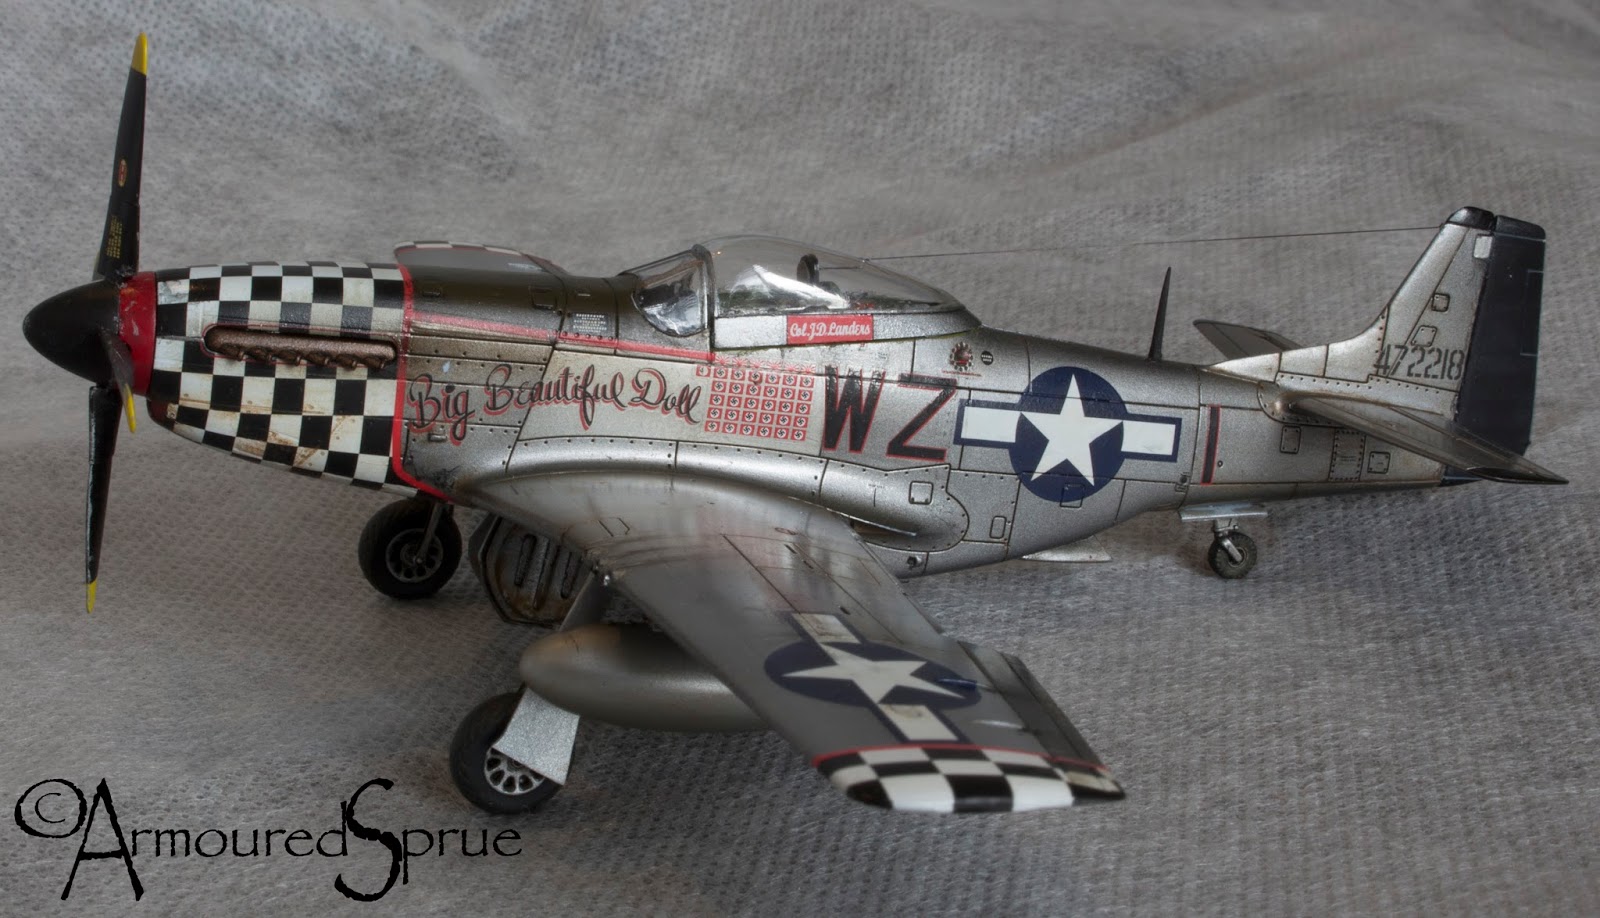
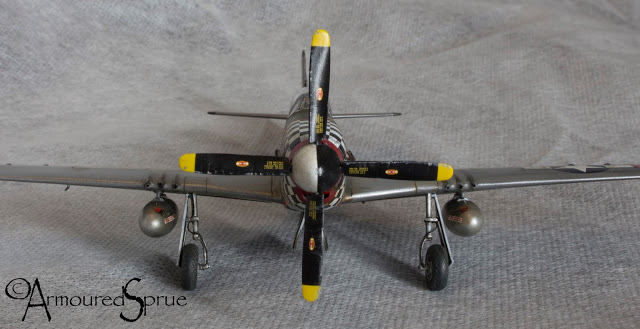
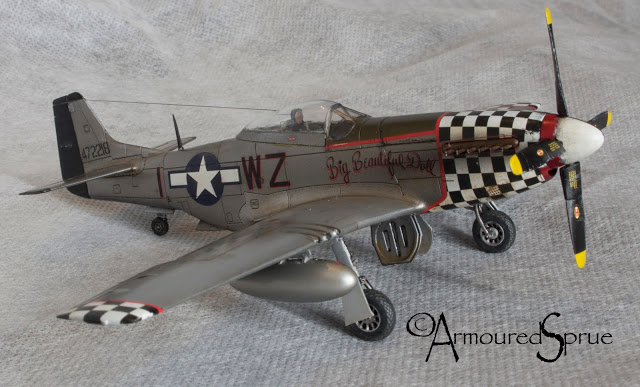
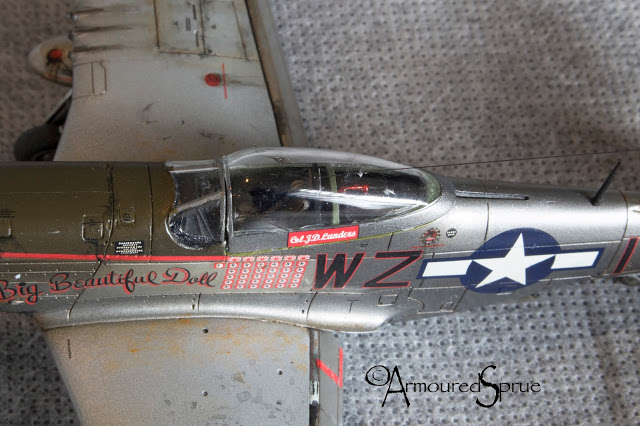
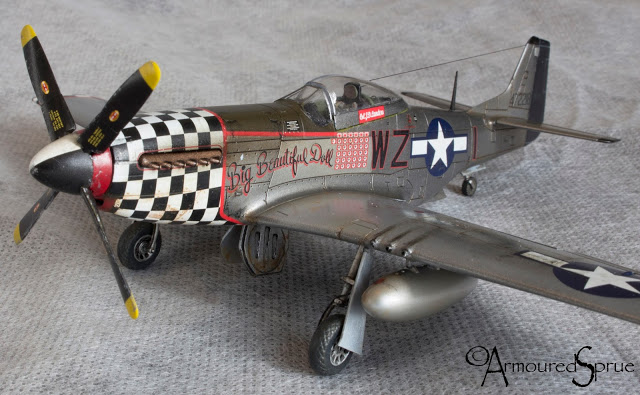
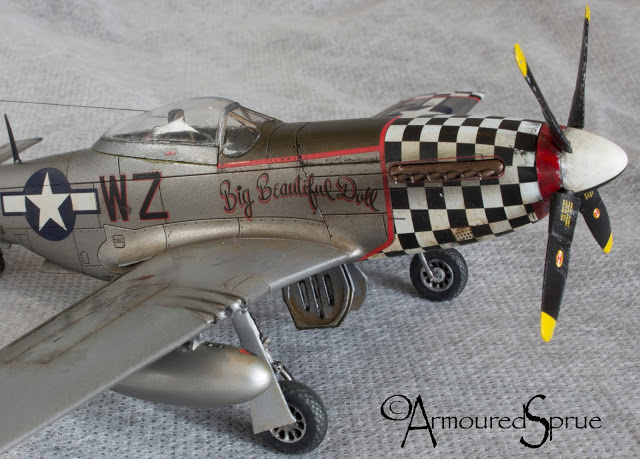
here is a LINK for the WIP WIP P-51D

Cpmments and critics are welcomed!

Cheers
Paulo
halfpint33
_VISITCOMMUNITY
Kansas, United States
Joined: April 13, 2014
KitMaker: 4 posts
AeroScale: 2 posts
Posted: Sunday, November 15, 2015 - 09:12 AM UTC
Nice job.
spaarndammer
_VISITCOMMUNITY
Noord-Holland, Netherlands
Joined: January 28, 2007
KitMaker: 1,945 posts
AeroScale: 388 posts
Posted: Sunday, November 15, 2015 - 01:36 PM UTC
Great job on the build and finish. I like your NMF and weathering very much.

Was it difficult to align the red stripes with the anti-glare panel and chessboard?

Thanks for sharing a link to your WIP as well. Will definitely take a look at it.


Jelger
ArmouredSprue
_VISITCOMMUNITY
South Australia, Australia
Joined: January 09, 2002
KitMaker: 1,958 posts
AeroScale: 116 posts
Posted: Sunday, November 15, 2015 - 03:44 PM UTC

Quoted Text

Great job on the build and finish. I like your NMF and weathering very much.

Was it difficult to align the red stripes with the anti-glare panel and chessboard?

Thanks for sharing a link to your WIP as well. Will definitely take a look at it.


Jelger


Thanks

It was actually easier than I thought to apply the decals.

Cheers
Joel_W
Staff MemberAssociate Editor
AUTOMODELER
_VISITCOMMUNITY
New York, United States
Joined: December 04, 2010
KitMaker: 11,666 posts
AeroScale: 7,410 posts
Posted: Sunday, November 15, 2015 - 07:03 PM UTC
Paulo,
Just an exceptional build. Your NMF certainly looks most realistic. I'm amazed that you were able to get those results using Tamiya Acrylics, as I've always found their Flat Aluminum to be very grainy.

Your decaling is rock solid as it looks just like it was painted on. The engine cowling checkerboard came out perfect. Not a wrinkle to be seen.

I really like your controlled weathering. It's not over done, yet conveys a sense of a well maintained operational aircraft.

Joel
ArmouredSprue
_VISITCOMMUNITY
South Australia, Australia
Joined: January 09, 2002
KitMaker: 1,958 posts
AeroScale: 116 posts
Posted: Monday, November 16, 2015 - 12:32 AM UTC

Quoted Text

Paulo,
Just an exceptional build. Your NMF certainly looks most realistic. I'm amazed that you were able to get those results using Tamiya Acrylics, as I've always found their Flat Aluminum to be very grainy.

Your decaling is rock solid as it looks just like it was painted on. The engine cowling checkerboard came out perfect. Not a wrinkle to be seen.

I really like your controlled weathering. It's not over done, yet conveys a sense of a well maintained operational aircraft.

Joel


Thanks Joel

If you click on the link for the WIP of this project (included in the first post) you see that I've used the X32 Titanium Silver rubbed with graphite powder to achieve the metallic appearance. This decal is very good and I was surprised to not having any problems with it.
Cheers
Joel_W
Staff MemberAssociate Editor
AUTOMODELER
_VISITCOMMUNITY
New York, United States
Joined: December 04, 2010
KitMaker: 11,666 posts
AeroScale: 7,410 posts
Posted: Monday, November 16, 2015 - 09:58 PM UTC

Quoted Text


Quoted Text

Paulo,
Just an exceptional build. Your NMF certainly looks most realistic. I'm amazed that you were able to get those results using Tamiya Acrylics, as I've always found their Flat Aluminum to be very grainy.

Your decaling is rock solid as it looks just like it was painted on. The engine cowling checkerboard came out perfect. Not a wrinkle to be seen.

I really like your controlled weathering. It's not over done, yet conveys a sense of a well maintained operational aircraft.

Joel


Thanks Joel

If you click on the link for the WIP of this project (included in the first post) you see that I've used the X32 Titanium Silver rubbed with graphite powder to achieve the metallic appearance. This decal is very good and I was surprised to not having any problems with it.
Cheers


Paulo,

I indeed checked out your WIP thread, and I must say that I was more then impressed with your research and execution of it on the wings. As for your NMF technique, it's certainly innovative, and I do intend to try it out on small areas that require NMFs, where it seems a better choice then using Alcad, which I'm addicted to.

Joel
JPTRR
Staff MemberManaging Editor
RAILROAD MODELING
#051
_VISITCOMMUNITY
Tennessee, United States
Joined: December 21, 2002
KitMaker: 7,772 posts
AeroScale: 3,175 posts
Posted: Tuesday, November 17, 2015 - 03:01 AM UTC
Paulo,

1/72!? My, Airfix is surging in quality. Exceptional model.
GazzaS
#424
_VISITCOMMUNITY
Queensland, Australia
Joined: April 23, 2015
KitMaker: 4,648 posts
AeroScale: 1,938 posts
Posted: Tuesday, November 17, 2015 - 03:55 AM UTC
Hi Paulo,
Beautiful looking P-51. Great work at such a small scale!

Gary
ArmouredSprue
_VISITCOMMUNITY
South Australia, Australia
Joined: January 09, 2002
KitMaker: 1,958 posts
AeroScale: 116 posts
Posted: Tuesday, November 17, 2015 - 04:29 AM UTC

Quoted Text

Paulo,

1/72!? My, Airfix is surging in quality. Exceptional model.


Thanks mate!
ArmouredSprue
_VISITCOMMUNITY
South Australia, Australia
Joined: January 09, 2002
KitMaker: 1,958 posts
AeroScale: 116 posts
Posted: Tuesday, November 17, 2015 - 04:30 AM UTC

Quoted Text

Hi Paulo,
Beautiful looking P-51. Great work at such a small scale!

Gary


Thanks Gary
 _GOTOTOP