A-36 Apache - 1/48 Italeri/AccMin
Germany
Joined: September 07, 2005
KitMaker: 5,609 posts
AeroScale: 5,231 posts
Posted: Friday, July 10, 2015 - 03:09 PM UTC
Hi all,
well, time is running out for the Mustang campaign. I did not build anything for the past two months thus I will try to get some modelling MoJo back with this small project. not sure if it will work, but I'll try. (14 days is very short considering my normal glacial speed)
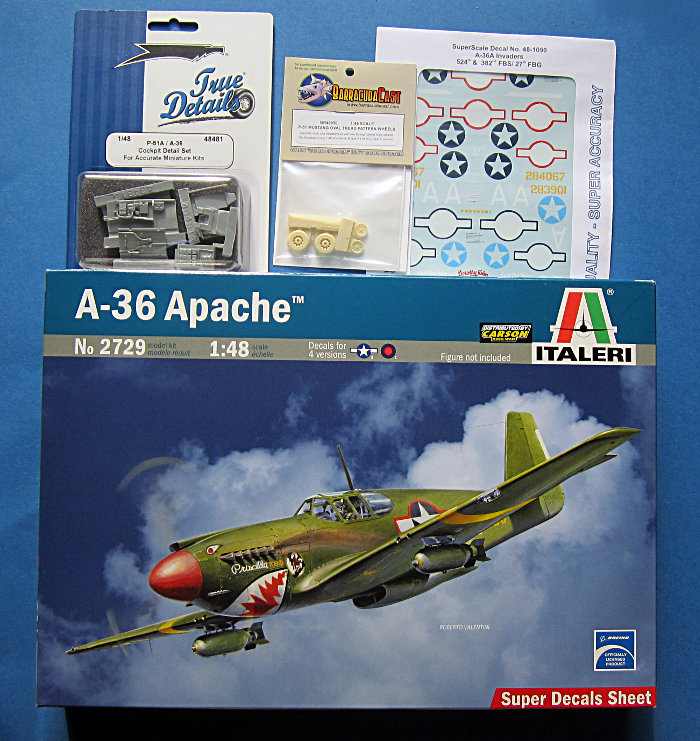
This is what I had organized for this build some months ago.
Yesterday I started sanding the resin sidewalls and attaching them to the kit. Today I gawve it a nice coat in XF-5. Not much progress to show yet, but I'll take some more pix soon.
all the best
Steffen
DULCE ET DECORUM EST PRO HOBBY MORI
Nordrhein-Westfalen, Germany
Joined: March 22, 2015
KitMaker: 671 posts
AeroScale: 614 posts
Posted: Friday, July 10, 2015 - 04:14 PM UTC
Hi Steffen,
I always wanted to build this bird of italeri, too, but in the 1/72 scale. So I am happy to follow Your build thread and catch some information!
Oliver

On the desk: Probably a Panzer III.
New Hampshire, United States
Joined: November 09, 2008
KitMaker: 615 posts
AeroScale: 459 posts
Posted: Friday, July 10, 2015 - 05:04 PM UTC
Hi Steffen,
Welcome back

It's always a pleasure to look over your shoulder as you build something.
I built this thing OOB when it first came out from Accurate Miniatures, it went together really well back then so this should be a fun build

P-61 Black Widows, the Group Build
Veni, Vidi, Velcro; I came, I saw, I stuck around
Germany
Joined: September 07, 2005
KitMaker: 5,609 posts
AeroScale: 5,231 posts
Posted: Friday, July 10, 2015 - 06:42 PM UTC
Hi Oliver and Bruce,
this is kind of oob, so I do not expect too much trouble from the kit itself.
The sprues are warped a bit but it seems it will work out. I assebled the wings which look o.k now although the lower wing was a double S.
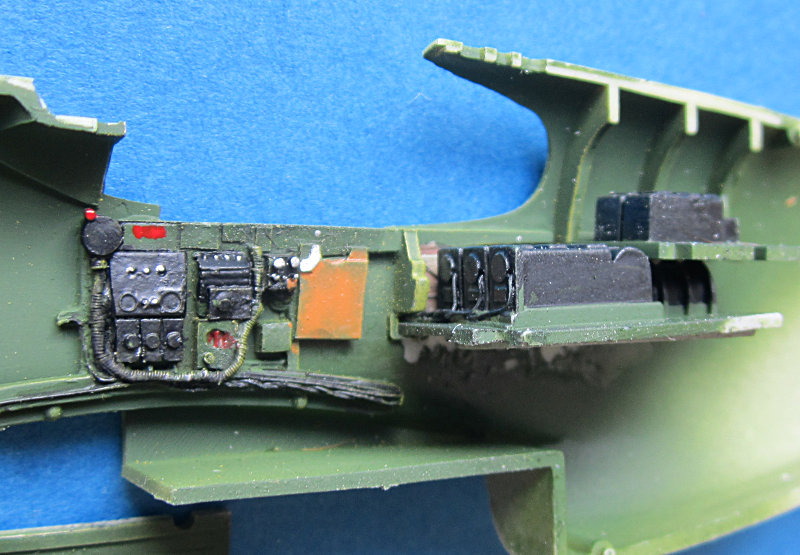
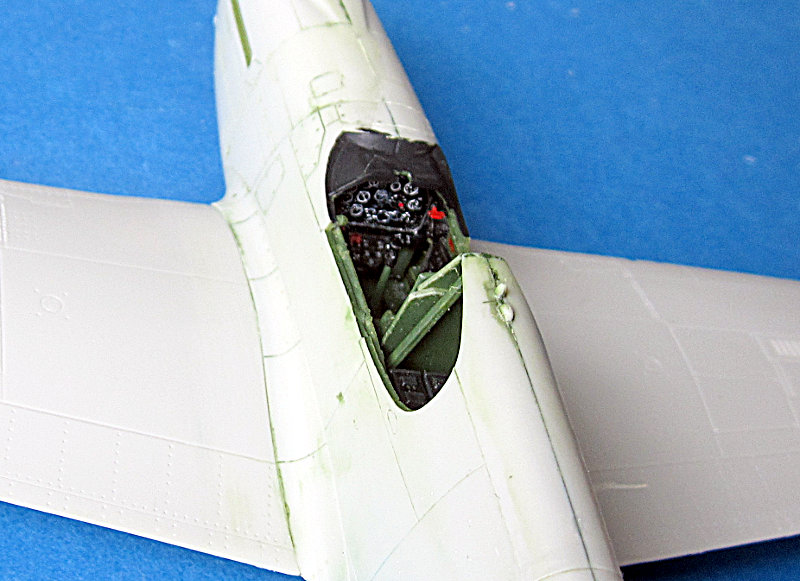
Here is a picture of the pit. Nothing spectacular though:
Just noticed the typo, maybe one of the board admins can change the "38" to "36" in the headline? .. doh
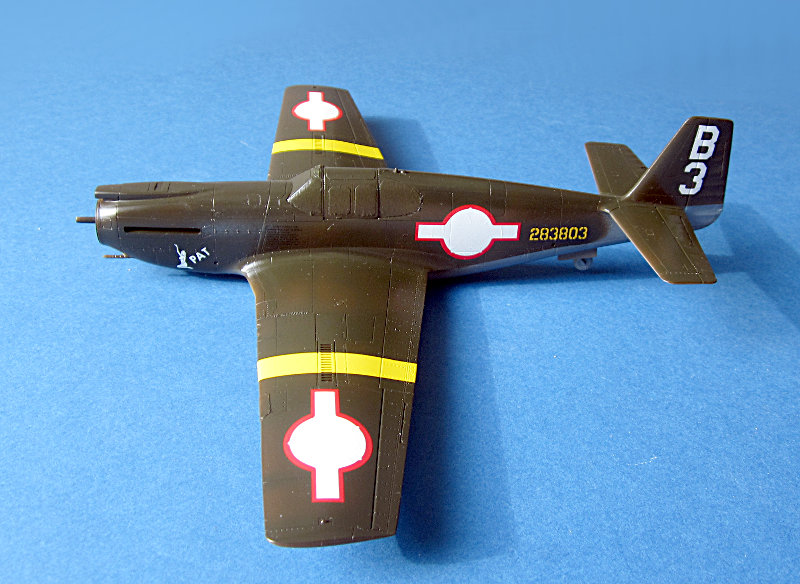
BTW I will do Michael T. Russo's "Pat"
all the best
Steffen
DULCE ET DECORUM EST PRO HOBBY MORI
Germany
Joined: September 07, 2005
KitMaker: 5,609 posts
AeroScale: 5,231 posts
Posted: Saturday, July 11, 2015 - 04:21 PM UTC
Hi again
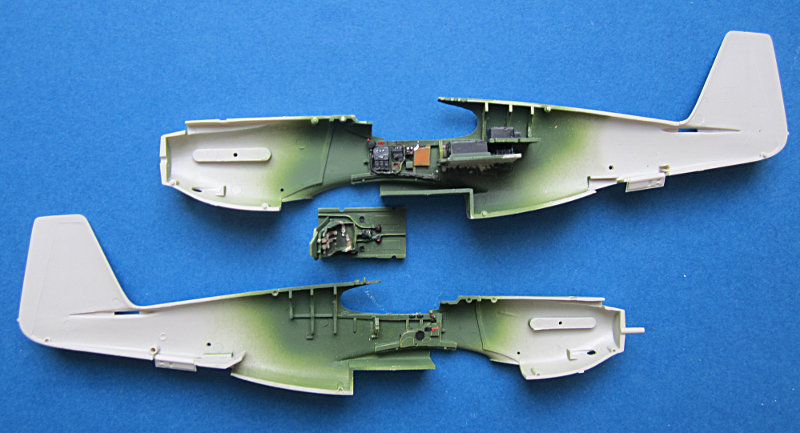
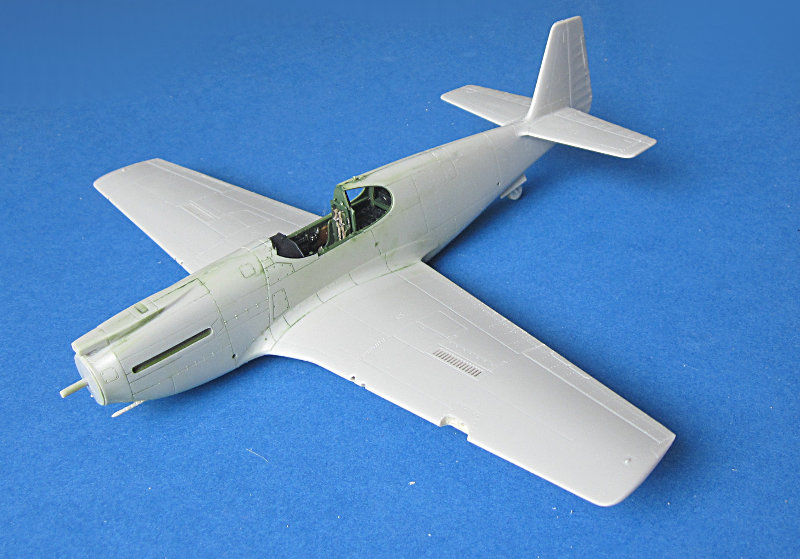
Meanwhile I completed the wings and the fuselage, works out pretty well so far. I had to fiddle a bit to get the rear decks fit, but all in all no problem. As I did not want to fit in the cockpitfloor together with these, I cut out the Fuselage underside after the glue had set.
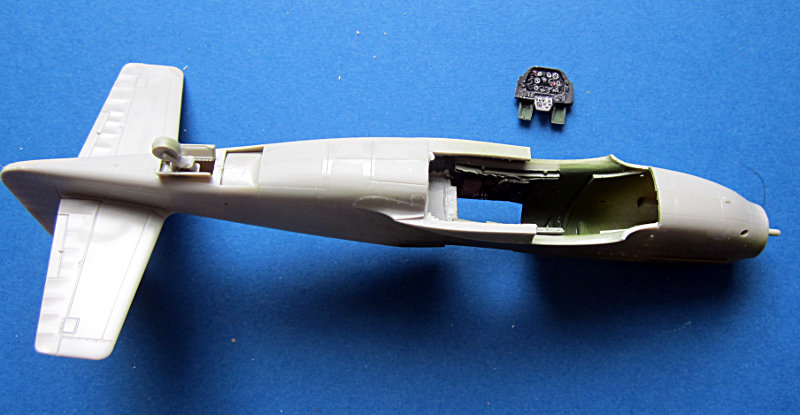
I also completed the instrument panel. I used the kit decal though it has a slightly different layout than the TD part. Some touchups with the brush and it is good enough for my taste. The Cockpit set is very good for a True Details set, but it is nowhere near Aires or even Vector...
all the best
Steffen
DULCE ET DECORUM EST PRO HOBBY MORI
Pennsylvania, United States
Joined: June 17, 2009
KitMaker: 566 posts
AeroScale: 507 posts
Posted: Saturday, July 11, 2015 - 08:03 PM UTC
Finally an Allison engined mustang in the campaign! Progress is looking good so far Steffen. Your are right about the TD cocpit set for the AM mustangs, theyre pretty good and an easy fit as they appear to me to have been built around the kit parts. A newer nicer set would be welcomed, certainly one that doesnt rely on using kit parts like the stick. At least we have something though

"...Fat, drunk, and stupid is no way to go through life son"
Germany
Joined: September 07, 2005
KitMaker: 5,609 posts
AeroScale: 5,231 posts
Posted: Saturday, July 11, 2015 - 09:32 PM UTC
Cheers Mike!
The build is fun so far. I got the major airframe together and In did not make too big mistakes so far.
I neede to fill a gap on the right wing root. I used magic sculp and the rest went into the wing light opening where I also made two indentions for the twin lights.
Next will be paint on some details. The instructions want the main gear well to be the same like the green cockpit and the A-36A pix in Mustang D&S pt. 1 look also pretty dark so be it. Thus I will first attach the canopy and mask it, as it will get the same colour. I also plan to airbrush the yellow stripes on the wings.
There will be little progress over the week but I still hope I can make it.
all the best
Steffen
DULCE ET DECORUM EST PRO HOBBY MORI
Merlin
 Senior Editor
#017
United Kingdom
Joined: June 11, 2003
KitMaker: 17,582 posts
AeroScale: 12,795 posts
Posted: Monday, July 13, 2015 - 12:48 AM UTC
Nice work Steffen

I've been tempted by the Italeri boxing sat on the shelf at my LHS, but I've got an original Accurate Miniatures boxing begging to be built, so I've shown unaccustomed restraint and passed on it!

All the best
Rowan
BEWARE OF THE FEW...
As I grow older, I regret to say that a detestable habit of thinking seems to be getting a hold of me. - H. Rider Haggard
Joel_W
Associate Editor New York, United States
Joined: December 04, 2010
KitMaker: 11,666 posts
AeroScale: 7,410 posts
Posted: Monday, July 13, 2015 - 01:24 AM UTC
Steffen,
Glad to hear that you're once again back at your workbench.
I've often looked at the P-36A from Accurate Miniatures, but since I've yet to build a single P-51 since coming back into the hobby several years ago, I've passed it up for other aircraft that holds a greater interest to me.
Your build to date looks really good, with an exceptionally nice job on the cockpit.
Joel
On my Workbench:
Monogram 1/24 scale 427 Shelby Cobra
Just Completed:
Beemax 1/24 scale BMW M3 E30 1992 Evolution II
Germany
Joined: September 07, 2005
KitMaker: 5,609 posts
AeroScale: 5,231 posts
Posted: Monday, July 13, 2015 - 02:12 AM UTC
Cheers guys,
yes another deep rabbit hole... hope I can gain enough motivation to finish some of my kits (at least the Yak-3 and the Ki 100 would be great)
The canopy of this rebox has only very faint panel lines so I ordered an Eduard mask set today .. hope it will arrive until the weekend.
Rowan: thanks for correcting the thread name! The bonus of the Italeri kit is the colourful markings and I got it for under 20 Euro. BTW one of my first quarterscale kits was the P-51A so it is interesting for me to see the difference (
http://www.ipmsdeutschland.de/Flugzeuge/Arndt/WK2/England_James.html )
all the best
Steffen
DULCE ET DECORUM EST PRO HOBBY MORI
Alberta, Canada
Joined: January 19, 2008
KitMaker: 6,743 posts
AeroScale: 6,151 posts
Posted: Wednesday, July 15, 2015 - 06:09 AM UTC
Looking good so far Steffen . I built the Accu kit when it first came out . Wasn't a bad kit out of the box .
Terri
Germany
Joined: September 07, 2005
KitMaker: 5,609 posts
AeroScale: 5,231 posts
Posted: Thursday, July 16, 2015 - 08:13 PM UTC
Thanks Terri!
Meanwhile I got the masks set and "Klear-ed" the canopy. It is a small drawback of the old kit, that you cannot open this. I hope I can apply the masks this evening and get the interior color on. No time tomorrow, but maybe I can proceed a bit on Sunday.
all the best
Steffen
DULCE ET DECORUM EST PRO HOBBY MORI
Germany
Joined: September 07, 2005
KitMaker: 5,609 posts
AeroScale: 5,231 posts
Posted: Sunday, July 19, 2015 - 12:40 AM UTC
Just a short update to show the current state
all the best
Steffen
DULCE ET DECORUM EST PRO HOBBY MORI
Germany
Joined: September 07, 2005
KitMaker: 5,609 posts
AeroScale: 5,231 posts
Posted: Tuesday, July 21, 2015 - 08:42 PM UTC
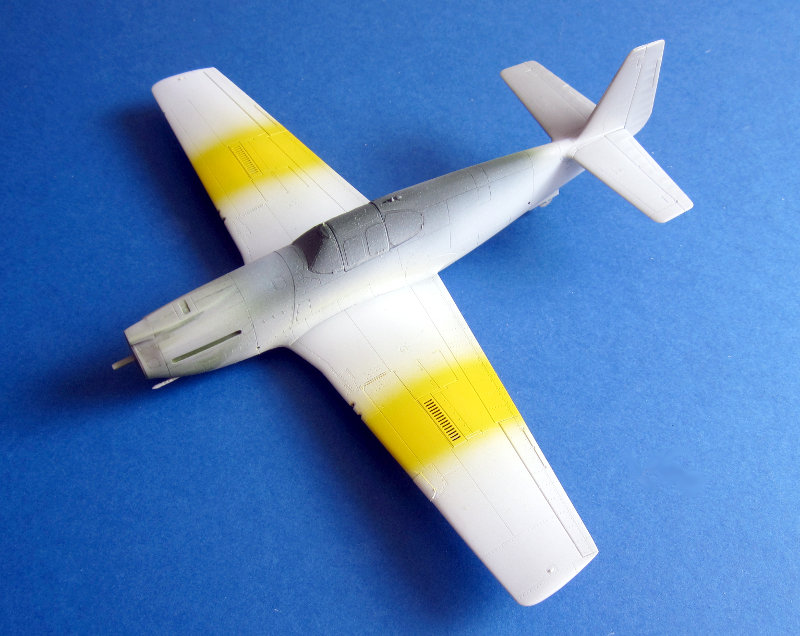
Slow progress,
I finished the landing lights and painted the wing stripe area yellow over a white base coat. I was not happy with the kit supplied landing light cover so I filled and sanded the whole area with Bondic. It is not perfect but i like it better than the kit part.
all the best
Steffen
DULCE ET DECORUM EST PRO HOBBY MORI
Joel_W
Associate Editor New York, United States
Joined: December 04, 2010
KitMaker: 11,666 posts
AeroScale: 7,410 posts
Posted: Tuesday, July 21, 2015 - 11:04 PM UTC
Steffen,
Nice progress with the base yellow. One question, What is Bonic? Did you use it to blend in the lit light, or to make a new light?
Joel
On my Workbench:
Monogram 1/24 scale 427 Shelby Cobra
Just Completed:
Beemax 1/24 scale BMW M3 E30 1992 Evolution II
Germany
Joined: September 07, 2005
KitMaker: 5,609 posts
AeroScale: 5,231 posts
Posted: Tuesday, July 21, 2015 - 11:17 PM UTC
Cheers Joel,
well, Bondic is an UV curing clear resin you can get in certain craft stores here in Germany (I am pretty sure there is something like that everywhere). Good thing is you can build up several layers that stick to each other without a "boundary layer" so you have no silvering inside the material.
In this case I have not prepped my model good enough so I have some silvering to the color covered plastic when looking from certain angles and the paint mixed a bit into it so it has a slight greenish hue (which is not that bad as it is close to the original). It should look o.k. once the paint is on.
all the best
Steffen
DULCE ET DECORUM EST PRO HOBBY MORI
Joel_W
Associate Editor New York, United States
Joined: December 04, 2010
KitMaker: 11,666 posts
AeroScale: 7,410 posts
Posted: Wednesday, July 22, 2015 - 03:13 AM UTC
Steffen,
Thanks for that information.
I've actually seen a few guys build up clear parts using Gel CA glue a little at a time. I've never tried it, but it does sound realistic. And dried CA glue does polish up very well.
Joel
On my Workbench:
Monogram 1/24 scale 427 Shelby Cobra
Just Completed:
Beemax 1/24 scale BMW M3 E30 1992 Evolution II
Germany
Joined: September 07, 2005
KitMaker: 5,609 posts
AeroScale: 5,231 posts
Posted: Wednesday, July 22, 2015 - 09:44 PM UTC
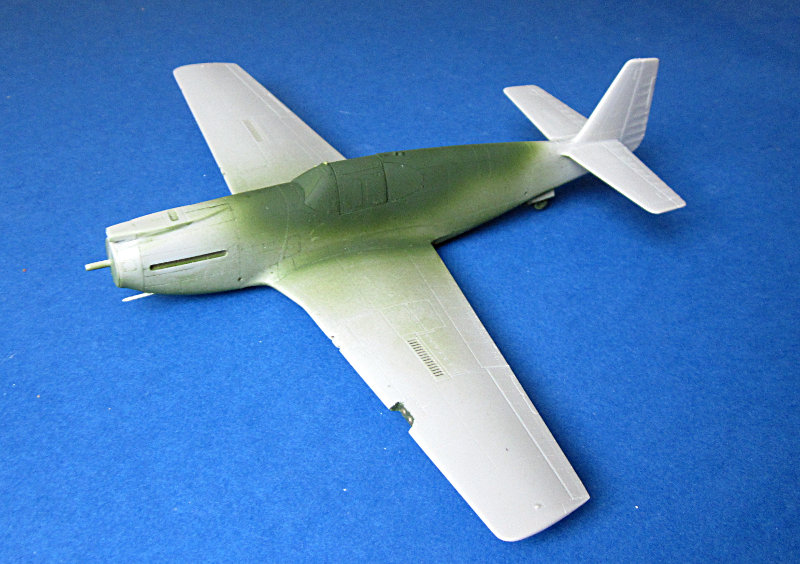
We got some paint
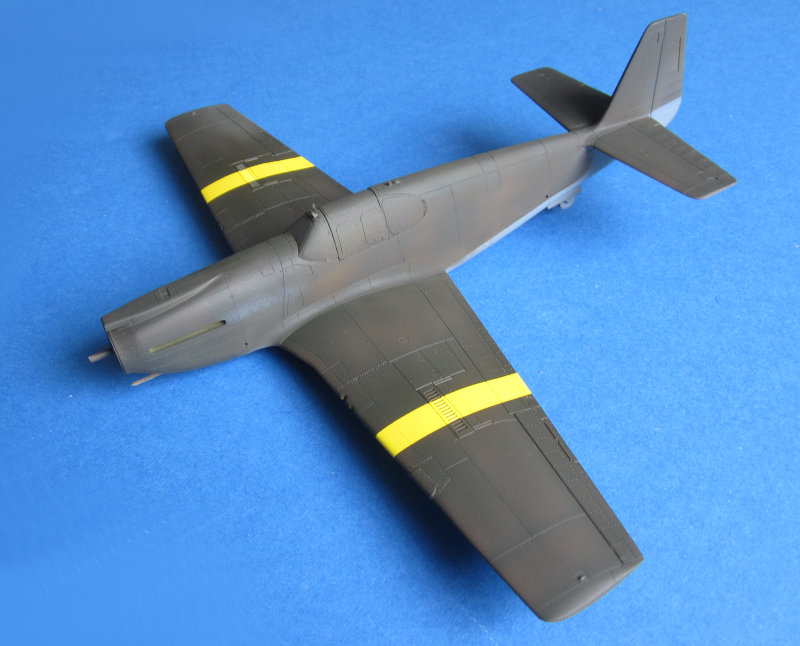
simple OD over NG both Tamiya thinned with Gunze Levelling Thinner (I did some preshading in black but this is almost futile as I spray pretty thick layers)
all the best
Steffen
DULCE ET DECORUM EST PRO HOBBY MORI
Joel_W
Associate Editor New York, United States
Joined: December 04, 2010
KitMaker: 11,666 posts
AeroScale: 7,410 posts
Posted: Thursday, July 23, 2015 - 01:24 AM UTC
Steffen,
Neat, and clean. Will you be decaling before post shading and weathering?
Joel
On my Workbench:
Monogram 1/24 scale 427 Shelby Cobra
Just Completed:
Beemax 1/24 scale BMW M3 E30 1992 Evolution II
Germany
Joined: September 07, 2005
KitMaker: 5,609 posts
AeroScale: 5,231 posts
Posted: Thursday, July 23, 2015 - 02:09 AM UTC
Yes, I sprayed on a layer of klear and will apply decals next. Then another clear coate and then a wash. No postshading this time.
All the best
Steffen
DULCE ET DECORUM EST PRO HOBBY MORI
Alberta, Canada
Joined: January 19, 2008
KitMaker: 6,743 posts
AeroScale: 6,151 posts
Posted: Thursday, July 23, 2015 - 05:35 AM UTC
The effect isn't that bad at all Steffen , has a more natural feel to it .
Terri
Germany
Joined: September 07, 2005
KitMaker: 5,609 posts
AeroScale: 5,231 posts
Posted: Thursday, July 23, 2015 - 08:28 PM UTC
Thanks Terri!
This won't be the best model ever built, but I hope to get it finshed soon... that is all that is important to me.
Just put on the first decals. I'll take a photo tomorrow to avoid any accident during handling (...I know myself...)
all the best
Steffen
DULCE ET DECORUM EST PRO HOBBY MORI
Uusimaa, Finland
Joined: March 30, 2004
KitMaker: 2,845 posts
AeroScale: 1,564 posts
Posted: Thursday, July 23, 2015 - 08:37 PM UTC
Nice progress! Looking forward to seeing it finished.
I hope I could make even half as fast progress on my B-239 build...

Germany
Joined: September 07, 2005
KitMaker: 5,609 posts
AeroScale: 5,231 posts
Posted: Thursday, July 23, 2015 - 10:08 PM UTC
Cheers Eetu,
mee too
Well your Brewster is a total different animal and as you are trying to correct it you have a whole lot of work to put into the model.
all the best
Steffen
DULCE ET DECORUM EST PRO HOBBY MORI
Joel_W
Associate Editor New York, United States
Joined: December 04, 2010
KitMaker: 11,666 posts
AeroScale: 7,410 posts
Posted: Friday, July 24, 2015 - 03:23 AM UTC
Steffen,
It's really starting to come together now with the 1st set of decals.
Joel
On my Workbench:
Monogram 1/24 scale 427 Shelby Cobra
Just Completed:
Beemax 1/24 scale BMW M3 E30 1992 Evolution II


