_GOTOBOTTOM
World War II
Discuss WWII and the era directly before and after the war from 1935-1949.
Hosted by Rowan Baylis
Hasegawa 1/72 P51b
mrockhill
_VISITCOMMUNITY
Pennsylvania, United States
Joined: June 17, 2009
KitMaker: 566 posts
AeroScale: 507 posts
Posted: Saturday, June 27, 2015 - 07:18 AM UTC
Thought I might share my build for the mighty mustang campaign with the rest of the folks. And because we can always use more P51b's. So this is the kit. My mother bought it for me at a flea market, probably been 25 years since she last bought me a kit, it was a nice treat, so I need to build this!

and by build I mean finish... which can be challenging. Im hoping the scale and adequate detail can carry me through. Ive added some detail here and there and bought some resin wheels. Going to keep the canopy closed, I really like the lines of the malcolm hood. So while detail will be visible, I can get away with less of it which will speed things up. Im planning on using the kit decals for Capt John Englands G4H "u've had it!" Ill mask and paint the stripes though.

Ive still not done a NMF scheme before so this kit is a good first candidate since its not the dominate finish of the scheme. Im planning on using decanted tamiya as12. One thing I am seeing as being a hold up at this point will be the 357th nose treatment. Im hoping the kit checker decals workout, but im going to need to match the colors for the spinner and neatly mask it. I Have an idea how I may do that but I'm open to feedback on any of this
mrockhill
_VISITCOMMUNITY
Pennsylvania, United States
Joined: June 17, 2009
KitMaker: 566 posts
AeroScale: 507 posts
Posted: Saturday, June 27, 2015 - 08:07 AM UTC
Naturaly with simplicity as my goal I immediately grabbed the exacto and cut the flaps free. Howd I know that would happen! I also filled and sanded the wing panels. In this pic you can also see this kits major shortfall, the D profile wing root, which will go uncorrected in this case.

This sort of madness didnt bode well for the rest of the build but sanity soon came to the rescue in the most unlikely if places, the cockpit! The existent detail was pretty suggestive of a mustang interior, which is much better than many hasegawa 1/72 kits. It still lacked the cluttered appearance and not wanting to get bogged down building it, I just drew and painted it with acrylics and colored pencils. I guess I was into it because it took all of 10 minutes to put that onto the interior green basecoat. Seatbelts are just strips of tamiya tape that I managed to successfully pose with the help of thin CA

After much test fitting and deep contemplation, a few alterations were made to what I already thought was a nice 'pit. First I extended the shadows and filled rest of interior with black, just to be sure. This mustang is full of holes and I dont want to see any bare plastic in there!
As for detail this kit left 2 things to be desired when viewed through the canopy. The first aid kit/headrest and the A framed rollover protection, I made both from styrene strip. The aid kit was just a rounded rectangle given life with some quick paintwork. The A frame used strips that were pretty underscale for the job. I used strips that looked the part and fit without issues. More painting of the shadows and highlights helps them look more the part. My appologies for the lousy pic, it slipped through.


I also had in the mean time got to work hollowing out the exhaust stacks and working on the flaps. The first set of exhaust stack went smooth as silk, the second set was like pulling teeth but persistence and judicious applications of CA and #77 drill eventually prevailed. I took no photos, such was my disgust for my vanquished foe.

On the otherhand the flaps have gone smashingly with work still ongoing. I dont regret cutting these free one bit!

PS I neglected to mention fitting the exhausts. These required a bit of fidgeting to get them to sit right. The oob fit would have the exhausts barely peeking out beyond flush. Some quick exacto work reduced the locating tabs on the fuselage halves so that I could get a more realistic appearance. These were glued and after they started to solidify I posed them and let them set.
Joel_W
Staff MemberAssociate Editor
AUTOMODELER
_VISITCOMMUNITY
New York, United States
Joined: December 04, 2010
KitMaker: 11,666 posts
AeroScale: 7,410 posts
Posted: Saturday, June 27, 2015 - 06:29 PM UTC
Mike,
Very nice progress so far on the rather old Hasegawa kit. I'm not very knowledgeable about 1/72 scale kits these days, so I did a little checking to see what the issue was with the kit wings. Scott Van Aken, who does a "million" reviews on ModelingMadness pointed this out:

.... It has the distinction of having the wrong wing for a P-51B/Mustang III. Apparently Hasegawa thought we'd not notice and used their P-51D wing instead....

Scott also pointed out that the needed corrections would end up sanding right into the wheel well.

With that being said, your extra detailing with dropping the flaps, and filling in all the wing seams for a smooth surface, adds that much more to your build.

Joel

mrockhill
_VISITCOMMUNITY
Pennsylvania, United States
Joined: June 17, 2009
KitMaker: 566 posts
AeroScale: 507 posts
Posted: Saturday, June 27, 2015 - 11:47 PM UTC
Joel, the wing is really the sour point of this kit all the way around, the academy is the way to go these days Ive read but I font have one to compare yet. The wheel wells are also super shallow so much so that it may even be noticeable when on its landing gear. Ill pose the main gear doors in a slightly dropped position to reduce visiblity here.

Its ashame as there is plenty of room in the wing for a much nicer, deeper set of wells. I gave thought to cutting out the back of the gear leg recesses to and stuffing some styrene strip in there to give it depth when viewed from the front.... but I glued the wings together instead before any tools came out. Its better this way


I also have some dihedral issues to tend to, so its good that I resisted complicating the wells. The drawing is of an Allison engined version but im guessing the wings profile is the same or similar.
Joel_W
Staff MemberAssociate Editor
AUTOMODELER
_VISITCOMMUNITY
New York, United States
Joined: December 04, 2010
KitMaker: 11,666 posts
AeroScale: 7,410 posts
Posted: Sunday, June 28, 2015 - 01:54 AM UTC
Mike,
90% plus of the views are looking at a angle down, so while the wheels are really way too shallow, it won't be seen unless one views it from a slightly upper angle. I guess that would depend on the height of the display shelf. But the wing dihedral really looks way to flat. As you assumed, the B & D have about the same dihedral angle.


Are you going to file/sand the wing upper inside edge then glue and tape?

Joel
mrockhill
_VISITCOMMUNITY
Pennsylvania, United States
Joined: June 17, 2009
KitMaker: 566 posts
AeroScale: 507 posts
Posted: Sunday, June 28, 2015 - 06:49 AM UTC
Joel, that's what I did, little at a time. It took awhile but I think I have it about right. I need to address a couple minor things before gluing the wings on though. An oversight on my part, I forgot to thin the wings where I cut the flaps before I glued the wings together. Left as is will make for an unsightly joint when I reattach the flaps. Not a big deal just now I have to thin them in less than ideal conditions

I got a bit of bench time today, and got some stuff done, sanding the joints, spot filling, eliminating some unusual or overly prominent recessed line detail. The front air intake under the nose is a separate piece that wasn't a good fit, but easily blended in with the sanding sticks.

Both the radiator intake and outlet got detail inspired by my tamiya kit. Over the top for some but it was pretty easy with some of my last bits of micro screen and stretched sprue and also hid some rather nasty seams that would have been time consuming to fill and in the case on the intake which despite the separate intake trunk/lip, it was still shallow and just black paint wouldnt hide it. I took no pictures of these hijinks, Ill take some later on.

Two disappointments to note. Well only one is an actual disappointment, the other is more a face palm moment. Being a flea market kit, it had been subject to signs of handling. Bags open, major pieces separated and its missing one complete 75gal drop tank. While I do prefer the look of 75 gal tanks if possible that wont be an issue here. However this might bother me.
The canopy was wrenched free at some point and it stressed the plastic in the canopy frame and quite possibly into the canopy, looks like it to me. Ill be stewing if this white wart goes fouling my lipsticked pig of a p51b. I might be looking into a vac canopy


As for the face palm moment, I was pretty proud of the improv firstaid kit and how much more complete the cockpit looked with it and then I find this!
This shot has the kit missing from the head armor.... Im not sweating it, it still looks good to me
Joel_W
Staff MemberAssociate Editor
AUTOMODELER
_VISITCOMMUNITY
New York, United States
Joined: December 04, 2010
KitMaker: 11,666 posts
AeroScale: 7,410 posts
Posted: Sunday, June 28, 2015 - 05:53 PM UTC
Mike,
Glad to hear that you've got the wing issue under control.

I guess if you look at enough actual pictures, you'll end up seeing just about every possible option, missing or otherwise. But as long as you know that the 1sr aid kit should be there, and you scratched one out, then by all means I vote to use it.

The canopy issue is something that I've had to deal with more then I'd like to admit. If it's cracked or has any valleys or chips, I try to seal them very carefully with extra thin CA glue. Then I polish. The final step is a bath in Pledge, let it dry for a day, and then a 2nd dunk. That sore spot will be gone or at least a whole lot less noticeable.

Joel
mrockhill
_VISITCOMMUNITY
Pennsylvania, United States
Joined: June 17, 2009
KitMaker: 566 posts
AeroScale: 507 posts
Posted: Monday, June 29, 2015 - 07:47 AM UTC
Thanks for the advice Joel, it will definitely come in handy as it seems a proper vac formed 51b malcolm hood for the hasegawa kit is tough to find at the moment
mrockhill
_VISITCOMMUNITY
Pennsylvania, United States
Joined: June 17, 2009
KitMaker: 566 posts
AeroScale: 507 posts
Posted: Friday, July 03, 2015 - 06:56 AM UTC
With the weekend upon me I'm finally able to get some quality benchtime. I've been test fitting, plotting and scheming all week so I came to the bench with lofty goals and a plan.

I started with working on the flaps. Previously I had glued scrap strips of styrene to the cutout flaps to fill them out and build up the hinge area. These were sanded to a rough shape. I chucked a cutter into my dremel and thinned the wings in the flap recess so the rounded edge of my flaps snuggle nicely into the wing.


The flaps being dropped exposes a bit of the wing root and it doesnt look like flap could possibly be closed. With the dremel already out I dug into the fuselage wingroot area and brought it to a more scale thickness and give the flaps room to sit evenly. I think this is as far as this needs to go detail wise.

The rudder of this kit has some odd yet fine engraved line detail. Some didnt exist on the real deal so I filled with thn putty and sanded. The rest should be just flat or barely showing ribs as its fabric covered. I decided to attempt a rib detail so have started by filling the engraved "ribs" with very fine stretched sprue. After this dries for a bit I plan to paint over my new ribs with mr surfacer 500 which along with some light sanding should leave me some fine rib detail


While im talking stretched sprue I also finished up my radiator details, which should look awesome....just in case they're visible


And then with everything going so well I decided to complicate matters slightly. I think it'll be worth it

Joel_W
Staff MemberAssociate Editor
AUTOMODELER
_VISITCOMMUNITY
New York, United States
Joined: December 04, 2010
KitMaker: 11,666 posts
AeroScale: 7,410 posts
Posted: Sunday, July 05, 2015 - 06:41 PM UTC
Mike,
A most impressive amount of added detail to a 1/72 scale P-51D. Your flaps really look great. Same goes for your detailed radiator. I'm very interested in seeing how those stretch sprue ribs with a primer/filler turn out.
Joel
mrockhill
_VISITCOMMUNITY
Pennsylvania, United States
Joined: June 17, 2009
KitMaker: 566 posts
AeroScale: 507 posts
Posted: Monday, July 06, 2015 - 02:28 AM UTC
Thanks for the compliments Joel its good to be able to share with folks who appreciate the different aspects of our hobby. I got quite a bit done last night, even glued wings to fuselage, definitely a turning point for a build. Ive got few parts left on the sprues so I should have construction complete this week though I'm sure I can sqeeze another detail or two out. To the bench!
thegirl
_VISITCOMMUNITY
Alberta, Canada
Joined: January 19, 2008
KitMaker: 6,743 posts
AeroScale: 6,151 posts
Posted: Monday, July 06, 2015 - 05:18 AM UTC
Your moving along very nicely on this one Mike . Looking good so far


Terri
mrockhill
_VISITCOMMUNITY
Pennsylvania, United States
Joined: June 17, 2009
KitMaker: 566 posts
AeroScale: 507 posts
Posted: Monday, July 06, 2015 - 06:06 AM UTC
Indeed! I'm not use to this sort of progress, if I go much faster somebody will tell me to put a helmet on
mrockhill
_VISITCOMMUNITY
Pennsylvania, United States
Joined: June 17, 2009
KitMaker: 566 posts
AeroScale: 507 posts
Posted: Tuesday, July 07, 2015 - 06:50 AM UTC
The canopy has agreed to cooperate and rejoin the rest of the build!

I fooled around with some clear bits from the parts box and tried out some ideas I was given. Admittedly I didnt try them all yet but I found success on the 2nd try tamiya extra thin cement. The blemish was mostly internal stemming from the sprue attachment. I carefully let some seep into the blem and it immediately started to clear up! I followed up with some polishing action using 8000 and 12000 pads. Heres the before pic again
And now

thegirl
_VISITCOMMUNITY
Alberta, Canada
Joined: January 19, 2008
KitMaker: 6,743 posts
AeroScale: 6,151 posts
Posted: Tuesday, July 07, 2015 - 08:27 AM UTC
Just gotta love Tamiya extra thin . When sol won't work on stubborn decals , Tamiya extra thin will

Very nice job on fixing the blemish Mike


Terri
Joel_W
Staff MemberAssociate Editor
AUTOMODELER
_VISITCOMMUNITY
New York, United States
Joined: December 04, 2010
KitMaker: 11,666 posts
AeroScale: 7,410 posts
Posted: Tuesday, July 07, 2015 - 05:35 PM UTC
Mike,
I'm a little confused with how you repaired the canopy marks left from removing it from the sprue tree. Sanded and polished through 12,000 grit. Then I usually either dunk the whole canopy/clear glass into a container with Pledge/Future or just add a few drops at a time to the damaged area. The results when dry are always a nearly perfect as Pledge is self leveling.

Are you saying that you used Tamiya Extra Thin Glue to repair the canopy? If so, then I'm assuming that the glue melted the surrounding plastic so it smoothed out, but that surface would no longer be perfectly level.

Terri,
I'm also confused as to your reference that you use Tamiya Extra Thin on decals? Never heard of that one before. How do you apply it so that it doesn't damage the gloss surfaces by eating through it and even into the paint?

Joel

Joel
mrockhill
_VISITCOMMUNITY
Pennsylvania, United States
Joined: June 17, 2009
KitMaker: 566 posts
AeroScale: 507 posts
Posted: Saturday, July 11, 2015 - 07:05 AM UTC
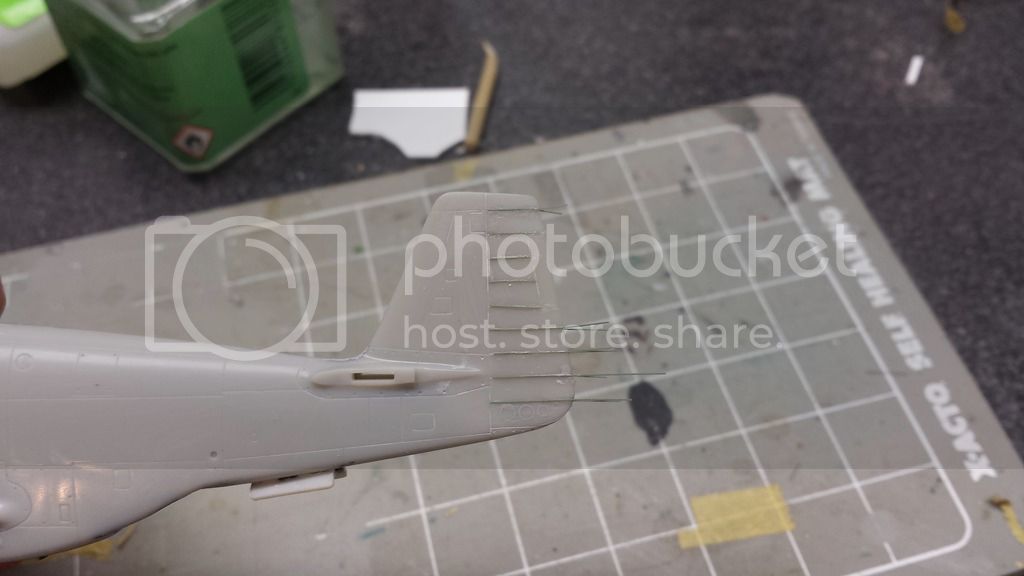
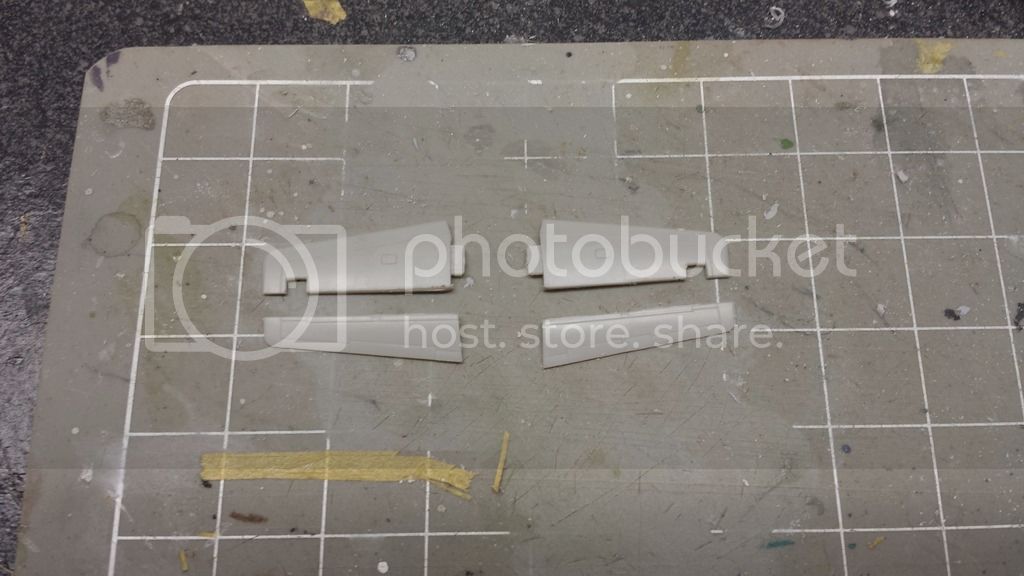
Joel, I appologize, I completely forgot about your interest in the rib detail on the rudder. Lets just say it has fallen short of my expectations thus far. Im not going to persue improving them unless its so ugly that I sand them flush. They just turned out wide and I wasnt able to blend the putty as neatly as I hoped, but I tried and if necessary I will try again sometime.

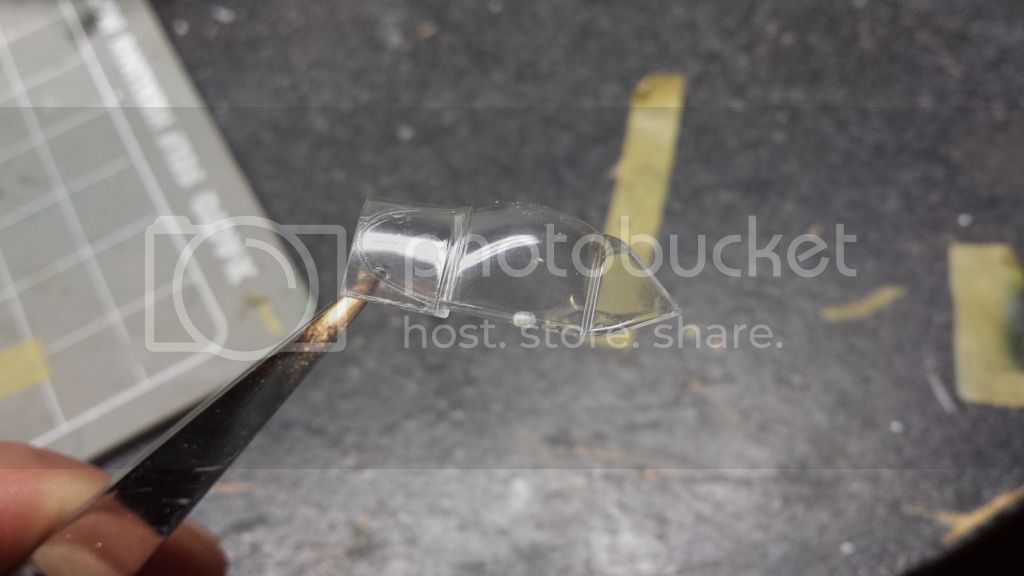
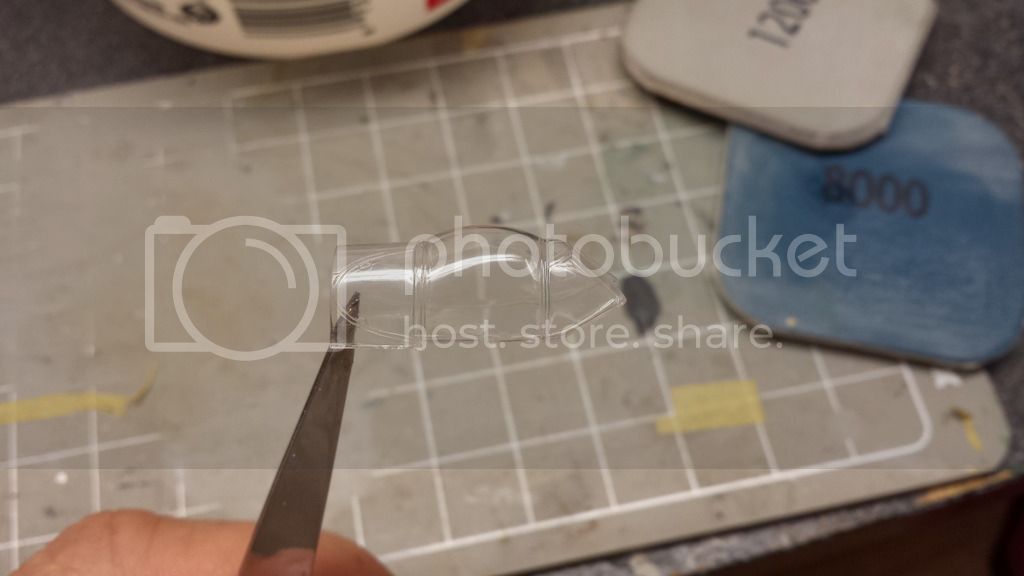
As for the canopy repair I just barely touched the applicator to the open "wound" where the sprue attached in the canopy frame. The glue wicked up into the canopy and melted the crazed and fractured plastic leaving it alot less white than before. Its not gone, just much less noticeable. The scar is mostly inside the plastic itself where polishing and future cant reach it. I first tried this idea with future but it didnt work near as well. I have dipped the canopy in future since, still looks great but ill have to paint the inside canopy frame, at least just there to eliminated seeing the blem from the other side.

It was a hot week, I came home pretty tired each day but with the build always on my mind so I've got some progress to report. Most of it however is sanding, and scribing lost detail... and a missing detail.
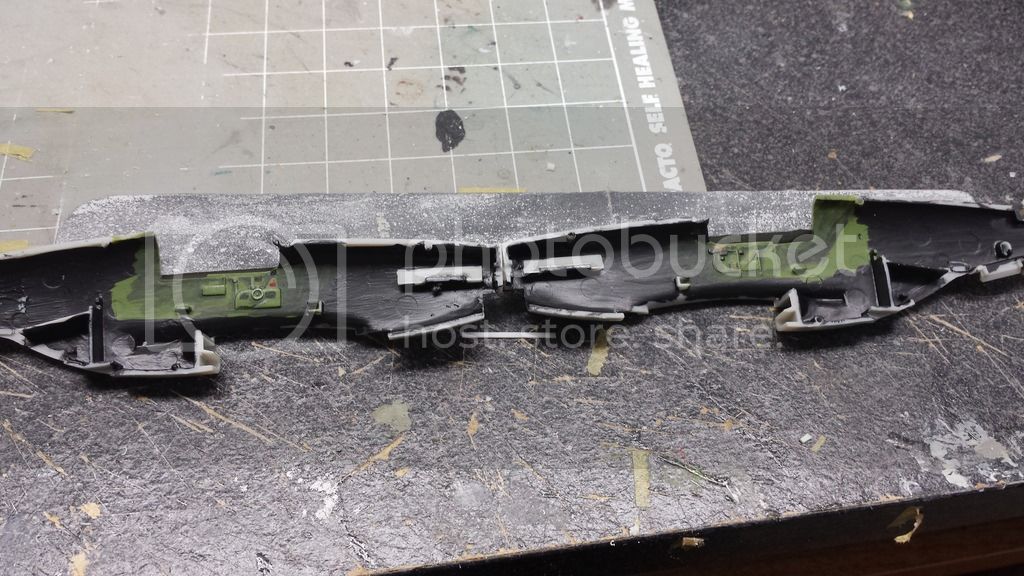
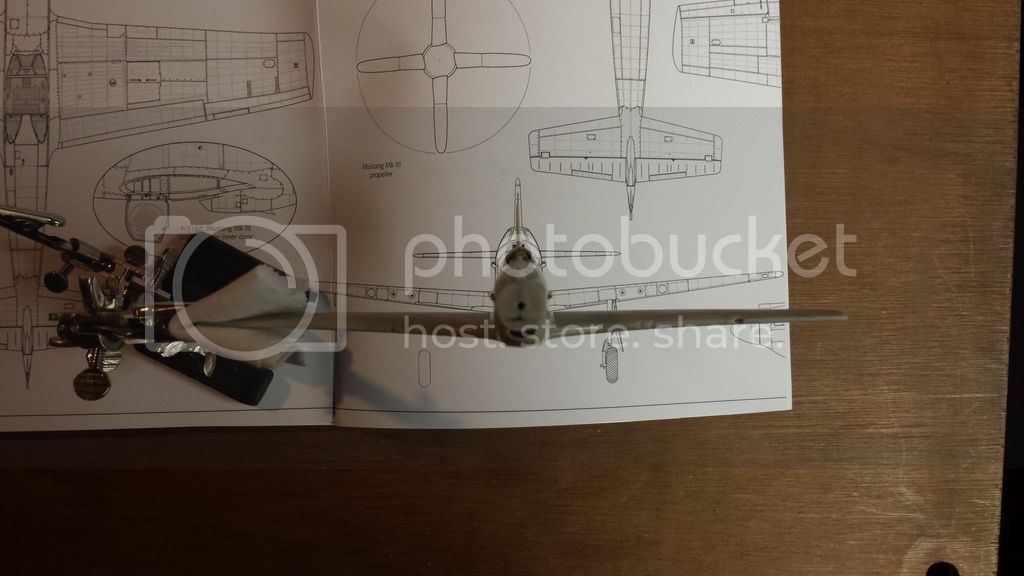
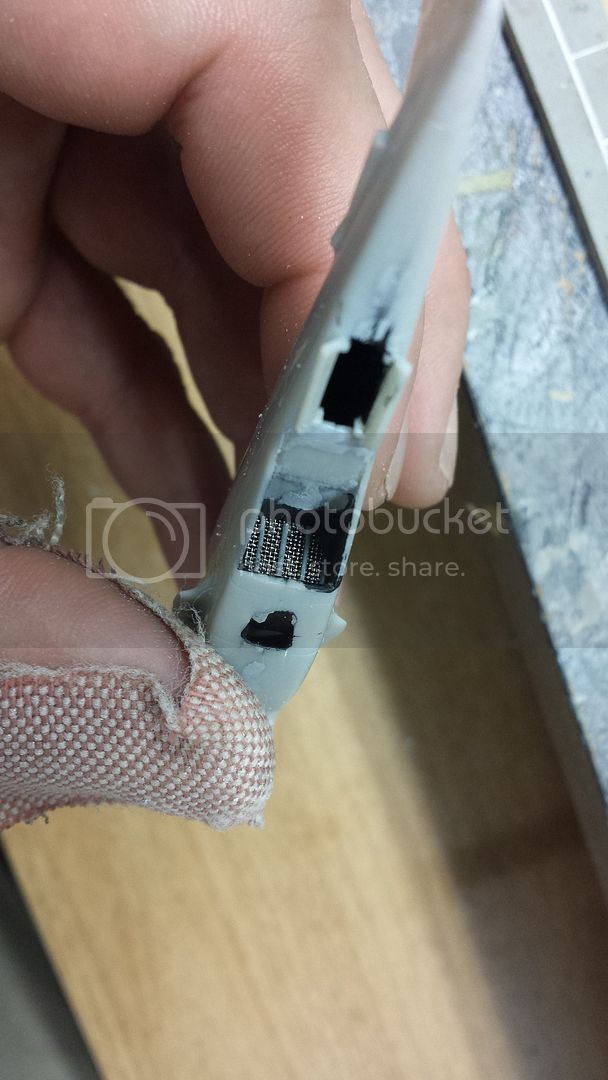
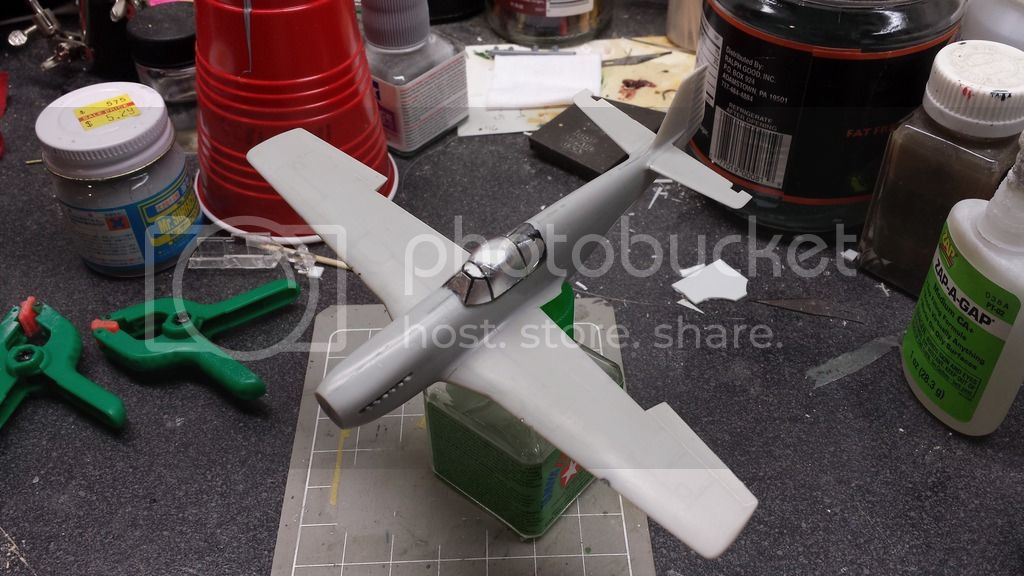
I don't really know what's behind this door, but it stands out like a sore thumb to me on many p51b's, So I needed to add it and thankfully it didnt take long. I filled in the seam in the target area and after it was thouroughly dry I sanded it flush, drew my door with a pencil and freehanded it with an xacto. It definitely passes for me in 72nd scale, I'm happy. If it was 48th, I'd do it over

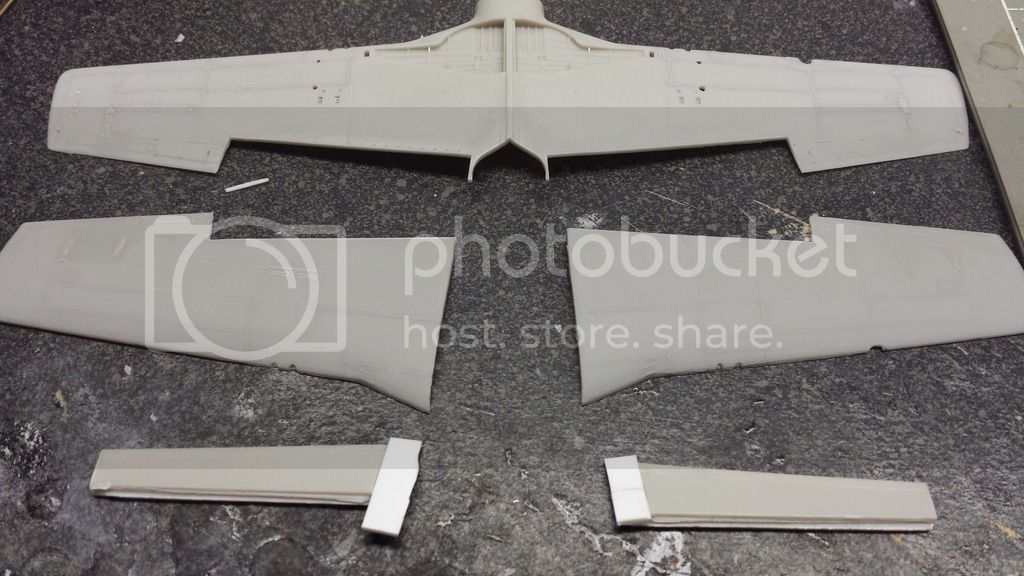
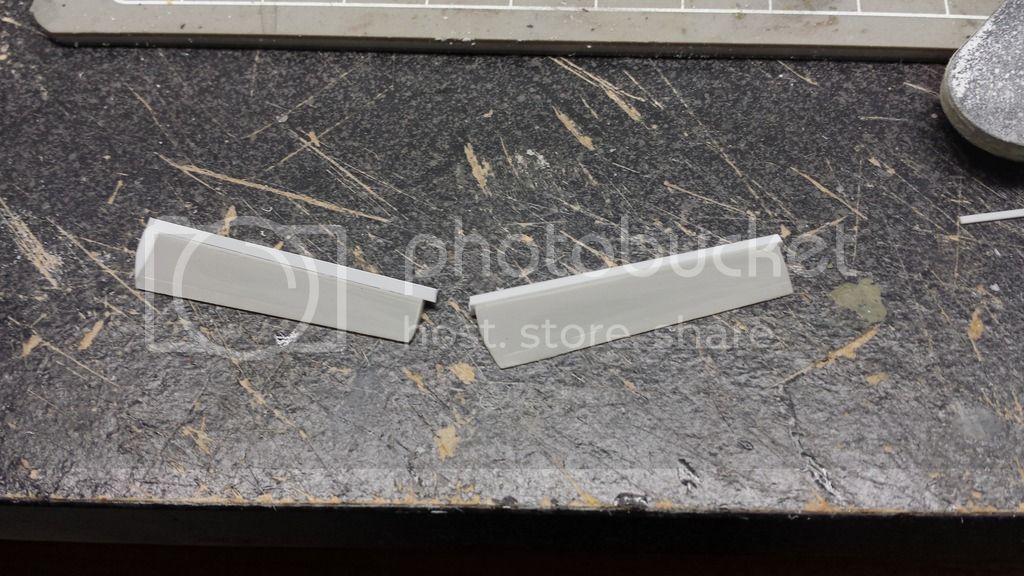
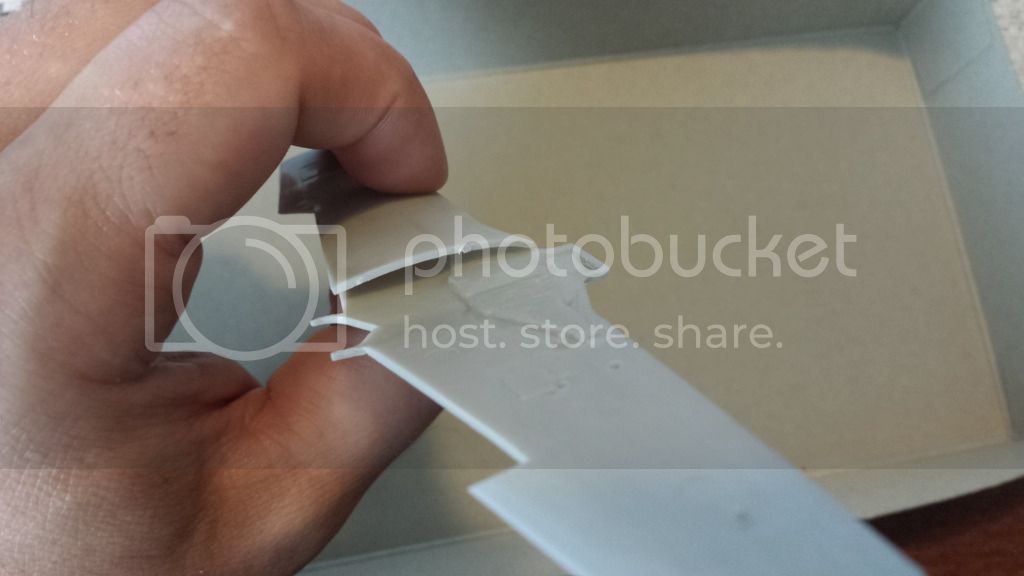
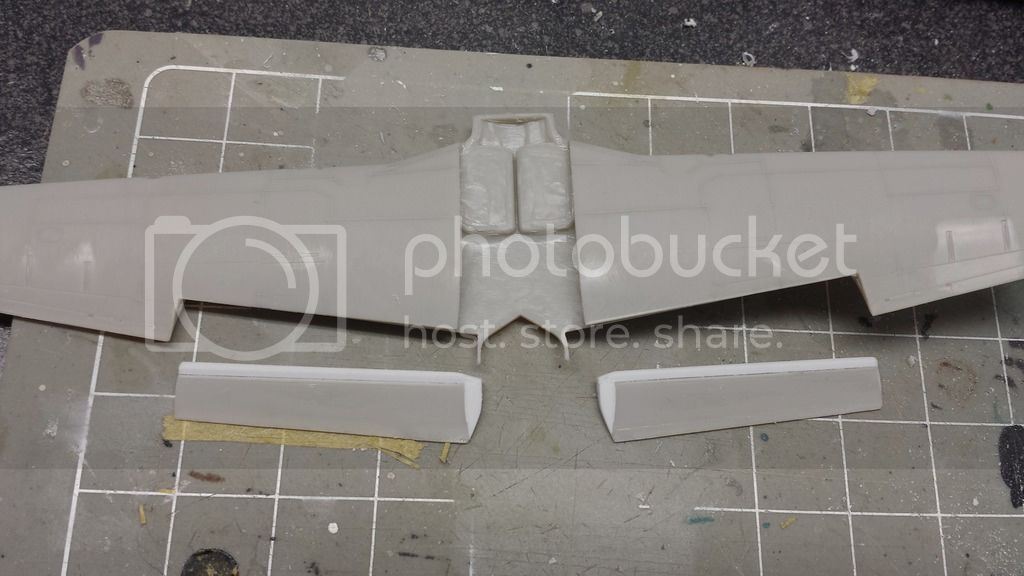
Ive also as you can see attached the wings, got my dihedral set and used some scrap styrene to reinforce the wings where the flaps are missing so that mere handling wont pop the wing root seams.
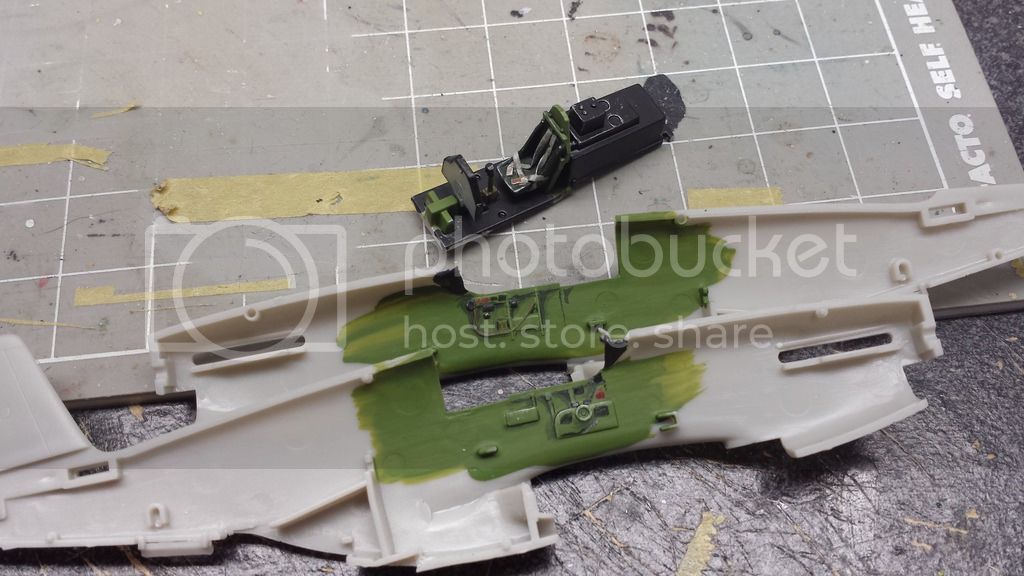
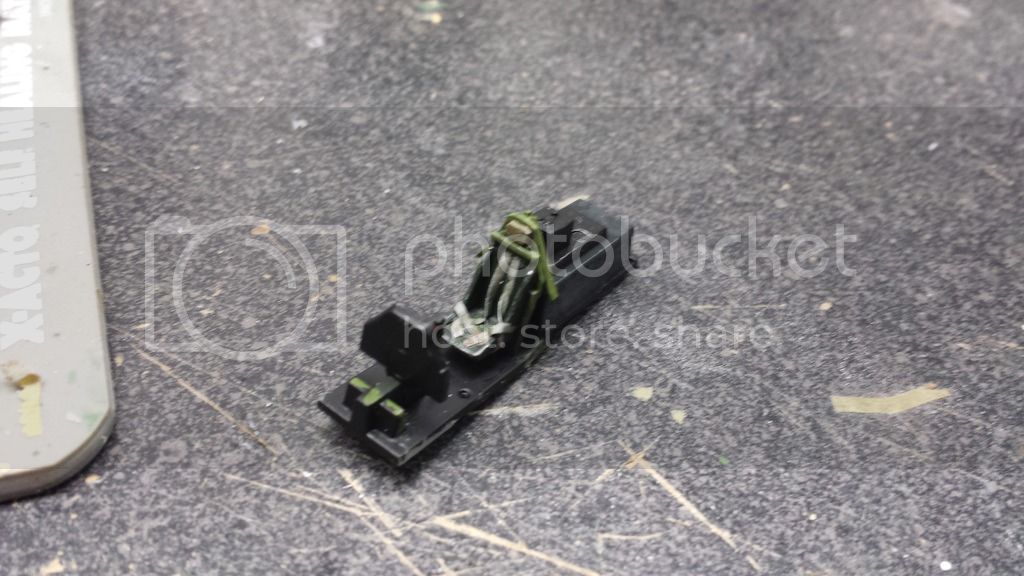
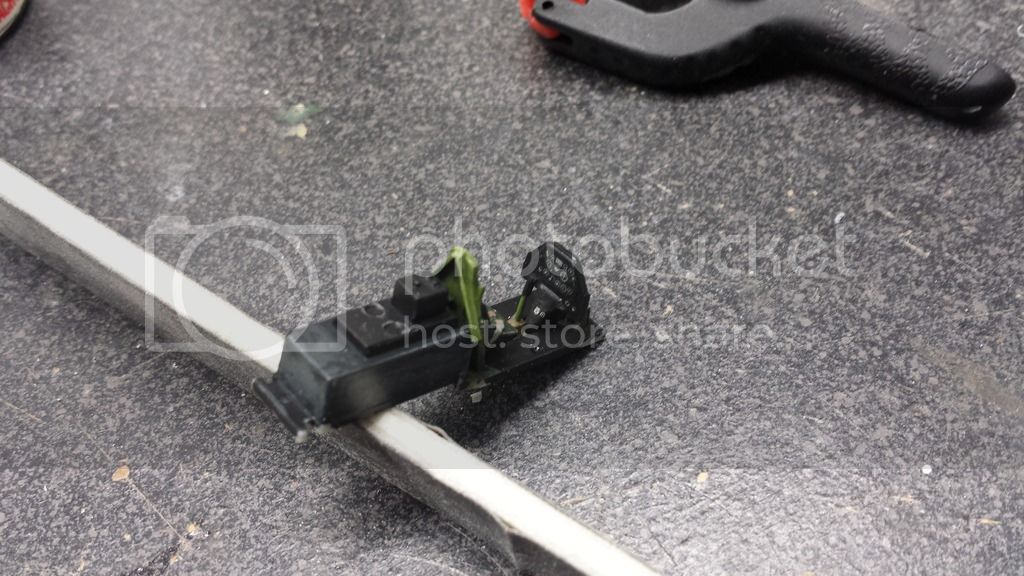
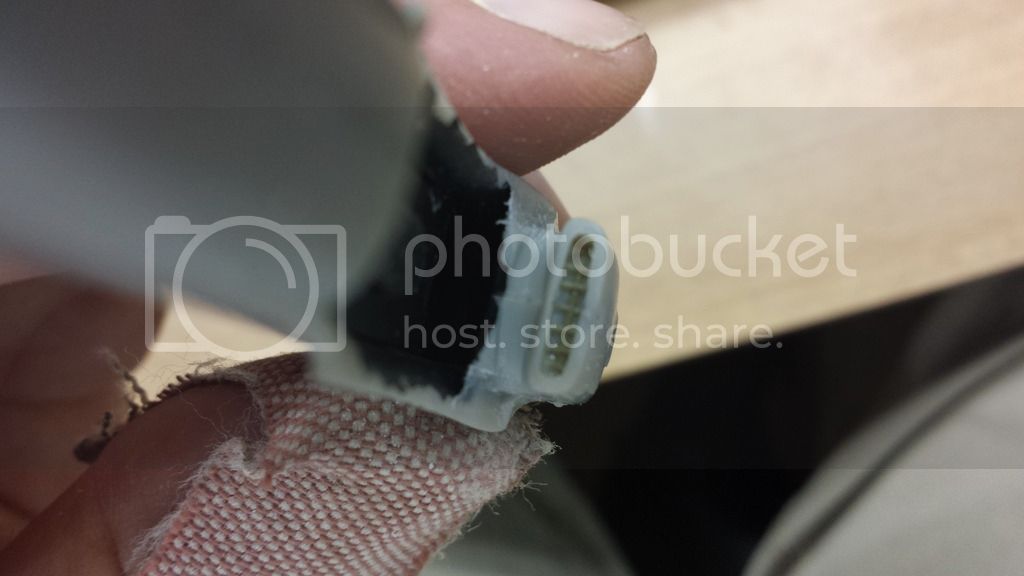
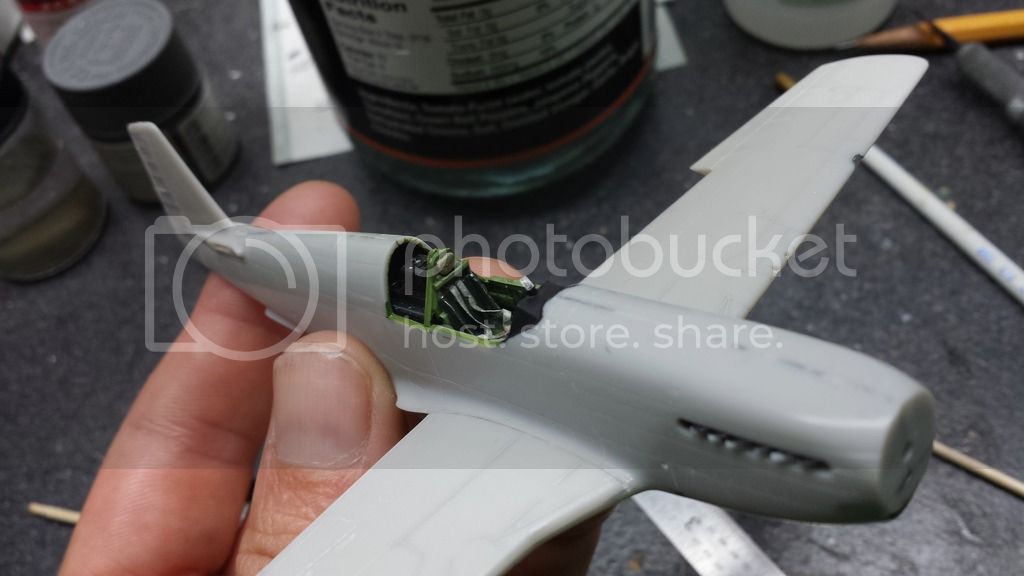
I took care of the landing light by drilling a hole with a #61 bit and filled it with a polished bit of stretched clear sprue. The inside of the light area was painted a random dark green and the lense attached with future then a few days later sanded flush with the wing and polished. Its not easy to tell if there is anything is in there, but it was a good exercise and I'd do it again. I think the thickness of the lense is the culprit.

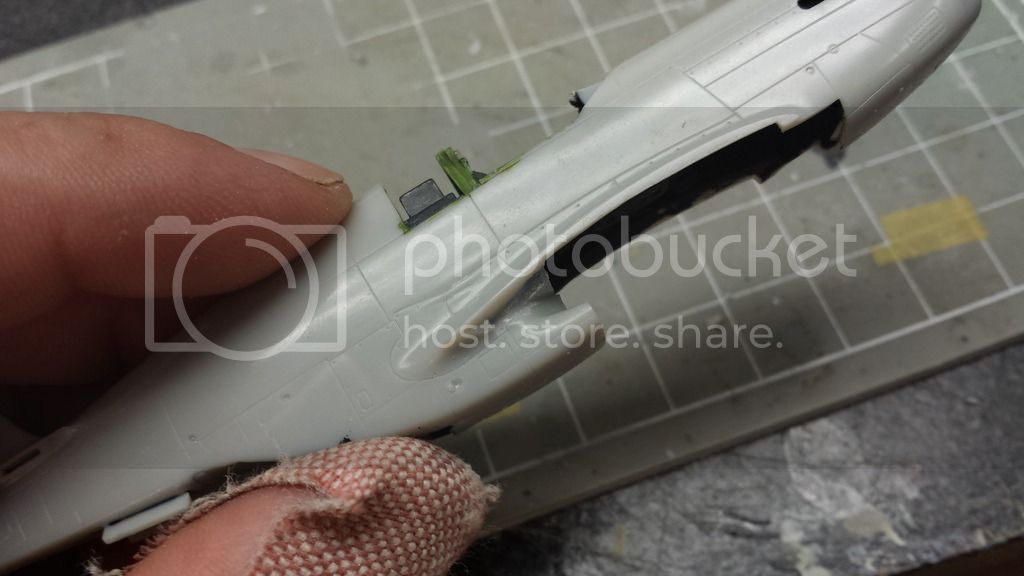
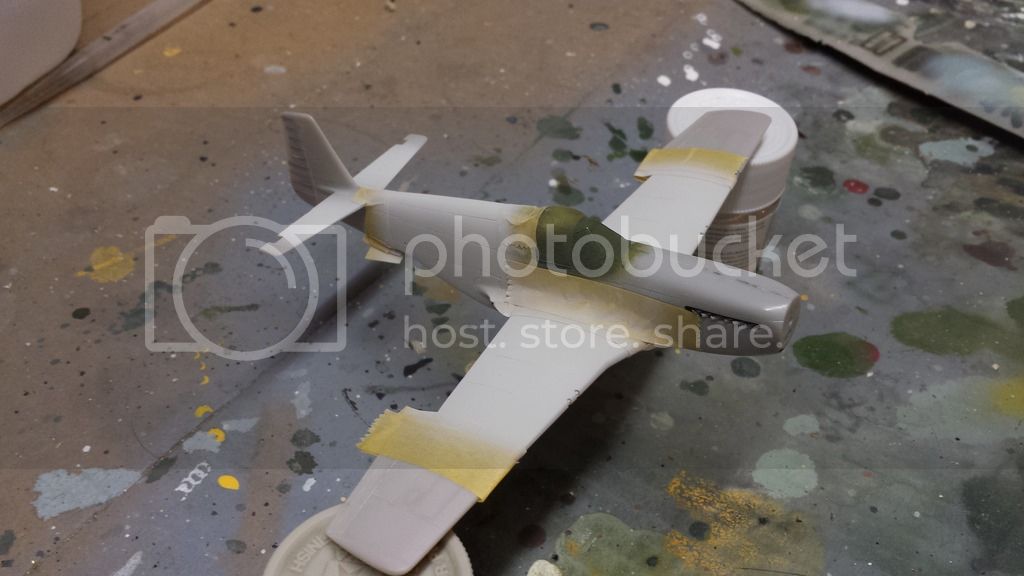
Next steps will be attaching the canopy and blending that with the fuselage then sand and polish the fuselage. After that I'll add the tailplanes and I'll be prepping the landing gear pieces along the way.

As for under the wings I think im going to hang 500lb bombs, since this aircraft has a bombing mission tally on the nose it seems fair to me. The stock 108 gallon tanks arent too bad, I wouldnt mind using them but the seam across the ribbed nose and tail will be a bear to fix up and Im not taking the time.
Joel_W
Staff MemberAssociate Editor
AUTOMODELER
_VISITCOMMUNITY
New York, United States
Joined: December 04, 2010
KitMaker: 11,666 posts
AeroScale: 7,410 posts
Posted: Sunday, July 12, 2015 - 02:34 AM UTC
Mike,
Certainly no need to apologize to me about the rib detail. The few times I've attempted to correct missing rib detail was with small strips of .010 sheet. I've never been able to get stretched sprue to blend in where it looks like a rib pushing up through the fabric.

Very nice scribing on that door. I would ask Florin as he has quite a bit of expertise on P-51Bs since he's been at his 1/32 scale build for 2 years now.

Excellent repair on the Canopy. It looks great.

Joel

mrockhill
_VISITCOMMUNITY
Pennsylvania, United States
Joined: June 17, 2009
KitMaker: 566 posts
AeroScale: 507 posts
Posted: Saturday, July 18, 2015 - 04:23 AM UTC
Work continues on my P51b. Last weekend I got the cockpit finished and sealed up under the canopy. The final details were a small strip of thin clear packaging for the relector sight and some stretched sprue wires going from radio up to the spine(not shown)

During the week I attached the horizontal stabalizers and went about double checking rescribing, and touching up seams and panel lines. I'm still working on blending the canopy into the fuselage with thinned mr surfacer 500 and fixing some minor blems with CA. I also have overlooked the formation lights so I need to get hot on replacing them as they were sanded off long ago. Ive also got the canopy masked with bare metal foil. I made a minor slip on canopy but it should
be fixable when im done. Id attempt to fix it now but as faint as the frames were after the polish, 2X future dip and BMF I feel lucky that I only slipped once, I dare not try again.
Ive also reversed my decision on underwing stores. After looking over close ups of paper tanks, which were in use during the normandy time frame, I decided they were the way to go. They also have rudimentary attachment detail which is much easier than having to drill and pin aftermarket bombs and make some sort of sway braces. I hope to start some painting tomorrow, We'll see
GazzaS
#424
_VISITCOMMUNITY
Queensland, Australia
Joined: April 23, 2015
KitMaker: 4,648 posts
AeroScale: 1,938 posts
Posted: Saturday, July 18, 2015 - 07:25 AM UTC
Mike,
Looking good so far. I'm interested in seeing how your mask with BMF goes. I've been sitting on the fence about buying some for weeks. You've really added a lot of detail to a small scale, impressively.

Best Wishes,

Gary
mrockhill
_VISITCOMMUNITY
Pennsylvania, United States
Joined: June 17, 2009
KitMaker: 566 posts
AeroScale: 507 posts
Posted: Saturday, July 18, 2015 - 03:55 PM UTC
Gary, Thanks for checking out my progress! Ive really enjoyed adding the extra details, even if not entirely correct or scale I think they do a good job of distracting the viewer from the kits limitations.

This is the 3rd kit ive masked using BMF. I think it works great esecially in 1/72. Couple of things about it though, this stuff super thin and needs to be burnished into the piece to cut out the frames. I use a couple round tooth picks that I sand smooth with blunt ends to smoothout the foil and work it into detail (you will see that many canopies look more like the surface of the moon than smooth perspex/glass) the foil wont tear much if your careful so fresh no 11 blade and the smooth tools are a must. Very little pressure on the blade when cutting and make sure to get all the way into the corners, maybe a little past if possible. This was the most challenging so far because of the curves of the malcolm hood, so it consists of several overlapping pieces. I again use tooth pics to peel off the frames, these are whittled down to tiny chisels to aid in this task. A noted down side that I havent had a problem with yet is that BMF leaves a residue on the surface the longer its on. This cleans up with some wd-40 on a cotton swab.

I also just picked up a sheet of the ultra chrome BMF to use on rearview mirrors and landing gear oleos. To be honest I found it not to be so ultra, plain chrome more like it IMHO but it should do the trick and we'll find out here on this kit shortly
thegirl
_VISITCOMMUNITY
Alberta, Canada
Joined: January 19, 2008
KitMaker: 6,743 posts
AeroScale: 6,151 posts
Posted: Saturday, July 18, 2015 - 05:40 PM UTC
Hey Mike ,

You are progressing pretty good on this one . Looking forward on seeing some colour on her
Joel_W
Staff MemberAssociate Editor
AUTOMODELER
_VISITCOMMUNITY
New York, United States
Joined: December 04, 2010
KitMaker: 11,666 posts
AeroScale: 7,410 posts
Posted: Saturday, July 18, 2015 - 09:55 PM UTC
Mike,
Excellent job on masking that canopy. 1/72 scale is a lot different then 1/48/ & even 1/32 scale for masking using the canopy framing as a guide. For the larger scales I just use small strips of Tamiya tape and work my way around. Only time I actually use a blade on the canopy is for some curved areas.

Looking forward to finally seeing some primer and paint on.

Joel
mrockhill
_VISITCOMMUNITY
Pennsylvania, United States
Joined: June 17, 2009
KitMaker: 566 posts
AeroScale: 507 posts
Posted: Sunday, July 19, 2015 - 05:17 AM UTC
We've got paint! Its a step in the right direction but im in for alot more masking before its all done. So far I sprayed the canopy a darkened interior green and then masked out and sprayed the white field of the invasion and tail ID stripes. I used tamiya white with a drop of deck tan. Im trying to decide if I should finish the stripes before or after I paint the NMF and OD portions.

I appreciate everyone stopping by to checkout the progress and comment, hopefully well have this wrapped up before too long
mrockhill
_VISITCOMMUNITY
Pennsylvania, United States
Joined: June 17, 2009
KitMaker: 566 posts
AeroScale: 507 posts
Posted: Sunday, July 19, 2015 - 10:41 PM UTC
And the verdict, by unanimous decision of one vote, was to finish the stripes before moving on. Work got backed up a day so I found myself with some unforseen free time and I jumped right into 2.5-3 hours of masking the invasion stripes and the tail ID stripes. Hopefully it will be a while before I decide to do full D-day stripes again!

The stripes were then sprayed with a 60/40 of tamiya black and red for a scale effect, I think this turned out well but wont know for sure till its all done.(Oh, the suspense!) Im just going to mask over the black, pull off the unnecessary tape and roll right into spraying the tamiya AS12 and finally OD. And then on to everything Ive forgotten about so far

I also masked off the panels surrounding the exhaust and sprayed them in 2 darker shades of gray. Hopefully this will result in some darker variation in the NMF that is typically seen here, fingers crossed!
 _GOTOTOP