_GOTOBOTTOM
World War II
Discuss WWII and the era directly before and after the war from 1935-1949.
Hosted by Rowan Baylis
1/144 Beaufort Mk.VIII WiP
pbhawkin
_VISITCOMMUNITY
New South Wales, Australia
Joined: November 23, 2009
KitMaker: 179 posts
AeroScale: 170 posts
Posted: Tuesday, April 21, 2015 - 04:04 AM UTC
Hi all.
This is going to be a Work in Progress thread (copied from Kampfegruppe144).
Please feel free to comment/critique.
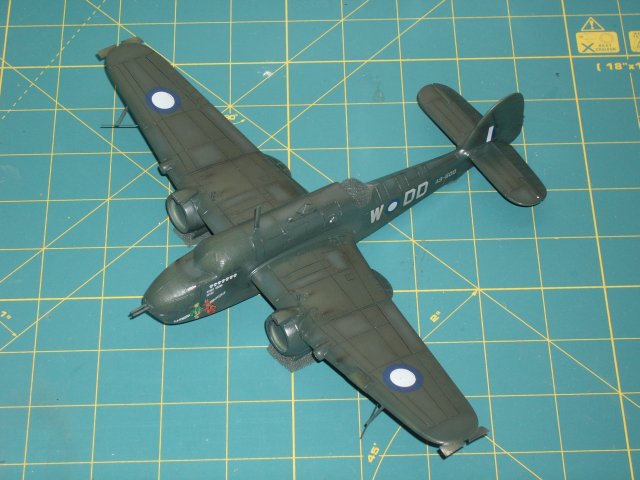
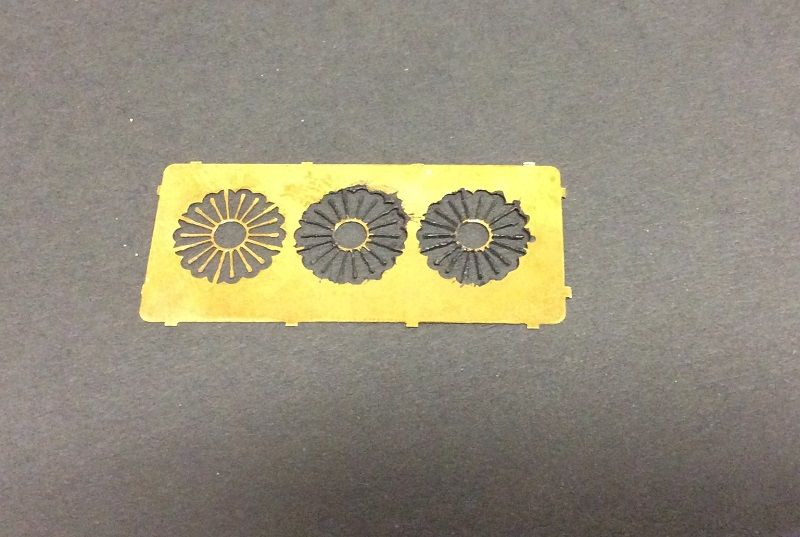
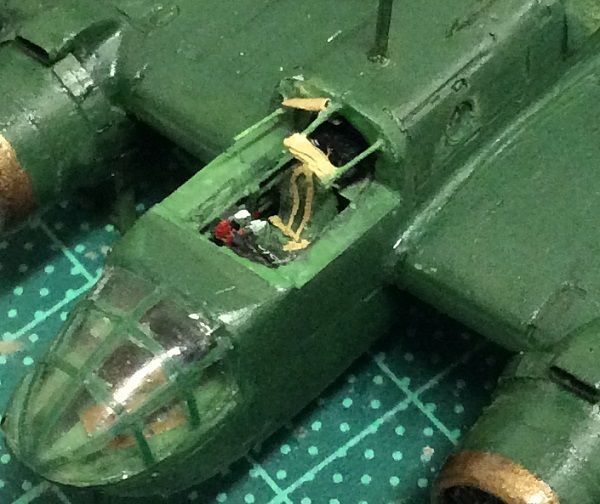
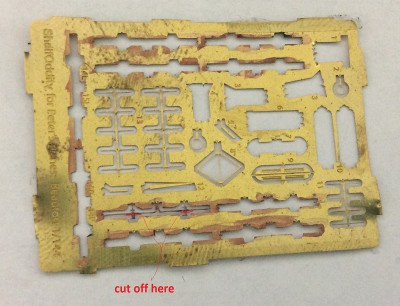
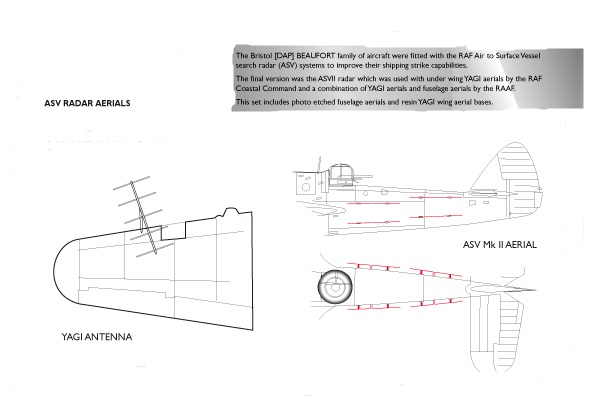
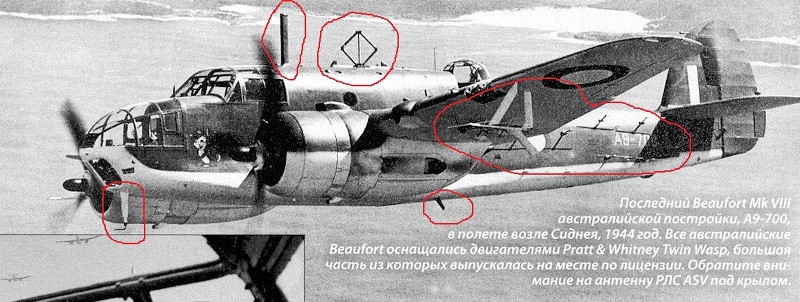
There are two main reasons, firstly I wanted to show off some PE that I have had made by Marek (and Leszek) at 'Shelf Oddity'. They have done a beautiful job of making the various aerials, antennas pitot tubes and radars (ASV Mk.2 radar) that this aircraft carried.
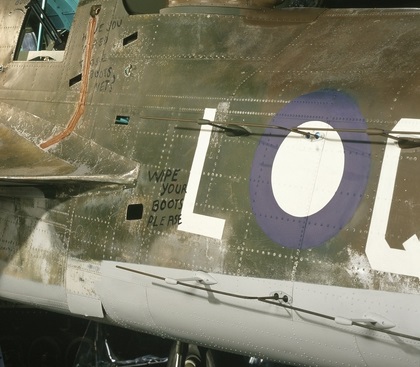
See here for the pictures on the real aircraft.


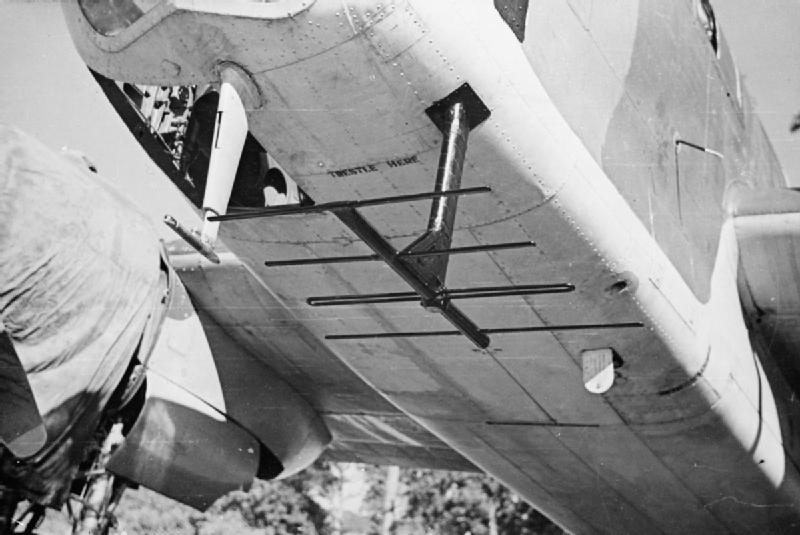
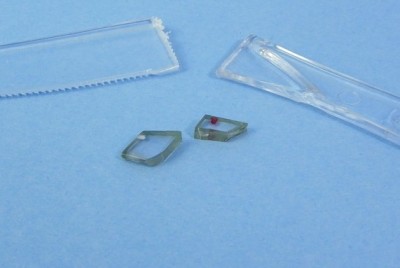
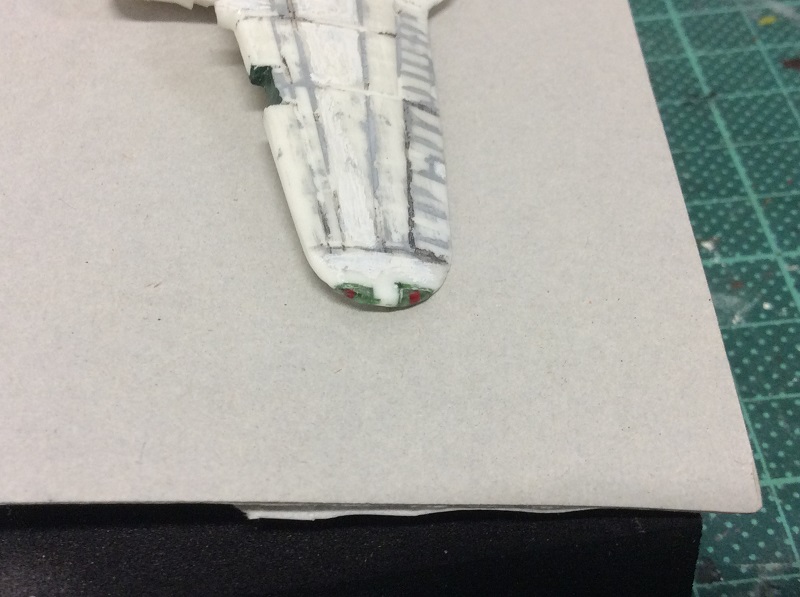
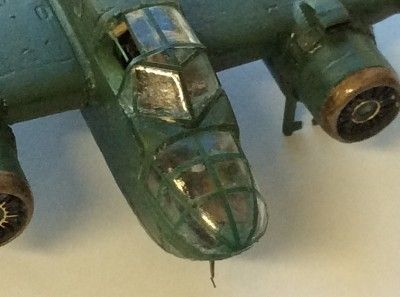
as well as the distinctive diamond-shaped DF aerial was fitted on the cabin roof replacing the loop antenna.

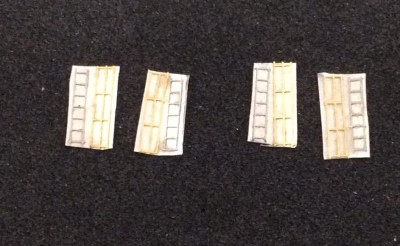
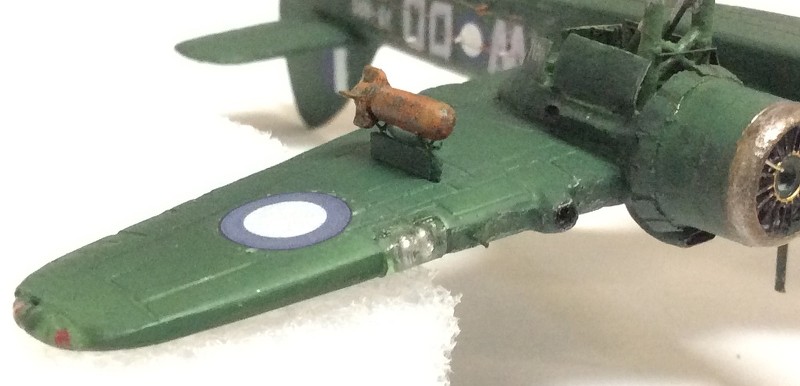
the above photo shows all the various bits that 'Shelf Oddity' have made, and the fret itself is below:


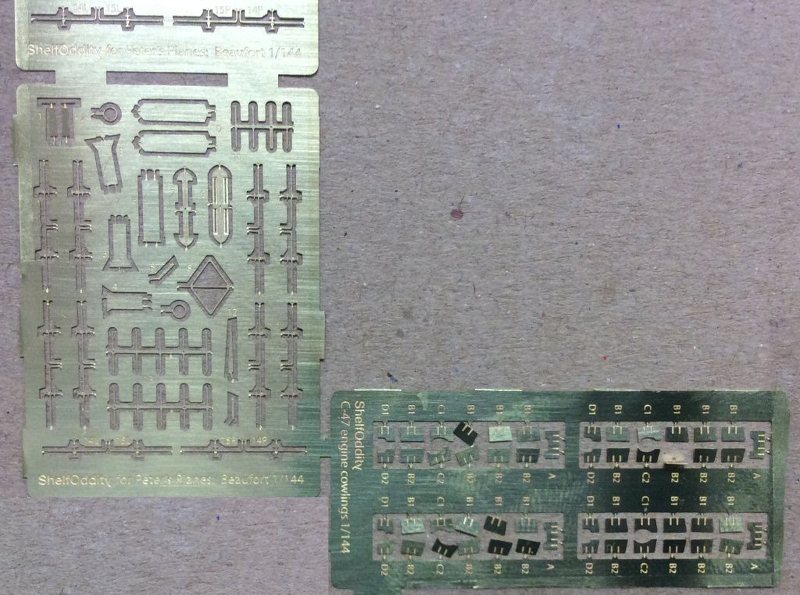
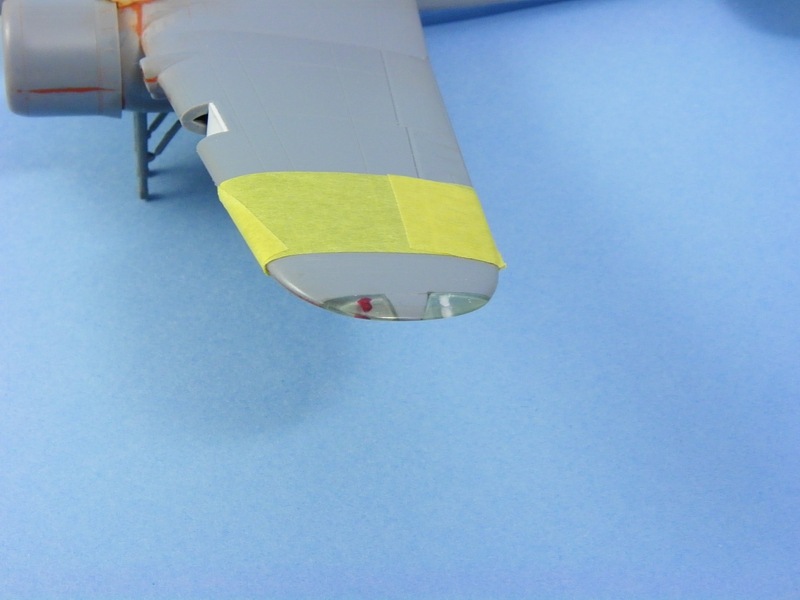
NOTE that the second fret for the C-47 cowlings was not made for me and will be available from 'Shelf Oddity' soon. However, I am going to try to 'adjust' it to fit on the Beaufort.

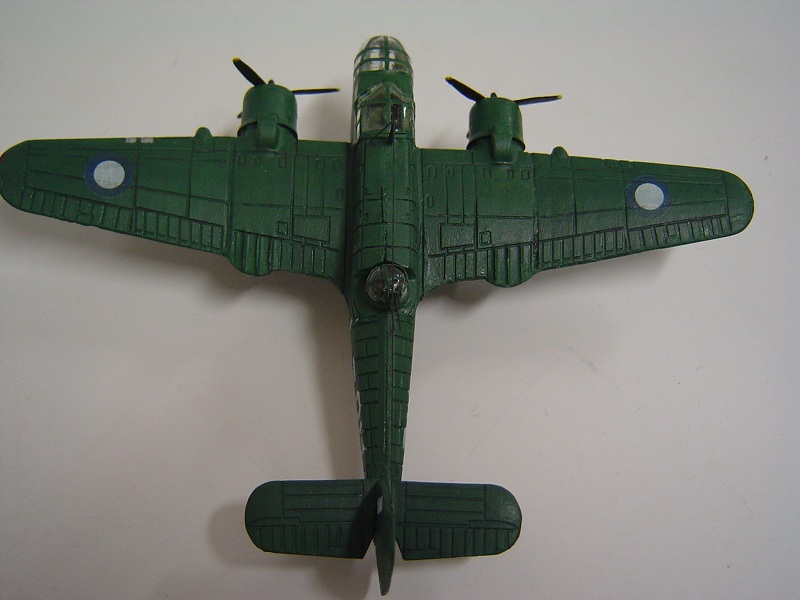
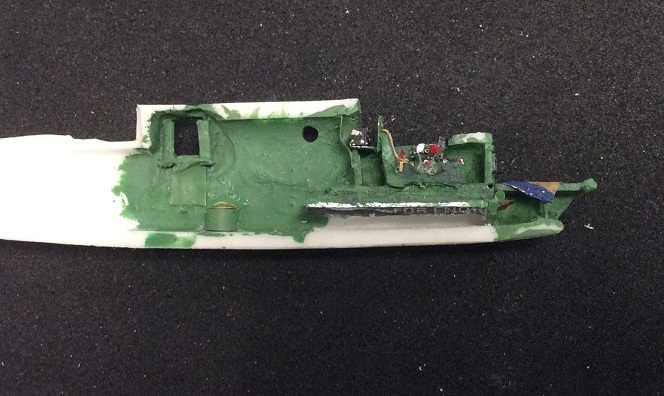
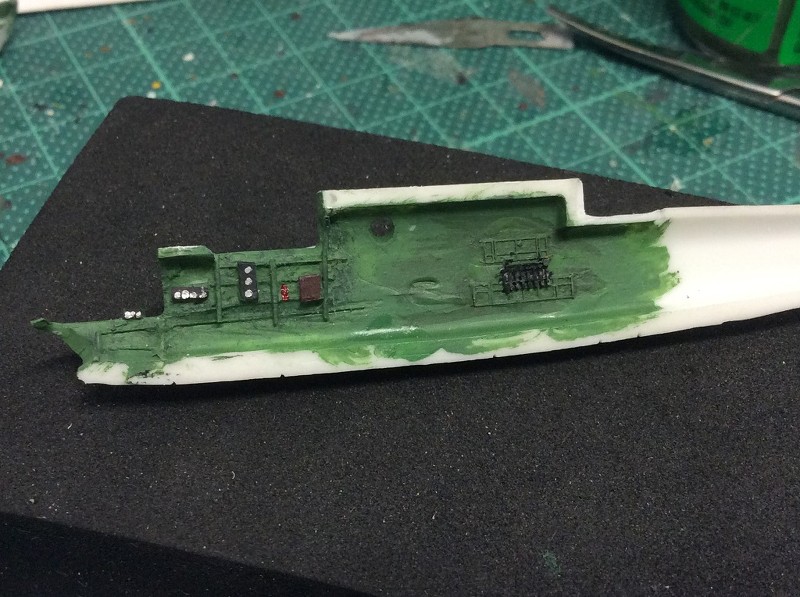
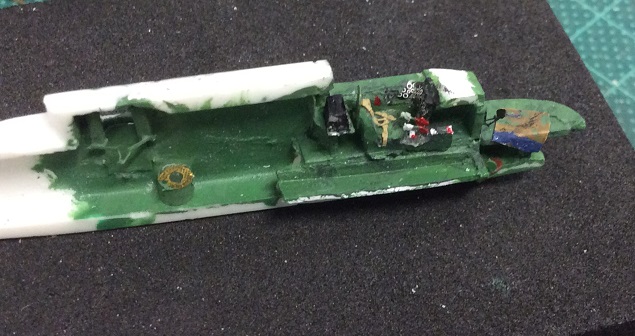
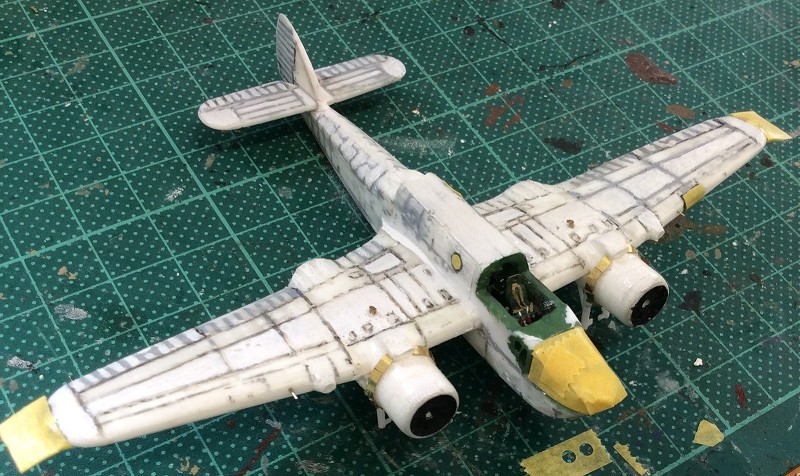
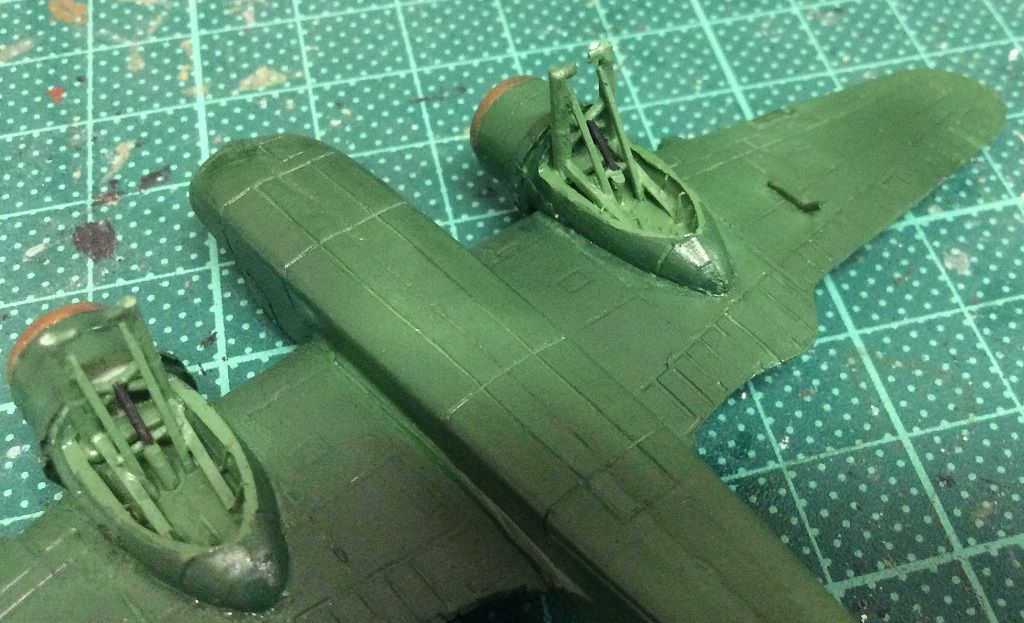
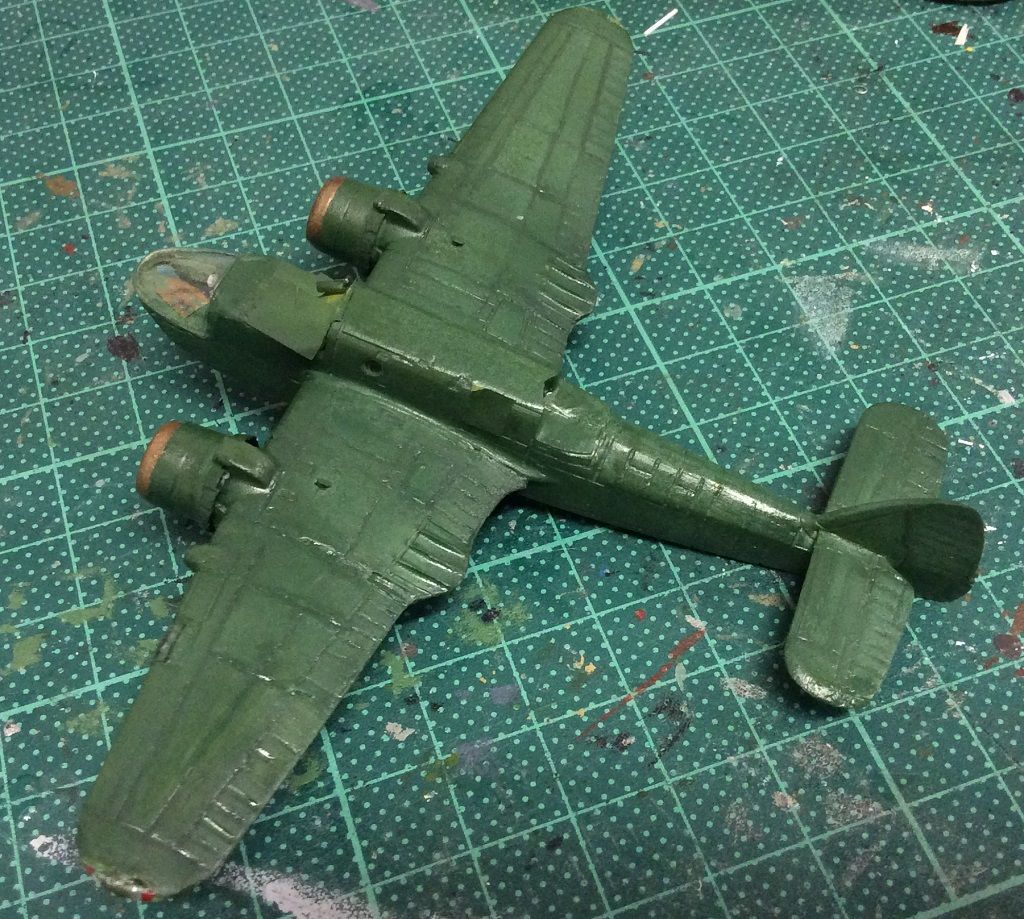
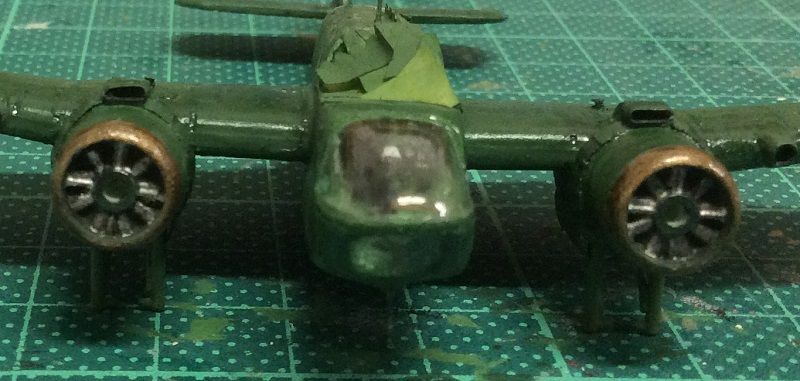
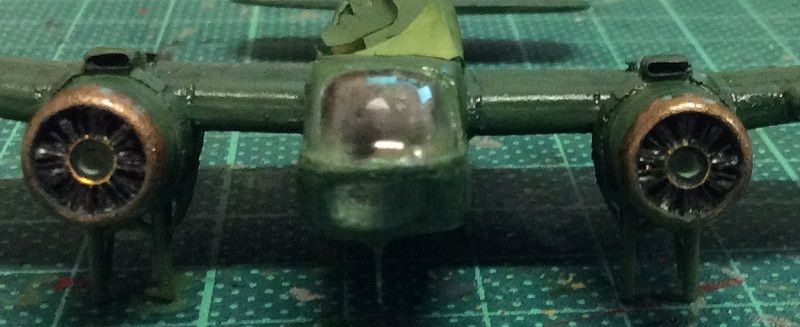
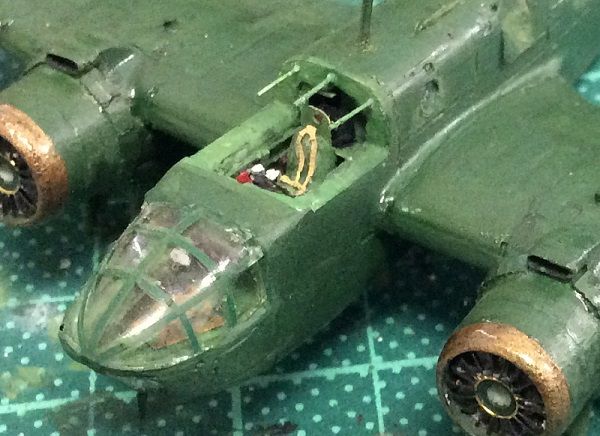
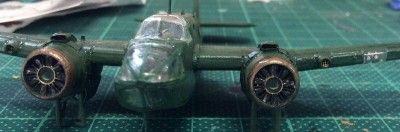
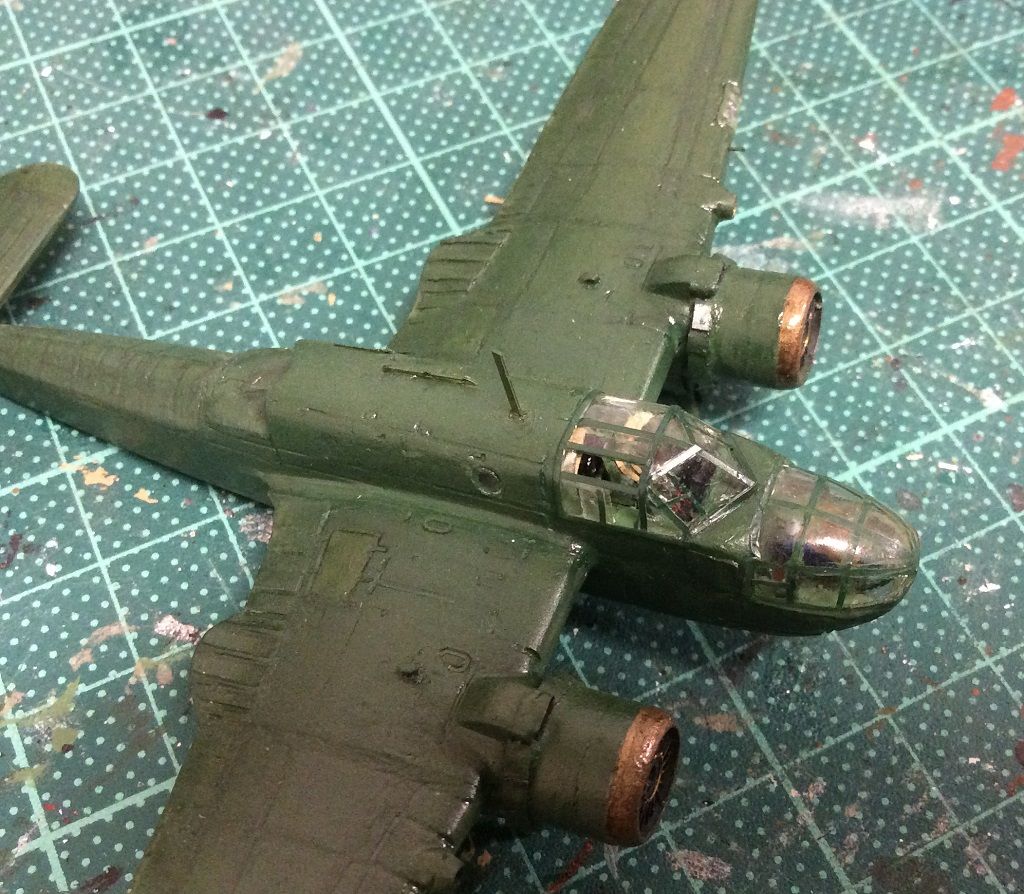
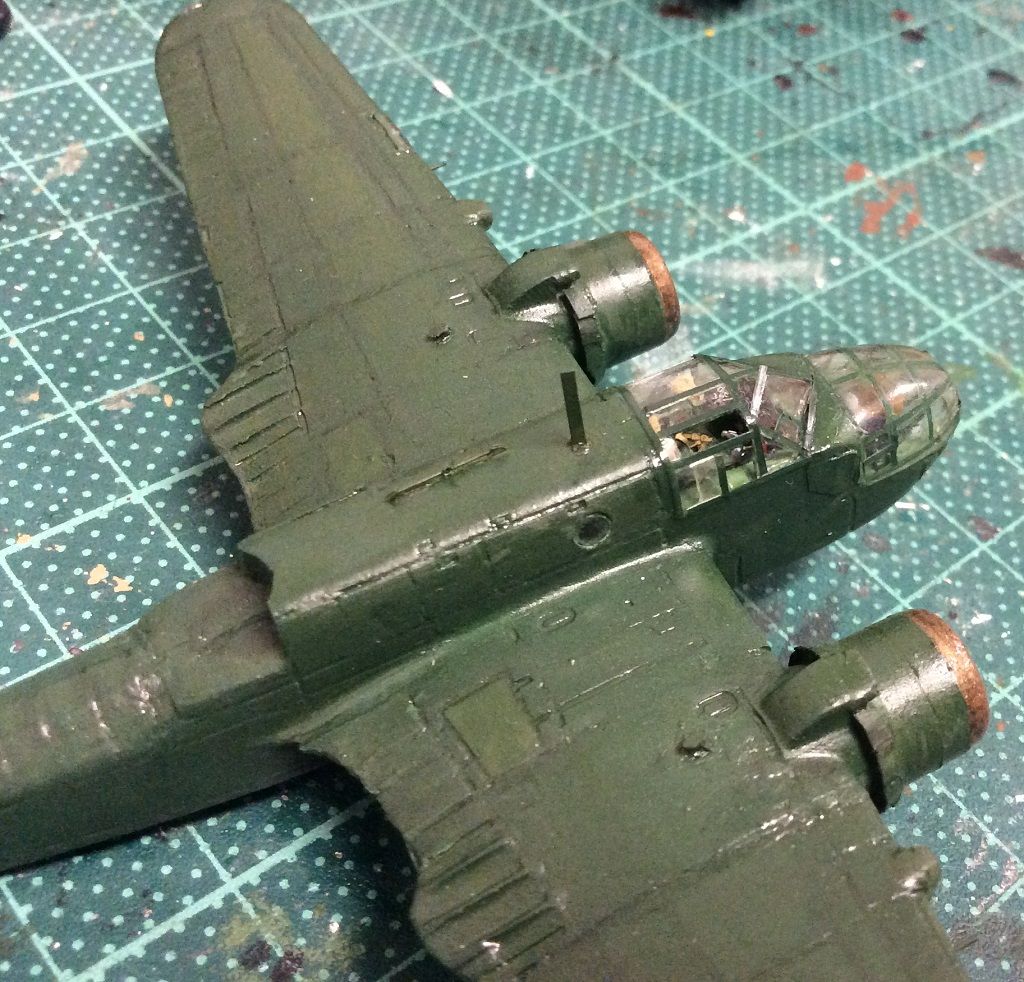
Secondly, I wanted to make a Beaufort to address a complaint about the heaviness of the panel lines. I hope to show that it is easier to cover the panel lines if not wanted than it is to scribe them if they are not there in the first place.
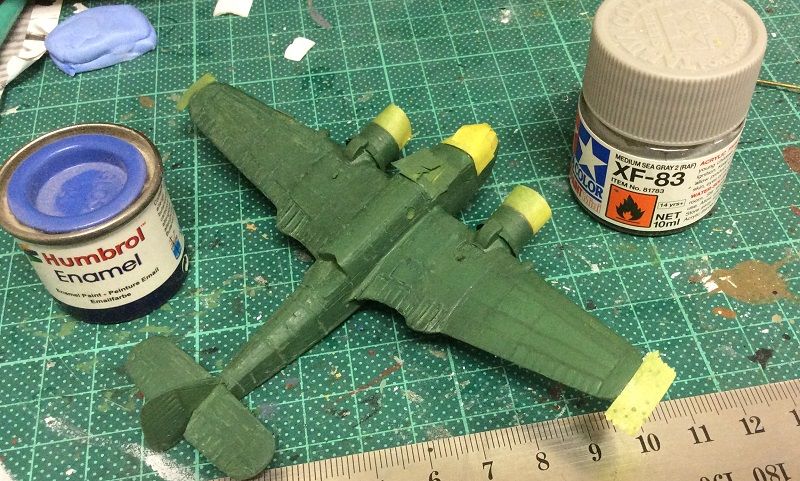
I have filled them in with Testors contour putty (and Tamiya putty that is cream in colour) and then sanded flat the surface. As this putty is quite dark I plan to then lightly paint over it with the correct colours and in effect use it as a pre-shading to highlight the panel lines. The fact that the other putty is lighter in colour will just add to the variation (I hope).


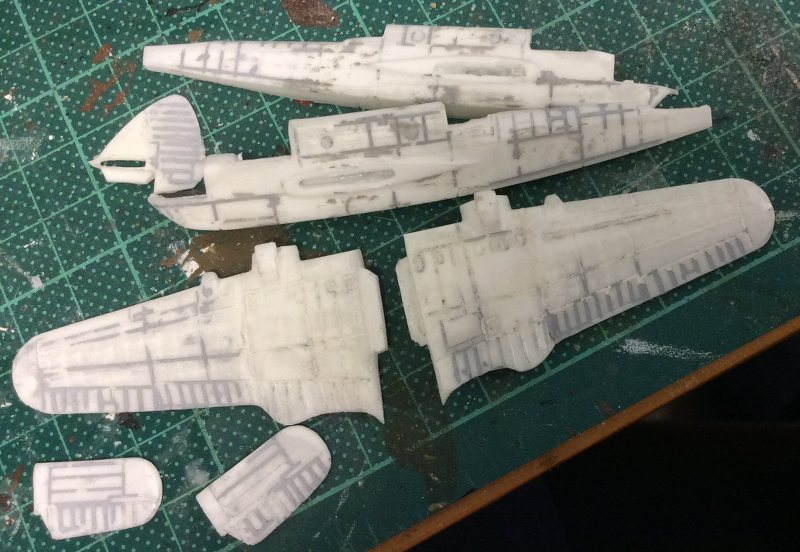
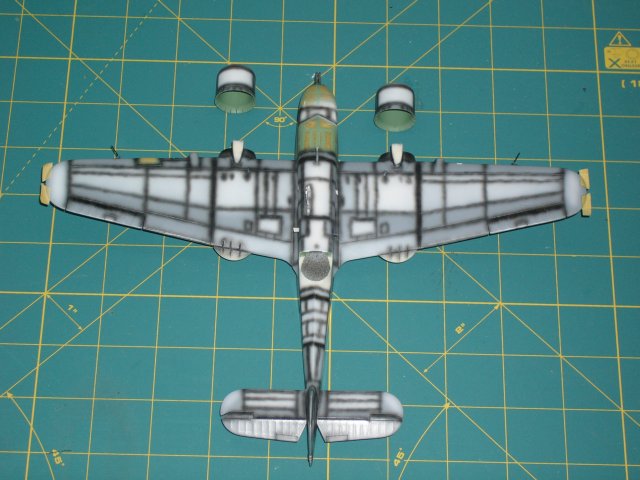
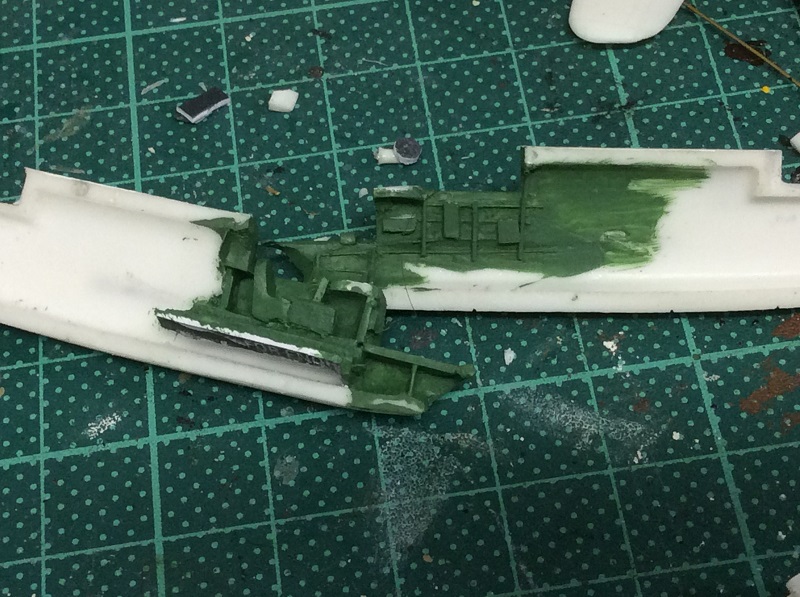
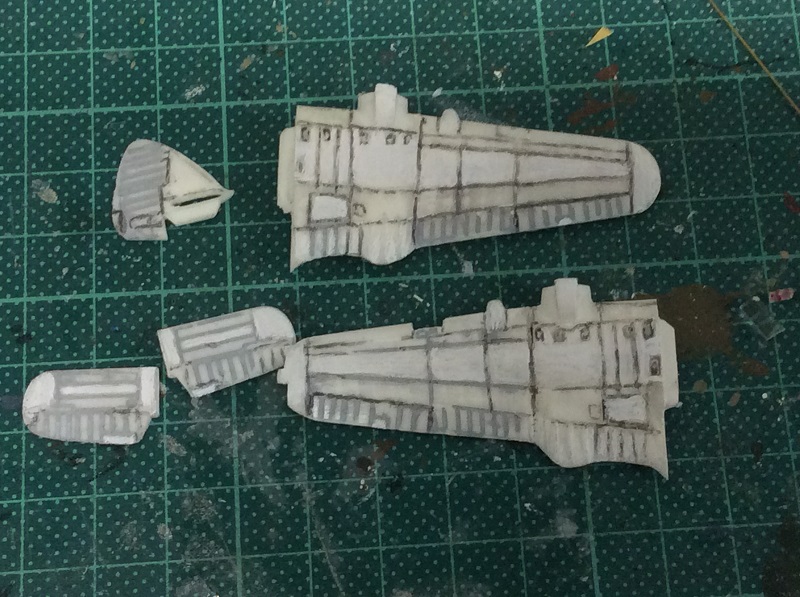
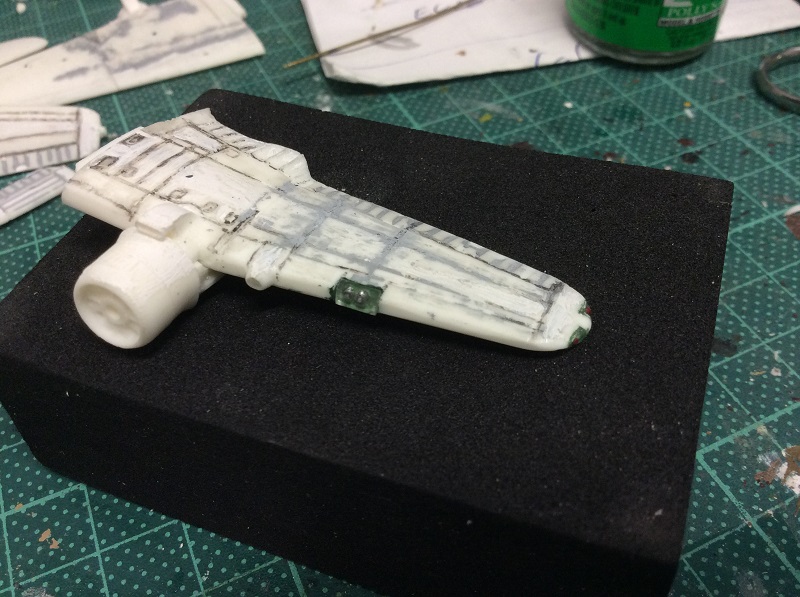
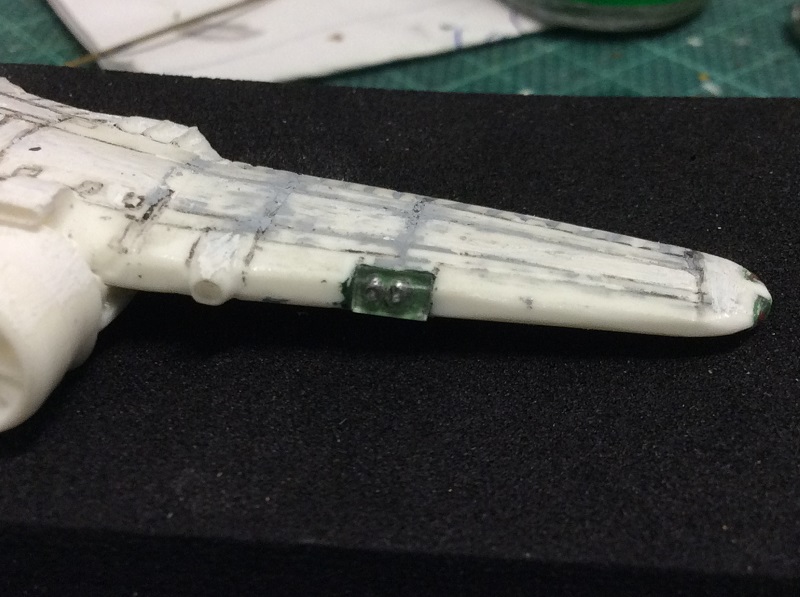
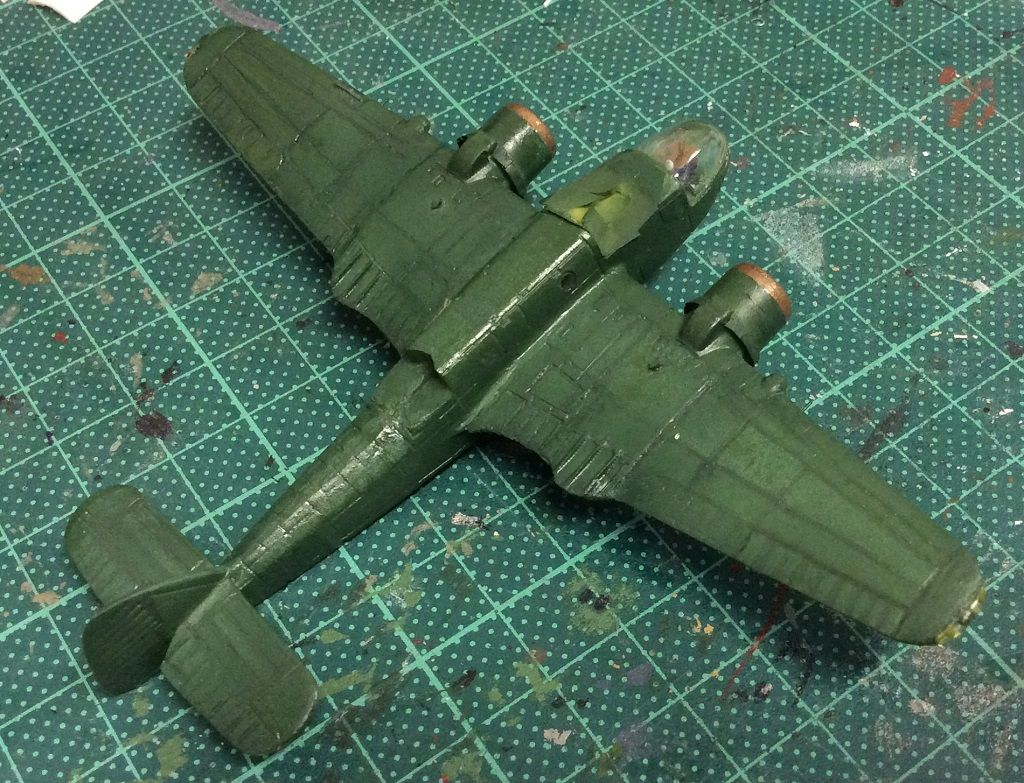
here is a picture of the casting without putty:
pbhawkin
_VISITCOMMUNITY
New South Wales, Australia
Joined: November 23, 2009
KitMaker: 179 posts
AeroScale: 170 posts
Posted: Tuesday, April 21, 2015 - 04:14 AM UTC
Here is the panel line highlighting I am trying to do:


And this is the effect I want to achieve:


NOTE, that the above two photos are of a Special Hobby 1:72 Beaufort by Bill Gilman see:
https://www.scalemates.com/profiles/mate.php?id=10105&p=albums&album=19687

Here is the cockpit taking shape:


and interior Green:
pbhawkin
_VISITCOMMUNITY
New South Wales, Australia
Joined: November 23, 2009
KitMaker: 179 posts
AeroScale: 170 posts
Posted: Tuesday, April 21, 2015 - 04:17 AM UTC
I am trying to copy the work of Bill Gilman and his 1/72 plane (as seen in the link above). To that end I am going to try adding clear acrylic lights to the wings.
Here is what he has done in 1/72 with the clear acrylic shaped, sanded and polished:


Attached and being sanded:


and after polishing:
pbhawkin
_VISITCOMMUNITY
New South Wales, Australia
Joined: November 23, 2009
KitMaker: 179 posts
AeroScale: 170 posts
Posted: Tuesday, April 21, 2015 - 04:20 AM UTC
further work on the interior.
Here is a series of shots showing ongoing detailing of the interior.
Note I have decided to open up the Port crew access hatch and show some of the mechanism of it's sliding as well as the Port Lewis gun (yet to be installed) on it's swivel mount.


The Starboard interior with some various control/fuse boxes added as well as the square folded away navigator's seat. Also added some detail for the wall opposite the open crew hatch (but only a glimpse will be able to be seen).


In this view you can see the Lewis gun mount at the rear hatch as well as the chemical toilet(!). Also, radio behind the pilot's seat as well as added armour (PE offcut) for the pilot's seat and PE seatbelts, instrument panel and throttle quadrant with it's Red and White knobs. In the observer's area is a map on the table with flexible covered light and seat on swinging arm.


Here is the finished Port side with the additional fuselage windows cut in and thinning of the fuselage surrounding the port hole to avoid a tunnel effect.


Outside shot of the additional windows cut into the Starboard fuselage.
pbhawkin
_VISITCOMMUNITY
New South Wales, Australia
Joined: November 23, 2009
KitMaker: 179 posts
AeroScale: 170 posts
Posted: Tuesday, April 21, 2015 - 04:25 AM UTC
Onto the wing and it's lights.
Here are the wings with all their panel lines filled with putty and pre-shaded with light Black. Also, some random panels and those along the spar line are lightened in White pre-shading AND I have just noted I also meant to do the Ailerons as well!! Well will do that tomorrow!


The clear acrylic has been cut to length and one side sanded to make it flat and then a small number 70 drill hole made on the flat surface about 1/3 of the way in. This is then filled with the appropriate colour (Red here) and then the cut-outs in the wing and the back of the clear rod is painted in interior Green. Note how the curvature of the clear acrylic magnifies the 'globe' effect and it appears to change in size depending on the viewing angle.


In position ready for sanding.


And sanded to shape and polished with micro-mesh.


And finally the landing lights. You can see the larger piece of clear rod required three pictures up. It was also flattened at the back and drilled (to only a shallow amount) twice, and then Silver paint was put into the two holes and the wing cut-out and back again painted in Interior Green.
There is a little bit of sanding left on the bottom of the light to make it flush with the wing.


pbhawkin
_VISITCOMMUNITY
New South Wales, Australia
Joined: November 23, 2009
KitMaker: 179 posts
AeroScale: 170 posts
Posted: Tuesday, April 21, 2015 - 04:35 AM UTC
Added a PE cowling (courtesy of Marek from 'Shelf Oddities' who makes and will sell these as part of his C-47 PE set) as well as the raised fuel vent (from aerofoil shaped brass (courtesy Strutz) and the Port wing .303 Mg (made from 0.3mm hollow tubing).


Also added a fuel dump tube from brass as well as a view of the cowling on the underside of the engine. Note, the landing light has now been sanded in line with te wing profile.


I plan to detail the wheel well a little with the supports for the landing gear doors out of PE and replace the resin doors with aluminium foil (the thick type that seals in cans of Milo after you open the lid) and use PE to represent the internal framing. Lastly the leading edge air vent will have some PE added to it's opening in the form of a grill. I can't do these as yet until the wings are attached to the fuselage as there are too many delicate items starting to appear on each sub-assembly!
pbhawkin
_VISITCOMMUNITY
New South Wales, Australia
Joined: November 23, 2009
KitMaker: 179 posts
AeroScale: 170 posts
Posted: Tuesday, April 21, 2015 - 04:39 AM UTC
This is really only a comment whilst I am at work (in between the coughs and colds) and so pictures to follow.
The wings and horizontal stabs are on.
I have added the vacforms for the observer's and bomb aimer's positions as well as the 2.2mm circular portholes in the fuselage. I did these with a 2mm punch biopsy (used for taking a core sample of a skin lesion and which come in a mixture of sizes up to 10mm) on some clear acrylic packaging I found. I had to bevel the porthole slightly (0.1mm) around to allow the porthole to sit flush with the fuselage. These are all masked along with the landing lights and wingtip lights ready for spray painting.
For the pilots glazing I have cut each side sliding window out and 'glued' in with Future a small thin piece to represent these windows in a open position (to better see the cockpit detail). I also want to open the cockpit roof hatch too BUT I am unable to find any clear photos of this open (any help appreciated)! There are quite a few pictures showing crewmen looking out or even sitting on the cockpit with their legs through the hatch BUT nothing that shows the hatch itself.
I am quite surprised that despite quite an extensive library of Beaufort magazines, articles and modelling pieces there is NO real major work on this aircraft like there is with the Beaufighter or even the Blenheim http://www.valiant-wings.co.uk/airframe-album-no5-303-p.asp .

I am thinking how best to proceed with painting as well. I have the undercarriage all thought out, but it is delicate. I think I should paint the plane overall Foliage Green and then insert the undercarriage and doors and then paint these items interior Green once in place. OR should I put it all together and then paint the plane and then paint the landing gear? I am trying to do the least number of steps without risking handling too much.
pbhawkin
_VISITCOMMUNITY
New South Wales, Australia
Joined: November 23, 2009
KitMaker: 179 posts
AeroScale: 170 posts
Posted: Tuesday, April 21, 2015 - 04:49 AM UTC
I just trawled through all their images on the Australian War Museum (AWM) website of the Beaufort (350 or so) and found 4 reasonable shots of the roof.
However, I have proven (to myself at least) that the roof of the Beaufort IS asymmetrical in that the glazing over the Pilot (Portside) is one large piece that doesn't open and on the Starboard side it is a two piece arrangement. The frame is split in half front to back with each piece hinged allowing it to fold inwards with the right hand piece laying against the Starboard side windows when open and the left hand piece either hanging straight down or perhaps being able to fold 180 degrees and be held flat against the inside of the Pilot's roof. I assume that the section that hangs straight down would perhaps impede the pilot's ability and so isn't opened even whilst taxiing.
pbhawkin
_VISITCOMMUNITY
New South Wales, Australia
Joined: November 23, 2009
KitMaker: 179 posts
AeroScale: 170 posts
Posted: Tuesday, April 21, 2015 - 04:54 AM UTC
The AWM link gave me some great close-up pictures to use as references. Most of the ones in the very limited books and magazines on the Beaufort are general views.
Anyway, as promised here are left and right views of the model with wings and horizontal stabs on. It's starting to look like a plane now!


The rather crisp White putty used for the wing/fuselage join is a new one for me. It's called 'Perfect Plastic Putty' by Deluxe Materials, AND it is beautifully easy to use. It goes on with a toothpick or a old paint brush and can be smoothed with a wet finger or paint brush dipped in water.

I decided to do the undercarriage detail before painting as I wanted to reduce handling the painted plane as much as possible (although it will get a couple of coats of Future to seal it as soon as the paint is dry), and I thought it would be easier to make like this.
This was my reference (from 'Plastics Modeller', No.11 Feb-Mar 1990):


and here is the result:


Painting is next (If I can get the Tamiya tape to stick long enough!!) and then onto these fun little items:


I plan on using the thick aluminium seal inside a Milo tin to replicate the doors. I will use my resin doors as a master and press firmly into the foil to get an outline and then cut around it to shape. Then using some suitable PE I have (ships railing for a 1/700 Japanese ship) will glue this on the inside. It should be both visually appealing as well as somewhat functional (like the real thing) in providing some strength to the foil doors!
pbhawkin
_VISITCOMMUNITY
New South Wales, Australia
Joined: November 23, 2009
KitMaker: 179 posts
AeroScale: 170 posts
Posted: Tuesday, April 21, 2015 - 05:03 AM UTC
First try at the undercarriage doors and things are progressing well.
Two different types of PE railing used and I think it looks pretty good!
The Foil was trimmed (a little more is required) to correct size and the PE held by a tiny drop of CA at each end and then coated in Future.


I only have the four smaller rear doors (that enclosed the wheel on the Mk.VIII) to go.
litespeed
Staff MemberNews Reporter
AEROSCALE
_VISITCOMMUNITY
England - North West, United Kingdom
Joined: October 15, 2009
KitMaker: 1,976 posts
AeroScale: 1,789 posts
Posted: Wednesday, April 22, 2015 - 02:32 AM UTC
This looks like a fascinating build Peter. I have always admired the Beaufort as they were frequently featured in the war comics of my youth.
Keep up the excellent work.
tim
pbhawkin
_VISITCOMMUNITY
New South Wales, Australia
Joined: November 23, 2009
KitMaker: 179 posts
AeroScale: 170 posts
Posted: Friday, April 24, 2015 - 06:26 PM UTC
Undercarriage doors are basically done. I have painted them and tried a wash which makes it look appropriately dirty for it's location (I think).
Have to add a tiny strut from the leading edge of each door that catches the inner edge of the one in front to allow it to close by being pushed on as the landing gear retracts (all very simple).
Also have added a couple of PE pieces in the wheel well, to represent the structure that the doors are attached to.
Doors:


Undercarriage gear completed (apart from weathering and PE piece at the front of each Oleo that catches the doors to make them close)


Oh, and I have got the initial painting done too!
Seems to have worked out ok, I think. The variation in the panels has come up well as has the pre-shading (although I might try to tone this down a bit more with another very light coat).
There is still a little more touching up to do and once the decals are on some weathering.


magnusf
_VISITCOMMUNITY
Stockholm, Sweden
Joined: May 02, 2006
KitMaker: 1,953 posts
AeroScale: 1,902 posts
Posted: Friday, April 24, 2015 - 11:45 PM UTC
Peter! An interesting build! I dabble a bit in 144-scale but I have kept to the wide, well-paved, mainstream road when it comes to choosing kits (Eduard has been my main provider...). Your build is inspiring, it might be time to try something a bit more unusual !


Magnus
JClapp
#259
_VISITCOMMUNITY
Massachusetts, United States
Joined: October 23, 2011
KitMaker: 2,265 posts
AeroScale: 1,715 posts
Posted: Saturday, April 25, 2015 - 03:57 AM UTC
The struts and landing gear doors with the tiny PE braces are stunning.
Scrodes
_VISITCOMMUNITY
Ontario, Canada
Joined: July 22, 2012
KitMaker: 771 posts
AeroScale: 763 posts
Posted: Saturday, April 25, 2015 - 07:29 AM UTC
Would you mind taking a photo of the fuse next to a bottle of Tamiya paint, or similar, for size reference? I can't quite wrap my head around it.


Good call on filling those panel lines in the casting. I'd love to see a 1:1 mockup with panel lines like that.
pbhawkin
_VISITCOMMUNITY
New South Wales, Australia
Joined: November 23, 2009
KitMaker: 179 posts
AeroScale: 170 posts
Posted: Saturday, April 25, 2015 - 04:12 PM UTC
Matt,
hope this helps your head!

further tidying up of blemishes and needing another thin coat to unify them together.

Next will need to do decals so they can be on and weathered.
Scrodes
_VISITCOMMUNITY
Ontario, Canada
Joined: July 22, 2012
KitMaker: 771 posts
AeroScale: 763 posts
Posted: Monday, April 27, 2015 - 07:37 AM UTC
Yes, that's perfect thank you. I always have such a hard time picturing it because it's a scale I have never dabbled in.

I saw a 1/144th BIG ED set for something or other when I was on SprueBrothers the other week and I had to chuckle - how many different sheets could there be that would justify it not all being released in the same set to begin with?


Have you considered white metal landing gear for your bird?
pbhawkin
_VISITCOMMUNITY
New South Wales, Australia
Joined: November 23, 2009
KitMaker: 179 posts
AeroScale: 170 posts
Posted: Tuesday, April 28, 2015 - 04:04 AM UTC
Hi all,
As part of my detailed Beaufort WiP I am going to try to add some weathering to the markings. I want to show a weather worn (SE Asia) aircraft, exposed to the tropical conditions.
Now this means that either the markings are painted on and weathered (too hard I suspect) or that decals are used and somehow weathered.
The plane will be in RAAF markings so I am talking about Blue and White roundels, fuselage codes (probably in White) and fin flash mainly.
The two methods I am familiar with are using a dirty grey was over the decal once it is in place ad using fine sandpaper to wear away some of the colour of the decal. I suspect that ALPS printed (separate layers for each colour) decals will work better than silkscreen (all one layer) decals for this.
Does anyone have any suggestions or experience with either of these techniques or can suggest others?
Did the ground crews maintain markings to freshly painted standard at all times?

regards
Peter


Matt, the detail of the actual landing gear is quite good for a resin piece. I am not sure that white metal offers more detail. However, I did look at a Lancaster set of landing gear that has a similar layout and it looked ok.
pbhawkin
_VISITCOMMUNITY
New South Wales, Australia
Joined: November 23, 2009
KitMaker: 179 posts
AeroScale: 170 posts
Posted: Saturday, May 02, 2015 - 04:57 PM UTC
another week and more fiddling.
I have removed the rear facing wing lights and drilled out the Red bulbs and re-painted them in with White as it should be. Needless to say this didn't go perfectly and depending on viewing angle a little Red is still to be see on one light.
Further panel line painting has been done (along with a little filling in of seams) using various lightened colours and some panel line shading.


Also, tried to add some engine detail in the form of a ignition harness (courtesy of Brengun for the Ju52!):


A before adding harness shot:


And a after adding shot:
magnusf
_VISITCOMMUNITY
Stockholm, Sweden
Joined: May 02, 2006
KitMaker: 1,953 posts
AeroScale: 1,902 posts
Posted: Saturday, May 02, 2015 - 11:09 PM UTC
Peter! This is an interesting build! I'm sitting here on "Vulture's row" waiting for you to deal with the canopies and how to do the lines in them, I had great trouble with my two-seater Me-262 (and that was probably a breeze compared to your Beaufort!).


Magnus
pbhawkin
_VISITCOMMUNITY
New South Wales, Australia
Joined: November 23, 2009
KitMaker: 179 posts
AeroScale: 170 posts
Posted: Sunday, May 17, 2015 - 04:29 AM UTC
Observers canopy has glazing framing now with using Green decals that were re-painted Foliage green:


Also note the three rods protruding from the frame at the rear of the cockpit?
Well, they are to hold the moveable sunshades for the pilot and navigator:


Also PE grills added to each wing airintake:


And the cockpit on with some framing done:

The missing section is where I plan on having the side window and one of the two top emergency hatches open.
JClapp
#259
_VISITCOMMUNITY
Massachusetts, United States
Joined: October 23, 2011
KitMaker: 2,265 posts
AeroScale: 1,715 posts
Posted: Sunday, May 17, 2015 - 06:18 AM UTC
The canopy lining is about perfect. I love the sun shades!

what is the canopy made of? it's rather amazingly glass like!

I'm used to not seeing anything through a 1/144 canopy so just not bothering much with what's under it.
pbhawkin
_VISITCOMMUNITY
New South Wales, Australia
Joined: November 23, 2009
KitMaker: 179 posts
AeroScale: 170 posts
Posted: Tuesday, May 19, 2015 - 04:21 AM UTC
just the vacforms I make for the kit using an old (1965) 'Vac-U-form' machine by Mattell and custom made clear acrylic pre-perforated pieces (0.01" thick) from a Ebay seller made for the machine.
pbhawkin
_VISITCOMMUNITY
New South Wales, Australia
Joined: November 23, 2009
KitMaker: 179 posts
AeroScale: 170 posts
Posted: Saturday, May 30, 2015 - 06:12 PM UTC
Slowly, slowly.
Here is the cockpit glazing completed.


And the wheels are also painted. I used my trusty punch biopsy (3mm this time) to cut out a mask from Tamiya tape to cover the central Silver rim:


and tyre painted (not perfect but better than free hand):


Now to finish the landing gear closing mechanism on the undercarriage with some PE (if I can find something suitable!).
And then it is applying the decals for weathering before I can do any of the ASV radar aerials.
pbhawkin
_VISITCOMMUNITY
New South Wales, Australia
Joined: November 23, 2009
KitMaker: 179 posts
AeroScale: 170 posts
Posted: Monday, October 31, 2016 - 03:18 AM UTC
so after a Looooong time awaiting for some decals they final arrive.
I had to put the fuselage decals on before I could attach the PE ASV Mk.II aerials (all 16 of them) courtesy of ShelfOddity:


as usual the close up picture shows all the errors but these are not visible to the naked eye (even with my normal glasses on) :geek:

A little trial and error as the PE aerials were designed to have the one central support folded over to make it thicker than the rest of the piece but it was almost impossible to align the folded pieces up perfectly and so the appearance was rather jagged. so I ended up cutting off one of the pieces and this looked better. I also ended up drilling 16 by #80 holes to locate the supports.


This is what they are supposed to look like:


I have added two wing Bomb hard points with a couple of 250Lb GP bombs (made quite rusty looking):
 _GOTOTOP