Berlin, Germany
Joined: February 20, 2005
KitMaker: 204 posts
AeroScale: 99 posts
Posted: Sunday, March 15, 2015 - 03:33 AM UTC
Berlin, Germany
Joined: February 20, 2005
KitMaker: 204 posts
AeroScale: 99 posts
Posted: Sunday, March 15, 2015 - 03:12 PM UTC
Hello everyone,
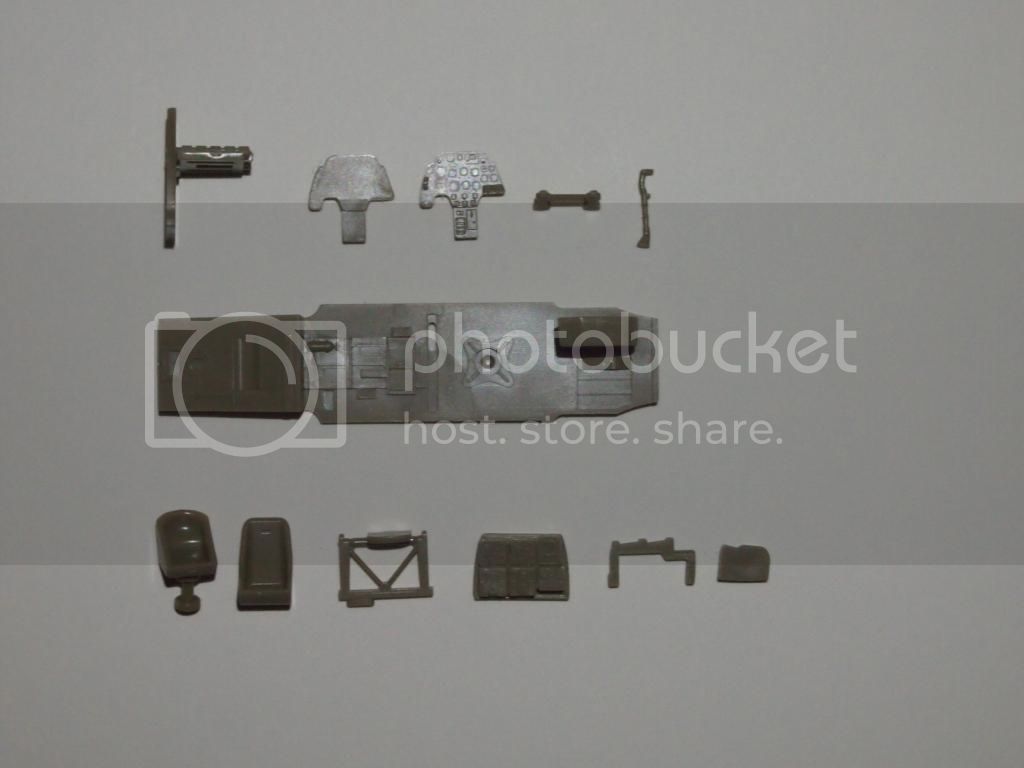
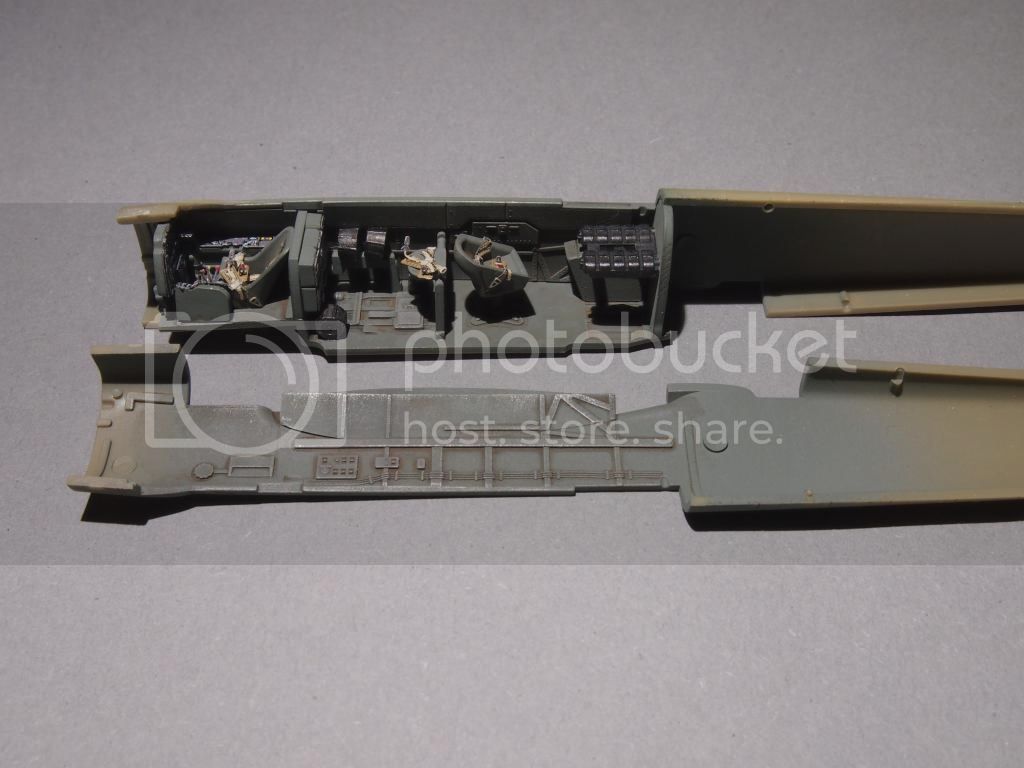
work starts on the cockpit. You get a lot of small parts plus the PE fret. All the parts are clean, no flash and they look sharp. For me, working in 1/72 is a bit fiddly ... You will end with a nicely detailed cockpit.
Thanks for stopping by.
kind regards ro
AussieReg
 Associate Editor
#007
Victoria, Australia
Joined: June 09, 2009
KitMaker: 8,156 posts
AeroScale: 3,756 posts
Posted: Sunday, March 15, 2015 - 05:46 PM UTC
Nice work so far Robert, a neat looking office !
ON the bench
Revell 1/24 '53 Corvette (building as '54)
Revell 1/24 BMW 507 Coupe and Cabrio
Italeri 1/48 Me262 B-1a/U1 Nightfighter
Monogram 1/24 '57 Chevy Nomad
Dragon 1/350 USS Frank Knox DD-742
Stockholm, Sweden
Joined: May 02, 2006
KitMaker: 1,953 posts
AeroScale: 1,902 posts
Posted: Sunday, March 15, 2015 - 08:31 PM UTC
You're in for a treat Robert! I've built one and it's the best kit I've ever built!

Magnus
Press banner to the right to follow my trail to the new forums!
Berlin, Germany
Joined: February 20, 2005
KitMaker: 204 posts
AeroScale: 99 posts
Posted: Monday, March 16, 2015 - 03:05 AM UTC
Quoted Text
Nice work so far Robert, a neat looking office !
Thanks Damien. I was surprised how well detailed the cockpit is right out of the box.
greetings ro
Berlin, Germany
Joined: February 20, 2005
KitMaker: 204 posts
AeroScale: 99 posts
Posted: Monday, March 16, 2015 - 03:06 AM UTC
Quoted Text
You're in for a treat Robert! I've built one and it's the best kit I've ever built!
Magnus
Magnus you're right, up to now everything fits perfect.
kind regards ro
Joel_W
Associate Editor New York, United States
Joined: December 04, 2010
KitMaker: 11,666 posts
AeroScale: 7,410 posts
Posted: Monday, March 16, 2015 - 07:35 PM UTC
Robert,
I'll be following right along with your build. The cockpit looks really quite nice. Plenty of detail to capture ones eye.
Joel
On my Workbench:
Monogram 1/24 scale 427 Shelby Cobra
Just Completed:
Beemax 1/24 scale BMW M3 E30 1992 Evolution II
Berlin, Germany
Joined: February 20, 2005
KitMaker: 204 posts
AeroScale: 99 posts
Posted: Monday, March 16, 2015 - 10:13 PM UTC
Quoted Text
Robert,
I'll be following right along with your build. The cockpit looks really quite nice. Plenty of detail to capture ones eye.
Joel
Hi Joel,
thanks for stopping by, it's always nice to have you on board. Hopefully the rest of the build turns out as well.
greetings ro
Berlin, Germany
Joined: February 20, 2005
KitMaker: 204 posts
AeroScale: 99 posts
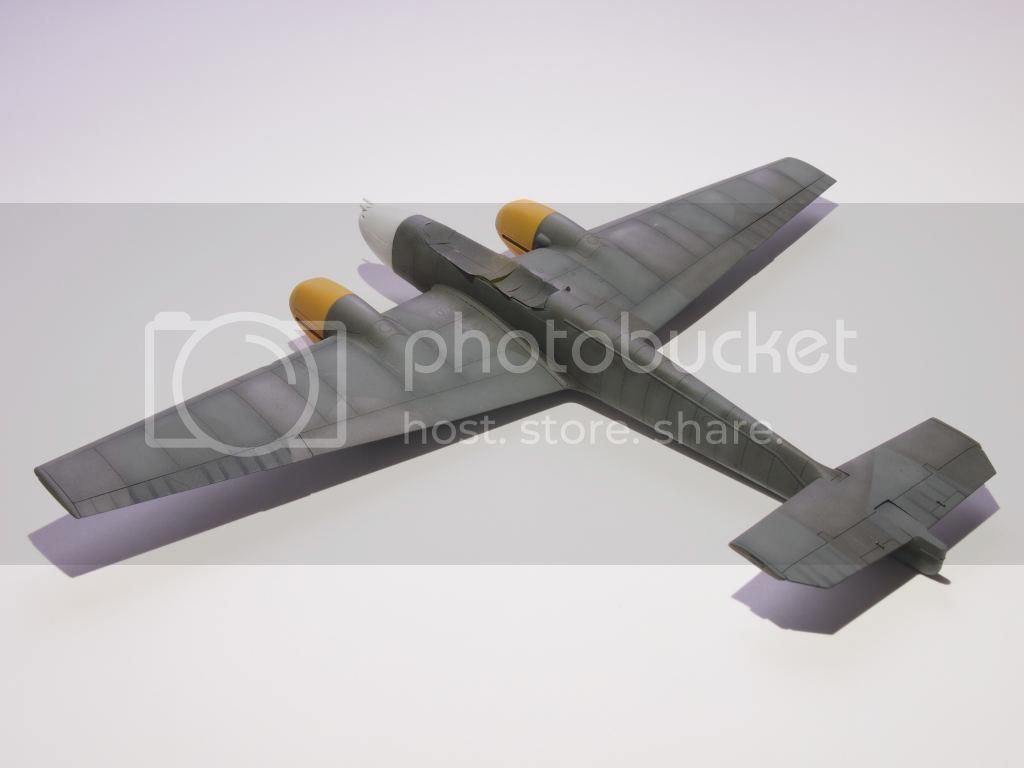
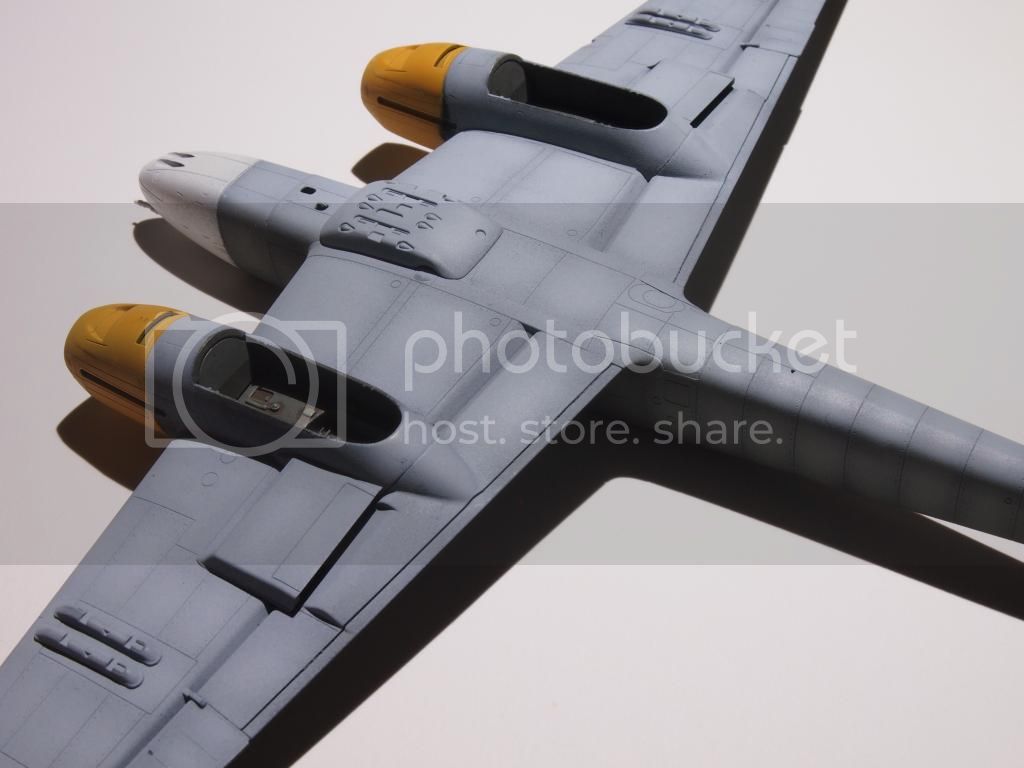
Posted: Tuesday, March 17, 2015 - 11:18 PM UTC
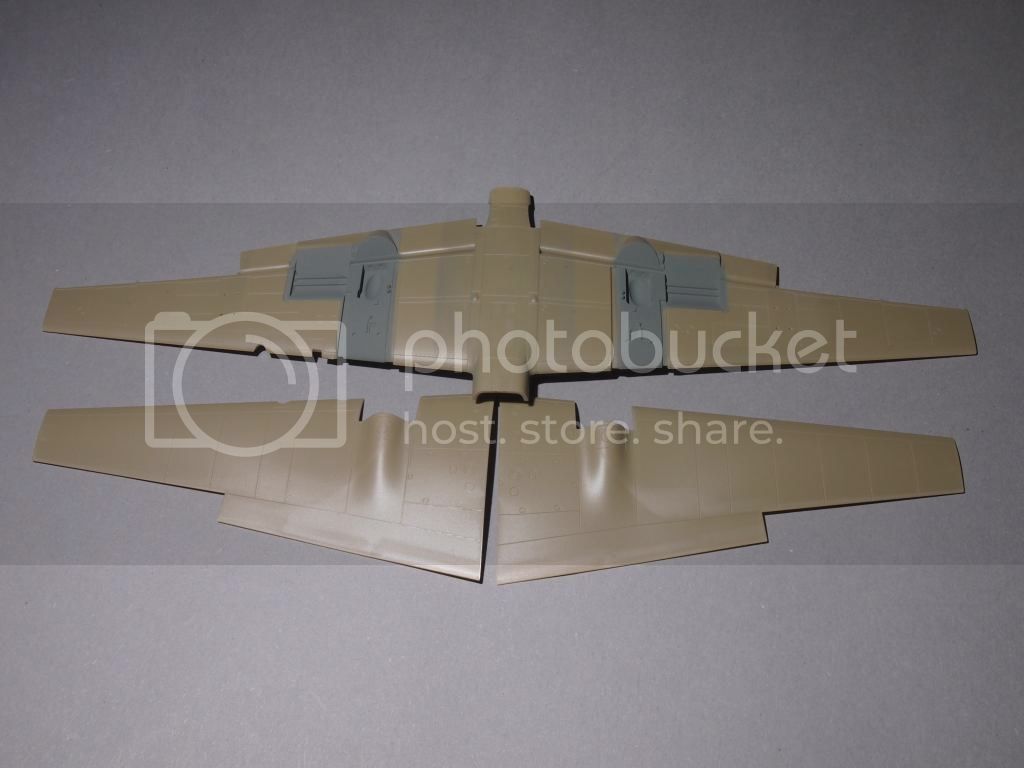
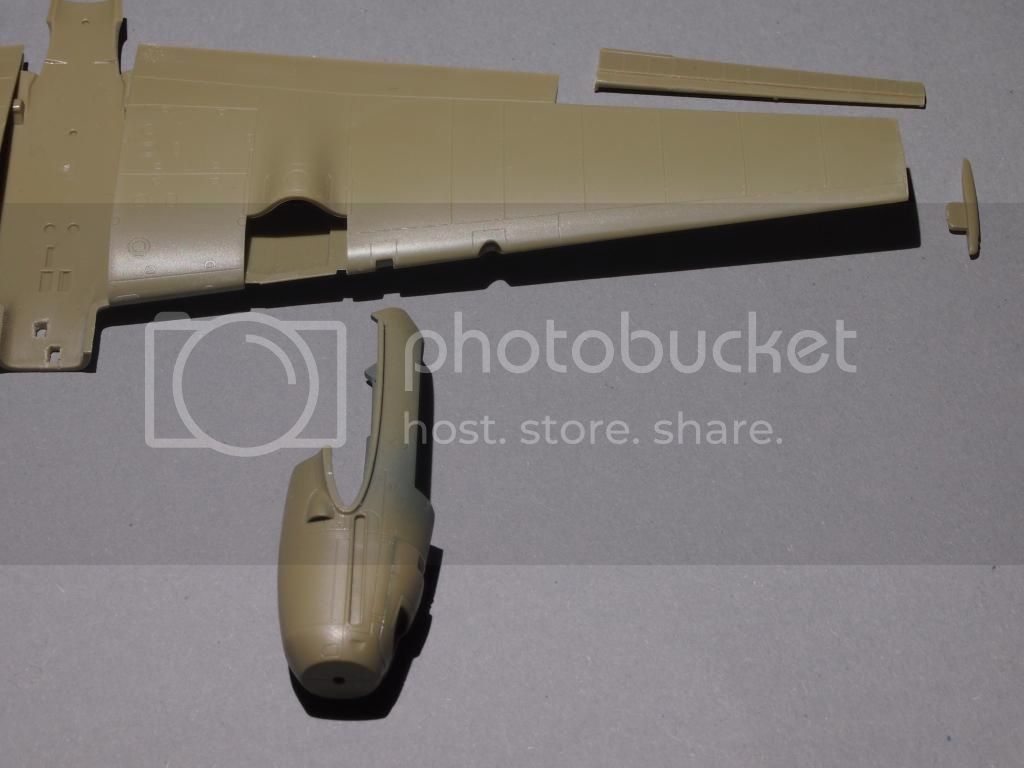
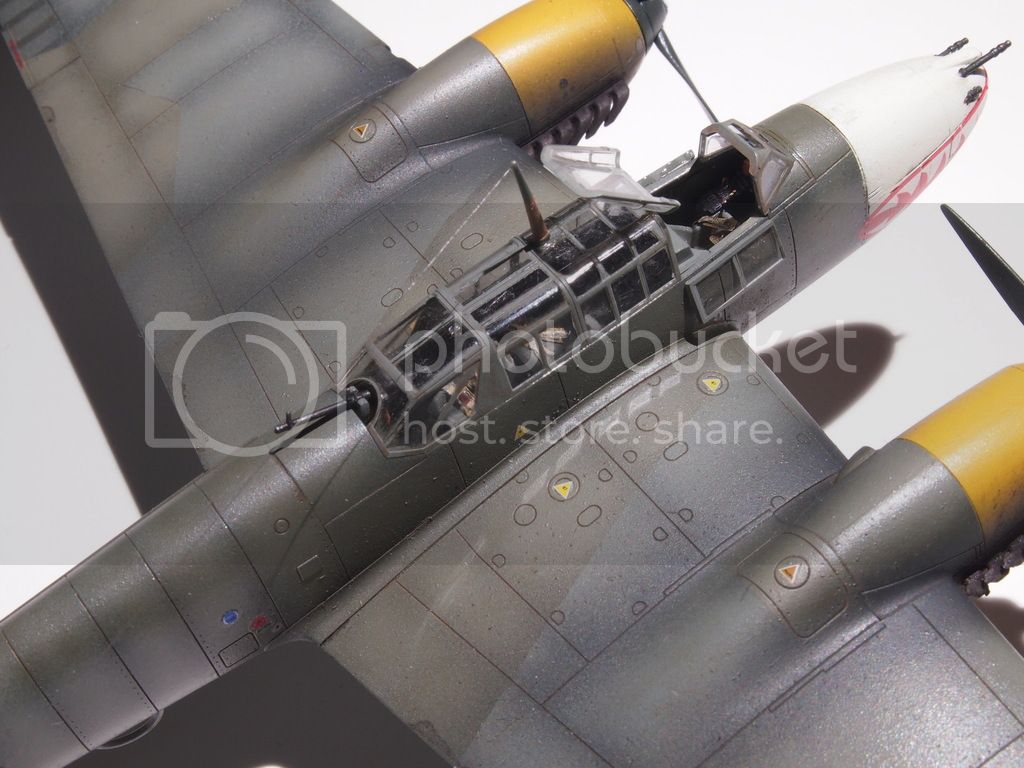
Hi there,
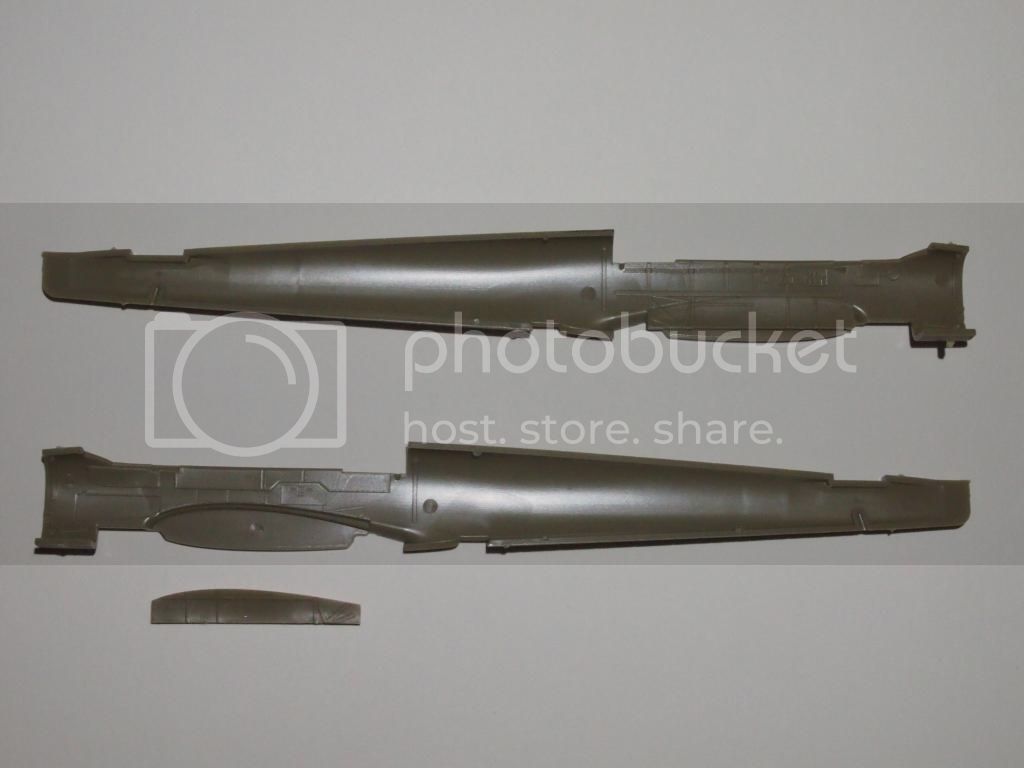
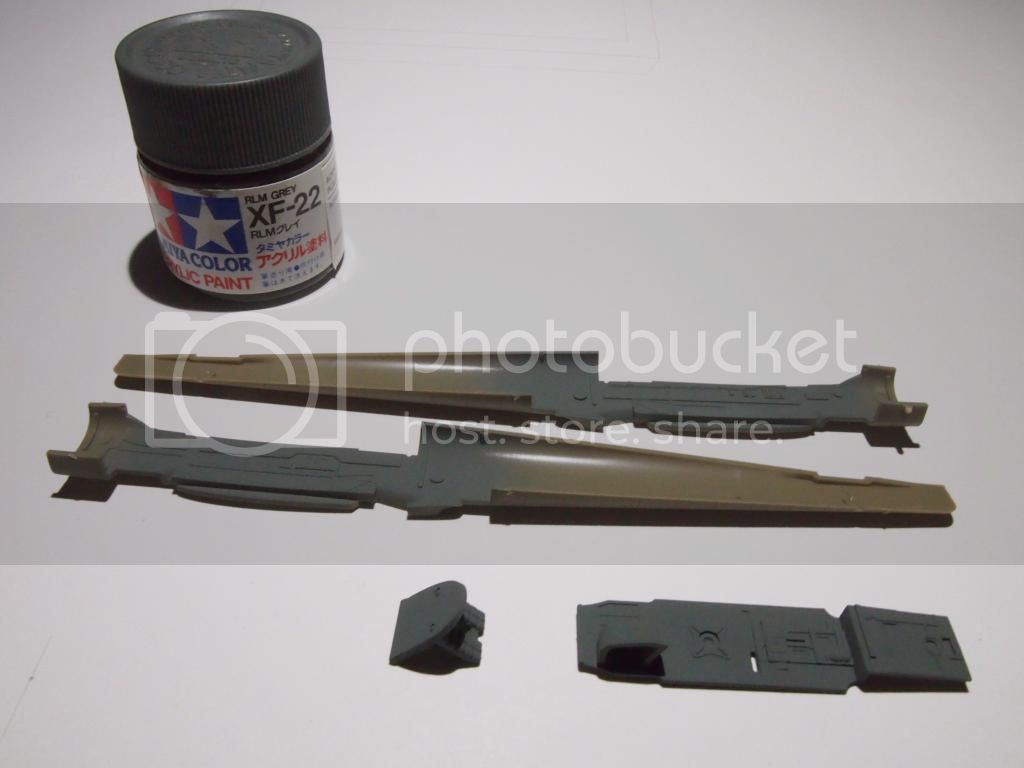
while the cockpit is finished I went on with the wings and the engine nacelles. The inside was painted in RLM02 (Tamiya XF-22) and finished with a brown oil wash and some light dry brushing, not much will be seen in the end. The fit of the parts was excellent, only tiny amounts of homebrew filler were used in some areas. There are a lot of very fine details on the surface and I'm really impressed with the quality of this small kit.
kind regards ro


Berlin, Germany
Joined: February 20, 2005
KitMaker: 204 posts
AeroScale: 99 posts
Posted: Wednesday, March 18, 2015 - 11:33 PM UTC
Berlin, Germany
Joined: February 20, 2005
KitMaker: 204 posts
AeroScale: 99 posts
Posted: Saturday, March 21, 2015 - 12:51 AM UTC
Joel_W
Associate Editor New York, United States
Joined: December 04, 2010
KitMaker: 11,666 posts
AeroScale: 7,410 posts
Posted: Saturday, March 21, 2015 - 05:47 AM UTC
Robert,
Your topside paint scheme is simply perfect. The post shading really works extremely well for a slightly weather worn look to it.
Joel
On my Workbench:
Monogram 1/24 scale 427 Shelby Cobra
Just Completed:
Beemax 1/24 scale BMW M3 E30 1992 Evolution II
Berlin, Germany
Joined: February 20, 2005
KitMaker: 204 posts
AeroScale: 99 posts
Posted: Sunday, March 22, 2015 - 10:23 PM UTC
Quoted Text
Robert,
Your topside paint scheme is simply perfect. The post shading really works extremely well for a slightly weather worn look to it.
Joel
Hi Joel,
thanks for leaving a comment on my build.
With the post shading I can get better results. Normally my pre shading disappears during the paintjob.
kind regards ro
Berlin, Germany
Joined: February 20, 2005
KitMaker: 204 posts
AeroScale: 99 posts
Posted: Sunday, March 22, 2015 - 11:49 PM UTC
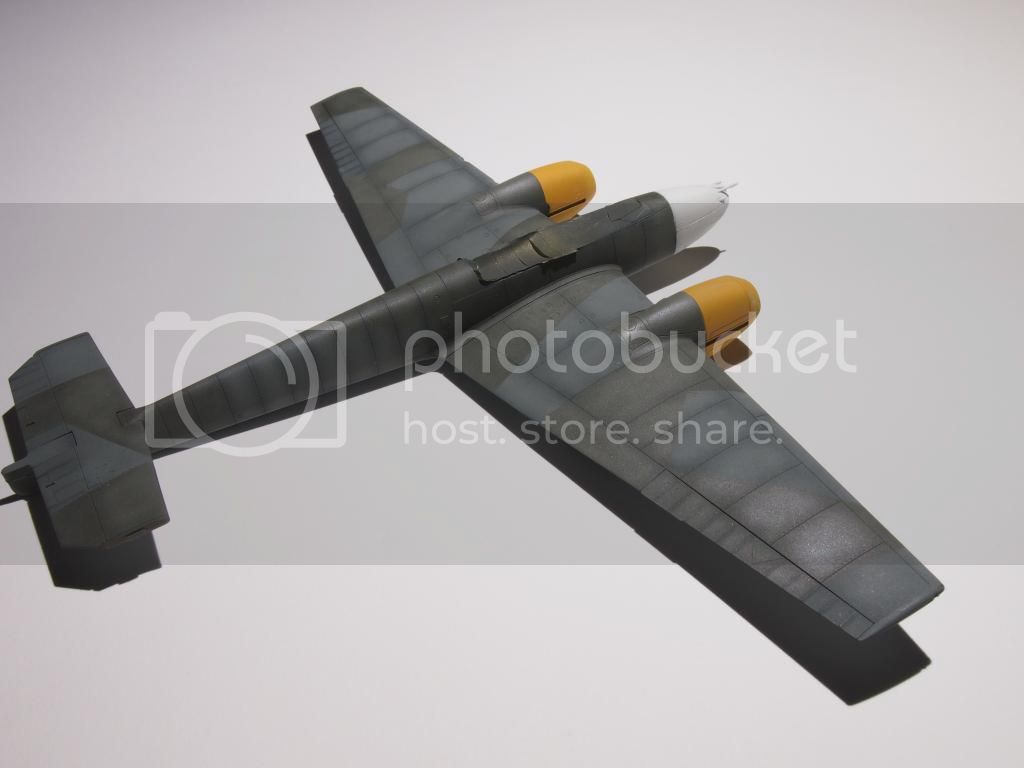
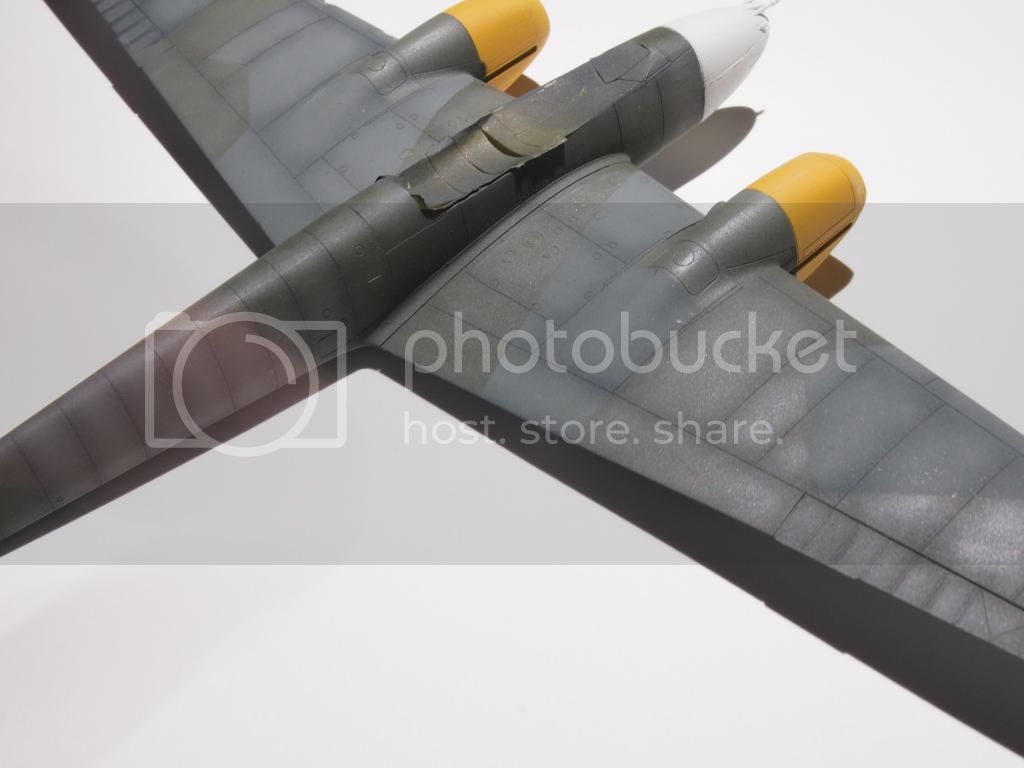
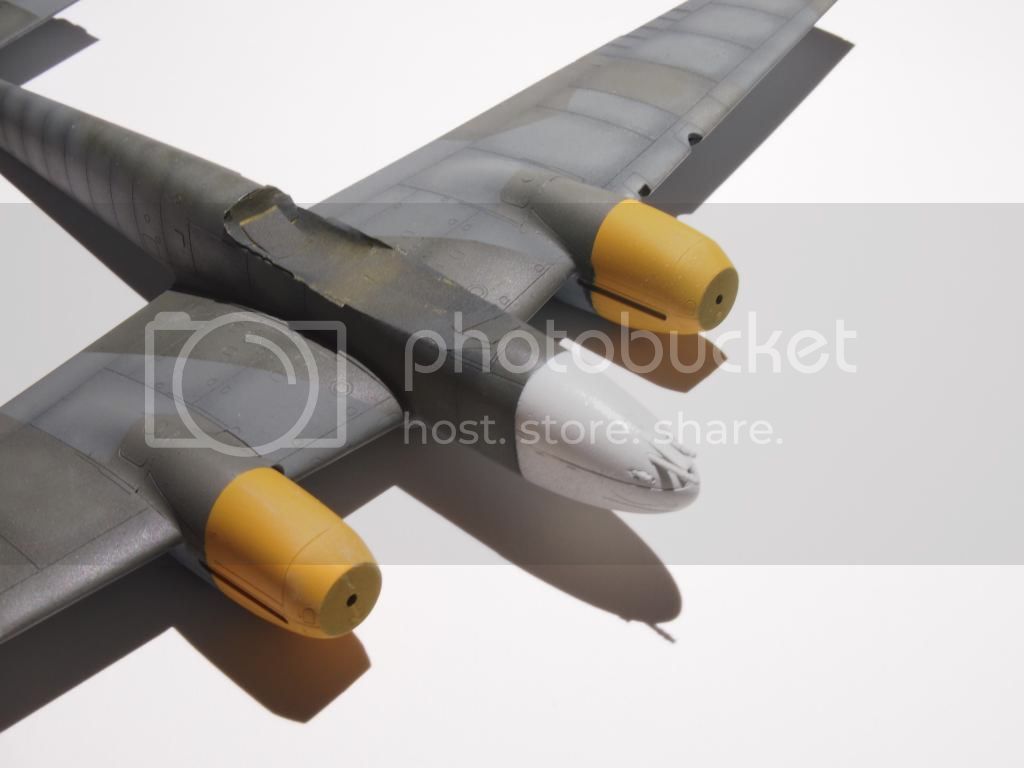
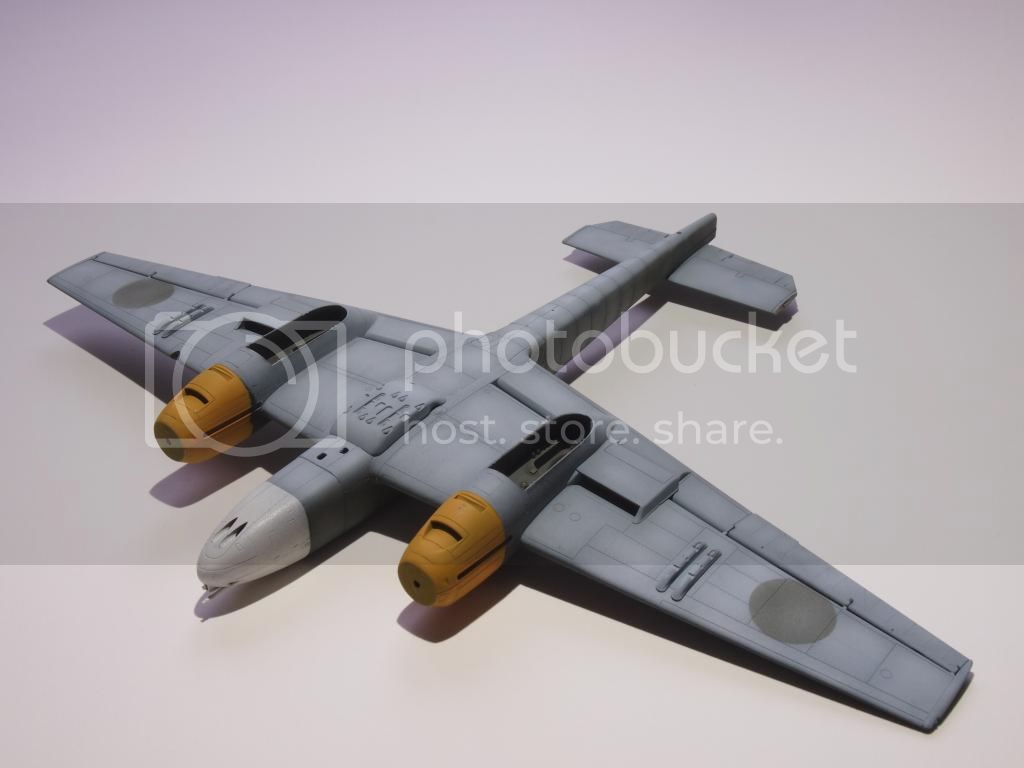
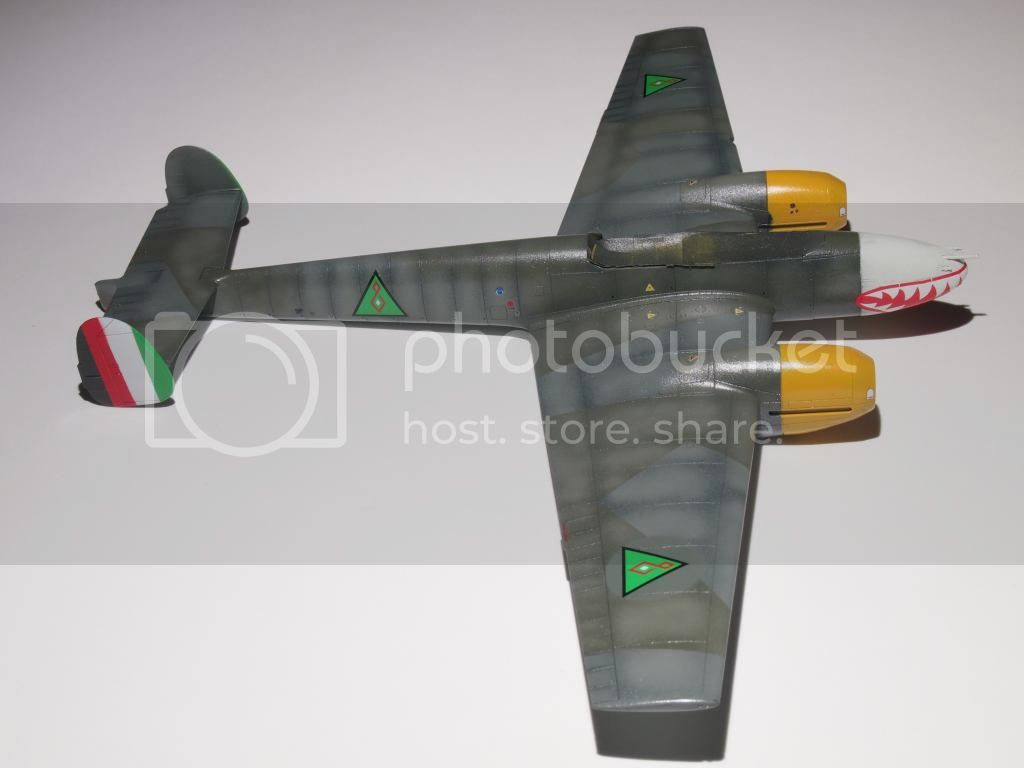
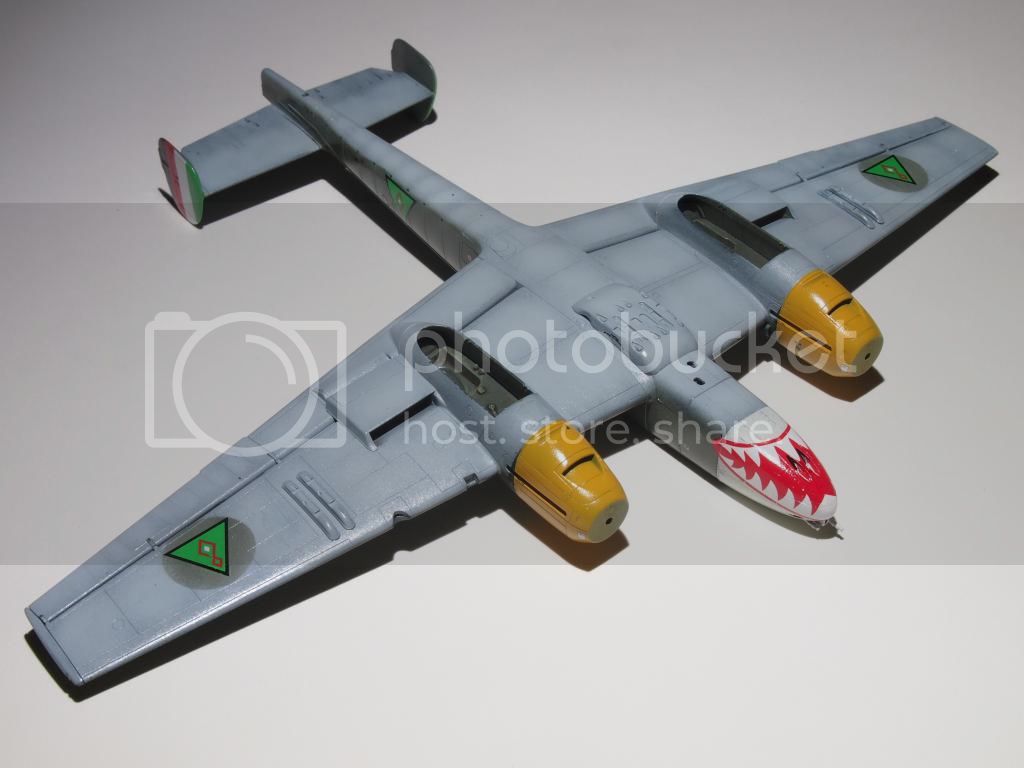
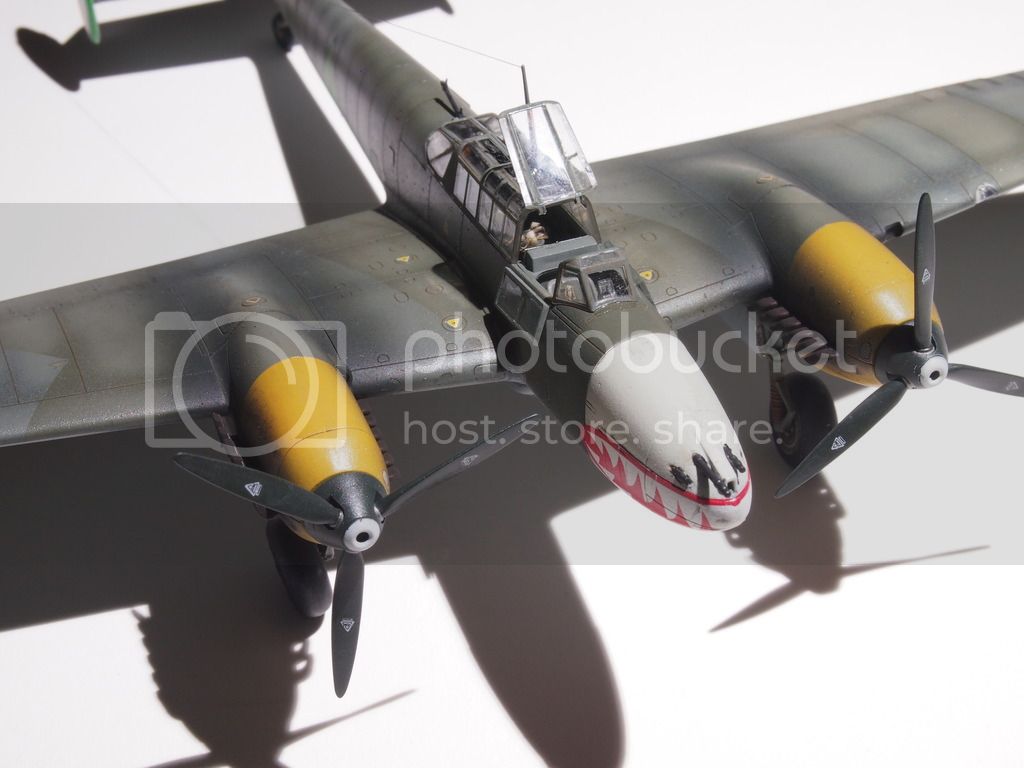
Hi there,
time for an update. I went on with painting. The nose has to be white and the engine nacelles got yellow in the front parts. The underside is RLM76 which I mixed from Tamiya.
Thanks for looking and kind regards
ro
Berlin, Germany
Joined: February 20, 2005
KitMaker: 204 posts
AeroScale: 99 posts
Posted: Wednesday, March 25, 2015 - 01:54 AM UTC
Hi there,
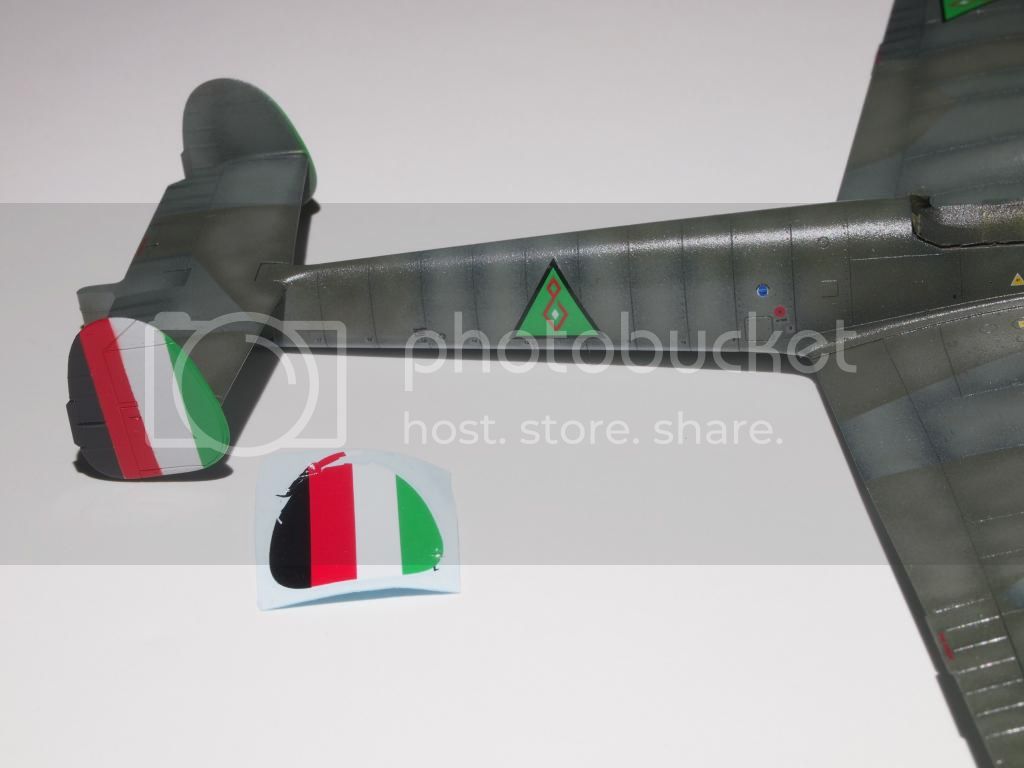
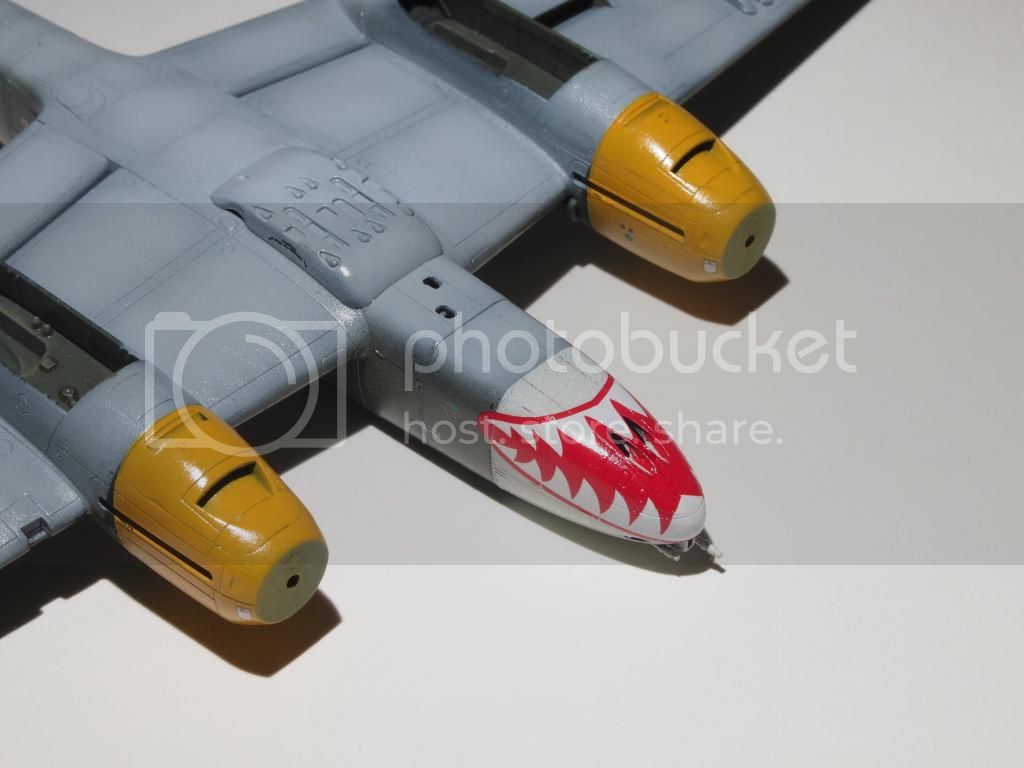
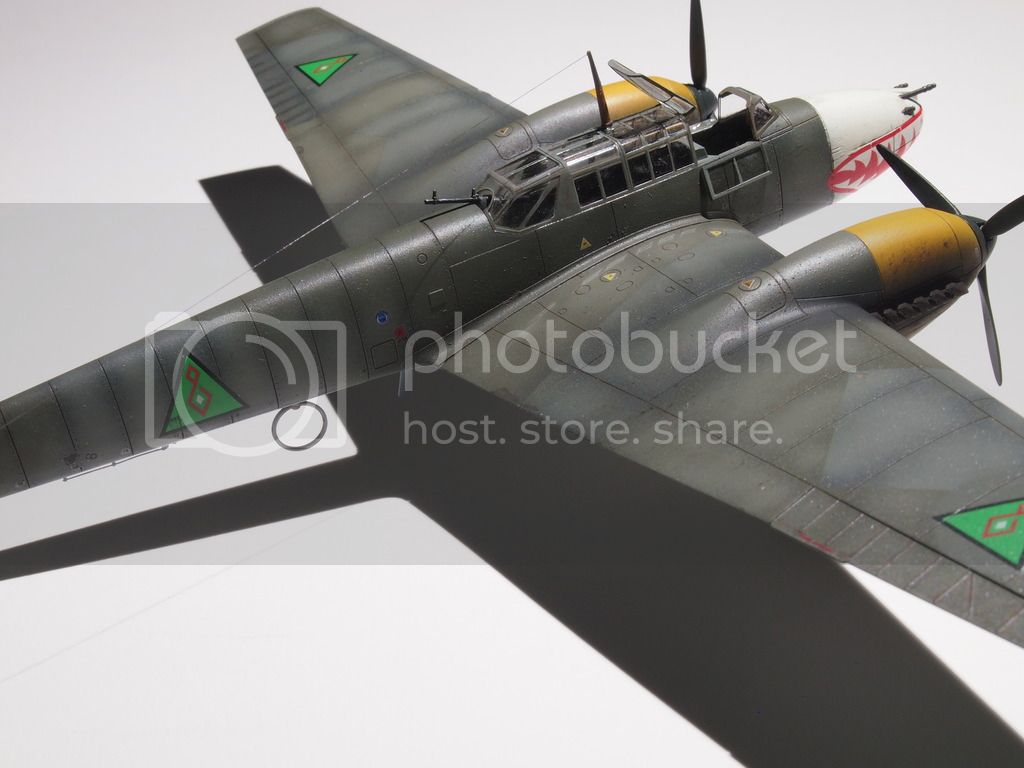
tonight here's some progress for you. After completing the paintjob the whole model got a coat of Pledge. Then I started with decaling, the ones for the tail were far to big so I removed the first one and painted the Iraqi colors myself. The shark mouth came in two pieces, first they looked horrible and after several coats of Micro Sol they even looked like a mess. Next morning I saw them settled very nice ...
best regards ro
Stockholm, Sweden
Joined: May 02, 2006
KitMaker: 1,953 posts
AeroScale: 1,902 posts
Posted: Wednesday, March 25, 2015 - 02:52 AM UTC
Coming along nicely! Regarding the decals on the fin: I've never managed to figure out how to use them, no matter what size they are they are always a potential source for trouble. And usually they aren't too hard to paint with a superior result either!
My build of (almost) that same kit can be found
here by the way!
Magnus
Press banner to the right to follow my trail to the new forums!
Berlin, Germany
Joined: February 20, 2005
KitMaker: 204 posts
AeroScale: 99 posts
Posted: Friday, March 27, 2015 - 04:02 AM UTC
Quoted Text
Coming along nicely! Regarding the decals on the fin: I've never managed to figure out how to use them, no matter what size they are they are always a potential source for trouble. And usually they aren't too hard to paint with a superior result either!
My build of (almost) that same kit can be found here by the way!
Magnus
Magnus, thanks a lot for the link to your build. What a beauty, turned out very very well.
You're right about the tail markings, the painted ones do look so much better.
best regards ro
Berlin, Germany
Joined: February 20, 2005
KitMaker: 204 posts
AeroScale: 99 posts
Posted: Friday, March 27, 2015 - 04:12 AM UTC
Berlin, Germany
Joined: February 20, 2005
KitMaker: 204 posts
AeroScale: 99 posts
Posted: Sunday, March 29, 2015 - 01:04 AM UTC
Berlin, Germany
Joined: February 20, 2005
KitMaker: 204 posts
AeroScale: 99 posts
Posted: Friday, April 03, 2015 - 10:38 PM UTC
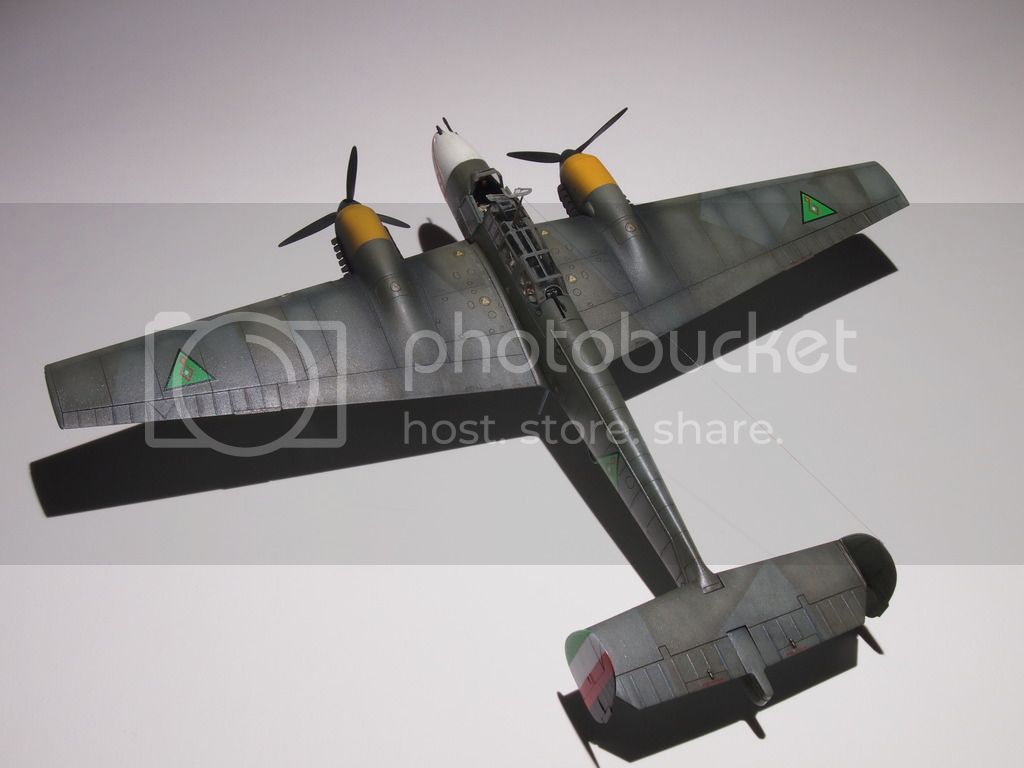
Good evening,
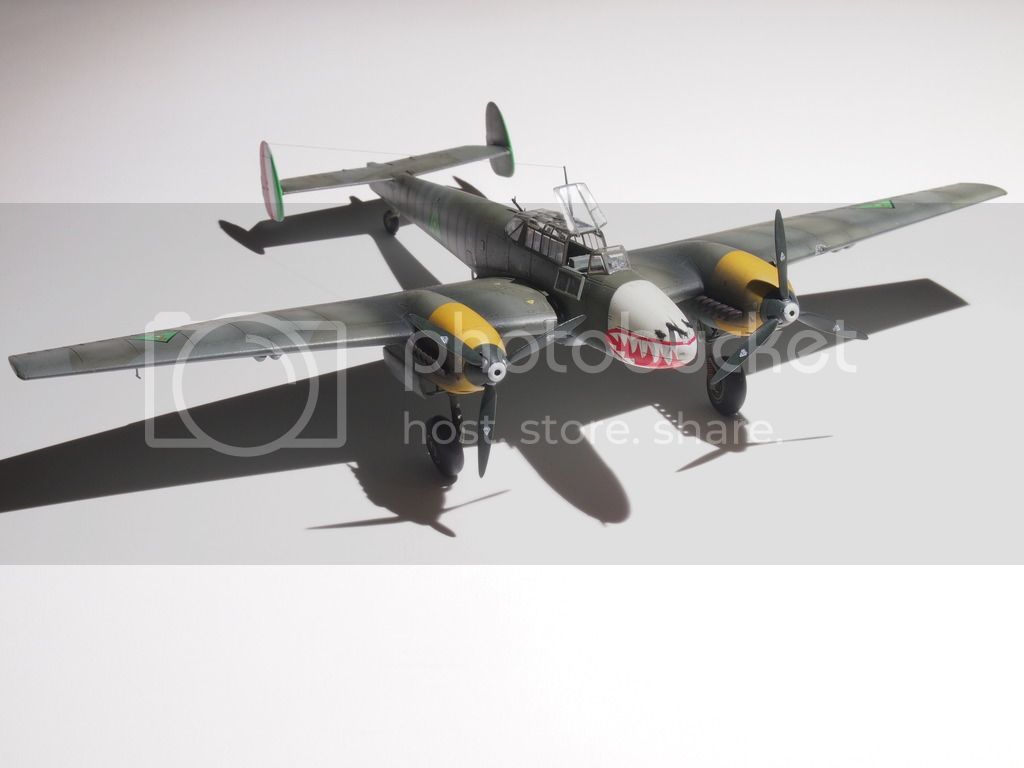
I received the replacement parts from Eduard and so went on with the Bf 110. Props and spinners are on, canopy was completed, antenna and wiring and finally the exhausts. I call it finished now.
This was a very enjoyable build without any problems. It's a perfect engineerd kit by Eduard. And there are also a lot of resin goodies available from Eduard if someone wants to have more details.
Hopefully my build log was informative ...for me it seems there was not much interest ...
Thanks for stopping by and leaving a comment.
kind regards ro

AussieReg
Associate Editor #007
Victoria, Australia
Joined: June 09, 2009
KitMaker: 8,156 posts
AeroScale: 3,756 posts
Posted: Saturday, April 04, 2015 - 09:06 PM UTC
Beautiful build Robert, and a very informative thread. The paint and weathering look great. Thanks for sharing so much detail along the way.
Cheers, D
ON the bench
Revell 1/24 '53 Corvette (building as '54)
Revell 1/24 BMW 507 Coupe and Cabrio
Italeri 1/48 Me262 B-1a/U1 Nightfighter
Monogram 1/24 '57 Chevy Nomad
Dragon 1/350 USS Frank Knox DD-742
Berlin, Germany
Joined: February 20, 2005
KitMaker: 204 posts
AeroScale: 99 posts
Posted: Sunday, April 05, 2015 - 01:22 AM UTC
Thanks a lot Damien, much appreciated it.
kind regards ro
Stockholm, Sweden
Joined: May 02, 2006
KitMaker: 1,953 posts
AeroScale: 1,902 posts
Posted: Sunday, April 05, 2015 - 10:28 AM UTC
That's a 110 to be proud of and I think the first Iraqi one I've seen built!
Beautiful!
Magnus
Press banner to the right to follow my trail to the new forums!
Berlin, Germany
Joined: February 20, 2005
KitMaker: 204 posts
AeroScale: 99 posts
Posted: Monday, April 06, 2015 - 02:47 AM UTC
Thanks Magnus for stopping by. Yes, the Iraqi markings are not often seen, the main reason was the kit took place in a SIG with "Middle Eastern Conflicts" and I didn't want to buy something new.
greetings ro
Berlin, Germany
Joined: October 12, 2008
KitMaker: 709 posts
AeroScale: 651 posts
Posted: Thursday, April 09, 2015 - 12:10 AM UTC
Great build my friend! Painting and weathering is real artwork.
And finally there's a beautiful bird!
Followed up your log but just waited until the last set of pics.
Sometimes you need to distance yourself to see things clearly - Lao Tzu -
... in scale and in real life -T.