_GOTOBOTTOM
World War II
Discuss WWII and the era directly before and after the war from 1935-1949.
Hosted by Rowan Baylis
Bf 110D-1 Nightfighter - 1/48 Dragon
alpha_tango
_VISITCOMMUNITY
Germany
Joined: September 07, 2005
KitMaker: 5,609 posts
AeroScale: 5,231 posts
Posted: Monday, February 23, 2015 - 02:01 PM UTC
Hi all,

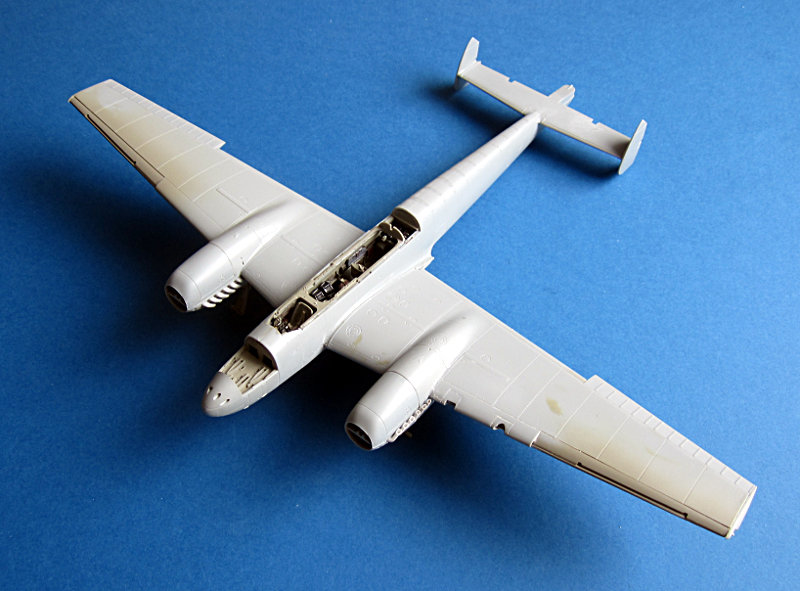
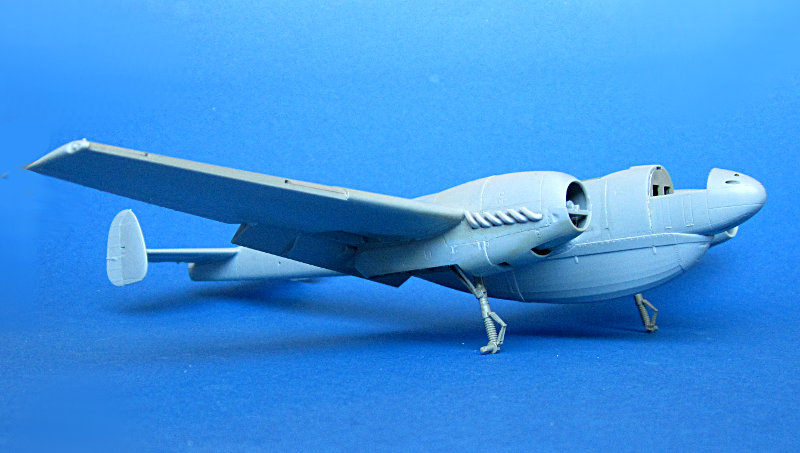
over the past weeks I built some of the kits components for this kit. Progress is slow as you know from me, but nonetheless I can show some pix alrady.

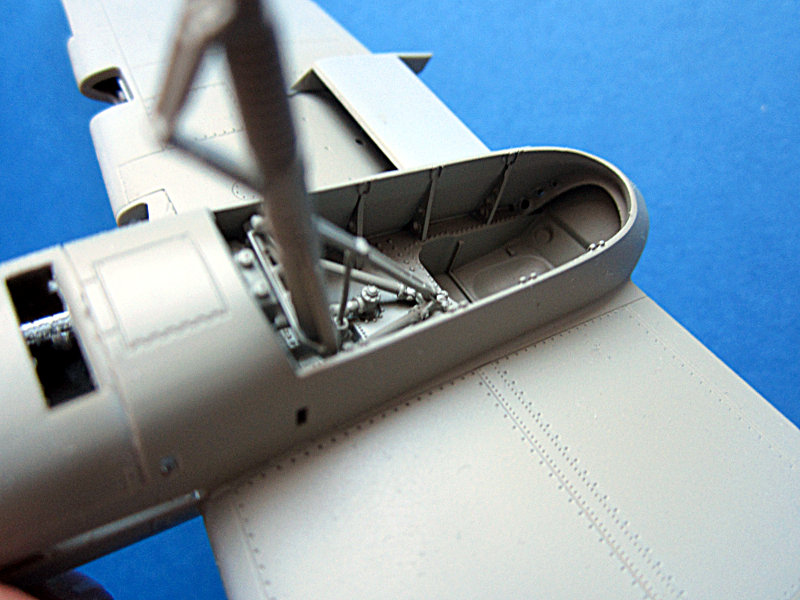
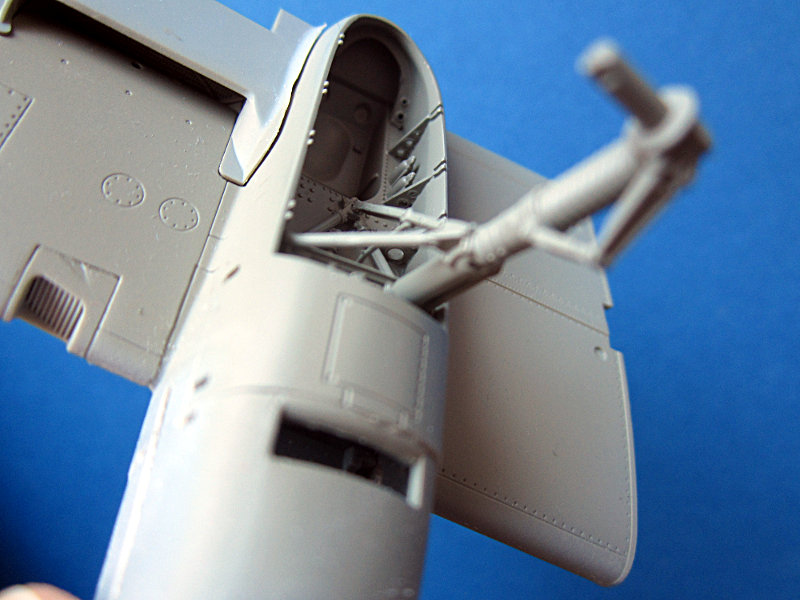
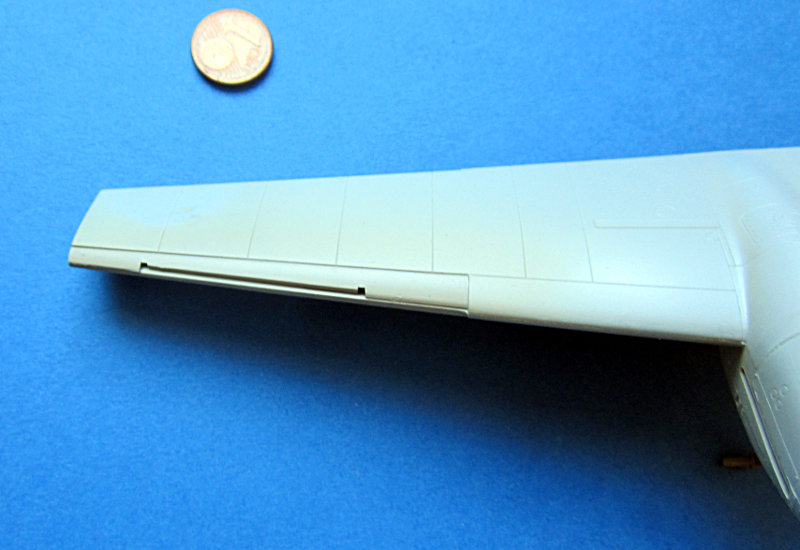
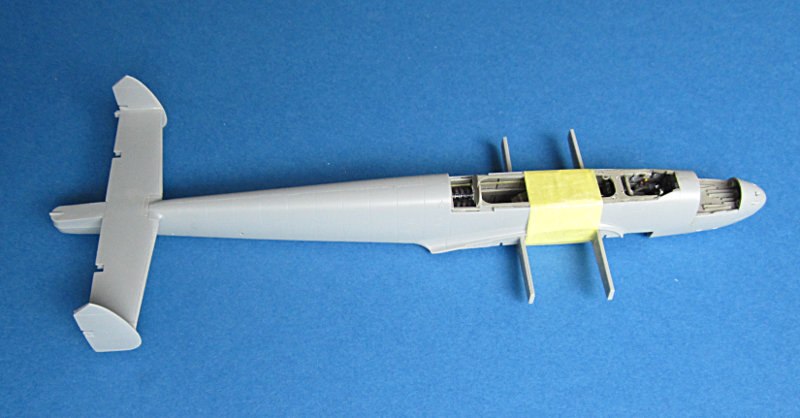
As I do not like building cockpits (shall I say hate ... I am probably the only modeler on the planet because everyone I ask loves doing cockpits) ... I started with the wings. Some cuting to get the slats monted and then pure modelling joy .. well not that much because I deviated from the very crowded and not always clear instructions. Thus I tried to mount the engine panels after the wing was together.
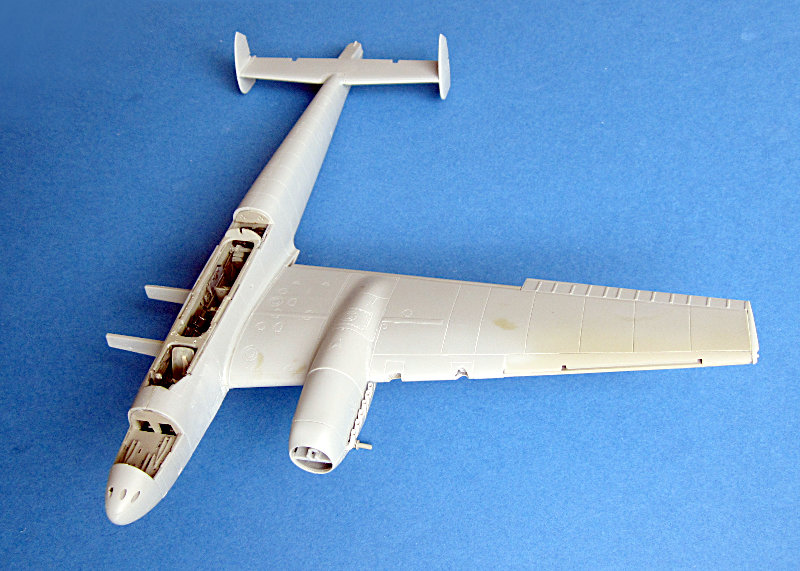
Big mistake! I had to cut all the fasteners to get this together. In the end you will hardly see this but as I first tried to fit it without cutting it was a bit tediuos.

BTW I really like the wheelbays of the Dragon kit.


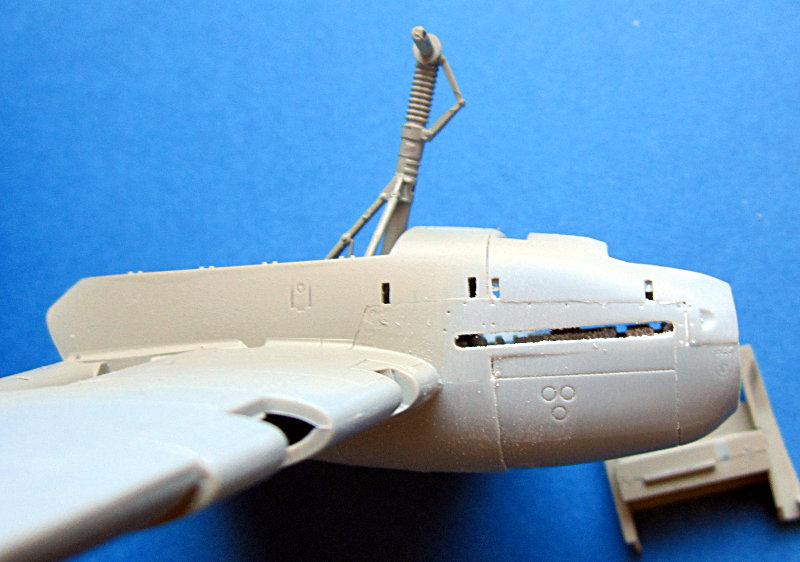
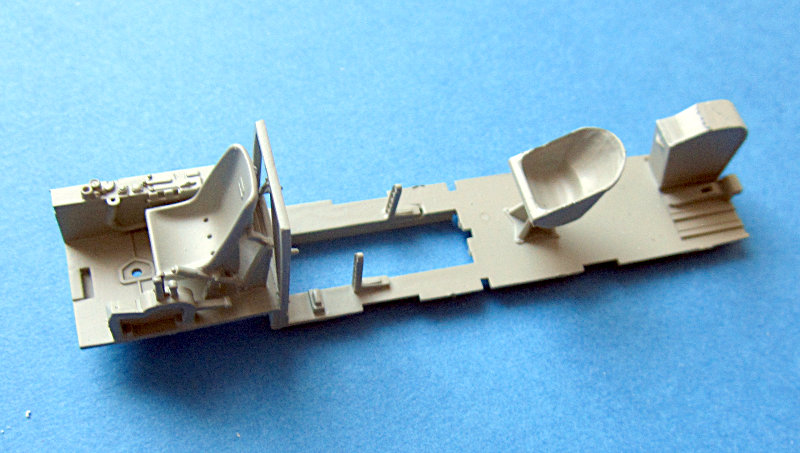
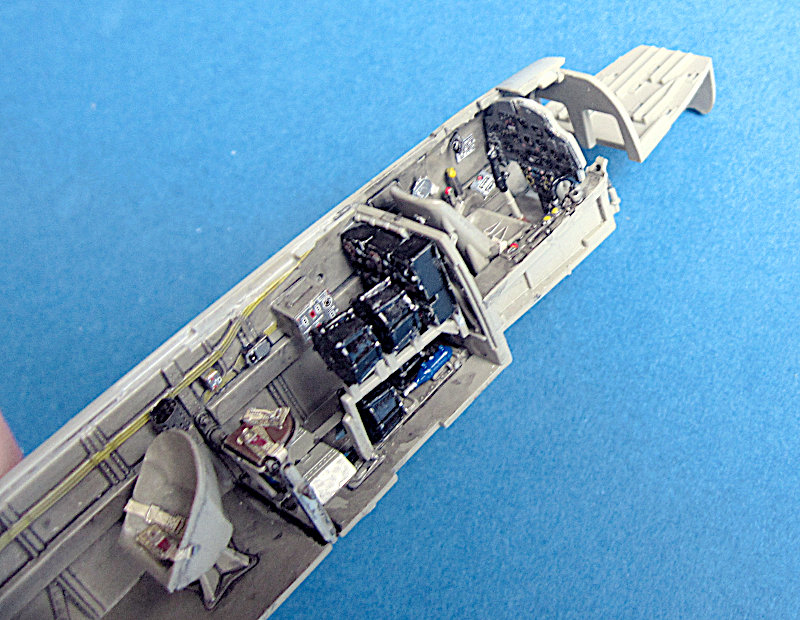
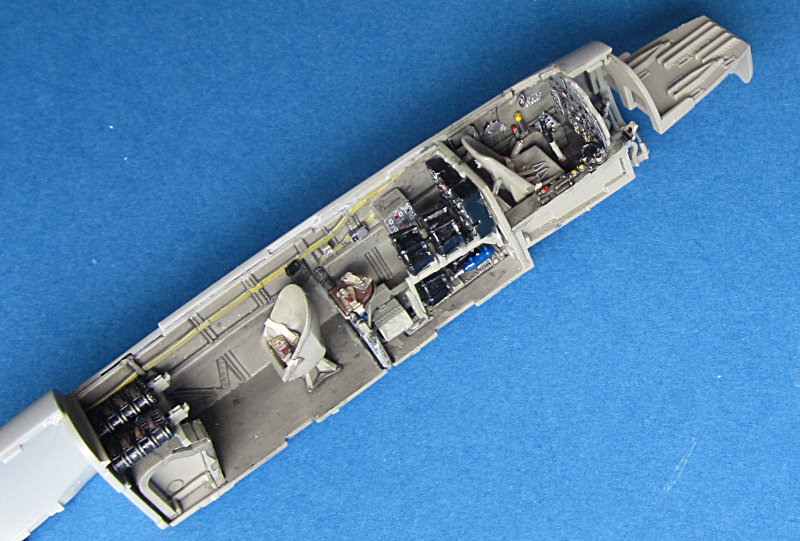
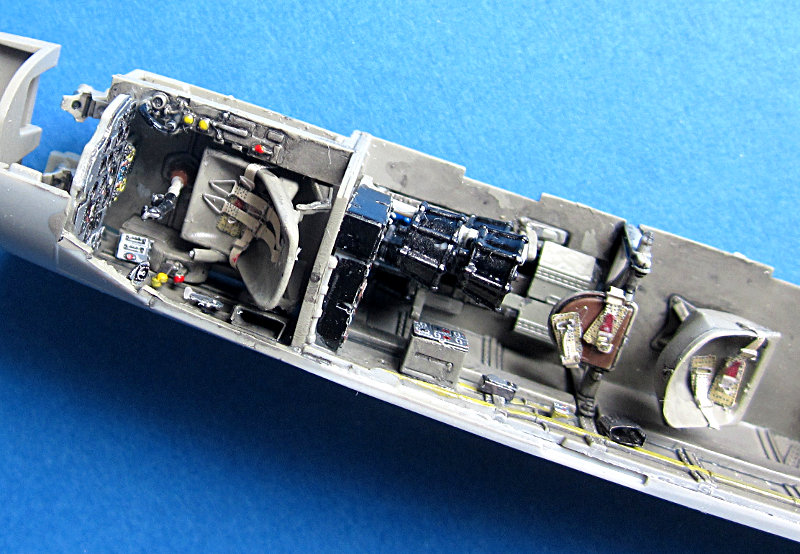
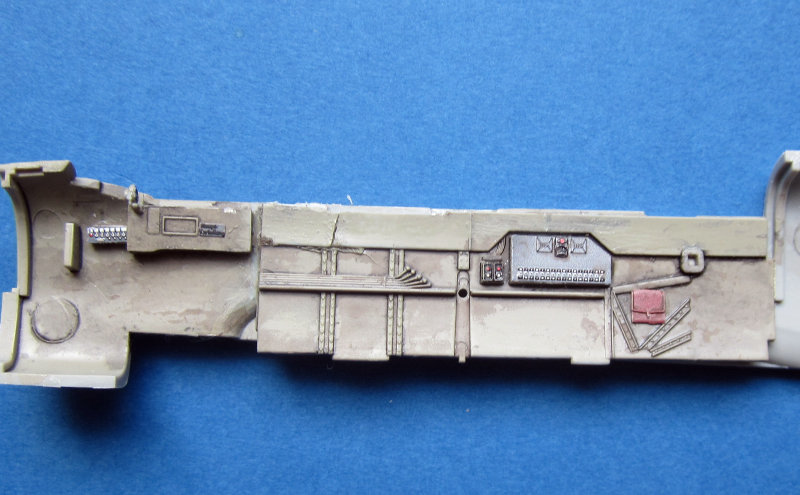
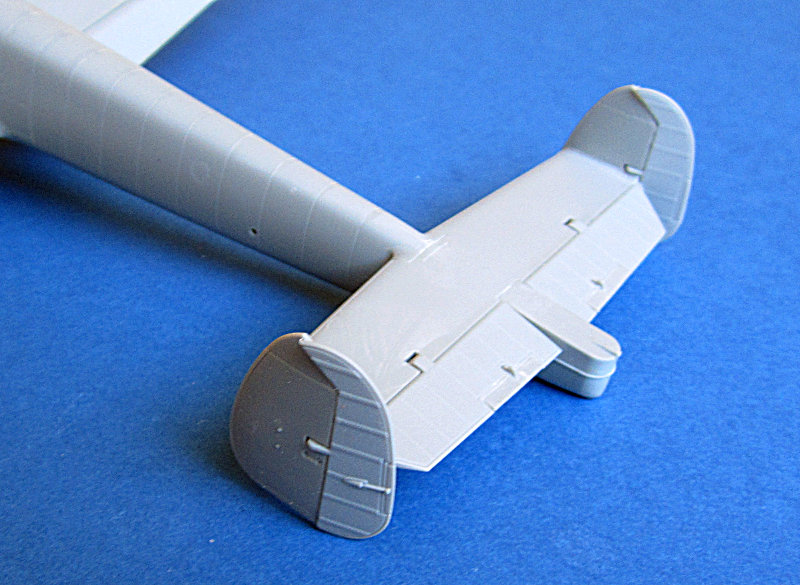
An the it was time for the pit. It is still not done because

1. the instructions are really crap (and I normally do not use them to closely)
2. I used Eduards set for it (not the Zoom, but I should have)


slowly moving forward.

all the best

Steffen
alpha_tango
_VISITCOMMUNITY
Germany
Joined: September 07, 2005
KitMaker: 5,609 posts
AeroScale: 5,231 posts
Posted: Tuesday, February 24, 2015 - 08:58 PM UTC
Hi again,

as I wrote progress was(and is) slow! Between the last pic of yesterdays post and todays picture (taken some minutes ago) were some 2 weeks of fiddling PE and other small stuff. Still some parts to add and when the fuselage is closed there are another myriad parts to add to the - not so good fitting - cockpit framing ... tedious.


all the best

Steffen
Joel_W
Staff MemberAssociate Editor
AUTOMODELER
_VISITCOMMUNITY
New York, United States
Joined: December 04, 2010
KitMaker: 11,666 posts
AeroScale: 7,410 posts
Posted: Tuesday, February 24, 2015 - 11:00 PM UTC
Steffen,
For someone who doesn't like cockpits, yours is really looking quite good. Certainly an excellent effort of weathering.

I'm really impressed with the detail that Dragon has put into this kit.

Will be tagging along, following your build. As for your pace, it's about the same as mine.

Joel
Merlin
Staff MemberSenior Editor
AEROSCALE
#017
_VISITCOMMUNITY
United Kingdom
Joined: June 11, 2003
KitMaker: 17,582 posts
AeroScale: 12,795 posts
Posted: Wednesday, February 25, 2015 - 01:25 AM UTC
Nice going Steffen

I hope you got a kick out of the "Steffen slats" - they're only there at all because I passed on your feedback on the original kit design.

All the best

Rowan
alpha_tango
_VISITCOMMUNITY
Germany
Joined: September 07, 2005
KitMaker: 5,609 posts
AeroScale: 5,231 posts
Posted: Wednesday, February 25, 2015 - 05:37 PM UTC
Thanks guys!

Joel: detail is a mix of Dragon and Eduard, but for what you can see after everything is closed, Dragon is pretty good oob.

Rowan: as you can see I build it with the Slats and it was really easy to do that option. Though I do not see why these are "Steffens slats"... Dragon did them, not me.

all the best

Steffen
P.S. hope to get the fuselage closed on the weekend...
Tojo72
_VISITCOMMUNITY
North Carolina, United States
Joined: June 06, 2006
KitMaker: 4,691 posts
AeroScale: 238 posts
Posted: Wednesday, February 25, 2015 - 07:48 PM UTC
Nice work Steffen,office is looking great.
chukw1
_VISITCOMMUNITY
California, United States
Joined: November 28, 2007
KitMaker: 817 posts
AeroScale: 729 posts
Posted: Wednesday, February 25, 2015 - 08:50 PM UTC
Very nice, Steffen! I agree that those landing gear are the bee's knees, as they used to say.
Merlin
Staff MemberSenior Editor
AEROSCALE
#017
_VISITCOMMUNITY
United Kingdom
Joined: June 11, 2003
KitMaker: 17,582 posts
AeroScale: 12,795 posts
Posted: Thursday, February 26, 2015 - 02:39 AM UTC

Quoted Text

Rowan: as you can see I build it with the Slats and it was really easy to do that option. Though I do not see why these are "Steffens slats"... Dragon did them, not me.


Hi Steffen

But the kit wouldn't have them included if you hadn't stated so forcefully that they should be. I passed that on and Dragon took note and modified the moulds (see, everyone, manufacturers do listen to feedback sometimes ) - hence, they will always, quite rightly, be "Steffen slats".

I won't hold a grudge that they ignored me on the equal importance of depicting fabric-covered flaps - that's another story.

All the best

Rowan
alpha_tango
_VISITCOMMUNITY
Germany
Joined: September 07, 2005
KitMaker: 5,609 posts
AeroScale: 5,231 posts
Posted: Thursday, February 26, 2015 - 11:42 PM UTC
Hi all,

sorry no productive update yet, but I want to thank you for your support!

Rowan: actually in 48 scale you won't see any differnce between a fabric covered surface and sheet metal. Even 1:1 the difference is marginal to the eye and best replicated with paint. But I understand your sentiment. I do not want to give the slats epic discussion .. we don't want to let Godwin's law come into effect

cheers

Steffen
chris1
_VISITCOMMUNITY
Auckland, New Zealand
Joined: October 25, 2005
KitMaker: 949 posts
AeroScale: 493 posts
Posted: Friday, February 27, 2015 - 02:38 AM UTC
I'm following.

Steffen, I hope Dragon rewarded you well for "slats feedback"


Chris


alpha_tango
_VISITCOMMUNITY
Germany
Joined: September 07, 2005
KitMaker: 5,609 posts
AeroScale: 5,231 posts
Posted: Friday, February 27, 2015 - 02:42 AM UTC
Hi Chris,

this is just a running gag that Rowan likes to play .. I had nothing to do with that!!! ...

Probably because I did complain when he posted the CAD here that there would be again no separate slats and thus the advantage over the Eduard kit would be very minor

all the best

Steffen
alpha_tango
_VISITCOMMUNITY
Germany
Joined: September 07, 2005
KitMaker: 5,609 posts
AeroScale: 5,231 posts
Posted: Saturday, February 28, 2015 - 04:36 PM UTC
So here are the final Pix befor the fuselage was closed. Those who know the PE Set will notice that I left off a few thngs .. it is becaus you just cannot see it (I already built in some that I will never see again like the radio beneath the MG drums. Some parts are still glossy, but I will add another flat coat once thd glue is dry.:


Now the fuselage is closed and I hope I put enough pressure on the pit to get the canopy on later in the build... we will see.

all the best

Steffen
betheyn
Staff MemberSenior Editor
AEROSCALE
#019
_VISITCOMMUNITY
England - South East, United Kingdom
Joined: October 14, 2004
KitMaker: 4,560 posts
AeroScale: 2,225 posts
Posted: Saturday, February 28, 2015 - 05:30 PM UTC
That cockpit looks really y good Steffen.
I have one of Dragons Bf 110s in the stash, so I will be following your progress.
Andy :-)
alpha_tango
_VISITCOMMUNITY
Germany
Joined: September 07, 2005
KitMaker: 5,609 posts
AeroScale: 5,231 posts
Posted: Sunday, March 01, 2015 - 10:12 PM UTC
Now the fuselage is closed and some additional parts attached


BTW a bit more clamping than shown was necessary to get the fuselage top match the cockpit insert.

all the best

Steffen
Joel_W
Staff MemberAssociate Editor
AUTOMODELER
_VISITCOMMUNITY
New York, United States
Joined: December 04, 2010
KitMaker: 11,666 posts
AeroScale: 7,410 posts
Posted: Monday, March 02, 2015 - 03:55 AM UTC
Steffen,
Nicely done. I have that issue every once in a while too.
Joel
greif8
_VISITCOMMUNITY
Bayern, Germany
Joined: January 17, 2006
KitMaker: 673 posts
AeroScale: 492 posts
Posted: Monday, March 02, 2015 - 11:44 AM UTC
Very nice build so far Steffen. Both the wheel bays and the cockpit look outstanding. I have both the D-3 and C-7 in 1/32 scale waiting in the wings to build. I hope mine turn out as well as your build is.

Ernest
alpha_tango
_VISITCOMMUNITY
Germany
Joined: September 07, 2005
KitMaker: 5,609 posts
AeroScale: 5,231 posts
Posted: Monday, March 02, 2015 - 06:18 PM UTC
Vielen Dank!

Yesterday evening I put on the left wing. This way I could apply some pressure in the right places to make it sit right at the wing root:


all the best

Steffen
Joel_W
Staff MemberAssociate Editor
AUTOMODELER
_VISITCOMMUNITY
New York, United States
Joined: December 04, 2010
KitMaker: 11,666 posts
AeroScale: 7,410 posts
Posted: Monday, March 02, 2015 - 07:59 PM UTC
Steffen,
Most likely the right way to do it, but it sure does look funny that way
Joel
alpha_tango
_VISITCOMMUNITY
Germany
Joined: September 07, 2005
KitMaker: 5,609 posts
AeroScale: 5,231 posts
Posted: Wednesday, March 04, 2015 - 05:32 PM UTC
Hi Joel,

does this look better now?


BTW the u/c legs both broke during handling.. which was not that bad, as the were not equally positioned (and I tried hard to do so when I built the wings). Note for my next build: Keep 'em off as long as possible.

BTW 2 Exhausts are Quickboost for Fujimi, which were easy to make fit

all teh best

Steffen
alpha_tango
_VISITCOMMUNITY
Germany
Joined: September 07, 2005
KitMaker: 5,609 posts
AeroScale: 5,231 posts
Posted: Saturday, March 07, 2015 - 02:32 PM UTC
Hi again,

now this Messerschmitt is a big belly bird ... really ugly, isn't it? I also completet the control surfaces on the tail. I cut the counter balances on the elevator and bent them with pliers. (I did not do it on the rudders).


Still a lot of small stuff to do in the cockpit area...

all the best

Steffen
greif8
_VISITCOMMUNITY
Bayern, Germany
Joined: January 17, 2006
KitMaker: 673 posts
AeroScale: 492 posts
Posted: Sunday, March 08, 2015 - 12:19 PM UTC
Ahh, die Dackelbauch, die leistungsmindernden Schönheit! Looking good Steffen, the exhausts look very sharp!

Ernest
Joel_W
Staff MemberAssociate Editor
AUTOMODELER
_VISITCOMMUNITY
New York, United States
Joined: December 04, 2010
KitMaker: 11,666 posts
AeroScale: 7,410 posts
Posted: Monday, March 09, 2015 - 01:45 AM UTC
Steffen,
Yep. Looks a lot better with both wings on. The reattached landing gear looks quite nice.

You're making excellent progress. Slow but steady is my motto is how I also go about my builds.
Joel
 _GOTOTOP