_GOTOBOTTOM
World War II
Discuss WWII and the era directly before and after the war from 1935-1949.
Hosted by Rowan Baylis
Republic P-47M Thunderbolt, 1/48 (Tamiya)
Maelstrom
_VISITCOMMUNITY
Victoria, Australia
Joined: August 11, 2014
KitMaker: 20 posts
AeroScale: 19 posts
Posted: Thursday, September 11, 2014 - 10:07 PM UTC
Hi all, I'm relatively new to modelling & aeroscale but I wanted to share some photos from my recent p-47 thunderbolt build:


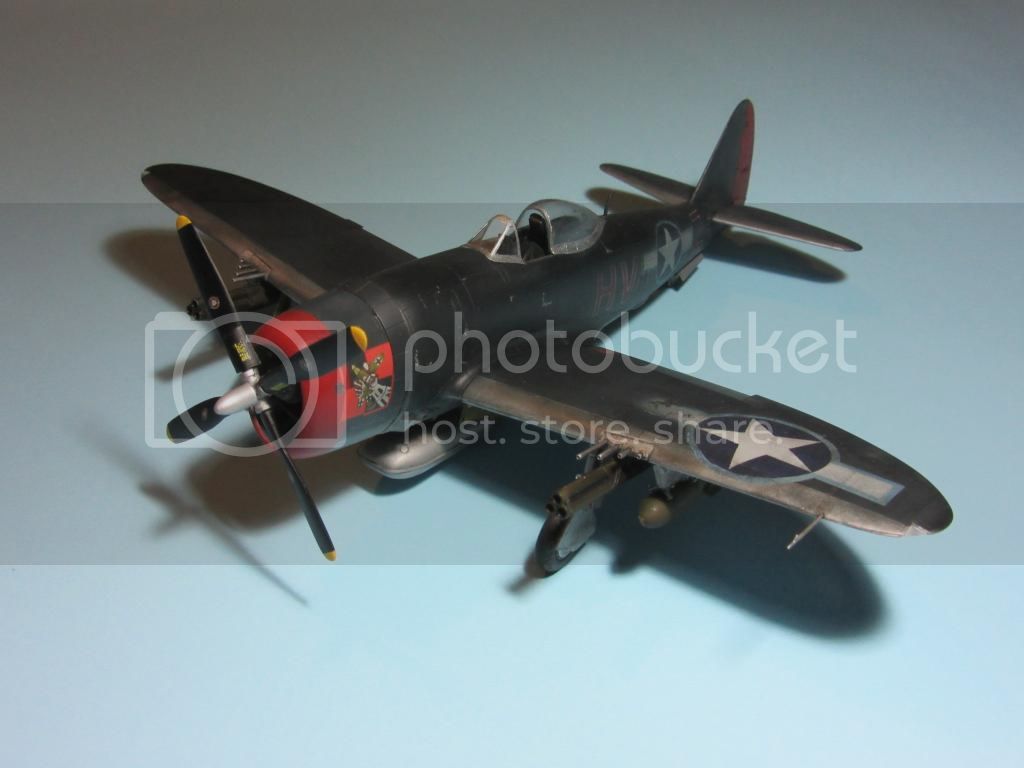
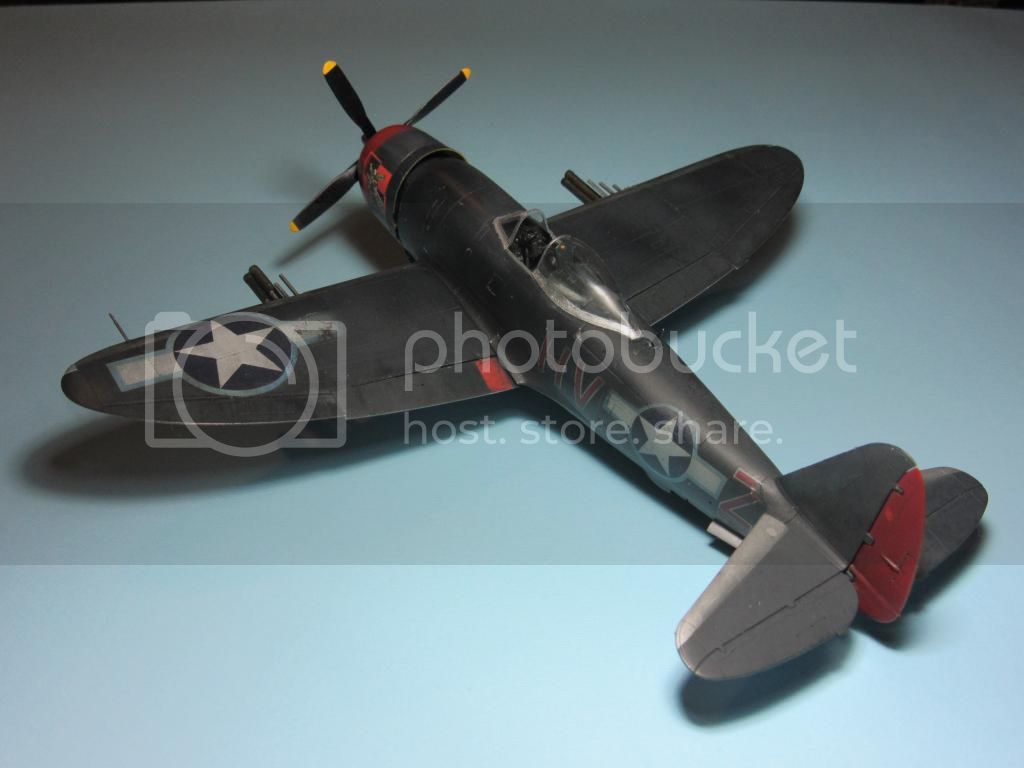
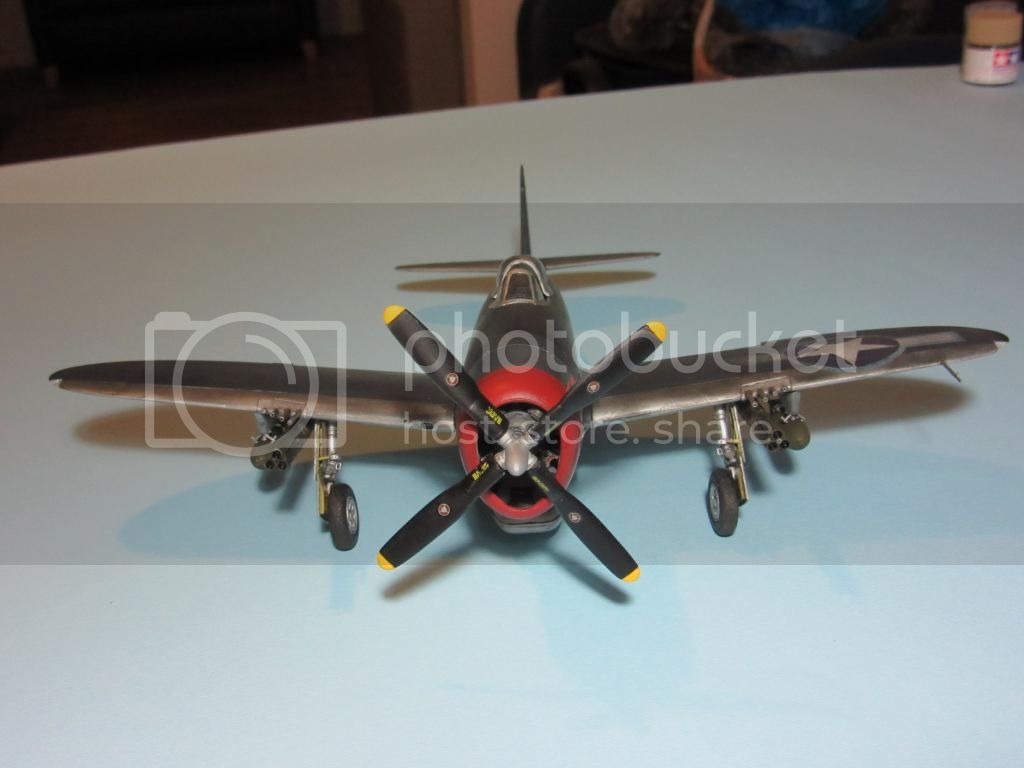
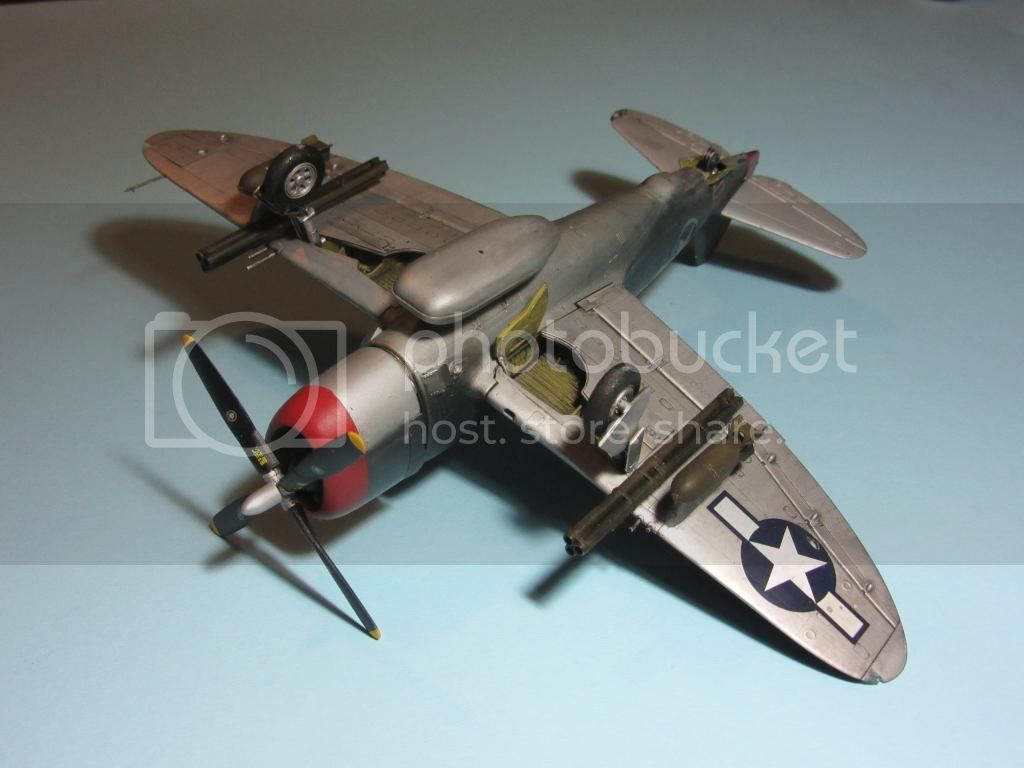
I would really love some feedback to see where I stand.

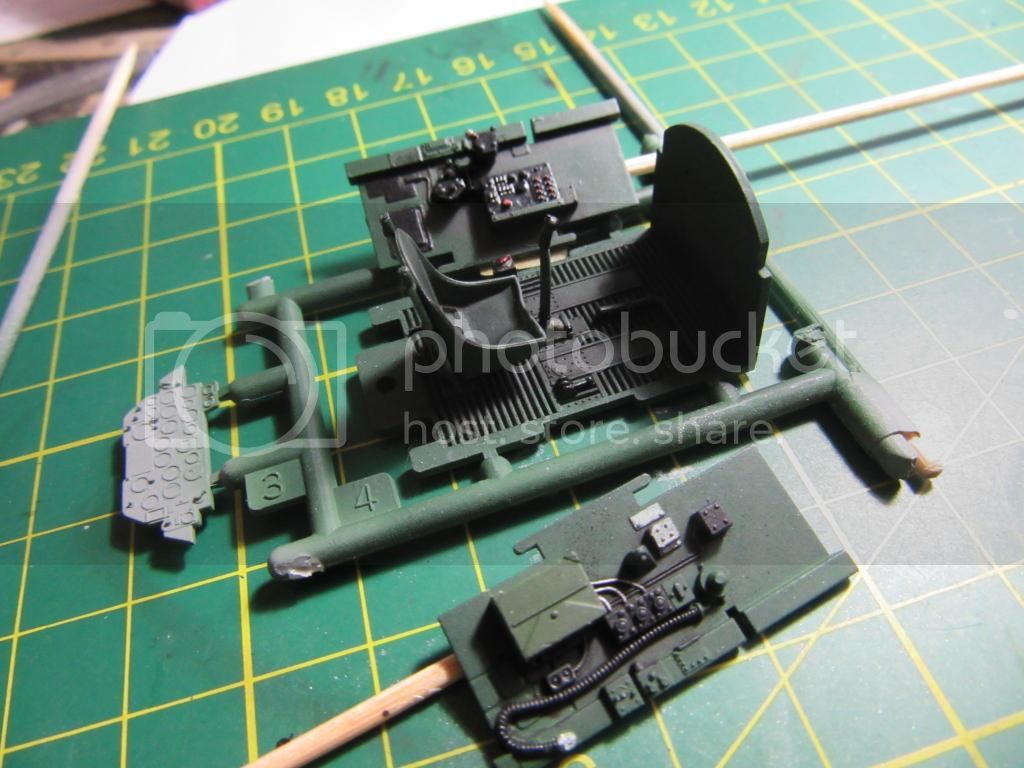
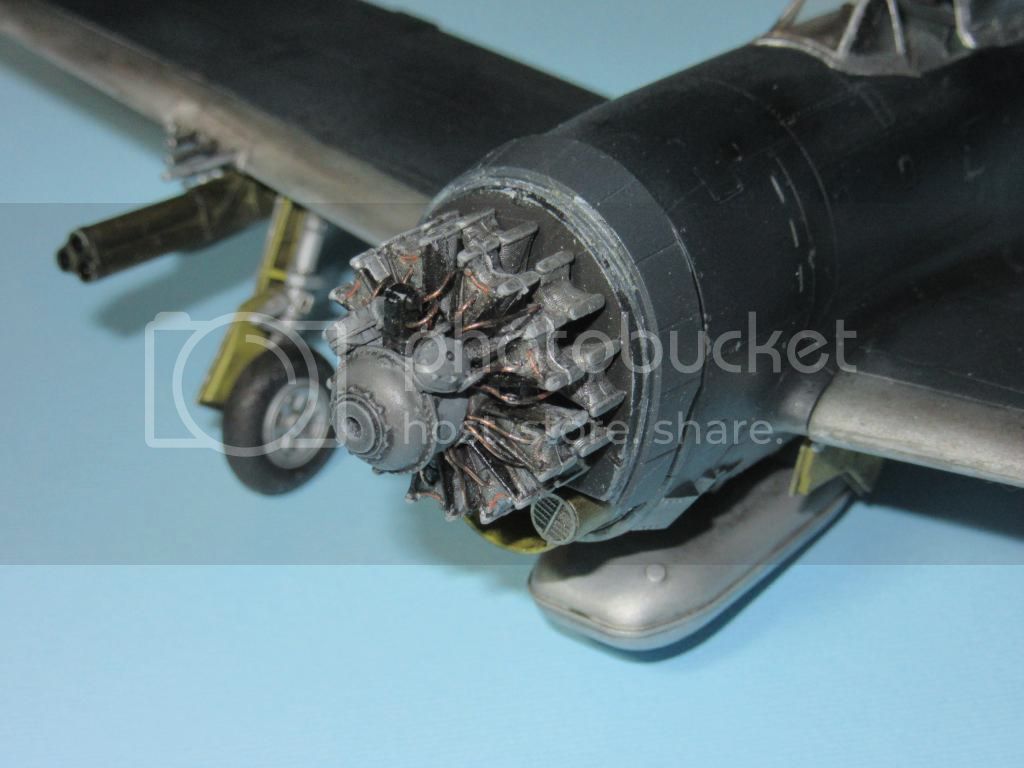
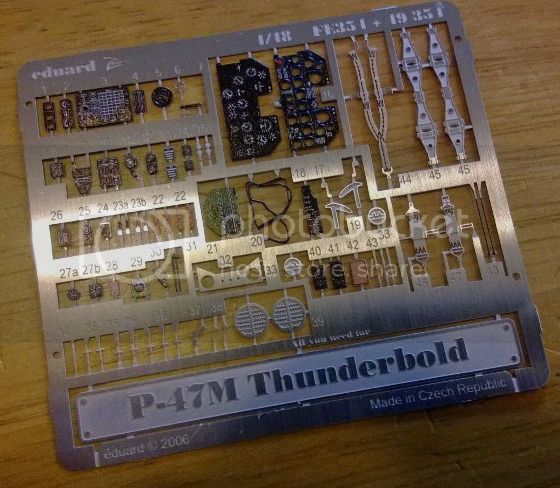
Areas where I feel I need a lot of help in are dealing with photo-etched parts. One this model I tried my hand at these ones made by eduard:


I live in Australia and it seems very difficult to obtain photo-etched parts locally. It also takes a long time to order them from overseas and this can really kill a lot of the momentum in a build.

But with regards to attaching photo-etched parts to models, I would really like to gain some insight into what is the correct type of adhesive to use. I read up that modelling glue is a no-no and a lot of people use regular super-glue. I personally didn't have much luck with the super-glue, so i'm very interested to learn how the veterans do it.

I also had a bit of trouble bending some of the photo-etched parts. Some of the seat-belt parts can be mighty tricky. is it just a matter of being very patient with tweezers, or am I missing something?

Thanks for reading my build. Sorry for weighting it wight a lot of questions at the end.

Dinuka
Mcleod
_VISITCOMMUNITY
Alberta, Canada
Joined: April 07, 2010
KitMaker: 1,028 posts
AeroScale: 939 posts
Posted: Friday, September 12, 2014 - 01:09 AM UTC
Firstly, welcome to Aeroscale, Dinuka. You'll like it here, even though its not overly busy.

You did a great job on your P-47. Perhaps a tad overdone on the weathering, as it has a dusty, stored look. Still looks great, though.
PE can be difficult. If it dosen't stick with cyano, it usually means there some kind of oily interference. In the case of seat harness, try sanding the PE glue surface with some emery cloth, and always wash the model parts. You must glue to plastic, not paint. A little CA goes a long way.
Ben
PeeJay74
#363
_VISITCOMMUNITY
Pennsylvania, United States
Joined: January 08, 2014
KitMaker: 425 posts
AeroScale: 401 posts
Posted: Friday, September 12, 2014 - 01:23 AM UTC
Dinuka,

first off: nice looking Thunderbolt! I haven't built the M subtype but it's on my "To Do" list. Yours looks great.

As for PE, I make no claim to expertise but can tell you what works for me after reading lots of build logs to get ideas. I always scuff the back of the PE with a piece of 320 sandpaper to rough up that smooth metal surface and give the glue a little more bite. It helps keep it from popping off so easily if bumped.

I typically use Thick CA to attach it, I find the slow curing stuff much easier to work with since it doesn't run everywhere. It also lends itself well to being applied with a needle or toothpick in precise spots.

I mix it up a little for Eduard's multipart instrument panels. If the panel will be glued to the original kit plastic, I sand all of the original detail off of the plastic and then attach the first PE part as above. Once that dries, I brush on a heavy coat of Future and attach the second part. The Future will work as an adhesive as long as you don't abuse the panel and knock it around. Plus it guarantees you don't ruin the instrument faces with glue errors; they will be nice and shiny. Once the Future cures (at least 24hrs), I will normally use a toothpick to run Thick CA around the outside edge and fill the tiny gap between the two PE parts for a good seal, then I spray it with any clear coat I intend to use (Flat, Satin, Gloss, whichever). Last I use a toothpick and place a drop of Clear Parts Cement over each dial to form glass; just make sure you use the clear coat before this step so you don't ruin your "glass". I've had great success with that method on Eduard's panels.

If not using the original kit panel as a base, I will either glue the assembled PE panel directly in place with CA or I will mount it to a piece of 0.010" card stock first and then use standard plastic cement to attach it to the kit so I don't make a mess with CA. You can use that trick to mount any PE by the way if CA gives you trouble. Glue the PE to card stock and after it cures fully, trim around and use standard cements to attach them to the kit. Again, not my idea just a method I picked up from reading build logs.

Lastly, how to bend the stuff? It used to kick my butt to be honest; lots of mishapen little tiny parts that were impossible to straighten out once bent. Invest in a PE bending tool. I bought one from The Small Shop for around $30 maybe, and it gets constant use. I personally feel its a mandatory tool if you intend to make use of PE. Just my opinion. For harness belts I use a variety of small round objects to bend them: toothpicks, brush handles, sprue scrap.

Btw, everything I just said applies to using the new pre-painted types of PE. If it's not pre-painted, hold it over a candle to anneal it. It is so much easier to bend complex curves and shapes into it if you anneal it first and then you can paint it afterwards. The other hints still apply.

Hope some of that will help! I learned all of that reading build logs. There is so much knowledge out there that people have taken the time to share.
russamotto
_VISITCOMMUNITY
Utah, United States
Joined: December 14, 2007
KitMaker: 3,389 posts
AeroScale: 375 posts
Posted: Friday, September 12, 2014 - 01:27 AM UTC
Dinuka, welcome to Aeroscale. For a first post and being relatively new to modeling, you did a nice job. Do you have a photo of the cockpit with any of the etch included, or did you end up leaving it off?

Like Ben said, remove any paint where the etch is to be applied with super glue. Otherwise it will pull the paint up. You may have to experiment with different brands to see what you are most comfortable with. Thin glue dries fastest, gel dries slowest, but slow isn't always better as you can end up waiting a long time for a part to stay in place. With seat belts, I try to form them while the seat is separate, bending them around the edges carefully. I have a set of smooth pliers with a pair of long, thin needle nose and another with a broad flat tip. I also have a small etch bending tool. Tweezers have too much flex in them to get a good, even bend.

Joel_W
Staff MemberAssociate Editor
AUTOMODELER
_VISITCOMMUNITY
New York, United States
Joined: December 04, 2010
KitMaker: 11,666 posts
AeroScale: 7,410 posts
Posted: Friday, September 12, 2014 - 05:39 AM UTC
Dinuka,

Welcome to Aeroscale, you're really going to like it here.

Over all, a very nice OOB build, especially for someone that is relatively new to plastic aircraft modeling.

Paul has given you some excellent suggestions on how to work with PE. Believe me, it's not the easiest modeling media to work with. Bare PE to bare plastic. Scuff with sand paper, use just a drop of Super Glue as less is much better in this case. For larger parts I use the Gel, for really small parts I uses the extra thin which dries faster. I also like to use a accelerator which I prefer to apply with a brush rather then with the pump from the bottle as it gets over everything including me.

As for some critique of your P-47M, try to go some what easier on the weathering of USAAF aircraft, as they were maintained to a very acceptable level, especially those of the 56 Fighter Group.

Your aircraft depicts the P-47M, 44-21108, HV-Z, 61 FS/56 FG, as flown by Capt Witold Lanowski. I really can't tell what color you painted the upper fuselage. Current references has it as being actually a dark Blue not black.

The cockpit looks nicely painted and weathered. The only building issue I can see is the leading edge of the wing has a seam showing, which is a easy fix if you prime 1st and look for issues. Personally, I've never had a build where I haven't found numerous issues that need to be addressed.

Since you decided to heavily weather your Jug, it would have been a logical progression to weather the prop to a similar degree as well.

Nice job with the adding the ignition wires to the Big R2800 twin radial engine. The only advice I can offer is that they used a duel ignition system. One spark plug was located in the upper front of each cylinder head, and the 2nd one is located on the top of the cylinder head.

Looking forward to your next build.

Joel
Maelstrom
_VISITCOMMUNITY
Victoria, Australia
Joined: August 11, 2014
KitMaker: 20 posts
AeroScale: 19 posts
Posted: Sunday, September 14, 2014 - 12:08 AM UTC
Thanks everyone (Ben, Paul, Russ and Joel) for the sound advice!

I feel so much better prepared to tackle PE parts on future builds. I am also going to try and not go so overboard with the weathering next time.

Russ - sorry i didn't take any pics of the cockpit with PE parts, but i'll definitely try and include some on my next project.

Joel - i really valued your comment about the R2800 having a dual ignition system. After looking back at:


i came to terms with my oversight.

My next build is going to be a Lancaster B.III 'Dambusters' 1/72 (Revell). My friend gave it to me as an early birthday present. Feeling very excited about starting it!
Joel_W
Staff MemberAssociate Editor
AUTOMODELER
_VISITCOMMUNITY
New York, United States
Joined: December 04, 2010
KitMaker: 11,666 posts
AeroScale: 7,410 posts
Posted: Sunday, September 14, 2014 - 01:13 AM UTC
Dinuka,
Looking foward to your 1/72 Lancaster B.III 'Dambusters' build, Sure hope that you'll share your build with us as a Build Thread.

It's been years since I built one of Tamiya's P-47 Ds. A really nice kit, but looking at the picture of the W&P R2800 the leading edge of the wing is right above it, and you can plainly see that the gun barrels don't follow the leading edge line, but rather stay parallel to the fuselage. The kit has it the opposite way. I missed it not once but twice as I built both versions back aways. Next time, I'll get it right.

Joel
berndm
_VISITCOMMUNITY
Niedersachsen, Germany
Joined: March 26, 2014
KitMaker: 844 posts
AeroScale: 630 posts
Posted: Sunday, September 14, 2014 - 07:58 PM UTC
A very well done P-47, thumbs up. It would be very nice, to see
more of your work !
 _GOTOTOP