Air Campaigns
Want to start or join a group build? This is where to start.
OFFICIAL: Grumman Campaign
hellbent11
_VISITCOMMUNITY
Kansas, United States
Joined: August 17, 2005
KitMaker: 725 posts
AeroScale: 55 posts
Posted: Friday, August 08, 2014 - 06:28 PM UTC

Quoted Text

Hellbent,
That's sure a lot of wheat, but it will help feed the nation. Personally, love bread & rolls, which are a major portion of my 2,500 cal intake per day.

Looking forward to your F6F-3 build.
Joel


I love bread and rolls too and have a hard time considering them "bad" for me. Well too much of a good thing I suppose!

I've noticed you're really up on your color knowledge... What would be the correct interior colors for my build? And if I'm following your previous posts right the cockpit should be a different color than the rest of the "interior greens" used in wheel wells etc?

Thanks, Hellbent
hellbent11
_VISITCOMMUNITY
Kansas, United States
Joined: August 17, 2005
KitMaker: 725 posts
AeroScale: 55 posts
Posted: Friday, August 08, 2014 - 06:40 PM UTC
FYI... Jimmy Buffet apparently is a skilled pilot and owns an albatross and a widgeon. I'd like to see the paint jobs on those birds. Only thing is I'm sure with being a celebrity they are designed to blend in. Still, a giant flying margarita mural with a "mexican cutie" nose art would be sweet! Maybe paint the floats up like flip-flops?
Joel_W
Staff MemberAssociate Editor
AUTOMODELER
_VISITCOMMUNITY
New York, United States
Joined: December 04, 2010
KitMaker: 11,666 posts
AeroScale: 7,410 posts
Posted: Saturday, August 09, 2014 - 10:48 AM UTC
Hellbent,

F6F-3 Hellcats after the 1st 100 or so to come off the line changed from Bronze Green to FS 34151 Interior Green. The area in the cockpit behind the seat where those two small windows are located was painted Grumman Gray, which is very close to FS36440. Same Grumman Gray for the inside of the engine cowling. The cockpit side walls didn't change to flat black above the consuls until the -5 variant.

Usually the wheel wells, both sides of the gear doors,landing gear struts, wheels, the area of the wing that the flaps close up to, the rear wheel well, are the same color as the bottom of the aircraft.

Joel
scribbles101
_VISITCOMMUNITY
United Kingdom
Joined: May 25, 2013
KitMaker: 137 posts
AeroScale: 103 posts
Posted: Sunday, August 10, 2014 - 12:15 AM UTC

Quoted Text

As an alternative to replacing the seat with scrap plastic to lower the pilot, you could have filed his bottom down until he was low enough, that way anyone looking into the cockpit will still see the pilots seat.


Joel - thanks for the filling tips, I will remember those for future reference, also, when I said the pilot's "seat" it was not really a proper seat - by that I mean that the only detail on the seat from the kit is the back rest, you cannot see anything else, so I simply cut off the platform that the pilot figure sits on and replaced that with scarp plastic, because it cannot be seen on the finished model.

Anyway, more progress


The upper wing is now attached to the model, this was not easy because there were really annoying ejector pin marks inside the small hollows cut into the underside of the upper wing where the support struts between the wing and fuselage fit, on top of this the struts themselves had a considerable amount of flash on them, as did the upper wing, all of which had to be carefully removed with a small file and a very sharp scalpel blade. No pics of this unfortunately due to poor lighting


wing floats and undercarriage are fitted - the undercarriage was a tricky job because it was very hard to see the small holes where the main undercarriage struts fitted into the top of the undercarriage housings, in the end I resorted to using a Mechanics inspection light from the tool kit I put together for my car.

As always, any constructive criticism is welcome, I hope to get the first coat of paint onto this thing later on today, and will put more pics up when all the painting is finished.

Cheers
Joel_W
Staff MemberAssociate Editor
AUTOMODELER
_VISITCOMMUNITY
New York, United States
Joined: December 04, 2010
KitMaker: 11,666 posts
AeroScale: 7,410 posts
Posted: Sunday, August 10, 2014 - 04:52 AM UTC
Simon,
You're making great progress.

I've never built a bi-plane of any type, so I'm going by builds that I've read. Most seam to attach the top wing after painting and decaling, as it must be a real bear to do either with the top wing attached. Looking forward to how you handle this.
Joel
JClapp
#259
_VISITCOMMUNITY
Massachusetts, United States
Joined: October 23, 2011
KitMaker: 2,265 posts
AeroScale: 1,715 posts
Posted: Sunday, August 10, 2014 - 05:58 AM UTC
I have only failed attempts at biplanes in my background, but I do love the JF's, so I am also watching with interest.

I would have left those wheels off until all the finish was done, because I find I break off little parts while I am futzing with decals and thusly add weeks to the schedule.

I am being trained in systems engineering currently, ok re-trained, ok, a lot of water has gone under the bridge. "what gets done before or after what else" is the main thrust of the program- Having that all worked out before starting to spend money and time is the key to success.

gluing stuff together and building a model is fun sitting down and figuring out what will cause grief later on is not fun in itself, but will contribute mightily to job satisfaction.

what thread is this? Grumman? got my box of Albatrosses right next to me... back to work J
scribbles101
_VISITCOMMUNITY
United Kingdom
Joined: May 25, 2013
KitMaker: 137 posts
AeroScale: 103 posts
Posted: Monday, August 11, 2014 - 06:32 AM UTC
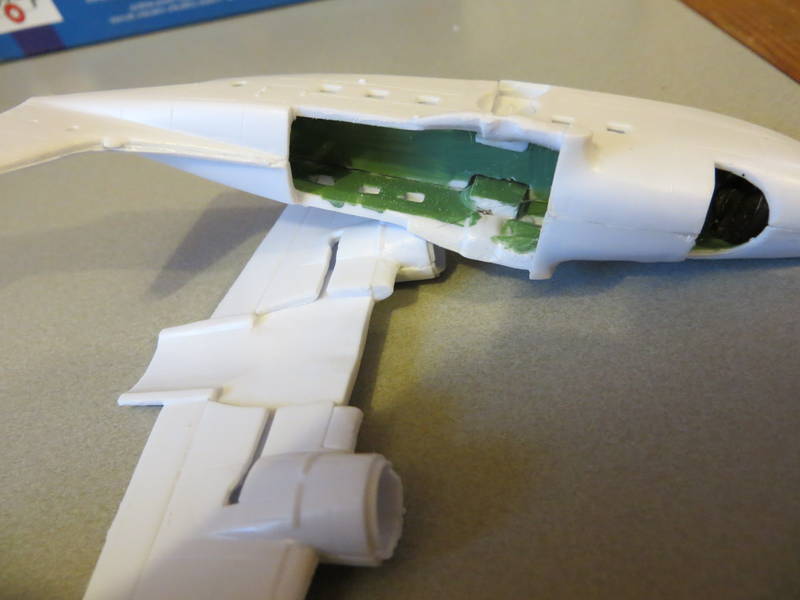
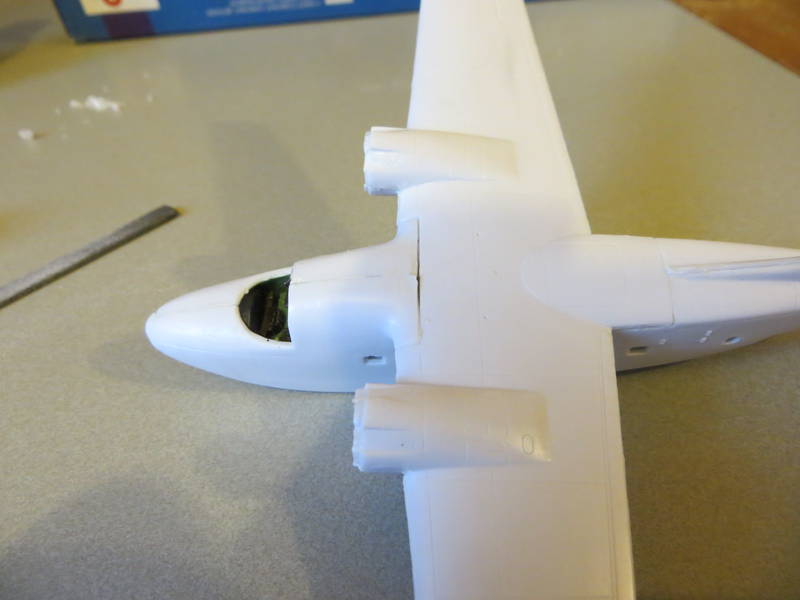
Joel - The duck is not so bad for painting and decaling with the top wing attached because it is set quite far forward from the lower wing, meaning that at the right angle, it is really easy to get a paint brush onto the lower wing - will show in progress pics (below) - also, I personally prefer to hand paint these smaller models as oppose to using an airbrush, which does simplify it a bit.

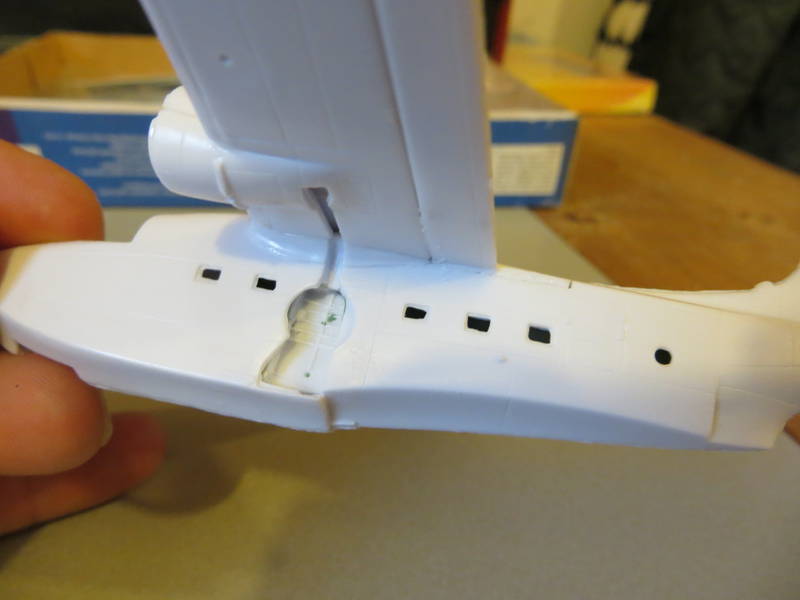
Jonathan - glad my little project has caught your interest, I can see where you are coming from there about the undercarriage, but thankfully it is pretty sturdy on the duck, and also I normally rest the model on a sort of foam cradle when I work on it which does offer some protection for the small, delicate parts but normally I take it away if I need to take pictures because it is a little ugly... anyway here it is, included this time as a demonstration:


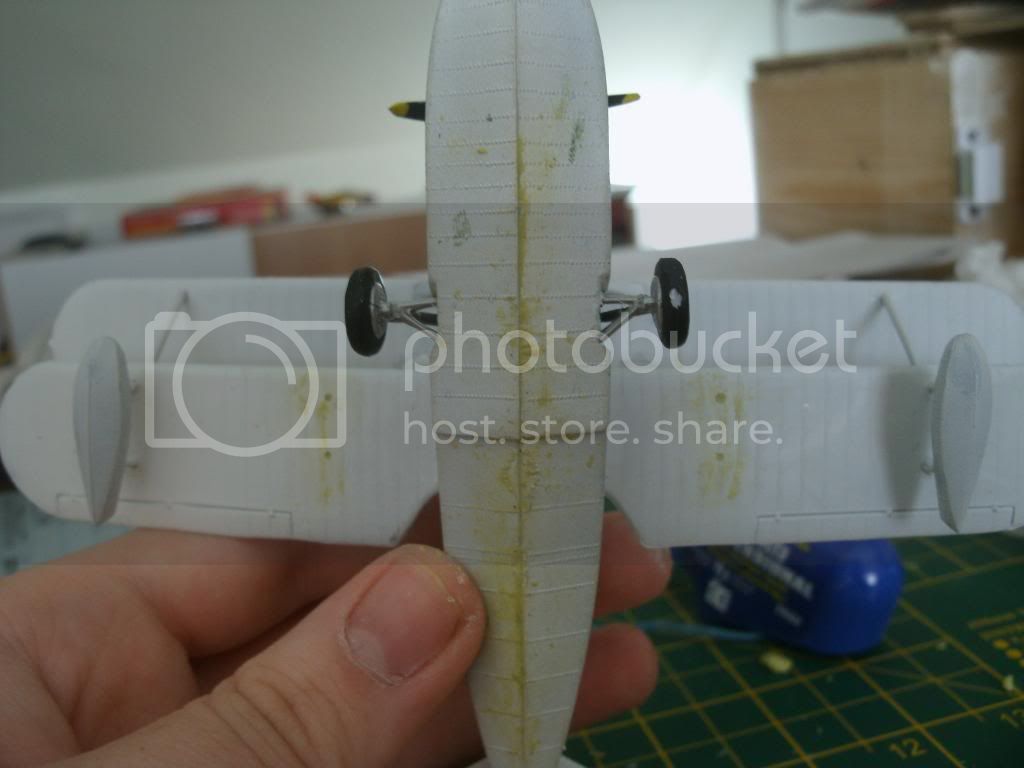
Here is that foam cradle thing I was going on about, the Duck's undercarriage fits rather neatly into it, and is pretty well protected by the foam - also, painting is done - this particular scheme is for an OA-12 Duck (as the USAF called it) from the 10th rescue squadron based in Elmendorf, Alaska in 1948.


This just shows the blue central float a bit better, also (as you can see) I have started on the rigging, not an easy job, but looks good it you get it right


This is just intended to show that the lower wing on the duck is pretty easy to paint even when the upper wing is attached due to the fact that it sits quite far back from the upper wing, this picture was taken from roughly my eye height, so you can see what I did when I painted it.

That is all for now, construcyive criticism is very welcome, as always! I will post more pics when the rigging s done.

Cheers
Joel_W
Staff MemberAssociate Editor
AUTOMODELER
_VISITCOMMUNITY
New York, United States
Joined: December 04, 2010
KitMaker: 11,666 posts
AeroScale: 7,410 posts
Posted: Monday, August 11, 2014 - 08:06 AM UTC
Just posted my latest A-6E update in my build blog, in the Cold War Forum. I've gotten through all the putty and sanding work, and have primed the fuselage as well. I've started work on both outer wing panels, which are almost mini kits.

I was originally going to build, paint, decal, and weather the fuselage separately from the outer wing panels, then add them at the very end of the build. But the fit isn't perfect, and I'm somewhat concerned about damaging the finish trying to get the wings installed correctly. Now I'm no so sure which way to go.

Joel

Joel_W
Staff MemberAssociate Editor
AUTOMODELER
_VISITCOMMUNITY
New York, United States
Joined: December 04, 2010
KitMaker: 11,666 posts
AeroScale: 7,410 posts
Posted: Monday, August 11, 2014 - 08:10 AM UTC
Simon,
Very impressive paint job. And I see what you mean about the top wing being so far forward. As I said, I have zero experience with bi-planes, so I'm just relating to what others seem to do.
Joel
goodn8
_VISITCOMMUNITY
Berlin, Germany
Joined: October 12, 2008
KitMaker: 709 posts
AeroScale: 651 posts
Posted: Tuesday, August 12, 2014 - 06:07 AM UTC
@Jonathan - just go on with your Albatrosses!
@Simon - you are fast!!! Nice work so far
@Joel - the A-E6 turns out pretty good.Hope you can fix the wing problem

A little progress on my Grum-Man. Cleaning, sanding, glueing, dry fitting and some details for the Cockpit (you won't see anything in that scale when the hood is closed). Added a (not realistic) headrest and seat-cushions. Instruments came with the decals - anyway, let's see

The under fuselage joint needs some filling and sanding too. But mostly all fits nice and the parts,details and rivets are fine molded for a 144-scale.


cheers, Thomas
hellbent11
_VISITCOMMUNITY
Kansas, United States
Joined: August 17, 2005
KitMaker: 725 posts
AeroScale: 55 posts
Posted: Tuesday, August 12, 2014 - 05:18 PM UTC

Quoted Text

Hellbent,

F6F-3 Hellcats after the 1st 100 or so to come off the line changed from Bronze Green to FS 34151 Interior Green. The area in the cockpit behind the seat where those two small windows are located was painted Grumman Gray, which is very close to FS36440. Same Grumman Gray for the inside of the engine cowling. The cockpit side walls didn't change to flat black above the consuls until the -5 variant.

Usually the wheel wells, both sides of the gear doors,landing gear struts, wheels, the area of the wing that the flaps close up to, the rear wheel well, are the same color as the bottom of the aircraft.

Joel


Thanks for the help! I'm glad I got straightened out on that one. Doing mostly armor I tend to just shoot evrything in the interior the same color on aircraft. It' always fun to learn something new.

Hellbent
hellbent11
_VISITCOMMUNITY
Kansas, United States
Joined: August 17, 2005
KitMaker: 725 posts
AeroScale: 55 posts
Posted: Tuesday, August 12, 2014 - 05:36 PM UTC
Joel- my .02$ on your situation is do join everything up and then weather. I've always done it that way and it has worked for me. I think it makes everything tie in better and makes it look like it's a complete object and not a pile of sub-assemblies. Simon's idea of the foam cradle will help avert any damage you may be worried about.

Johnathan, that systems engineering is hard stuff! It's very important though, and lowers costs to the end user. I think you'll do well with your time modelling. I always thought there were many parallels between the two. Good luck!

Simon, nice work and great idea on the foam cradle! Also, great paint job. Are you brushing or airbrushing it, it has a nice gloss?

hellbent11
_VISITCOMMUNITY
Kansas, United States
Joined: August 17, 2005
KitMaker: 725 posts
AeroScale: 55 posts
Posted: Tuesday, August 12, 2014 - 05:44 PM UTC
Does anyone have a pic or know where to go to find what the next bulkhead after the cockpit looks like in an f6f? You can see a lot through the rear cockpit windows of my kit and I just want to fill that negative space.

For Grumman Gray would tamiya's "sky gray" XF-19 work for that?

Thanks, Hellbent
Joel_W
Staff MemberAssociate Editor
AUTOMODELER
_VISITCOMMUNITY
New York, United States
Joined: December 04, 2010
KitMaker: 11,666 posts
AeroScale: 7,410 posts
Posted: Wednesday, August 13, 2014 - 12:36 AM UTC
Thomas,

I must say that I'm quite impressed with how the E-2 Hawkeye looks in 1/144 scale. Looking forward to seeing some paint on it.

Hellbent1,
There really isn't much of an issue blending the weathering from the fuselage assembly to the outer wing sections, as I'm planning on doing them the same time, just not having them glued together but rather next to each other. Topside is done in a few sessions, then the bottom is done in a few sessions.

Like I said I'm concerned about the overall strength of the joints as the wings were really meant to be folded. There is still the issue of gluing up the slats, flaps, and flap covers. All this would require holding the aircraft, and putting pressure/strain on those joints. Now the actual line will show, it's supposed to, it's the cracking of the joint, and then the twisting of the wing sections that concerns me.

I've been playing around with the wing sections, and I'm pretty confident that I can glue them up at the end without any issues. The trailing edge joint is nice and flush, but the leading edge butt joint needs some work, which also concerns me as I have to drill out the mounting pin and replace it with a longer one.

Joel
Joel_W
Staff MemberAssociate Editor
AUTOMODELER
_VISITCOMMUNITY
New York, United States
Joined: December 04, 2010
KitMaker: 11,666 posts
AeroScale: 7,410 posts
Posted: Wednesday, August 13, 2014 - 01:01 AM UTC

Quoted Text

Does anyone have a pic or know where to go to find what the next bulkhead after the cockpit looks like in an f6f? You can see a lot through the rear cockpit windows of my kit and I just want to fill that negative space.

For Grumman Gray would tamiya's "sky gray" XF-19 work for that?

Thanks, Hellbent


Hellbent1
the area from the cockpit seat past the side windows to the bulkhead was painted Grumman Light Gray FS 36440. Past that bulkhead to the tail it was left in it's YZC primer as a general rule. But keep in mind that the tail wheel compartment would have been painted flat white to match the bottom of the aircraft.

To further confuse matters, Grumman Gray was a homemade color, hence it varied per patch. Best sources I've come across for Tamiya paints have it FX-20 gray.with a few drops of Fx-2 flat white to lighten it a tad. FX-19 is the wrong shade as it looks more like a pale gray/green.

Joel
JClapp
#259
_VISITCOMMUNITY
Massachusetts, United States
Joined: October 23, 2011
KitMaker: 2,265 posts
AeroScale: 1,715 posts
Posted: Wednesday, August 13, 2014 - 04:48 AM UTC
Simon L., nice progress on the Duck, I like your foam cradle. I might have to find something like that. Far from that, my model building style often involves dropping the model on to the stone floor, then after cursing for a few minutes crawling around with a flash light to try to recover the scattered broken bits.

Ive been working on my Albatrosses this morning.


I actually think this is a well designed kit.

the wing to fuselage joint keys together in three dimensions.

after much filing and fiddling -

Just too bad they didnt spring for some Japanese tool and die work, then one woudln't have to deal with this kind of thing -


progress -


b17-peter
#392
_VISITCOMMUNITY
Hessen, Germany
Joined: January 09, 2013
KitMaker: 696 posts
AeroScale: 608 posts
Posted: Wednesday, August 13, 2014 - 04:54 AM UTC
Hi fellow modelers,
first plastic was cut yesterday for my entry, Grumman E-2C Hawkeye in 1/144.
Well Thomas beat me here, but I think I can join in, because at least I'll put the 8-blade-props on her. So there's still a difference between our models
So far, the parts look nice even in "smurf scale"
Joel_W
Staff MemberAssociate Editor
AUTOMODELER
_VISITCOMMUNITY
New York, United States
Joined: December 04, 2010
KitMaker: 11,666 posts
AeroScale: 7,410 posts
Posted: Wednesday, August 13, 2014 - 05:06 AM UTC
Jonathan,
Your twin Albatross build is looking good. That's a nasty looking step, but with careful filing and sanding, should look fine. That top wing fuselage joint looks like a real bear with that gap.

One question, I noticed you're using Proweld. I've never used it. Is it comparable to Tamiya's Extra Thin?
Joel
Joel_W
Staff MemberAssociate Editor
AUTOMODELER
_VISITCOMMUNITY
New York, United States
Joined: December 04, 2010
KitMaker: 11,666 posts
AeroScale: 7,410 posts
Posted: Wednesday, August 13, 2014 - 05:10 AM UTC
Peter,
Welcome to our Grumman campaign.

Another 1/144 scale model, as well as another E2C Hawkeye. With those OzMods 8 bladed props, and those distinctive markings, especially that outrageous radar, it certainly will be a outstanding build. That sure is a lot of weight you're adding to the front of the fuselage. Just how strong is that landing gear?

Joel
goodn8
_VISITCOMMUNITY
Berlin, Germany
Joined: October 12, 2008
KitMaker: 709 posts
AeroScale: 651 posts
Posted: Wednesday, August 13, 2014 - 05:46 AM UTC
Hi Peter!
Great to have another E-2 here, the blades are cool!
Let's see, what we can manage with this fiddling kit.
You already assembled the tail - I wonder how you'll go for the decals there? Are you planning to cut them into pieces?
And do you think this is enough weight?

Jonathan: nice to see these Albatrosses in progress

Thomas
JClapp
#259
_VISITCOMMUNITY
Massachusetts, United States
Joined: October 23, 2011
KitMaker: 2,265 posts
AeroScale: 1,715 posts
Posted: Wednesday, August 13, 2014 - 07:12 AM UTC
We have a very active campaign going here.

I am glad to see more 1:144 models built here. Two different Hawkeyes by Thomas and Peter will be very interesting to see.

The Albatrosses also have cargo bays filled with lead weights, maybe more than they need too, but it iss too difficult to go back and add it later.

Joel, I havent used Tamiya Extra thin. The actual chemical may be different but I'm sure the action is about the same.


Joel_W
Staff MemberAssociate Editor
AUTOMODELER
_VISITCOMMUNITY
New York, United States
Joined: December 04, 2010
KitMaker: 11,666 posts
AeroScale: 7,410 posts
Posted: Wednesday, August 13, 2014 - 08:02 AM UTC
Jonathan,
I'm more then thrilled at the number of started models so far. I'm hoping that nearly all of the 52 signees, start and finish within the 5 months time.

As for the glue, it comes up every so often as a excellent bonding agent for non-polystyrene types of plastic. I'm going to buy some, and add it to my stable of glues.

Joel
hellbent11
_VISITCOMMUNITY
Kansas, United States
Joined: August 17, 2005
KitMaker: 725 posts
AeroScale: 55 posts
Posted: Wednesday, August 13, 2014 - 05:13 PM UTC

Quoted Text


One question, I noticed you're using Proweld. I've never used it. Is it comparable to Tamiya's Extra Thin?
Joel


Joel, thanks for the help in clearing up the Grumman gray. I saw a lot of conflicting stuff out there.

I would say it is similar in consistency but hotter. I can't tell Proweld from Tenax if you've ever used that. I knew a lot of architectural and structural engineering guys in college. On their different models they used the proweld for the same reason you mentioned because a lot of their stuff was mixed media.

Thanks, Hellbent
Joel_W
Staff MemberAssociate Editor
AUTOMODELER
_VISITCOMMUNITY
New York, United States
Joined: December 04, 2010
KitMaker: 11,666 posts
AeroScale: 7,410 posts
Posted: Thursday, August 14, 2014 - 12:28 AM UTC

Quoted Text


Quoted Text


One question, I noticed you're using Proweld. I've never used it. Is it comparable to Tamiya's Extra Thin?
Joel


Joel, thanks for the help in clearing up the Grumman gray. I saw a lot of conflicting stuff out there.

I would say it is similar in consistency but hotter. I can't tell Proweld from Tenax if you've ever used that. I knew a lot of architectural and structural engineering guys in college. On their different models they used the proweld for the same reason you mentioned because a lot of their stuff was mixed media.

Thanks, Hellbent


Hellbent1
Glad I could help. And thanks for the info on the Proweld. It's what I'm basically looking for.
Joel
b17-peter
#392
_VISITCOMMUNITY
Hessen, Germany
Joined: January 09, 2013
KitMaker: 696 posts
AeroScale: 608 posts
Posted: Thursday, August 14, 2014 - 08:33 AM UTC

Quoted Text

Peter,
Welcome to our Grumman campaign.

That sure is a lot of weight you're adding to the front of the fuselage. Just how strong is that landing gear?

Joel


Hi Joel,
just added the recommended 10g and the undercarriage will hold, I'm sure
Let's have fun!

Peter