_GOTOBOTTOM
World War II: USA
Aircraft of the United States in WWII.
Hosted by Rowan Baylis
1/48 P-47N Thunderbolt (Academy)
josepedro
_VISITCOMMUNITY
Portugal
Joined: June 15, 2005
KitMaker: 172 posts
AeroScale: 168 posts
Posted: Monday, August 26, 2013 - 09:57 AM UTC
Hello!

Here is my new project. It`s the Academy kit, enhanced through the use use of some photo-etched parts from an Eduard Zoom set.

Until now the work done consisted of:

Black primer, followed by interior green, both from the Vallejo Model Air Range.

Next, the detail was painted with various Vallejo Model color acrilics, and several sessions of drybrushing and aplication of oil filters delivered this result.


My best regards from Azores!

José Pedro
SHarjacek
_VISITCOMMUNITY
Croatia Hrvatska
Joined: January 29, 2011
KitMaker: 977 posts
AeroScale: 263 posts
Posted: Monday, August 26, 2013 - 10:03 AM UTC
Hey there Jose Pedro, I like the cockpit so far! I would maybe add a light brown filter to the seat because I think the contrast is a little high. But if you like it this way cool!


Kind regards,Sven.
Joel_W
Staff MemberAssociate Editor
AUTOMODELER
_VISITCOMMUNITY
New York, United States
Joined: December 04, 2010
KitMaker: 11,666 posts
AeroScale: 7,410 posts
Posted: Tuesday, August 27, 2013 - 05:23 AM UTC
Jose, nice start to your P47. The cockpit looks really good. I especially like the overall weathering, as it has that used but not abused look to it. Nice job on the instrument panel with the wires and cables behind it.
Joel
phumbles
_VISITCOMMUNITY
Australia
Joined: June 14, 2013
KitMaker: 82 posts
AeroScale: 81 posts
Posted: Saturday, August 31, 2013 - 01:01 AM UTC
Hi Jose I like your cockpit but if that's the beginning the rest should look excellent Have fun Phil
josepedro
_VISITCOMMUNITY
Portugal
Joined: June 15, 2005
KitMaker: 172 posts
AeroScale: 168 posts
Posted: Thursday, November 21, 2013 - 01:26 AM UTC
hello!

Thanks a lot for your comments!

This build is going slowly...
I´m trying to make the best of this older kit, using very simple techniques.
Therefore, the leading edges of the various exhaust and air scoops were filed and sanded for a more scale appearance;

The engine was detailed with jewellery wire;

The wing to fuselage seam was tweaked and compensated with plastic card, in order to avoid a lot of sanding;

So, here are some photos:


Joel_W
Staff MemberAssociate Editor
AUTOMODELER
_VISITCOMMUNITY
New York, United States
Joined: December 04, 2010
KitMaker: 11,666 posts
AeroScale: 7,410 posts
Posted: Thursday, November 21, 2013 - 02:30 AM UTC
Jose, the Jug is coming along nicely. Nice job on the wing to fuselage joint. Looks clean & neat. Your engine wiring is fine for how far you've taken it, but the Big radials had duel ignition systems. One spark plug was located in the upper front of the cylinder, and the 2nd one was dead center in the top. There is a 2nd set of ignition wires for the other bank of cylinders.

Joel
josepedro
_VISITCOMMUNITY
Portugal
Joined: June 15, 2005
KitMaker: 172 posts
AeroScale: 168 posts
Posted: Sunday, October 02, 2016 - 03:23 AM UTC
Hello All!

Here is the latest photos of this authentic saga.
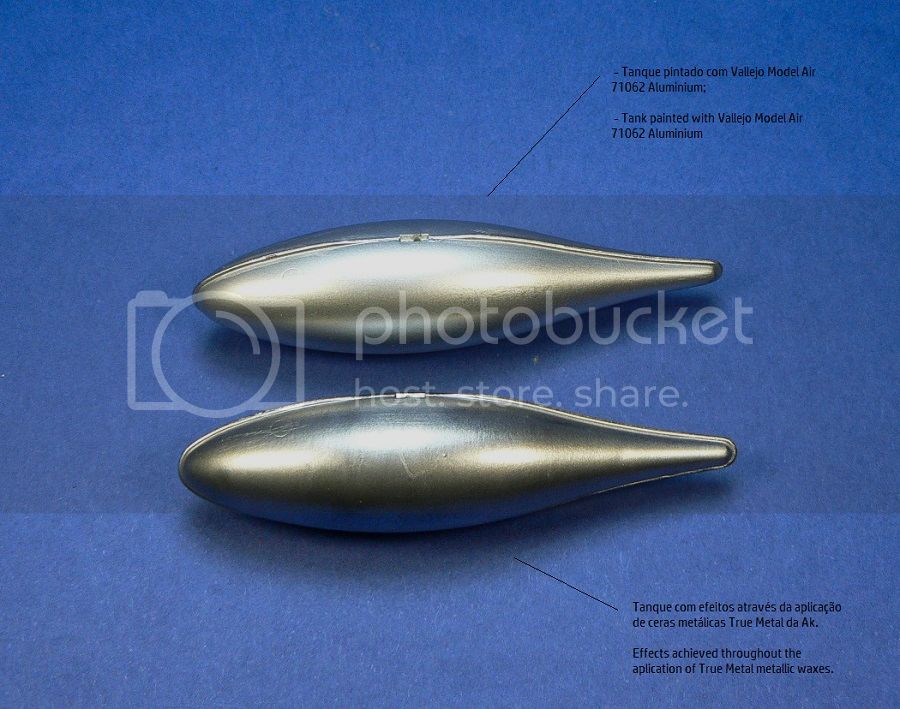
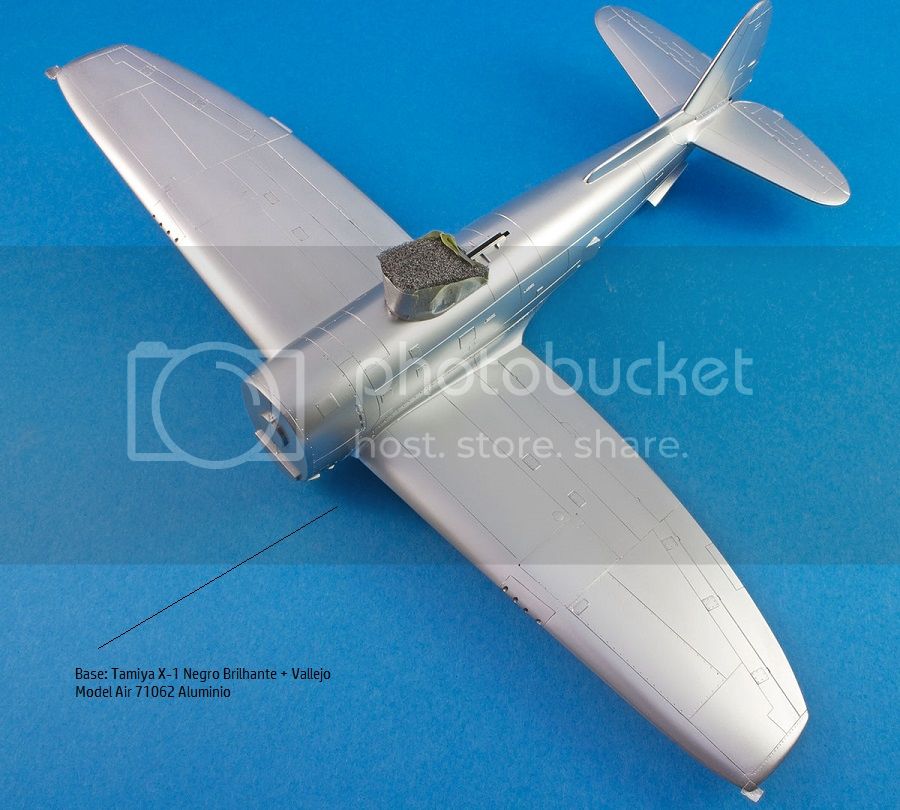
Long story made short - When i started theis build i intended to use acrilic colours for this build. My choice fell on the Vallejo Model Air range of metallics. However, fragility was a real issue, and a layer of varnish was needed in order to lend some resilience to the paint.
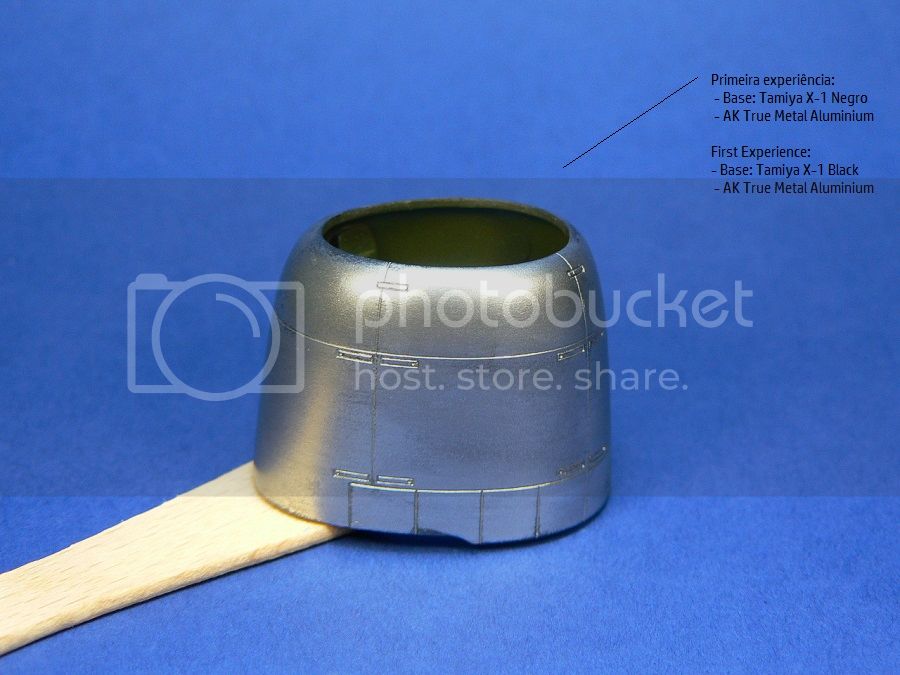
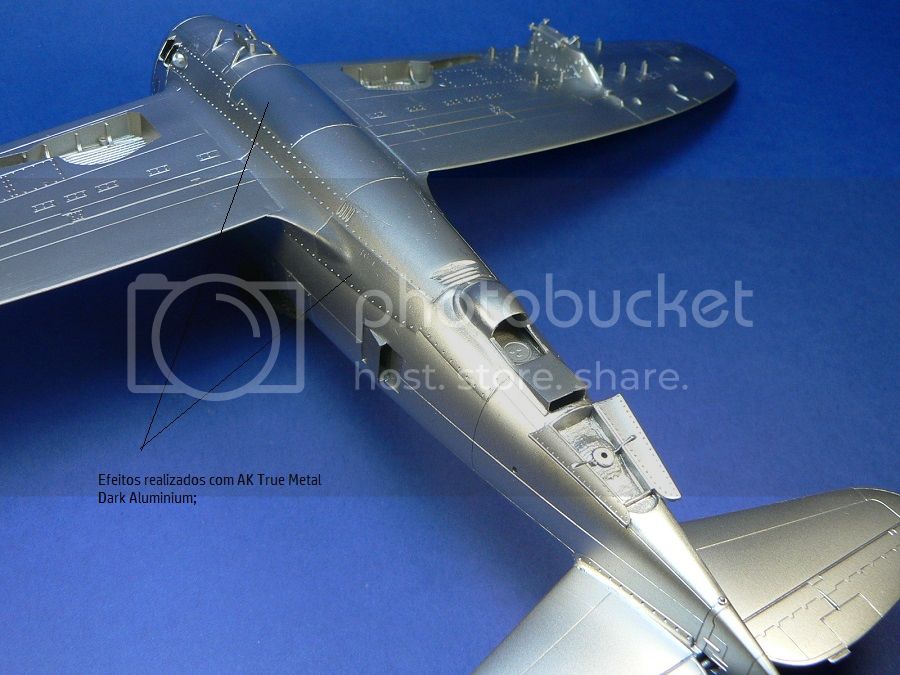
I tried to use True Metal waxes for several effects, but did not like the results... As the primer coat was Tamiya X-1 Black, i sprayed Ajax window cleaner on the model, and ten minutes later, it was dead clean for a fresh start.

Several days after i had the dumbest idea ever: I lost my mind and shot the model with a gloss black paint from a rattle can purchased on a hardware store... what was i thinking???

Result: Several hours sanding to correct the major failure (Has you already know, the idea of acrilic was already gone by... )

Whit the plastic filled with imperfections, two choices lurked on my mind :
1 - Garbage Bin
2 - Polish the damn plane as best aspossible and shoot it again with Tamiya X-1

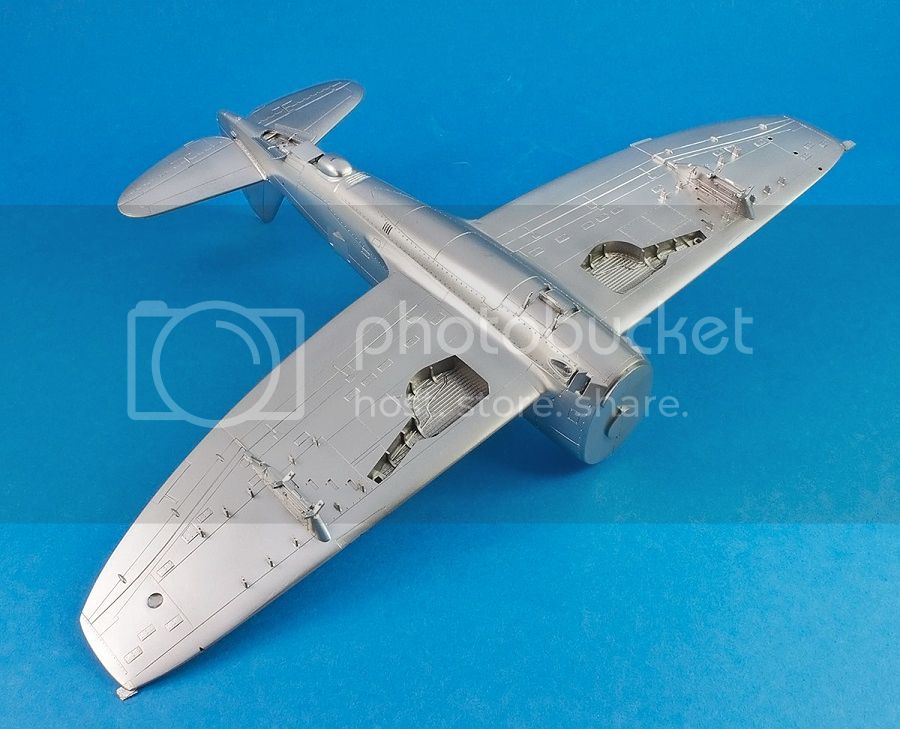
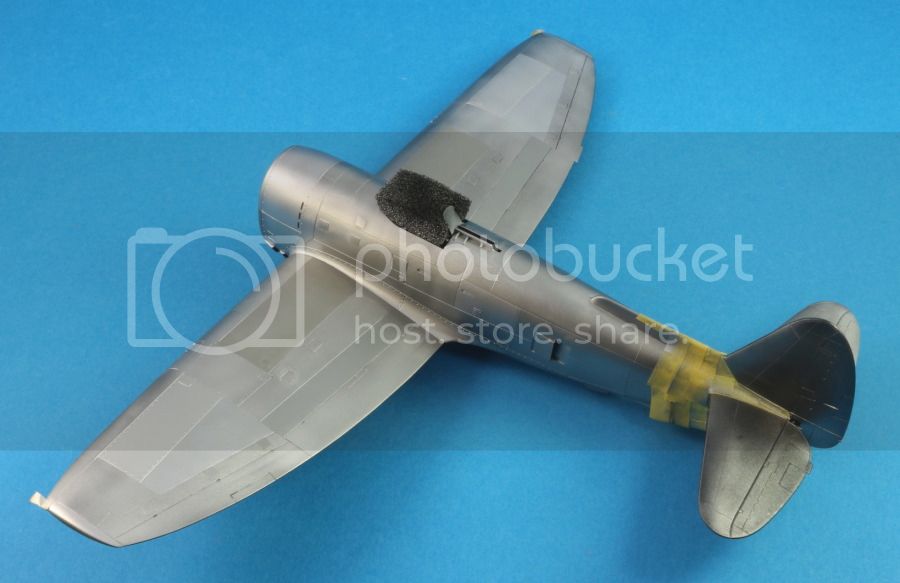
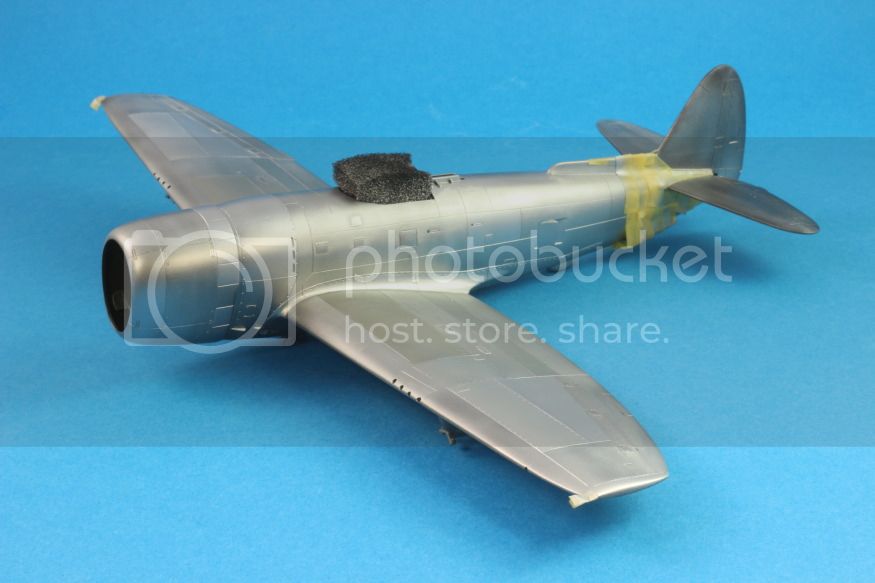
I chose the second one and decided to try the metallic range of MRPaint.
The result achieved was far from perfect but was the best i could achieve.
I utilised MRPaint Super Silver Metallic, Duraluminium, White Aluminium, Silver, e Dark Aluminium.

The saga goes on...


Joel_W
Staff MemberAssociate Editor
AUTOMODELER
_VISITCOMMUNITY
New York, United States
Joined: December 04, 2010
KitMaker: 11,666 posts
AeroScale: 7,410 posts
Posted: Sunday, October 02, 2016 - 04:54 AM UTC
Jose,
Your results speak for themselves. The extra effort and retries really paid major dividends. The various panel shading looks as realistic as one can hope to achieve with model paints. Well done.

Joel
GazzaS
#424
_VISITCOMMUNITY
Queensland, Australia
Joined: April 23, 2015
KitMaker: 4,648 posts
AeroScale: 1,938 posts
Posted: Sunday, October 02, 2016 - 05:31 AM UTC
Jose,
Wow! Your modulation of the panels is excellent. Your interior work made a great impression on me.

Gaz
JPTRR
Staff MemberManaging Editor
RAILROAD MODELING
#051
_VISITCOMMUNITY
Tennessee, United States
Joined: December 21, 2002
KitMaker: 7,772 posts
AeroScale: 3,175 posts
Posted: Sunday, October 02, 2016 - 06:16 AM UTC
Jose,

Welcome back, you and your beautiful Jug! I'll keep watching. I enjoyed my Academy P-47N.

Which plane are you going to decal?
wing_nut
_VISITCOMMUNITY
New Jersey, United States
Joined: June 02, 2006
KitMaker: 1,212 posts
AeroScale: 468 posts
Posted: Sunday, October 02, 2016 - 06:55 AM UTC
Always nice to get a shelf queen back to the bench. Very nice looking metal finish.
josepedro
_VISITCOMMUNITY
Portugal
Joined: June 15, 2005
KitMaker: 172 posts
AeroScale: 168 posts
Posted: Sunday, October 02, 2016 - 04:17 PM UTC
Hello!
Thanks for the feedback. This one has been quite a journey. Not on the kit fault, but certainly due to my inexperience with NMF`s.


Quoted Text

Jose,

Welcome back, you and your beautiful Jug! I'll keep watching. I enjoyed my Academy P-47N.

Which plane are you going to decal?


I´m going towards "Lil Meaties - Meat Chopper"
Let`S see how it turns out!
AussieReg
Staff MemberAssociate Editor
AUTOMODELER
#007
_VISITCOMMUNITY
Victoria, Australia
Joined: June 09, 2009
KitMaker: 8,156 posts
AeroScale: 3,756 posts
Posted: Sunday, October 23, 2016 - 01:15 AM UTC
Great work Jose, the interior and the NMF look very good. Very nice work on the panel tone variations.

Looking forward to more progress.

Cheers, D
 _GOTOTOP