_GOTOBOTTOM
World War II
Discuss WWII and the era directly before and after the war from 1935-1949.
Hosted by Rowan Baylis
Can I OOB?
mrockhill
_VISITCOMMUNITY
Pennsylvania, United States
Joined: June 17, 2009
KitMaker: 566 posts
AeroScale: 507 posts
Posted: Sunday, August 25, 2013 - 05:23 AM UTC
Yesterday Im sitting in the basement work shop, feeling sorry for myself because I, like many others get a project started and then it goes flat for lack of a specific detail bit, reference, confidence etc. While I enjoy my progress no matter how slow it sometimes is, I feel I should be able to do occasional simple builds without OCD taking over. With this in mind and the constant gnashing of teeth on other sites over IPMS conventions, judging and of course OOB rules, I wonder if I have it in me to build OOB?

So I did the last thing I need to do and started another kit, a 1/48 Tamiya Ki-84. ....and the need to improve detail is already straining my mind! I long to dive into research and wallow in pages of heated debate on the color of the inside of the landing gear doors, have I lost my mind!

I want to rescribe raised panel lines,scratch a new seat and instrument panel out of styrene. I want to lop off the silly soild gray plastic reflector portion of the gunsight and replace with acetate, I want resin wheels and above all.....I want seat belts! But none of this can be allowed happen, I must be able to build OOB. So here it goes, time to make a silk purse out of a $10 kit using whats in the box.


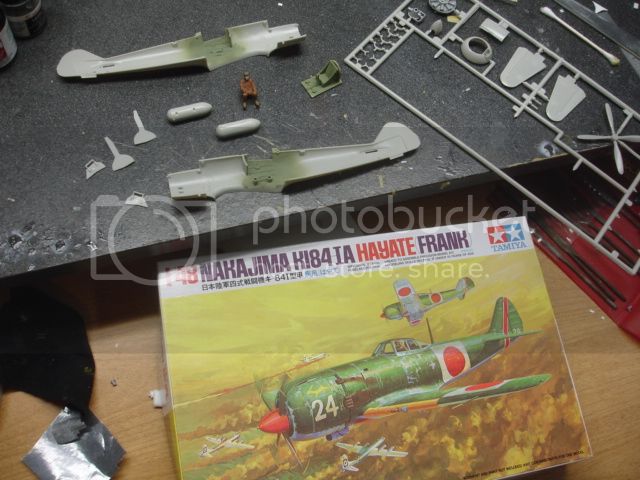
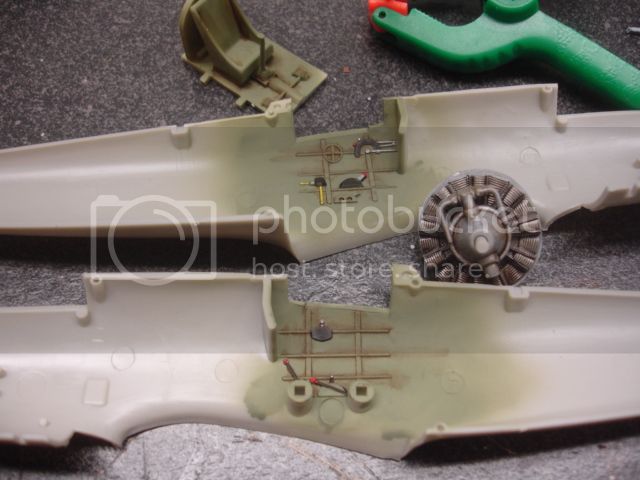
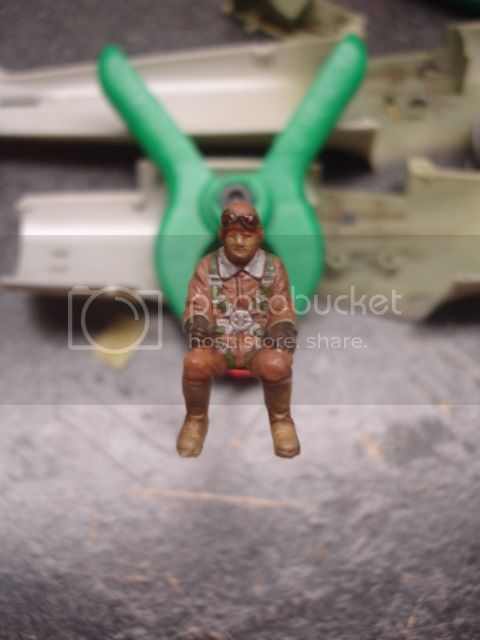
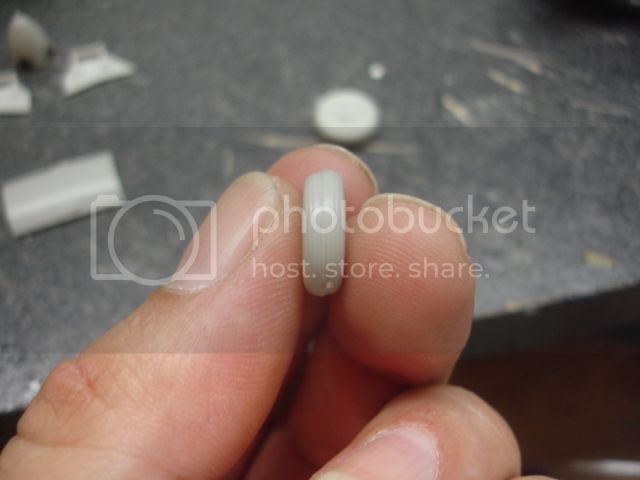
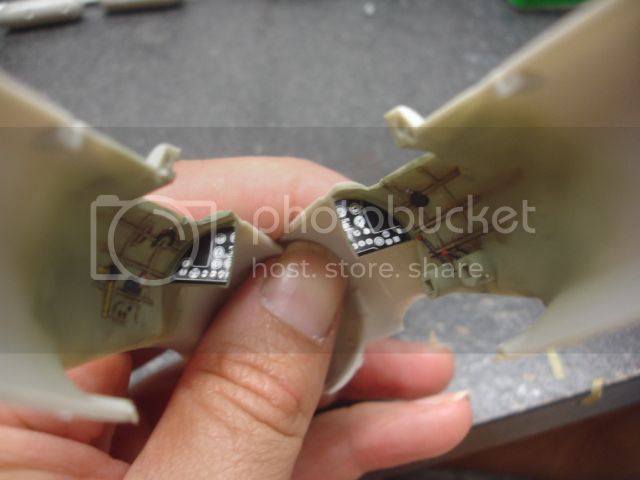
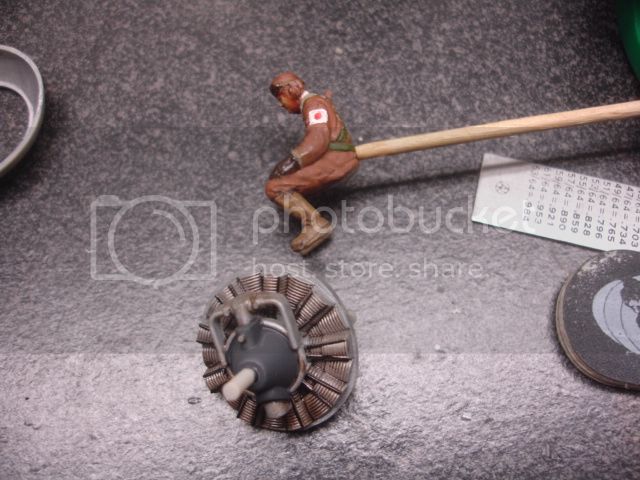
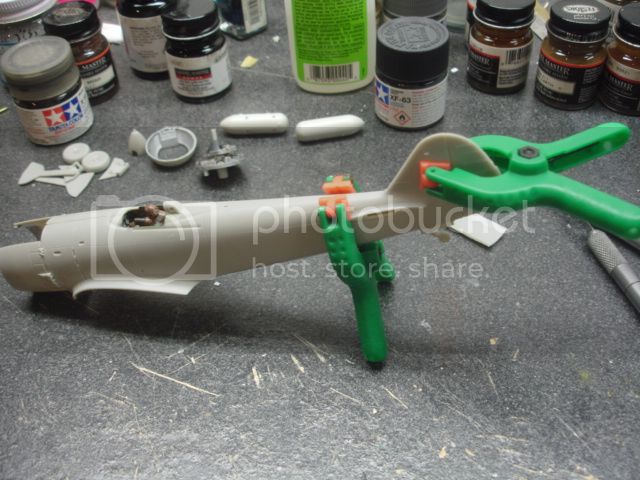
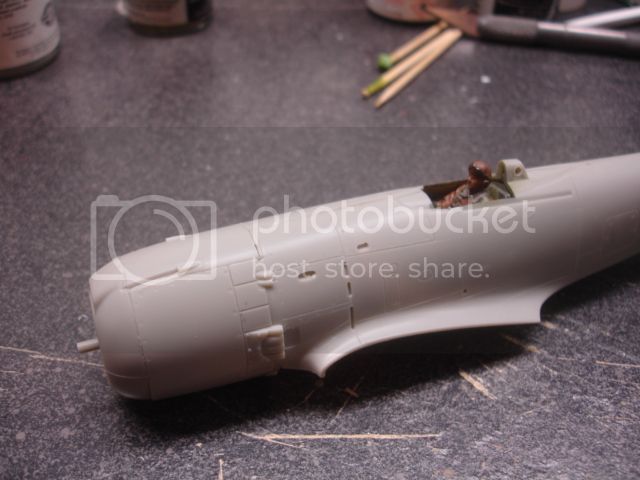
So far I assembled and base coated the 4 pieces of cockpit, glued the drop tanks together, base coated the engine pieces and began painting the pilot (I need him to hide the fact that the seat is horrible and he helps me side step the whole seatbelts issue)


Apart from my goal of building OOB im also planning on using this kit as the test bed for me using alclad for the first time. Depending on how good it looks will help decide the finished scheme, will I go overall NMF or will it be base coat for a worn green finish?
Jessie_C
_VISITCOMMUNITY
British Columbia, Canada
Joined: September 03, 2009
KitMaker: 6,965 posts
AeroScale: 6,247 posts
Posted: Sunday, August 25, 2013 - 06:34 AM UTC
Remember that the instruction sheet is in the box, and it will never miss little slivers cut out of it and made into seat belts. Stretched sprue properly bent makes good buckles
mrockhill
_VISITCOMMUNITY
Pennsylvania, United States
Joined: June 17, 2009
KitMaker: 566 posts
AeroScale: 507 posts
Posted: Sunday, August 25, 2013 - 01:42 PM UTC
I would have gone that way in heartbeat if this interior wasn't so lacking. This OOB thing would be much easier on the soul if I was using a nicer kit, but I guess I decided to really give myself a beating. Fortunately I once fancied myself as a half decent painter of figures so thankfully I think I can do a good enough job on the pilot to distract the viewer(or at least me) from the barren cockpit.


Todays progress Included detail painting of the various boxes and levers in the cockpit. I have no detailed references on this a/c so all painted detail is conjecture and in the spirit of progress. Not rushing, just not letting myself get bogged down in research. The cockpit and engine were given a wash of burnt umber oil paint to bring out the detail. The propeller got its coat of paint and is ready to be masked for markings. most of todays efforts went into the figure and so far I think its paying off.


This is "Bob" Bob is painted with an assortment of model master enamels, Tamiya acrylics and oils. Bobs flight suit and details may be a mix of IJA and IJN but I think for winging it he looks pretty passable. His goggles appear to be crooked but Im not all the snazzy of a dresser either. Especially if all I was doing was chilling out in my Ki-84 waiting for the Hellcats and Corsairs to come
Joel_W
Staff MemberAssociate Editor
AUTOMODELER
_VISITCOMMUNITY
New York, United States
Joined: December 04, 2010
KitMaker: 11,666 posts
AeroScale: 7,410 posts
Posted: Monday, August 26, 2013 - 05:04 AM UTC
Mike, 1st of all take a deep breath, relax, and remember that this is a hobby, and you're not building a OOB contest model where you have to follow certain rules.

All OOB builds should be done to the highest standards one can achieve, which should be the 1st primary goal of every modeler. It makes little sense to have just so so basics, then add details and AM parts on top, and a complicated paint scheme. The errors are still there. Goal #1 should be to be able to produce a near perfect OOB, no matter what the kit is. Of course picking a kit that is up to today's standards makes life just that much easier.

I wouldn't get hung up on the interior, since one has to look into a rather small cockpit to see it. With careful painting and weathering, there is enough there to make a nice presentation.

Concentrate on parts fit, gluing & sanding to remove as little of the raised panel lines as possible. It's much harder to repair or replace them, then to re-scribe recessed panel lines. Prime, look for mistakes, and build issues, then correct, and re-prime. Once satisfied, you're ready to paint.

Looking forward to your next update.

Joel

Siderius
_VISITCOMMUNITY
Tennessee, United States
Joined: September 20, 2005
KitMaker: 1,747 posts
AeroScale: 1,673 posts
Posted: Monday, August 26, 2013 - 06:21 AM UTC
I agree with Joel. Good advice. Enjoy your hobby, do the best you can, no one can ask any more of you. Russell
BlackWidow
_VISITCOMMUNITY
European Union
Joined: August 09, 2009
KitMaker: 1,732 posts
AeroScale: 1,336 posts
Posted: Monday, August 26, 2013 - 08:30 AM UTC
Mike, it's all up to you. It depends on how far you want to go and how much time you want to spend for the model. At the Kitmaker Family we all share one of the greatest hobbies and everyone is different. Just remember, the finished model has to please you, not me or any contest judge. And if it does so, everything is fine. So if you want to build oob, do so. And if you want to include every available resin and PE part, go for it.

Torsten
mrockhill
_VISITCOMMUNITY
Pennsylvania, United States
Joined: June 17, 2009
KitMaker: 566 posts
AeroScale: 507 posts
Posted: Monday, August 26, 2013 - 10:20 AM UTC
Thanks for the comments and concerns! Perhaps my dry and often self deprecating sense of humor doesn't translate well in cyberspace...

Im wasn't actually feeling sorry for myself, wallowing in disappointment and questioning my existence. I was mostly sorry that I was all hyped to actually cut plastic and build and all I found myself surrounded with was projects that for one reason or another got hung up or are in less than fun stages. One needs decals, two others need gloss coats, one awaiting parts, one has some references coming. I didn't want to start a project than just let it sink because the cockpit isn't up to my standards or I cant find the decals I want or I have no references to verify the wheel well color, etc. I like my details and I strive to make things as correct as I can without turning a hobby into work.

Judges need not apply. Im pretty sure no judge will ever see this build but I choose to hold myself to IPMS OOB rules for a couple reasons. Foremost is that it automatically prevents me from getting bogged down on improving a $10 kit (my far superior hasegawa ki-84 was only $22) and keeps me focused on making what is there shine. Second is all the talk and heated debates Ive read regarding OOB, its popularity and its often controversial rules. I just want to see what its like for myself. Im probably going to gripe a bunch about the kit, most of it with a smile on my face. I know what Im getting into as far as the technology of the kit goes, I bought it for the express purpose of being an Alclad test subject. So if the Alclad works out as it should, I might have a decent looking Hayate on my hands

Not sure whats in store for the build tonight, I should be able to get the fuselage buttoned up... but ill likely grab a beer and go hangout at the bench for an hour or so. Ill see about tweaking my narratives for a more positive effect and see if it helps
Joel_W
Staff MemberAssociate Editor
AUTOMODELER
_VISITCOMMUNITY
New York, United States
Joined: December 04, 2010
KitMaker: 11,666 posts
AeroScale: 7,410 posts
Posted: Tuesday, August 27, 2013 - 05:14 AM UTC
Mike, I would think that the models that need decals, and or Glosscoats, would be easy stages of their builds, with the finish line in sight.

Every since my 1st return to the hobby 40 years ago, and now the present one of almost 4 years, I've never had more then one build going at a time. Just can't concentrate on two or more builds at a time. So I tend to focus and get through the build no matter the good, the bad, or the ugly. And I've had may fair share of uglies with eventual filing in the circular display case, if you get my drift.

I long ago gave up contests on any and all levels. It's just much more fun to build for myself, to my current standards, and have no one to answer to but myself.

Joel
md72
#439
_VISITCOMMUNITY
Washington, United States
Joined: November 05, 2005
KitMaker: 4,950 posts
AeroScale: 3,192 posts
Posted: Tuesday, August 27, 2013 - 07:48 AM UTC
Didn't somebody say "Build what you like, like what you build"?

I for one am a couple of classes below the work I see here most of the time. So I build the best I can with the tools (metallic and organic)I've got and try to get a little better for the next one. I'm enjoying this build so far as it's basic, honest work that I can learn from. When you start building radial engines out of punched disks of card stock, I'm gone.
mrockhill
_VISITCOMMUNITY
Pennsylvania, United States
Joined: June 17, 2009
KitMaker: 566 posts
AeroScale: 507 posts
Posted: Tuesday, August 27, 2013 - 02:49 PM UTC
Joel- I always have multiple builds going. Part of my enjoyment of the hobby is to have something interesting or refreshing to do, which doesnt always jive with what needs to be done. Only two of my current builds have campaign deadlines, both months away. The rest are subject to be finished as I feel ready to finish them, some may even get worked on while this is ongoing.

Mark- I hope you enjoy the progress! Looking at online builds really inspired me to get back into the hobby and strive to build better models each time.

Been a long start for the new work week but I snuck an hour in at the bench. Working on filling and sanding some sink holes in the spinner and hollow out the pointy end(actually this portion in reality is also slotted and used to interface with a starting truck) I also filled and started sanding some pesky ejector pin marks on the inner gear doors. Being they are surrounded by raised detail I super glued some tiny bits of various grade sandpaper to the flattened end of some fancy pants toothpicks and when to town.


The wheels Also suffered some mold shift (note the offset halves of the wheel) I got one sanded smooth, haven't decided if Im going to restore the groove tread or go plain...hmmmm


For those not familiar with this kit this is how tamiya handled the instrument panel. To be honest this is one of tamiyas older kits and from what ive heard its from their old 1/50 line. The other aging 1/48 kits still in the catalog such as the raiden and zero kits don't do this. The instrument decal has guide marks to aid cutting it in half and I managed to get it lined up pretty good. Still cheesy IMHO but its a start and better than nothing. Im brain storming some ideas on how I might spice this up and stay OOB


tinbanger
_VISITCOMMUNITY
Ontario, Canada
Joined: February 04, 2008
KitMaker: 2,507 posts
AeroScale: 1,814 posts
Posted: Tuesday, August 27, 2013 - 10:48 PM UTC
"Joel- I always have multiple builds going. Part of my enjoyment of the hobby is to have something interesting or refreshing to do, which doesnt always jive with what needs to be done."

Hi Mike .
I have a similar build routine.
I have 9 builds on the go, 6 campaigns and 3 builds for the fun of it with no dead lines.
Joel_W
Staff MemberAssociate Editor
AUTOMODELER
_VISITCOMMUNITY
New York, United States
Joined: December 04, 2010
KitMaker: 11,666 posts
AeroScale: 7,410 posts
Posted: Wednesday, August 28, 2013 - 12:14 AM UTC
I'm still amazed at how you guys can work on so many projects at one time. I still have trouble staying focused on a single build especially when I get to something that starts to fight me.

Case in point is the 1/48 scale SBD-4 Dauntless I'm working on. It's the older Hasegawa kit. I decided to detail it to the best of my skill level, and it hasn't always been a smooth run. I've opened up the cowl flaps, and had to re-think how I was going to make new flaps, and then install them other then with the traditional butt joint. I was frustrated several times over a few days with one dead end start after another. Finally worked it out and have one side finished.

My point is that if I had other builds going, I would have continually put this build down, and worked on other projects. It would never be to this level of completion, and most likely would remain a shelf Queen for some time, without a likely hood of ever being finished. By sticking with the project, I've forced myself to concentrate and focus my efforts to keep moving forward. This is the only way I know how to build. Not saying it the best or right way. It's just my method.

Joel
md72
#439
_VISITCOMMUNITY
Washington, United States
Joined: November 05, 2005
KitMaker: 4,950 posts
AeroScale: 3,192 posts
Posted: Wednesday, August 28, 2013 - 02:21 AM UTC
I may not be as industrious as Joel, but he's got a point. Some times everything on a project is at a holding point, glue curing, paint drying, waiting on a part, and you still want to be building something. So out comes a new kit and the process starts all over again. Here in the Pacific North Wet, some times you have to wait til the monsoon season is over to spray paint so you can ger a few backed up waiting for the sun.....
mrockhill
_VISITCOMMUNITY
Pennsylvania, United States
Joined: June 17, 2009
KitMaker: 566 posts
AeroScale: 507 posts
Posted: Wednesday, August 28, 2013 - 10:37 AM UTC
Some of my projects get set aside when I encounter an obstacle but I try not to box them up and shelf them, because for me that leads to "out of sight out of mind", but still happens to some. I try to keep them around my work area in their opened box covered with a loose rag and quite often I find myself with the motivation to work on that pesky seam or shim the wings, mask the canopy. When its time for clear coating I tend to have a couple kits in the que ready to go.

As far as what kit Im working on, its all about motivation and interest in particular subjects which can change hourly, but as long as im actively doing something, to some kit on a regular basis and keep the creative process going I get more accomplished overall. When the process gets hung up for any of the many reasons we all know to well, I sink like a stone and might be away from the bench for months and it takes a lot for me to get back into the swing of it.
Joel_W
Staff MemberAssociate Editor
AUTOMODELER
_VISITCOMMUNITY
New York, United States
Joined: December 04, 2010
KitMaker: 11,666 posts
AeroScale: 7,410 posts
Posted: Wednesday, August 28, 2013 - 10:54 AM UTC
With me, this time around, every project build from OOB to what I would consider well detailed, has been carefully planned out after considerable discussions with my brother, (whose a much better modeler then I'll ever be). I then focus on collecting and assembling all the research and documentation I need, often discovering things I didn't know, and usually some facet that changes my game plan. This is usually done during the previous build as a time out to clear my head, and take a break from the building process. Once the new project is started, it's the only build on my workbench till it's done to the best of my ability, or every so often just gets the better of me, and it's back in the box, or worse

Joel
phumbles
_VISITCOMMUNITY
Australia
Joined: June 14, 2013
KitMaker: 82 posts
AeroScale: 81 posts
Posted: Saturday, August 31, 2013 - 12:16 AM UTC
Mike I like "Bob" and his cock-eyed goggles Have fun Phil
mrockhill
_VISITCOMMUNITY
Pennsylvania, United States
Joined: June 17, 2009
KitMaker: 566 posts
AeroScale: 507 posts
Posted: Monday, September 02, 2013 - 01:08 PM UTC
In a weekend full of obligatory functions, I found my self a few hours here and there to work on some builds. Ater some fitting and some head scratching I determined the best I could add to the instrument panel without wasting effort was to flat coat the panel and give each instrument a blob of micro crystal clear. Nothing fantastic but noticeable at some angles. During all this I noticed these hollow inpressions in the headrest halves.

These headrests were made a sheet metal and had a large lightening hole on either side that is noticeable in what few crappy pics I have of the Ki-84. So to have it my way Ive convinced myself Tamiya didn't miss this detail, it just got flashed over ...so I opened them back up

To add some more color I painted the engine crank case dark gray and I gave Bob one of the common Home defense national ID flag on his sleeve (often both sleeves and top of helmet) I wouldn't have thought the Japanese had much difficulty distinguishing americans from friendly pilots and applying the pitchfork appropriately but apparently a severely burnt Japanese flyer was killed by some angry farmers who thought he was American. These flags became standard over the home islands from January 1945 on


I also used my pin vise, micro drills and sharp No.11 blade to hollow out the exhausts and gun ports before I fit the halves together.


After some test fitting I determined with all the various pieces involved in closing up the fuselage I would need as many extra fingers as possible to hold pieces in place while maneuvering and gluing others. I put the cockpit assembly in loose (so I can go back later and make sure its get glued in straight and level) and started gluing the halves from the cockpit back together.


After some drying time I tackled the Nose section by first gluing the halves and engine mounts, inserting the engine and connecting the halves. Next I set the gun cowling in place with some dabs of cement then introduced the front engine cowl and fidgeted around trying to line up as much as possible and keep filing and sanding to a minimum, with moderate success.

I tried to keep the compromises on the underside where things are a bit smoother and easier to blend but Ill still have my work cut out for me on the topside. This wasn't as bad as some have claimed it to be but the engineering is definitely dated in this area.
 _GOTOTOP