_GOTOBOTTOM
World War II: Great Britain
Aircraft of Great Britain in WWII.
Hosted by Rowan Baylis
Late Mark Double Spitfire build in 1/72!
magnusf
_VISITCOMMUNITY
Stockholm, Sweden
Joined: May 02, 2006
KitMaker: 1,953 posts
AeroScale: 1,902 posts
Posted: Wednesday, October 10, 2012 - 06:26 AM UTC
At the same time as I bought the Mustang I also picked up another one of Airfix´s latest offerings, the Spitfire 22. And since I am a Spitfire fan I of course also happened to have the Xtrakit kit in the stash so off we go for a double build!


Airfix box-art...


...and the box contents. Very much like the Mustang!


Xtrakit box-art...


...and the box contents. Looks quite different, lots of small parts!


A clever trick from Airfix! By using angled ejectors in the moulds they have managed to make very nice Griffon-bulges that would otherwise have been impossible to mould integrally with the fuselage halves! Nice touch, the engineer in me approves !

Finally, I have gotten myself an Xtradecal sheet with a myriad of marking options. I will go for a high speed silver Mk 22 from Turnhouse and a camouflaged Mk 24 from Kai Tak (old time favourite from the Matchbox 1/32 kit!).


Magnus
Siderius
_VISITCOMMUNITY
Tennessee, United States
Joined: September 20, 2005
KitMaker: 1,747 posts
AeroScale: 1,673 posts
Posted: Wednesday, October 10, 2012 - 07:14 AM UTC
Go Magnus! Looking forward to your builds. We 72 scaler modelers have to stick together you know! Russell
magnusf
_VISITCOMMUNITY
Stockholm, Sweden
Joined: May 02, 2006
KitMaker: 1,953 posts
AeroScale: 1,902 posts
Posted: Wednesday, October 10, 2012 - 06:33 PM UTC
Russell! Yep, endangered species :-) !


Obviously not the same DNA here...


...it will be interesting to see how much they differ when finished! Main thing seems to be a difference in rear fuselage lengths...


Parts-on-sticks! Interior parts with a bit of additions in the form of a resin dashboard and a home-made compass...


Magnus
magnusf
_VISITCOMMUNITY
Stockholm, Sweden
Joined: May 02, 2006
KitMaker: 1,953 posts
AeroScale: 1,902 posts
Posted: Tuesday, October 16, 2012 - 08:10 AM UTC
And a bit of interior painting...


Seat belts are masking tape.


Magnus
Siderius
_VISITCOMMUNITY
Tennessee, United States
Joined: September 20, 2005
KitMaker: 1,747 posts
AeroScale: 1,673 posts
Posted: Tuesday, October 16, 2012 - 09:00 AM UTC
Looking good. Keep up the good work. Russell
magnusf
_VISITCOMMUNITY
Stockholm, Sweden
Joined: May 02, 2006
KitMaker: 1,953 posts
AeroScale: 1,902 posts
Posted: Sunday, November 04, 2012 - 08:59 AM UTC
I've been busy assembling the airframes lately. I didn't manage to get them as right as I had hoped for, especially the Xtrakit Spit needed more putty than ideal around the wing roots.


Soon primer-time. And the traditional parts-on-sticks-photo of course !


Magnus
Siderius
_VISITCOMMUNITY
Tennessee, United States
Joined: September 20, 2005
KitMaker: 1,747 posts
AeroScale: 1,673 posts
Posted: Sunday, November 04, 2012 - 09:00 PM UTC
Parts on sticks? It sounds like something you eat! Keep up the good work. Looking forward to seeing more. Russell
magnusf
_VISITCOMMUNITY
Stockholm, Sweden
Joined: May 02, 2006
KitMaker: 1,953 posts
AeroScale: 1,902 posts
Posted: Monday, November 12, 2012 - 09:23 AM UTC
Preparing for primer...


And, as promised, parts on sticks! (FYI, not edible...)


I've actually primed them already even if I haven't taken a photo of them. It doesn't really add to the interest anyway !


Magnus
kenner
_VISITCOMMUNITY
Ontario, Canada
Joined: October 14, 2007
KitMaker: 122 posts
AeroScale: 119 posts
Posted: Monday, November 12, 2012 - 12:10 PM UTC
Looking good Magnus!

(Watching with interest as I have both kits in the to-do queue.)

(don't know why I get such a kick out of the parts on sticks but I do )


Ken
magnusf
_VISITCOMMUNITY
Stockholm, Sweden
Joined: May 02, 2006
KitMaker: 1,953 posts
AeroScale: 1,902 posts
Posted: Friday, February 06, 2015 - 03:55 PM UTC
Ken! Sorry to have kept you waiting, both for an answer and for the models to continue past primer stage ! Those got stuck when other stuff jumped the queue but now I've found some time for a restart. Have you gotten around to do yours?


A white background doesn't really add to the attraction in this case... There were a few blemishes in the finish to attend to, I've added wingtip lights from clear sprue and drilled out the canons on the Xtrakit Spit. On the Airfix one I will probably cut them off and substitute thin tubing.

I've also rethought my paint scheme strategy: I'll go for two camouflaged planes (one 22 and one 24).


Magnus
Joel_W
Staff MemberAssociate Editor
AUTOMODELER
_VISITCOMMUNITY
New York, United States
Joined: December 04, 2010
KitMaker: 11,666 posts
AeroScale: 7,410 posts
Posted: Friday, February 06, 2015 - 07:57 PM UTC
Magnus,
Talk about a long, long time between updates. Glad to see that you picked up both builds once again. Will be following along as you do both camo paints schemes.
Joel
kenner
_VISITCOMMUNITY
Ontario, Canada
Joined: October 14, 2007
KitMaker: 122 posts
AeroScale: 119 posts
Posted: Tuesday, February 10, 2015 - 05:30 AM UTC
Now worries. I got about as far as you did with the Airfix kit but my Xtrakit is still in the box.

My how time flies

MrMtnMauler
_VISITCOMMUNITY
Washington, United States
Joined: January 15, 2011
KitMaker: 224 posts
AeroScale: 223 posts
Posted: Tuesday, February 10, 2015 - 07:16 AM UTC
Magnus simply outstanding! Your work is very precise and looks great. I also appreciated the angled ejector note you made. I was so busy admiring your handywork that I would have otherwise not noticed. Please keep those photos coming. I too am doing a dual Spit build. Min my case I'm modeling the Hasegawa 1/48 and Tamiya Mk VIII Spitfires. A bit unusual I'll grant you but since I'm going to paint them in SEAC markings I thought I'd kill 2 birds with one airbrush. Anyway thanks for sharing and take care. Jim
MrMtnMauler
_VISITCOMMUNITY
Washington, United States
Joined: January 15, 2011
KitMaker: 224 posts
AeroScale: 223 posts
Posted: Tuesday, February 10, 2015 - 07:17 AM UTC

Quoted Text

Magnus simply outstanding! Your work is very precise and looks great. I also appreciated the angled ejector note you made. I was so busy admiring your handywork that I would have otherwise not noticed. Please keep those photos coming. I too am doing a dual Spit build. Min my case I'm modeling the Hasegawa 1/48 and Tamiya Mk VIII Spitfires. A bit unusual I'll grant you but since I'm going to paint them in SEAC markings I thought I'd kill 2 birds with one airbrush. Anyway thanks for sharing and take care. Jim


Sorry, Tamiya 1/32 Spitfire Mk VIII
magnusf
_VISITCOMMUNITY
Stockholm, Sweden
Joined: May 02, 2006
KitMaker: 1,953 posts
AeroScale: 1,902 posts
Posted: Thursday, February 12, 2015 - 01:21 AM UTC
Joel! You're as usual welcome to come along on the ride!

Ken! Maybe the Xtrakit Spit should stay in its box, have a look below ...

Jim! Thanks! Good luck with your big birds!

Some time since last update but I haven't been idle. I've done some camouflage experiments on my old Matchbox Spit IX paint test object and some detail work on the actual kits as well!


As usual I am very generous when it comes to equipment: my pilots always gets Quickboost sights without even having to ask for it!


The Mark II Gyro Sight was licensed to the US where it was called the K-14 Acemaker sight so Quickboost 72 066 "K-14 U.S Gunsights" will do fine for your late-mark Spit as well as for a D-Mustang!


They obviously can't both be accurate, Airfix to the left and Xtrakit to the right... Airfix part fits fine inside Xtrakit part!


The more I stare at the Xtrakit Spit, the stranger I think it looks. I look forward to seeing them both finished for comparison!


Magnus
MrMtnMauler
_VISITCOMMUNITY
Washington, United States
Joined: January 15, 2011
KitMaker: 224 posts
AeroScale: 223 posts
Posted: Thursday, February 12, 2015 - 05:28 AM UTC
Oh Dear, I fear at this rate we will unleash the vaunted red pen on random internet photos monster Gaston! Ahhhhhhh!!
magnusf
_VISITCOMMUNITY
Stockholm, Sweden
Joined: May 02, 2006
KitMaker: 1,953 posts
AeroScale: 1,902 posts
Posted: Friday, February 13, 2015 - 02:52 PM UTC
Jim! No need for red lines around here: both can't be correct but I'll wait with my judgement until both are finished

I have a quite substantial stash of Falcon's Clear-Vax sets, you never now when you need something from them... I pinched the last two Spit bubbles for this project.


The Falcon canopy is quite literally the "in-between-solution" in this case and I think it will even up the score quite nicely when both kits get one.


I would risk a guess now that the Airfix canopy is on the small side while the Xtrakit obviously is on the fat side ! It also looks rather "squashed" which is even worse than the size problem.


Magnus
Joel_W
Staff MemberAssociate Editor
AUTOMODELER
_VISITCOMMUNITY
New York, United States
Joined: December 04, 2010
KitMaker: 11,666 posts
AeroScale: 7,410 posts
Posted: Friday, February 13, 2015 - 08:38 PM UTC
Magnus,
That's certainly a excellent solution to the canopy issue. The vac Falcon ones look crystal clear which is another plus.
Joel
magnusf
_VISITCOMMUNITY
Stockholm, Sweden
Joined: May 02, 2006
KitMaker: 1,953 posts
AeroScale: 1,902 posts
Posted: Monday, February 16, 2015 - 02:23 AM UTC
Joel! Falcon does marvellous canopies, I have a quite a few of their full "thematic" sets as well as the single ones they make for Squadron. I often (like here) use the more difficult-to-glue and fit-critical windscreen from the kit and substitute only the moving part with a Falcon piece, especially if leaving the canopy open.

I thought I would be far into the paintjob by now but I wasn't as careful as I should have been when I started the kits so there have been quite a lot of small fixing to do. But now I think I'm quite close to where the fun starts really!


I've added a fuel filler tube and cap behind the cockpit and also the rather prominent oil filler hole in front of the windscreen...


...canopies have been masked and faired in as well!


Magnus
Joel_W
Staff MemberAssociate Editor
AUTOMODELER
_VISITCOMMUNITY
New York, United States
Joined: December 04, 2010
KitMaker: 11,666 posts
AeroScale: 7,410 posts
Posted: Monday, February 16, 2015 - 07:23 PM UTC
Magnus,
I really like the gas filler tube and cap. Most of the time it's just either a scribed line, or a round plate glued to the surface. Yours really looks like a filler tube and cap.
Joel
kenner
_VISITCOMMUNITY
Ontario, Canada
Joined: October 14, 2007
KitMaker: 122 posts
AeroScale: 119 posts
Posted: Tuesday, February 17, 2015 - 06:36 AM UTC
Gee, I might just get inspired to finish mine.

The Falcon canopy does look nice.

I've always been reluctant to use a vacuform canopy (one slip and you ruin it ) but I guess I have to get over that.

greif8
_VISITCOMMUNITY
Bayern, Germany
Joined: January 17, 2006
KitMaker: 673 posts
AeroScale: 492 posts
Posted: Tuesday, February 17, 2015 - 12:44 PM UTC
Very high quality craftsmenship in your builds Magnus. Both planes are looking excellent so far.

Ernest
magnusf
_VISITCOMMUNITY
Stockholm, Sweden
Joined: May 02, 2006
KitMaker: 1,953 posts
AeroScale: 1,902 posts
Posted: Friday, February 20, 2015 - 12:27 PM UTC
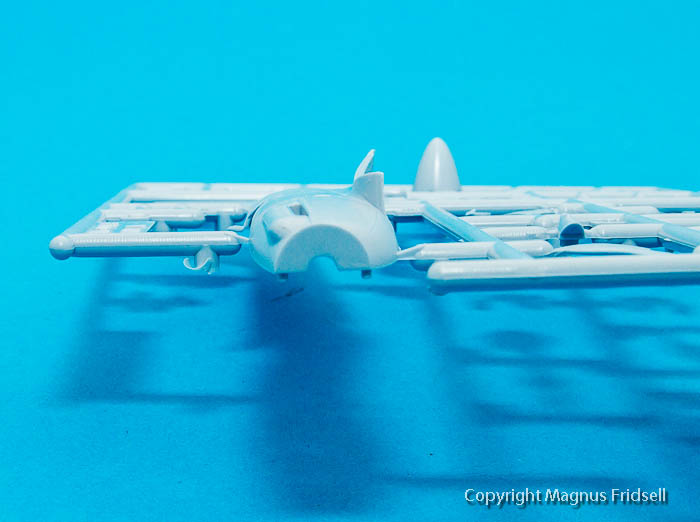
Joel! There was just about nothing around in the kit so if not for something else I had to do it out of necessity !

Kenneth! It's a Spitfire: it ALWAYS deserves to get finished 
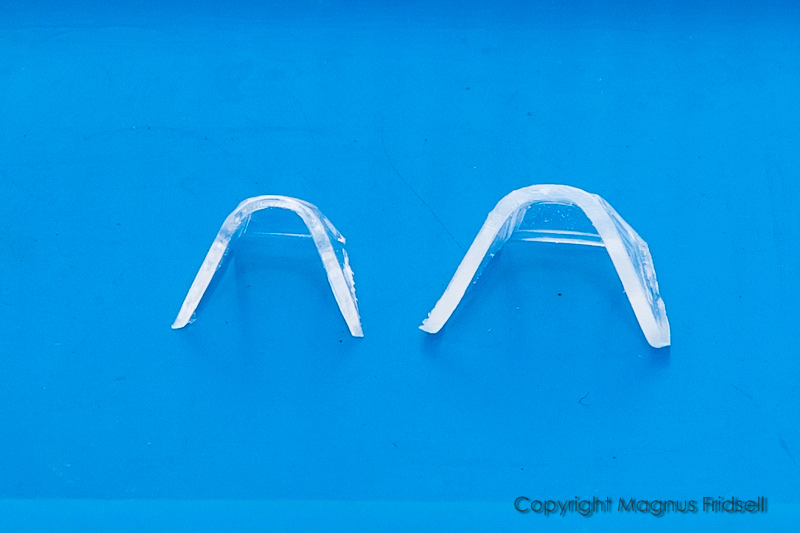
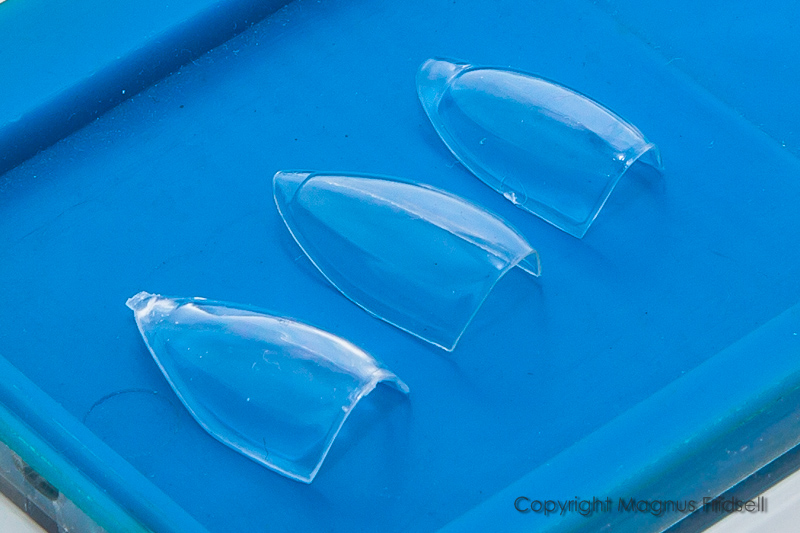
! When it comes to vacform canopies I try covering as much of it as possible with tape (it helps against accidental scratching even if it isn't much protection from a wildly slipping scalpel...). I always use a new blade and then I LIGHTLY score around the edges, slow and easy, time after time. If you avoid using force it is actually quite simple. Edges can be deburred using a fine file, remember to keep the tape protection in place until you're finished. They are quite flimsy when removed from their sheets so it has been known to happen that they bend away and the file slips into the canopy area while trimming the edges. And being of a quite resilient material, they can't be polished like injected canopies. A lengthy essay on the subject and then I haven't even gotten around to tell you what my worst nightmare with these is: attaching them to the model ! Edges are very thin and since they can't be sanded they have to fit no matter if you like it or not... But trying a bubble canopy (Tempest, Spit, Mustang or T-bolt) sometimes can't hurt if you stick to using the kit's original windscreen !

Ernest! Thanks and welcome for the ride!

Finally I've arrived at the painting stage, a rather lengthy post this will be!

To start with, I find RAF colours troublesome, there is nothing that I really like the look of "out of the bottle" (sounds a bit elitist but it is true, I'm sorry...). I did a fair bit of testing on the Matchbox Mk IX paint victim (it has been painted and sanded smooth so many times that it nowadays mostly looks like a recognition model: there are no features left at all except where the Matchbox Trench Digger worked overtime one late Tuesday evening around the engine covers )

The greatest disappointment were the "new" Tamiya colours that I have been intending to try for several years now, XF-81, 82 and 83. They MIGHT look good on the 32-scale Spit they were released for but in 1/72 there was something that bothered me: too dark, too blue, too green and really not to my liking. Bleaching them with white didn't do much good either.

So, back to basics (Google and Gunze paint - two things that always can be trusted!) I found a bunch of different recipes people are using for Dark Green, Ocean Grey and Medium Sea Grey. After some experimenting and leaving it overnight for a renewed look in the morning I finally was quite content with the following mixes using Gunze paints:

DG: 25xH73 10xH303
OG: 10xH335 2xH93 1xH11
MSG: H325

The numbers aren't percentages, they are "parts" - mix 25 drops of H73 and 10 drops of H303 (or multiply both numbers with the same factor if you need more paint (you'll get 50 and 20; 75 and 30; 100 and 40 and so on until you have a whole bucket-full of it )).

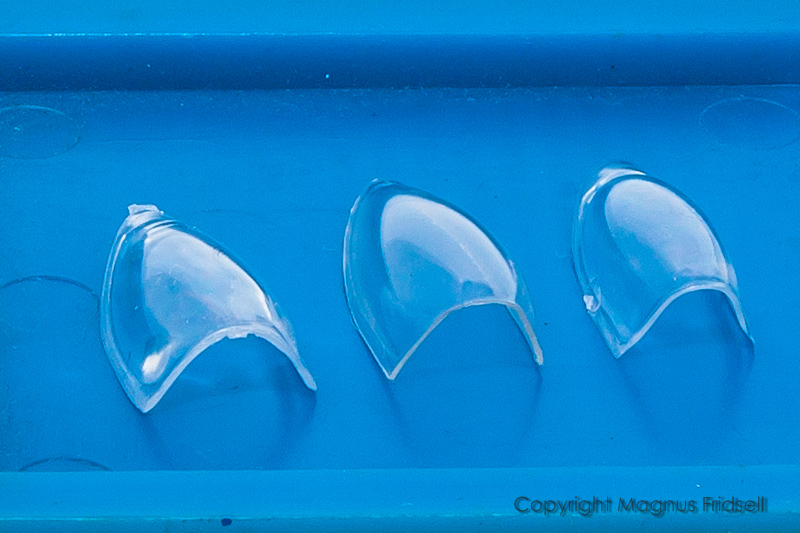
Finally, mostly for fun, I did a digital experiment as well. Using 
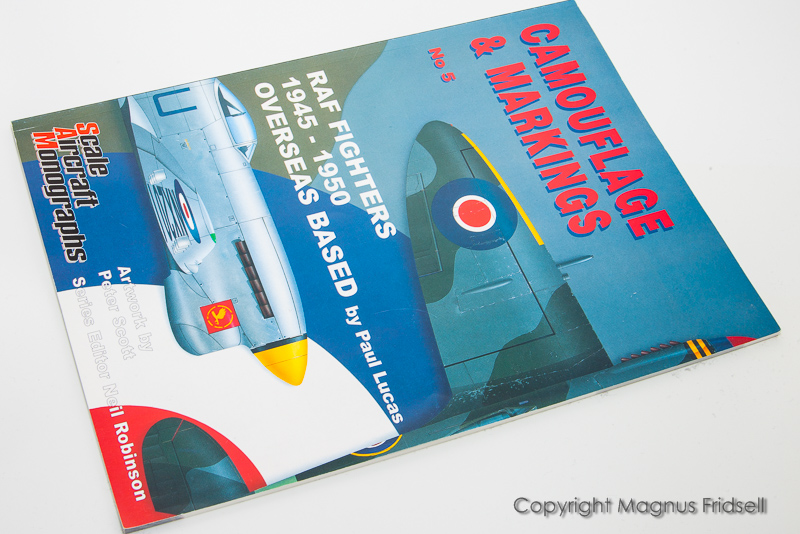
colorserver.net I generated paint samples for the nearest FS equivalents stated in this one:


...and ended up with this:

The one to the left is the FS matches "out of the box" while the other two are "digitally bleached" by putting a layer of white over them with transparency set to 10% and 20%.

So much for this, now on to the Spitfires!


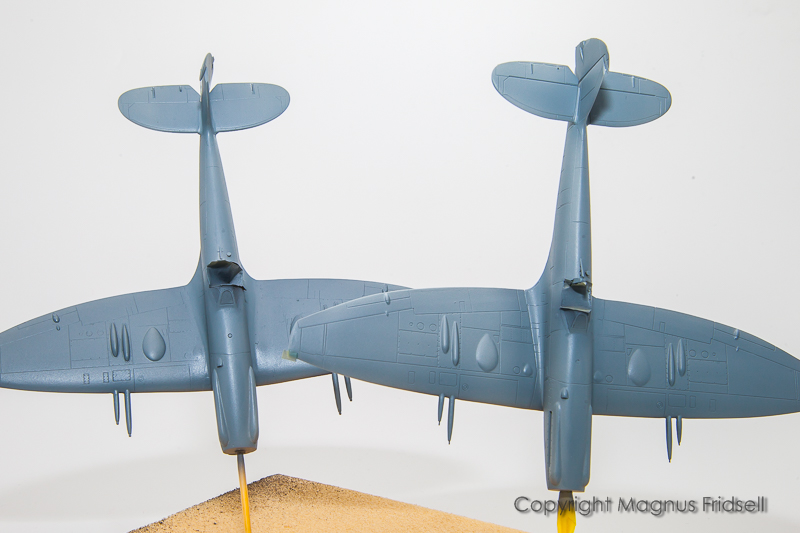
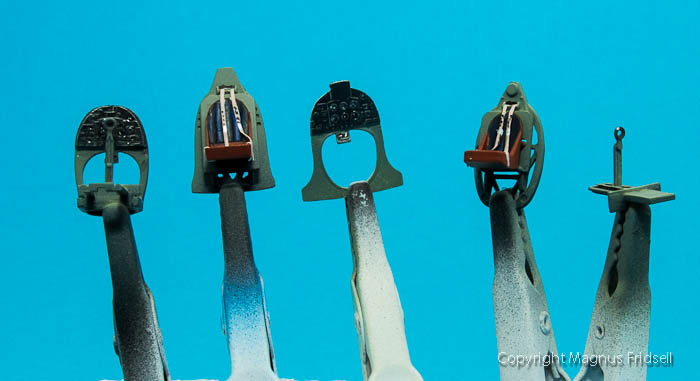
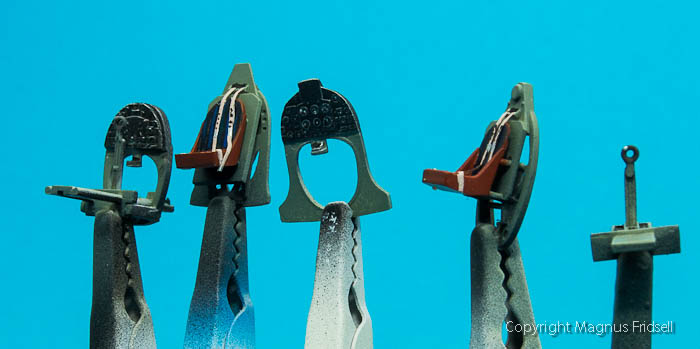
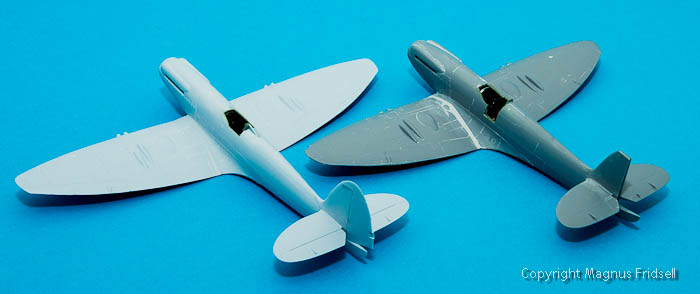
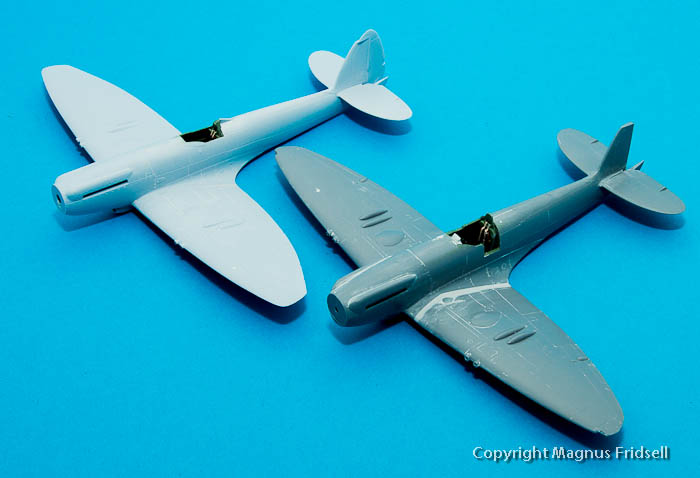
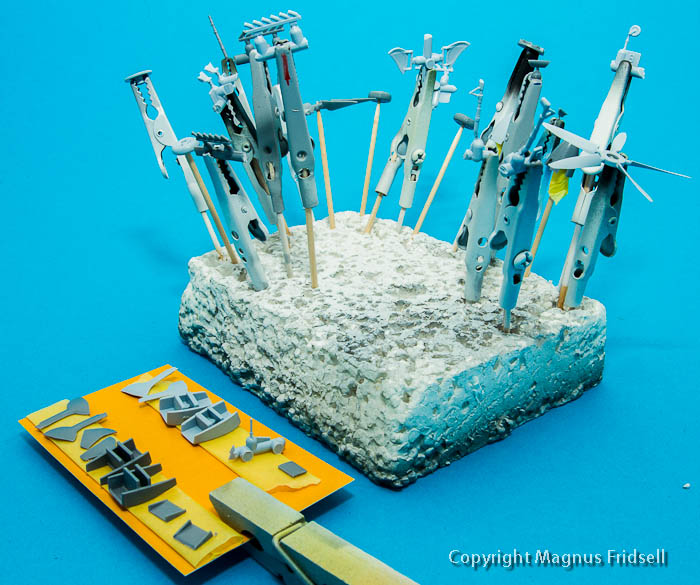
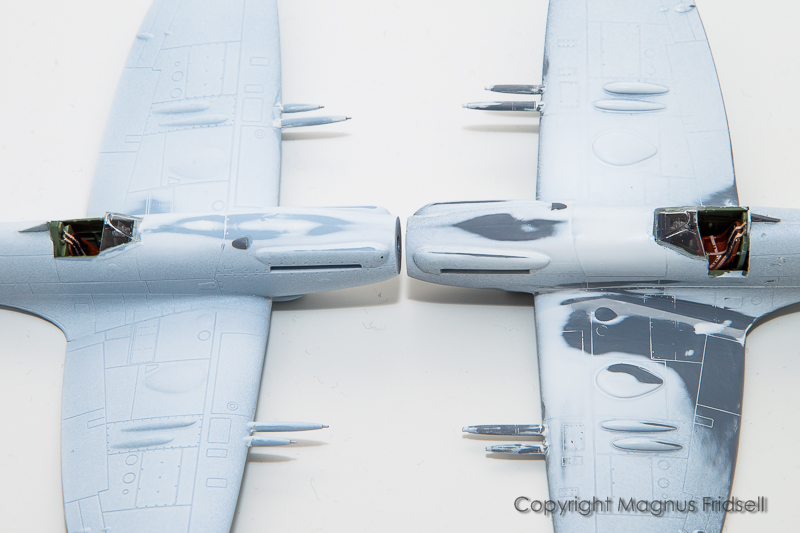
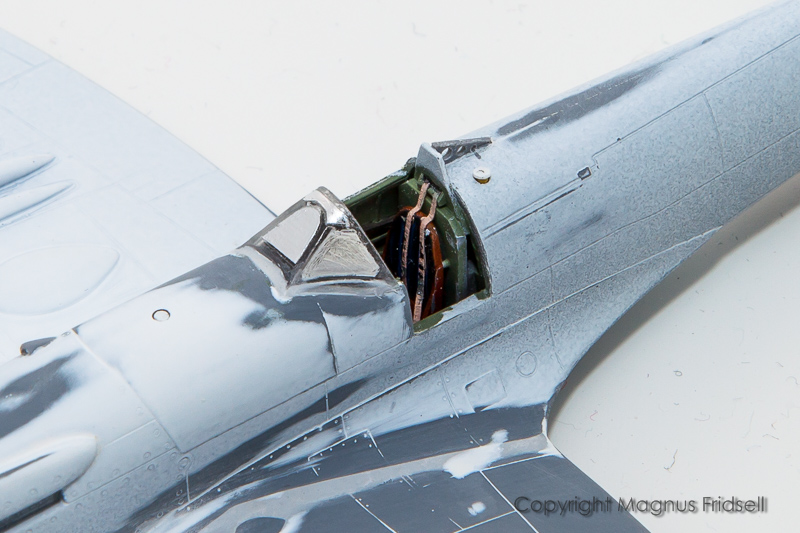
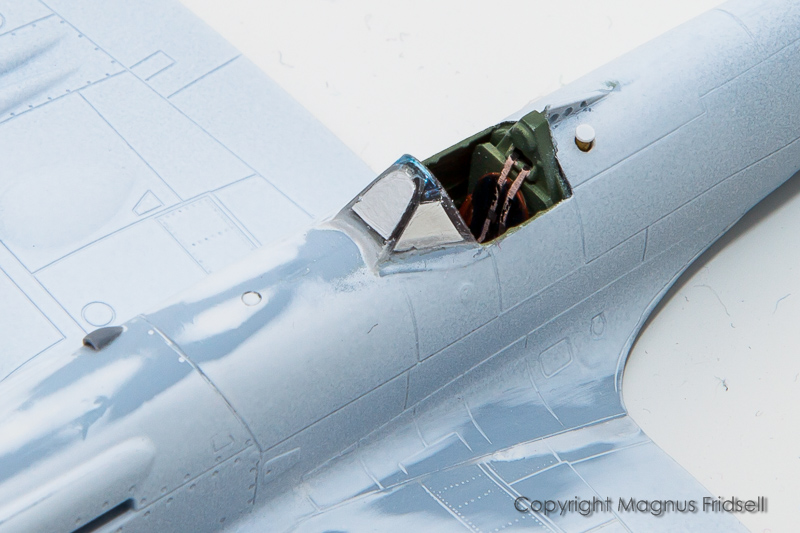
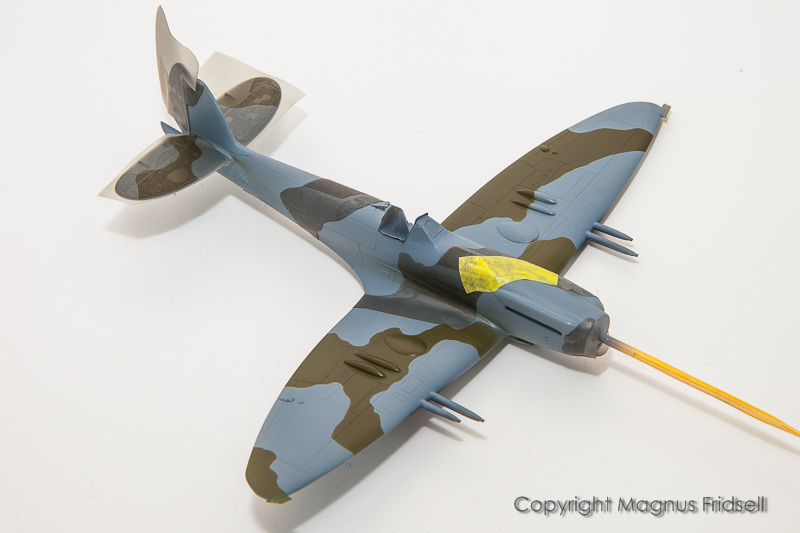
Spits on sticks. In Ocean Grey (or at least my idea about Ocean grey!).


And now for something further that is new to me. I usually like freehanding camouflage, if for nothing else it is great fun! It lends itself best to rather free-flowing lines, I find RAF camo to be a lot "tighter" and more "squiggly" so I decided to go for masks this time. At Telford Mal told me about this masking film that I was able to get from a supplier here in Sweden. Their minimum order was 3 meters on the roll and it is about the width of a bed sheet, sticking to 1/72 I have masking film to outlast my stash and probably this millennium as well ! It wasn't expensive though (about the price of five rolls of Tamiya tape!) so it's more a question of logistics and storage than money...

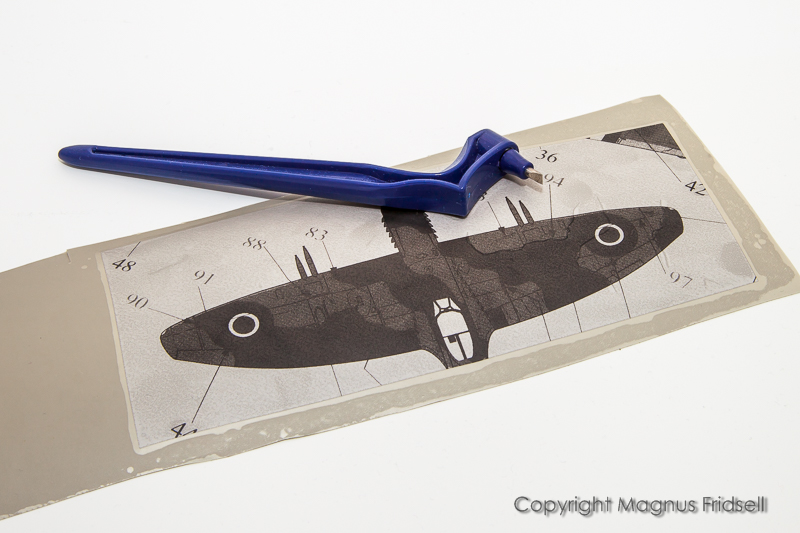
I resized and copied the top view from Xtradecal's instruction sheet and slipped it between the adhesive film and the backing and then I took out another thing I brought home from Telford: this absolutely magnificent swivelling craft knife! Cutting the masks was an absolute breeze!


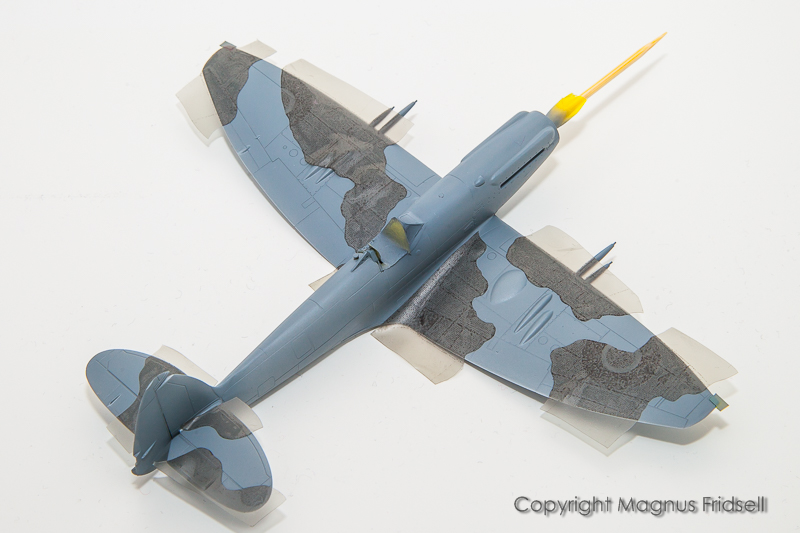
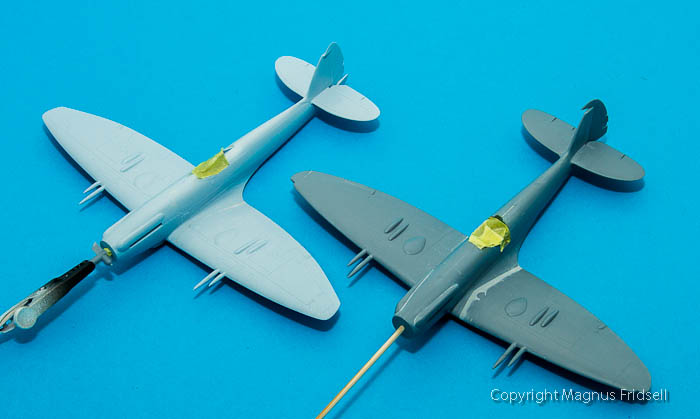
First set of masks in place! They bring with them some of the ink from my printer, that's the reason for the ghost roundel and the panel lines. A stroke of luck really, it makes it even easier to place them!


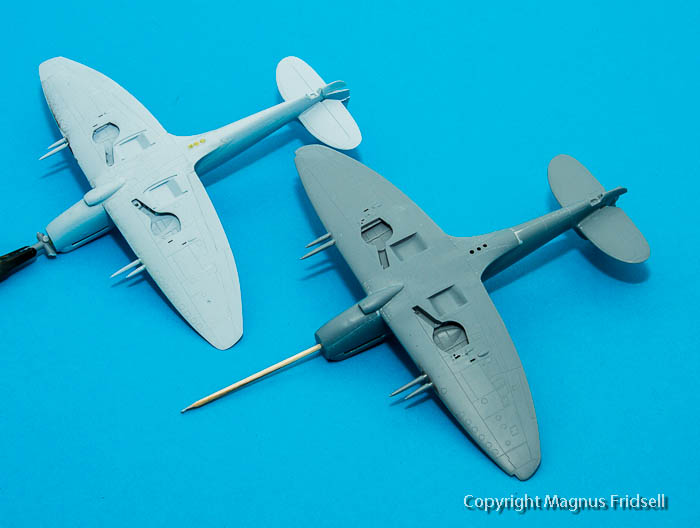
Horizontal surfaces finished and I've masked the fin for more painting. Originally I thought I should do the flat and easy surfaces of the wings and stabilisers and then try freehanding the curved surfaces but I ended up doing it all with masks.


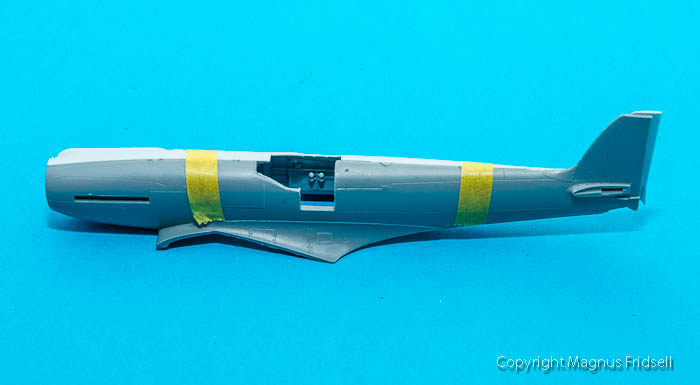
Fuselage done up for painting. I had to use a tiny bit of tape over the nose. The masking film is less sticky than the tape (tape over large areas is VERY sticky so I like this a lot) but also stiffer so it can't be "bent" the way tape can, it has to be cut to shape. Also, I wouldn't recommend doing any cutting while it is on the model, it is rather thick and the risk to ruin the paint below is very real!


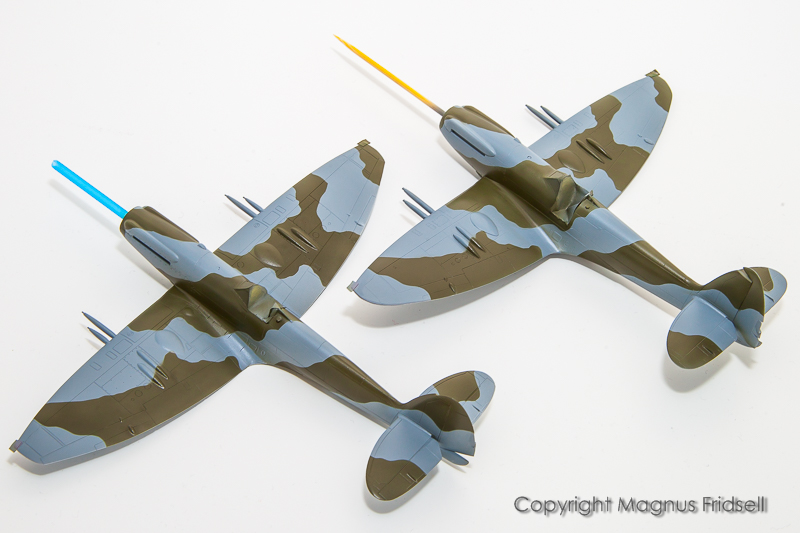
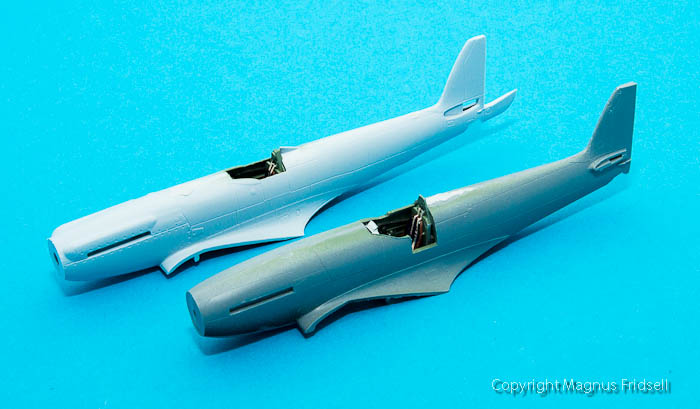
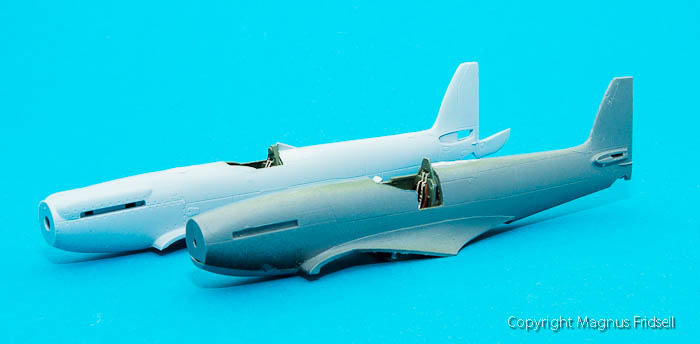
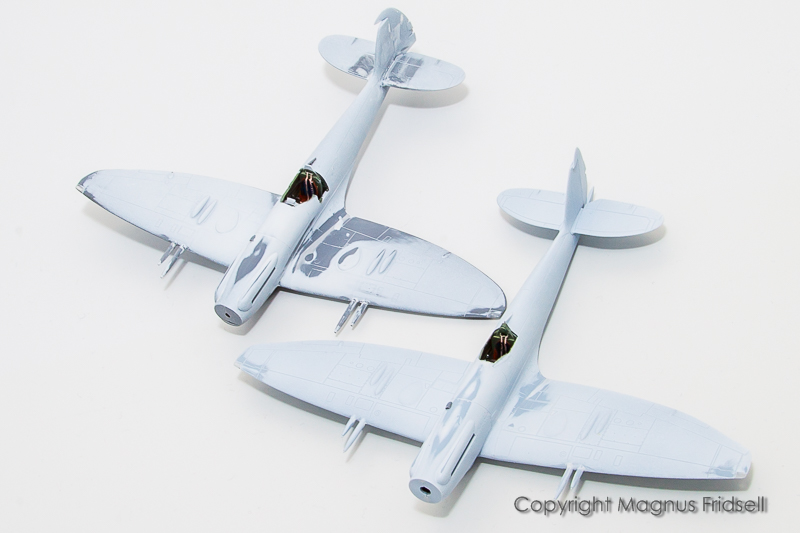
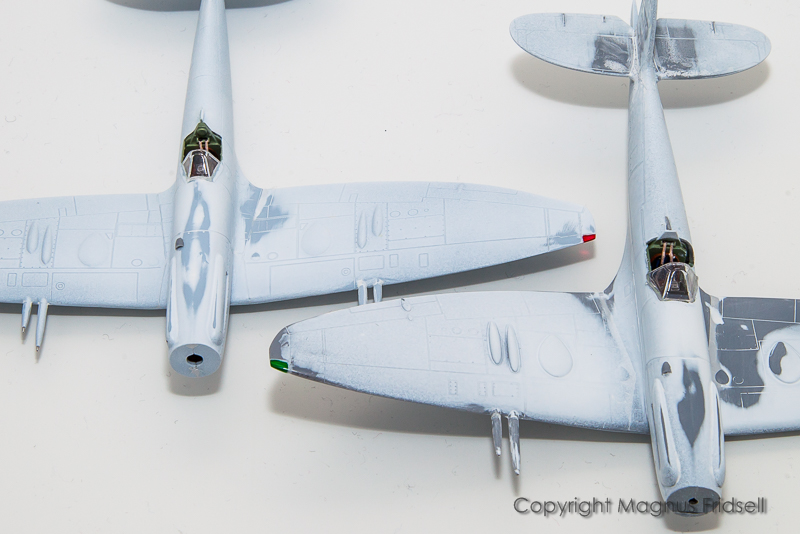
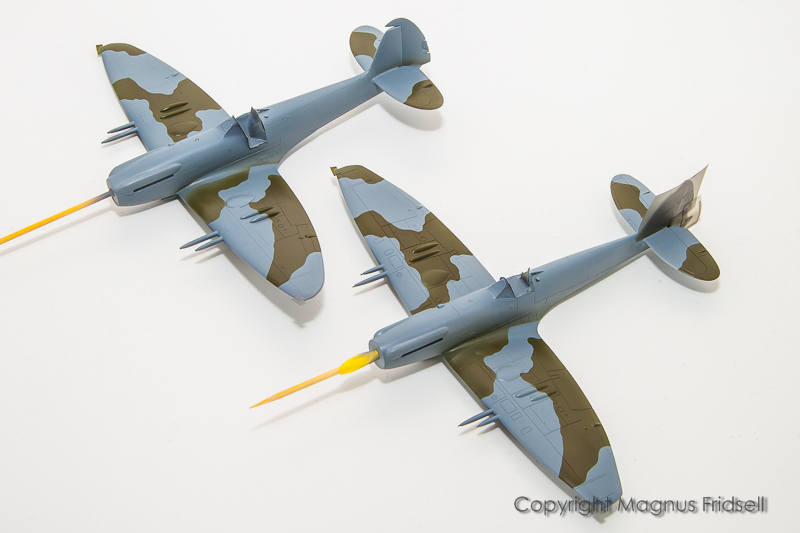
So, the result of last evenings handiwork: two very identical Spitfires. I trust that the markings and weathering will break up the "identical twin" look enough for it not to be too disturbing. And I don't have to put them on the same base plate either !

Sorry for the novel!


Magnus
AussieReg
Staff MemberAssociate Editor
AUTOMODELER
#007
_VISITCOMMUNITY
Victoria, Australia
Joined: June 09, 2009
KitMaker: 8,156 posts
AeroScale: 3,756 posts
Posted: Friday, February 20, 2015 - 04:42 PM UTC
Magnus, you've gone straight from "Parts-on-sticks" to "Spits-on-sticks." There was no "Major-subassemblies-on-sticks" in between, the continuity is all wrong!

Great work on the camo patterns, and a very informative post on how you arrived at these colours. Sure to create some discussion!

Cheers, D
magnusf
_VISITCOMMUNITY
Stockholm, Sweden
Joined: May 02, 2006
KitMaker: 1,953 posts
AeroScale: 1,902 posts
Posted: Friday, February 20, 2015 - 05:06 PM UTC
Damian! Thanks for pointing out the stick discontinuity, they can cause all sorts of trouble so I'll try to avoid them in the future!

Regarding the colours, note that I didn't say they are RIGHT, I only said that I like them and that's more than enough for me !


Magnus
 _GOTOTOP