1/144 Eduard MiG-21 double build!
Stockholm, Sweden
Joined: May 02, 2006
KitMaker: 1,953 posts
AeroScale: 1,902 posts
Posted: Saturday, December 31, 2011 - 03:46 AM UTC
It's MiG-time big-time (sorry, I couldn't resist...)!
I'll do a twin Eduard MiG-build for the
Small is Beautiful campaign. Model has been available for a few months and is a definite must-have!
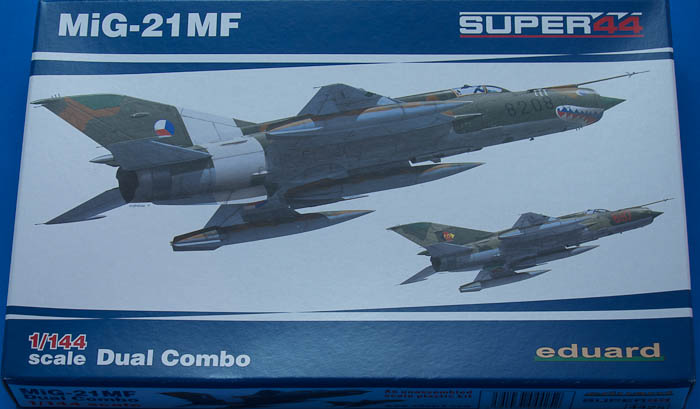
Boxart. Not as smashing at it could be but still rather attractive!
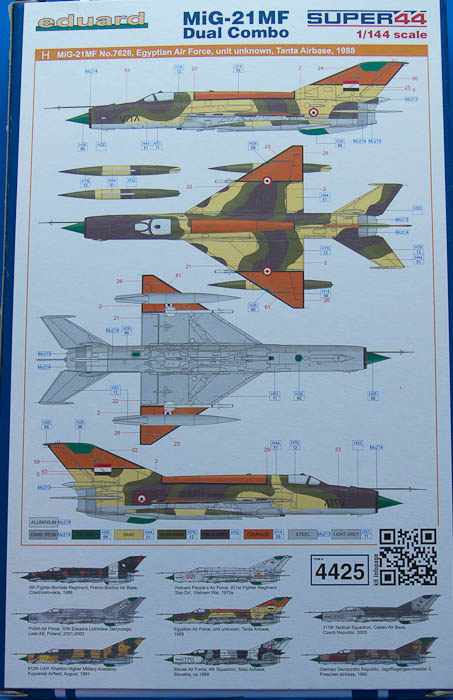
Rear part of the box is actually more attractive, this one is a no-brainer when it comes to picking the first decal option... The other one will be the equally attractive Slovak one that can be seen in the avatar.
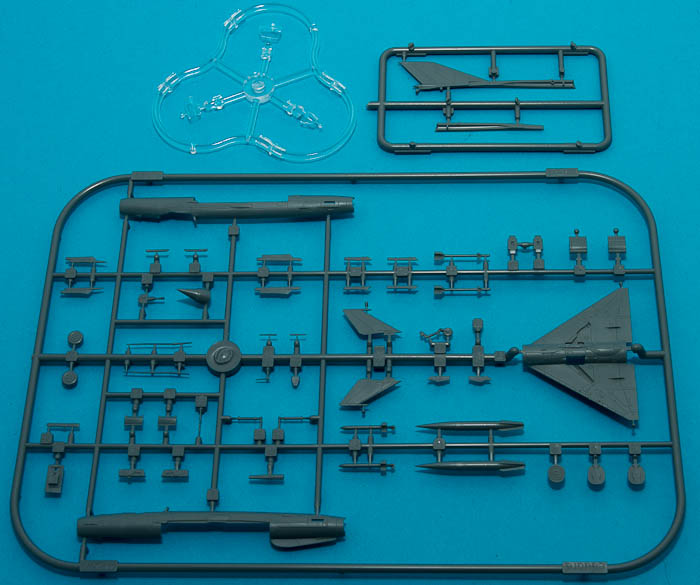
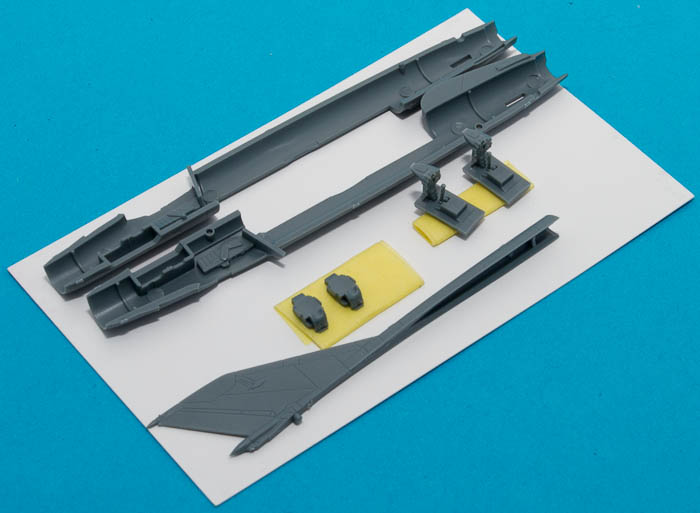
The plastic. It's exquisite!
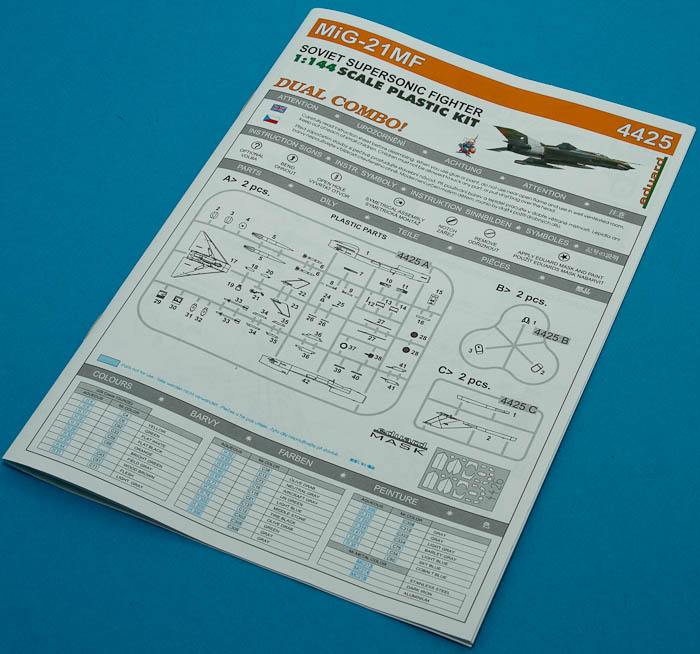
Instructions. Of great literary value as usual when coming from Eduard

!
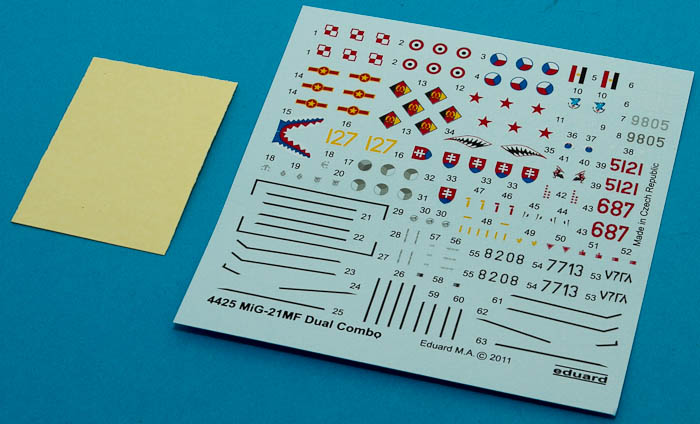
Decal sheet and a set of masks for both models.
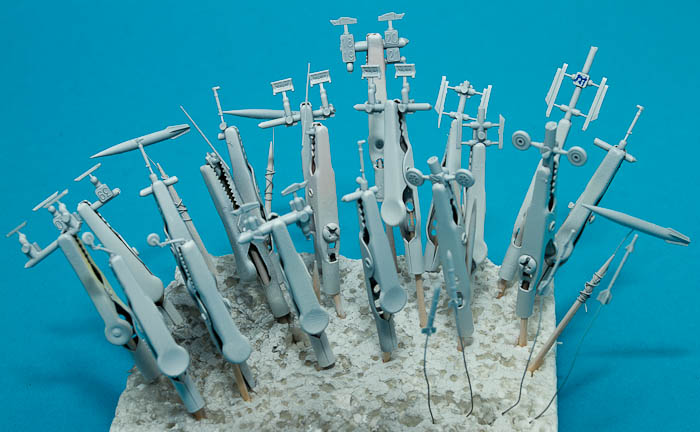
Plastic is still untouched, less than eight hours to go before it is allowed to start though!
Happy New Year to all!

Magnus
Press banner to the right to follow my trail to the new forums!
Roma, Italy
Joined: January 28, 2006
KitMaker: 1,368 posts
AeroScale: 377 posts
Posted: Saturday, December 31, 2011 - 06:34 AM UTC
I wanted to get the big one but for several reasons I got something else... looking forward to see you WIP, Magnus! Happy 2012 everyone!
Stockholm, Sweden
Joined: May 02, 2006
KitMaker: 1,953 posts
AeroScale: 1,902 posts
Posted: Saturday, December 31, 2011 - 10:24 PM UTC
Finally New Year's day!
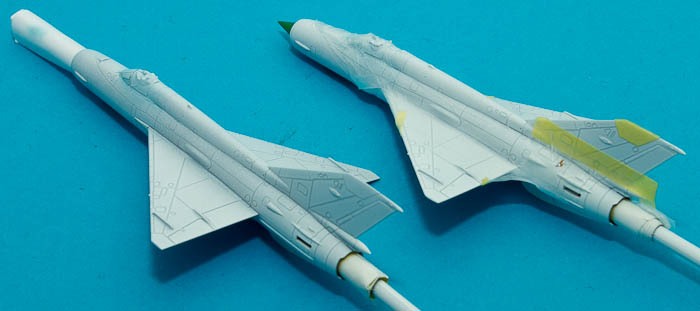
Interior under construction. The white card is a standard-sized business card... I am building both kits in parallell.
Magnus
Press banner to the right to follow my trail to the new forums!
Stockholm, Sweden
Joined: May 02, 2006
KitMaker: 1,953 posts
AeroScale: 1,902 posts
Posted: Monday, January 02, 2012 - 09:01 PM UTC
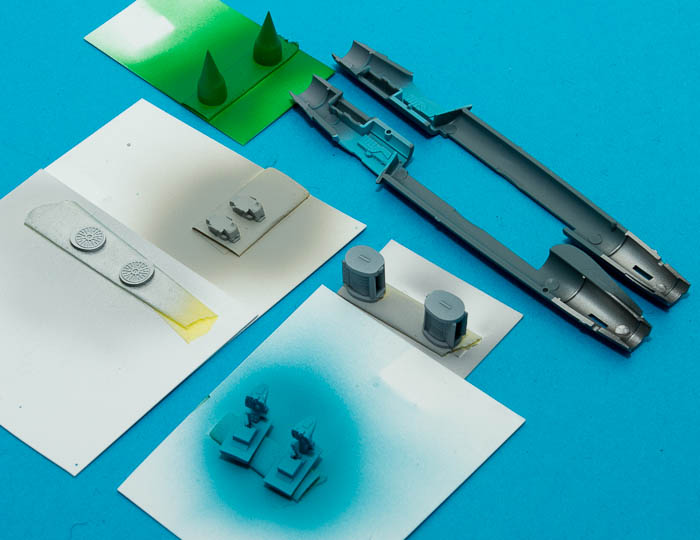
I had a good painting session this morning! A bit of detail work with a paintbrush left to do, then it is time for assembly!
Beware of the Eduard interior paint mix. The result is a very dark paintmix that might be OK for the 1/48 kit! I added a few drops of white and light blue to get something that more suited my taste!
Gunze paint according to the Eduard mixing instructions: 60% H25 + 20% H26 + 20% H35. I added some white H11 and light blue H45. It maybe should have been a bit more greenish but it really doesn't matter on this size of model I think!
Magnus
Press banner to the right to follow my trail to the new forums!
Removed by original poster on 01/03/12 - 21:17:42 (GMT).
Stockholm, Sweden
Joined: May 02, 2006
KitMaker: 1,953 posts
AeroScale: 1,902 posts
Posted: Tuesday, January 03, 2012 - 06:24 PM UTC
It will not surprise me if I can start painting the camo before this week is over!
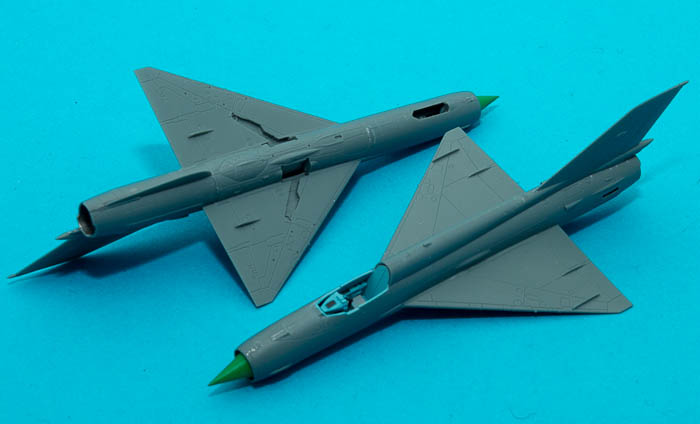
The combined spine/fin part fits magically well, and there is nothing to complain about when it comes to the rest of the model either!
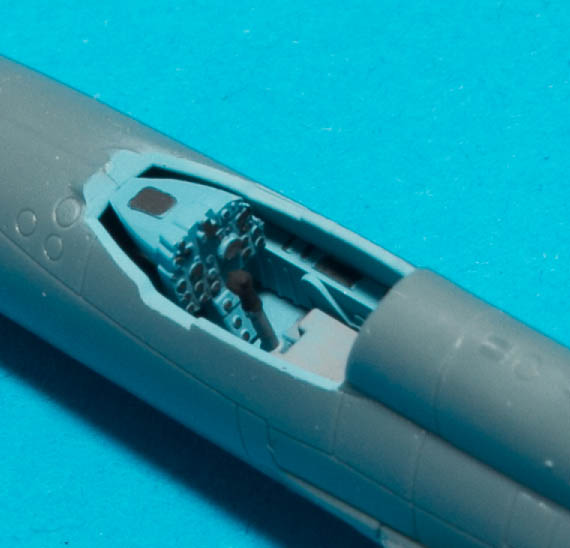
Cockpit was detailed using "off-black" paint. With a bit of extra painting care spent on the bang seats this will be more than enough.
As usual, it pays off to build carefully. Especially in this small scale since (quoting friend Martin) "glue blobs are constant size so the relative size of them compared to the model grows when scale goes down".
Magnus
Press banner to the right to follow my trail to the new forums!
Limburg, Belgium
Joined: October 11, 2010
KitMaker: 14 posts
AeroScale: 9 posts
Posted: Tuesday, January 03, 2012 - 11:18 PM UTC
Nice build!
I have build the big brother in 1/48 in the same Slovak camouflage scheme, it's very attractive.
I'm curious to see the finished kit.
ronald
Stockholm, Sweden
Joined: May 02, 2006
KitMaker: 1,953 posts
AeroScale: 1,902 posts
Posted: Wednesday, January 04, 2012 - 07:06 PM UTC
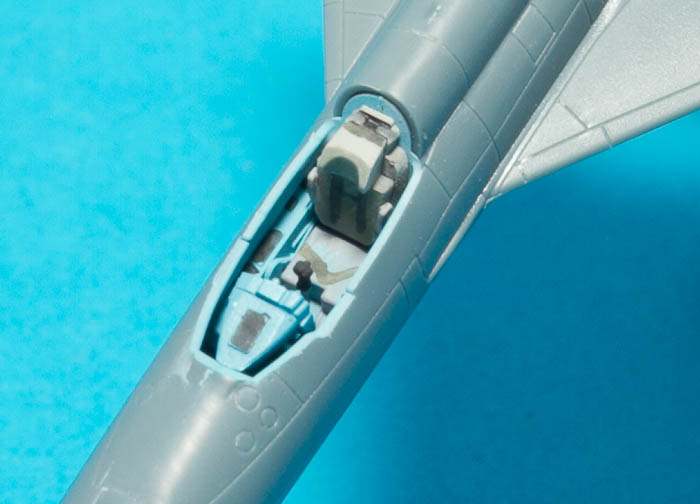
Even if the russian seats probably were excellent when it came to life saving capabilities, painting-wise they are quite boring! I went for a few different shades of beige and grey as per photos found on the Internet...
Canopy is on! One of my least favourite parts of a build, finished before breakfast this time!
Magnus
Press banner to the right to follow my trail to the new forums!
Stockholm, Sweden
Joined: May 02, 2006
KitMaker: 1,953 posts
AeroScale: 1,902 posts
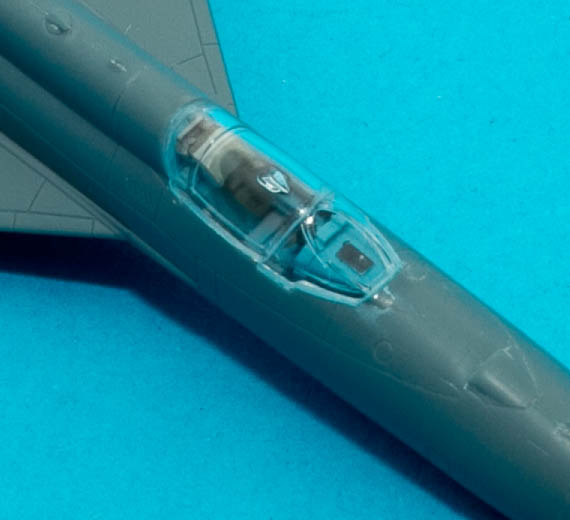
Posted: Friday, January 06, 2012 - 09:35 AM UTC
Canopy masks applied. Works like a charm! It was a bit tricky to mask snugly around the periscope using liquid mask but any mistakes can be touched up using a paintbrush easily later when the masks are removed.

A bit of interior colour to avoid see-through to the camouflage... That canopy really looks ill-fitting but very little of this is noticeable at normal eyesight and viewing distance. What I would like to have done differently is the fit of the spine to the fuselage, pressing it down a bit harder would have avoided the step between the canopy and the spine. I'll leave it as it is since I don't want to mess with putty and probably only make matters worse!
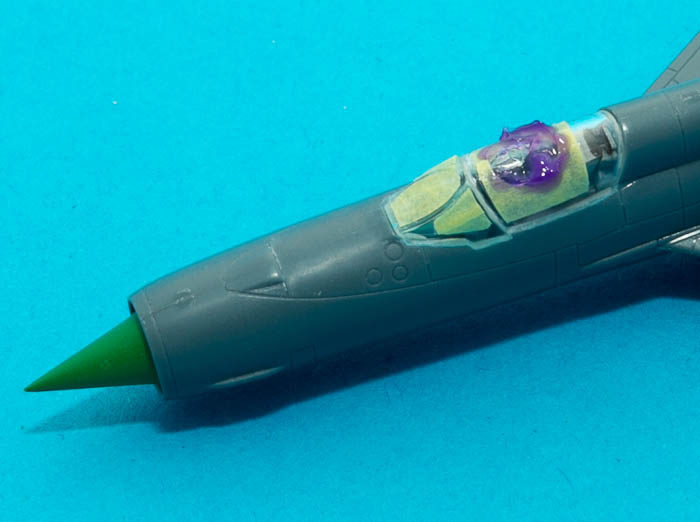
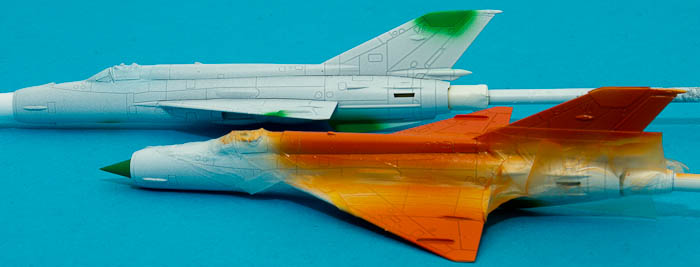
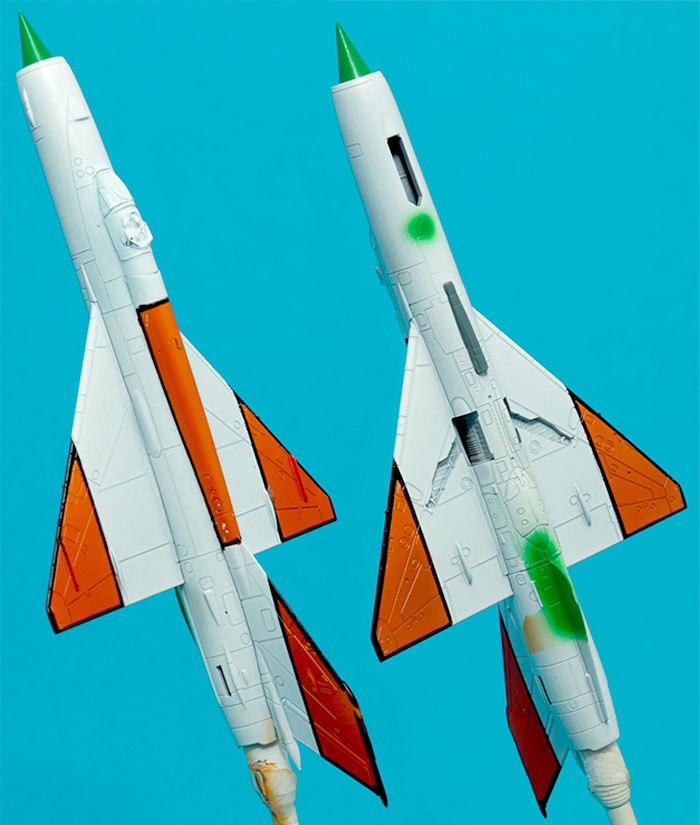
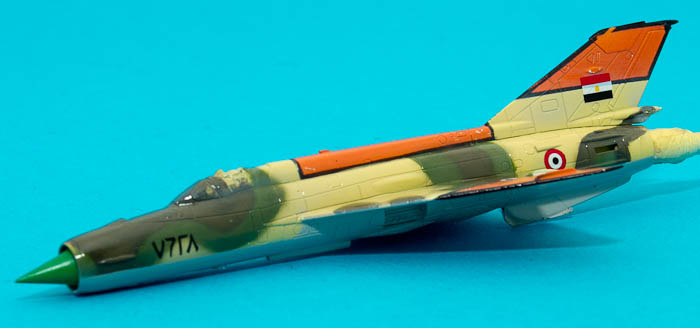
After a coat of Tamiya Fine White primer, masking is in progress for applying the orange fields of the Egyptian option!
Magnus
Press banner to the right to follow my trail to the new forums!
Stockholm, Sweden
Joined: May 02, 2006
KitMaker: 1,953 posts
AeroScale: 1,902 posts
Posted: Friday, January 06, 2012 - 09:34 PM UTC
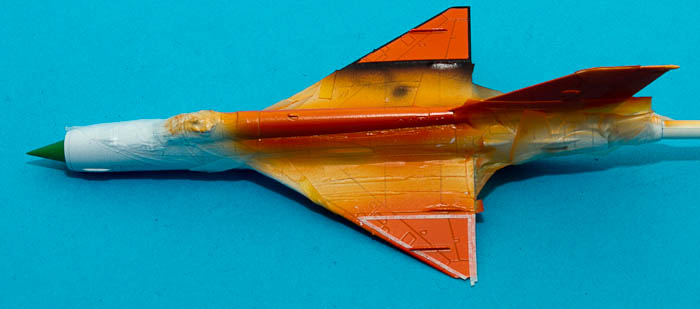
Let's go orange!
I masked the green dielectric panels so that I don't have to paint them over an orange background later. With a bit of luck I will be able to use the inverse of the masks for that!
Paint mix is Tamiya orange X-6 with about 10% of X-7 red added.
I haven't decided if I should try to mask and paint the black borders or if I should use the decal stripes supplied with the kit...
Magnus
Press banner to the right to follow my trail to the new forums!
Stockholm, Sweden
Joined: May 02, 2006
KitMaker: 1,953 posts
AeroScale: 1,902 posts
Posted: Saturday, January 07, 2012 - 09:44 AM UTC
An evening of masking using thin stripes of Jammydog tape...
I went for painted-on stripes. I've checked against the decals and the thinnest Jammydog-tape (0,5 mm) fits perfectly. I start by applying a strip of tape where the line should be, then I use that strip as a ruler and apply the "real" masking strip, then finally removing the first one. This way I end up with all the lines the same width. Or at least reasonably so...
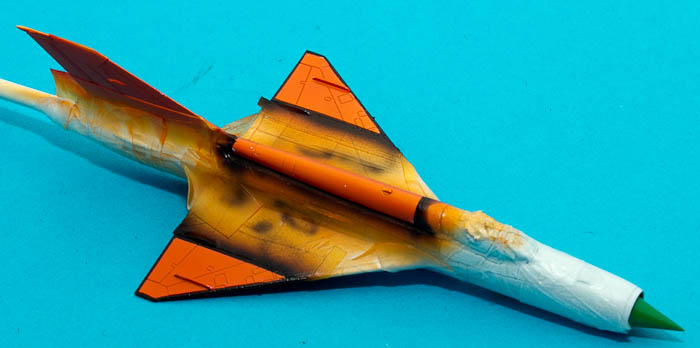
Since the masking is a bit fragile, I've done this operation one panel at the time. Fin and lower wing panels still to do.
Magnus
Press banner to the right to follow my trail to the new forums!
Stockholm, Sweden
Joined: May 02, 2006
KitMaker: 1,953 posts
AeroScale: 1,902 posts
Posted: Saturday, January 07, 2012 - 09:57 PM UTC
I've overdosed on orange, I really look forward to doing some old-fashioned camo painting now
!
My wife thinks it looks like one of those South American poison dart frogs... A bit of touch-ups to do on the quite fragile orange finish.
Magnus
Press banner to the right to follow my trail to the new forums!
AussieReg
 Associate Editor
#007
Victoria, Australia
Joined: June 09, 2009
KitMaker: 8,156 posts
AeroScale: 3,756 posts
Posted: Saturday, January 07, 2012 - 10:21 PM UTC
Looking great Magnus, super work in this scale. I doubt whether I would be able to find these little suckers between my big fingers !
Cheers, D
ON the bench
Revell 1/24 '53 Corvette (building as '54)
Revell 1/24 BMW 507 Coupe and Cabrio
Italeri 1/48 Me262 B-1a/U1 Nightfighter
Monogram 1/24 '57 Chevy Nomad
Dragon 1/350 USS Frank Knox DD-742
Stockholm, Sweden
Joined: May 02, 2006
KitMaker: 1,953 posts
AeroScale: 1,902 posts
Posted: Sunday, January 08, 2012 - 05:18 AM UTC
Quoted Text
Looking great Magnus, super work in this scale. I doubt whether I would be able to find these little suckers between my big fingers !
Cheers, D
Then I would seriously suggest that you stay with the plastic and keep away from the poison dart frogs

!
I've got big fingers myself but being myopic means that I can work really up close (the limiting factor is when my nose gets in the way
) and a pair of good quality tweezers help as well!
Magnus
Press banner to the right to follow my trail to the new forums!
Stockholm, Sweden
Joined: May 02, 2006
KitMaker: 1,953 posts
AeroScale: 1,902 posts
Posted: Monday, January 09, 2012 - 09:08 AM UTC
Some more painting done!
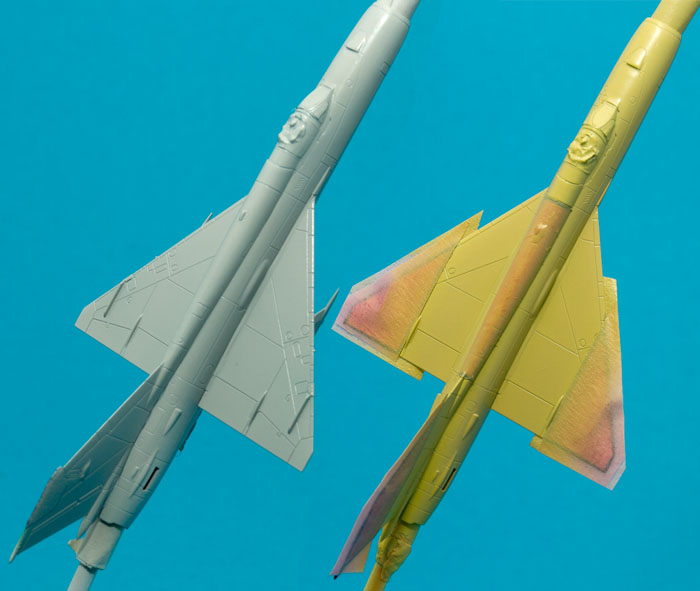
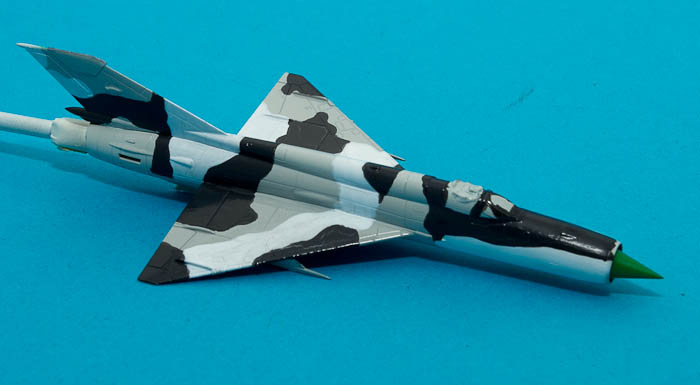
The Slovakian machine got a base coat of grey, to be complemented with black and white later. The Egyptian one got a coat of sand yellow. Or whatever I should call it, it is rather close to the colour on the boxart!
I tried cutting tape masks as a preparation for painting black and white, it didn't work out very well. I am toying with the idea of using Maskol to mask off the grey, paint the white, cover with some more maskol and then do the black. What worries me is the chemical compatibility between the maskol and the underlying paint... I'll think about it until tomorrow!
Magnus
Press banner to the right to follow my trail to the new forums!
Slovenia
Joined: July 27, 2007
KitMaker: 10 posts
AeroScale: 7 posts
Posted: Wednesday, January 11, 2012 - 04:22 AM UTC
Beautiful job so far, Magnus! I am also about to start this little MiGs - and as I got 2 boxes, I'll build 4 of them - two in the markings you chose, one from CSSR and one from Yugoslavia.
Stockholm, Sweden
Joined: May 02, 2006
KitMaker: 1,953 posts
AeroScale: 1,902 posts
Posted: Friday, January 13, 2012 - 10:34 AM UTC
Sebastijan! Thanks! And you won't be disappointed with the kits, they are wonderful. I won't use any etch but it would certainly come in handy for the gear doors.
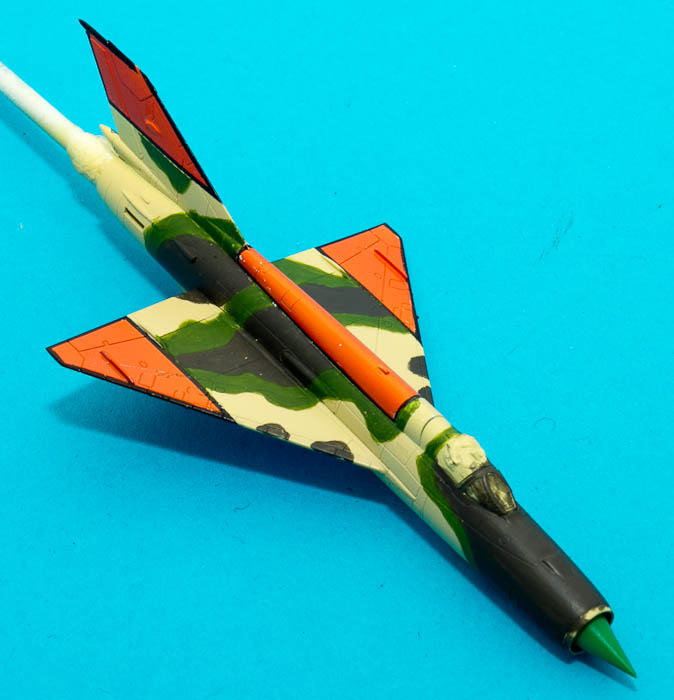
I have brush-painted the camo on the Egyptian aircraft using Vallejo acrylics. I am not sure that it was such an excellent idea after all but what I do know is that I will not use Maskol for this kind of job: I tried it on my old paint victim and it attacked the underlying paint.

The finish is slightly uneven but I will try polishing it tomorrow and then bleach and fill in the colours with the airbrush.
I still haven't decided how to do the Slovakian machine. Brush painting white doesn't feel like a viable option... I'll see if I can get hold of a bottle of Fasmask, that might be less aggressive than the Maskol.
Magnus
Press banner to the right to follow my trail to the new forums!
Uusimaa, Finland
Joined: March 30, 2004
KitMaker: 2,845 posts
AeroScale: 1,564 posts
Posted: Friday, January 13, 2012 - 11:30 AM UTC
Coming along very nicely!

For the Slovakian machine, why not airbrush the white areas first, then do the rest the good old fashioned way?
Or if you'd prefer airbrushing everything, have you considered white-tac for masking?

Stockholm, Sweden
Joined: May 02, 2006
KitMaker: 1,953 posts
AeroScale: 1,902 posts
Posted: Saturday, January 14, 2012 - 09:55 AM UTC
Eetu! Nice to hear from you, it has been a while
! I have bought a packet of tack today for the Slovakian machine, thanks for your advice! I was out looking for Fasmask or the stuff that watercolour painters use but I couldn't find it in the neighbourhood so I went for tack instead. I have never been a fan of it but I'll give it a chance again, it was a long time since last time!
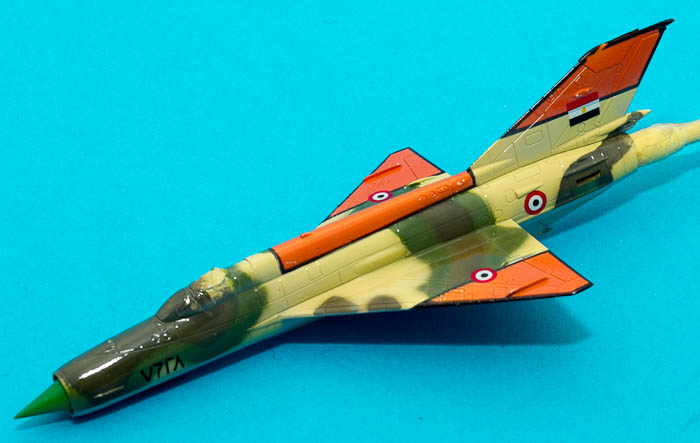
I managed to get the brush-painted finish reasonably even using polishing cloths, then I over-painted it using the airbrush. I would say the result is about "acceptable" and I will refrain from trying to brush-paint in the future. I am no good at it and I much prefer the airbrush!
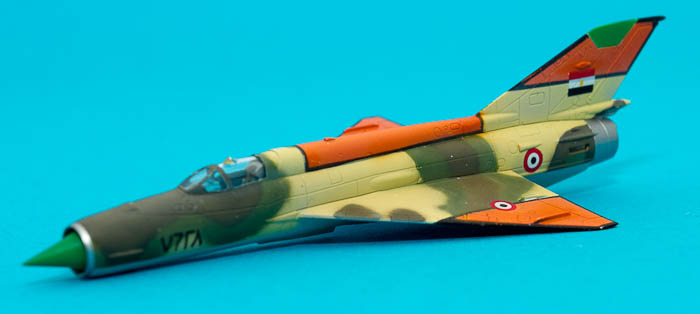
Not too many decals on this one but the ones supplied are, like everything else about this kit, excellent!
Magnus
Press banner to the right to follow my trail to the new forums!
Uusimaa, Finland
Joined: March 30, 2004
KitMaker: 2,845 posts
AeroScale: 1,564 posts
Posted: Monday, January 16, 2012 - 05:58 AM UTC
Yep, it's indeed been a while since I posted pretty much anything. Been quite busy, started my English studies and all. I haven't practically touched a thing on my workbench since early September 2011.
Your build's looking good. Definitely better after the airbrush touch-up.
Stockholm, Sweden
Joined: May 02, 2006
KitMaker: 1,953 posts
AeroScale: 1,902 posts
Posted: Wednesday, January 18, 2012 - 08:55 AM UTC
Eetu! Good luck with your studies, try to get an hour now and then at the modelling table, it helps a lot
! Regarding the touch-ups: I should never have tried the paintbrush

...
A quite uninteresting update today. It is more of a tradition really, I realise that I have one of those photos in every one of my build blogs! Priming in industrial scale!
When it comes to masking: Fasmask is as bad as Maskol, it strips and discolours the underlying paint
. I'll probably have to try the sticky stuff
!
Magnus
Press banner to the right to follow my trail to the new forums!
Ontario, Canada
Joined: October 14, 2007
KitMaker: 122 posts
AeroScale: 119 posts
Posted: Wednesday, January 18, 2012 - 11:33 AM UTC
I always get a kick out of these "Can't see the forest for the trees" pictures.
Inspiring build (as usual) Magnus!
Stockholm, Sweden
Joined: May 02, 2006
KitMaker: 1,953 posts
AeroScale: 1,902 posts
Posted: Friday, January 20, 2012 - 10:00 AM UTC
Kenneth! Thanks for the kind words! And I promise to continue with my forest photos...

I have managed to paint the drop tanks, or at least the top surfaces of them. I have also painted the metallic nose ring and the area around the exhaust with Games Workshop's "chainmail" - there will be some "mithril silver" when this coat has set thoroughly.
Another view, with a slightly blurred nose. I'm sorry!
Magnus
Press banner to the right to follow my trail to the new forums!
Portugal
Joined: September 11, 2009
KitMaker: 49 posts
AeroScale: 37 posts
Posted: Sunday, January 29, 2012 - 07:38 AM UTC
Looking very good.
José César
Stockholm, Sweden
Joined: May 02, 2006
KitMaker: 1,953 posts
AeroScale: 1,902 posts
Posted: Friday, February 03, 2012 - 03:39 AM UTC
José! Thanks!
I resorted to the brush in this case as well... Masking liquid attacked the paintwork and tack was far to stubborn to shape into tight curves
Magnus
Press banner to the right to follow my trail to the new forums!


