

General Aircraft
This forum is for general aircraft modelling discussions.
This forum is for general aircraft modelling discussions.
Hosted by Jim Starkweather
Help with chipped paint technique

kemo

Joined: October 07, 2006
KitMaker: 112 posts
AeroScale: 16 posts
Posted: Monday, September 05, 2011 - 03:09 AM UTC
Okay, Im an armor guy making an attempt at aircraft. Not going as well as intended, so I need a little advice. Building Hasegawa's A6M3 zero and did some research how to chip the paint. I decided to use the tape method by pulling up the top layer and revealing the aluminum base coat. Ran into an issue...the tape brought up aluminum base along with the top coat. I used acrylics for the aluminum base. Should I have used an enamel or lacquer? Why did this occur? I sealed the aluminum base with future before applying my top coats. I used masking tape, should I have used scotch tape? Any advice would be appreciated.

29Foxtrot

Joined: September 19, 2003
KitMaker: 708 posts
AeroScale: 674 posts

Posted: Monday, September 05, 2011 - 03:52 AM UTC
On the Zero, apply your base coat in either a Laquer or Enamel and let it cure for about 3 -4 weeks before applying a top coat. Tamiya AS-12 is a good lacquer base to use.
Apply Humbrol Maskol with a tooth pic to the area u want to show as Bare Metal and with tape you can peel the paint away once the Maskol is removed.
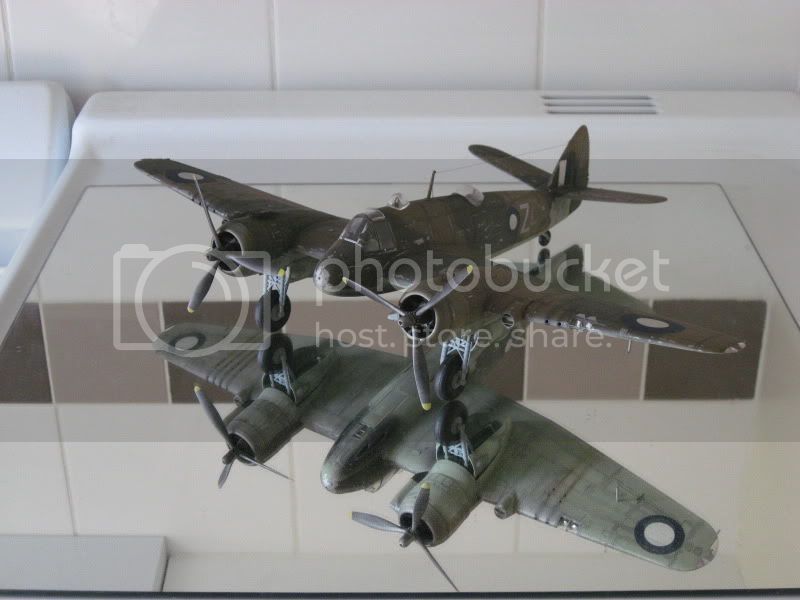
On this Beaufighter, I used Humbrol #191 as the base coat, and Xtra Color for the top coats. I rubbed an emery board over the top coats to get the chipped paint effect, on my build.
Hope this helps a little.
Apply Humbrol Maskol with a tooth pic to the area u want to show as Bare Metal and with tape you can peel the paint away once the Maskol is removed.
On this Beaufighter, I used Humbrol #191 as the base coat, and Xtra Color for the top coats. I rubbed an emery board over the top coats to get the chipped paint effect, on my build.
Hope this helps a little.


Jessie_C


Joined: September 03, 2009
KitMaker: 6,965 posts
AeroScale: 6,247 posts

Posted: Monday, September 05, 2011 - 05:31 AM UTC
When I did my Shiden, I used the tape technique. I sprayed on a silver base coat (Testors plain old sliver spray bomb) and then brushed on Tamiya Japanese Navy Green. I let it dry for about an hour and then applied the tape, gently smoothed parts of it down and quickly ripped it up. I used a dental probe to do the smaller chips. Because the green wasn't completely cured, it easily came up off the silver. I made sure that the silver had penty of time to cure, and also made sure that the plastic under the sliver was clean and free of fingerprints and anything else that may cause the paint not to adhere.


Tomcat31

#042

Joined: November 18, 2006
KitMaker: 2,828 posts
AeroScale: 1,720 posts

Posted: Monday, September 05, 2011 - 10:46 AM UTC
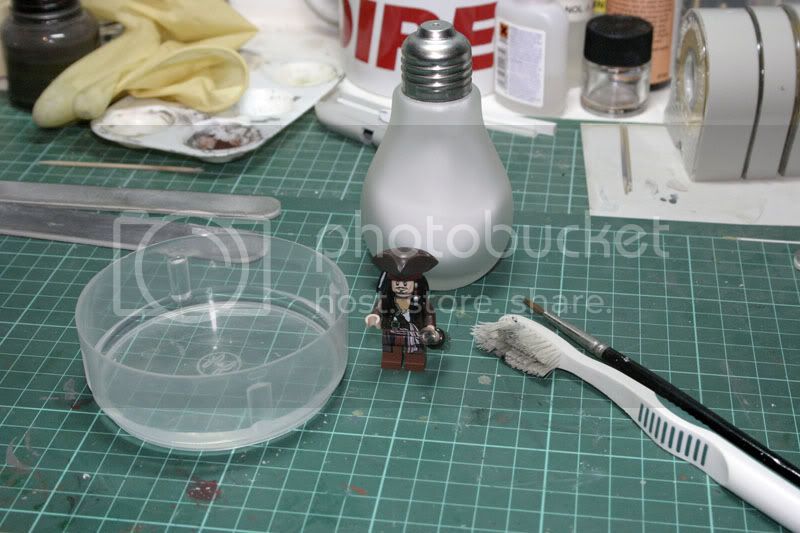
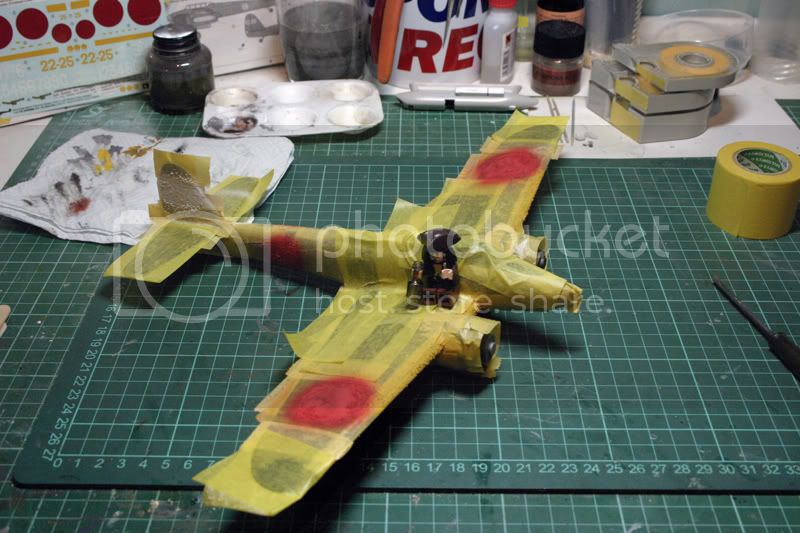
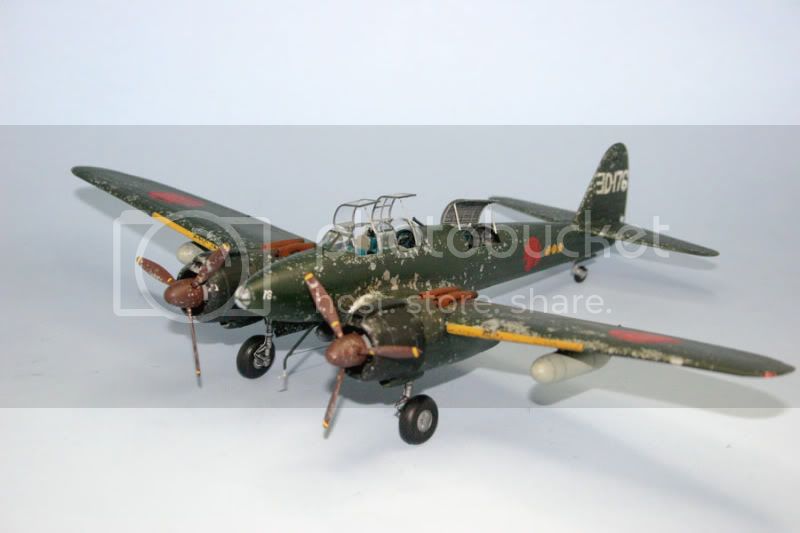
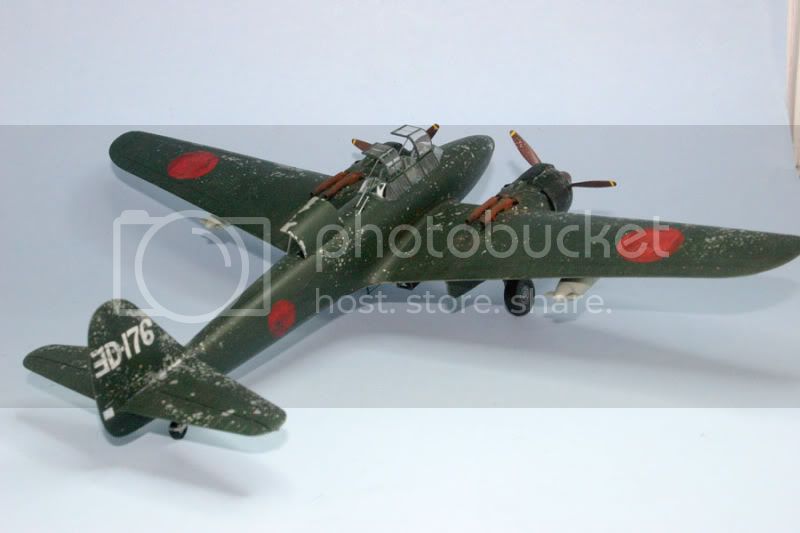
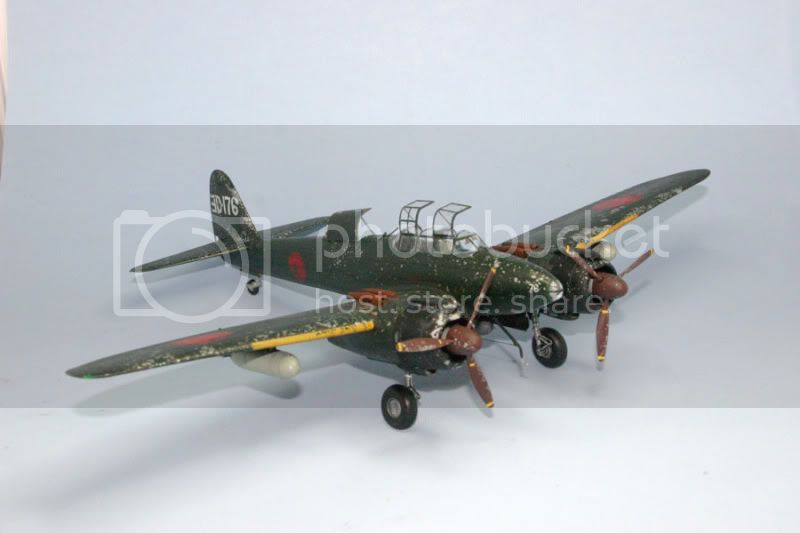
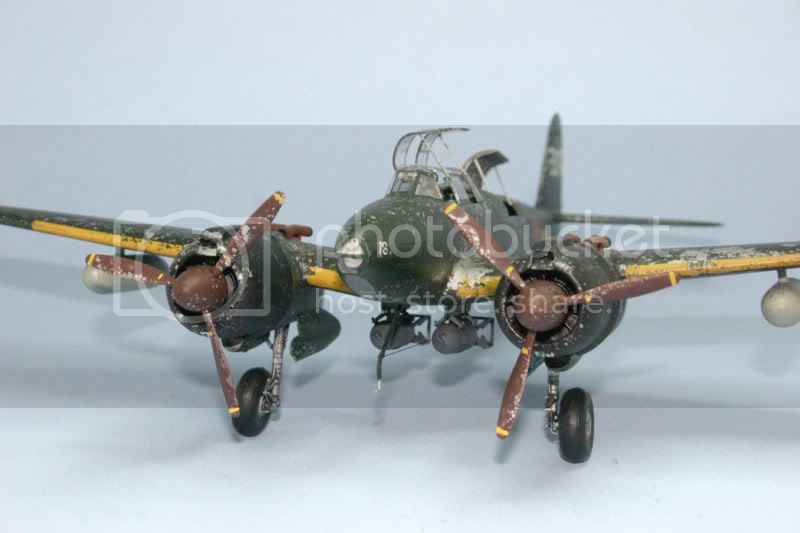
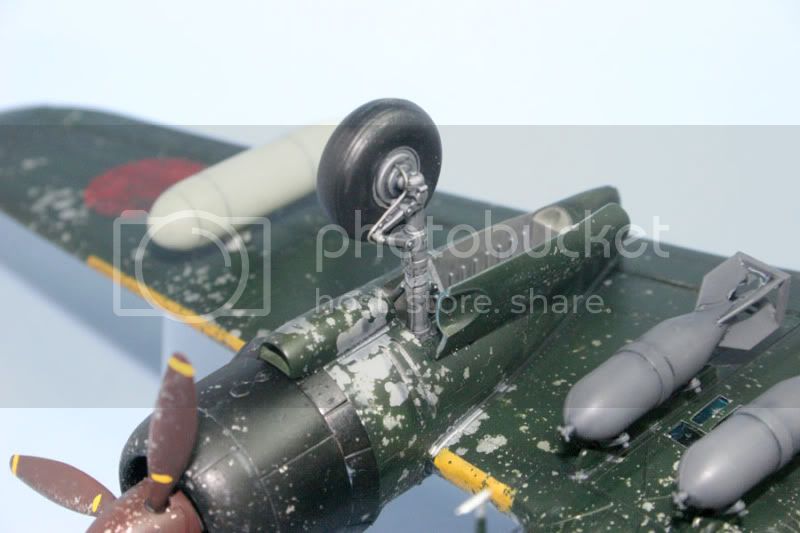
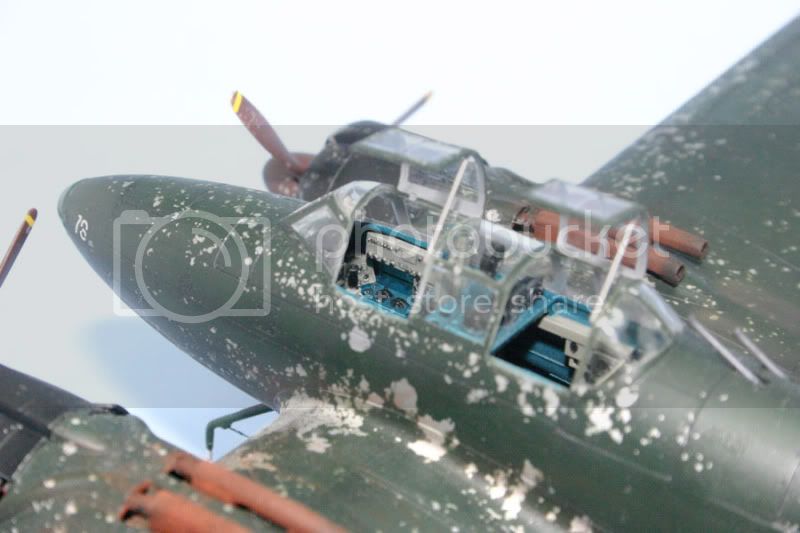
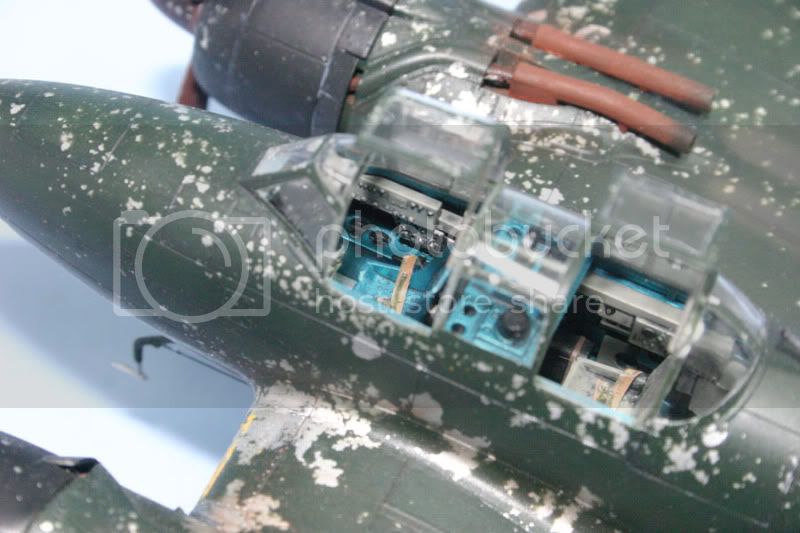
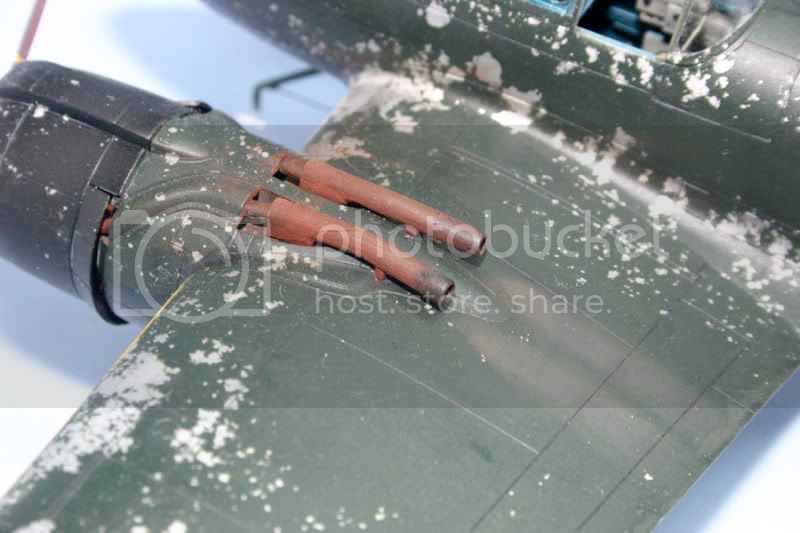
I recently had the same dilemma, I had heard of the salt weathering technique so i gave it a try on my Gekko for the Zerstorer campaign. This was my first attempt at this 
First you need some water, salt (in the shaker that looks like a light bulb), an old toothbrush and a small paint brush
The technique seems quiet simple wet the toothbrush with the water and flick it onto the surface then sprinkle the salt on. For larger patches of weather area just dab water on with the paint brush instead the salt should set with the water almost instantly.
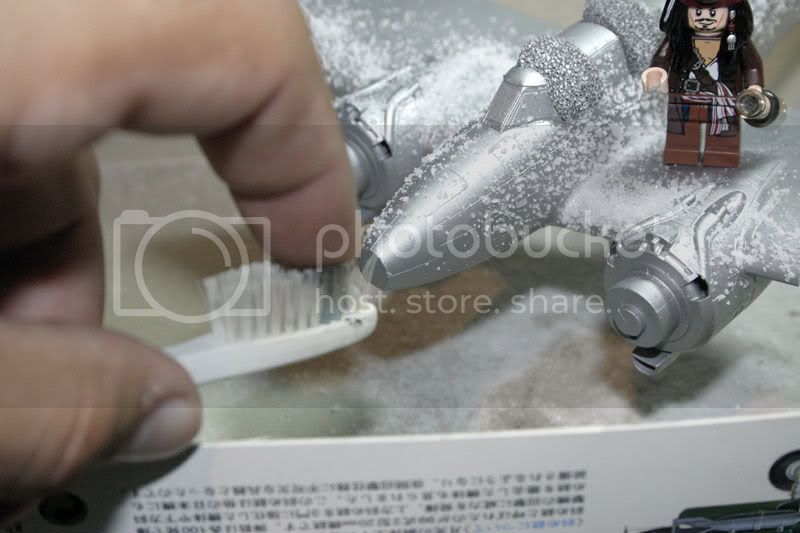
I left the salt to dry over night and then knocked of any excess area that i didn't want chipping with a cotton bud (Q-tip)
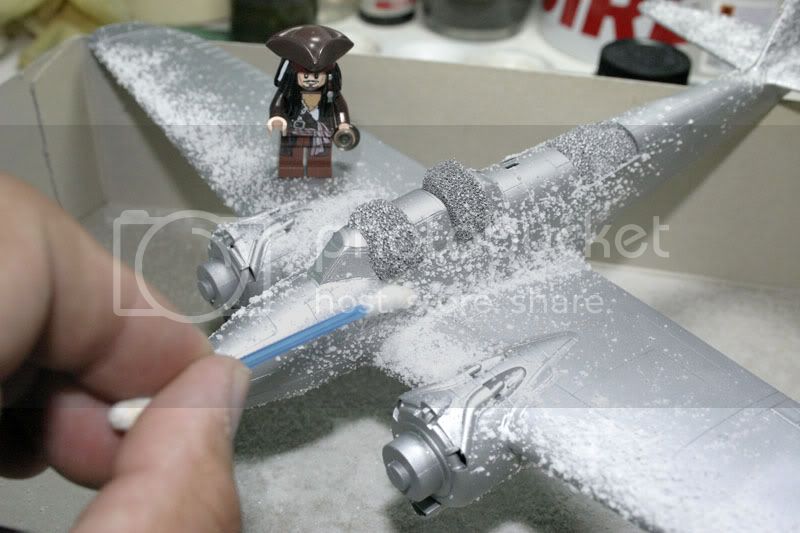
Once happy it went to the spray bay. As it's an overall green I decided to pre shade the panels with black in the hope it'll break up the monotony of the colour. At this point I realised that the salt masking is very fragile and some fell off or blew off with the airbrush before the paint got near it. So take care not to knock it all off or put extra on to start with.
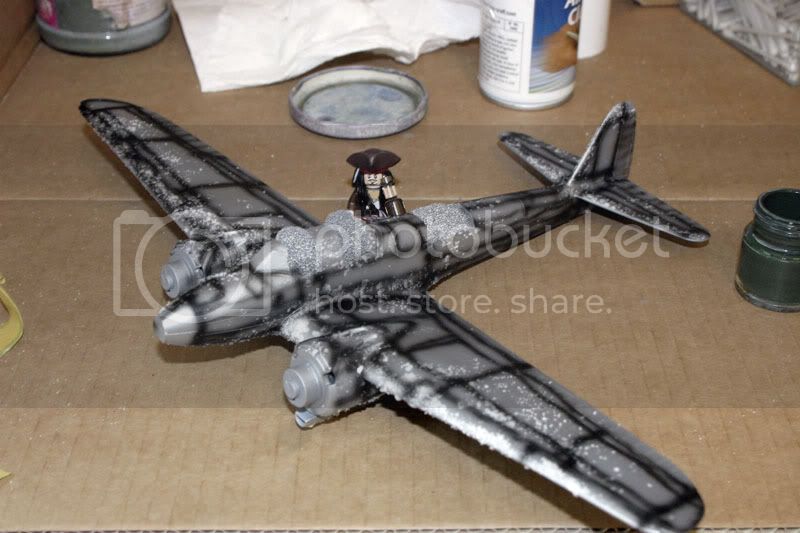
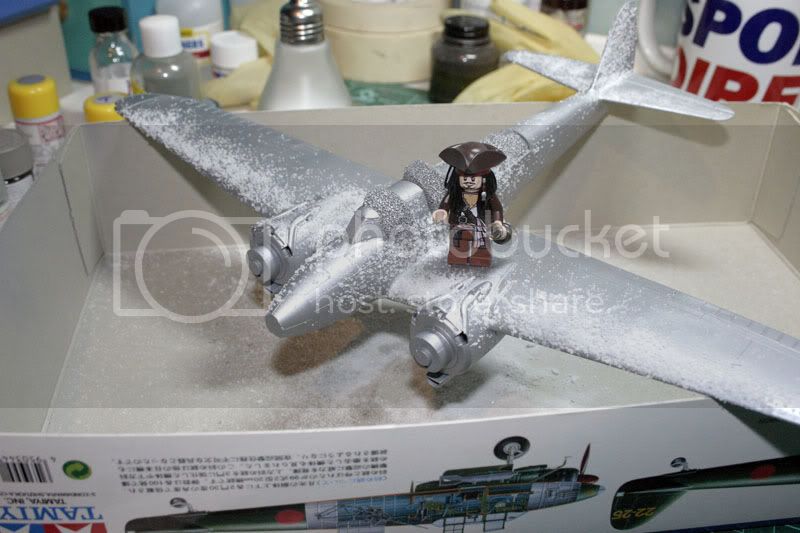
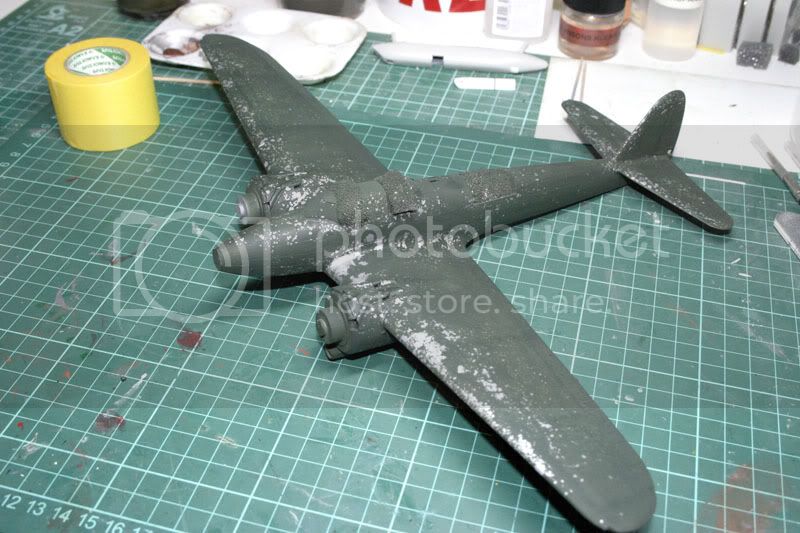
And then the coat of Tamiya XF-11 J.N. Green was applied in light coats to build up the colour but not hide the pre-shade too much. Before the paint had fully dried I got the toothbrush and scrubbed the salt off. I'm not sure if its meant to do this but the scrubbing not only removed the salt but has also left a patchy appearance to the paint as well... bonus
The gun bay door was a result of applying the water with a brush
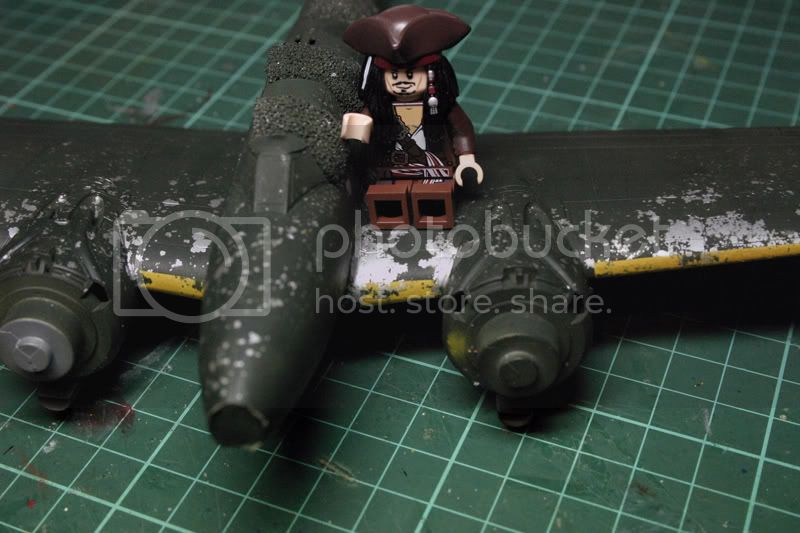
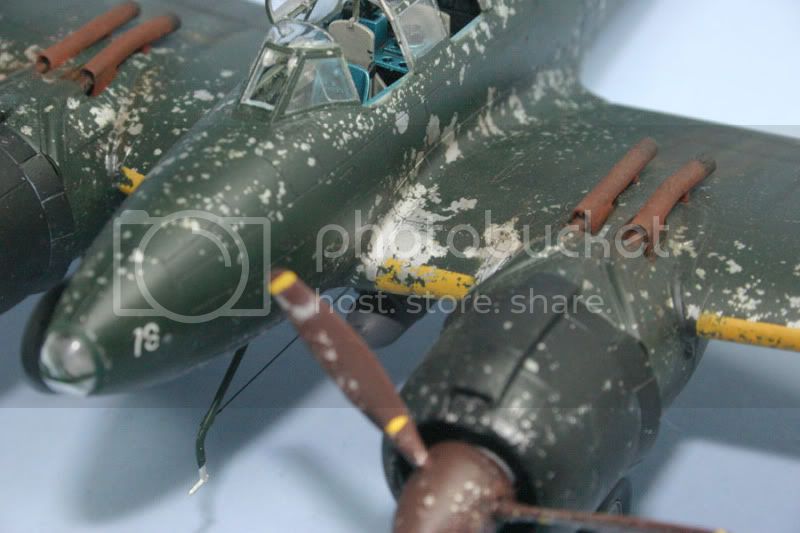
The engine nacelles got a similar treatment but were sprayed with XF-18 Semi Gloss Black but the salt was harder to remove (i think it maybe the paint that caused this)
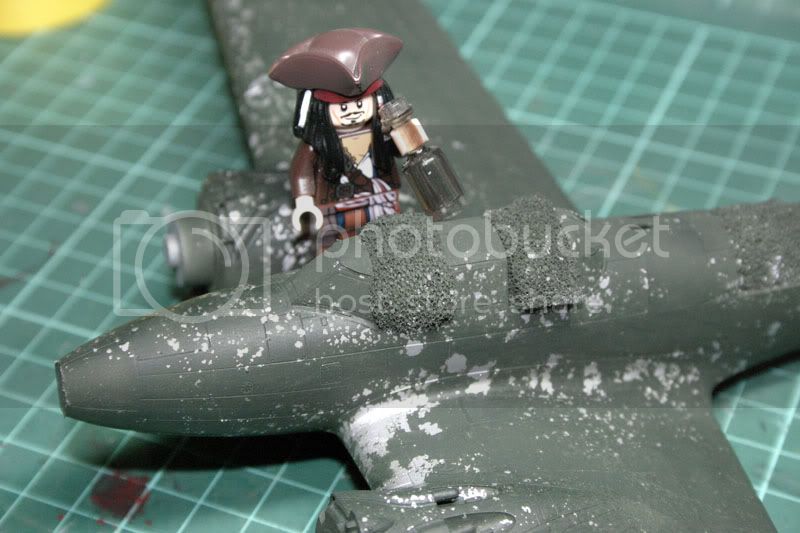
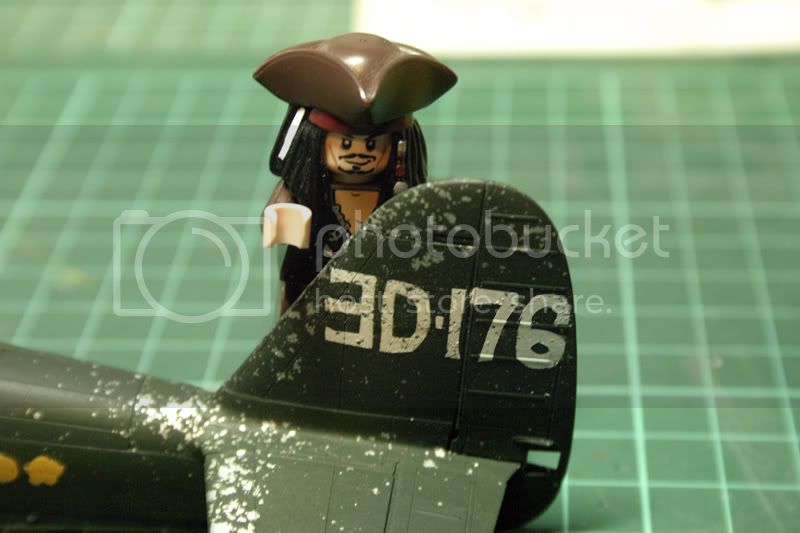
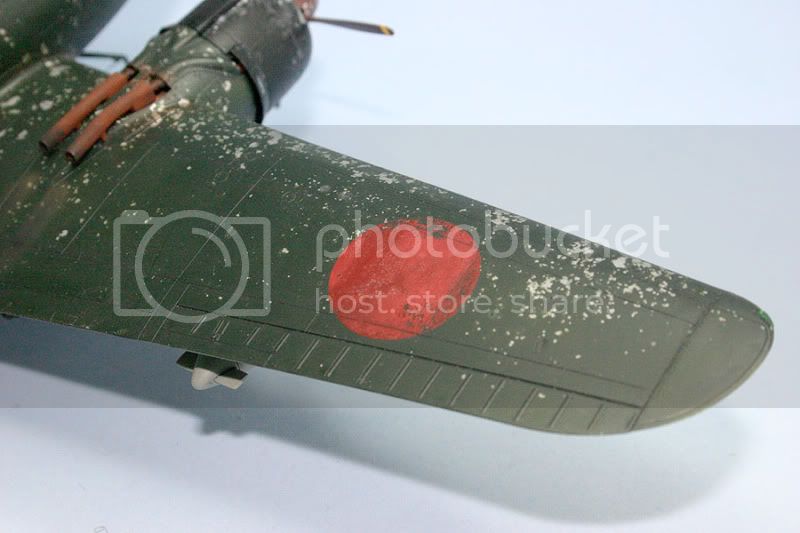
I also made my own masks for the Hinomaru's, Leading edge ID and the tail code as I wanted to salt weather these as well. Ideally I would have used Mal's Miracle Masks but I knew he's very busy at the moment..
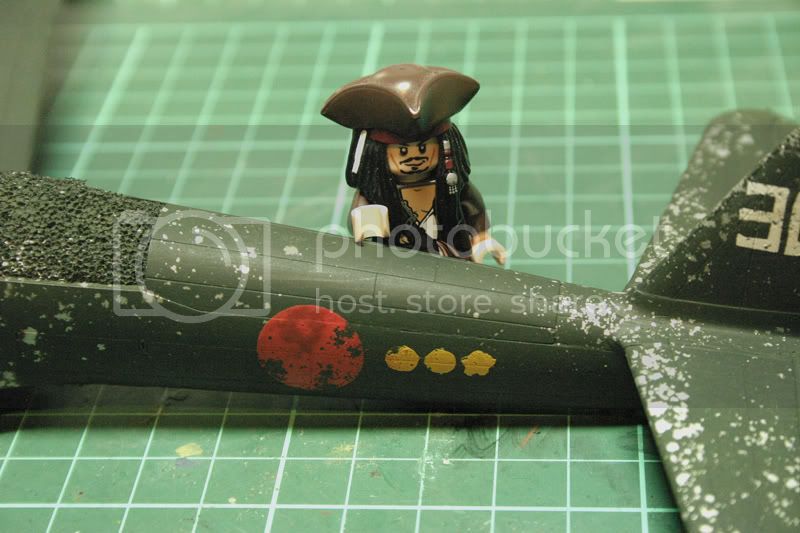
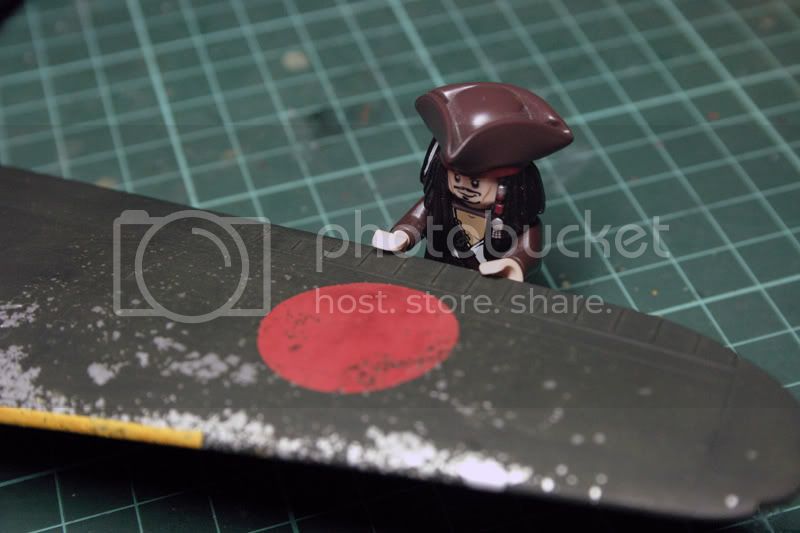
I taped the decal sheet to the back of some clear plastic-card and then made them out of Tamiya tape. I then masked everywhere else,Salt weathered and then sprayed the various areas in their respective colours. The Hinomaru's were Tamiya XF-7 Red, the Leading edges Tamiya XF-3 Flat Yellow with a drop of XF-64 Red Brown and the serials are Tamiya XF-2 Flat White
Then all the salt and masking was removed and this was the outcome
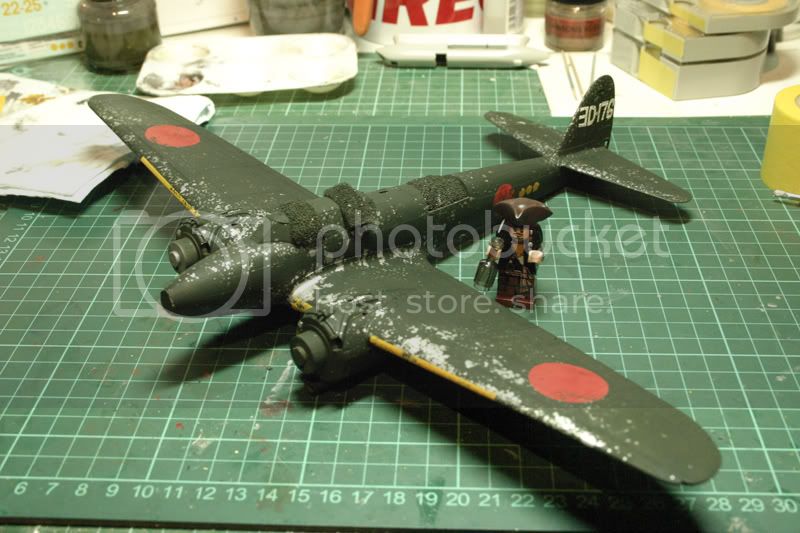
Again the water and salt had a funny affect to the paint but Sam and I think it adds a bit of extra weathering to it
And finally pictures of the finished plane


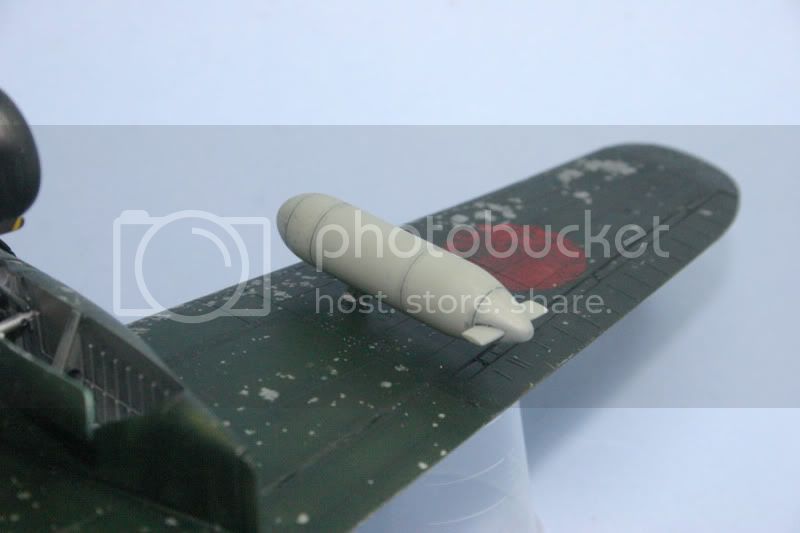

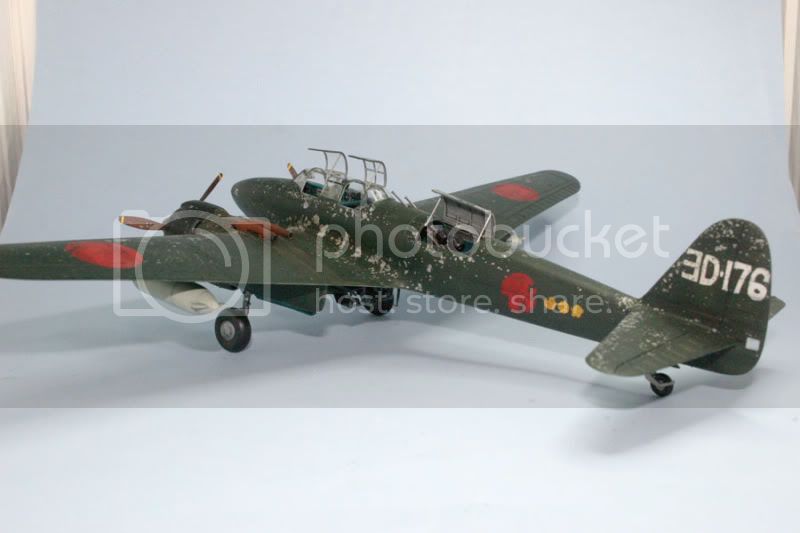
Hope this helps
First you need some water, salt (in the shaker that looks like a light bulb), an old toothbrush and a small paint brush
The technique seems quiet simple wet the toothbrush with the water and flick it onto the surface then sprinkle the salt on. For larger patches of weather area just dab water on with the paint brush instead the salt should set with the water almost instantly.
I left the salt to dry over night and then knocked of any excess area that i didn't want chipping with a cotton bud (Q-tip)
Once happy it went to the spray bay. As it's an overall green I decided to pre shade the panels with black in the hope it'll break up the monotony of the colour. At this point I realised that the salt masking is very fragile and some fell off or blew off with the airbrush before the paint got near it. So take care not to knock it all off or put extra on to start with.
And then the coat of Tamiya XF-11 J.N. Green was applied in light coats to build up the colour but not hide the pre-shade too much. Before the paint had fully dried I got the toothbrush and scrubbed the salt off. I'm not sure if its meant to do this but the scrubbing not only removed the salt but has also left a patchy appearance to the paint as well... bonus
The gun bay door was a result of applying the water with a brush
The engine nacelles got a similar treatment but were sprayed with XF-18 Semi Gloss Black but the salt was harder to remove (i think it maybe the paint that caused this)
I also made my own masks for the Hinomaru's, Leading edge ID and the tail code as I wanted to salt weather these as well. Ideally I would have used Mal's Miracle Masks but I knew he's very busy at the moment..
I taped the decal sheet to the back of some clear plastic-card and then made them out of Tamiya tape. I then masked everywhere else,Salt weathered and then sprayed the various areas in their respective colours. The Hinomaru's were Tamiya XF-7 Red, the Leading edges Tamiya XF-3 Flat Yellow with a drop of XF-64 Red Brown and the serials are Tamiya XF-2 Flat White
Then all the salt and masking was removed and this was the outcome
Again the water and salt had a funny affect to the paint but Sam and I think it adds a bit of extra weathering to it
And finally pictures of the finished plane
Hope this helps


Magpie
Joined: July 10, 2011
KitMaker: 653 posts
AeroScale: 165 posts

Posted: Saturday, September 24, 2011 - 03:09 PM UTC
Great technique Allen very realistic effect.
Can you use any Lego or does it have to be Cap'n Jack Sparra ?
Can you use any Lego or does it have to be Cap'n Jack Sparra ?
 |

WEB HOSTING BY


Copyright ©2021 AeroScale and Kitmaker Network, a subsidiary of Silver Star Enterprises
All Rights Reserved. Please read our Conditions of Use and Privacy Policy.
All Rights Reserved. Please read our Conditions of Use and Privacy Policy.