1/72 Dewoitine D.520 "weekend build"
Stockholm, Sweden
Joined: May 02, 2006
KitMaker: 1,953 posts
AeroScale: 1,902 posts
Posted: Friday, October 03, 2008 - 05:25 AM UTC
I have always wondered how people who did the reviews in FSM managed to build a model in ten hours. Since I haven't started my
Battle for Europe project this is a golden opportunity to see if I can do it! Ten hours isn't important but I would like to be able to put a finished model in the display cabinet not later than Sunday evening!
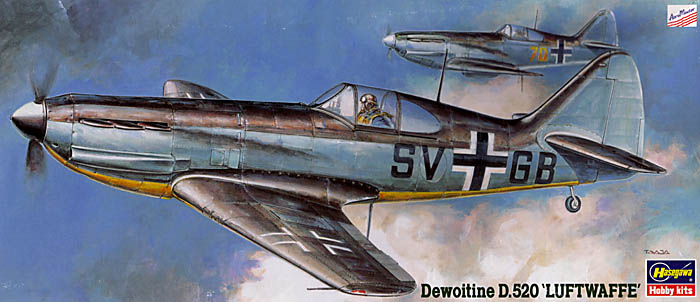
The Hasegawa D.520 is probably the easiest kit I have ever built (I did one in 1999). Fit is excellent, there are few parts and the paint scheme can be done freehand with the airbrush. And it fits the campaign well!
The kit has been in my stash for almost a decade, this is a special issue with Aeromaster decals for German and Italian aircraft. I will use a scheme from the spring of 1940, I haven't decided exactly which one yet.
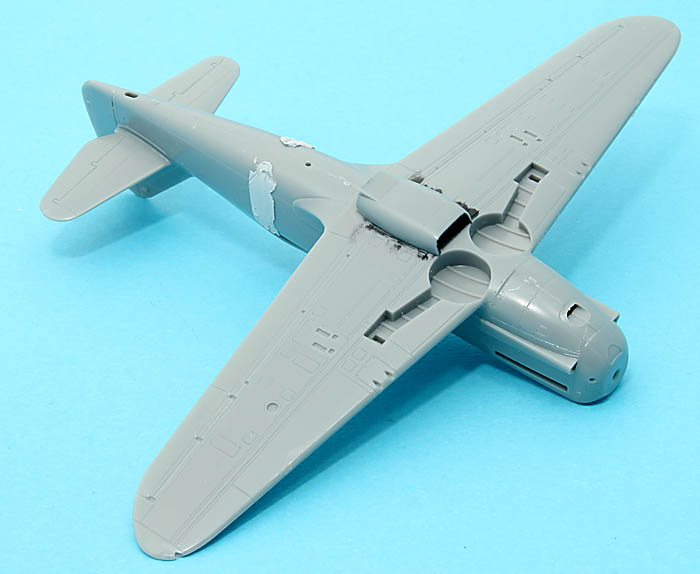
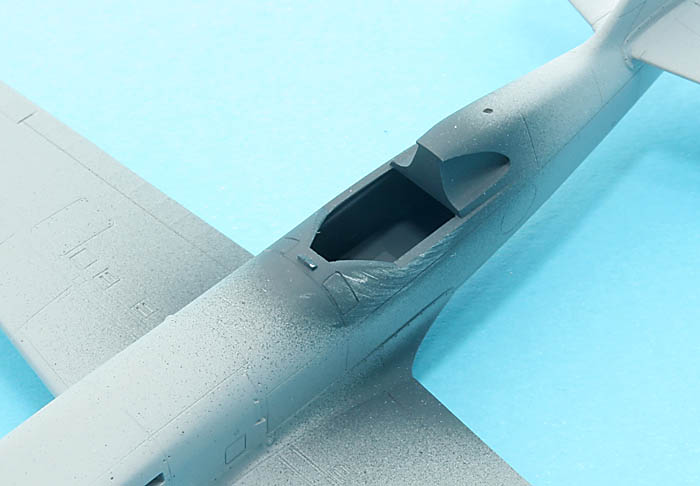
After about 45 minutes of filing and glueing, this is how far the project has gotten:
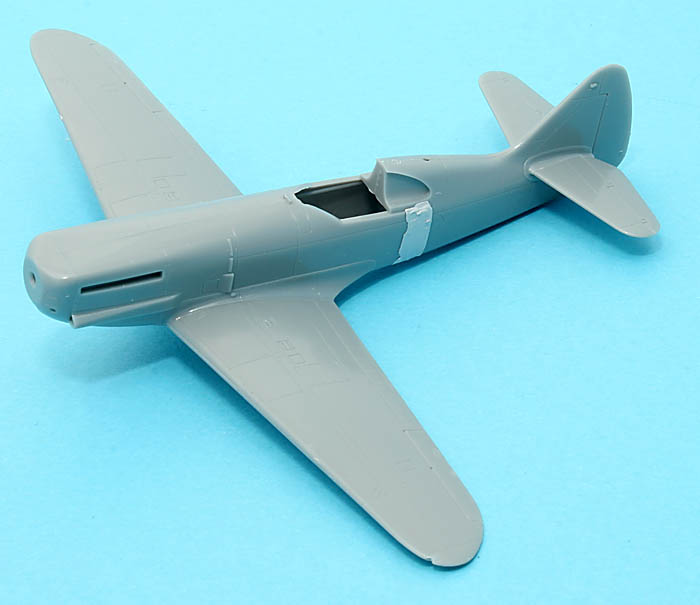
The putty below the cockpit is because of a sink mark due to a thick bulkhead on the inside of the fuselage halves.
See you soon!

Magnus
Press banner to the right to follow my trail to the new forums!
Uusimaa, Finland
Joined: March 30, 2004
KitMaker: 2,845 posts
AeroScale: 1,564 posts
Posted: Friday, October 03, 2008 - 07:25 AM UTC
Looking good.

Finished on Sunday evening? Well, good luck on the endeavour.

There's only one thing that caught my eye, is the cockpit missing from the fuselage?
Buenos Aires, Argentina
Joined: September 07, 2006
KitMaker: 918 posts
AeroScale: 688 posts
Posted: Friday, October 03, 2008 - 11:59 AM UTC
A very interest project Magnus

. You are going very well.
Michigan, United States
Joined: February 11, 2008
KitMaker: 311 posts
AeroScale: 278 posts
Posted: Friday, October 03, 2008 - 04:24 PM UTC
Magnus:
Another interesting build. Complete by Sunday is a great challenge. I have never finished anything in a weekend. I'm cheering for you

Current Builds:
FW 190 D (Butcher Bird)
P61A (Night Stalkers)
P47D (CaveTonitrum)
Sea Fury ( Airedale Navy)
S-199 for finish the job again on Armorama
Stockholm, Sweden
Joined: May 02, 2006
KitMaker: 1,953 posts
AeroScale: 1,902 posts
Posted: Saturday, October 04, 2008 - 07:38 AM UTC
Quoted Text
Looking good.
Finished on Sunday evening? Well, good luck on the endeavour.
There's only one thing that caught my eye, is the cockpit missing from the fuselage?
Cockpit missing? Talking to me
?
I checked that I could install "all" parts of the very sparingly detailed cockpit afterwards. With canopy closed and a "blue nuit" interior, not much will be seen anyway!
Model primed and cockpit painted from the outside!
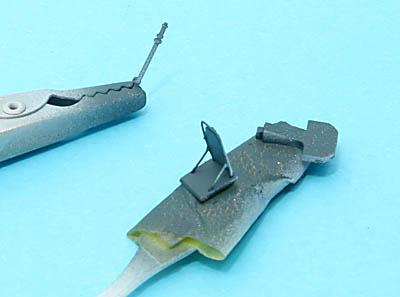
The rather standard-looking seat was rebuilt to something more French-looking!
Magnus
Press banner to the right to follow my trail to the new forums!
Uusimaa, Finland
Joined: March 30, 2004
KitMaker: 2,845 posts
AeroScale: 1,564 posts
Posted: Saturday, October 04, 2008 - 08:05 AM UTC
Oh, it's one of those things. Sorry...

The interior sidewalls in particular looked quite spartan, but I didn't think about it being a Hasegawa kit without any AM stuff.
Funny, I've never even thought about installing cockpit parts from the outside. I always seem follow the same routine. Paint cockpit & fuselage interior - assemble cockpit - install cockpit - close the fuselage.

Stockholm, Sweden
Joined: May 02, 2006
KitMaker: 1,953 posts
AeroScale: 1,902 posts
Posted: Saturday, October 04, 2008 - 06:37 PM UTC
I don't think I will have to open up the champagne tonight, it won't be finished Sunday evening!
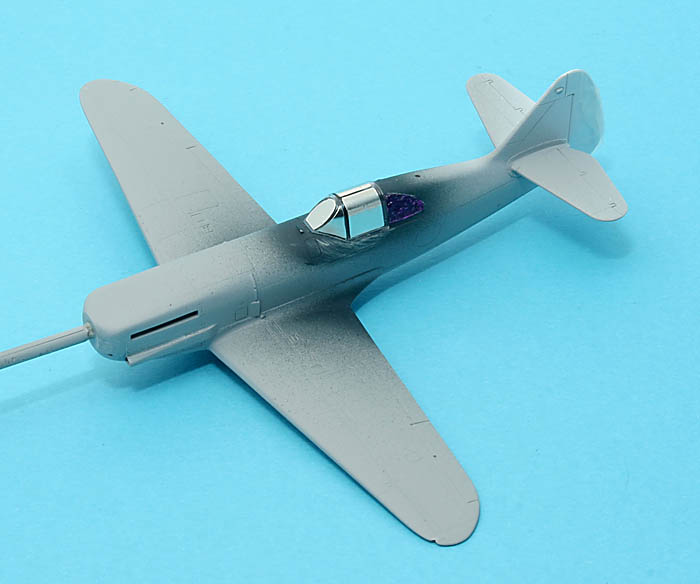
Canopy and quarterlights masked and installed, this alone took more than one hour!
Total time spent modelling is about five hours now. I might still make it below ten!
Eetu wrote:
Quoted Text
Funny, I've never even thought about installing cockpit parts from the outside. I always seem follow the same routine. Paint cockpit & fuselage interior - assemble cockpit - install cockpit - close the fuselage
The only reason for doing it this time was to gain some time. I could build and paint what little there is in the cockpit while the fuselage waited for glue and putty to dry. For another D.520 (I need to use those Aeromaster decals for an Italian one some day) I have a good detail set from Hi Tech!
Magnus
Press banner to the right to follow my trail to the new forums!
Stockholm, Sweden
Joined: May 02, 2006
KitMaker: 1,953 posts
AeroScale: 1,902 posts
Posted: Sunday, October 05, 2008 - 01:26 AM UTC
It will definitely not be finished by tonight but I am enjoying myself royally anyway
!
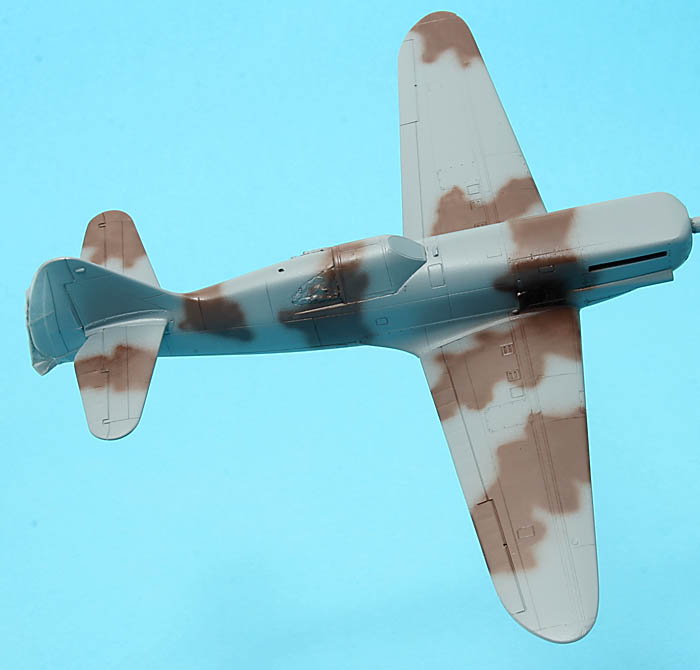
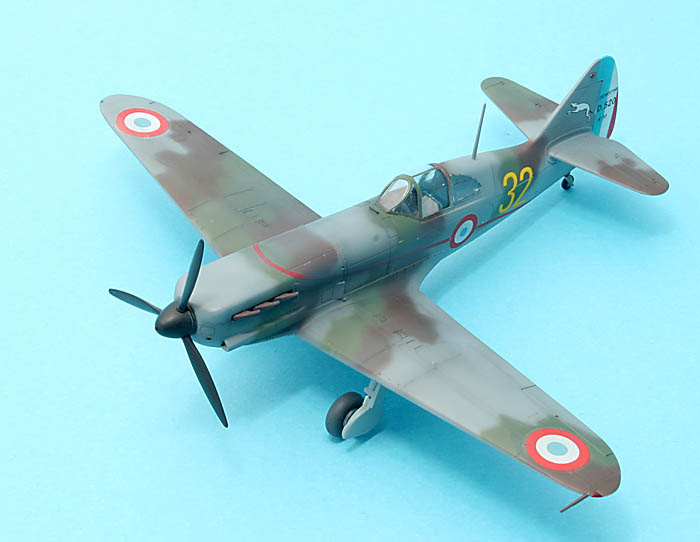
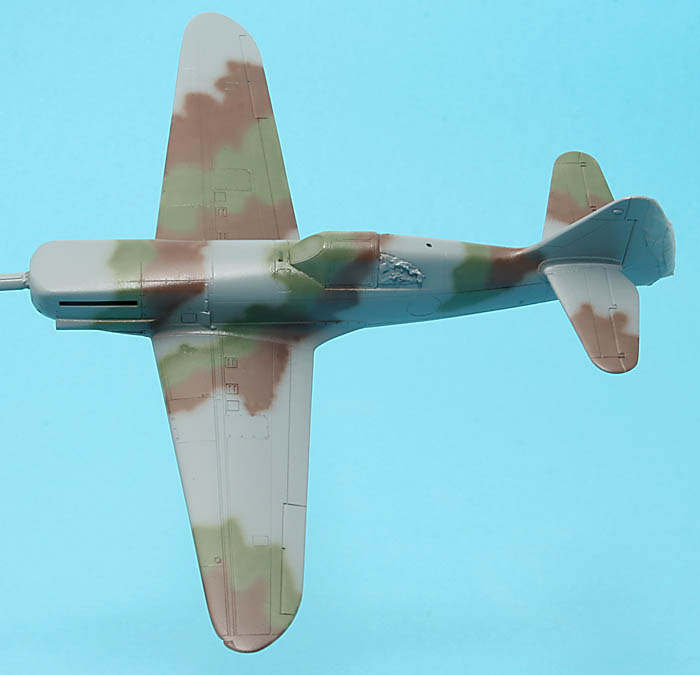
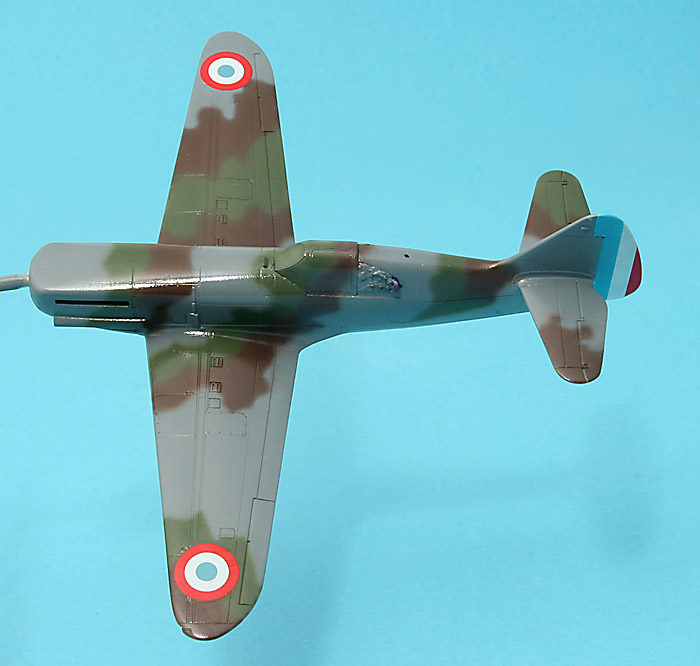
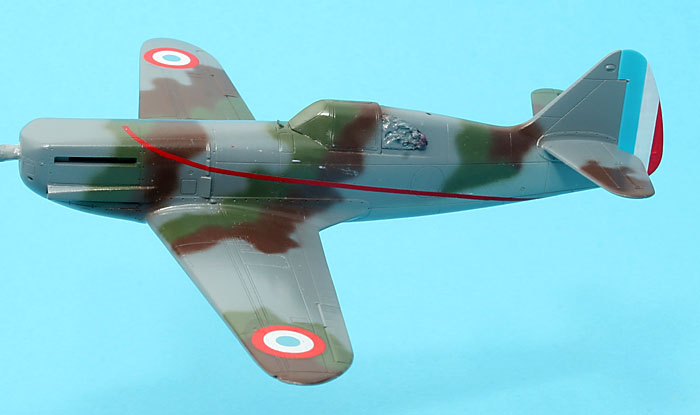
I just love those French camo patterns! I am working from a profile so most of it is purely guesswork. What I know is that it is predominantly grey with green and brown used rather sparingly. Paint is Gunze.
In retrospect, I think a Tamiya bubbletop Thunderbolt in OD over NG would have had bigger chances to succeed, while painting a camo like the one above is fun it is also a rather slow process. Well, there is a T-bolt group build starting after the New Year so I suppose I can have a go at one of them then!
Magnus
Press banner to the right to follow my trail to the new forums!
Stockholm, Sweden
Joined: May 02, 2006
KitMaker: 1,953 posts
AeroScale: 1,902 posts
Posted: Sunday, October 05, 2008 - 02:23 AM UTC
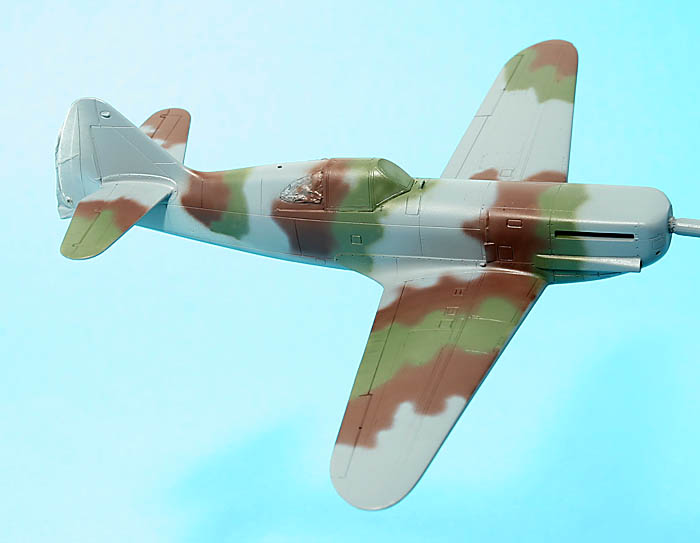
And now the green parts... This is REALLY fun!
Magnus
Press banner to the right to follow my trail to the new forums!
Stockholm, Sweden
Joined: May 02, 2006
KitMaker: 1,953 posts
AeroScale: 1,902 posts
Posted: Sunday, October 05, 2008 - 07:03 AM UTC
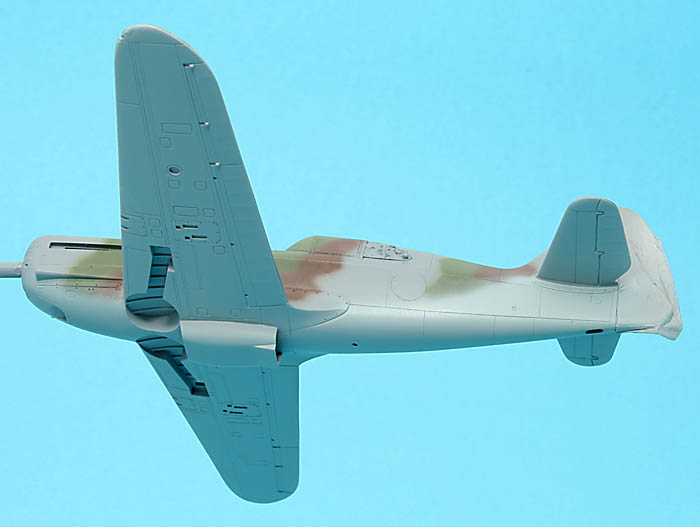
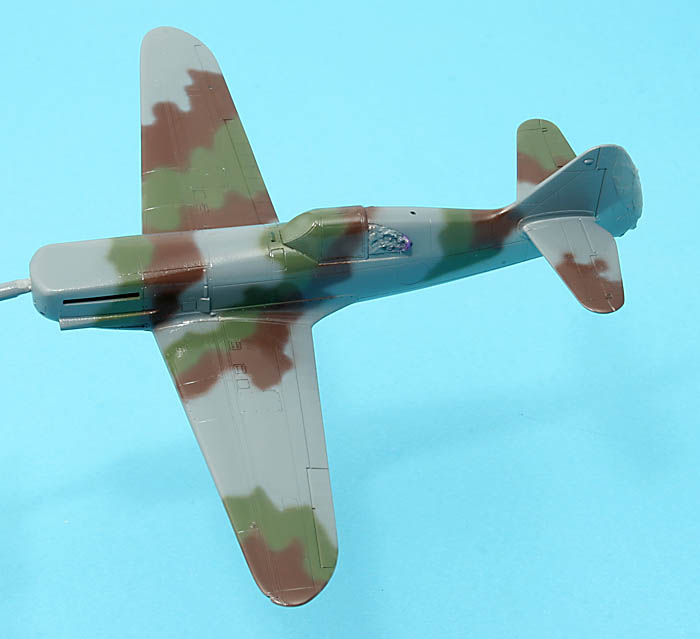
...and the lower surfaces. And now some touch-ups!
See you soon!
Magnus
Press banner to the right to follow my trail to the new forums!
Stockholm, Sweden
Joined: May 02, 2006
KitMaker: 1,953 posts
AeroScale: 1,902 posts
Posted: Sunday, October 05, 2008 - 07:42 AM UTC
Touch-ups finished! Now on to polishing the paintwork slightly and with some luck I might be able to put the decals on before
Ashes to Ashes starts!
Magnus
Press banner to the right to follow my trail to the new forums!
Stockholm, Sweden
Joined: May 02, 2006
KitMaker: 1,953 posts
AeroScale: 1,902 posts
Posted: Sunday, October 05, 2008 - 08:05 AM UTC
Polishing didn't work so it got a coat of Gunze clear instead. Decaling postponed until tomorrow then!
I'll do some work on the other bits and pieces (there should at least be a set of wheels and a landing gear rattling around somewhere in the box) instead tonight!
Working time spent up until now: About eight hours!
See you tomorrow.
Magnus
Press banner to the right to follow my trail to the new forums!
Stockholm, Sweden
Joined: October 02, 2007
KitMaker: 31 posts
AeroScale: 29 posts
Posted: Sunday, October 05, 2008 - 08:46 AM UTC
Sten Ekedahl
Rule Britannia!
Stockholm, Sweden
Joined: May 02, 2006
KitMaker: 1,953 posts
AeroScale: 1,902 posts
Posted: Sunday, October 05, 2008 - 09:14 AM UTC
Nope! I've had high quality lady company all the time in the shape of miss Piggy, my two-year-old! (OK Sten, your'e partially right: The big girls have been for a girls-only-weekend to Gothenburg leaving me lots of time to spend in the workshop while miss Piggy is asleep!)
Magnus
Press banner to the right to follow my trail to the new forums!
Stockholm, Sweden
Joined: May 02, 2006
KitMaker: 1,953 posts
AeroScale: 1,902 posts
Posted: Monday, October 06, 2008 - 08:47 AM UTC
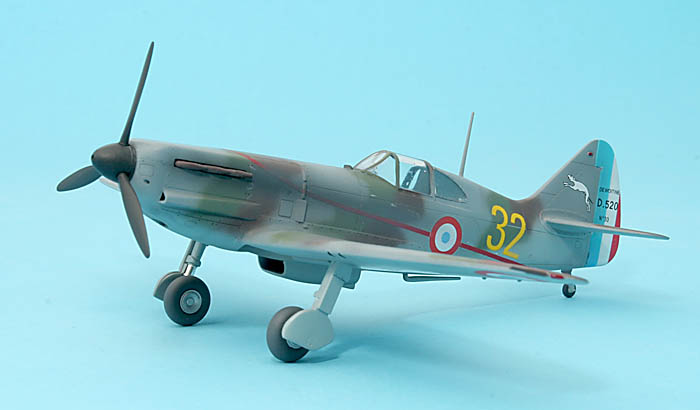
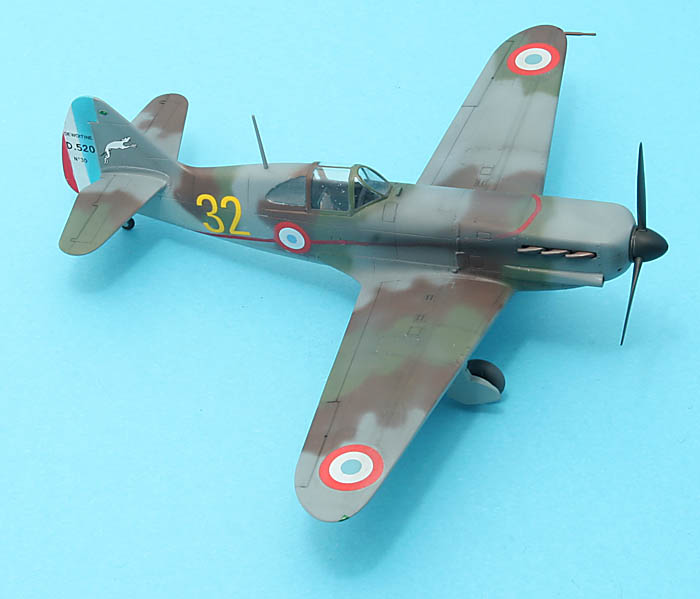
Paint it blue:

Paint it red:
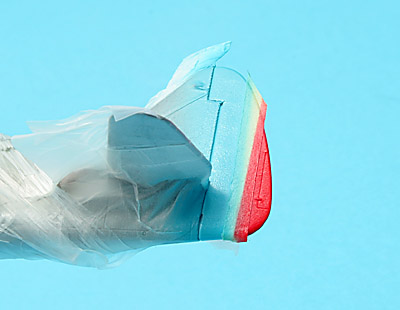
Demask it:
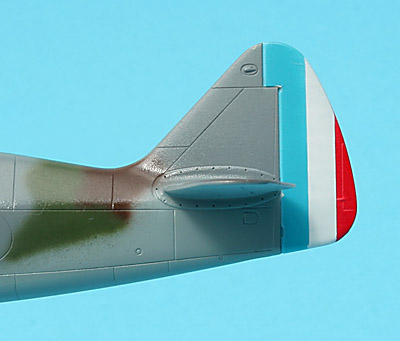
Veeery French-looking
!
Magnus
Press banner to the right to follow my trail to the new forums!
Stockholm, Sweden
Joined: May 02, 2006
KitMaker: 1,953 posts
AeroScale: 1,902 posts
Posted: Monday, October 06, 2008 - 09:09 AM UTC
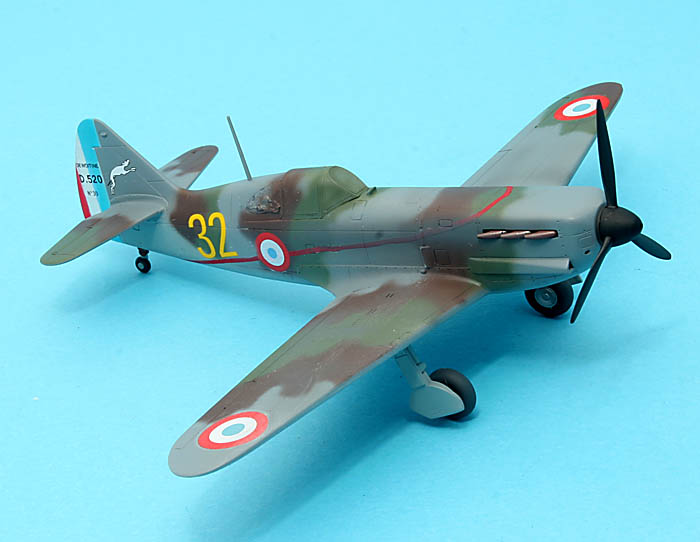
Odds and ends from the decal box:
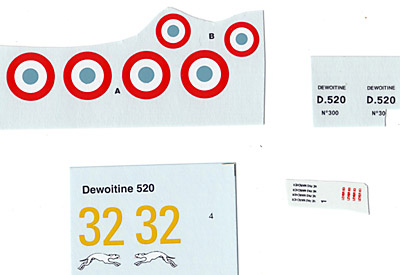
Carpena roundels, number and zoologic oddity (I know for sure it isn't a kangaroo at least) from a WingMasters sheet, stencils from another WM sheet. Aircraft number is not known but it ought to be a low one, I crop one of the "0"s from Pierre le Gloans aircraft and end up with a/c 30. Ain't I a stinker

!
Magnus
Press banner to the right to follow my trail to the new forums!
Stockholm, Sweden
Joined: May 02, 2006
KitMaker: 1,953 posts
AeroScale: 1,902 posts
Posted: Monday, October 06, 2008 - 09:31 AM UTC
Last post for tonight...
Decaling has started! It is clever to begin with the roundels since I have more of them if something unpleasant should happen. It is worse when it comes to the non-kangaroos, I only have one for each side of the fin...
Magnus
Press banner to the right to follow my trail to the new forums!
Michigan, United States
Joined: February 11, 2008
KitMaker: 311 posts
AeroScale: 278 posts
Posted: Monday, October 06, 2008 - 02:35 PM UTC
Magnus:
As always the paint work looks great. Maybe I need to speed up and mine will turn out better. I love the way the rudder turned out
Current Builds:
FW 190 D (Butcher Bird)
P61A (Night Stalkers)
P47D (CaveTonitrum)
Sea Fury ( Airedale Navy)
S-199 for finish the job again on Armorama
Stockholm, Sweden
Joined: May 02, 2006
KitMaker: 1,953 posts
AeroScale: 1,902 posts
Posted: Friday, October 17, 2008 - 09:38 AM UTC
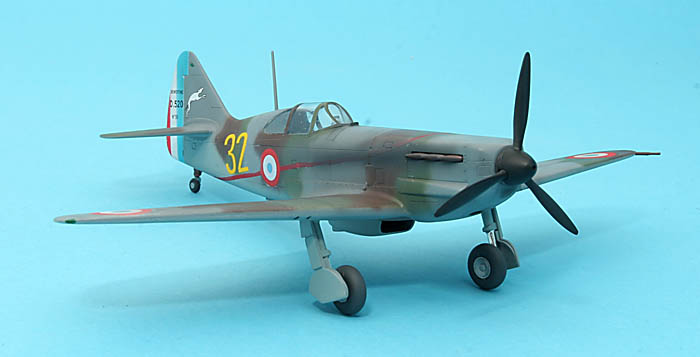
Eleven days since the last update of my weekend build, embarrasing... So what went wrong then? There is one simple answer: The red stripe! I had hoped that I could use scrap red decal for it but I didn't get it to curve around the corner of the engine cover the way it should. The easiest way would have been starting with a red fuselage, then masking the line and painting the rest of the camo. Obviously this idea came a bit late...
Final solution was painting some clear decal film red and then using a template to cut a suitably shaped stripe using two scalpel blades laminated together with some plasticard as a spacer. I made the template by drawing the required line directly on tape I had attached to the fuselage. This tape was then moved to the plasticard and the template was made by cutting along the line on the tape, through the plasticard. Figuring this out took a few days for a slow thinker with a small brain...
I will try another weekend build in the future, without the stripe!
Magnus
Press banner to the right to follow my trail to the new forums!
Stockholm, Sweden
Joined: May 02, 2006
KitMaker: 1,953 posts
AeroScale: 1,902 posts
Posted: Thursday, December 04, 2008 - 04:28 PM UTC
As you all have already figured out: very little modelling has been done during the last two months! I will spend a bit more time at the modelling table now I hope.
This is the status right now. The decal work really was a disaster, this one will never be a competition winner!
Magnus
Press banner to the right to follow my trail to the new forums!
Scotland, United Kingdom
Joined: February 07, 2008
KitMaker: 1,699 posts
AeroScale: 1,384 posts
Posted: Thursday, December 04, 2008 - 08:20 PM UTC
Just show the port side! It looks fine from there. I'll remember your advice of mask the line before painting if I come across a scheme like this. Thanks Magnus
Stockholm, Sweden
Joined: May 02, 2006
KitMaker: 1,953 posts
AeroScale: 1,902 posts
Posted: Friday, December 05, 2008 - 01:05 AM UTC
Press banner to the right to follow my trail to the new forums!
Jönköping, Sweden
Joined: April 25, 2006
KitMaker: 831 posts
AeroScale: 688 posts
Posted: Friday, December 05, 2008 - 02:35 AM UTC
Nice save with the exhaust stains. Almost like Ravelli in the US-world cup
It's a sleek plane, almost like a racer, and a nice build at that. By the way, I've tried to get the faded dark and light grey look on tyres, but I don't seem to get it. How do you do it? Paint the whole in light grey and then spray the hubs black, allowing overspray, or is it some other secret?
Stockholm, Sweden
Joined: May 02, 2006
KitMaker: 1,953 posts
AeroScale: 1,902 posts
Posted: Saturday, December 06, 2008 - 03:33 AM UTC
Quoted Text
Nice save with the exhaust stains. Almost like Ravelli in the US-world cup
It's a sleek plane, almost like a racer, and a nice build at that. By the way, I've tried to get the faded dark and light grey look on tyres, but I don't seem to get it. How do you do it? Paint the whole in light grey and then spray the hubs black, allowing overspray, or is it some other secret?
Hi Tony!
The stains are a bit on the heavy side but rather them than those ill-fiiting decals
!
Regarding the wheels, I paint the hubs first, mask the hubs and then I paint the tire "black" (I use a dark grey). After that I add white to the paint, spraying "slitbanan" (sorry, I don't know the English word for that) the lighter colour.
Since I always mount the wheels on a toothpick when painting them it is very easy to slowly rotate the wheel while spraying the light part of it. No masking necessary!
Magnus
Press banner to the right to follow my trail to the new forums!
Jönköping, Sweden
Joined: April 25, 2006
KitMaker: 831 posts
AeroScale: 688 posts
Posted: Saturday, December 06, 2008 - 04:02 AM UTC
Ok. Then you can rotate the wheel and slightly move it into the spray from the brush, you mean?
And what is "slitbanan" in English? As a vehicle engineer I would go for thread pattern, but the literary "wear banana" is much mor fun, dont you think?
(And for the non-swedish speaking here, trying to translate that would be like dubbing Monty Python.

)