_GOTOBOTTOM
Early Aviation
Discuss World War I and the early years of aviation thru 1934.
1/32 Roden GB 2008 Fok.F.I - Hugh
MerlinV
_VISITCOMMUNITY
Victoria, Australia
Joined: November 26, 2006
KitMaker: 608 posts
AeroScale: 602 posts
Posted: Saturday, February 16, 2008 - 04:35 PM UTC
Air superiority in the Great War was traded between the protagonists only by the constant and unstinting efforts of the designers and manufacturers working behind the scenes in an effort to provide their pilots with the most technologically advanced and lethal machines in which to duel their foe.

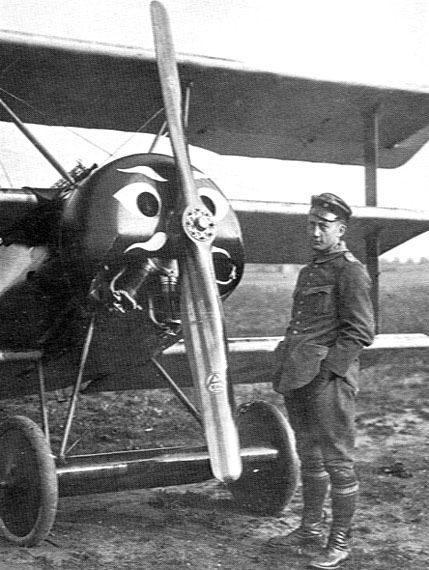
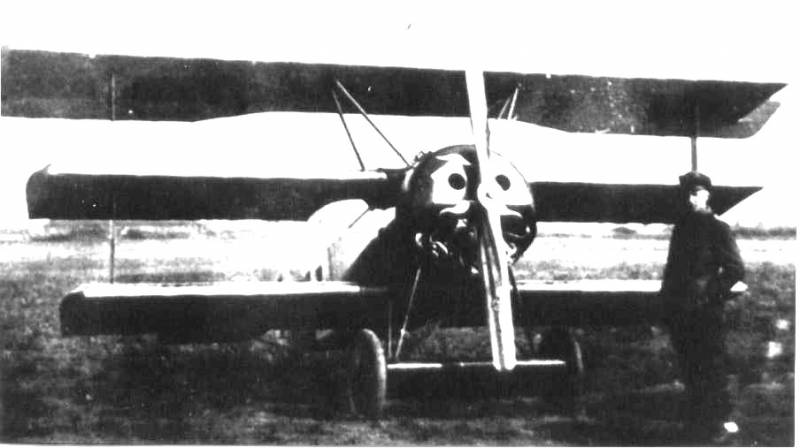
In response to Sopwith introducing their Triplane to front line service, Dutchman, Anthony Fokker began work on a design that might adopt the "Tripehound's" agility and speed. After tests by the air ministry of the V 4 prototype at Adlershof during early July 1917, three aircraft were produced under contract to the IdFlieg, denoted F.I and given the serials 101/17, 102/17 and 103/17. Two of these , 102/17 and 103/17 were delivered to Jagdgeschwader I at Marckebeeke, Flanders on August 19th 1917. These were both quickly claimed by the commander of the Jagdgeschwader, Manfred von Richthofen (Jastas 4, 6, 10 & 11) and Ltn. Werner Voss commander of Jasta 10.

This build will encompass Voss's aircraft, 103/17.


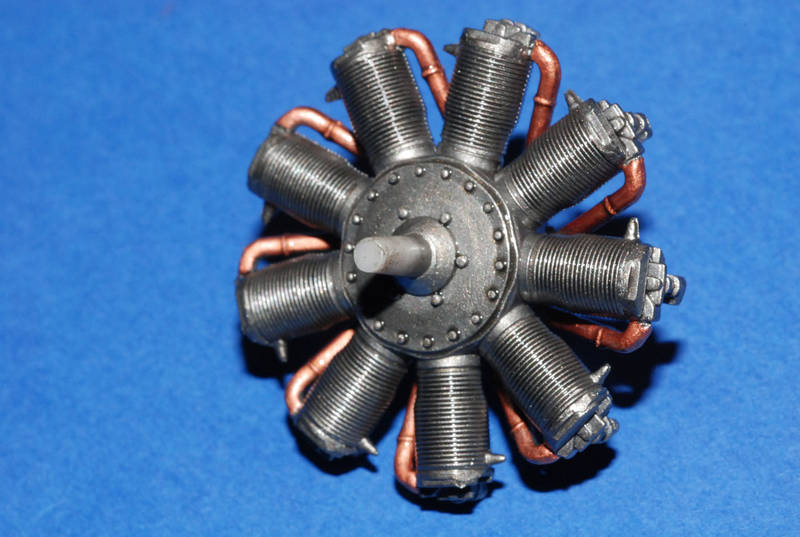
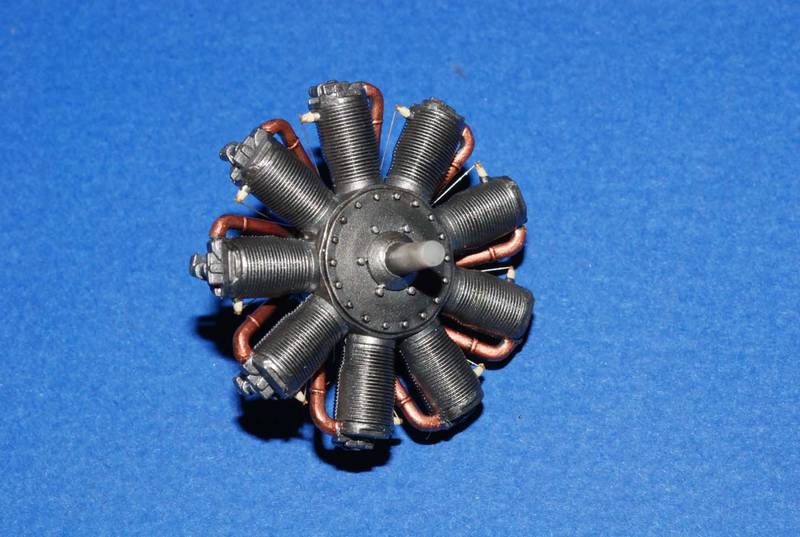
Rodens kit was released a couple of years ago now. The box top shows 103/17.


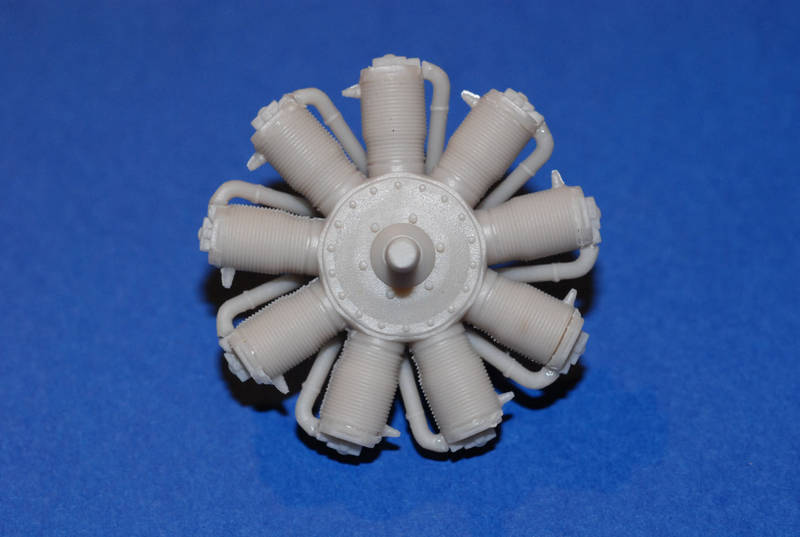
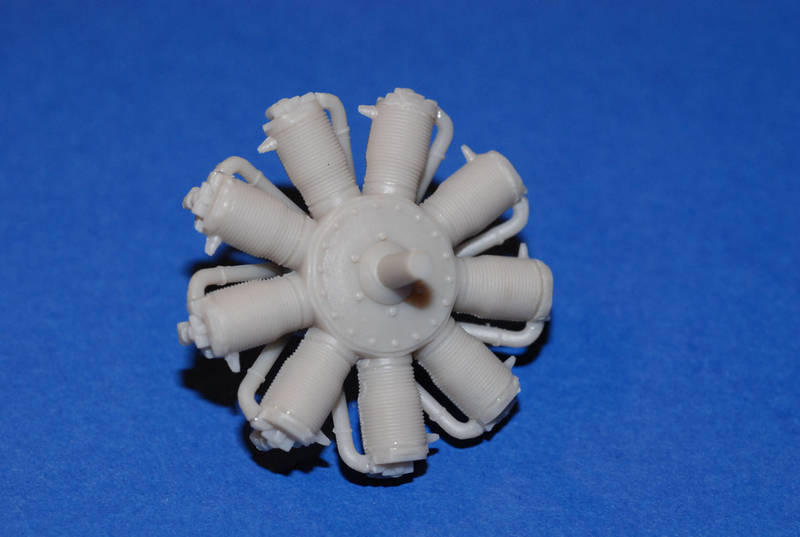
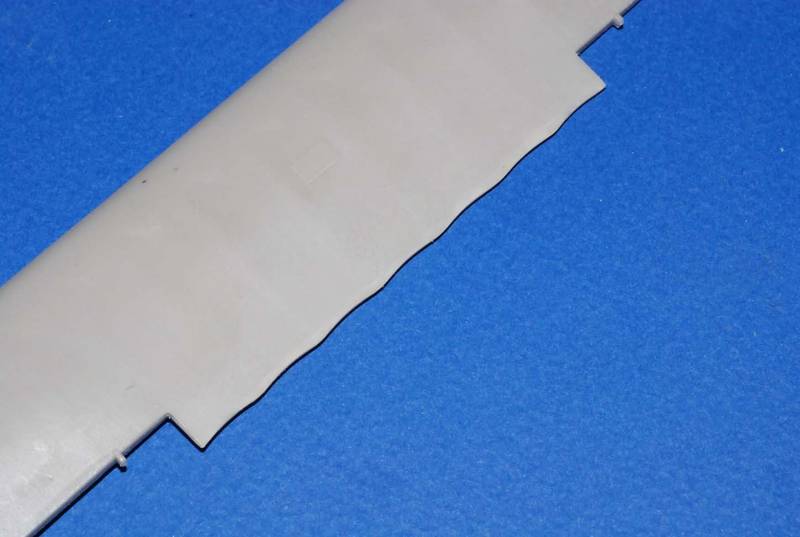
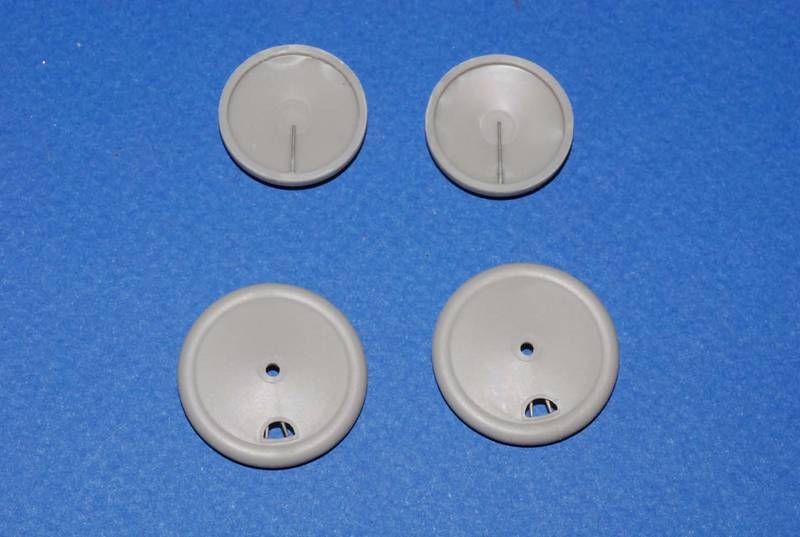
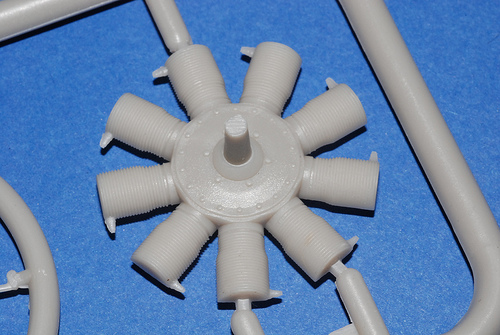
The plastic itself is Rodens typical softish, light brown and looks like it is holding detail quite well.


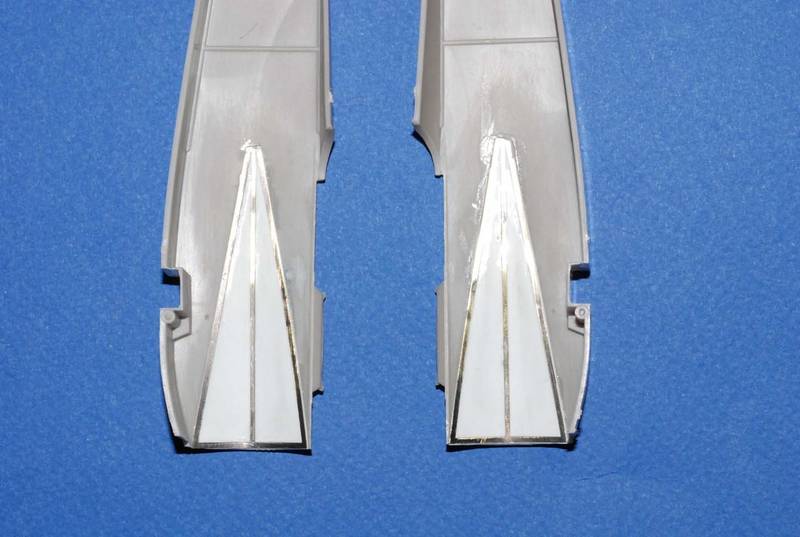
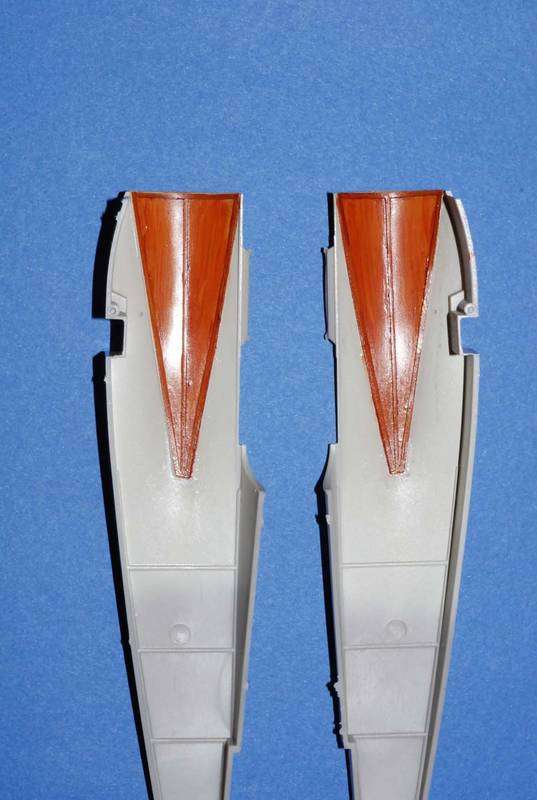
I will follow the kit instructions as closely as is practical.

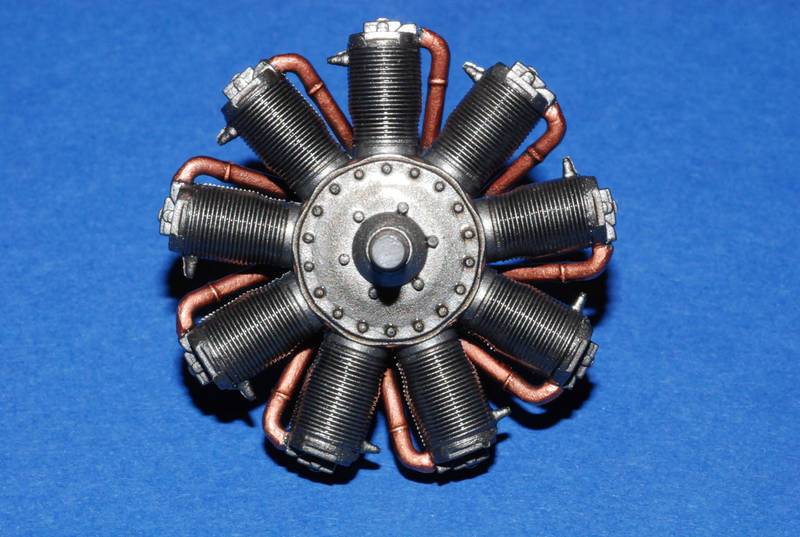
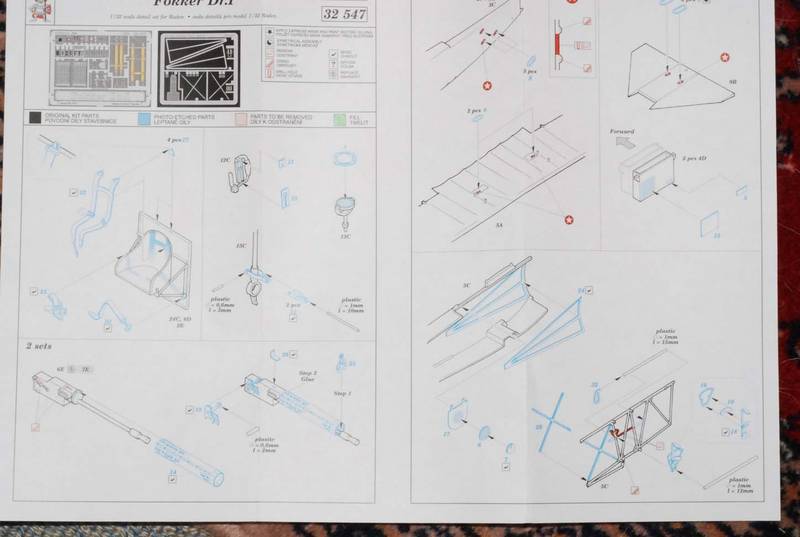
Along the way, I will use some components from Eduards Prepainted Etched set number 32547 designed for the Roden F.I /Dr.I.

Thanks for looking.

Many thanks to Stephen Lawson and to Roden for this Group Build.

Cheers,

Hugh
MerlinV
_VISITCOMMUNITY
Victoria, Australia
Joined: November 26, 2006
KitMaker: 608 posts
AeroScale: 602 posts
Posted: Monday, February 18, 2008 - 06:55 AM UTC
Greetings,

There is much contention regarding the actual colours that were worn by this aircraft; Primarily concerning the colour of the engine cowel (sometimes quoted as yellow, but now generally accepted to have been a dark green), but even more discussion takes place regarding the colour that the underside surface were painted in.
For a full run down, see the following.

see post #12.

I welcome discussion on this matter on this thread, but please note that I have already decided the particular colour that I will be using and will possible not be swayed by contrary arguments.

Cheers,

Hugh


MerlinV
_VISITCOMMUNITY
Victoria, Australia
Joined: November 26, 2006
KitMaker: 608 posts
AeroScale: 602 posts
Posted: Tuesday, March 04, 2008 - 10:54 PM UTC
I have been playing over on the Aerodrome on Brad Cancians Build thread of this very subject.

Click here.

It seems to me that the LeRhône that was apparently fitted to Voss's machine later in it's career (short as it was) might well have been one that sported the induction pipes and push rods at the front of the engine.

But since my brief is to build this kit, from the parts in the box alone (or enhanced by aftermarket sets that have been specifically designed for this kit), I think I might have my hands tied.

Unless... I can manage to perform such surgery that will replicate this using only the Kit parts...

Hmmm, there's a challenge.

Cheers,

Hugh
JackFlash
_VISITCOMMUNITY
Colorado, United States
Joined: January 25, 2004
KitMaker: 11,669 posts
AeroScale: 11,011 posts
Posted: Wednesday, March 05, 2008 - 01:20 AM UTC
Beg to differ here Hugh the 80hp was never fitted to the F.I 103/17 only the captured LeRhône 110hp was installed. The type you describe was the 80hp. Even on the trainer Dr.I types the 100hp Goebel Goe .II was used. Here is an image of Ltn. Voss and Fok. F.I 103/17 origianlly released by the legendary research fiend Alex Imrie. Clearly the 110-120hp LeRhône displayed here.

MerlinV
_VISITCOMMUNITY
Victoria, Australia
Joined: November 26, 2006
KitMaker: 608 posts
AeroScale: 602 posts
Posted: Wednesday, March 05, 2008 - 09:10 AM UTC
Oh good. That's a weight off my mind.
I was so befuddled by different archives of engines and shots of reproduction aircraft that I wasn't quite sure how I was going to tackle this.

Thanks for clearing this up Stephen.

Cheers,

Hugh
MerlinV
_VISITCOMMUNITY
Victoria, Australia
Joined: November 26, 2006
KitMaker: 608 posts
AeroScale: 602 posts
Posted: Wednesday, March 05, 2008 - 09:20 AM UTC
Oh, and in case anybody is wondering where this build is actually at, I am awaiting delivery of the Eduard Prepainted set designed for the Roden DR1/F1 ordered through Snowymountains Models in Melbourne...
I did toss up between the PART of Poland set and the Eduard set... The Eduard set came out the winner for purely subjective reasons.
In all likelyhood i will not use the entire etched set, but there are areas where the kit can do with enhancing and to my mind, the Eduard set fits the bill just nicely.

Cheers,

Hugh
JackFlash
_VISITCOMMUNITY
Colorado, United States
Joined: January 25, 2004
KitMaker: 11,669 posts
AeroScale: 11,011 posts
Posted: Wednesday, March 05, 2008 - 10:37 AM UTC
Here is a bit of fun concerning the Oberursel Ur.II
MerlinV
_VISITCOMMUNITY
Victoria, Australia
Joined: November 26, 2006
KitMaker: 608 posts
AeroScale: 602 posts
Posted: Sunday, March 09, 2008 - 04:37 PM UTC
And Speaking of engines...
I have been spending this afternoon escaping the heat and getting some serious progress on the LeRhone Type J that would have been fitted to Voss' machine later in its short career.

First up, two shots of the assembly without any paint... This goes together very easily. Just make sure you have the push rod and lever assembly fitted the right way, or else you will not be able to fit the induction pipes.


And with some paint. The crank case and cylinders are done with "Games Workshop" metallic acrylics (specifically Chain Mail Silver and Bolt Gun Grey). These are designed for brush painting Gaming Figures, but I find that they spray very well when thinned with Tamiya Acrylic Thinners and have a pleasingly fine pigment. The induction pipes are brushed painted with "Mr Metal" Metallic Laquer. Then the whole lot is given a spray with a good thick coat of Tamiya Smoke.


I think a few details (Spark Plugs and Etc) and a coat of flat and I'll be relatively happy with that.

Cheers,

Hugh
RAGIII
_VISITCOMMUNITY
North Carolina, United States
Joined: June 19, 2007
KitMaker: 604 posts
AeroScale: 600 posts
Posted: Monday, March 10, 2008 - 01:55 PM UTC
The Engine is looking great. I wonder about that flat coat though? I think the engine as is has that "Oily L0OK"
RAGIII
MerlinV
_VISITCOMMUNITY
Victoria, Australia
Joined: November 26, 2006
KitMaker: 608 posts
AeroScale: 602 posts
Posted: Monday, March 10, 2008 - 10:07 PM UTC
Hi RAGIII,
I have pondered that myself. I think the Crank Case might be best left in Gloss, but I reckon the Cylinders should definitely be flat.

Cheers,

Hugh
JackFlash
_VISITCOMMUNITY
Colorado, United States
Joined: January 25, 2004
KitMaker: 11,669 posts
AeroScale: 11,011 posts
Posted: Thursday, April 17, 2008 - 03:40 AM UTC
Hugh have you thought much about the bleached or unbleached linen theory?
MerlinV
_VISITCOMMUNITY
Victoria, Australia
Joined: November 26, 2006
KitMaker: 608 posts
AeroScale: 602 posts
Posted: Thursday, April 17, 2008 - 11:06 AM UTC
Hi Jackflash,

I think I have decided that we are going to be going with bleached fabric. The question now sits with how to get that shade. I am tending towards Tamiya Decktan with white added at this stage.

Now, I am also thinking that "Bleached Fabric" will be possibly a touch more opaque than unbleached would have been... I stand ready to be corrected...
So, any attempt to replicate shadow of ribs etc will be misplaced?

Cheers,

Hugh
MerlinV
_VISITCOMMUNITY
Victoria, Australia
Joined: November 26, 2006
KitMaker: 608 posts
AeroScale: 602 posts
Posted: Wednesday, May 07, 2008 - 11:13 AM UTC
Dear Readers

Please do not despair! Progress is... in progress!

I have been putting wings together (in the order of the instructions) and have been attending to other details (such as Wheel Spokes and tire tube air fillers) photos of which will appear tomorrow (I have a day of annual leave).

These will include shots of the single major moulding defect in the kit! i.e. the trailing edge of the upper main plane has a scollop which appears to me to be evidence of cold moulding. A productive five minutes with various grades of wet'n'dry has adressed this. As I say, photos to come.

The Eduard Etch has arrived... This is a mix of pre-painted and raw etch. The seat harness and the Instrument dials are beautifuly painted.

I have a suspicion that Voss was a Mahler fan (Gustav Mahler). Mahlers tenth symphony has been playing on my stereo during the work as described above... Very insprirational. Work is rapid with Mahler.

Cheers,

Hugh
MerlinV
_VISITCOMMUNITY
Victoria, Australia
Joined: November 26, 2006
KitMaker: 608 posts
AeroScale: 602 posts
Posted: Thursday, May 08, 2008 - 06:19 PM UTC
Here is the engine finished. Note the cream (Ceramic) Spark Plugs and the ignition leads.


Here is Eduards Prepainted Etched Fret for this kit (and for the DR1).


And Instructions for Same.


Here, you can see the Moulding flaw that I was talking about.


Which was easily fixed with some scrupulous application of various grades of Wet'n'Dry.


The wheels have had the Access ports cut out and psuedo spokes inserted.


Next, work begins on the Cockpit with all the Etched bits that will be hidden after assembly

Cheers,

Hugh
jaypee
_VISITCOMMUNITY
Scotland, United Kingdom
Joined: February 07, 2008
KitMaker: 1,699 posts
AeroScale: 1,384 posts
Posted: Thursday, May 08, 2008 - 08:47 PM UTC
Tasty rims. I think I'll try that trick.
JackFlash
_VISITCOMMUNITY
Colorado, United States
Joined: January 25, 2004
KitMaker: 11,669 posts
AeroScale: 11,011 posts
Posted: Saturday, May 10, 2008 - 03:53 PM UTC
Rims that will be duplicated on my Fok. D.VI build.
Kalt
_VISITCOMMUNITY
Mendoza, Argentina
Joined: June 14, 2006
KitMaker: 222 posts
AeroScale: 219 posts
Posted: Saturday, May 10, 2008 - 07:52 PM UTC
Nice technique Hugh, I will use it for my Dr.I build!
JackFlash
_VISITCOMMUNITY
Colorado, United States
Joined: January 25, 2004
KitMaker: 11,669 posts
AeroScale: 11,011 posts
Posted: Saturday, May 24, 2008 - 02:33 PM UTC
The Eduard fret has some very nice details. I like the separate triangle fairing supports. Makes painting much easier.

MerlinV
_VISITCOMMUNITY
Victoria, Australia
Joined: November 26, 2006
KitMaker: 608 posts
AeroScale: 602 posts
Posted: Saturday, May 24, 2008 - 07:54 PM UTC
Yes, very nice, but just try to get the buggers to stay glued to the fuselage sides!
Because the curve is slightly compound, there is a natural tendancy for the trailing end of the fret to lift. I have glued them, sprayed, masked, sprayed and aplied Oil for a wood effect, then put a top coat on... and then the port side etch lifted
I am working on getting it seated again as we speak. I should have anealed it first maybe.

Sigh.

Cheers,

Hugh
MerlinV
_VISITCOMMUNITY
Victoria, Australia
Joined: November 26, 2006
KitMaker: 608 posts
AeroScale: 602 posts
Posted: Saturday, May 24, 2008 - 09:54 PM UTC
I had to first fill the ENORMOUS ejector fin marks that festooned the inside faces of the fuselage halves.
This might not have been absolutely necessary as this was then covered by the styrene sheet that I later applied.

I used the Eduard Etched Framing as a template to cut two sections from 5 thou Evergreen Styrene Sheet. These were then applied to the Fuselage halves, allowed to dry thoroughly and then the Etched Framing attached using CA.

This was then given a spray of Tamiya Desert Sand, and Then Masked off.

I applied a spray of my own recipe for Bleached Linnen. I reckon a 50-50 mix of Tamiya Deck Tan and White works really quite well.

After removal of the masks, I applied Burnt Sienna almost neat (thinned a touch with White Spirit) to the framed area in an attempt to replicate Varnished Ply.

As Stated previously, the Etch on the port fuselage half kept lifting, But I eventually got it to stick down and quickly gave it all a spray of Gunse Satin Clear from a rattle can to seal it all.


Now to dirty it up a bit and get the framing fitted.

Cheers,

Hugh
MerlinV
_VISITCOMMUNITY
Victoria, Australia
Joined: November 26, 2006
KitMaker: 608 posts
AeroScale: 602 posts
Posted: Monday, June 02, 2008 - 11:10 PM UTC
I forbore using the eduard Etched Bracing wires and used my favoured rigging method to replicate this instead.


The turnbuckles were later painted with Gunze Sail Colour to replicate the tape that was wrapped around them in 1:1 scale.

And the Fuselage is finally together.


Note the amount of filler required to get a smooth curve across the Turtle deck.

Cheers,

Hugh
thegirl
_VISITCOMMUNITY
Alberta, Canada
Joined: January 19, 2008
KitMaker: 6,743 posts
AeroScale: 6,151 posts
Posted: Tuesday, June 03, 2008 - 03:16 AM UTC
Hugh , looking really great . I started using your technique for doing turnbuckles a while back and iI really like the effect . Is the map case PE parts ?
Repainted
_VISITCOMMUNITY
Östergötland, Sweden
Joined: April 04, 2006
KitMaker: 1,058 posts
AeroScale: 1,004 posts
Posted: Tuesday, June 03, 2008 - 04:47 AM UTC
Sweet, nice and clean
I`m really like that interiorwork of yours. Well done. You have that nice flow to the seat belt too.
I can see that you are using the filler tube to


Larsa
MerlinV
_VISITCOMMUNITY
Victoria, Australia
Joined: November 26, 2006
KitMaker: 608 posts
AeroScale: 602 posts
Posted: Tuesday, June 03, 2008 - 11:10 AM UTC
Hi Terri,
Yes it is the etched Map Case. I really do like this rigging technique, but it won't be appropriate for every situation... Damn...

Thanks Larsa,
I am going to add the Shoulder straps later and drape them outside of the cockpit.
Yeah, that tube of Tamiya Filler is about ten years old... I have only used it twice...

Cheers,

Hugh
RAGIII
_VISITCOMMUNITY
North Carolina, United States
Joined: June 19, 2007
KitMaker: 604 posts
AeroScale: 600 posts
Posted: Tuesday, June 03, 2008 - 11:38 AM UTC
Looking great! I like the bracing wires and the PE map case.
RAGIII
 _GOTOTOP