World War II
Discuss WWII and the era directly before and after the war from 1935-1949.
Hosted by Rowan Baylis
Helldiver, all out build!
chukw1
_VISITCOMMUNITY
California, United States
Joined: November 28, 2007
KitMaker: 817 posts
AeroScale: 729 posts
Posted: Wednesday, November 28, 2007 - 11:41 AM UTC
Hello, all! This is my first post here- hope you don't mind my adding to the fray. I've posted this elsewhere, but here goes...
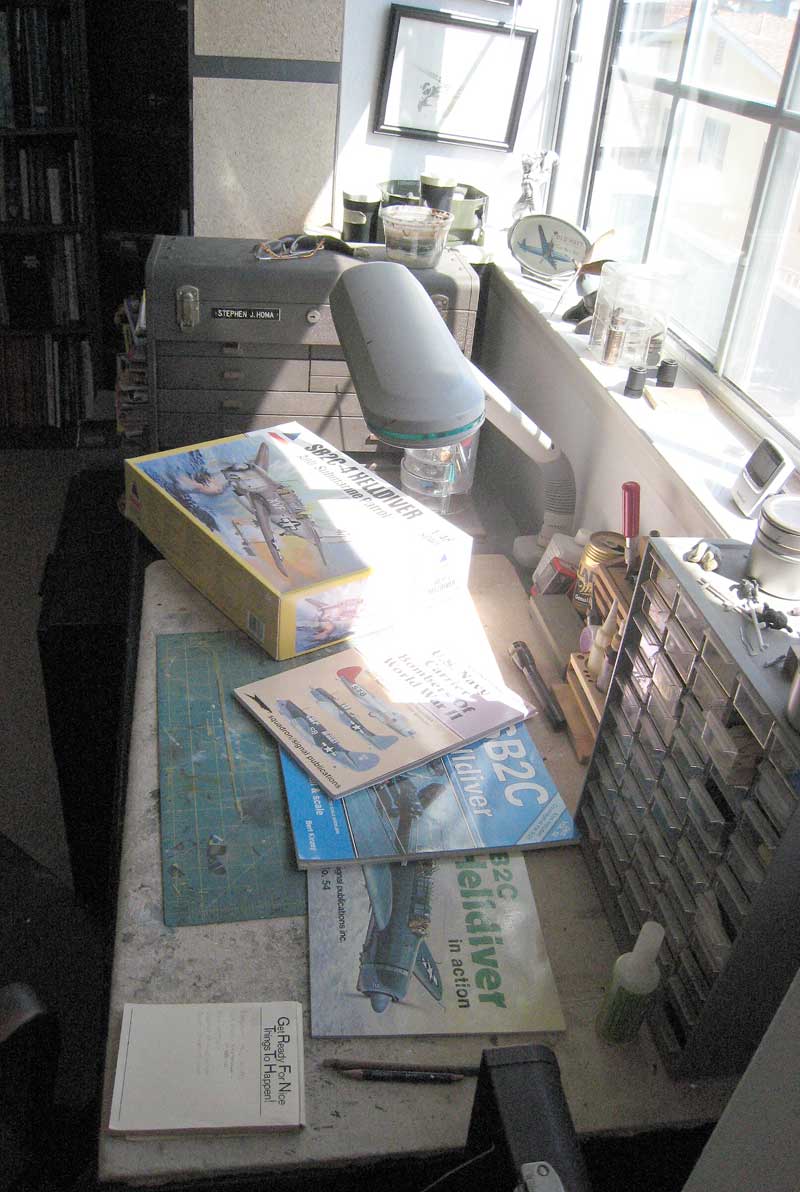
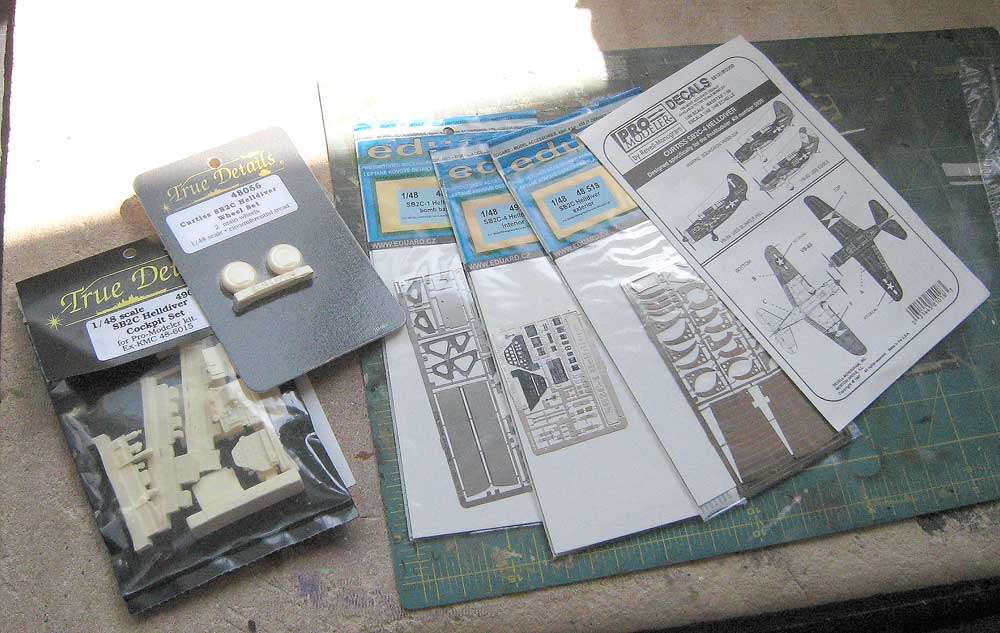
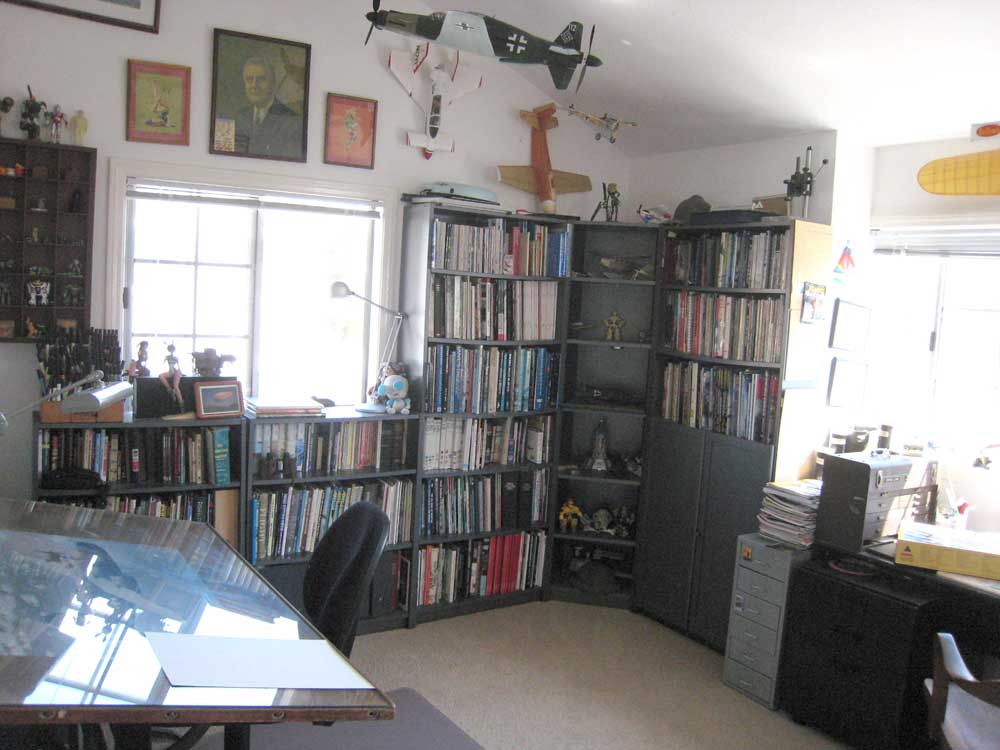
I was really glad when Accurate Miniatures re-released the Monogram ProModeler SB2C kit as the -4 variant. I had missed it the first time around, having spent many years in the stick-and-tissue world of Free-Flight Scale modeling. I collected reference and some choice aftermarket goodies, and have cleared my bench to start a comprehensive build. Here's my Chamber of Models:


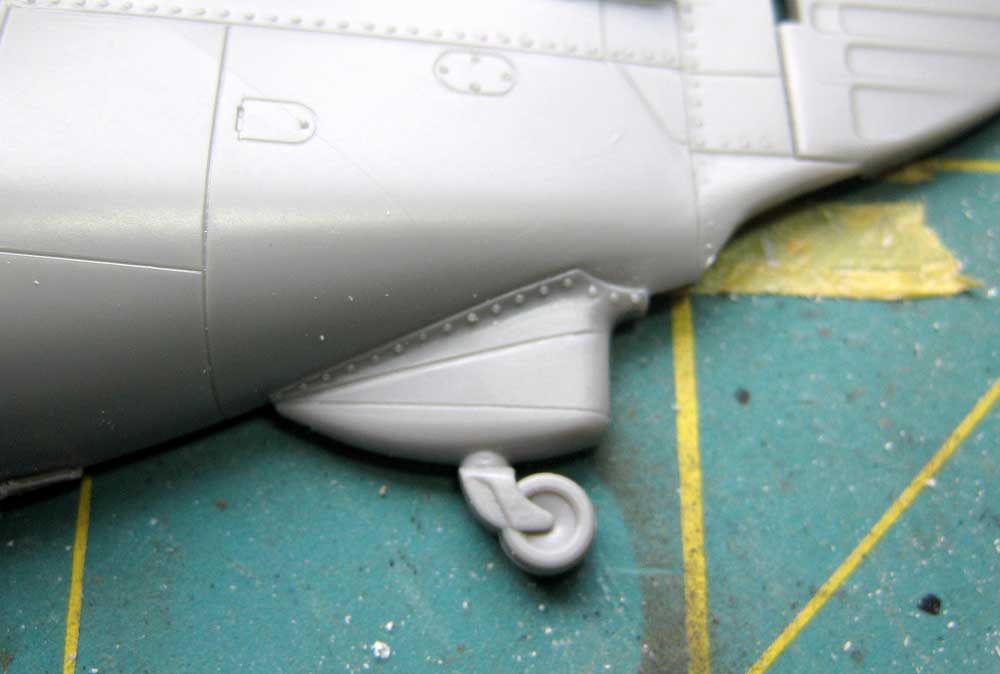
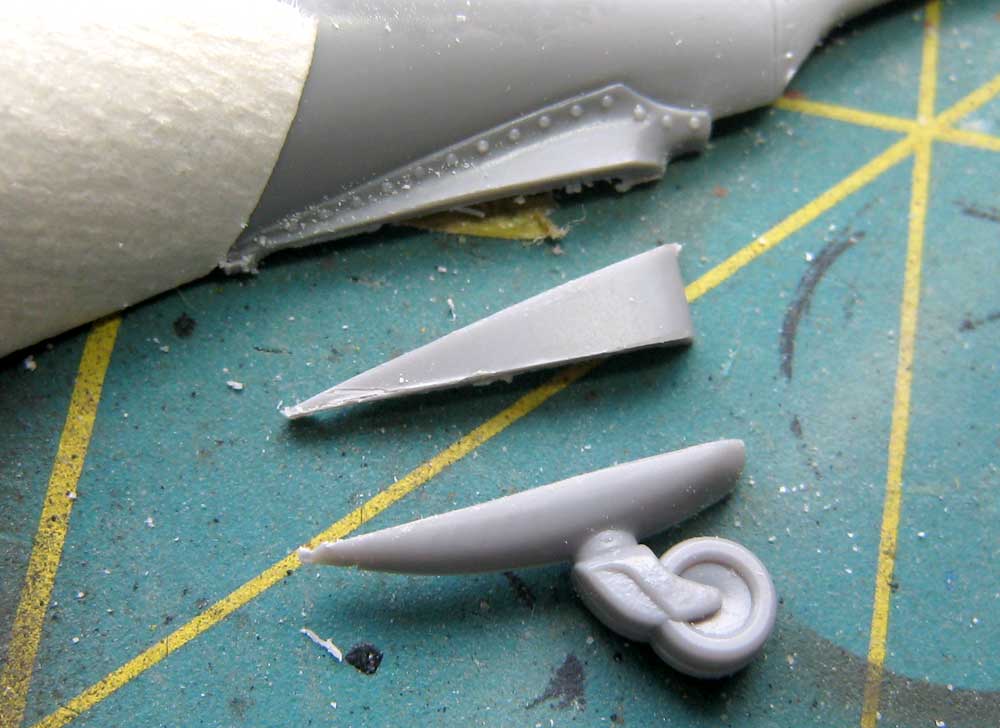
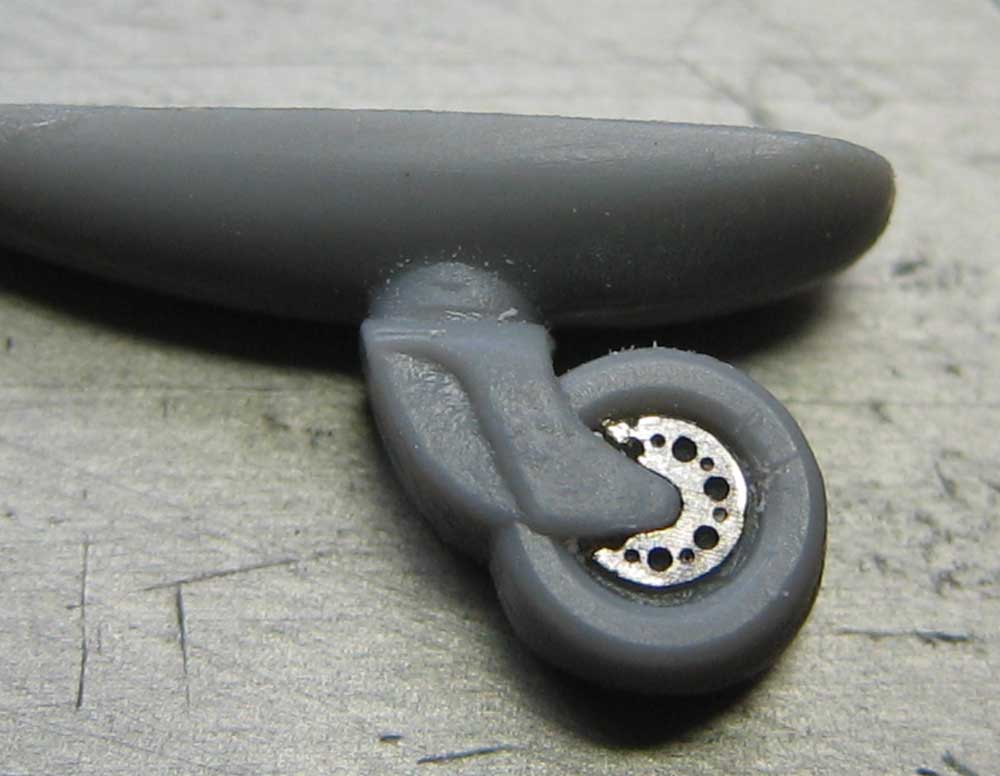
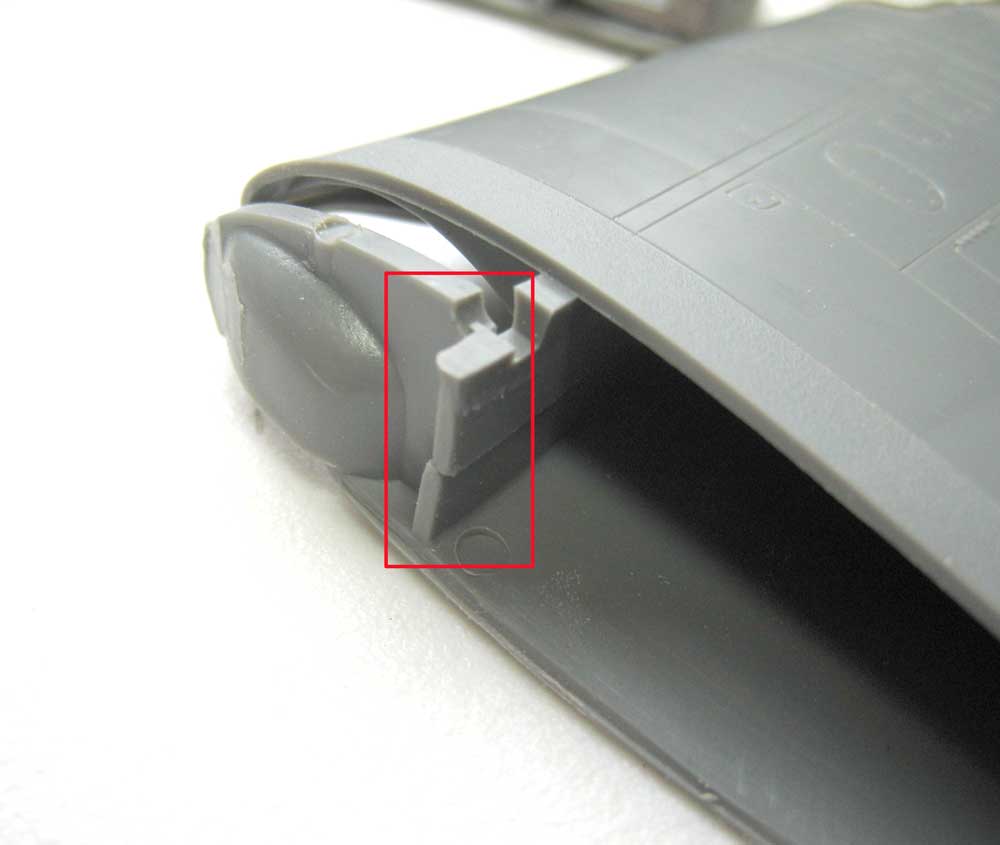
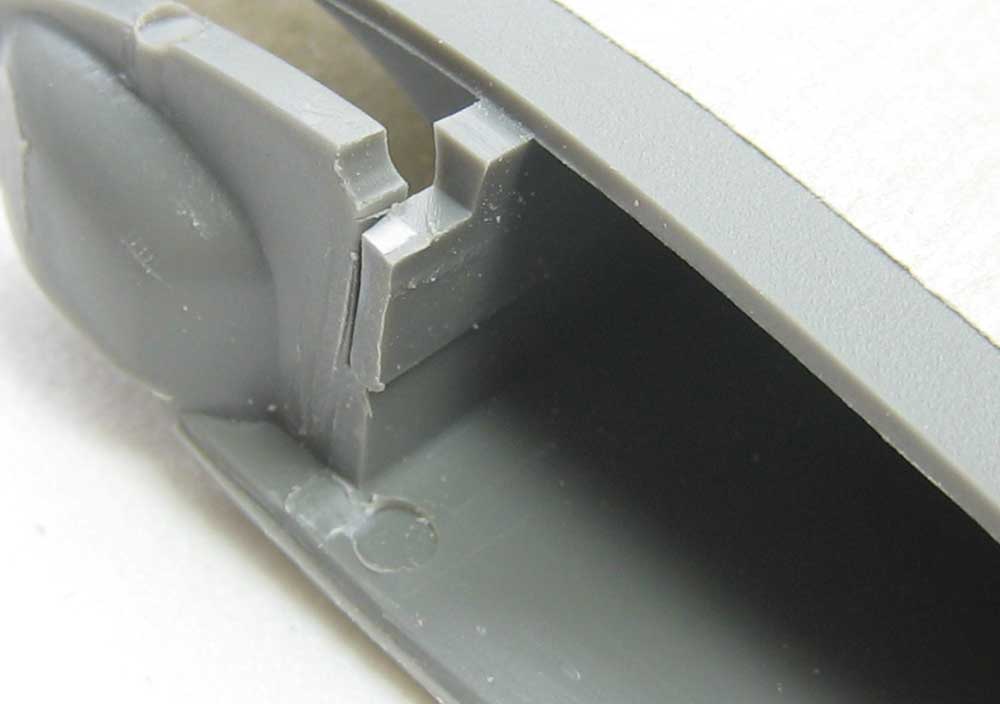
I thought I'd start at the tailwheel, just like everybody else. The tailwheel fairing telescoped as it compressed, and while on the deck, especially when loaded, she compressed all the way. The kit is properly molded for an in-flight posture.

That wedge in the middle need to come out!

Since that hub is plain to the point of being offensive, the etchmasters at Eduard have come to the rescue: Blinging Rims!!

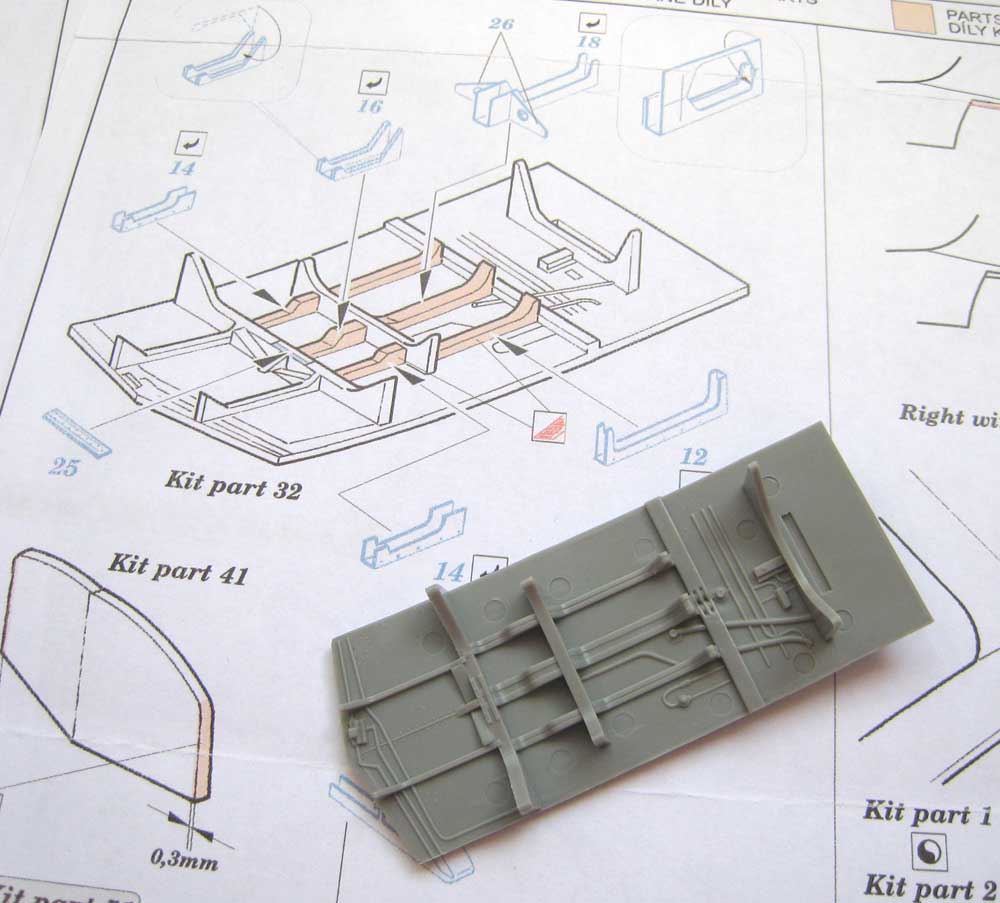
Since I'm starting out by chopping stuff up, I thought it prudent to move to the bomb bay.

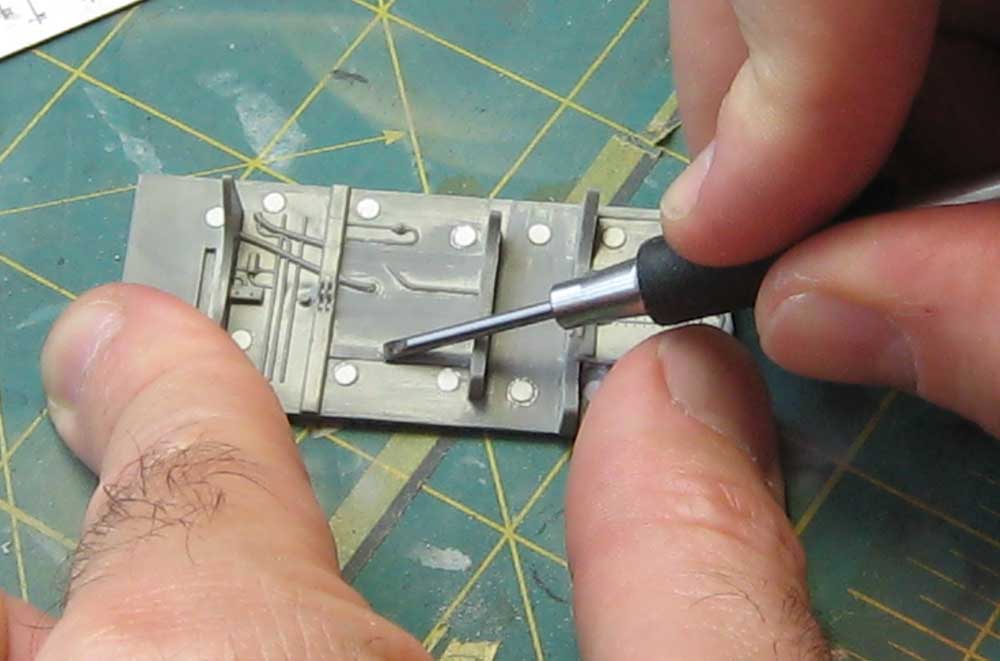
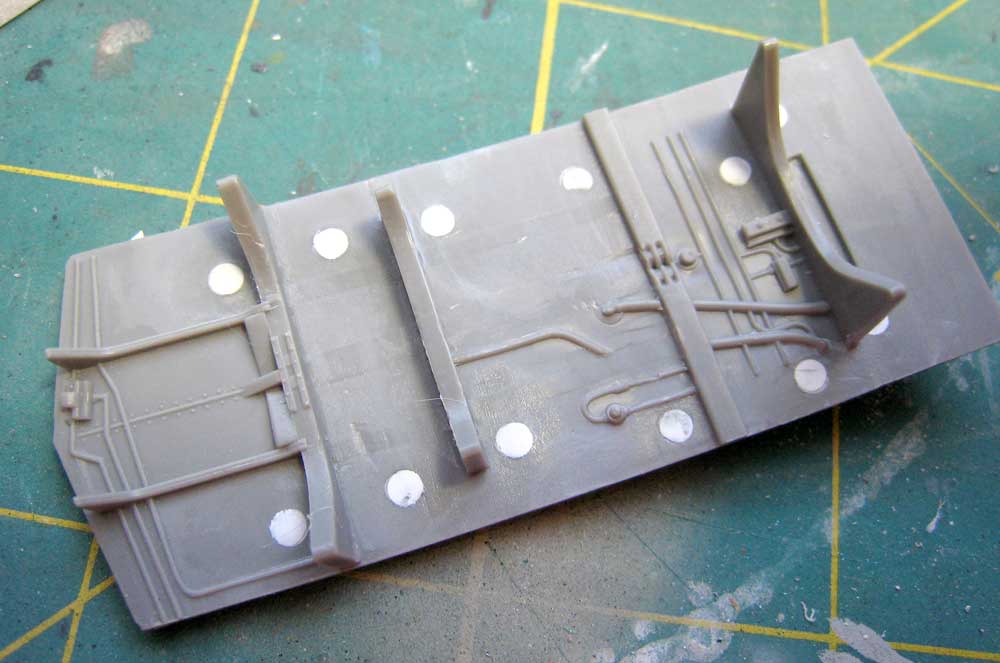
A lot of those structures had to go, so I whipped out mt Micro-Chisel from Mission Models and let fly. Note that I've also filled in the verdamt ejector pin marks with plastic discs.

Is smooth like butt of baby!

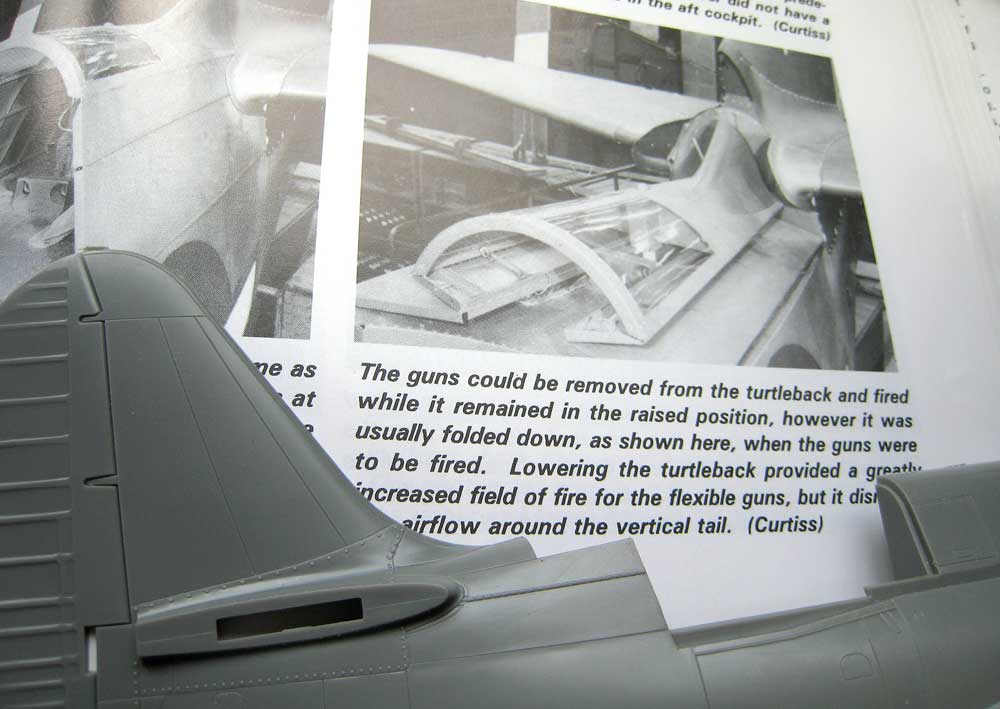
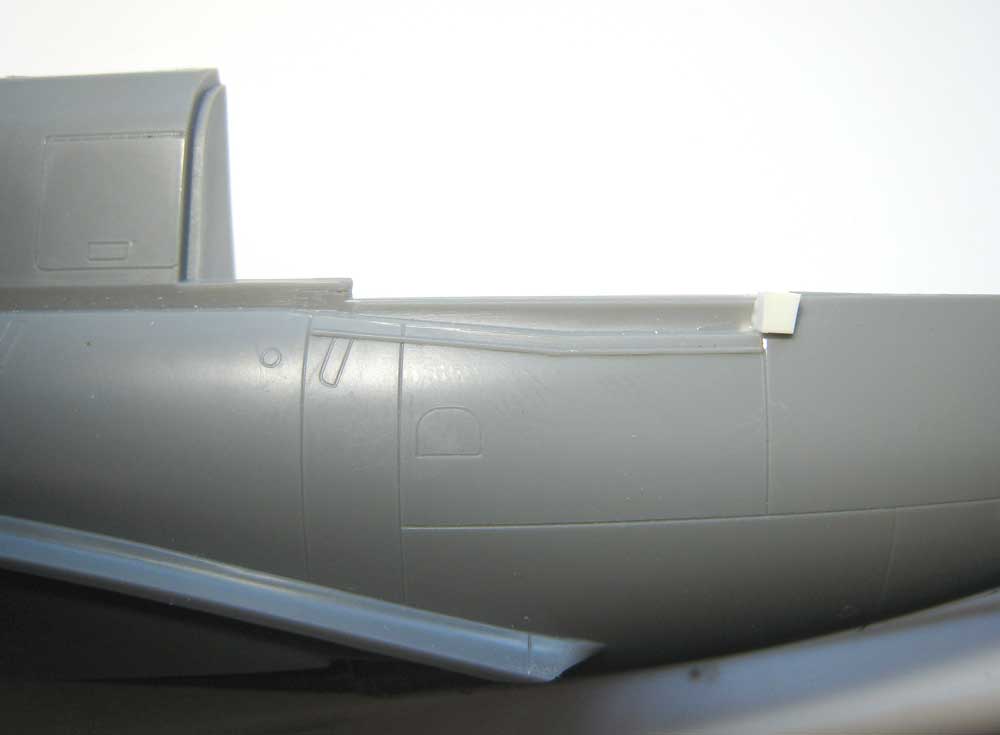
Being of unsound mind I decided to lower the turtleback. Here's the kit, and reference photo that will haunt my dreams. Thanks, Detail and Scale!
chukw1
_VISITCOMMUNITY
California, United States
Joined: November 28, 2007
KitMaker: 817 posts
AeroScale: 729 posts
Posted: Wednesday, November 28, 2007 - 11:41 AM UTC
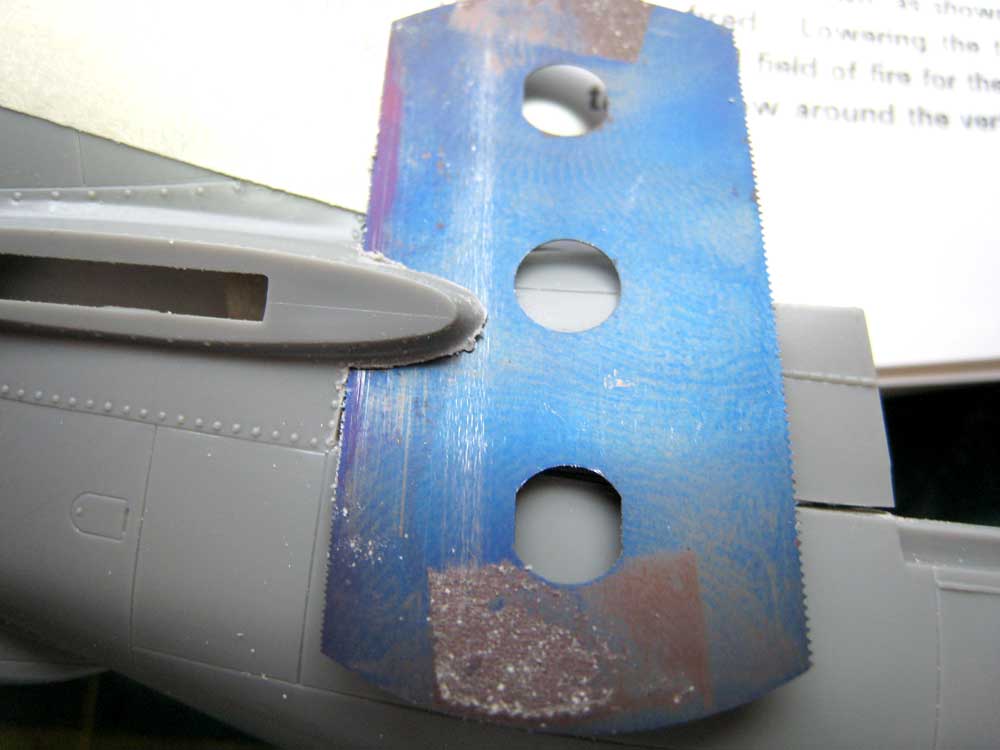
I'm using one of those European razor-sawblades- excellent!

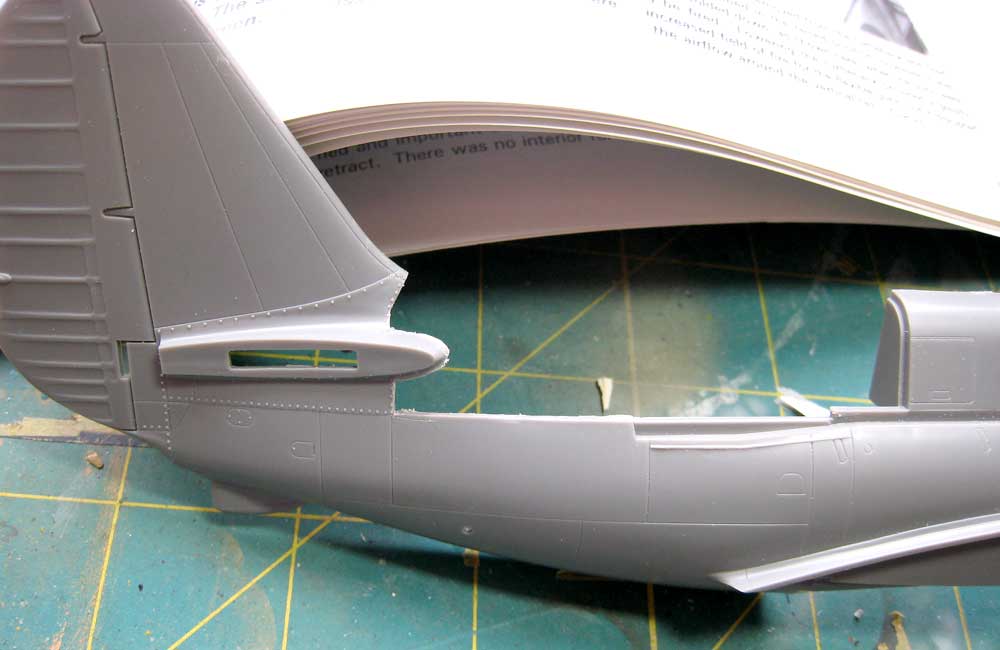
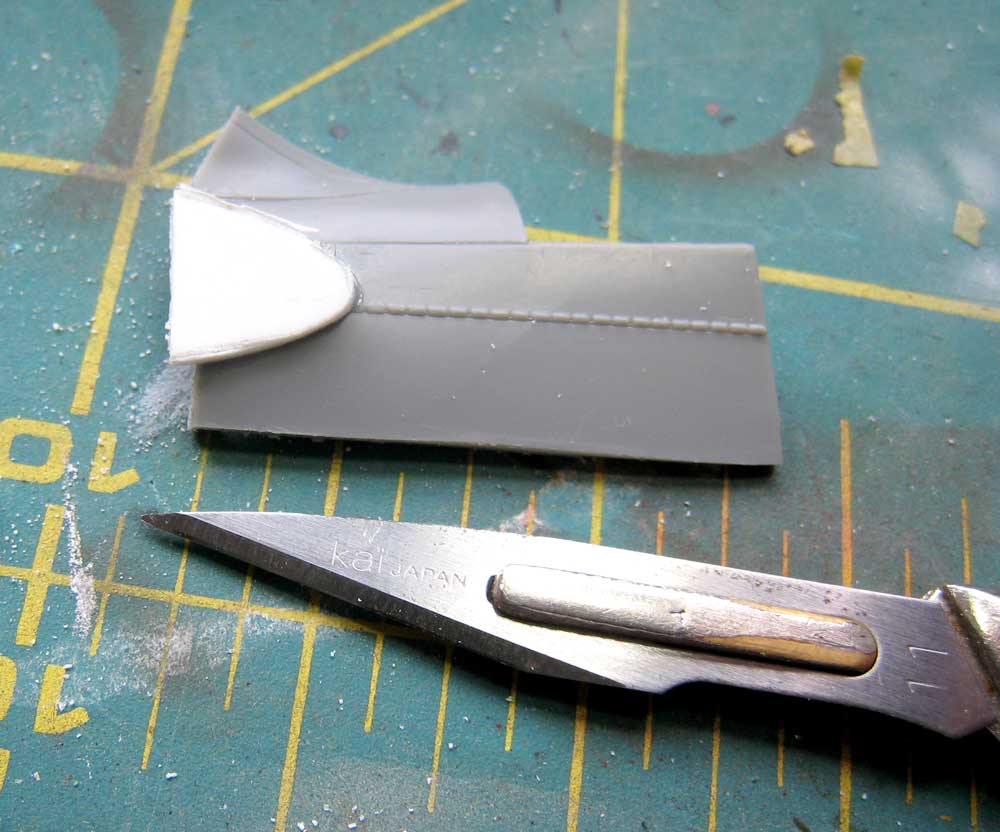
Result: a very different silhouette.

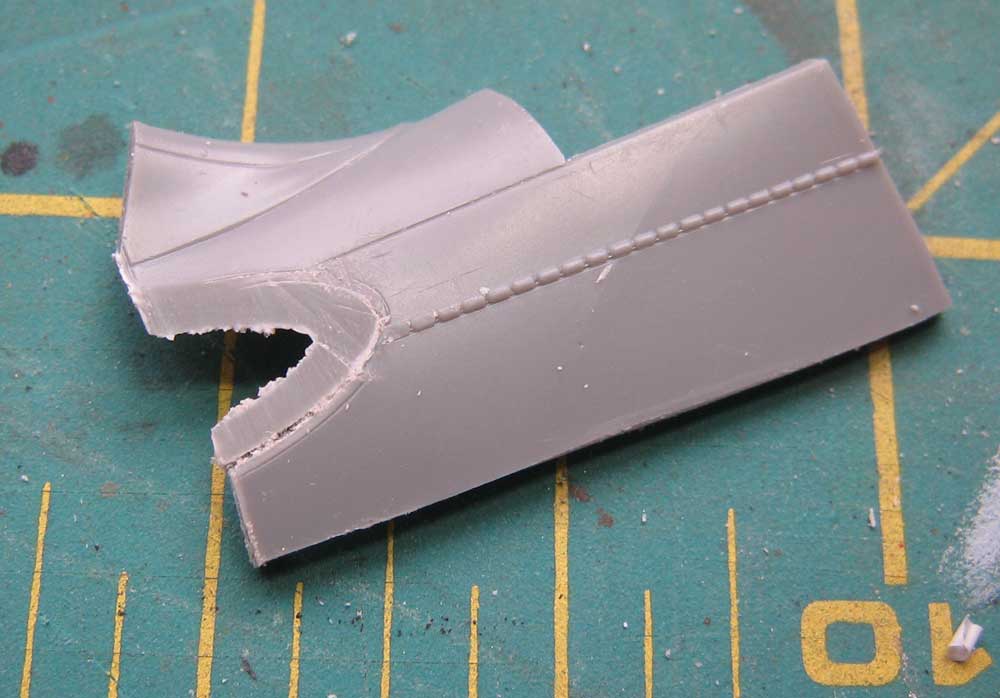
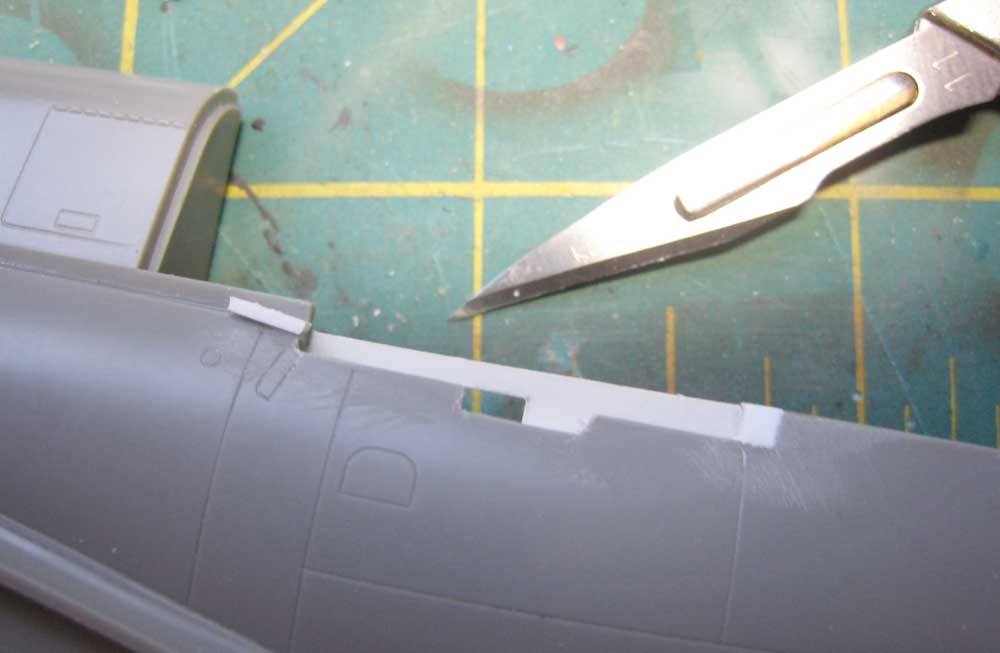
Here's the cut part:

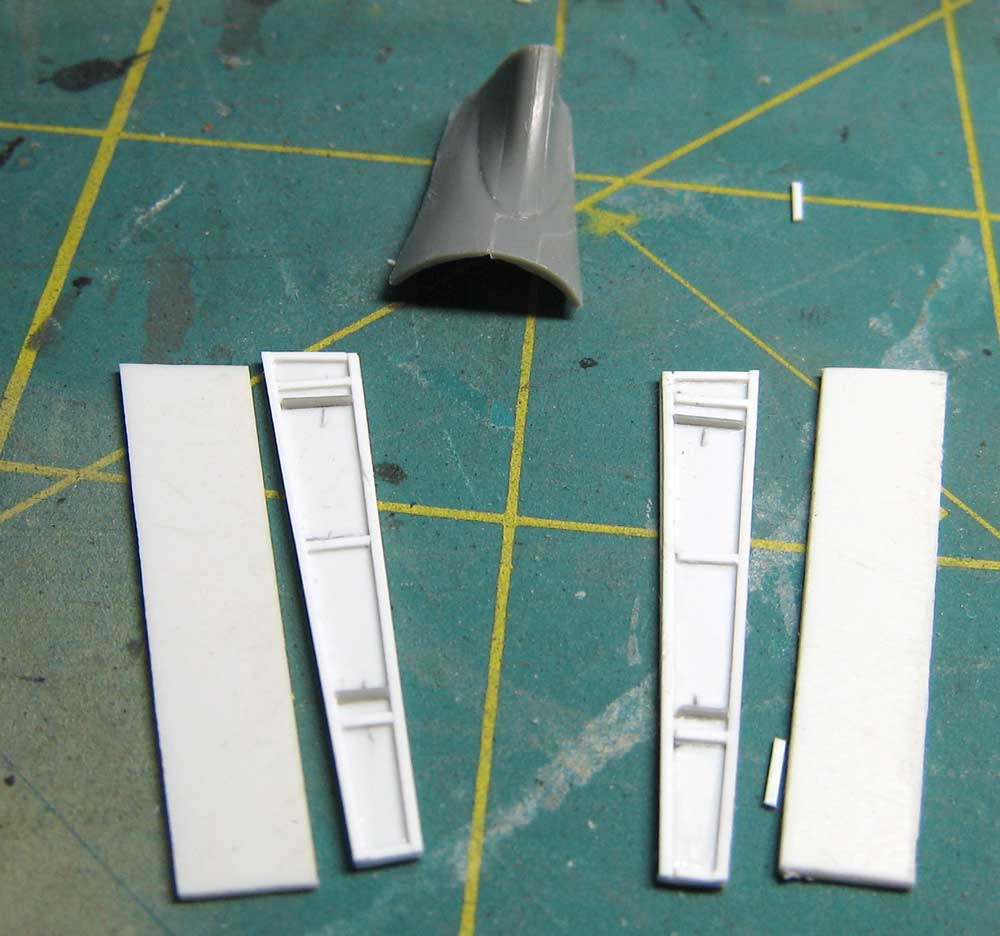
Some styrene is glued over the scab- modeling first aid! The doors themselves will be replaced with styrene copies- only the top fairing needs to be fixed up.

Well, now comes the fun part- you need to cut away the rear bulkhead on kit part, extend the floor and make a properly sized bulkhead. But... look at the gap! Whatever shall I do?? Stay tuned, bold readers!
chukw1
_VISITCOMMUNITY
California, United States
Joined: November 28, 2007
KitMaker: 817 posts
AeroScale: 729 posts
Posted: Wednesday, November 28, 2007 - 11:43 AM UTC
Got a little done- things have been busy!
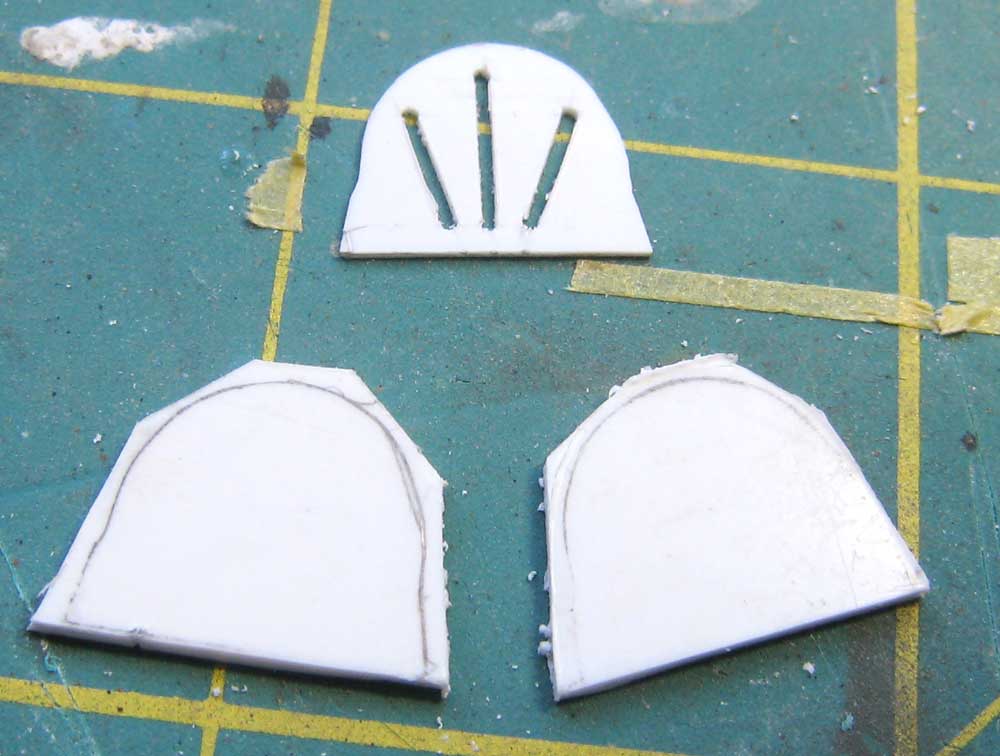
Here's that rear bulkhead, with stiffening grooves and rear laminations cut out:

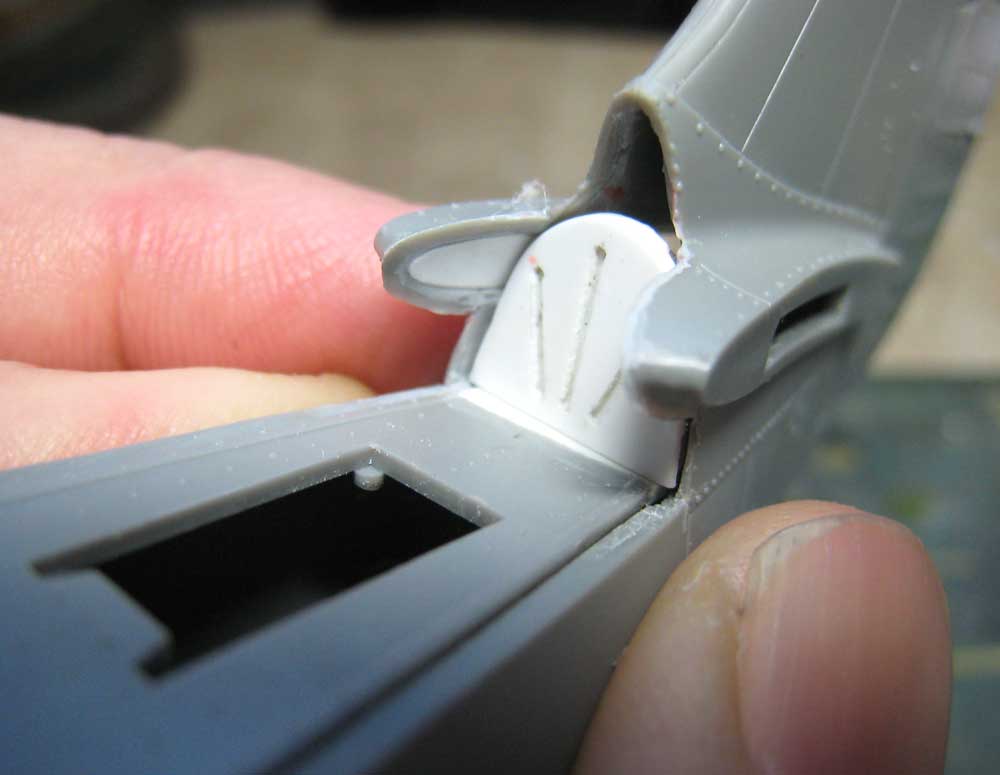
...glued, shaped and in the process of test-fitting. Photographic proof that I am all thumbs!

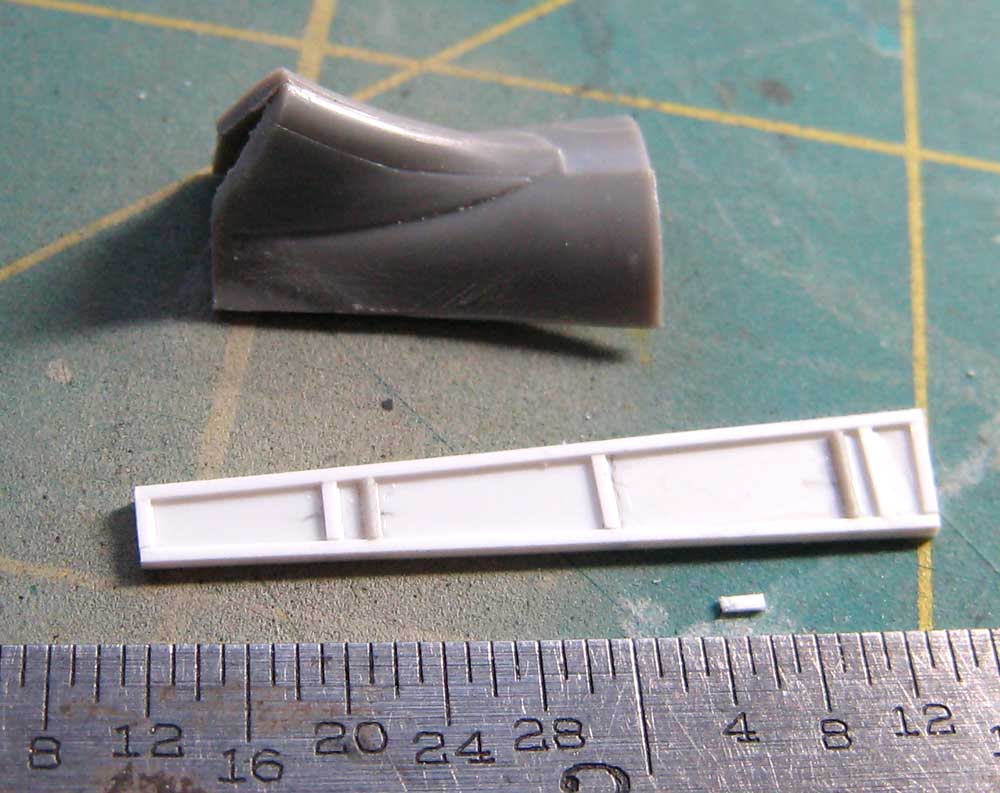
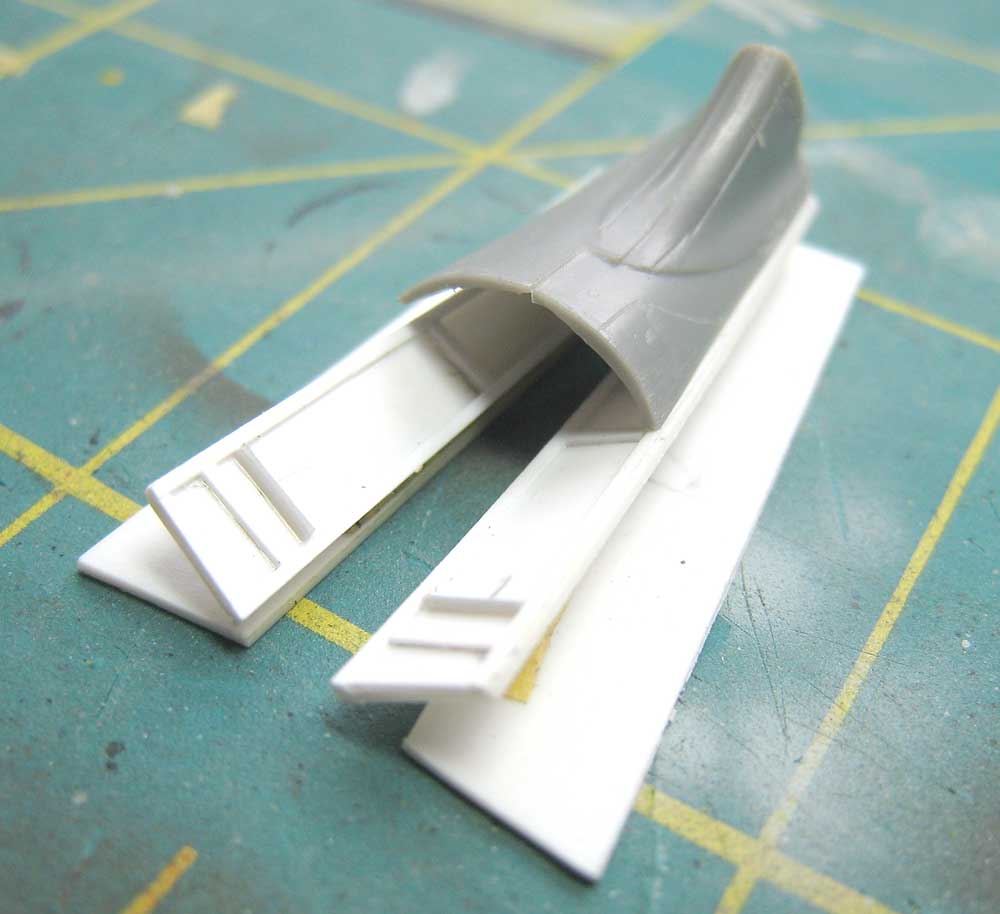
Here are the new folding panels, from styrene, stretched sprue and Evergreen strip, plus the tail fillet. Note the rudder offset- that's not making fitting the bulkhead any easier!

Here's a detail short- this is one of the second set of upper panels. The first set was ruined when I tried give them a mild bend using hot water to better match the ones cut from the kit. Careful examination of photos of the rear turtledeck doesn't really show any curvature. I think I'll leave 'em flat.

That's it for now, True Believers!
chukw1
_VISITCOMMUNITY
California, United States
Joined: November 28, 2007
KitMaker: 817 posts
AeroScale: 729 posts
Posted: Wednesday, November 28, 2007 - 11:44 AM UTC
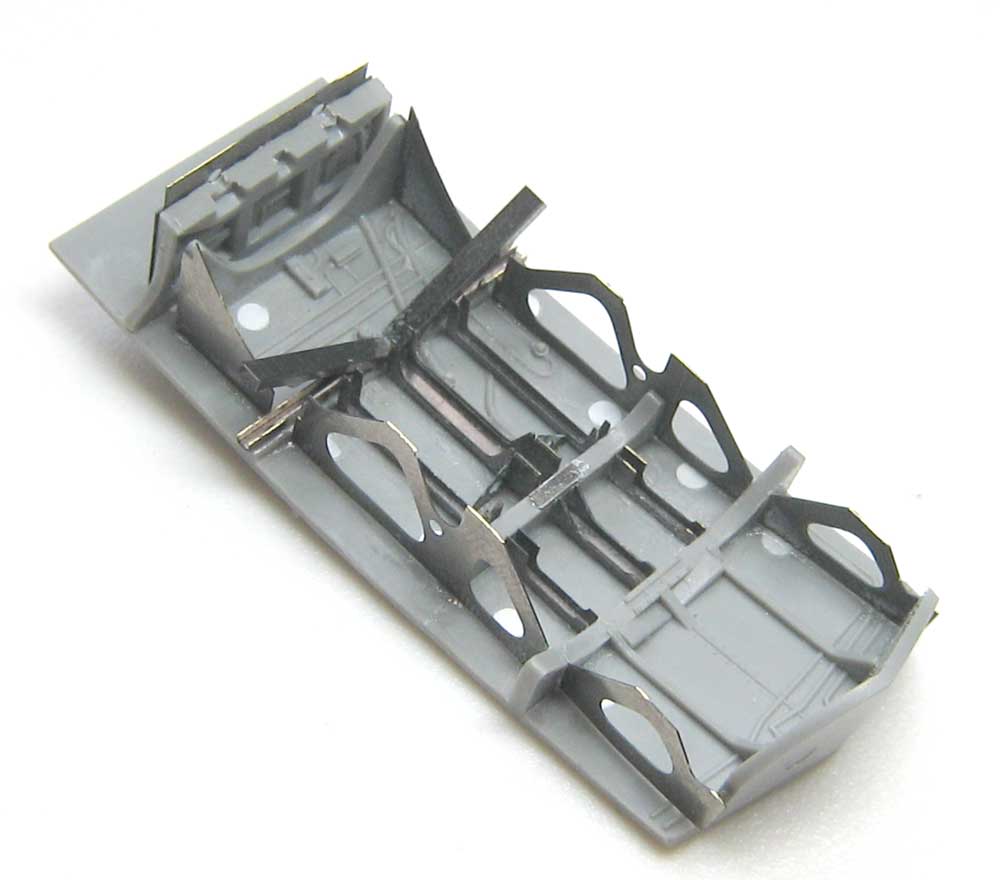
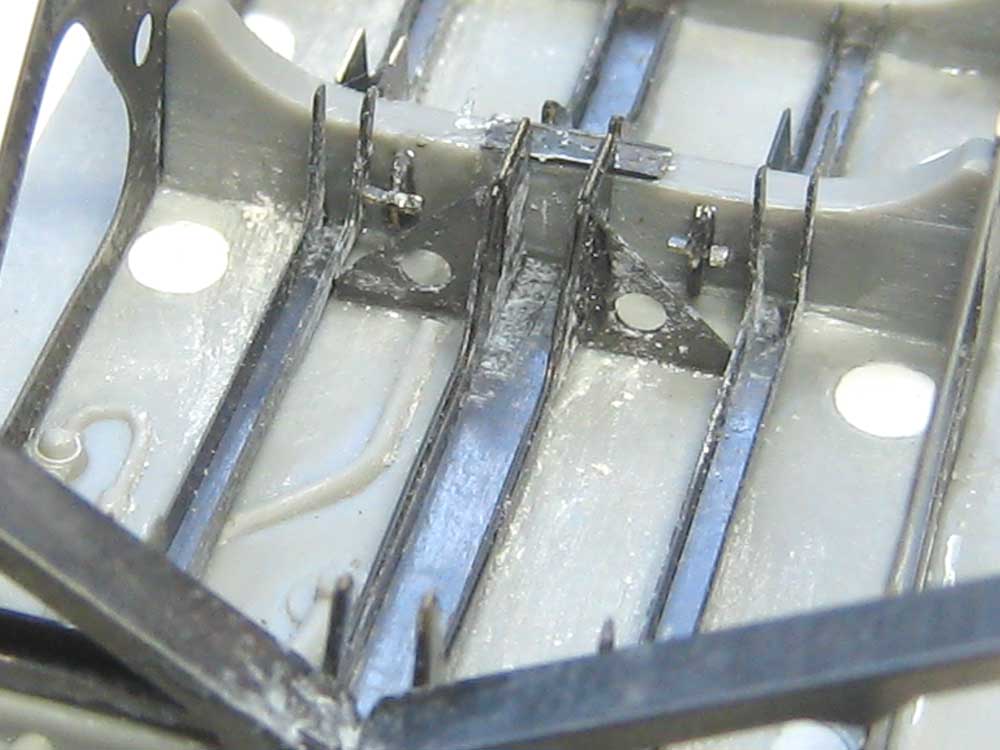
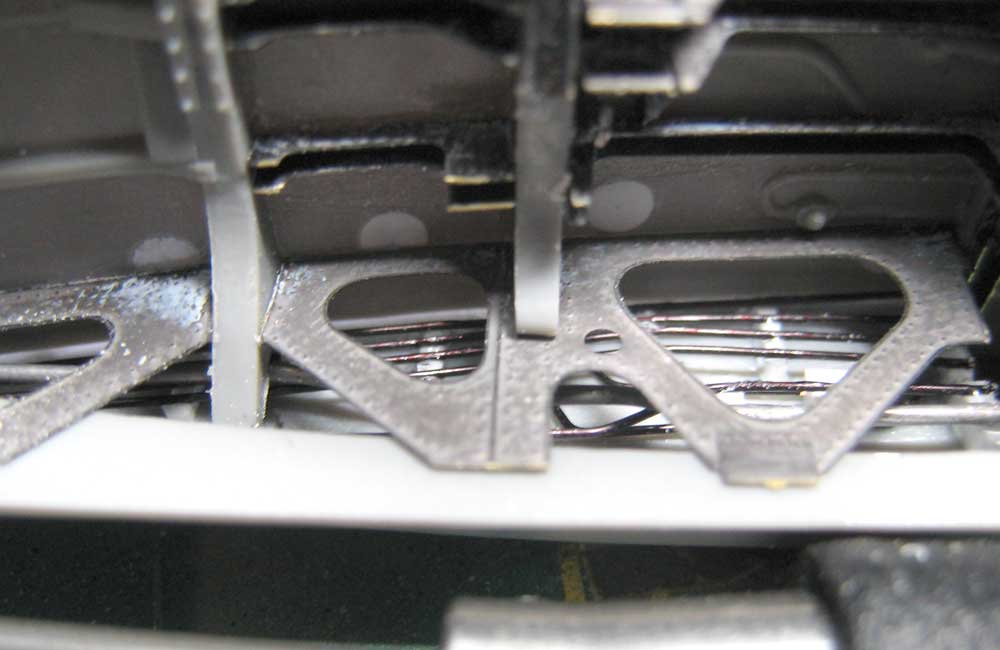
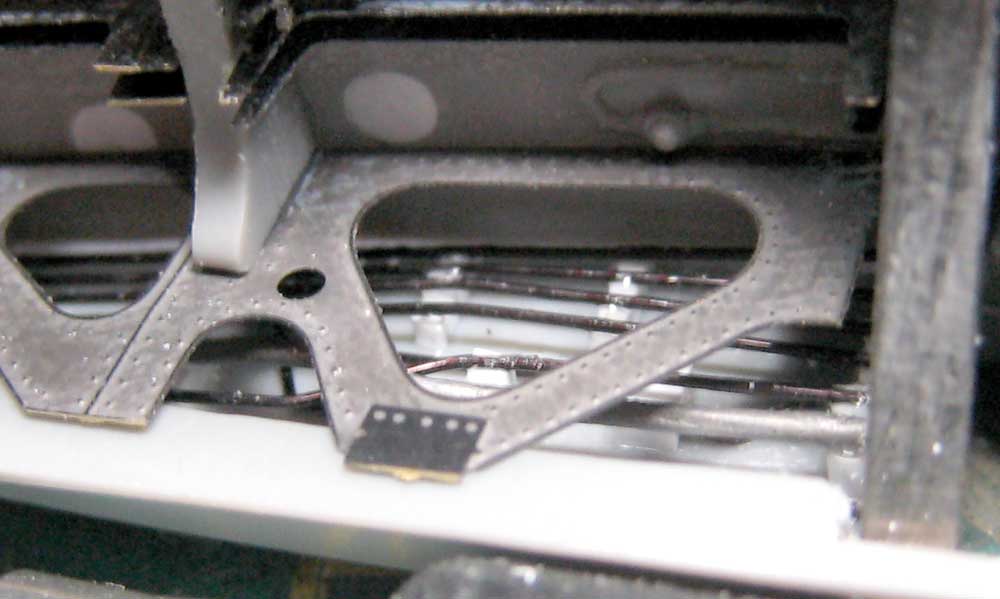
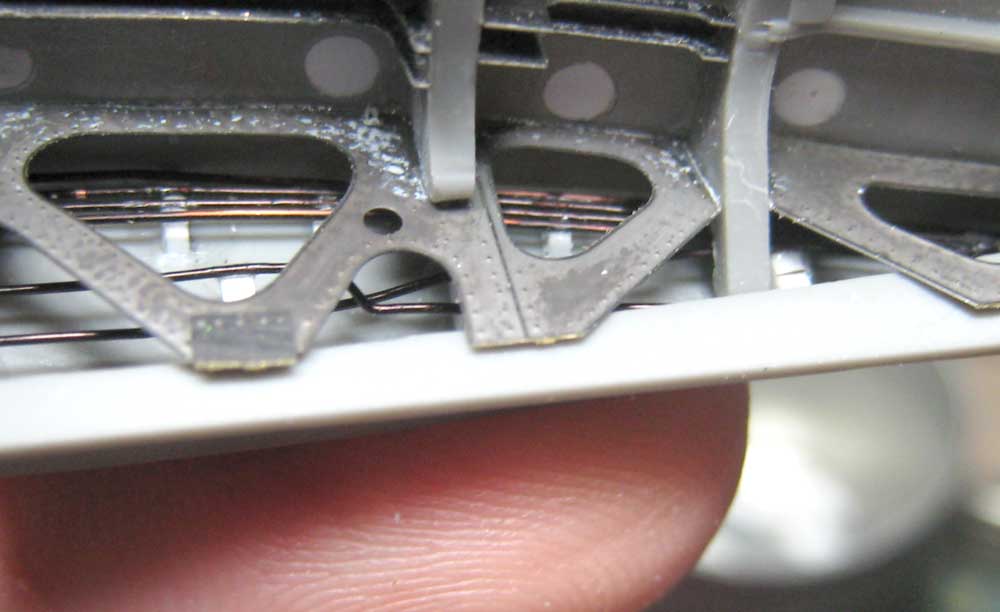
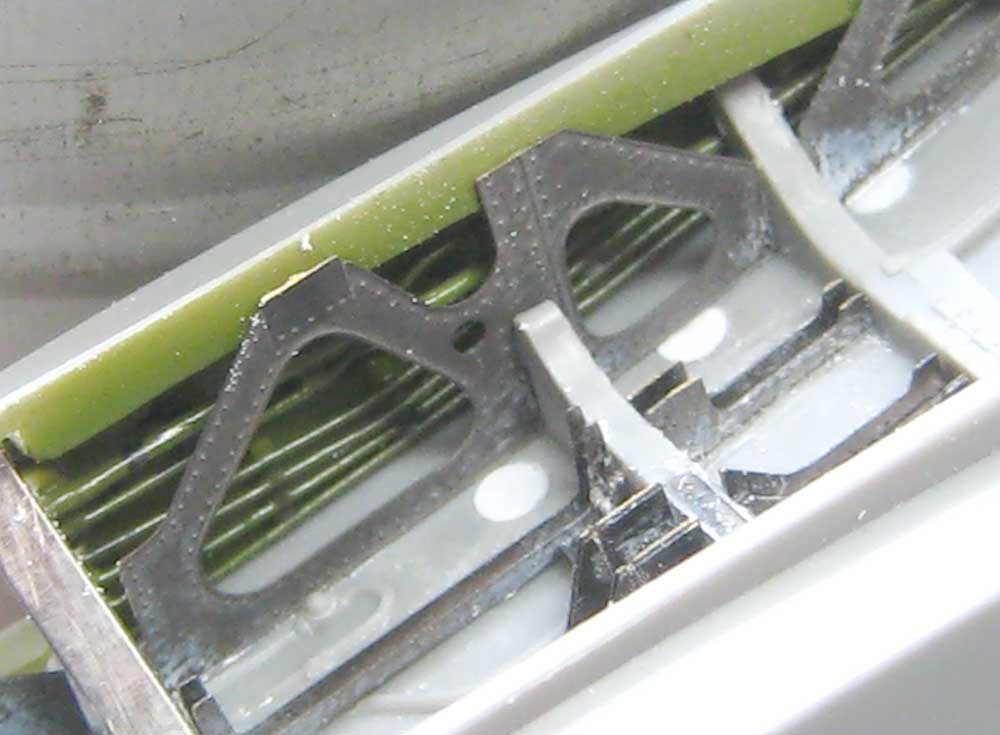
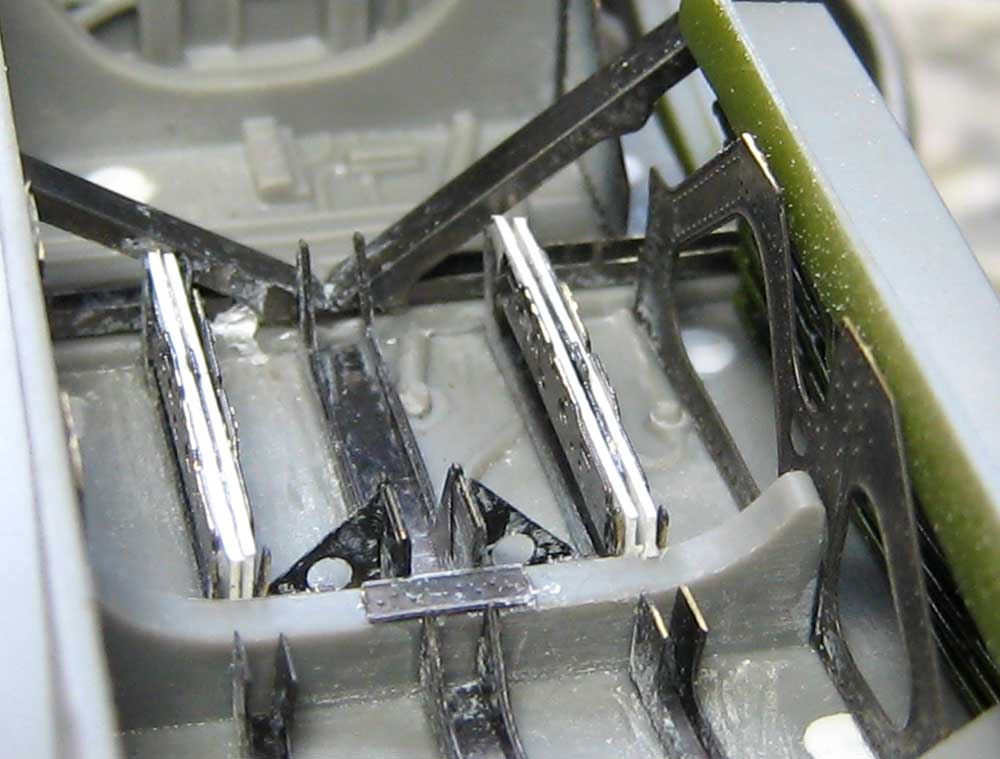
I managed to sneak a bit of modeling time in- I laid the photo-etch in the bomb bay- starting to look busy! The fit of all the little widgets is excellent- good job, Uncle Eduard!

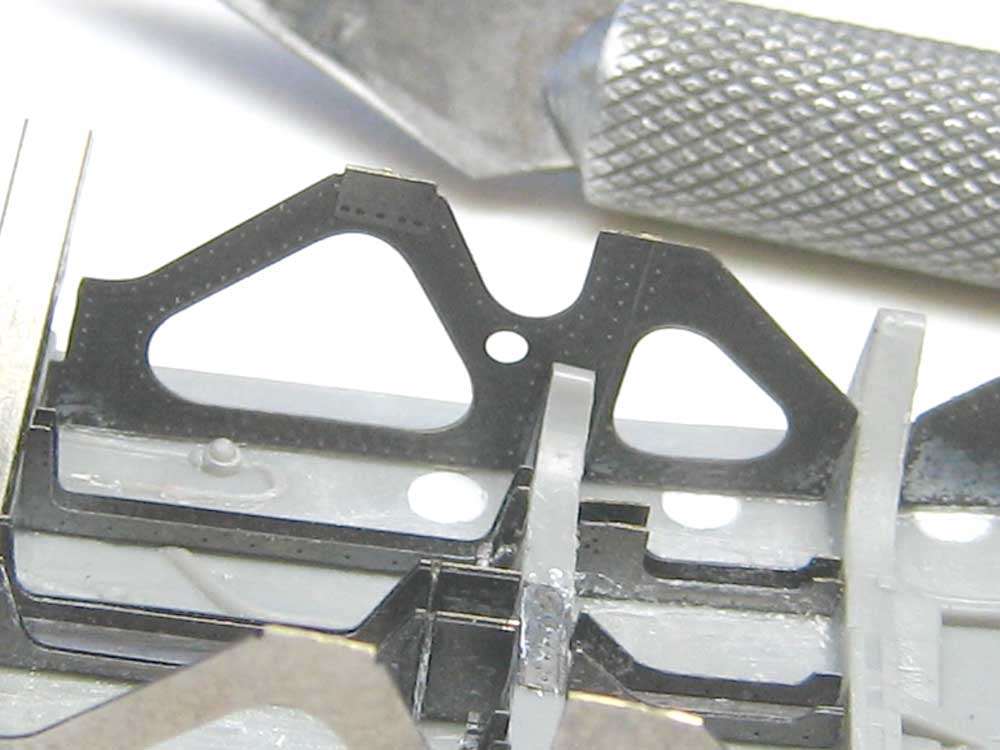
The trusses sport some excellent detail.

Uh-oh! Lots of CYA "frost"- not to worry- this will disappear under a coat of primer. Lots of plumbing to be added as well!

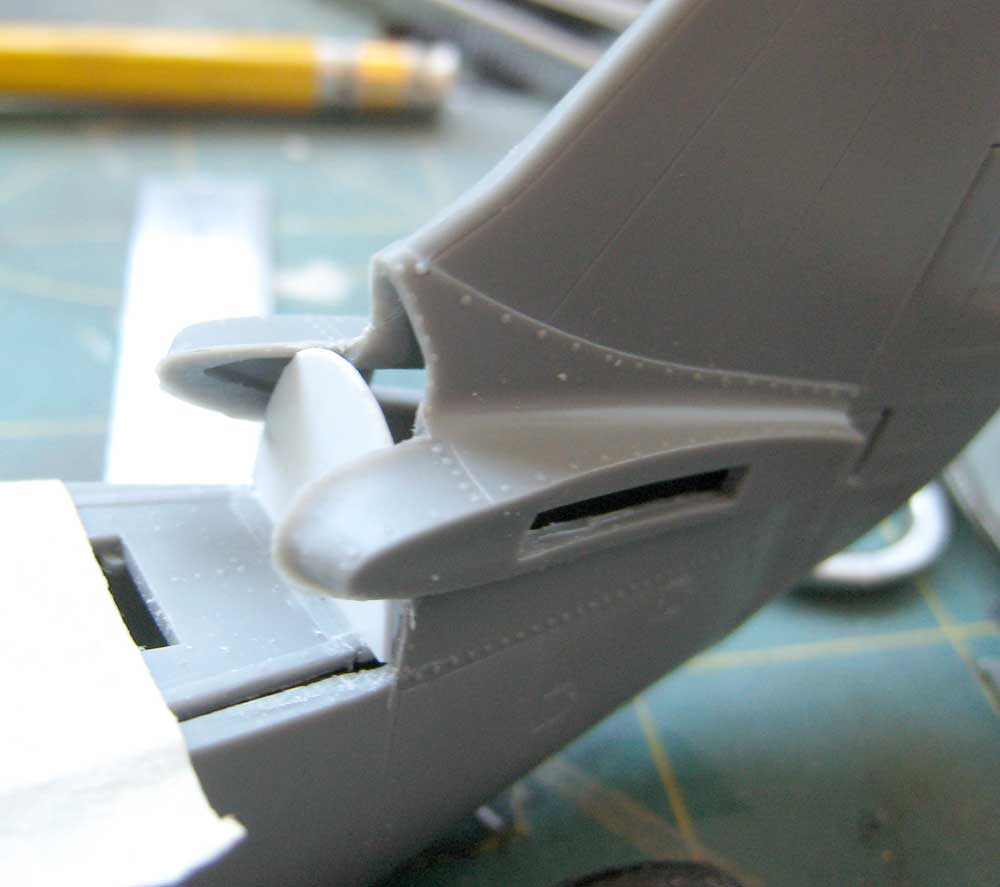
I'm still fussing with the turtledeck bits- here's the deck temporarily hinged with masking tape. I think it's gonna work. B)

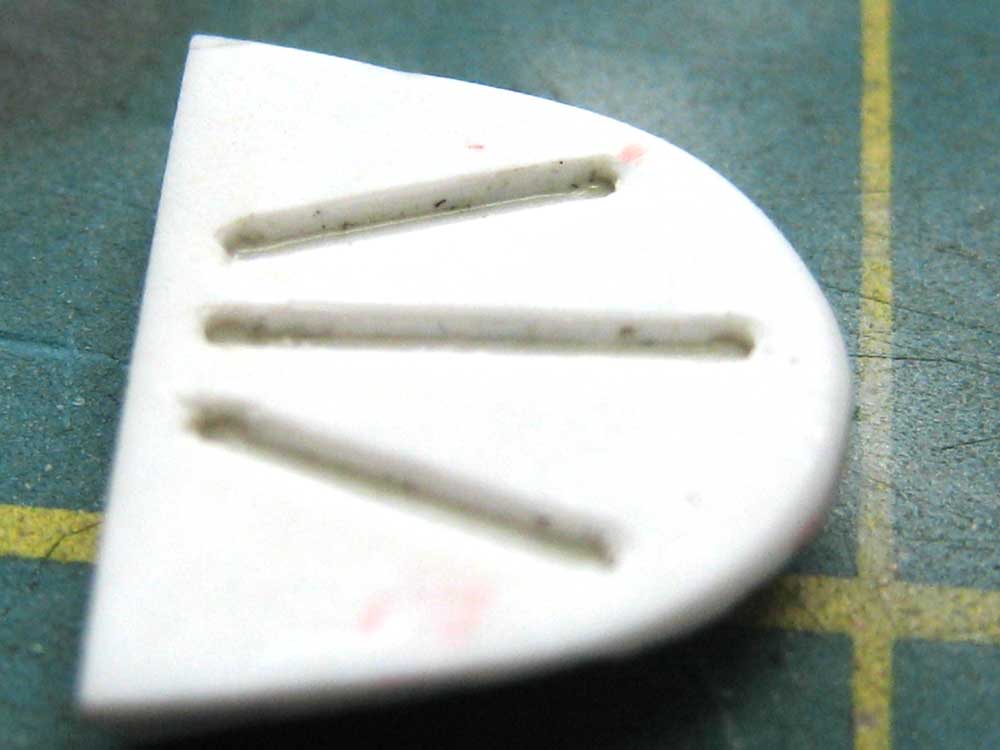
I did figure out a way to make those pressed stiffening ribs look less like these simple cutouts...

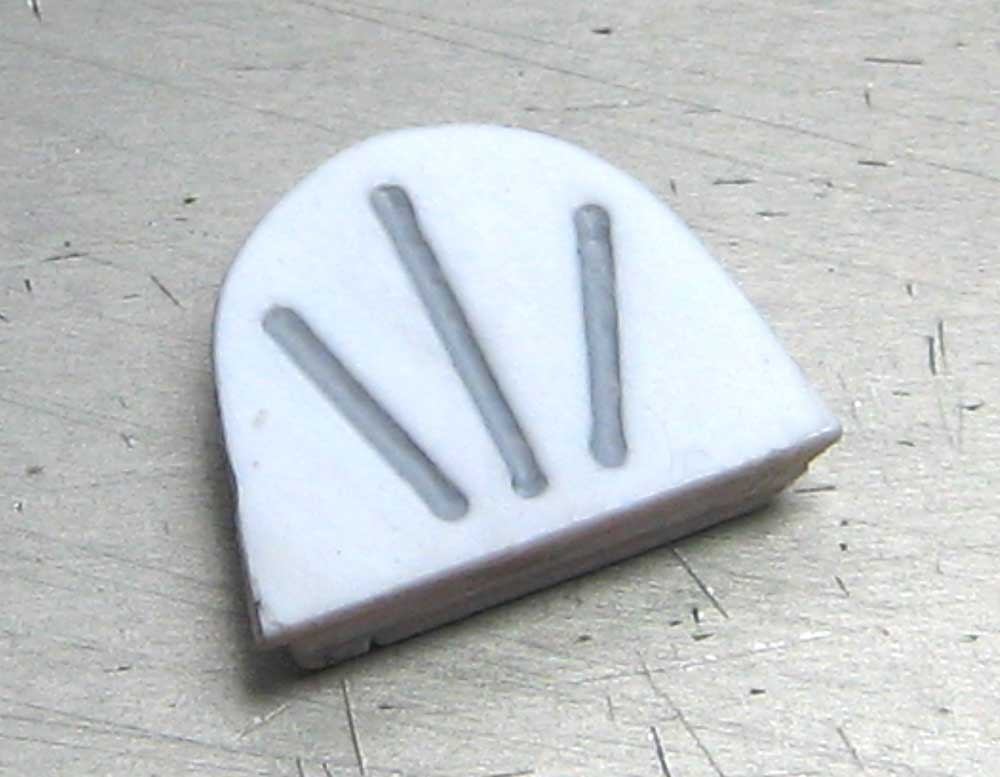
..just brush on a little Mr. Surfacer and let dry for 30 minutes or so. Then wipe away the excess with a q-tip dampened with laquer thinner- presto! Rounded grooves!
chukw1
_VISITCOMMUNITY
California, United States
Joined: November 28, 2007
KitMaker: 817 posts
AeroScale: 729 posts
Posted: Wednesday, November 28, 2007 - 11:46 AM UTC
Back to that bomb bay! Here's an alert- one thing the good folks at Eduard fail to mention is this little stub spar in the wing root. Chop it out or the PE-enhanced bay won't fit!

Here's what it should look like- easy!

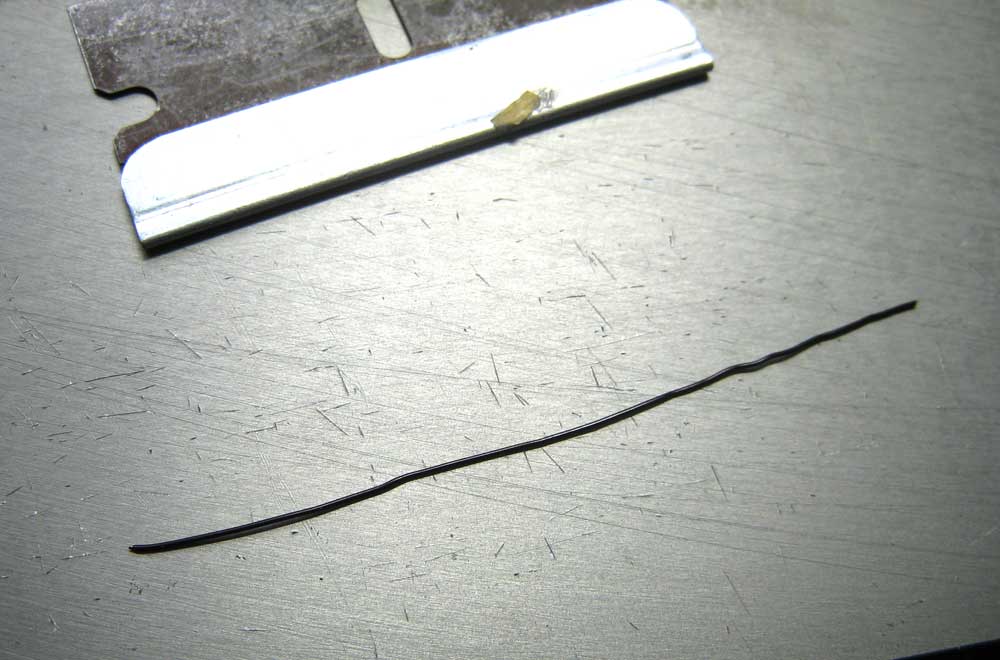
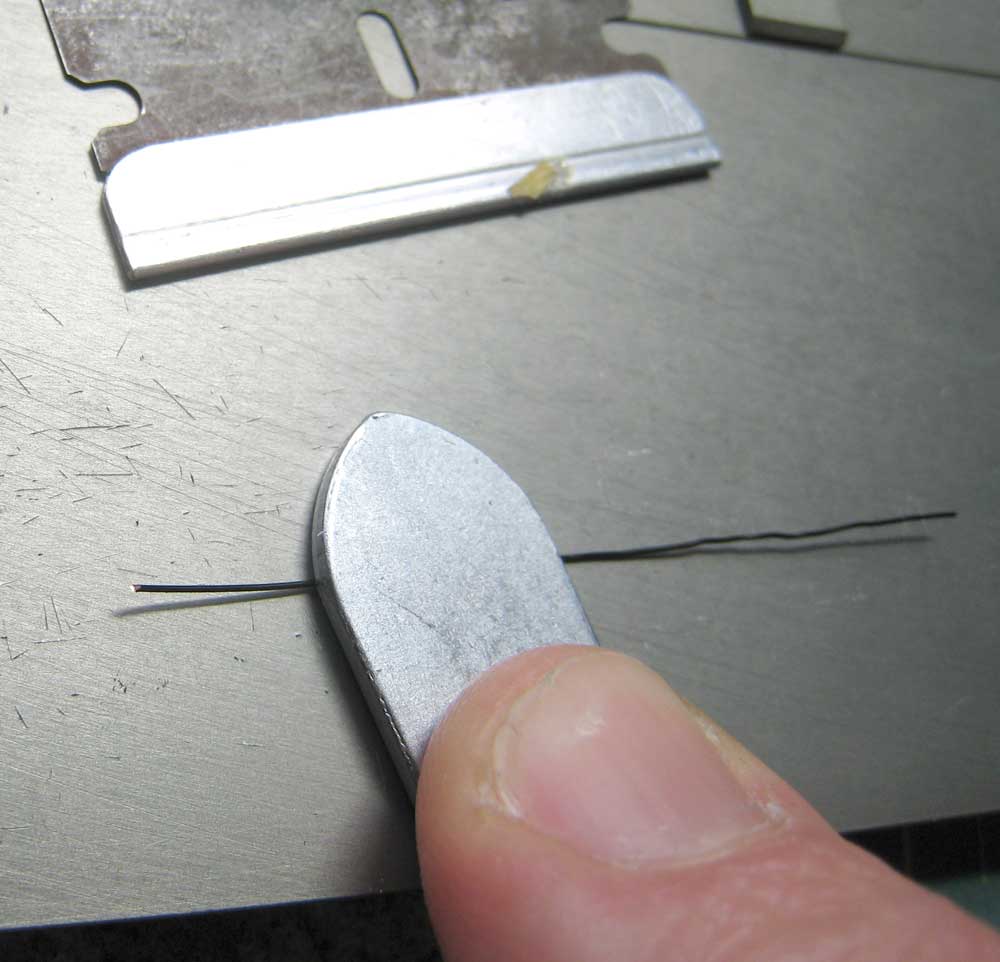
Before we go any further, here's a tip for straightening wire- even a kinked piece like this can be salvaged. Just lay it on a flat, hard surface- glass will do, but I use the base of my Mission Models Etch-Mate.

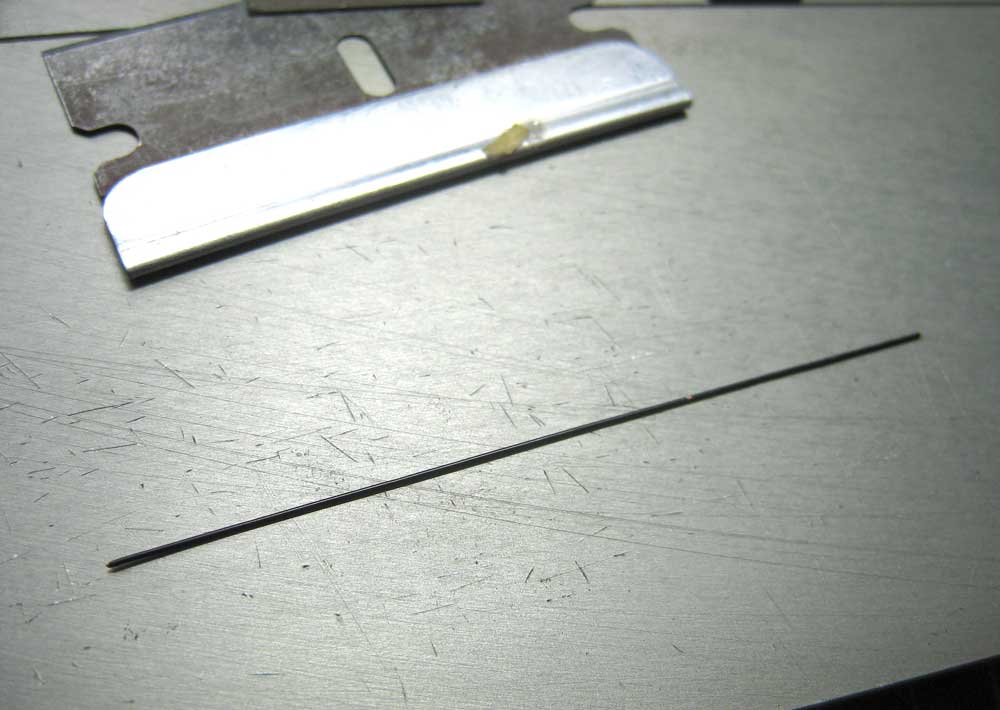
Simply roll the wire with a flat tool, like the base end of a pair of tweezers.

Hey, Presto! The wire is ready to become a simulated hydraulic line.
chukw1
_VISITCOMMUNITY
California, United States
Joined: November 28, 2007
KitMaker: 817 posts
AeroScale: 729 posts
Posted: Wednesday, November 28, 2007 - 11:46 AM UTC
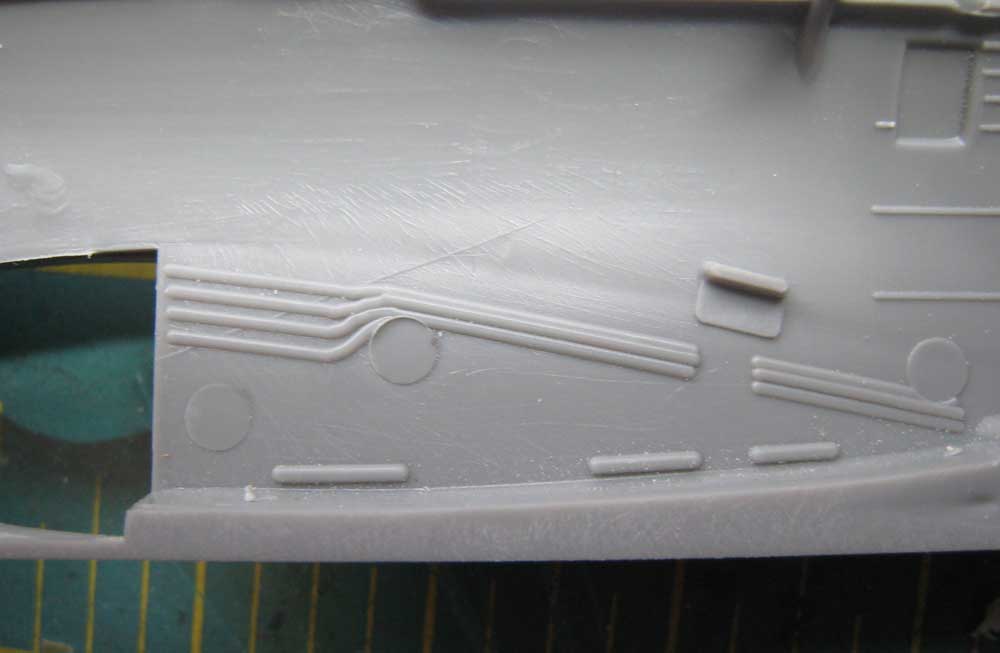
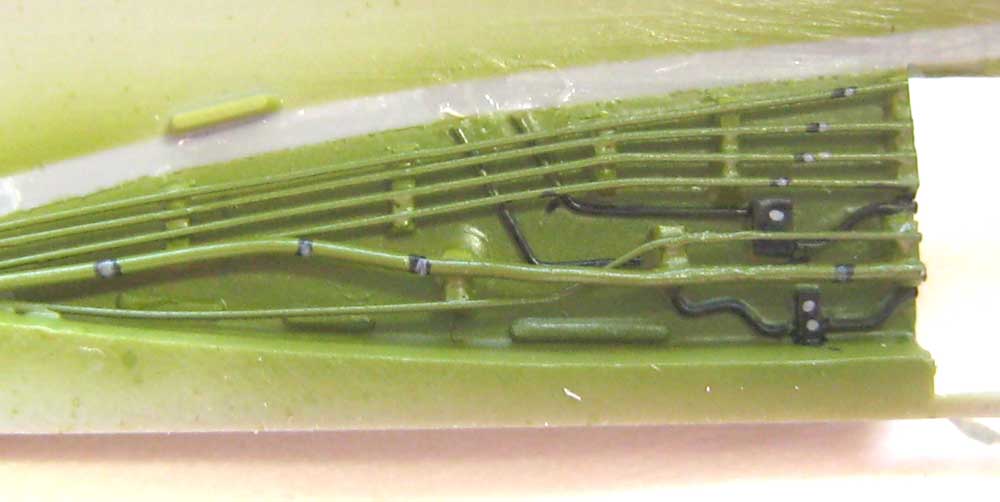
The kit wing roots display some basic engraved detail- these appear to be the continuations of the hydraulic lines in the wheel well. They've got to go- scrape 'em out!

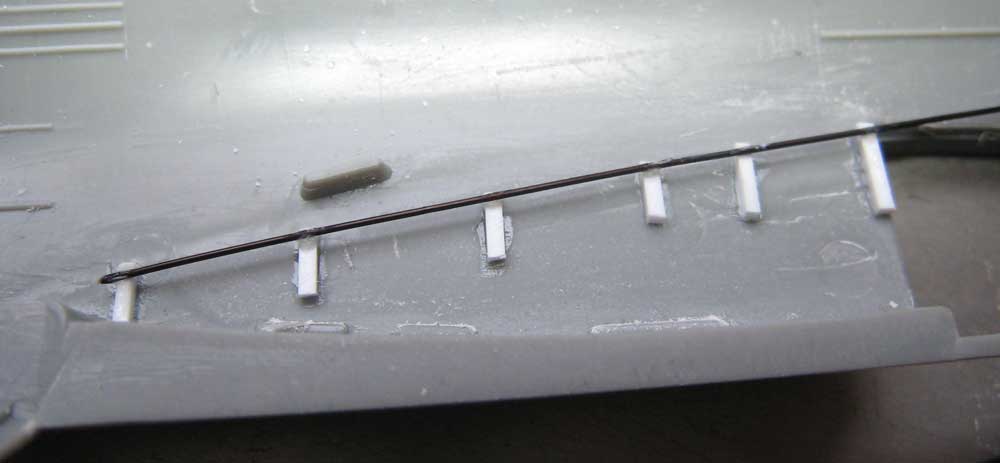
Add some spacers from styrene stock and place your first wire- it's basically straight.

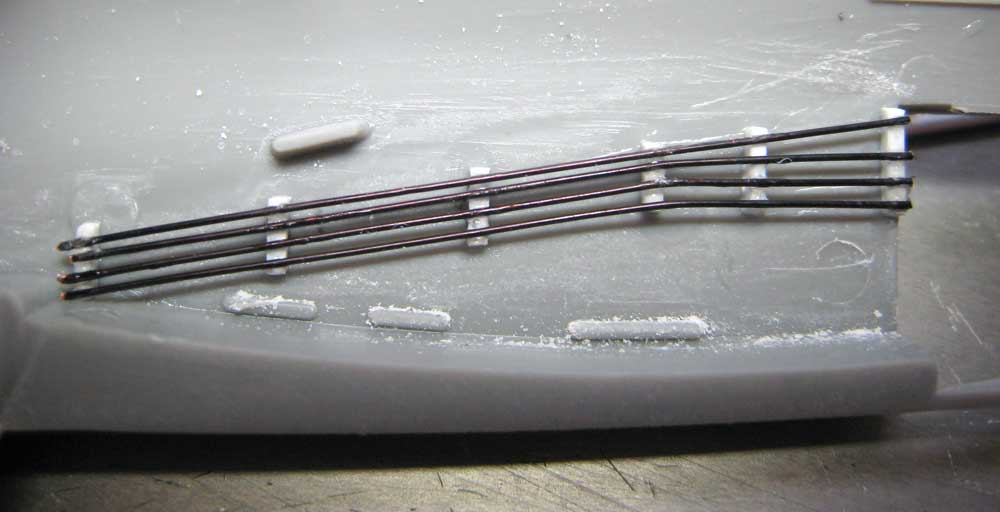
Here the rest have been added.

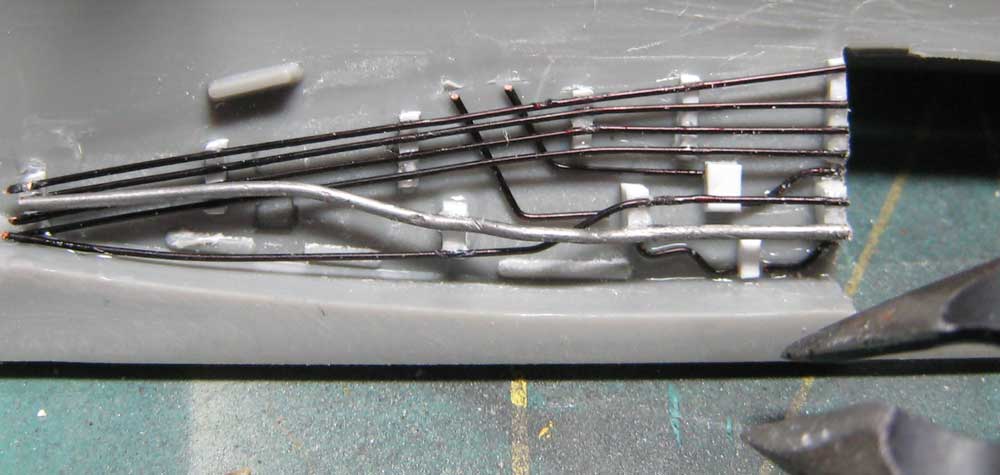
Using more spacers a second layer of piping has been put in place- not a thicker line form fine solder. I was having fun and this was going a lot faster than I thought it might, so I added a third layer, flush with the hull. Tiny blocks of styrene formed junction boxes which I linked together with neatly-bent lengths of scrap wire form the first two layers. Waste not, want not, move along quickly.

Here's what it looks like with the bomb bay dry-fitted in place.


I did the other side while I was all fired up.


Test-fitting the wings saved me from an awkward time fitting the baomb bay later, but also revealed upcoming obstacles. The fit ain't so hot, and the chord on the starboard ming seems too long for it's rroot. Oh, Woes! Not to fear- I'll let this problem percolate through my chugging cranium. Victory shall be mine!
chukw1
_VISITCOMMUNITY
California, United States
Joined: November 28, 2007
KitMaker: 817 posts
AeroScale: 729 posts
Posted: Wednesday, November 28, 2007 - 11:47 AM UTC
Here's a shot of the root wearing some quick paint. I'm not going too crazy because it'll tough to protect it from overspray.

I've glued the subassembly to the fuselage- no turning back now!

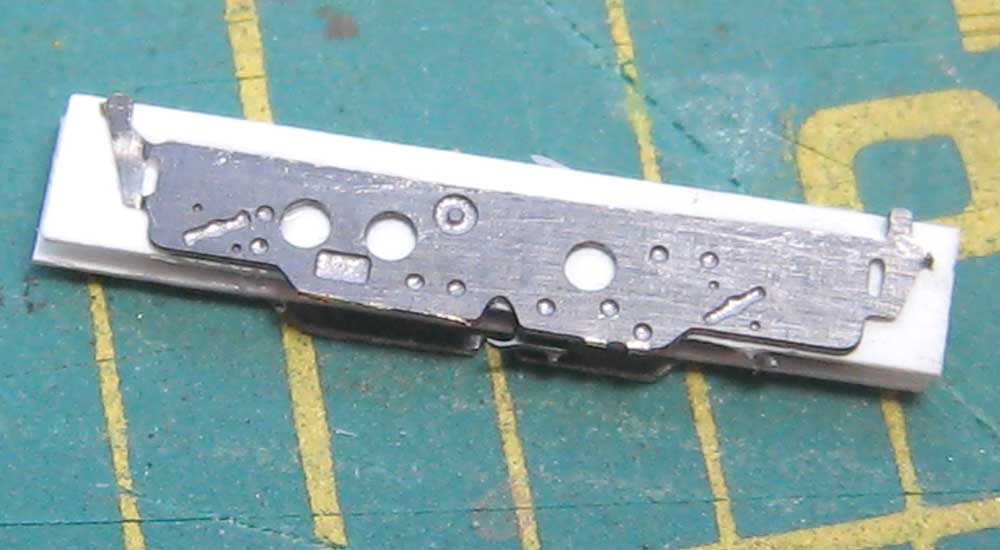
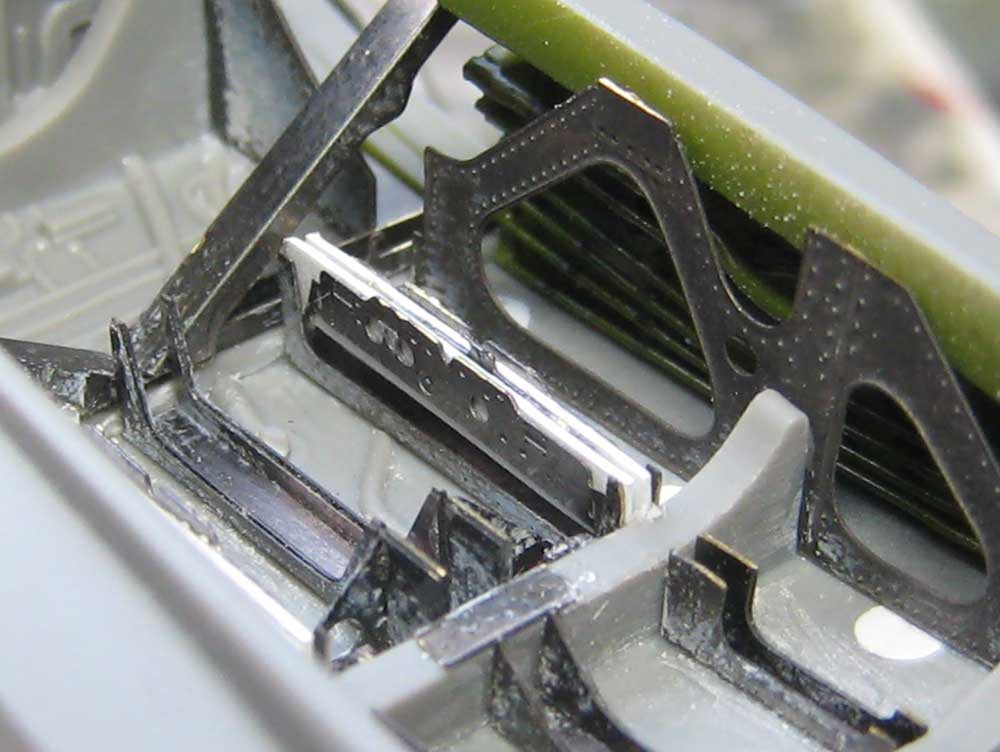
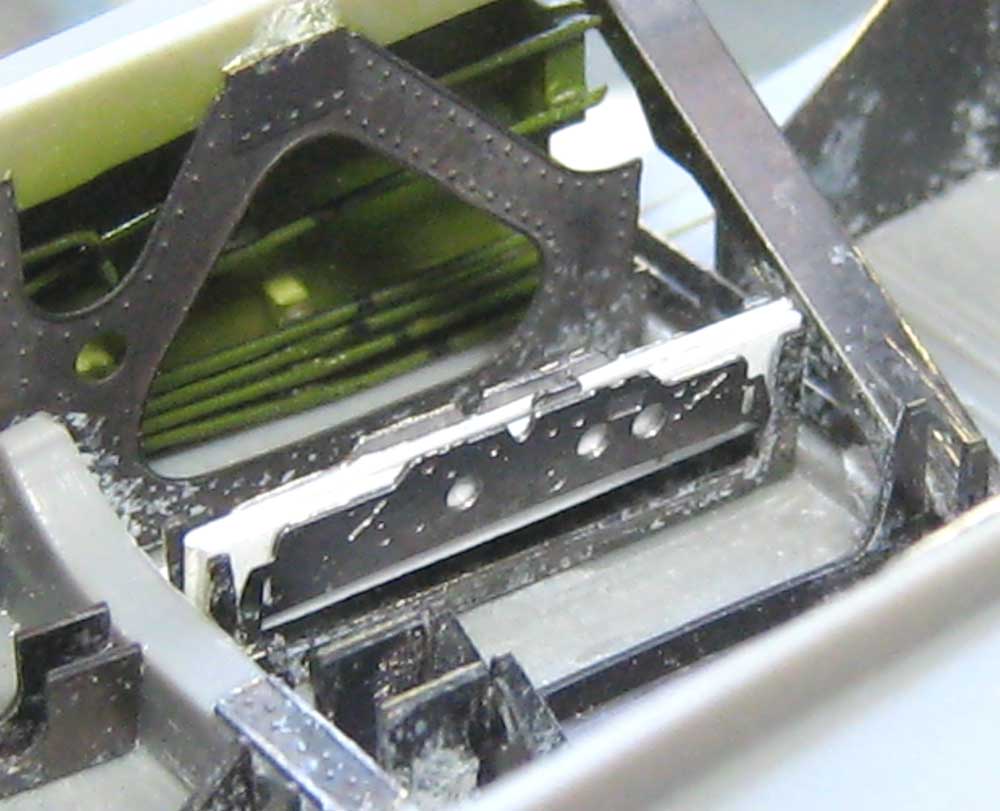
After relentless inspection of the photographic reference at hand, I finally realized what was missing from the bay. It's the actual bomb racks! Eduard referenced the surviving SB2C-5, which has had 'em removed. I swiped some PE racks from Classic Airframes' Brewster Model 239 Buffalo (Finnish version)- they're a nice surplus on the etch fret. I layered them with some strip of styrene to fit the Etched brackets. Kinda kluged together, but they look good and busy.

Here they are temporarily set in place- they're bare metal, so I'll fix them in after the Interior green is sprayed in.


My photos show a centerline rack fitted along with the outers- for a heavy payload. I'll be scratchbuilding this one- but now I've got to go wash the Spyder. See you next week!
chukw1
_VISITCOMMUNITY
California, United States
Joined: November 28, 2007
KitMaker: 817 posts
AeroScale: 729 posts
Posted: Wednesday, November 28, 2007 - 11:48 AM UTC
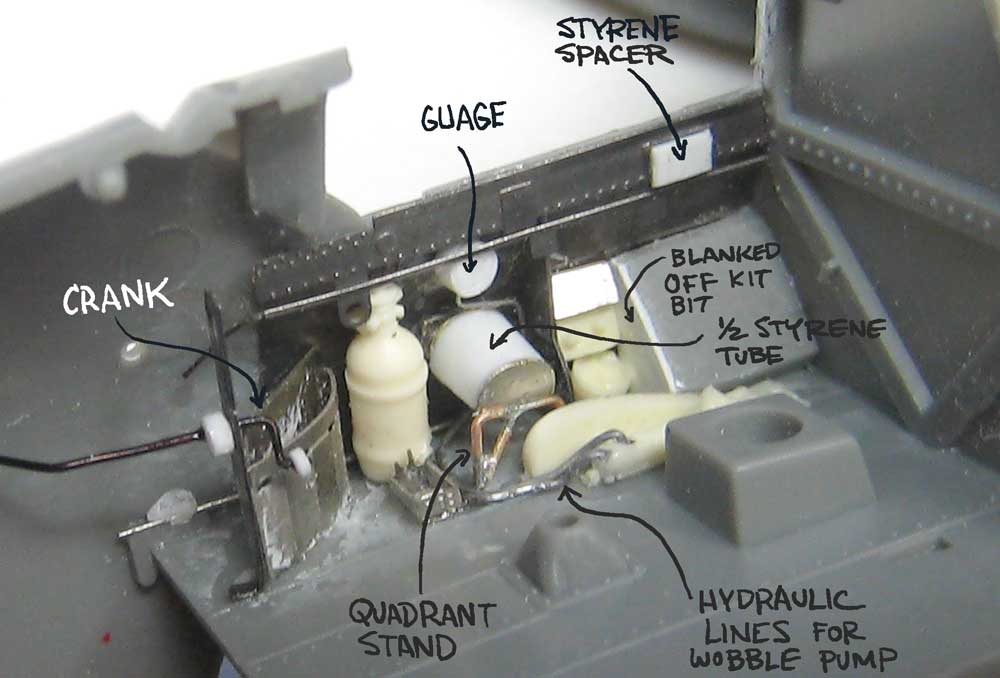
I got a little done last weekend, but nothing to write home about. I spent this Saturday at the office- the pilot's office, that is! So far, just the cockpit floor, bulkhead and one little sidewall bit are left from the kit parts. I've used all the Eduard bits and some of the better parts from from the True Details set. Here's an early shot of the starboard sidewall. Note the soldered brass legs for the control quadrant, the solder hydraulic lines for the wobble pump ready for placement- and the repair to the goofed-up PE quadrant. Oh, well- ya mess up these little bits once] in a while... oh:

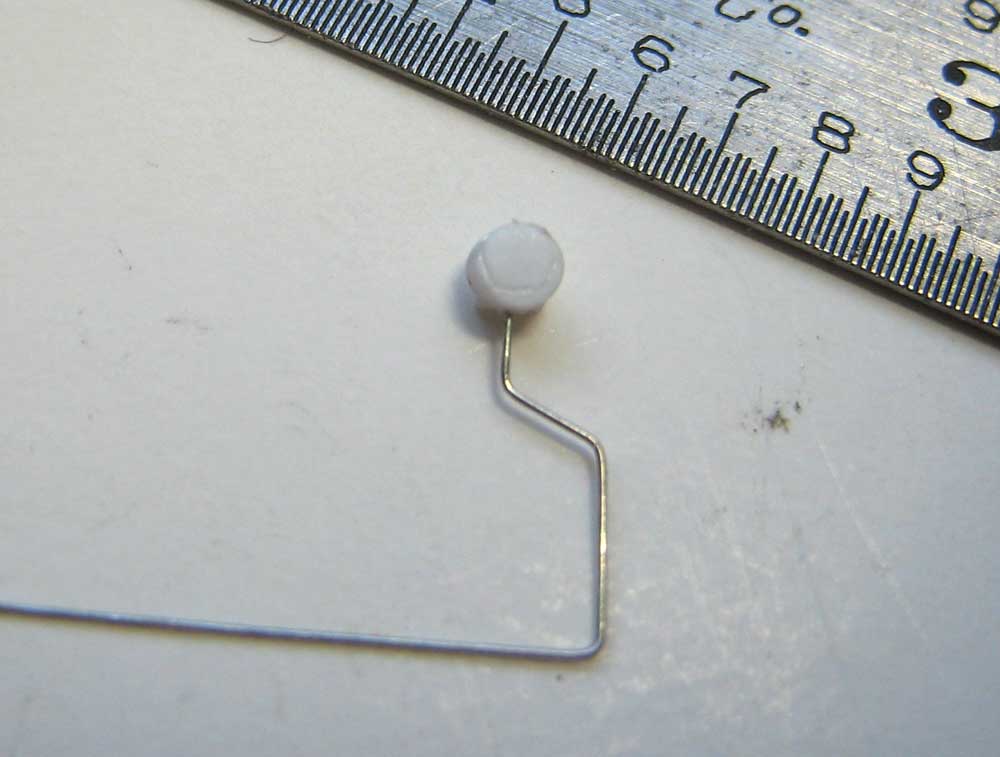
I added a guage seen in a photograph. The True Details version was kind of lumpy so I made my own. The wire is stripped from an old bit of electric cable.

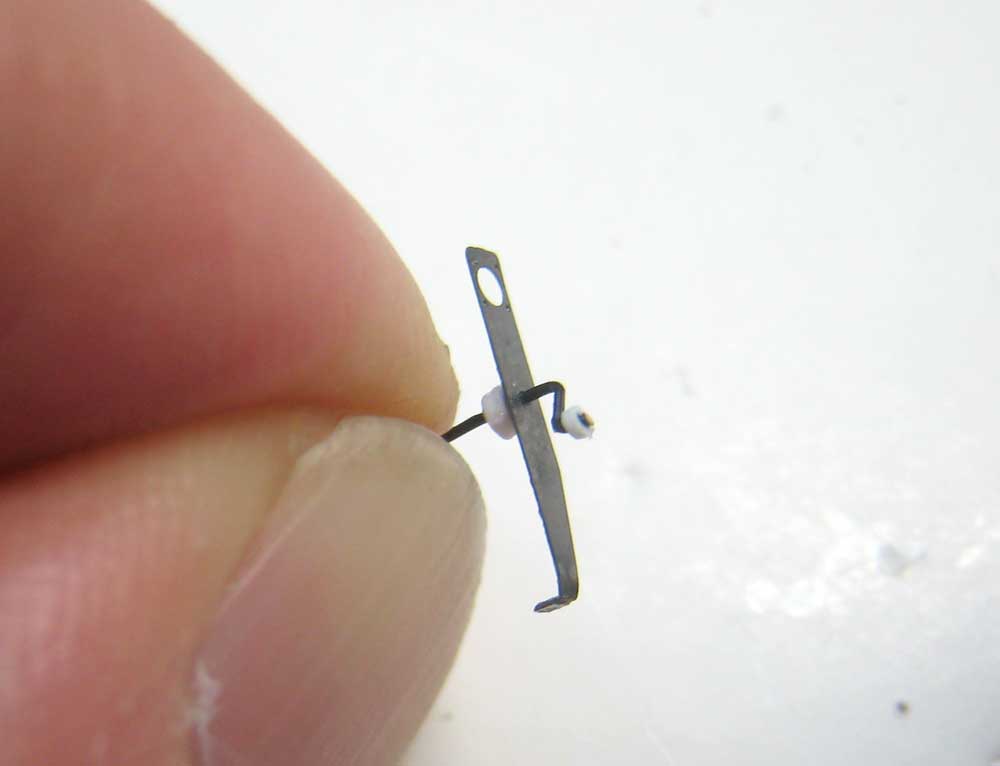
Eduard provided this bracket, but I made the crank that goes through it. I drilled tiny holes in styrene and then punch out the discs for the knob and support spacer.

Here's an annotated view of the sidewall listing all the scratchbuilt (and repaired) pieces.

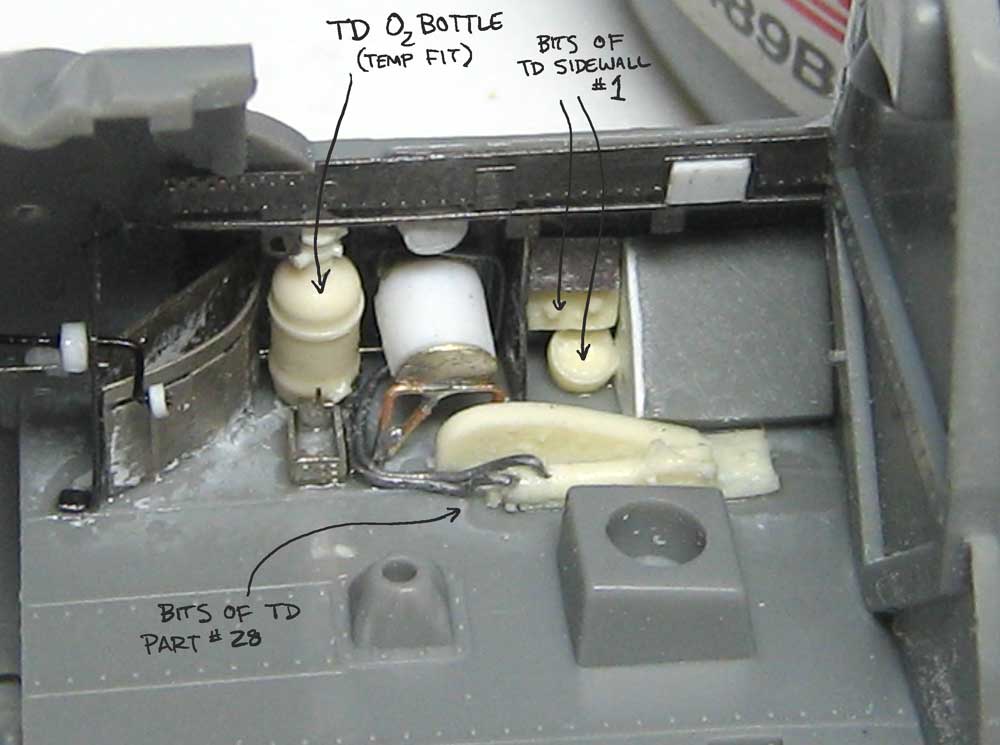
Likewise, a breakdown of the True Details elements.

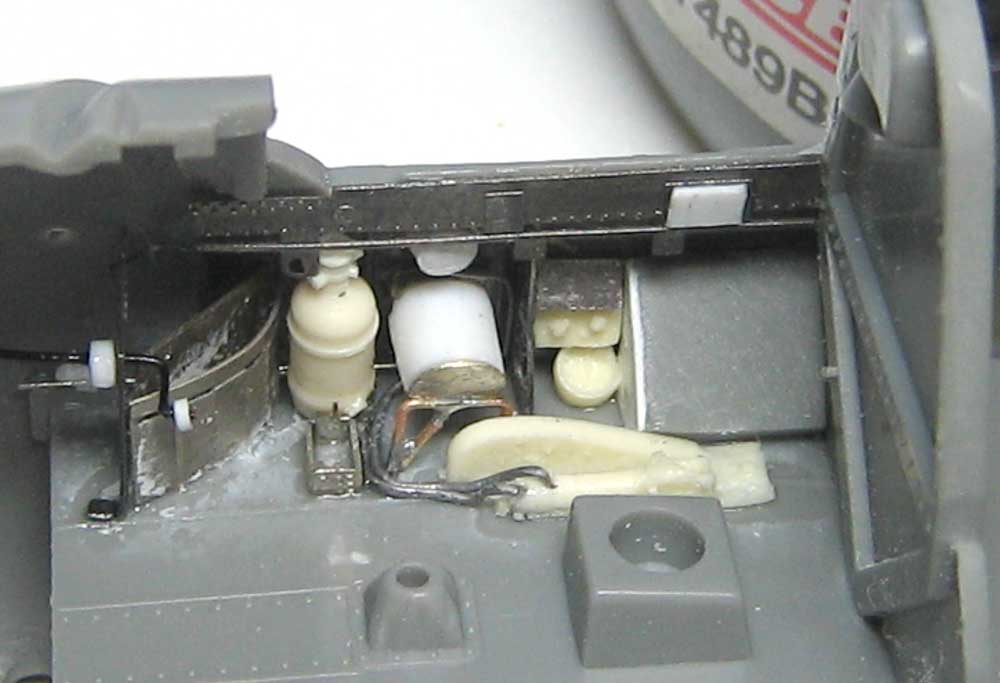
Let's see it without all that yammering:

There's lots of pre-colored and printed PE to go in, but that will have to wait until after painting....

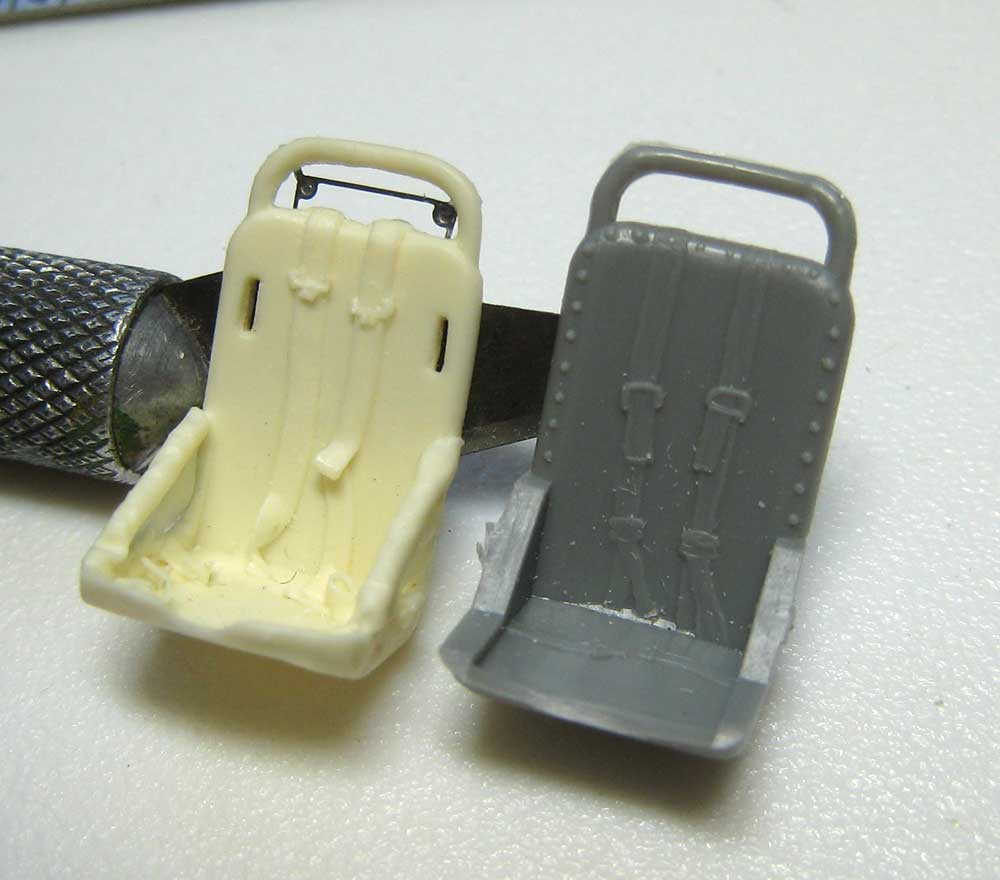
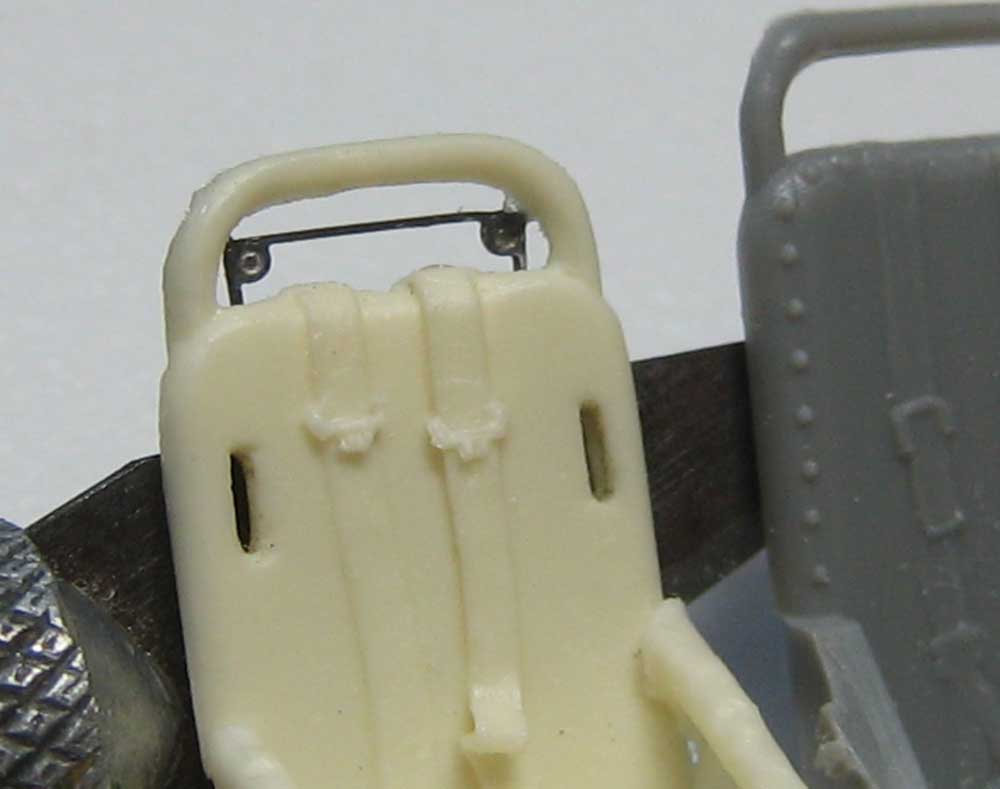
Every office needs a comfy chair, and True Details wins out here- check out the comparison with the kit chair. I like seat belts as they're molded here.

Eduard adds this uber-nifty set of pulleys and bungees for the adjustment mechanism. I love this stuff!
chukw1
_VISITCOMMUNITY
California, United States
Joined: November 28, 2007
KitMaker: 817 posts
AeroScale: 729 posts
Posted: Wednesday, November 28, 2007 - 11:49 AM UTC
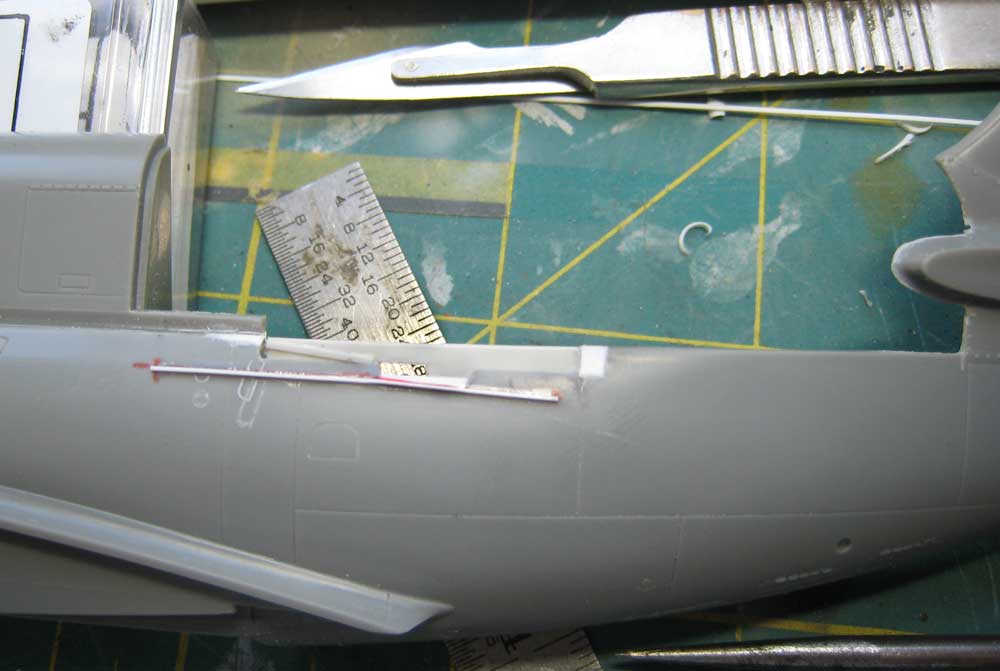
I'm truly thankful- for four days off this week! My Thanksgiving holiday gave me plenty of time to get down to work. I always study my ref before tackling a sub-assembly and noticed that the kit rear canopy opening was just plain wrong. Curses! The rails need to be fixed and the opening re-shaped. I've already glued a bit of styrene into the gap to shorten it up.

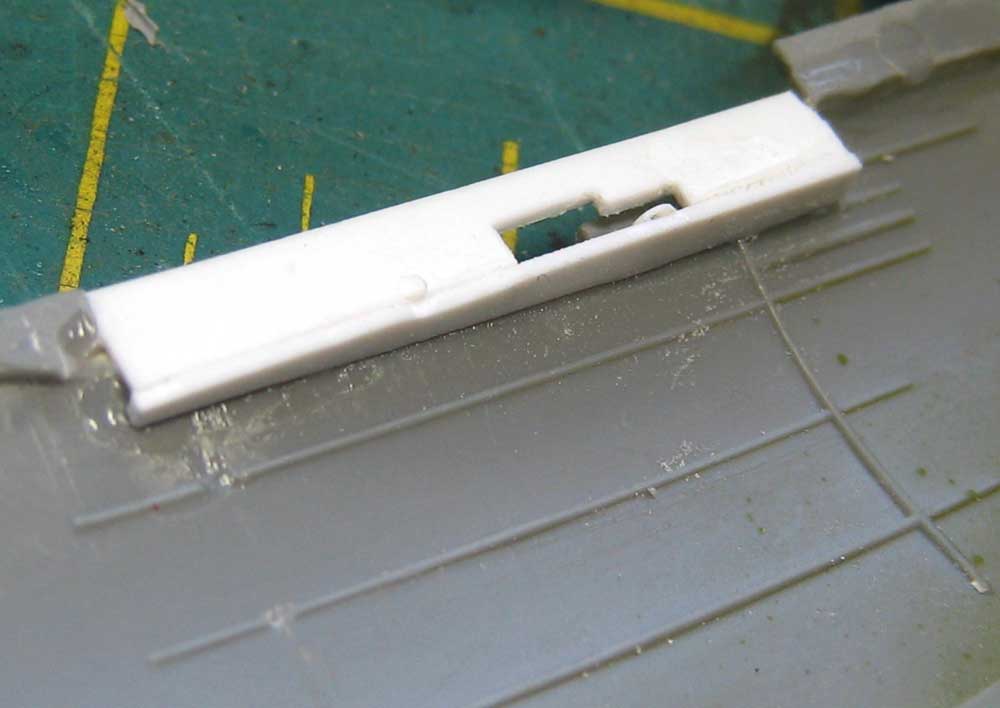
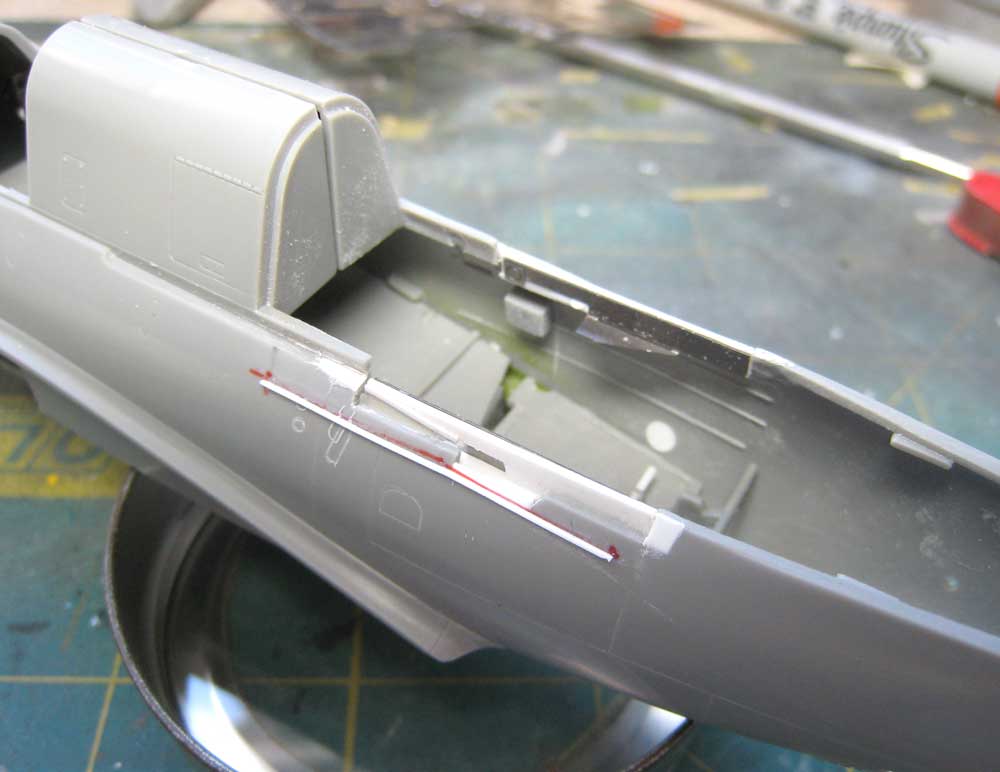
I cut a new opening, matching it to the PE inner rail and photographic ref. That notch is abit deep and got a styrene bit to fix it. Also note the block in place to level out the rail.

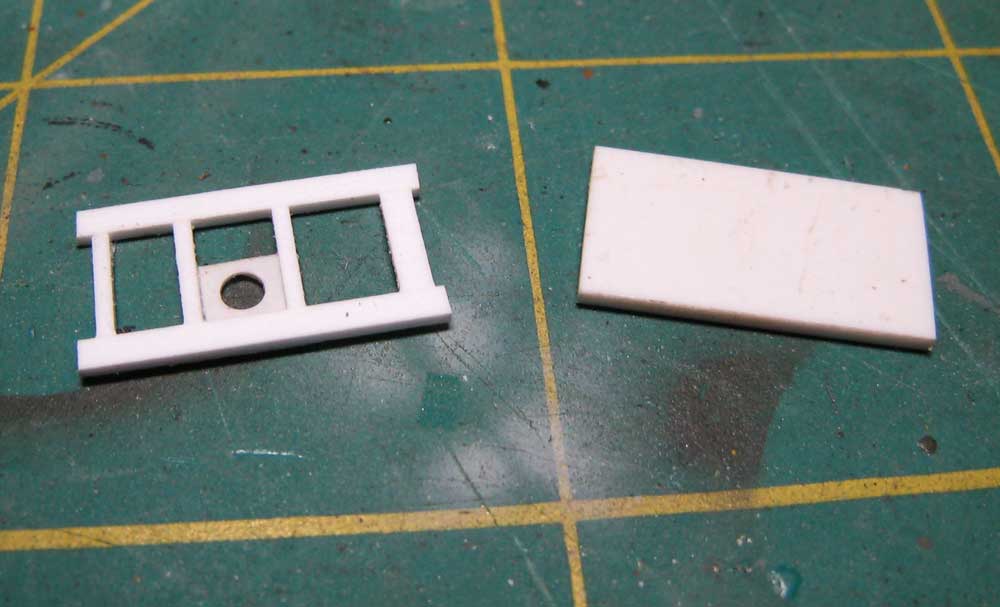
The inner rail is supported by a shelf. You can see a punch-disc pulley in the cut-out.

Here's the finished bit. Inner and outer rails have been added, the handgrip and circular port filled and rescribed.

A much more accurate set of rails for a late-model Beast. The compulsive nerd in me can now sleep at night... :coolio:
chukw1
_VISITCOMMUNITY
California, United States
Joined: November 28, 2007
KitMaker: 817 posts
AeroScale: 729 posts
Posted: Wednesday, November 28, 2007 - 11:51 AM UTC
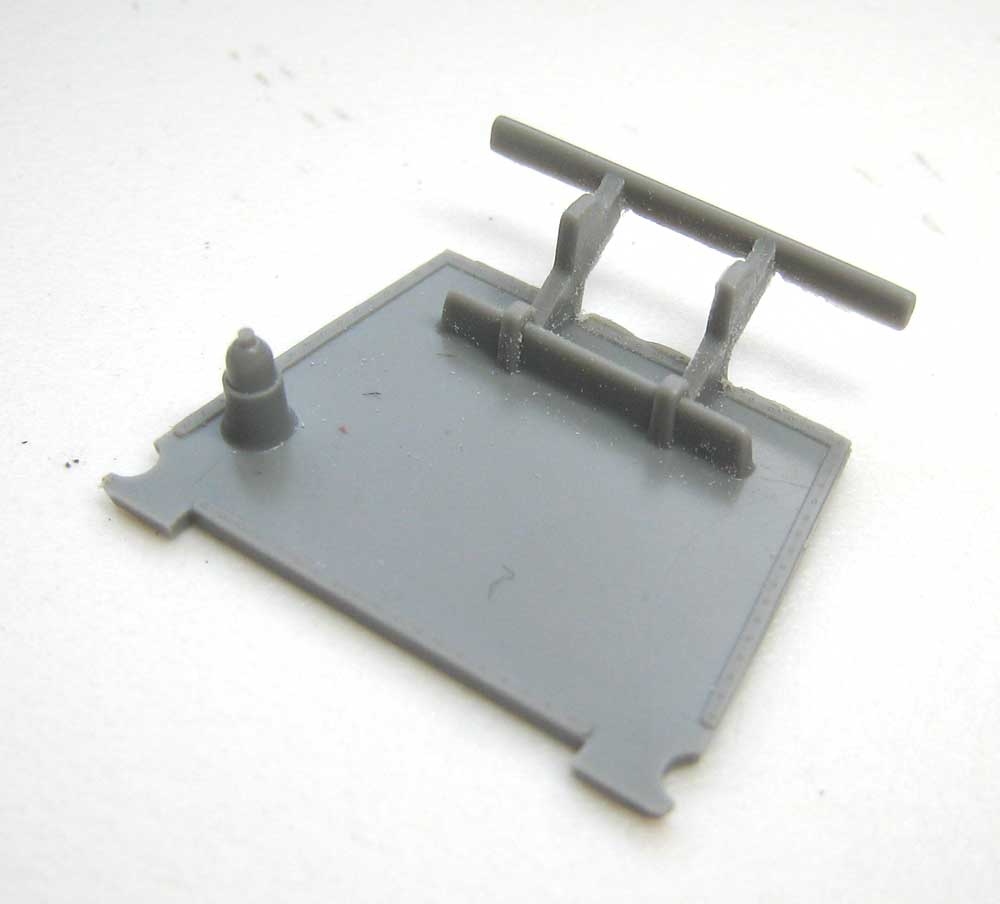
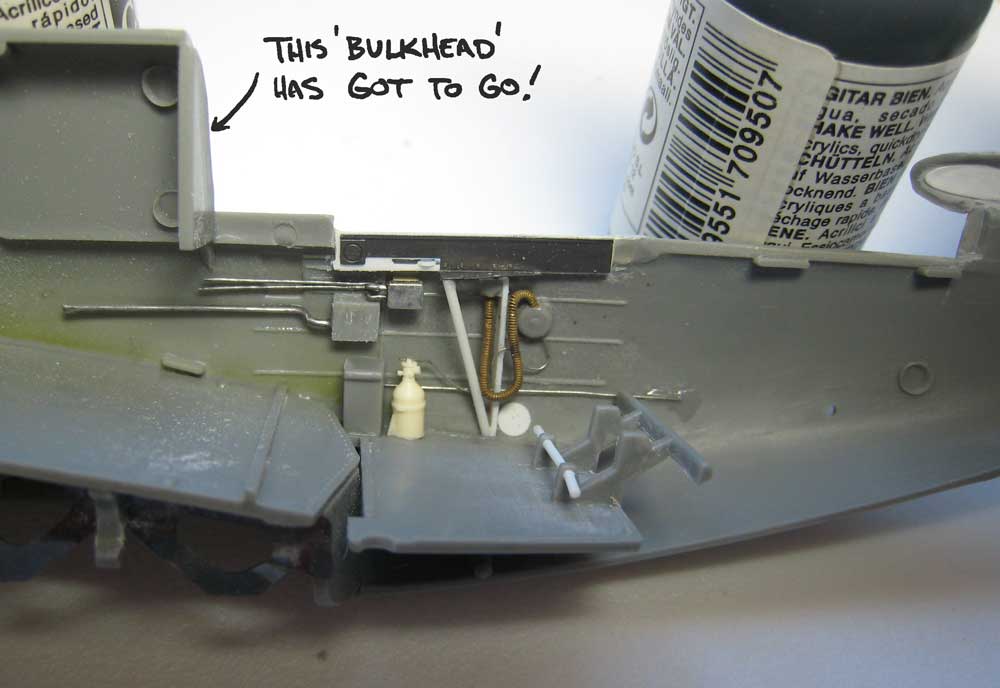
While I'm railing on- how about the gunner's footrail? The kit's is pretty basic, and that oxygen bottle has to make way for sweet, sweet resin....

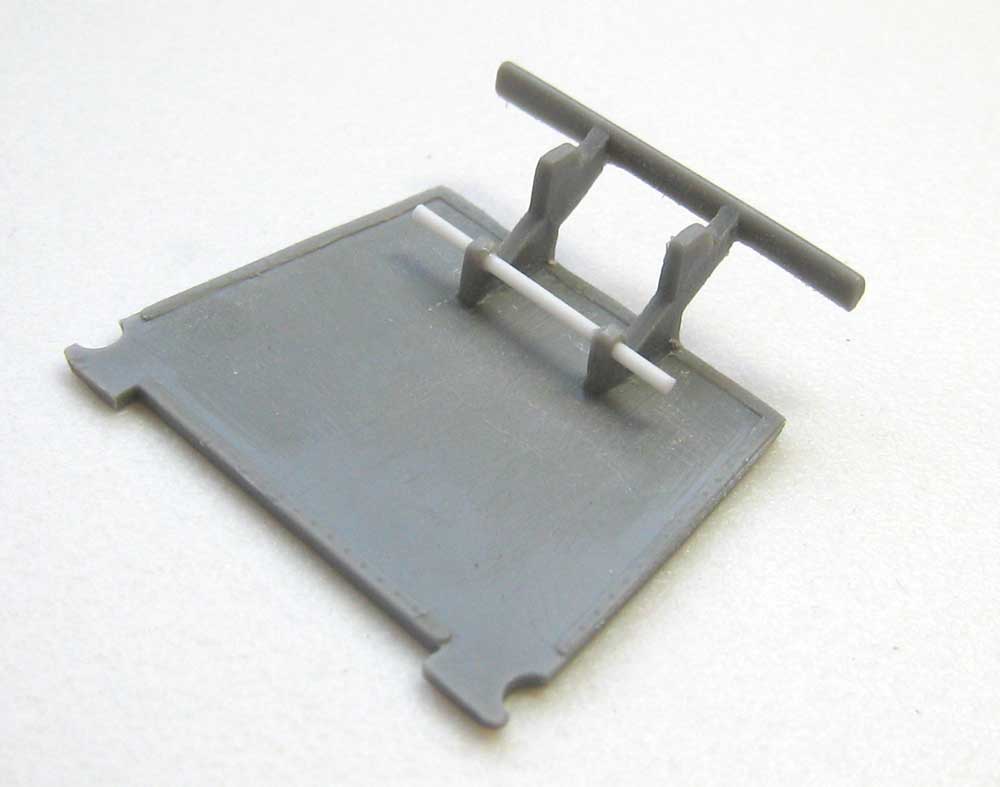
Styrene rod to the rescue!

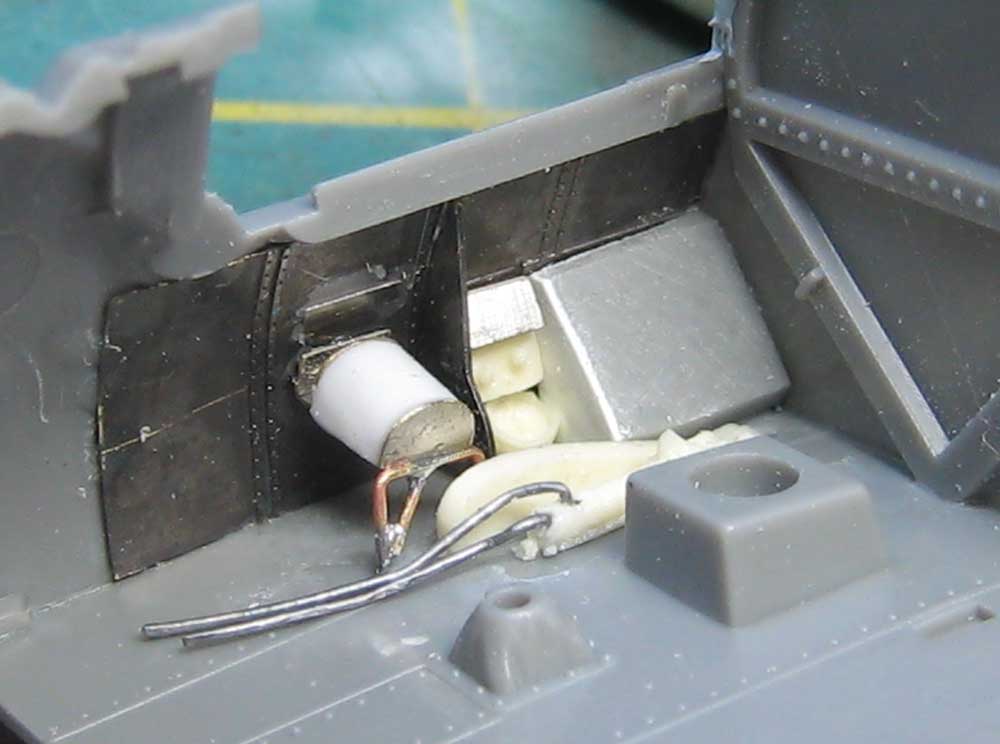
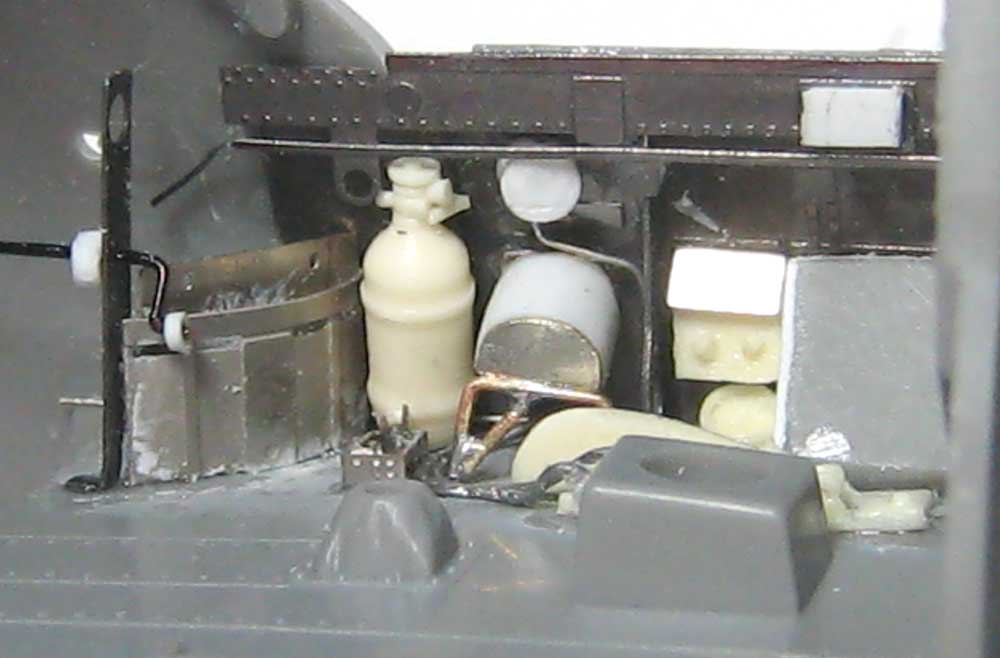
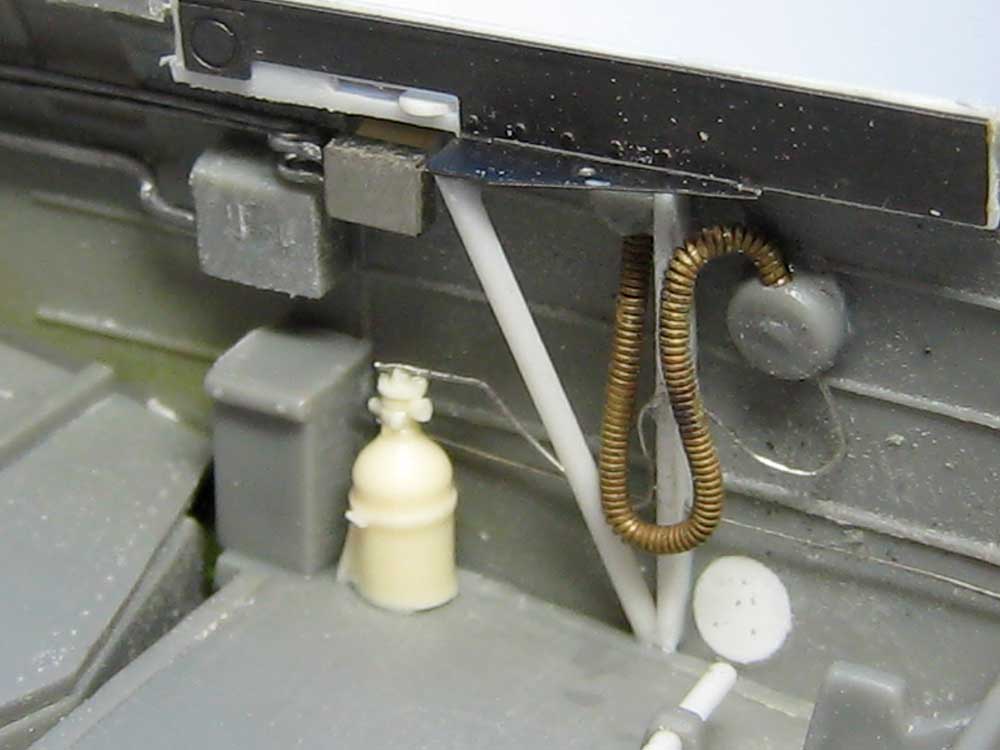
Now I could finally move on to the rear sidewalls- I'm working on the starboard side first. I mixed bits of the kit sidewall, the True Details O2 bottle, styrene, wire and solder.

A broken guitar string serves as the oxygen hose. I heated it red hot in a gas flame and let it cool slowly to anneal it and make it pliable. That white circle is a styrene disc filling an ejector pin depression.

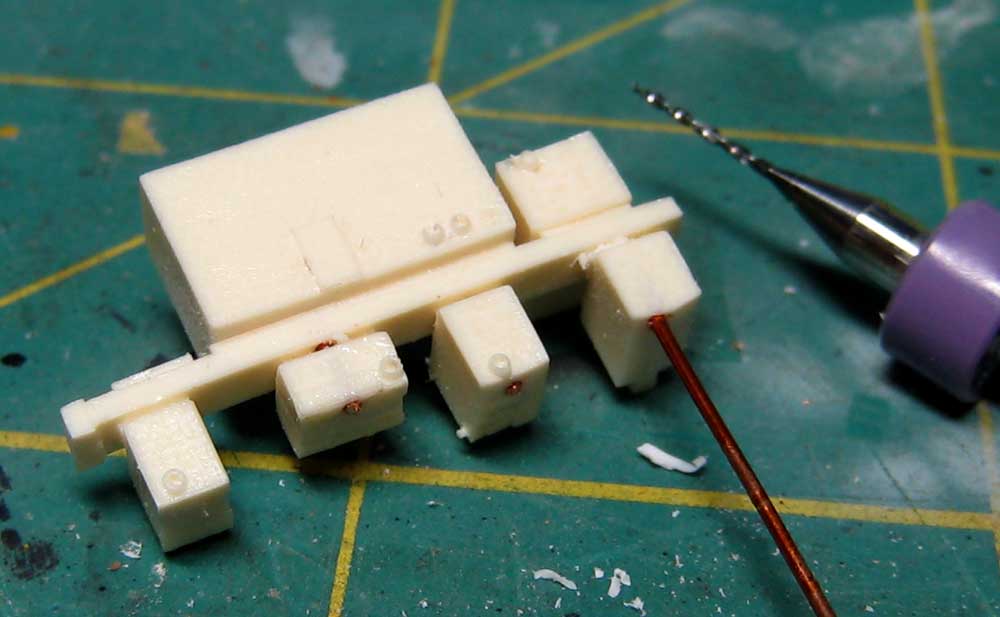
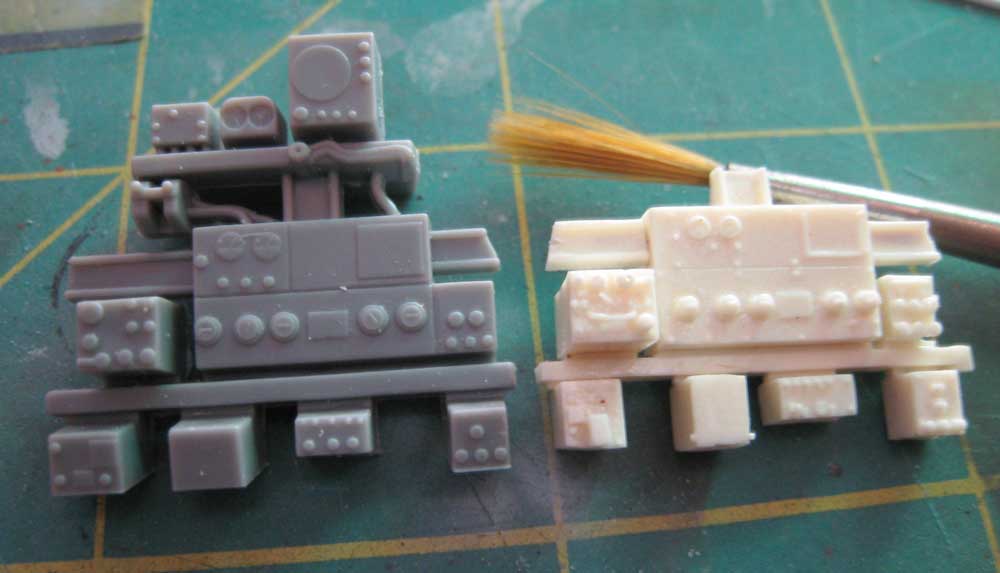
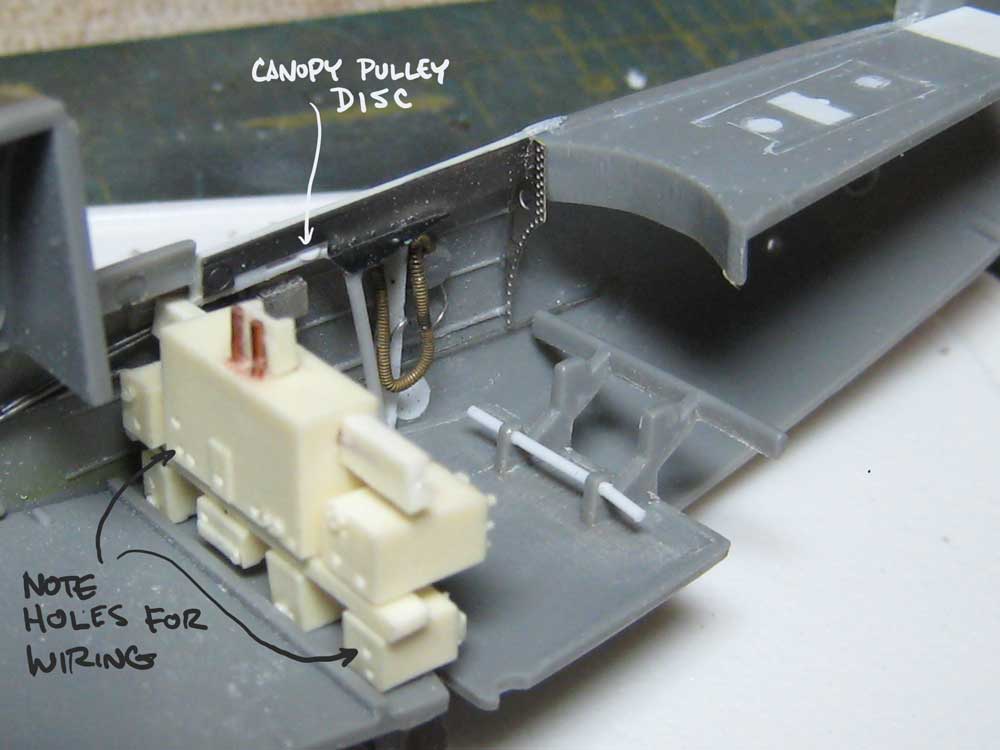
The True Details radio boxes are more square than the kit examples. Each box and rail is a separate piece and need to be glued, drilled and pegged. I used copper wire for that, clipping the excess off after the glue had set.

The TD parts have a lot of character- it's a shame I've got to scrape it off to make way for the Eduard printed faces- they can't be beat!

I started to replace the upper rack with a simple shelf, but photo ref revealed a much more interesting rack. As I'm building -4E model I'll have to scratchbuild the APNS radar set and it's components to mount here

The radio is seen temporarily in place- it's a busy little station!

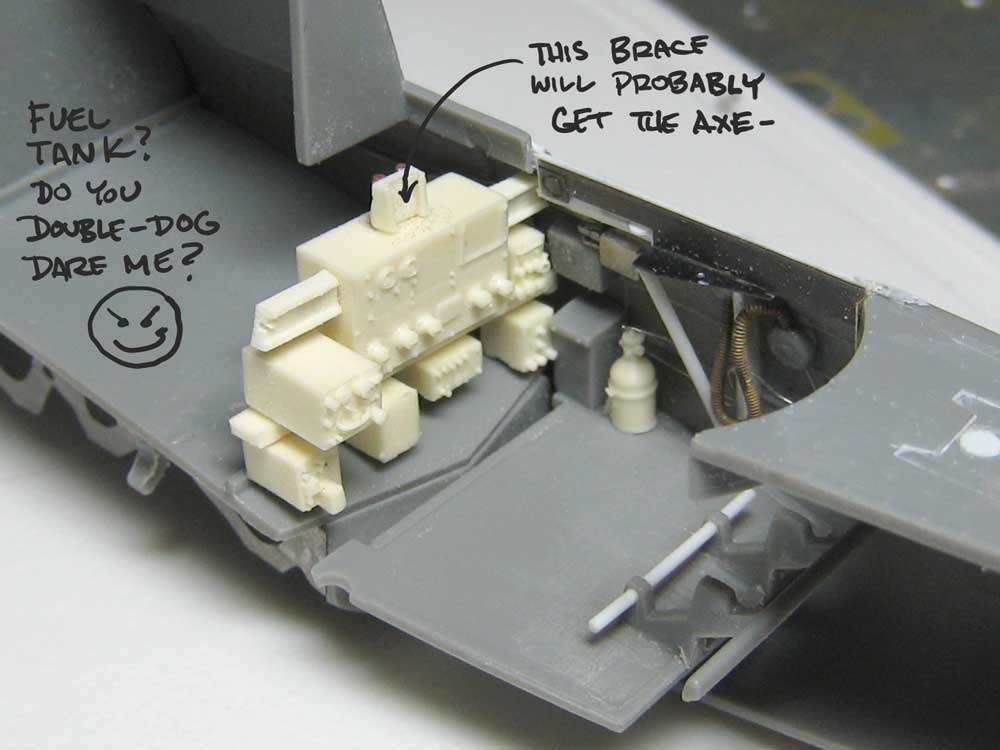
The space behind the radios was wide open- I can't bring myself to hide it behind the kit "bulkhead". There's a rollover pylon, fuel tank and lot's of cool piping. I could open up some inspection hatches... do you dare me?
alpha_tango
_VISITCOMMUNITY
Germany
Joined: September 07, 2005
KitMaker: 5,609 posts
AeroScale: 5,231 posts
Posted: Wednesday, November 28, 2007 - 11:53 AM UTC
This is coool stuff Chuck

keep on posting and maybe think of submitting a feature to the staff!!

thanks for sharing

best wishes

Steffen
TedMamere
_VISITCOMMUNITY
Moselle, France
Joined: May 15, 2005
KitMaker: 5,653 posts
AeroScale: 4,347 posts
Posted: Wednesday, November 28, 2007 - 06:09 PM UTC

Quoted Text

This is coool stuff Chuck

keep on posting and maybe think of submitting a feature to the staff!!


Same here! Fantastic job so far...

...and by the way, welcome to Aeroscale!

Jean-Luc
bf443
_VISITCOMMUNITY
Idaho, United States
Joined: May 16, 2003
KitMaker: 895 posts
AeroScale: 457 posts
Posted: Wednesday, November 28, 2007 - 06:41 PM UTC
Hello Chuck,

Welcome to the site. Just for clarity "You are Insane" but I am enjoying every photo of your build.

Sincerely,
Brian
Holdfast
Staff MemberPresident
IPMS-UK KITMAKER BRANCH
#056
_VISITCOMMUNITY
England - South West, United Kingdom
Joined: September 30, 2002
KitMaker: 8,581 posts
AeroScale: 4,913 posts
Posted: Thursday, November 29, 2007 - 08:20 AM UTC
Stunning work Chuck, keep it up.
Mal
CaptainA
_VISITCOMMUNITY
Indiana, United States
Joined: May 14, 2007
KitMaker: 3,117 posts
AeroScale: 2,270 posts
Posted: Thursday, November 29, 2007 - 08:26 AM UTC
Looks like a real complicated build. I do like what you are doing. You should do more styrene builds.
Merlin
Staff MemberSenior Editor
AEROSCALE
#017
_VISITCOMMUNITY
United Kingdom
Joined: June 11, 2003
KitMaker: 17,582 posts
AeroScale: 12,795 posts
Posted: Thursday, November 29, 2007 - 09:10 AM UTC
Hi Chuck

Wonderful stuff! And yes - definitely submit this as a Feature when it's finished!

I can't wait to see how the build progresses.

All the best

Rowan
chukw1
_VISITCOMMUNITY
California, United States
Joined: November 28, 2007
KitMaker: 817 posts
AeroScale: 729 posts
Posted: Sunday, December 02, 2007 - 02:16 PM UTC
Steffen, Jean-Luc, Mal- Thanks so much! An article from me? I'll take that as a real compliment...

Brian- I'm nutty all right- thanks!

Carl- I built scale free-flight rubber power back when I lived on the East Coast, in North Carolina. We flew our ships on a hundred-acre sod farm! Here in LA, it's windy and covered in houses, so it's styrene for me now.

Merlin- to you, too!


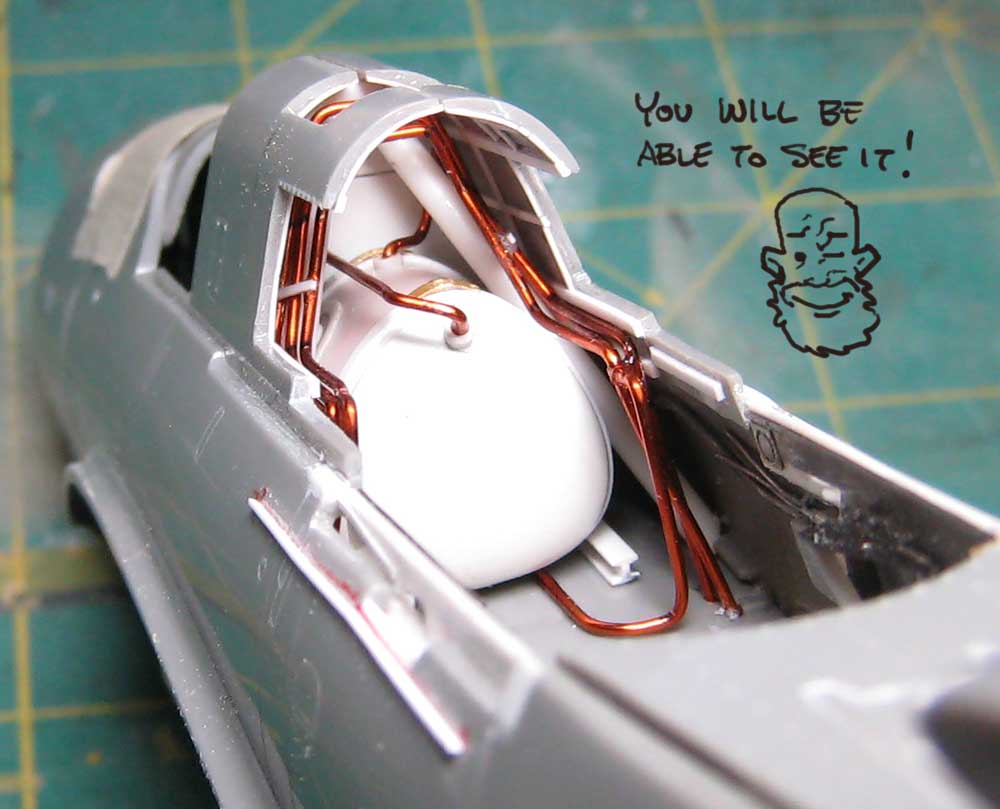
So, here goes- I cut away the bulkhead, thinned the sides (sooooooo boring!), filled the ejector pin marks, thinned the sides some more and cut away the access panels. Not all -4's had the upper panel, but I figured screw it! I want this work to be seen. Next came the fun stuff- building up the inner ribbing. Aaaah- modeling heaven!
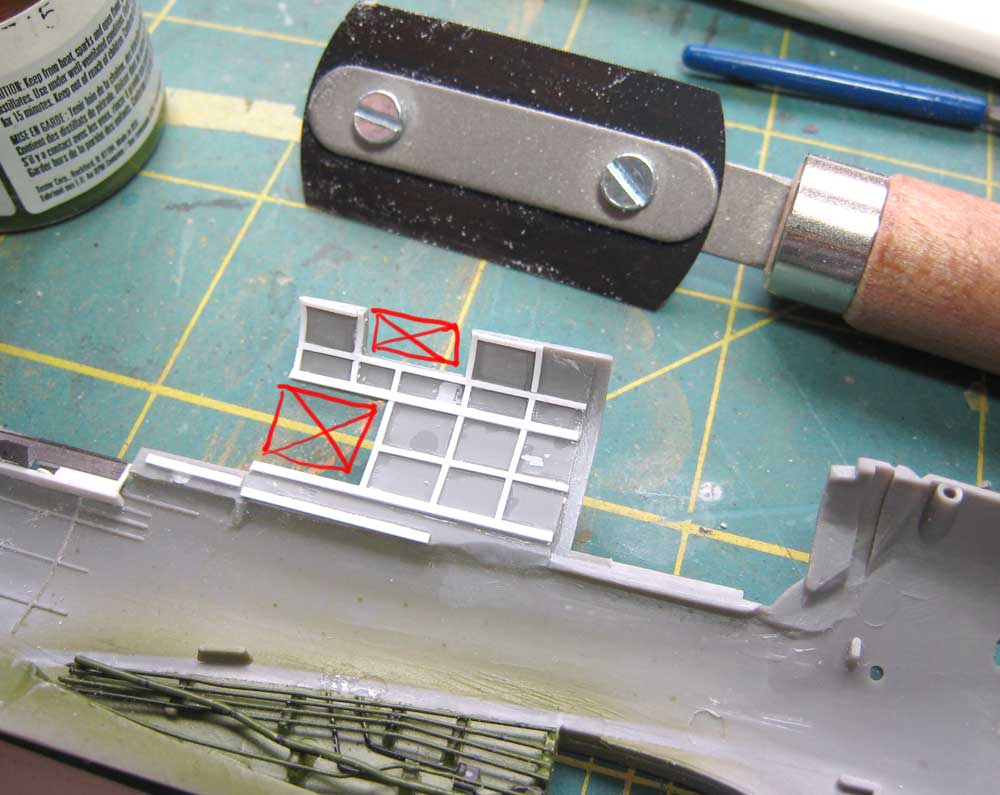

I began building from the front of the compartment- here are the two front legs of the turnover pylon and the pilot's armor panel. Details from bits of strip stock and sliced sprue, just like our armor-building brethren. See the notes for various details- and pitfalls!
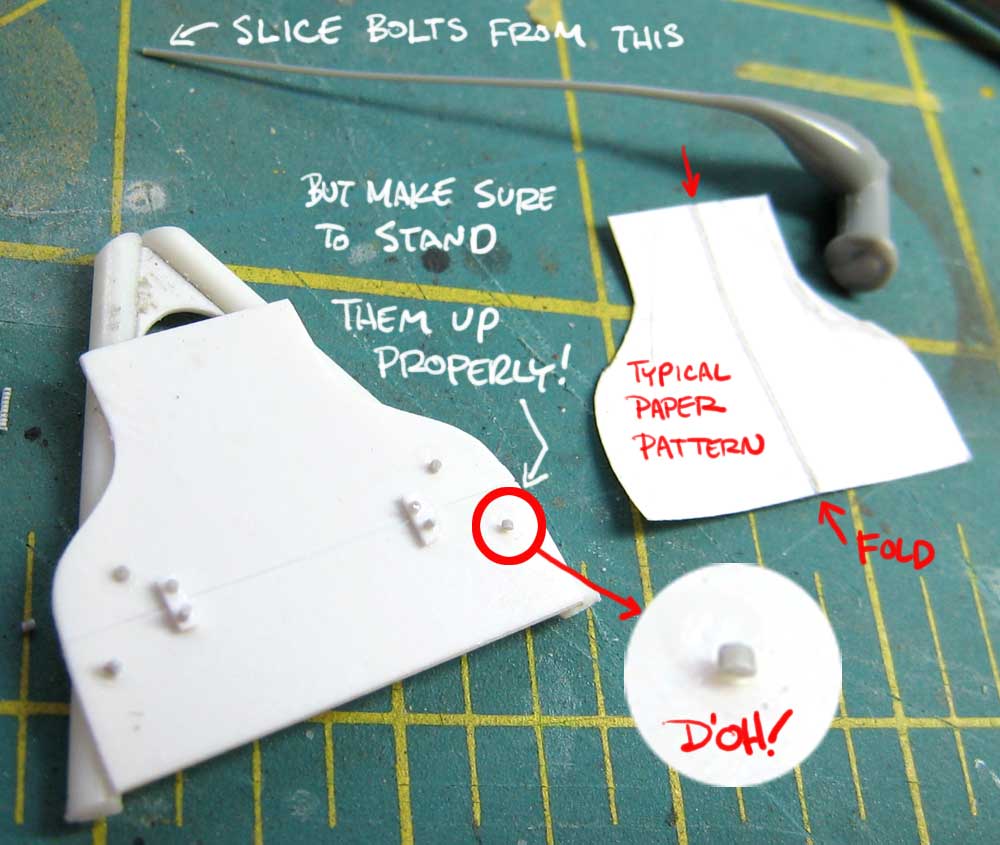


The ribbing on the other side was a bit more challenging with the various subcomponents already in place. Not crushing things is always priority one! I glued the front assembly in and added one of the rear braces. Note that I've gotten those rivets installed correctly at last.
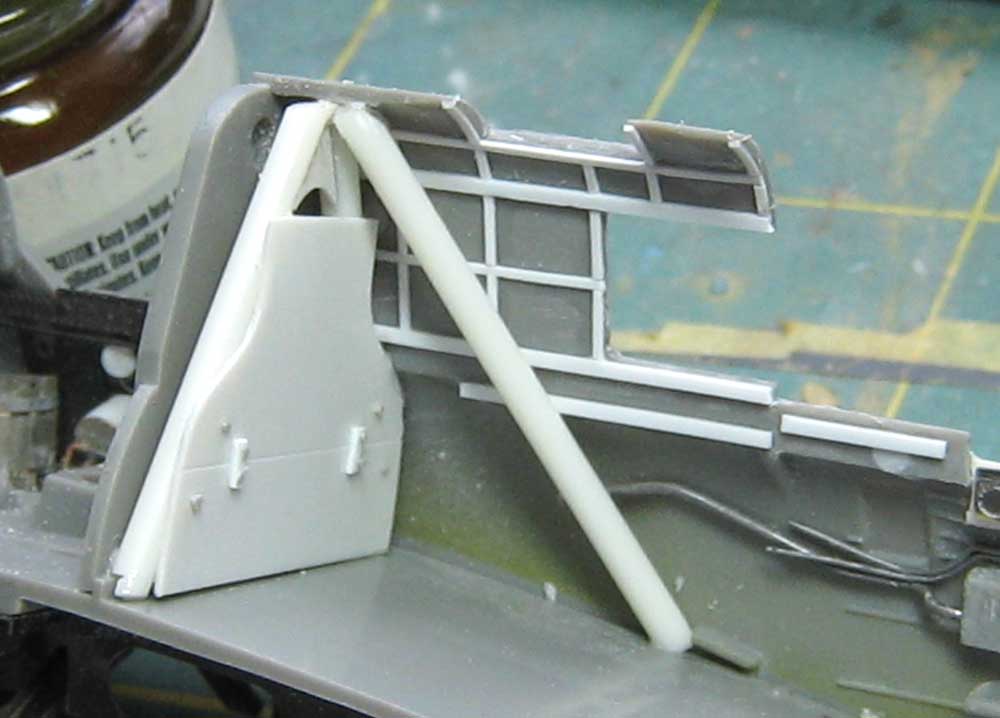


The fourth leg was carefully added- I did some test-fitting with the other fuselage half in place before gluing.
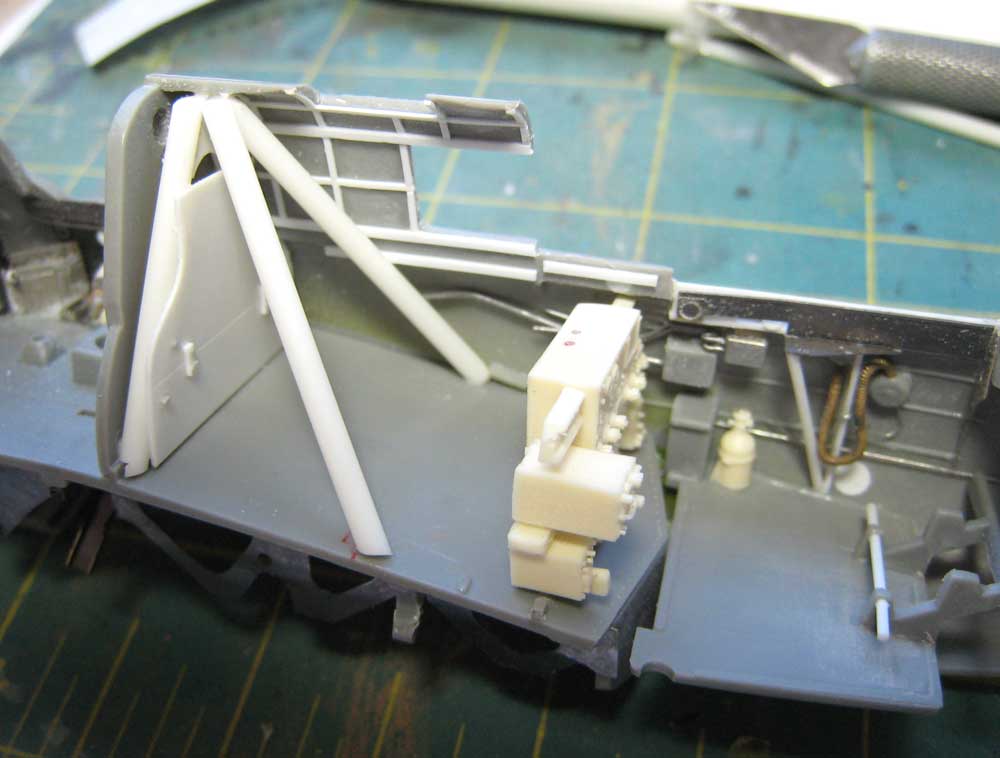
The radio is set in place temporarily to assess the size of the pylons. I'm doing this by the Mk I Eyeball method.


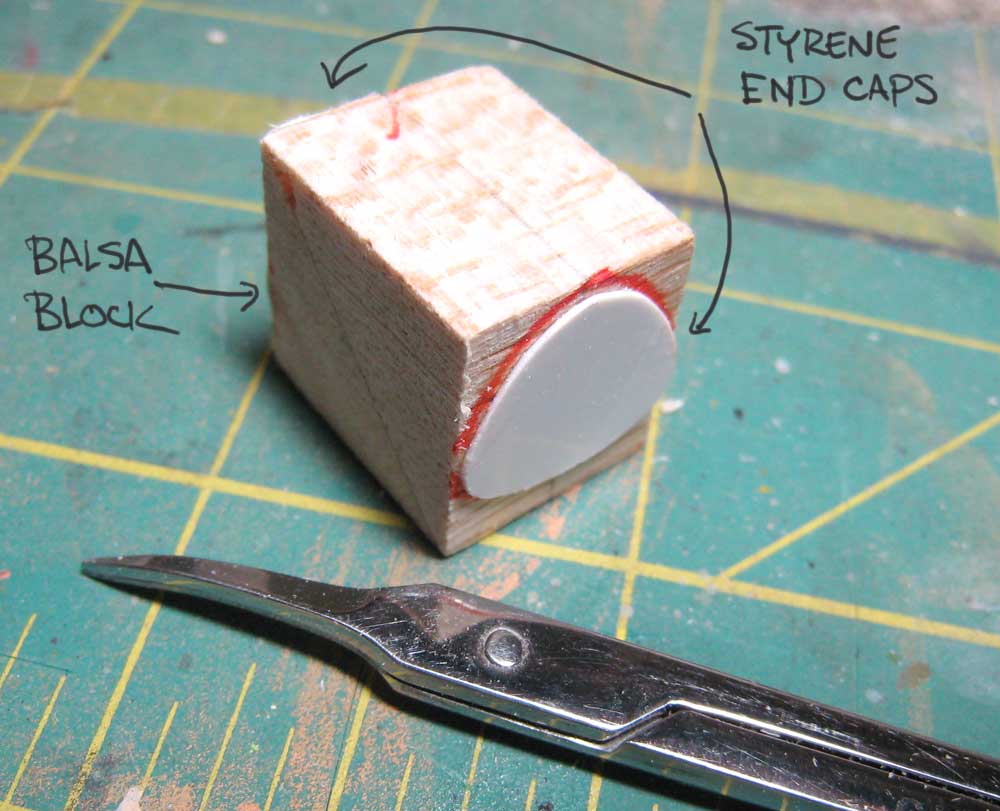
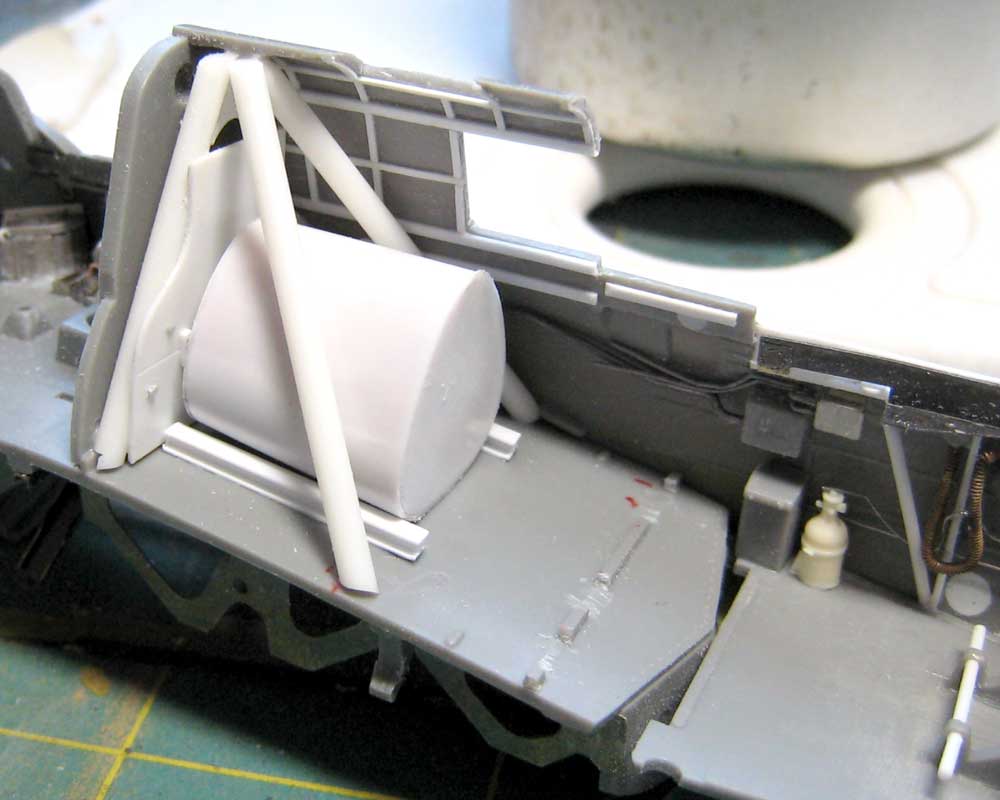
I did some caliper measurements on the space between the pylon legs, drew up some paper patterns and cut the endcaps of the tank from styrene. These in turn were glues to a small block of balsa wood. The tank is, lengthwise, flat along the top but sloped on the bottom, so these endcaps are differently-sized.


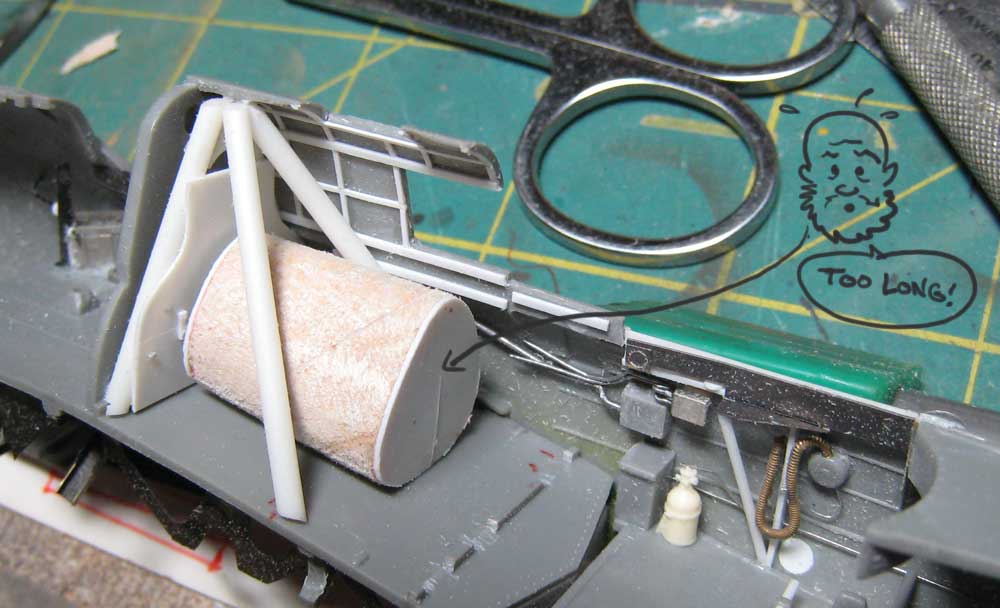
With a sanding block I carved the tank to shape- it was pretty easy, as the endcaps set the shape. I got the to and bottom angles right, but the tank was too long. Well, it's easier to take material away than add it...


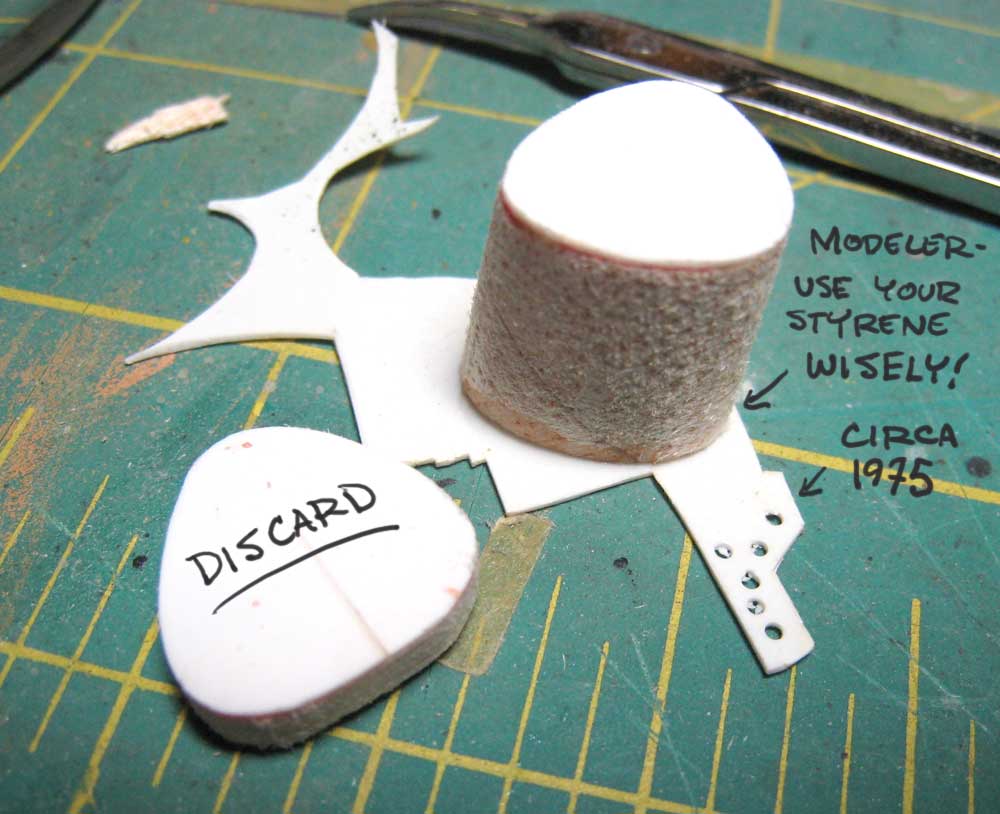
Using my trusty calipers I scribed a line around the rear end of the tank, held my breath and cut it off. Success! From here it was a simple trick to glue it a scrap of styrene and trim that down to match the balsa profile. Whew!


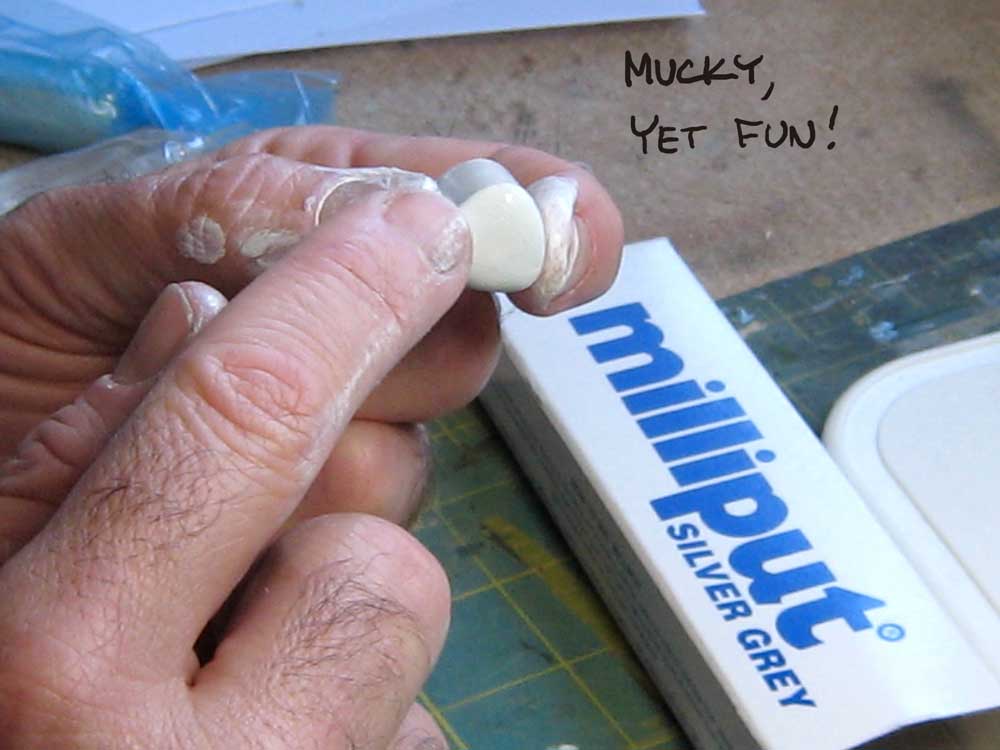
I wrapped a bit of paper around the tank to create a rough pattern, then used it to cut a piece from .010 styrene. Wrapped, glued and trimmed to shape, it's starting to look like a fuel tank! There's more shaping to be done- I'll break out the Miliput for that. This photo shows how much more internal ribbing needs to be added- not much, but that's for later! ;D
chukw1
_VISITCOMMUNITY
California, United States
Joined: November 28, 2007
KitMaker: 817 posts
AeroScale: 729 posts
Posted: Sunday, December 16, 2007 - 03:18 PM UTC
Man, the Christmas season has been keeping me busy! I got in only an hour or two last week, but was able to hit the bench some yesterday and today. First order was to add the rounded ends of the fuel tank from Milliput, smoothed out with a wet, sloppy finger. I usually hold the camera in my teeth for this kind of shot, but my wife helped out this time- thanks, Honey!


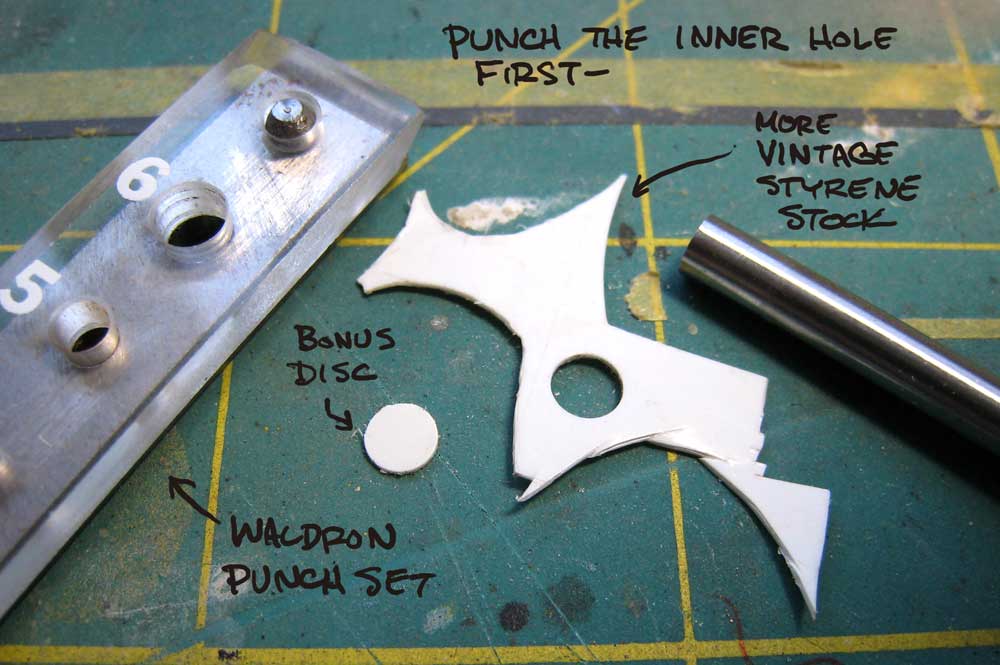
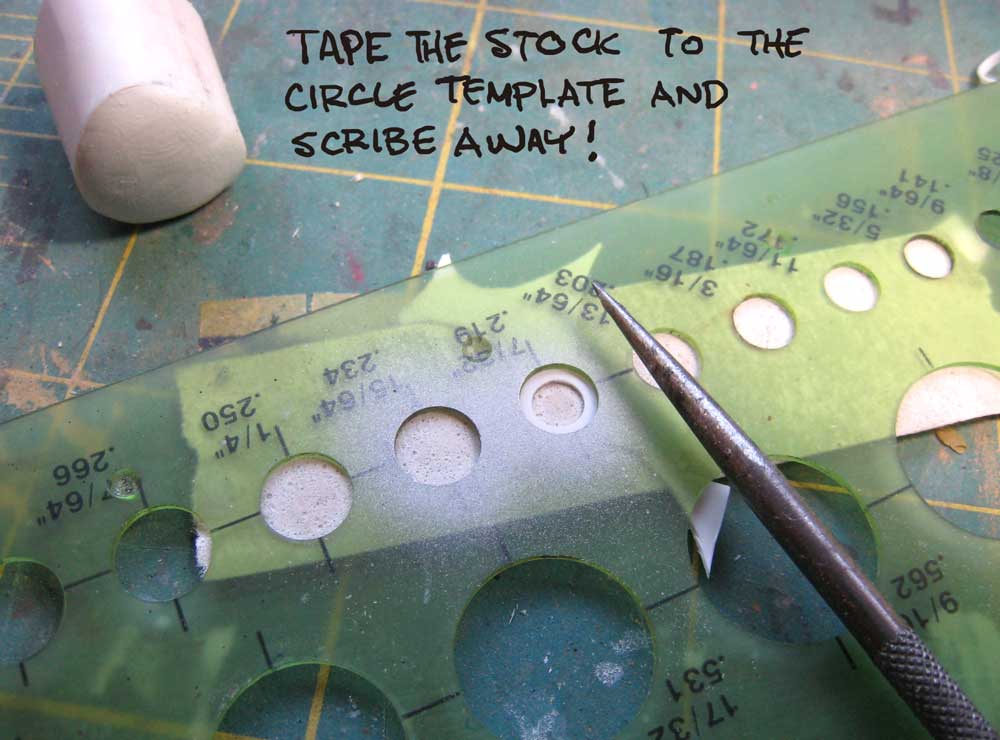
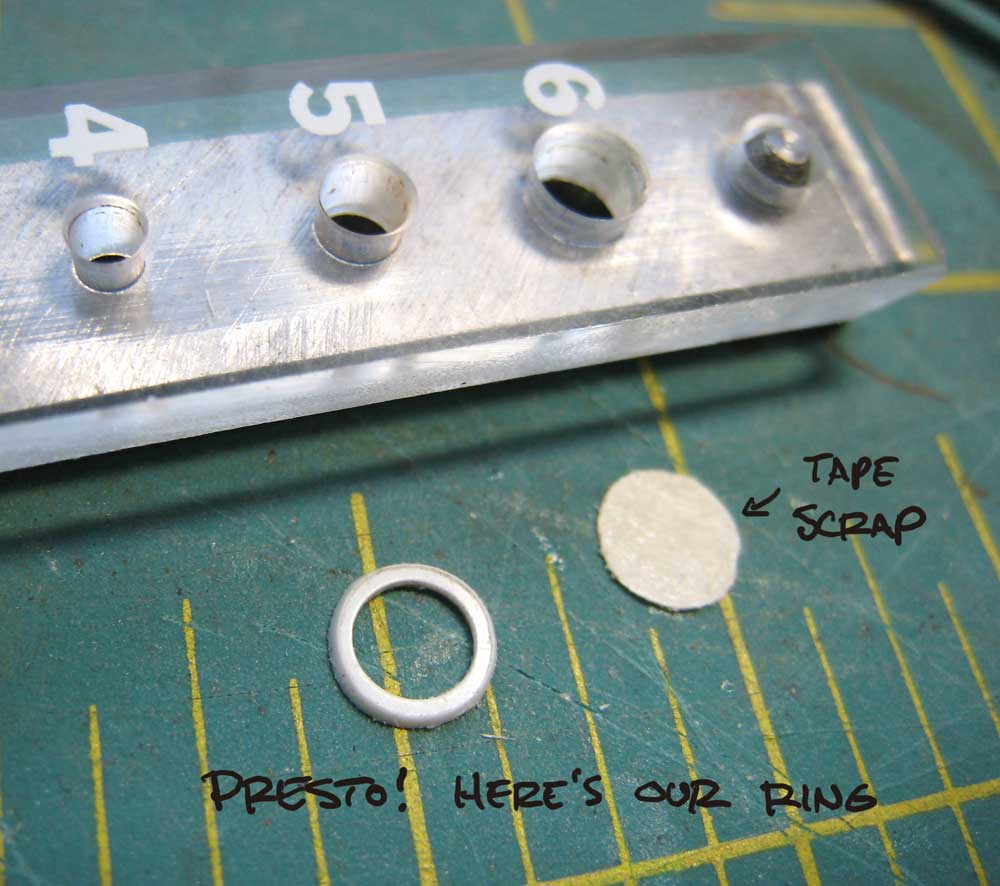
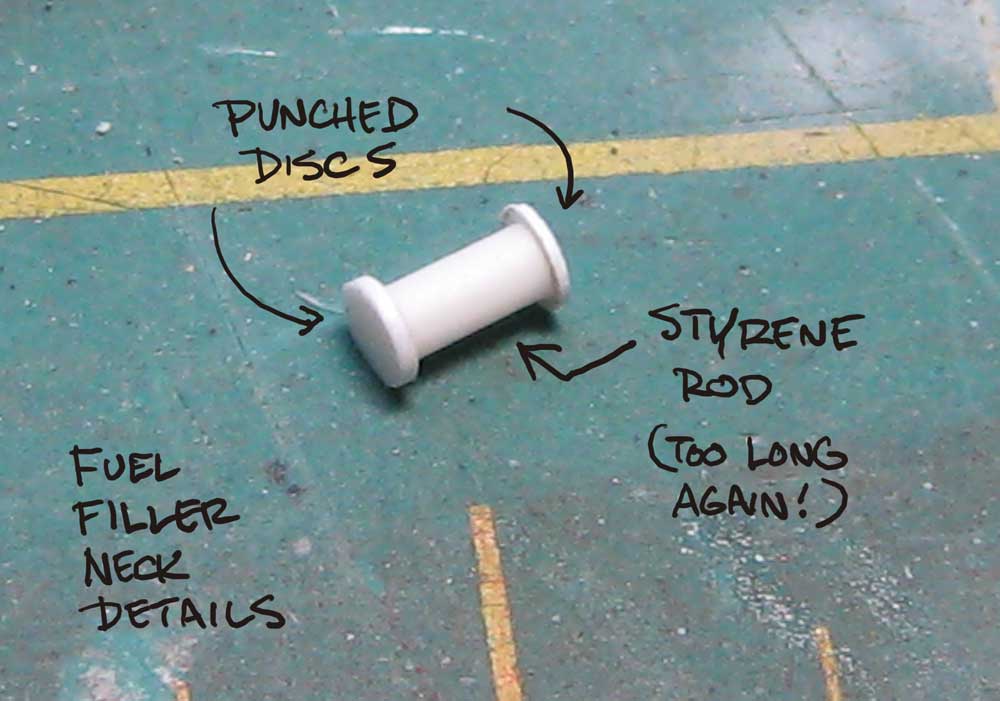
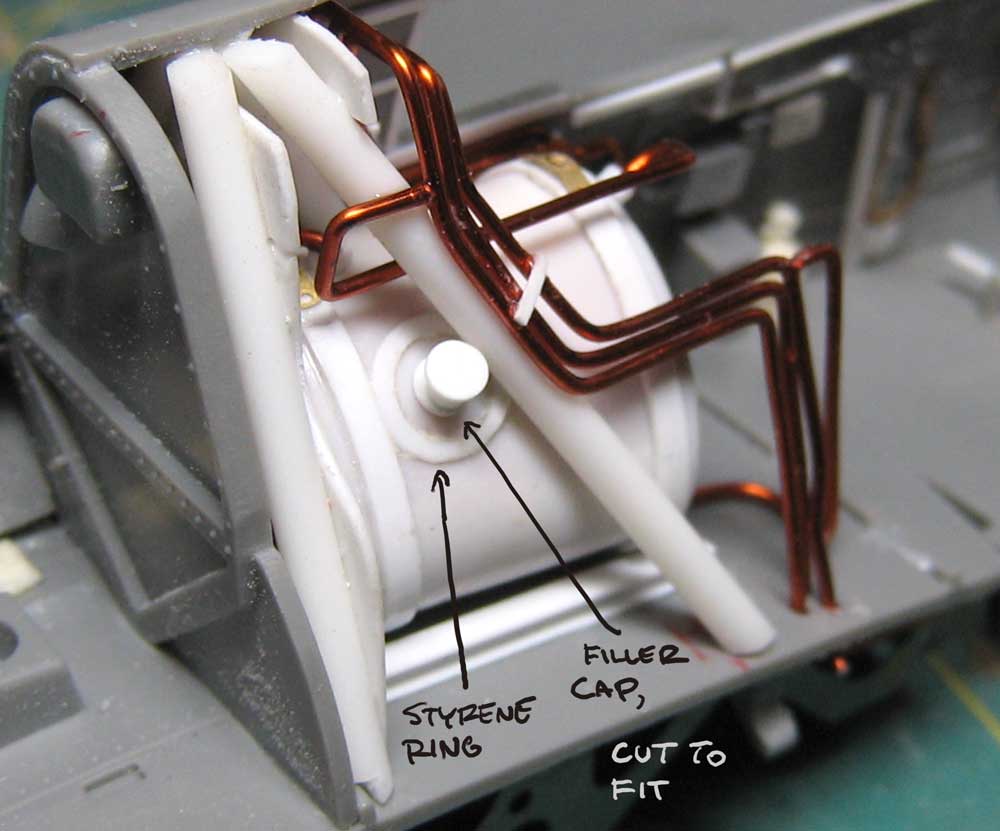
While harding for the putty to harden I whipped up some sub-assemblies and such. There's a big ring around the fuel filler cap, so that was first- here's how I did it:


Next came the filler neck itself. I was guessing at the length- it was later cut to fit.


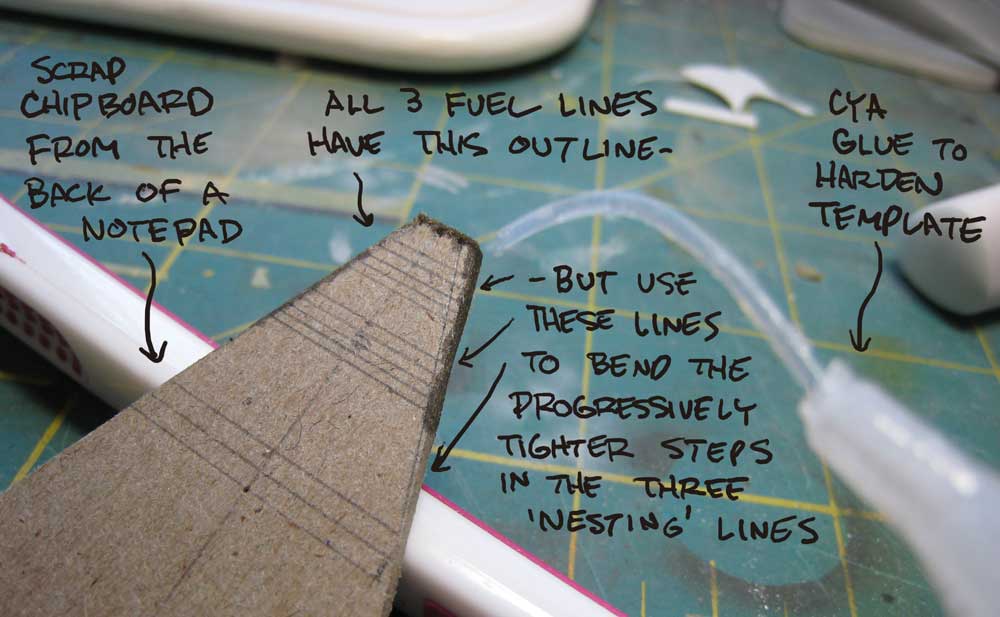
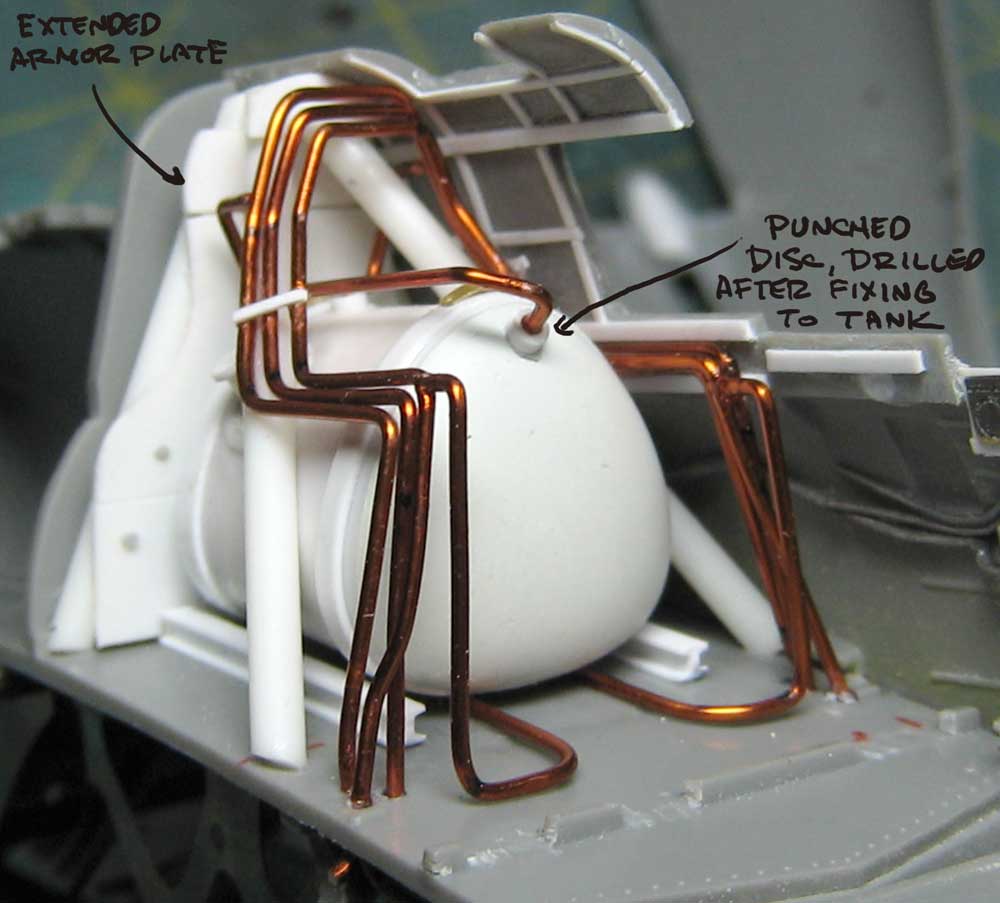
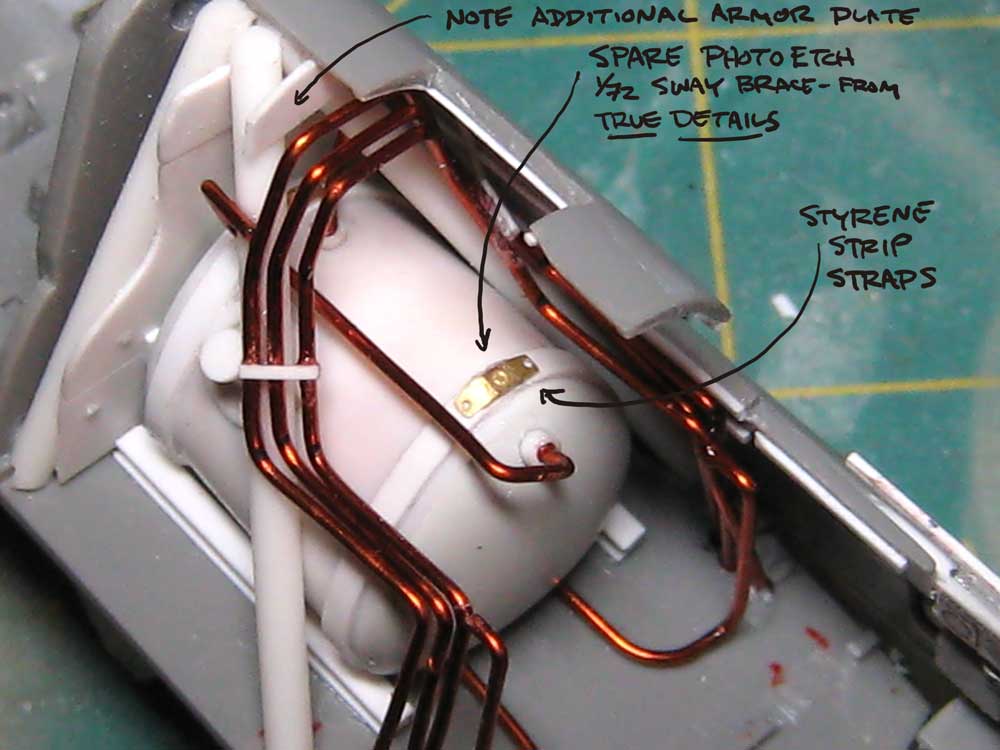
The Helldiver's wing tanks were inked to the main tank by a series of beautifully bent, nesting lines. A template is the only sane way to do this, so I broke out the calipers, took some measurements off the rear rollover bar and drew a guide onto some cardboard. The various marks were used to bend the three differently-stepped lines. I used copper wire for the lines, and bent them using my Mission Models Etchmate. The template made it relatively easy.


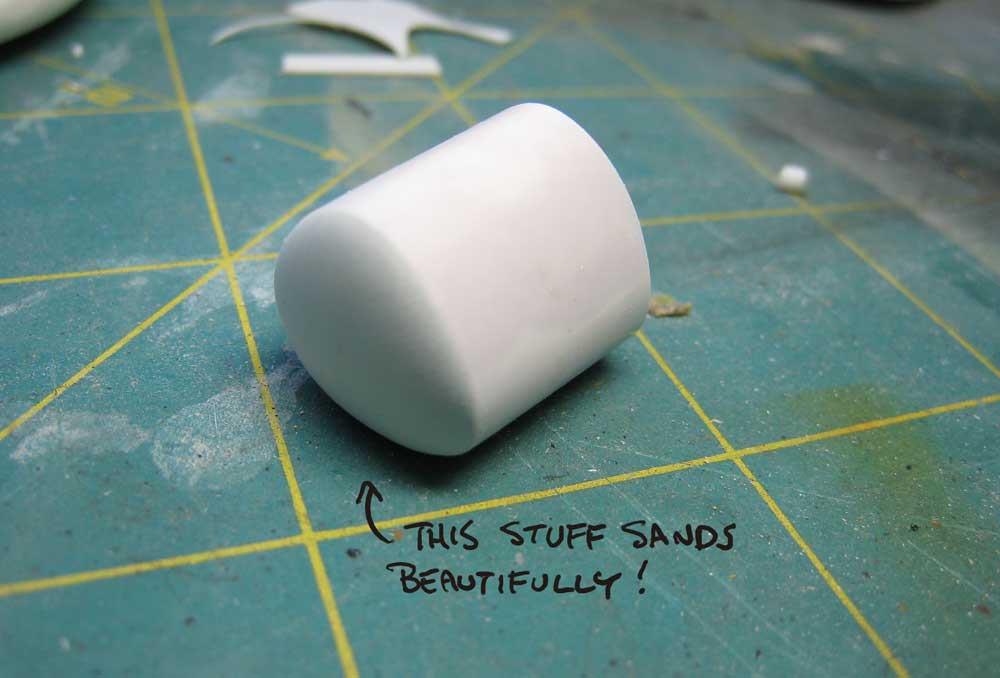
One week later I got back to the tank itself. The Milliput sanded easily and to a beautiful surface.


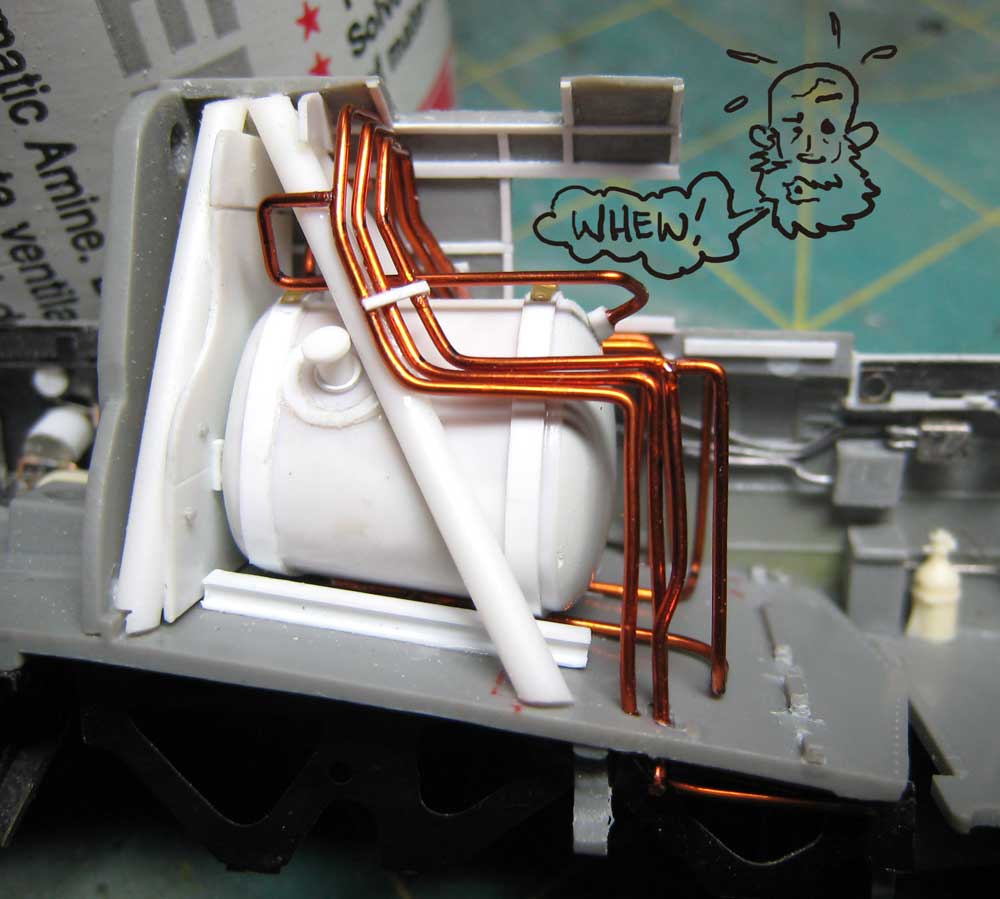
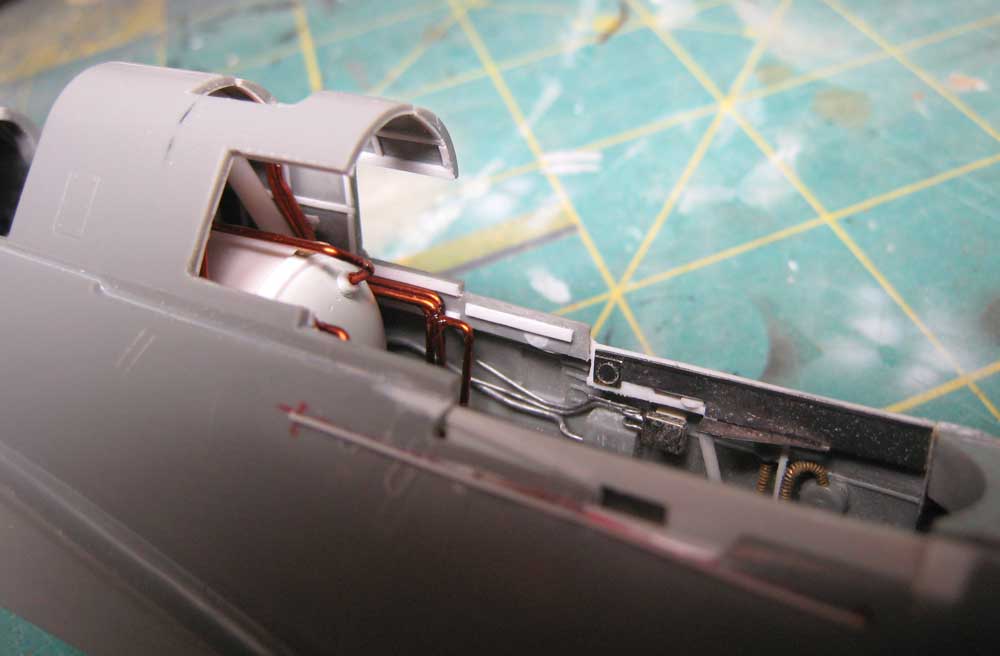
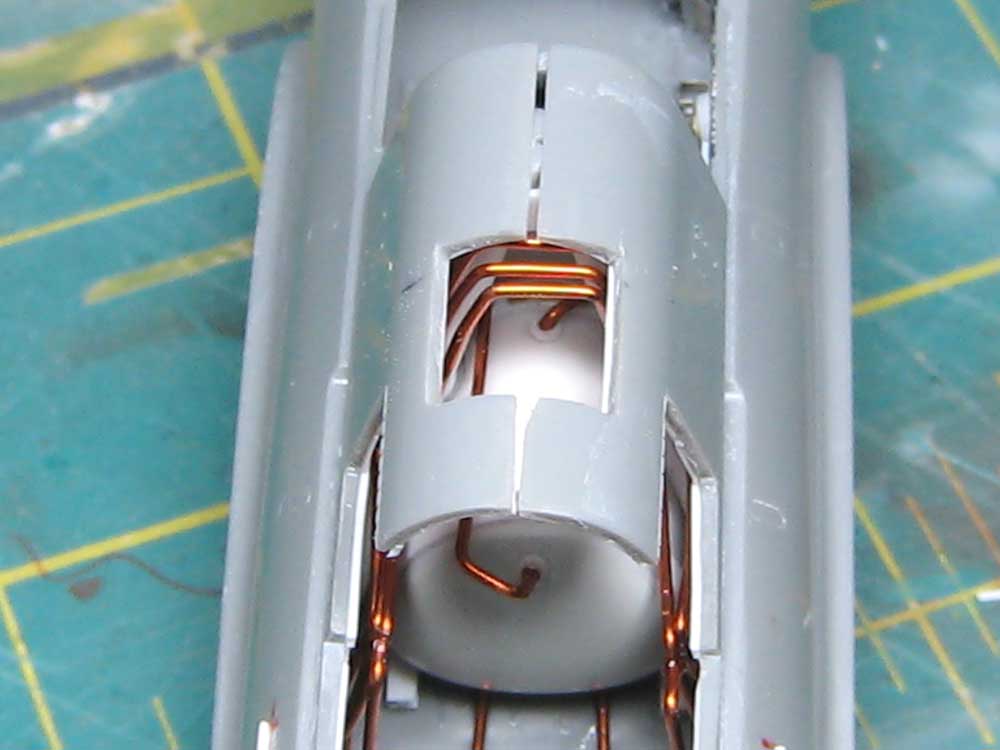
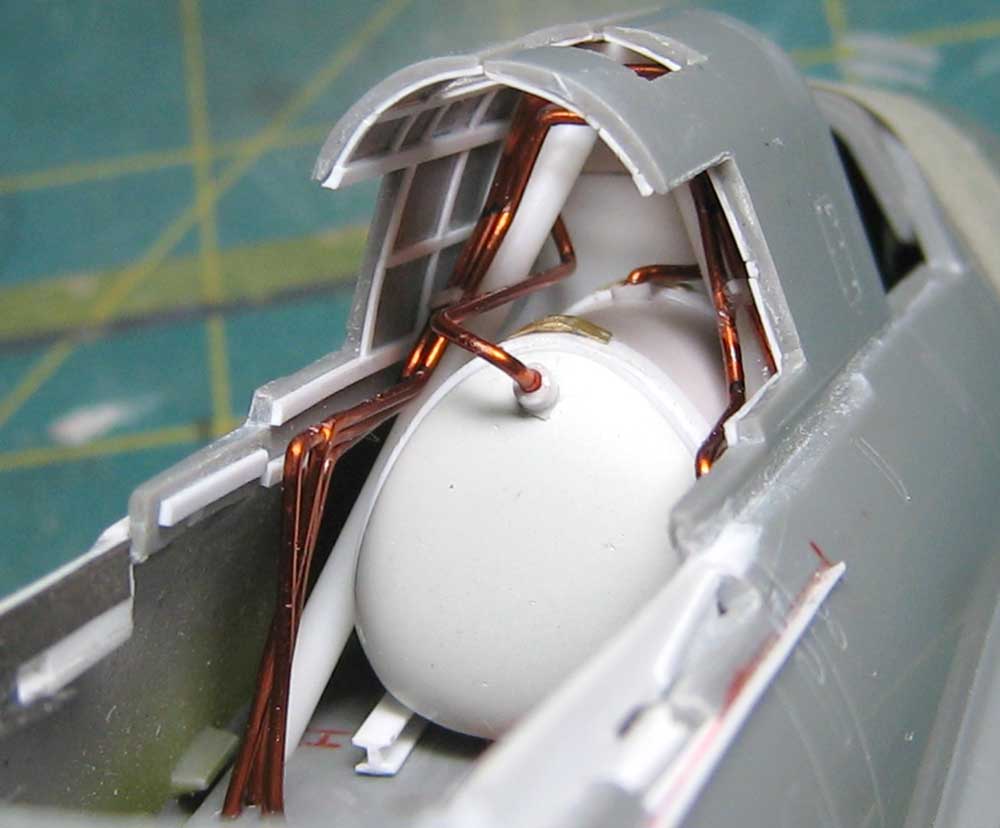
All this from two old photos! The notes explain a lot, but patience was the main ingredient. I bent the three nesting lines first, then the feed lines from the tank itself. The auxiliary lines that run under the tank were last. The nested lines were glued first ( they run down into the wing roots and out of sight). Next the tank was wiggled into place and its lines added. lastly the auxiliary lines went in. The fuel filler cap was the cerry on the cake.


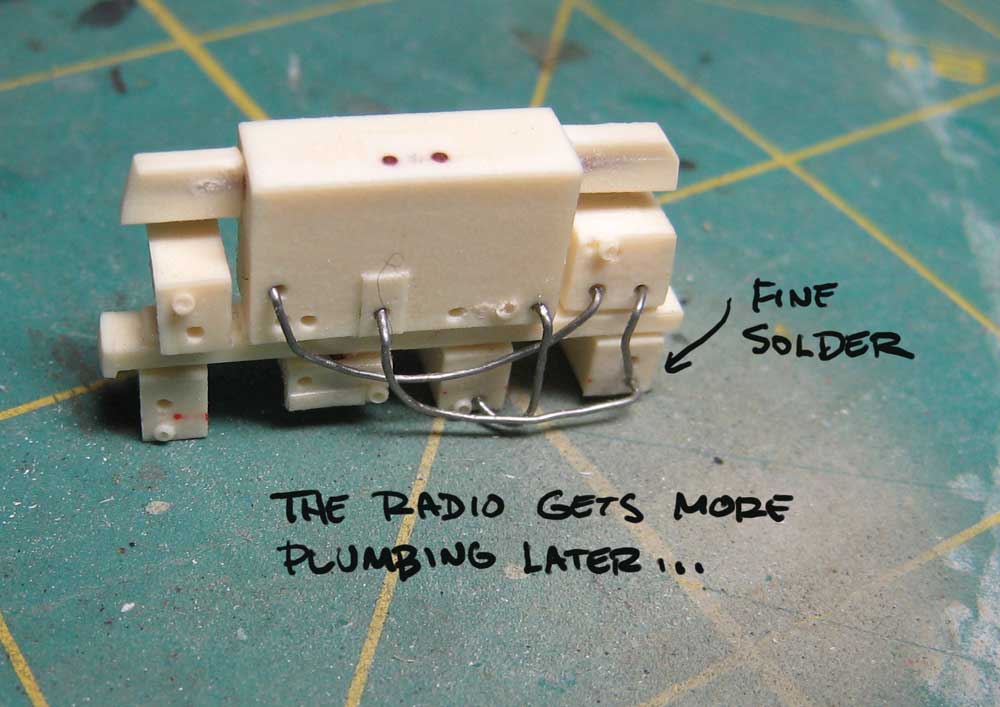
The radio got some love, too- but that's another story...

Aurora-7
#360
_VISITCOMMUNITY
Connecticut, United States
Joined: June 18, 2003
KitMaker: 1,020 posts
AeroScale: 125 posts
Posted: Monday, December 17, 2007 - 05:31 AM UTC
Truly, I am in awe. I have the Pro-Modeler Helldiver, still in it's box and have often contemplated how I would lower the turtle deck.

This is inspiring work.
Percheron
_VISITCOMMUNITY
Washington, United States
Joined: September 23, 2006
KitMaker: 432 posts
AeroScale: 360 posts
Posted: Monday, December 17, 2007 - 05:43 AM UTC
Chuck,

Absolutely incredible! I have this kit in my stash, and you have given my lots of inspiration to get going on it.

-Derek
calvin2000
_VISITCOMMUNITY
Colorado, United States
Joined: July 25, 2007
KitMaker: 886 posts
AeroScale: 332 posts
Posted: Monday, December 17, 2007 - 06:58 AM UTC
amazing work you are doing. I am hooked watching this
TedMamere
_VISITCOMMUNITY
Moselle, France
Joined: May 15, 2005
KitMaker: 5,653 posts
AeroScale: 4,347 posts
Posted: Monday, December 17, 2007 - 08:33 AM UTC
Hi Chuck!

Incredible work! This is high standard model building. Very inspiring indeed.

I also visited your personal website and I must say you are an artistically multi-talented person. Now I know why there are comic style comments on the pictures... Keep them coming please!

Jean-Luc
SGTJKJ
#041
_VISITCOMMUNITY
Kobenhavn, Denmark
Joined: July 20, 2006
KitMaker: 10,069 posts
AeroScale: 3,788 posts
Posted: Tuesday, December 18, 2007 - 02:06 AM UTC
Fantastic job! You are basically building your own Helldiver and then adding a little bit of injection moulded kit

Very impressed
chukw1
_VISITCOMMUNITY
California, United States
Joined: November 28, 2007
KitMaker: 817 posts
AeroScale: 729 posts
Posted: Tuesday, December 18, 2007 - 04:17 AM UTC
Thanks so much, gentlemen! I'm glad you're enjoying it- and by all means, start your Helldivers, Micheal and Derek. ;D I have a nice long break coming up from Christmas to New Years- I'll be working up the starboard interior and who knows? Maybe even paint it. That's all I want for Christmas!
lodni_k
_VISITCOMMUNITY
California, United States
Joined: October 09, 2004
KitMaker: 65 posts
AeroScale: 45 posts
Posted: Tuesday, December 18, 2007 - 04:44 PM UTC
Truely inspiring work!! I really wished that I had your references & talent when I built mine not long ago - but the Vet that I gave it to didn't seem to mind my ham-handed effort (it was the first aircraft he was part of an aircrew in)!!

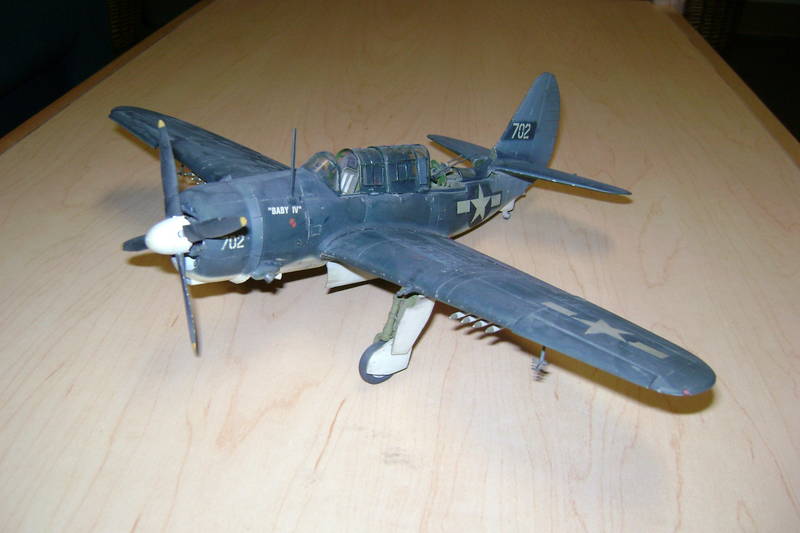
My effort:


The photo I had I couldn't really see the doors - I assumed they folded in!