_GOTOBOTTOM
Pre-Flight Check
Constructive critique of your finished or in-progress photos.
Buccaneer S2D
Tomcat31
#042
_VISITCOMMUNITY
England - North East, United Kingdom
Joined: November 18, 2006
KitMaker: 2,828 posts
AeroScale: 1,720 posts
Posted: Saturday, August 04, 2007 - 04:02 AM UTC
This will be the build thread for my latest project which I intend on starting tomorrow. I've been commissioned to build a Hawker Sidley Buccaneer S2D as an 809 NAS aircraft on the final cruise of the HMS Ark Royal.

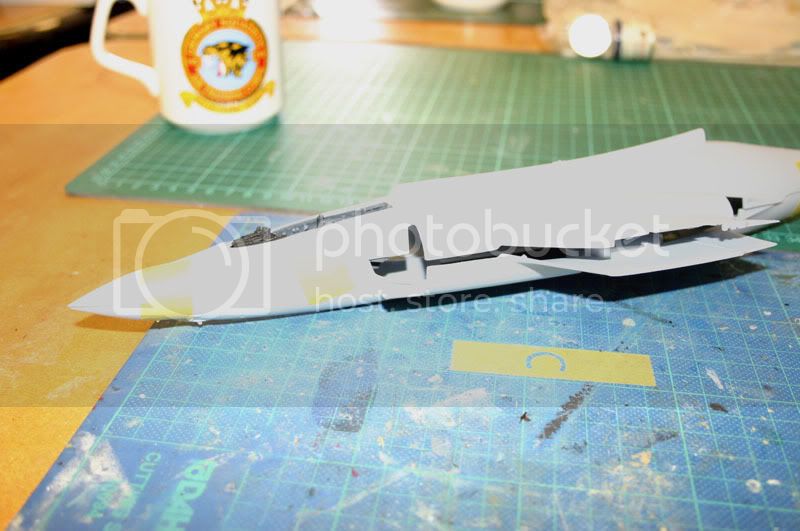
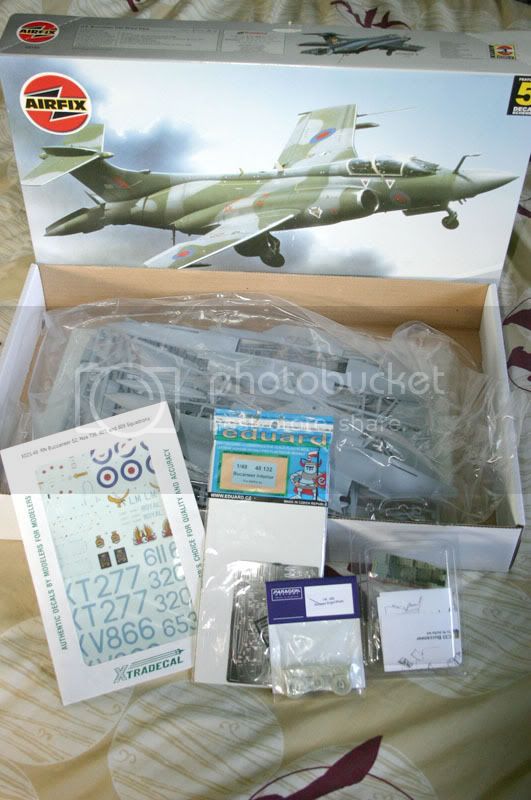
The kit I'm using is the Airfix 1/48 kit with the following after market stuff:
Pavla's resin cockpit detail set
Eduard's Interior detail etch set
Eduard's exterior detail etch set (although I'm still waiting for it to arrive)
Paragon's resin bulged wheels
Xtradecal's Buccaneer decals

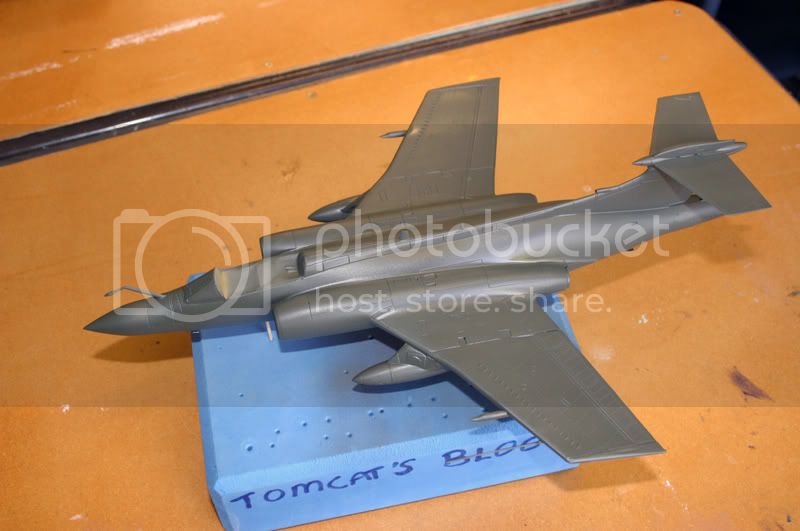
This is the picture my customer provided


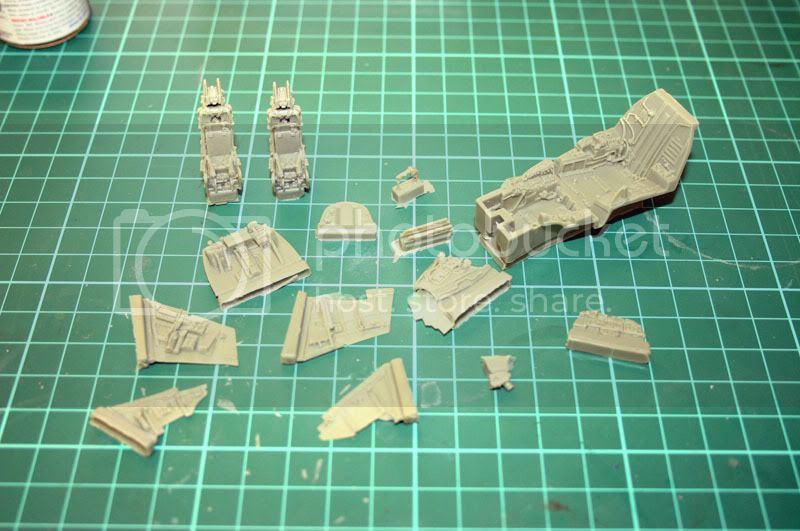
And the kit and extras before starting


As this is a build for a customer, he has made certain requests for the build and as such I will be taking my time on this build
betheyn
Staff MemberSenior Editor
AEROSCALE
#019
_VISITCOMMUNITY
England - South East, United Kingdom
Joined: October 14, 2004
KitMaker: 4,560 posts
AeroScale: 2,225 posts
Posted: Saturday, August 04, 2007 - 06:48 AM UTC
Hi Allen,
I shall enjoy watching this build as I do just love the Buccaneer.
Has the Airfix kit got raised or engraved panel lines ? All that A.M stuff should really make this build a show stopper once finished.
Are there any differences between the RAF and Naval aircraft ?
Andy
Tarok
_VISITCOMMUNITY
Victoria, Australia
Joined: July 28, 2004
KitMaker: 10,889 posts
AeroScale: 174 posts
Posted: Saturday, August 04, 2007 - 08:16 PM UTC
Wow! Now that kit is a blast from the past. I remember building one of these when I was in Primary (junior) school back in the 80's. Is this kit still on the market? Does it still come with the old SAAF decals?

I'm sure you'll do a stellar job on this one, Allan!!

Rudi
Tomcat31
#042
_VISITCOMMUNITY
England - North East, United Kingdom
Joined: November 18, 2006
KitMaker: 2,828 posts
AeroScale: 1,720 posts
Posted: Sunday, August 05, 2007 - 03:53 AM UTC

Quoted Text

Has the Airfix kit got raised or engraved panel lines ?

The panel lines and rivets are recessed (and slightly over sized)


Quoted Text

Are there any differences between the RAF and Naval aircraft ?

the only differences that I can see (according to the instructions) are a few different lumps, aerials and fuel tanks.


Quoted Text

Is this kit still on the market? Does it still come with the old SAAF decals?


I'm not sure if it's still on the market but i have seen it around in some hobby shops and at shows this kit was provided by my client and it come with options to build an S2B/C/D aircraft with decals for 208 Sqn RAF, 800 & 809 Sqn RN and 24 Sqn South African Air Force. I know that they also did a boxing with decals for just 2 RAF aircraft, one of which was a Gulf War paint scheme.

The excess resin has been removed off the cockpit parts and all of them washed in a mild detergent to remove all the mould release agents and excess resin dust. they have now been left to dry thoroughly before I start any gluing and painting

Here's a pic of the cockpit parts before the removal of excess resin

SGTJKJ
#041
_VISITCOMMUNITY
Kobenhavn, Denmark
Joined: July 20, 2006
KitMaker: 10,069 posts
AeroScale: 3,788 posts
Posted: Sunday, August 05, 2007 - 09:57 PM UTC
It looks very interesting - will be fun to follow this Airfix kit being turned into a nice model. I hope you get a good hourly wage

Looking forward to see more
Tomcat31
#042
_VISITCOMMUNITY
England - North East, United Kingdom
Joined: November 18, 2006
KitMaker: 2,828 posts
AeroScale: 1,720 posts
Posted: Sunday, August 19, 2007 - 04:08 AM UTC
Quick update:

The Neomega (Not Pavla as previously mentioned) cockpit set has been cleaned up and primed. Then followed a base coat of XF-63 German Grey followed by a heavy drybrushing of XF-53 Neutral Grey and then a lighter drybrushing of XF-66 Light Grey for highlights. I'm leaving it to dry now and then i'll get round to picking out the detail of the panels and switches.

Phantom2
_VISITCOMMUNITY
Östergötland, Sweden
Joined: April 18, 2006
KitMaker: 708 posts
AeroScale: 678 posts
Posted: Sunday, August 19, 2007 - 07:38 AM UTC
Hi Allen!

Another of my favourites, on par with the F-4 Phantom!

I have one just started too, but It has been abandoned for some time due to all Campaign builds!
I have four of these kits, I will build one Naval, one RAF and one Gulf Warrior.
The fourth was a "bonus" kit as I got two, yes TWO complete kits in the box, when I bought the new re-issue.

I have the Neomega cockpit and all the other stuff you have, and I found the Paragon flaps too!
Looking forward to see your progress and how the Neomega pit fits, which by the way Is some of the best resin mouldings I have ever seen!

We need a Modern version of the down low Campaign, as I intended to build a Bucc for what showed to be WWII only!

Cheers!

Stefan E
Tomcat31
#042
_VISITCOMMUNITY
England - North East, United Kingdom
Joined: November 18, 2006
KitMaker: 2,828 posts
AeroScale: 1,720 posts
Posted: Wednesday, September 12, 2007 - 09:48 AM UTC
Update time:

The rather poor instructions supplied with the cockpit set left me to some guess work but I decided rather than glueing the cockpit sidewalls onto the kit after removing the excess plastic I thought it would be easier to build the tub as a complete unit. I also thought it would be easier to attach the instrument combing to the tub at the same time. As such the combing from the kit had to be removed. Unfortunately the kits part is bigger than the resin replacement and i'm now going to have to dig out some milliput to fill it. The front cockpit also has a small fit issue between the sidewalls and the plastic but a thin strip of 0.5mm plastic should rectify this.


As always comments are welcome
pigsty
_VISITCOMMUNITY
United Kingdom
Joined: January 16, 2007
KitMaker: 1,226 posts
AeroScale: 640 posts
Posted: Wednesday, September 12, 2007 - 09:06 PM UTC
I’ve just got the Neomega cockpit so it’s interesting to see how you’ve fettled yours - thanks! But I’ll be really interested in how you persuade the upper fuselage and the lower fuselage even to stay in the same county. Everything I’ve heard about that makes me quail - and dry-fitting (I use the term very loosely) isn’t doing anything for my confidence, either.

Dad told me once that the US Navy and the Royal Navy held a competition to see who could build the ugliest aircraft. The Yanks thought they were doing well with the Phantom, then the Buccaneer was unveiled and they gave up in despair. Don’t know what he means. After all, I’ve seen the Gannet, too …

seán
Tomcat31
#042
_VISITCOMMUNITY
England - North East, United Kingdom
Joined: November 18, 2006
KitMaker: 2,828 posts
AeroScale: 1,720 posts
Posted: Friday, September 14, 2007 - 07:19 AM UTC
Well theres a new buzz worrd in my house and it goes along the lines of F Airfix but I have managed to get quite a bit done today heres the order of business.

The excellently molded Neomega seats have been painted. I tried a new tecnique for the ejection handles by twisting coloured wire together but think I need to refine the idea


The fit of the fuselage was terrible with the worse bit at the rear so I made a spreader bar from sprue to improve the fit.


and the fuselage has been left for the glue to fully set.


I've started the engine intakes and exhaust and also the airbrakes, the client wants the brakes close so, as such I'll need to carefully fill some gaps and sand without loosing the rivet detail

Buzby061
_VISITCOMMUNITY
England - North West, United Kingdom
Joined: September 14, 2007
KitMaker: 7 posts
AeroScale: 3 posts
Posted: Saturday, September 15, 2007 - 07:28 AM UTC
Looks just like my build. I got the superb Neomega resin cockpit & it just went downhill after that. If I were to do another I would do it with wings up & airbrakes open. I ended up using a massive amount of filler & Milliput & lost all the rivet detail sanding the filler. We moved house 7 years ago (just after I got it Buccaneer shaped) & it's still packed away - I got so disheartened with it. May have to take some beer up to the attica to get me in the right frame of mind.

Good luck with the build, will follow it with interest.
SGTJKJ
#041
_VISITCOMMUNITY
Kobenhavn, Denmark
Joined: July 20, 2006
KitMaker: 10,069 posts
AeroScale: 3,788 posts
Posted: Saturday, September 15, 2007 - 08:47 AM UTC
Looks good, although it definently requires a lot of work.

Looking forward to see more
magnusf
_VISITCOMMUNITY
Stockholm, Sweden
Joined: May 02, 2006
KitMaker: 1,953 posts
AeroScale: 1,902 posts
Posted: Saturday, September 15, 2007 - 08:02 PM UTC
What a pig of a kit!

I suppose there is very little to do about it if your customer have flown the aircraft. You could try asking him if he could get a conversion course onto something that is a bit easier to build, maybe a Hasegawa Harrier !

Following the build wih great interest!

Regards

Magnus
Tomcat31
#042
_VISITCOMMUNITY
England - North East, United Kingdom
Joined: November 18, 2006
KitMaker: 2,828 posts
AeroScale: 1,720 posts
Posted: Saturday, September 15, 2007 - 08:16 PM UTC

Quoted Text

I suppose there is very little to do about it if your customer have flown the aircraft. You could try asking him if he could get a conversion course onto something that is a bit easier to build, maybe a Hasegawa Harrier !

My client has asked me if I can build a Phantom after this. With a bit of luck it'll be a Hasegawa offering
Tomcat31
#042
_VISITCOMMUNITY
England - North East, United Kingdom
Joined: November 18, 2006
KitMaker: 2,828 posts
AeroScale: 1,720 posts
Posted: Monday, September 17, 2007 - 05:14 AM UTC
Quick update: ( i would have posted last night but was too tired)

Half a bottle of micro weld, half a tube of plasto filler and 4 hours later I'm half way to having what looks like a fuselage. Here's the order of business.

In order to give the closed air brakes some support I used the kit part for open brakes and remove the wedges either side and then mounted the brakes and glued. I still haven't plucked up enough courage to try and fill the gaps yet though.


The fit of the engine intakes was terrible and left roughly a 1mm step all the way round. This was filled and sanded to blend it all together.


after three hours an almost satisfactory result ( but still needs a little tweak here and there)


and unfortunately the same was for the exhaust to fuselage fit.


Almost there, but sadly I'm back to work this week so it's back to working on the kit at weekends only
Bigskip
_VISITCOMMUNITY
England - South East, United Kingdom
Joined: June 27, 2006
KitMaker: 2,487 posts
AeroScale: 575 posts
Posted: Wednesday, September 19, 2007 - 12:08 AM UTC
Allen

I feel your pain. -re the buzz word - try replacing Airfix with Revell or Italieri - works for me at the mo.

Andy
Buzby061
_VISITCOMMUNITY
England - North West, United Kingdom
Joined: September 14, 2007
KitMaker: 7 posts
AeroScale: 3 posts
Posted: Wednesday, September 19, 2007 - 07:41 AM UTC
As you'll probably get bored with using the same old swear words I recommend Rogers Profanisaurus, you'll probably have got to the back page by the time you've finished the build.

http://www.amazon.co.uk/s/ref=nb_ss_w_h_/202-4767431-8933462?initialSearch=1&url=search-alias%3Daps&field-keywords=profanisaurus
Tomcat31
#042
_VISITCOMMUNITY
England - North East, United Kingdom
Joined: November 18, 2006
KitMaker: 2,828 posts
AeroScale: 1,720 posts
Posted: Sunday, September 30, 2007 - 07:42 AM UTC
Well update time, Unfortunately I couldn't post any pics last week as my camera was in pieces being cleaned. So here's last and this weeks progress:

I bit the bullet and decided that some detail would have to be lost when sanding the air brakes. I filled what I could with thin strips of plastic card and the rest with filler.


The visible part if the engines in the main wheel wells looked bland so I added some ribs to them to enhance them.


Finally the wings and fin was attached and checked for fit (which surpisingly wasn't as bad as i was expecting )


I read elsewhere that the canopy is actually perspex over a frame but Airfix have moulded the frames on the outside. So I painted the frame from the inside with Citadels Bleached Bone and when dried I supported it with blue tac and started sanding with my micro mesh set


And finally a quick polish and dipped in some Klear/Future


Finally primed with just some aerials and odd bits to attach and and its ready for it's coat of Dark Sea Grey


As always comments are welcome
Buzby061
_VISITCOMMUNITY
England - North West, United Kingdom
Joined: September 14, 2007
KitMaker: 7 posts
AeroScale: 3 posts
Posted: Wednesday, October 03, 2007 - 07:34 AM UTC
Good tip about the canopy.
SGTJKJ
#041
_VISITCOMMUNITY
Kobenhavn, Denmark
Joined: July 20, 2006
KitMaker: 10,069 posts
AeroScale: 3,788 posts
Posted: Thursday, October 04, 2007 - 10:24 PM UTC
This looks great, Allen. It is interesting to follow this build and see what you can make of an old kit by using some AM stuff and a lot of TLC

Looking forward to see more
CaptainA
_VISITCOMMUNITY
Indiana, United States
Joined: May 14, 2007
KitMaker: 3,117 posts
AeroScale: 2,270 posts
Posted: Sunday, October 07, 2007 - 08:21 AM UTC
The sign of a good modeler is the ability to overcome the adversities of a substandard kit. I think you have overcome everything this kit has thrown at you quite well. Great job so far.
lampie
#029
_VISITCOMMUNITY
England - East Midlands, United Kingdom
Joined: December 23, 2005
KitMaker: 6,249 posts
AeroScale: 3,270 posts
Posted: Sunday, October 07, 2007 - 08:32 AM UTC
Great work Allen.
Despite all the grief its very satisfying when something like this starts to come together, and its really starting to look the business.
Makes you appreciate Tamigawa even more doesnt it
Nige
Tomcat31
#042
_VISITCOMMUNITY
England - North East, United Kingdom
Joined: November 18, 2006
KitMaker: 2,828 posts
AeroScale: 1,720 posts
Posted: Saturday, October 13, 2007 - 01:02 AM UTC
Your right Nige it does make you appreciate the Tamiya kits more and I may just have to build a P-47 or P-51 next as a break. Not really much of a update to give at the moment as I've been busy getting all my kits together and "tarting up" for a show and comp this weekend. All that i have got done was all the various aerials, pitot tubs and bits glued on so it would be ready for painting next week. I was going to paint the slipper tanks separately but after a quick dry fit, I've decided that it'll be better to fit them now and fill the gaps (No surprise there then ) and paint it all in one go. Hopefully more progress and pictures next week
magnusf
_VISITCOMMUNITY
Stockholm, Sweden
Joined: May 02, 2006
KitMaker: 1,953 posts
AeroScale: 1,902 posts
Posted: Saturday, October 13, 2007 - 02:43 AM UTC
Good to hear from you, I was worried that you had given up

Magnus
Tomcat31
#042
_VISITCOMMUNITY
England - North East, United Kingdom
Joined: November 18, 2006
KitMaker: 2,828 posts
AeroScale: 1,720 posts
Posted: Sunday, October 21, 2007 - 07:39 AM UTC
Hey all, just to let you know that I haven't given up hope on this yet. After a break last weekend at a model show it was back to the bench and on with the build. I fitted the slipper tanks and filled some of the "larger" gaps between the wing with plastic strip, I decided not to fully fill the gaps but to minimise them as there does seem to be a gap on some of the reference pics that I have found. The Bucc was primed and and given a base coat today but I'm not happy with the outcome.


(Yes that's Sam working away in the background)

The instructions and a couple of other sites I found on building this kit suggest using Humbrol 123 (Extra Dark Sea Grey) and after searching my stash of paint I found and old tin. After several minutes of mixing and thinning it was ready to airbrush. The reason I'm not happy is that for Extra Dark Sea Grey this looks far too green to both me and Sam than grey.


Does any one know if this is correct for a RN Buccaneer
 _GOTOTOP