

1⁄72Romanian MiG-15 Build
13
Comments
The Build
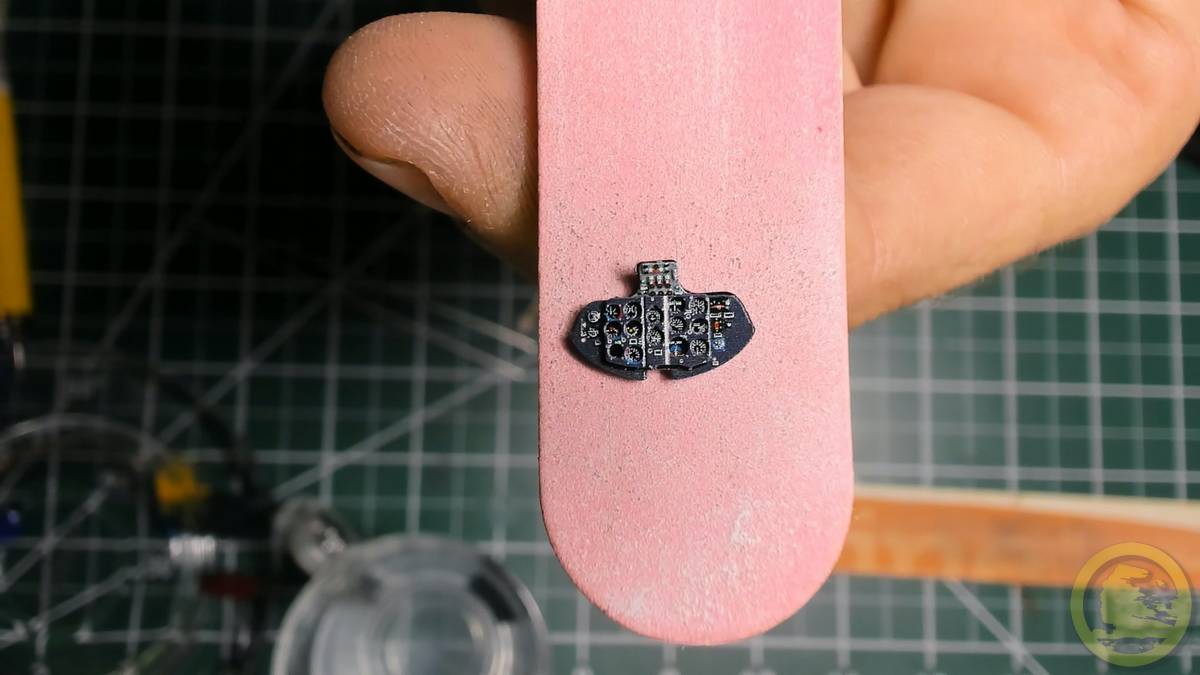
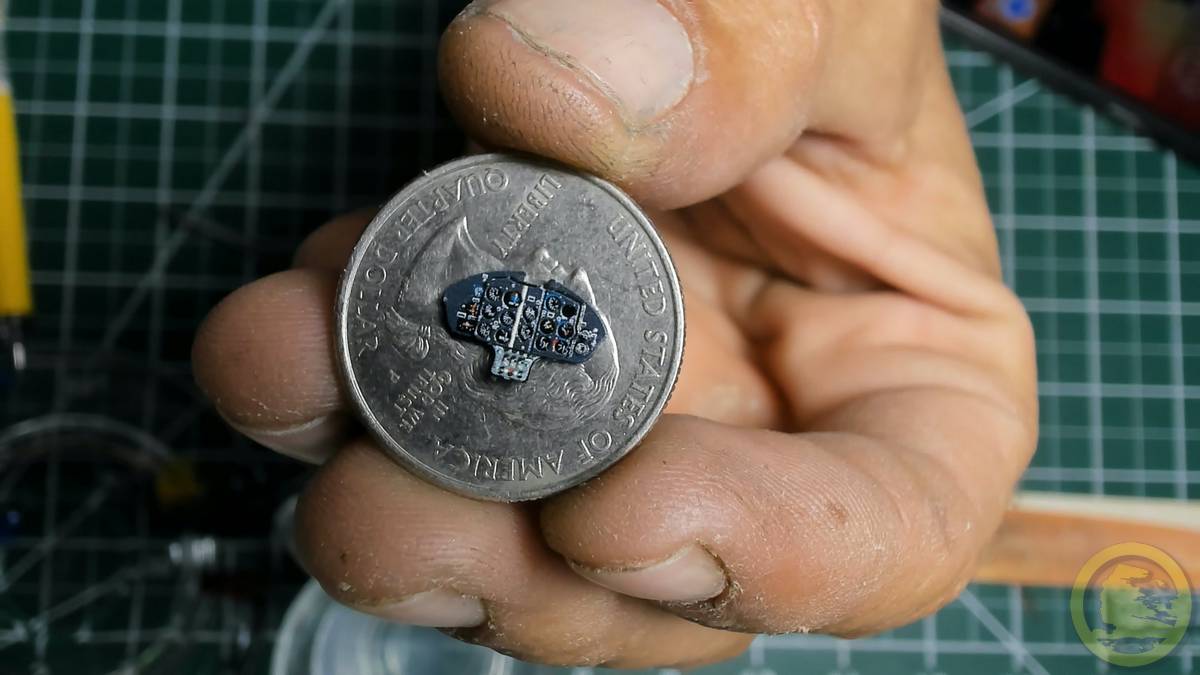
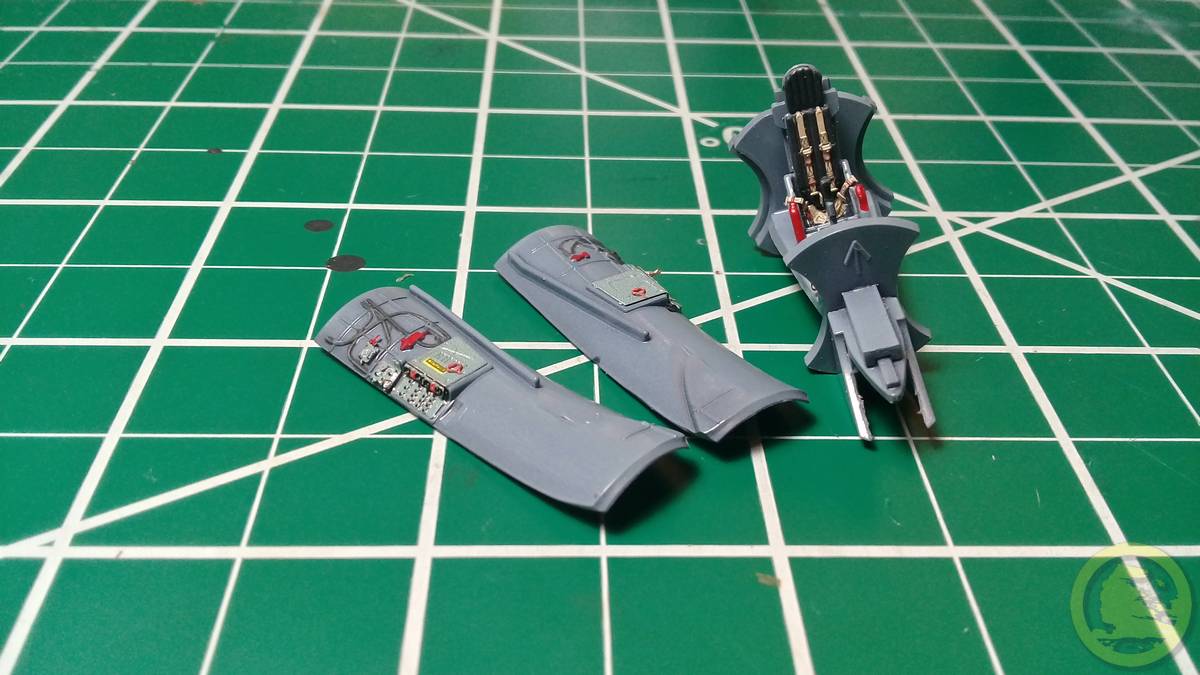
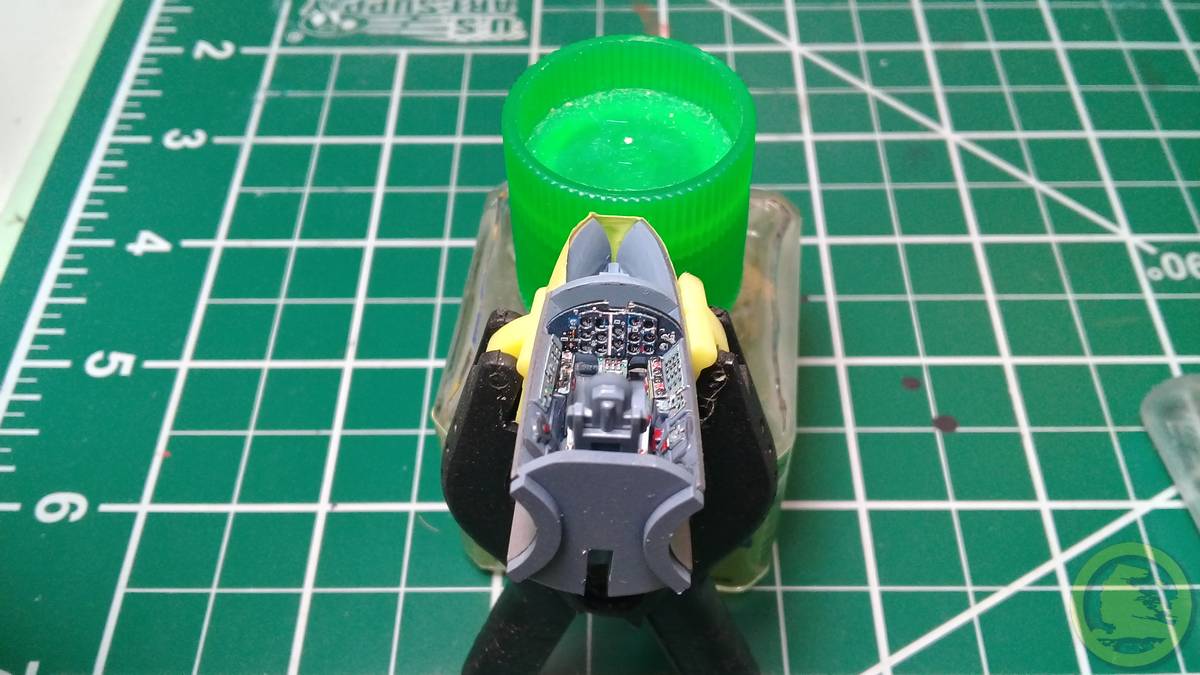
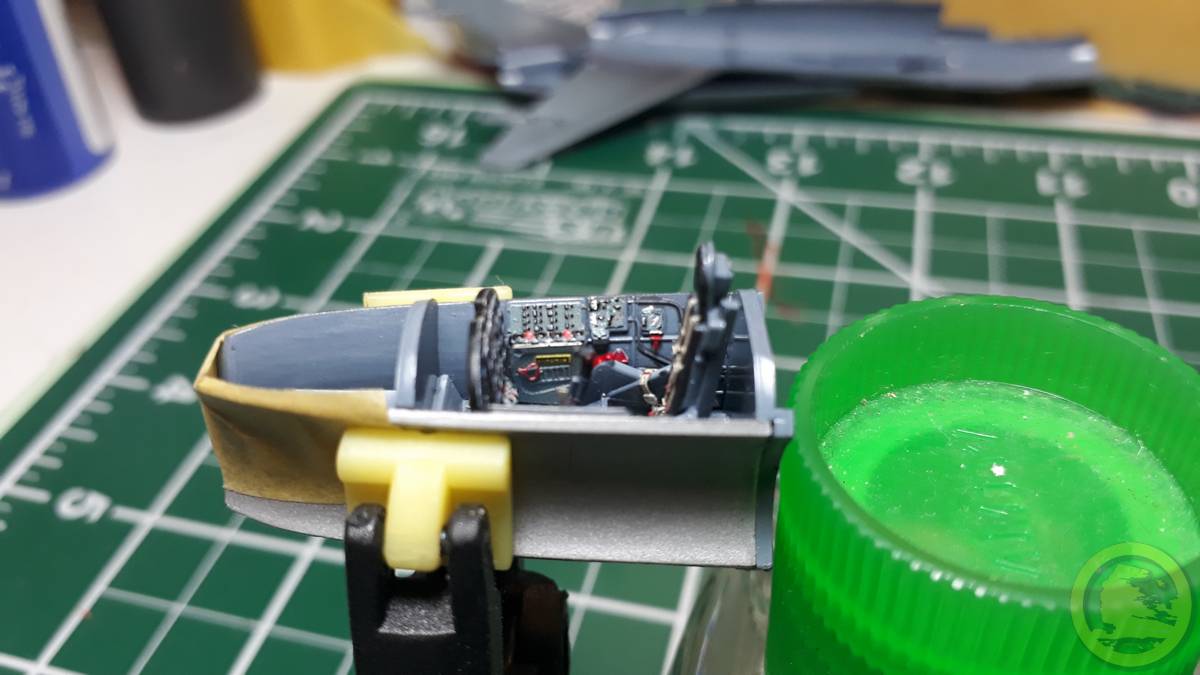
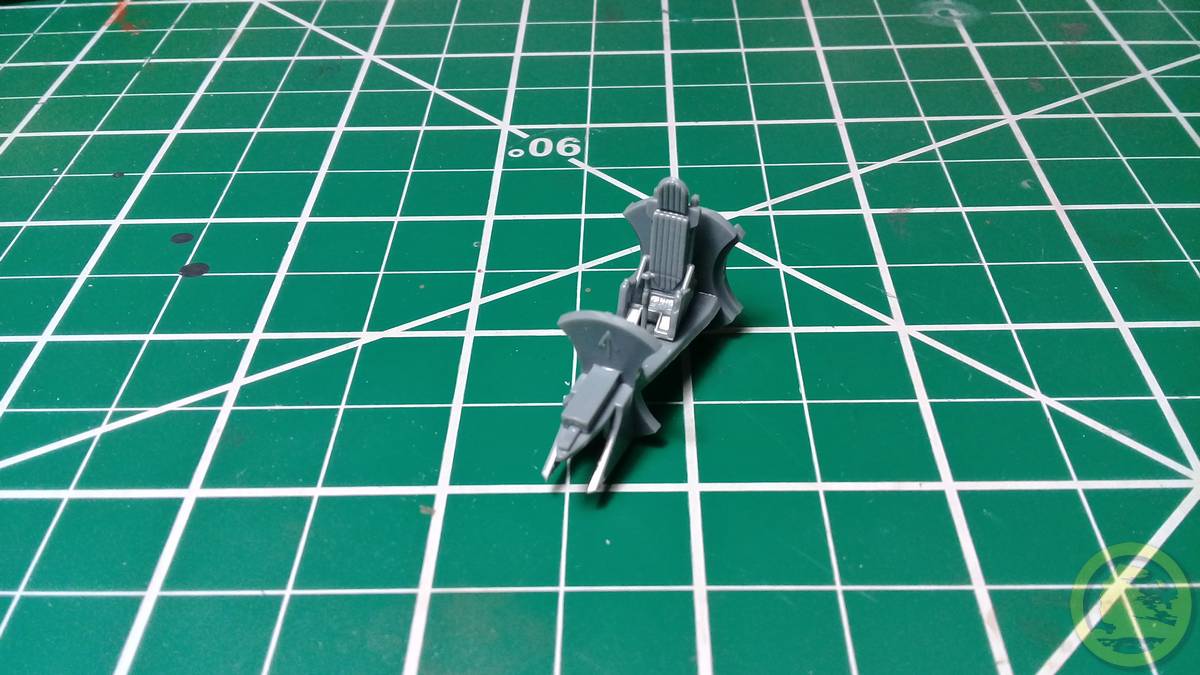
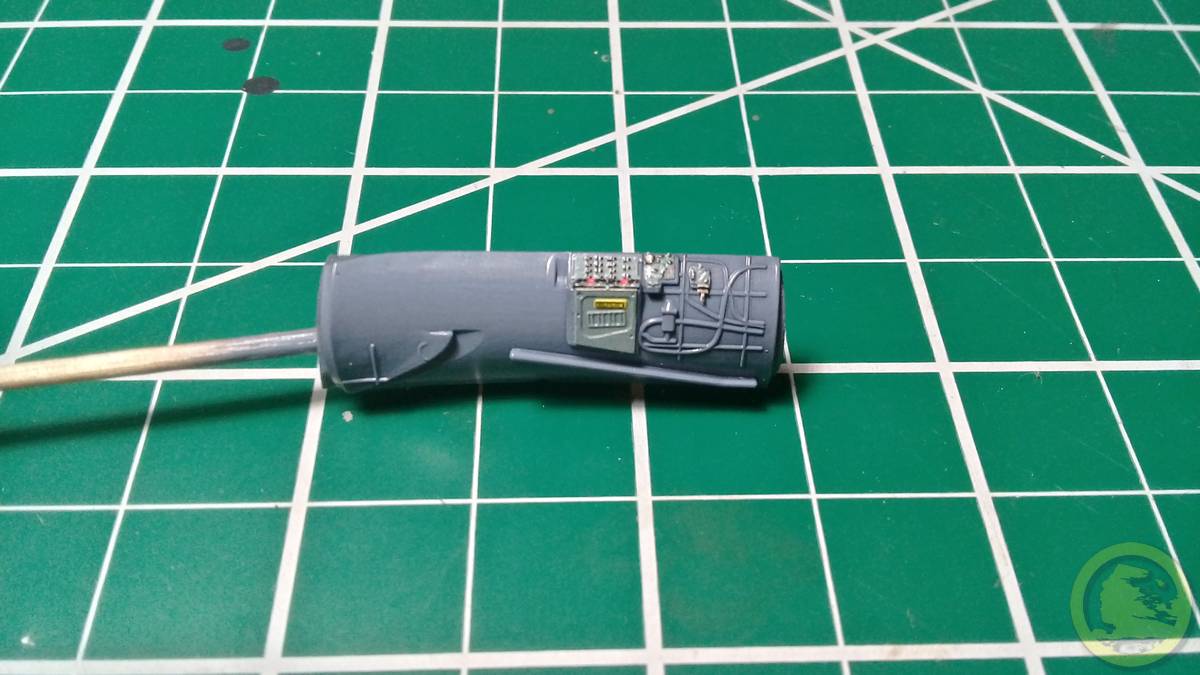
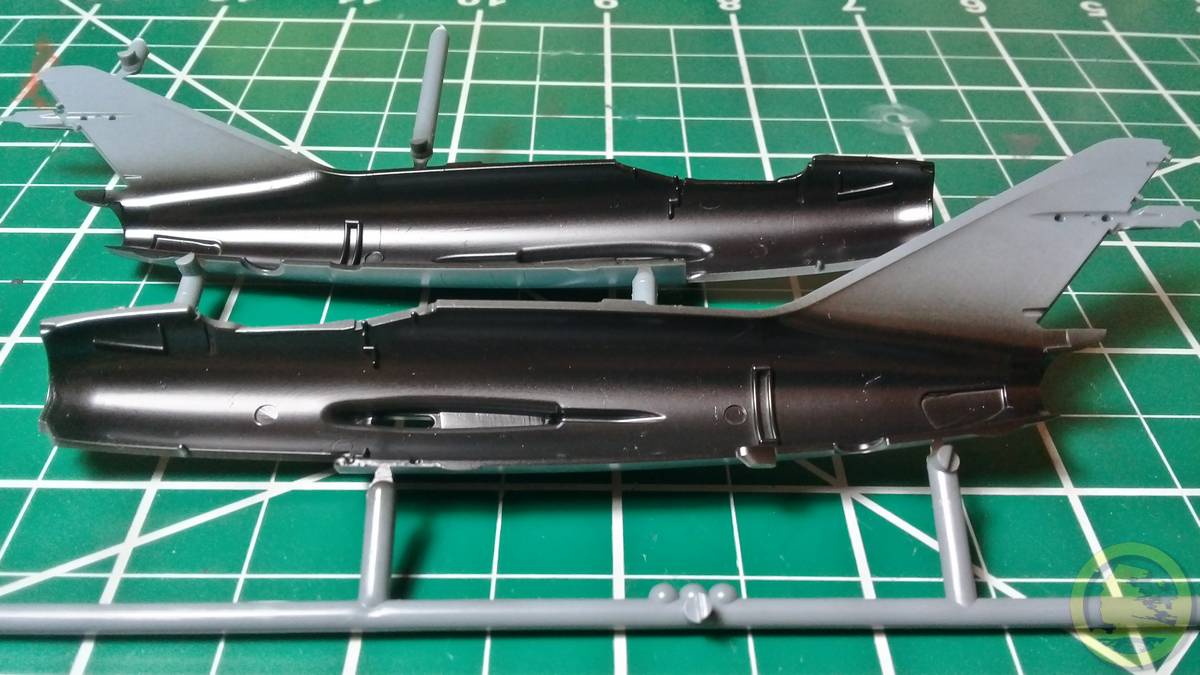
Because I had no prior experience at all with Eduard kits, I followed closely the instructions manual, skipping only the landing gear assembly and leaving it for last, in attempt to protect it. I should have done the same with the antennae!In very traditional fashion, the assembly starts with the cockpit. It is time consuming because includes pre-painting of styrene parts and bending and gluing of PE parts. It took me some two-three days, but after I joined the halves and I had for the first time the vision of the complete assembly, I was pretty much speechless. I just couldnt believe such level of detail can be achieved in 72nd scale but it was right there, under my nose!
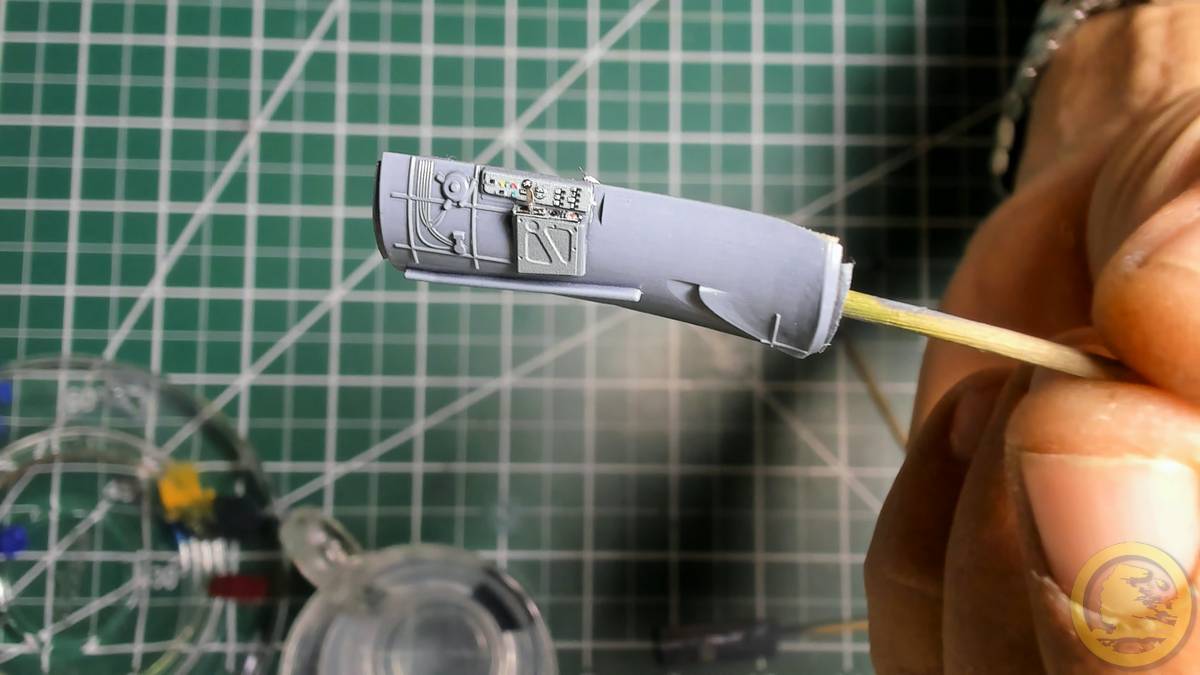
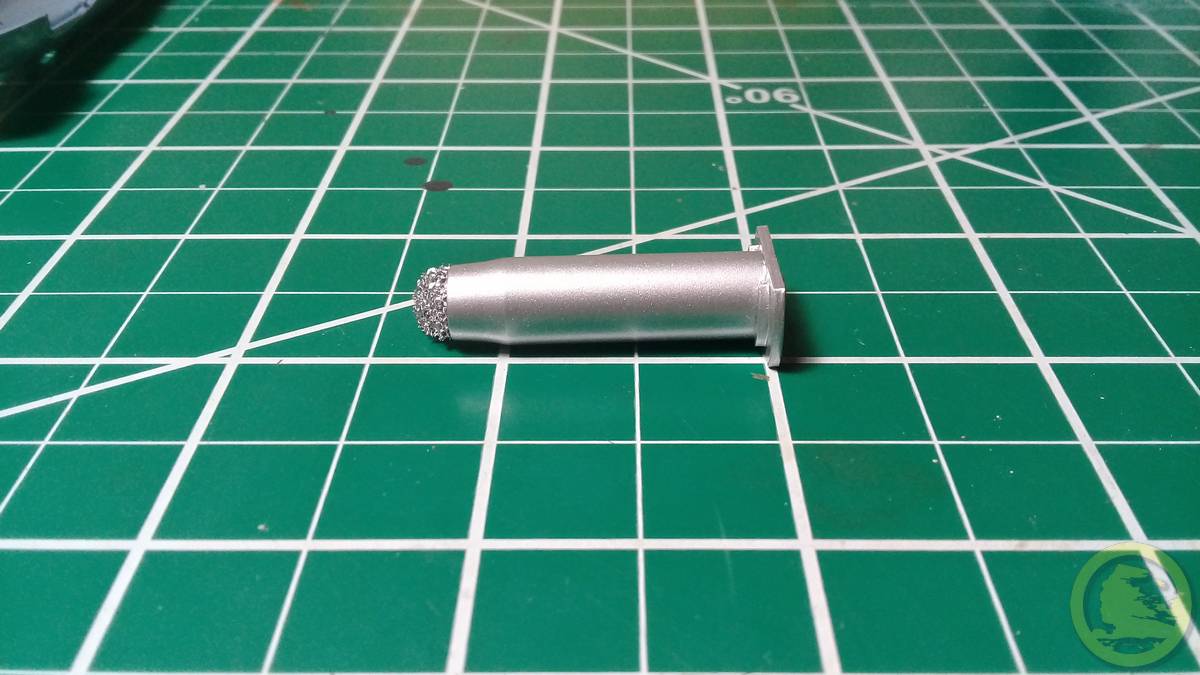
The engine is just a tube with a plug at its end! Not much more is needed, since there is well hidden in the complete assembly. Some perfectionists might find this a shortcoming, but for me worked just fine there is no need to fiddle with detail impossible to be seen. I never looked up, but I think must be resin alternatives available out there.
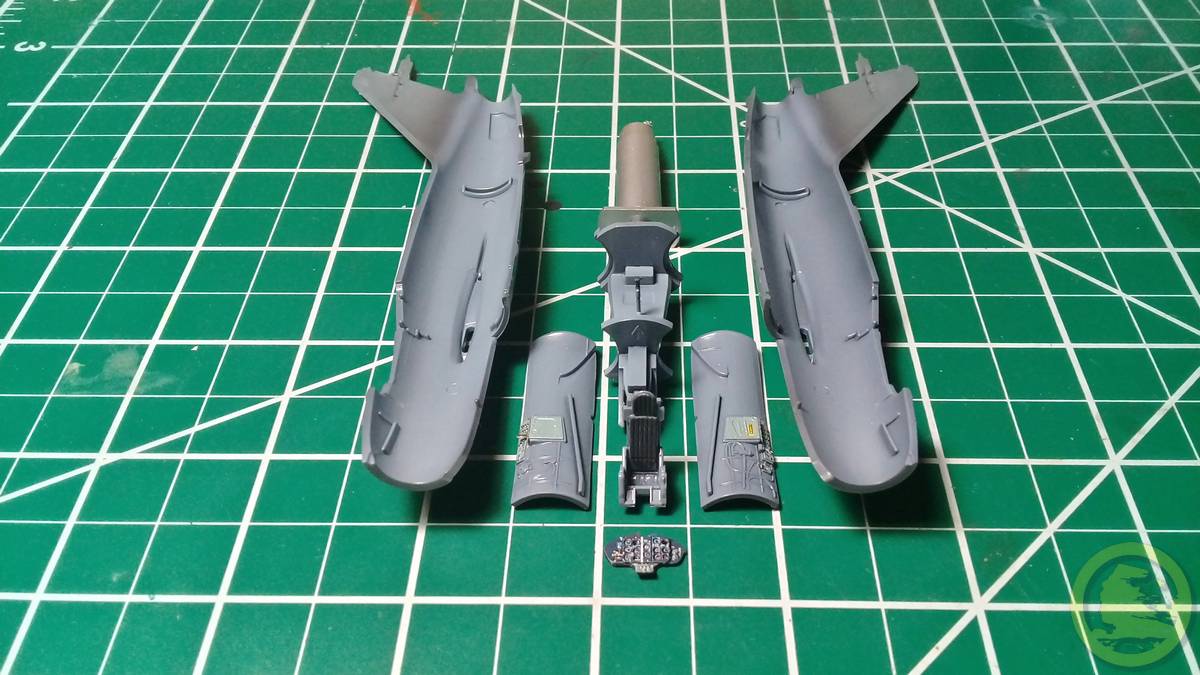
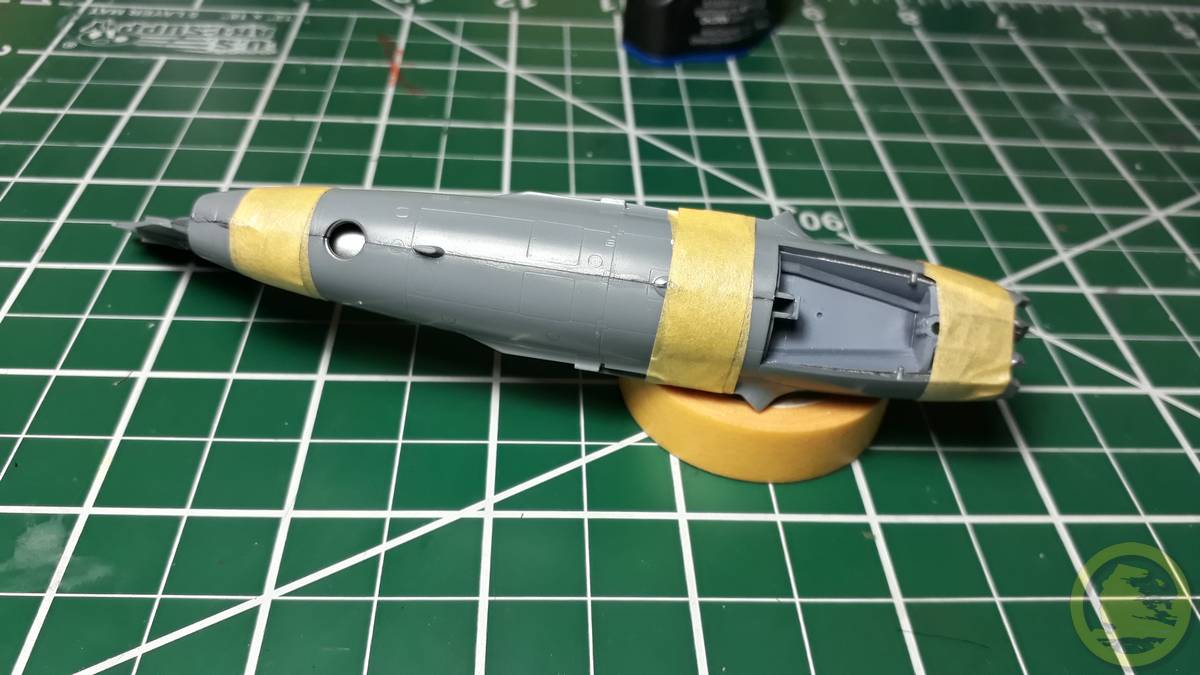
Once the cockpit and the engine are painted and assembled, the fuselage close around them from the sides, in classical fashion. This step includes also the rudder assembly and the added nose weight. And of course I forgot the weight (duh!). Luckily the air intakes werent sealed yet by the nose ring and I could cut small lead pieces and affix them with CA glue thru the small openings. I didnt forget to make the auxiliary antenna hole, though.
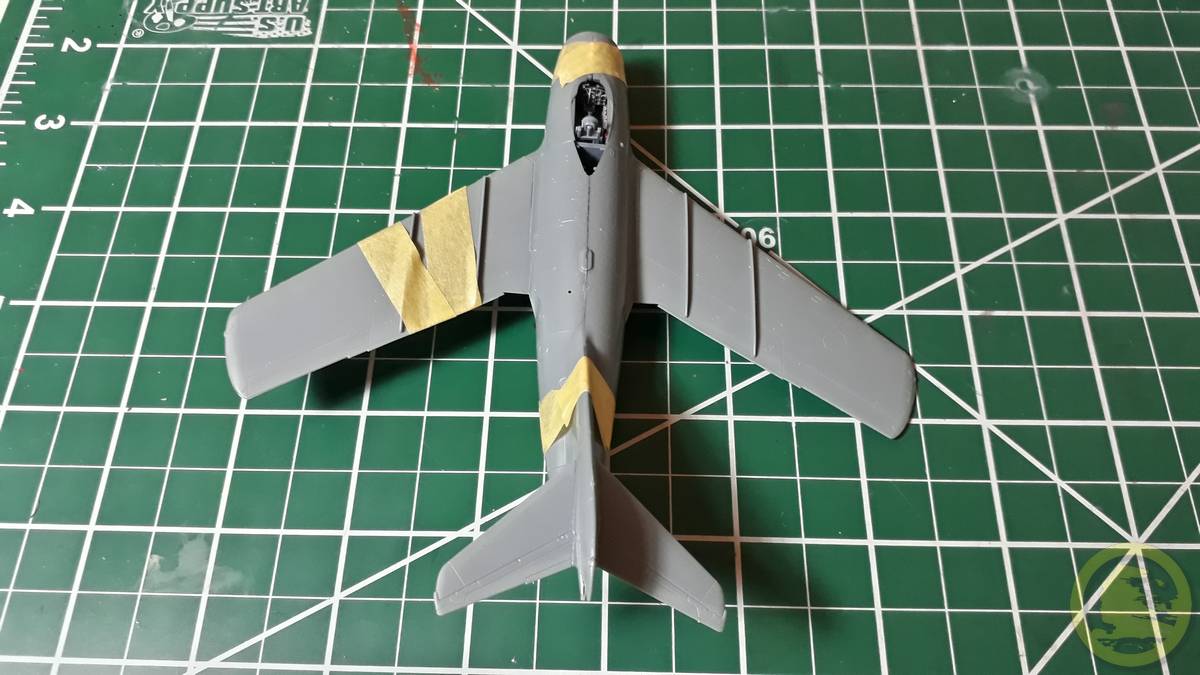
The assembly of the wings is deceptively easy because the fit is perfect; just a little sanding was needed at the leading edge. I also drilled the external fuel tanks holes, because the reference photographs of the Romanian aircraft shows them clearly. I managed to confuse myself with the horizontal stabilizers and I wasnt quite sure which is for left side and which one for right but Eduard came to my rescue. They graciously thought of lunatics like me and the alignment pins for those parts are keyed (thicker for the right, thinner for the left). Well done, Eduard, and thank you!
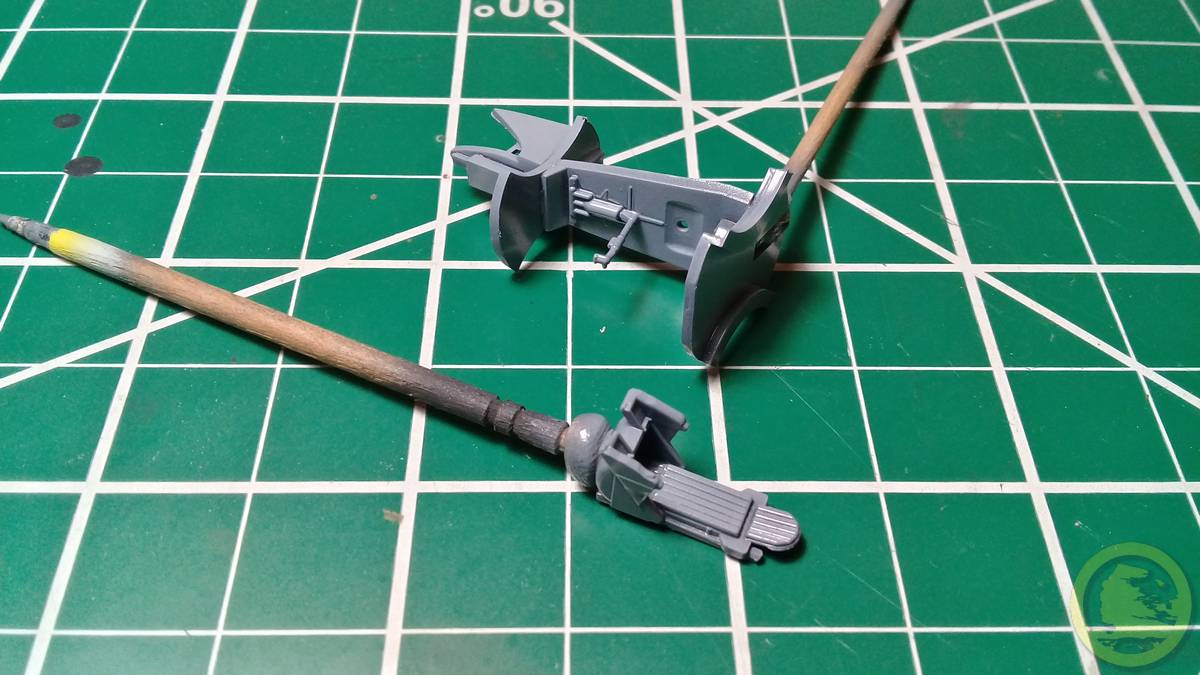
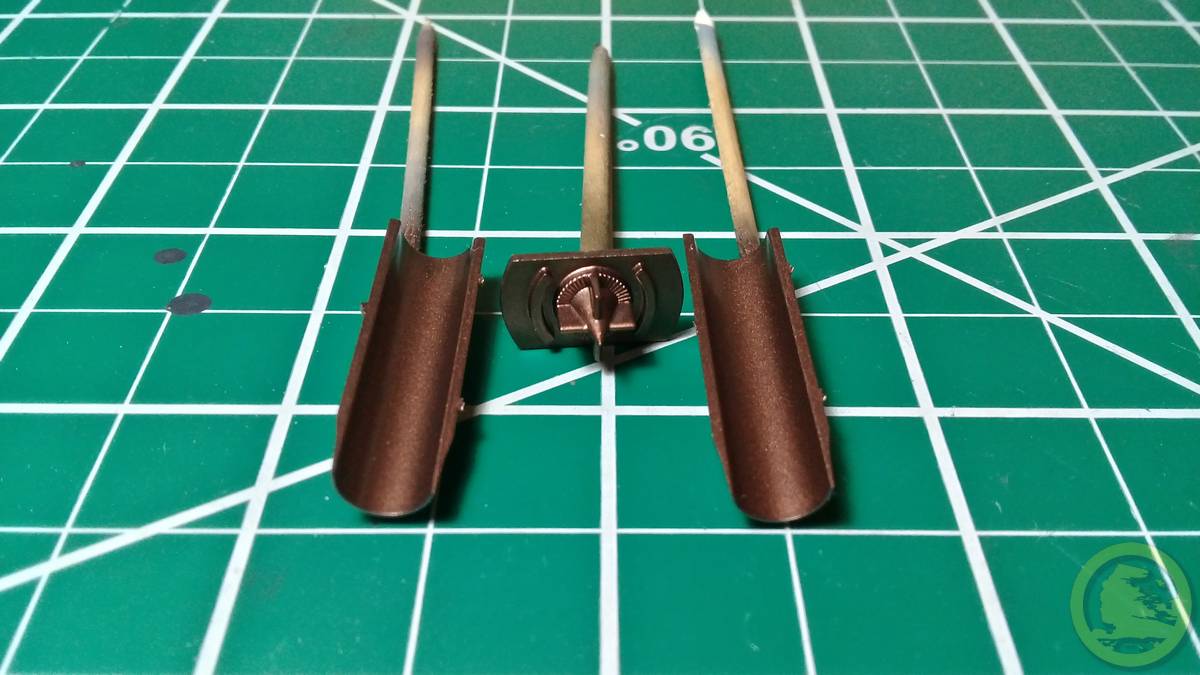
The under-the-nose area is teeming with detail and is more complicated than I initially estimated. Some additional nose weight is called out here and I havent omitted it this time, the front wheel is being added, the intake ring with the landing light, the MGs / gun pods and the front wheel bay doors all are crammed there. I had some issues with the fitting, especially with the intake ring alignment which I had to correct later. I also replaced the MGs barrels with stretched tube and drilled the gun barrel. All that detail is very delicate and the model handling became suddenly a high-risk operation. I budged and re-glued several times the MGs barrels replacements until I gave up doing it and I waited to finish the model and then go over it one more final time.
This assembly shouldnt be too complicated per se, but the parts are very small, and there is a mixture of PE and plastic parts the make the things quite hard for the modeler. For instance, the upper covers for the landing gear has to be supported by a pin molded on the main strut that has to be bent to an angle. Well, that might sound easy, but its not with small joining points and all that PE around! It took me four sessions to get it properly done (target-less curses included).
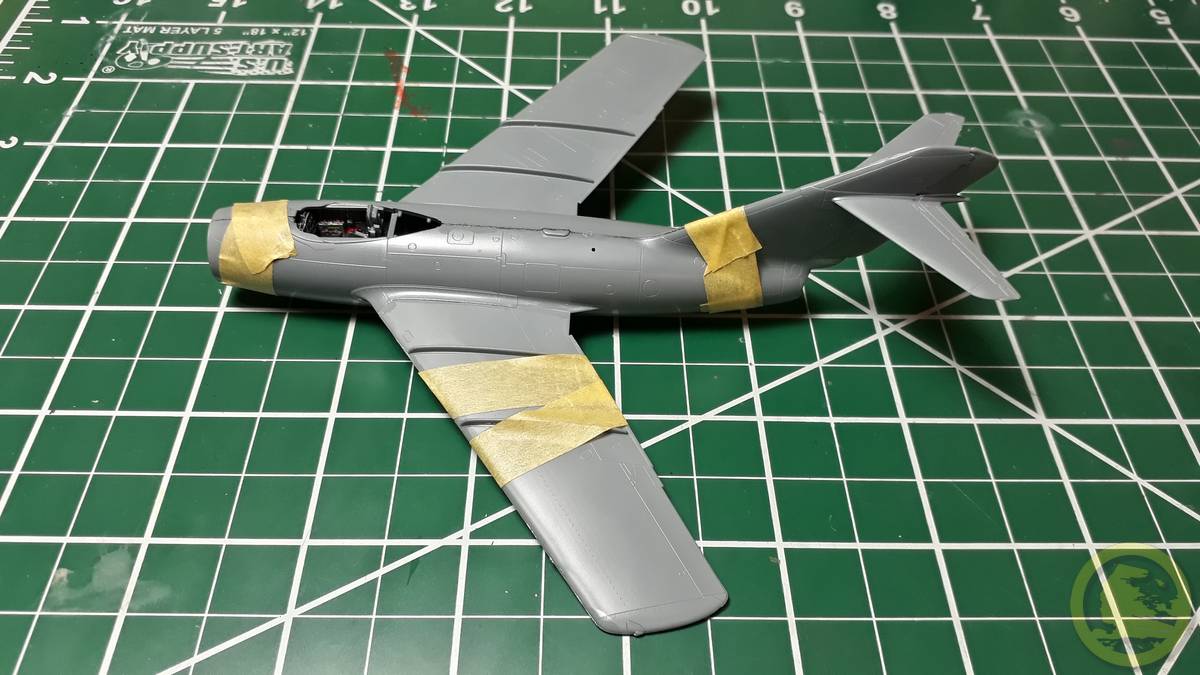
I chose to show the canopy on open position (just for the sake of that lavish interior!) and I attached the front piece only. The sliding part I masked it outside and inside, painted separately, and glued it in place later. I glued the gliding rail behind the pilots seat with white glue, just in case I needed more weight added; it was not the case. Note of advice: the canopy slides on the rail upwards and in open position the rear does not touch the fuselage. Eduard points this out but the detail is easy to overlook and Ive seen already modelers correcting the canopys stance because it looks a little awkward. Maybe it does, but so must be.
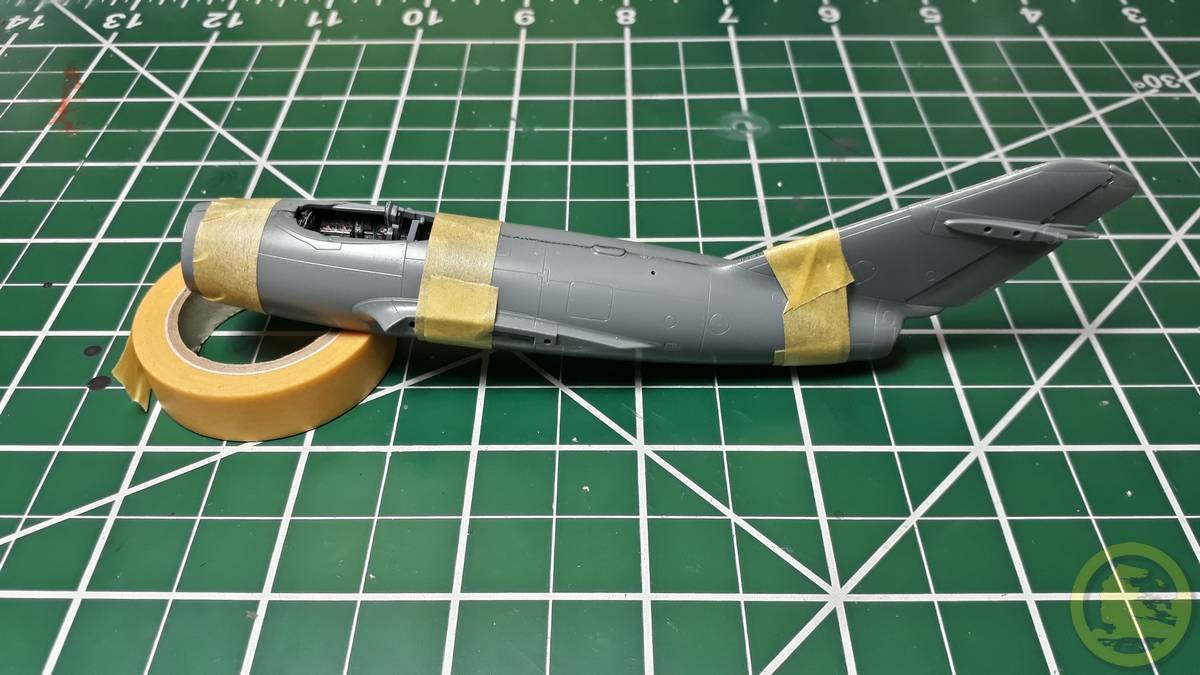
First I needed to deal with the assembly gaps. I had the usual joining line along the fuselage to address and just a little to fill at the wing and stabilizer roots. That is just model aircraft routine and nothing to complain about. I was disappointed though by the fit of the intake ring not because a gap remains thats easy to fix and acceptable but because its slightly sideways. Therefore I had to sand more one side to make it line-up symmetrically to the fuselage and that maimed my little aircraft for life. One has to look at it dead-center to see it but is still noticeable for an expert eye.
Furthermore I added all the small easy to break parts at the builds end (except for the canopy) and I was ready for painting. Even so, attaching the antennae proved to be a mistake, because some more sanding was laying ahead

About the Author


FROM: NETHERLANDS ANTILLES
Born in Romania, from a German father. Classical studies, Latin teacher. Currently holding French residency, business owner in a Dutch island where currently spoken language is English. At home I speak Spanish, though. Interest in history and modelling: since babyhood, I grown with my father's stor...
Comments

Not troublesome at all. I downloaded then from Google in one batch as a zip file. It might be helpful is you can resize them to no bigger then 1200x900, and email them to me at kevin.brant(at)kitmaker.com as a zip file.
APR 16, 2018 - 09:54 PM
Gabriel,
A most impressive build of the Iconic Mig-15.The decision to use the Romanian markings really makes the Mig standout all the more.
Eduard really did quite an excellent job designing and molding the cockpit. It really looks quite good.
Joel
APR 16, 2018 - 10:22 PM

Thank you, Joel! Yes, it's a gem of a kit. I bought already a new one which intend to make it also with Romanian markings but three tone camo this time. The Romanians used them until '90 as meteo recon planes.
Thank you for feedback.
Gabriel
APR 16, 2018 - 10:34 PM
Gabriel,
I have them but won't be able to get to them till tomorrow.
Kevin
APR 17, 2018 - 11:46 PM
Hi, Kevin!
Thank you for your efforts. There is no change on my screen whatsoever. I guess I have to live with it.
Thank again,
Gabriel
APR 18, 2018 - 08:05 PM
Copyright ©2021 by Gabriel. Images also by copyright holder unless otherwise noted. The views and opinions expressed herein are solely the views and opinions of the authors and/or contributors to this Web site and do not necessarily represent the views and/or opinions of AeroScale, KitMaker Network, or Silver Star Enterrpises. Images also by copyright holder unless otherwise noted. Opinions expressed are those of the author(s) and not necessarily those of AeroScale. All rights reserved. Originally published on: 2018-04-16 00:00:00. Unique Reads: 14228

WEB HOSTING BY


Copyright ©2021 AeroScale and Kitmaker Network, a subsidiary of Silver Star Enterprises
All Rights Reserved. Please read our Conditions of Use and Privacy Policy.
All Rights Reserved. Please read our Conditions of Use and Privacy Policy.