

1⁄48Slow, but deadly
9
Comments
history
The Douglas SBD was a development of the Northrop BT-1 dive bomber. Although it was nearly obsolete by the time the USA entered the war, it gave yeoman service throughout the conflict, especially in the desperate early years in the Pacific. The Battle of Midway was essentially won by the Dauntless, as they sank all four Japanese aircraft carriers committed to the action, rendering the Japanese fleet powerless to carry out their planned invasion.By 1944 the US Navy began phasing the Dauntless out in favour of the Curtiss SB2C Helldiver. A land-based version was used by the USAAF as the A-25 Banshee, which was also used by the French and Royal New Zealand Air Forces. The Armée de l'Air's A-25s and Aéronavale SBDs served into the early 1950s in French Indochina (Vietnam)
the model
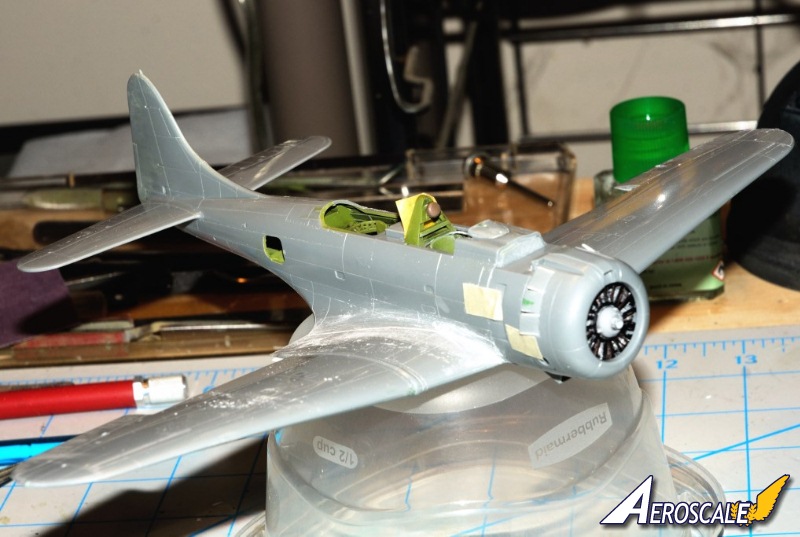
My scale of choice is 1/48 scale, and my preferred era is WW11, PTO, USA/Allies Naval aircraft. So I've slowly amassed a small stash of aircraft models that fits into that criteria. I opted for the old Hasegawa SBD-4 over the Accurate Miniature's kit, simply because I got it on sale from the Squadron shop. From what I recall, the reviews were OK with overall accurate dimensions. The kit interior did lack the detail of the AM kit, but it did come with the Eduard PE dive brakes.building
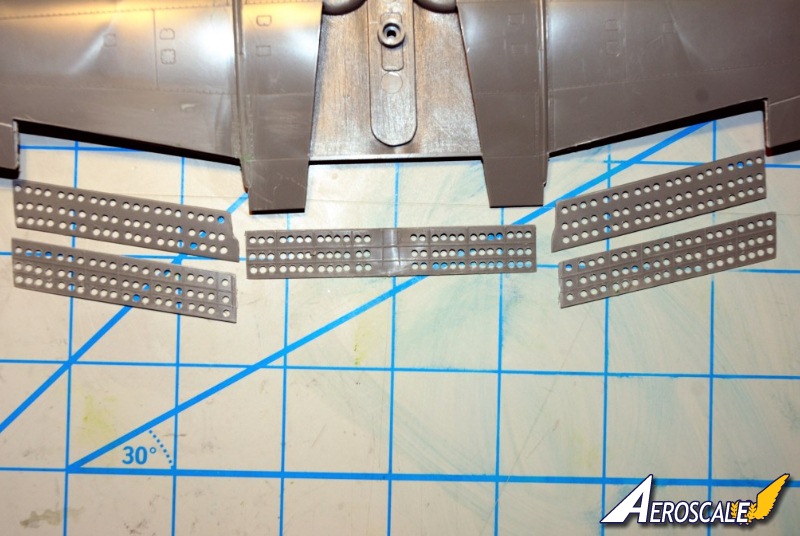
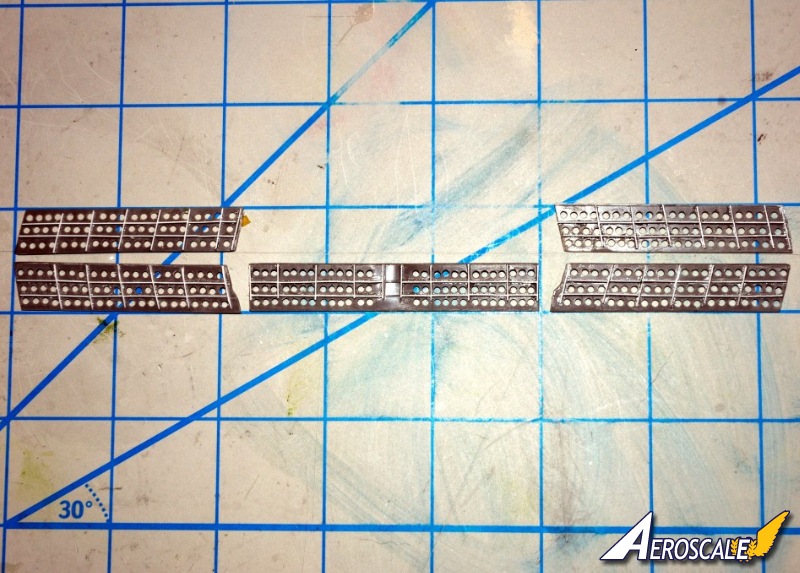
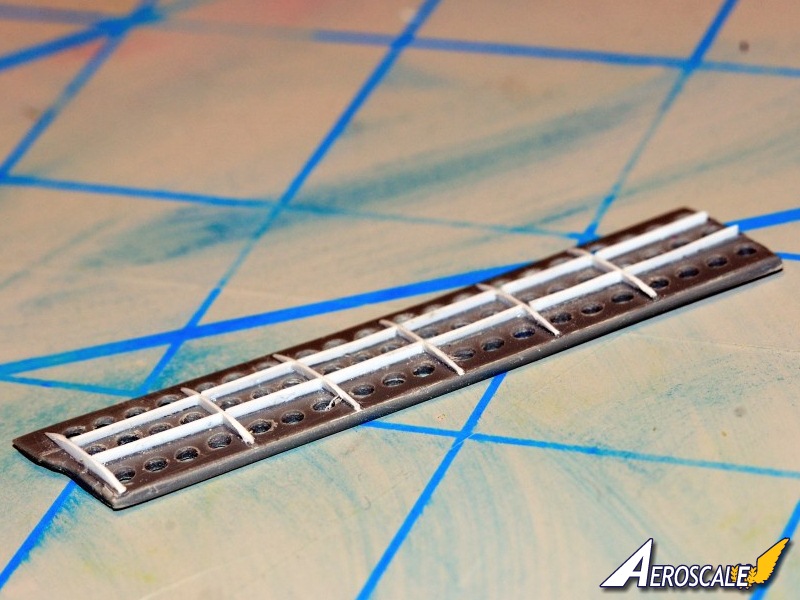
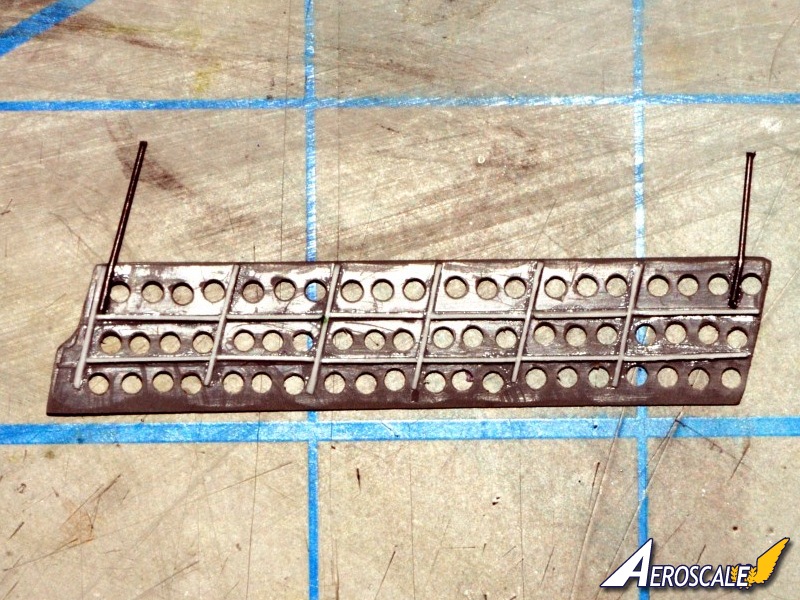
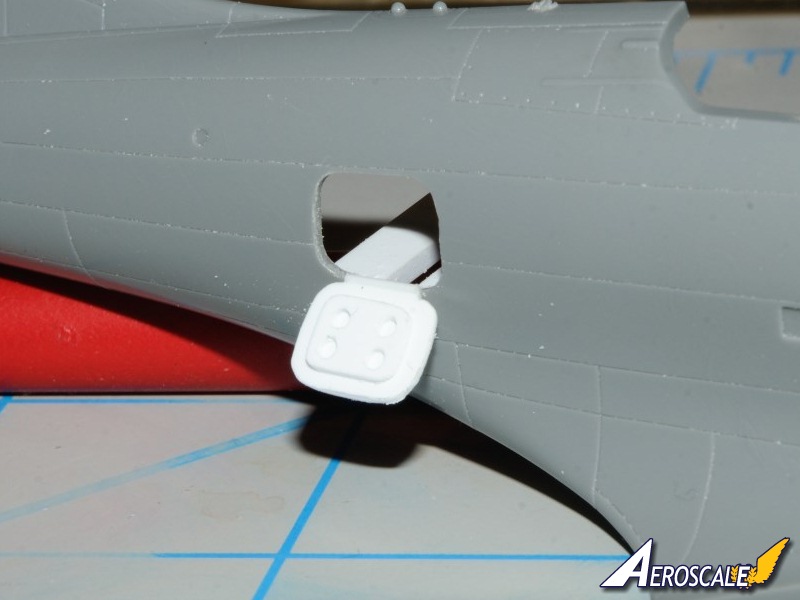
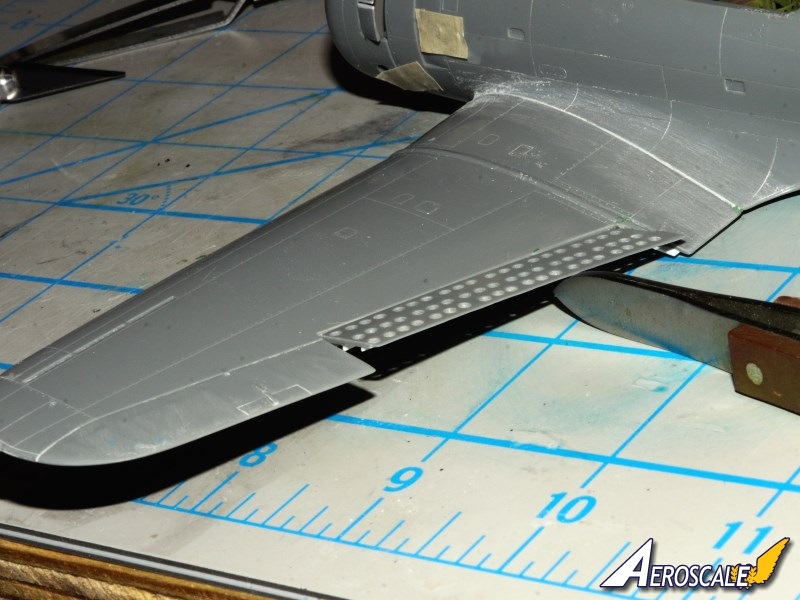
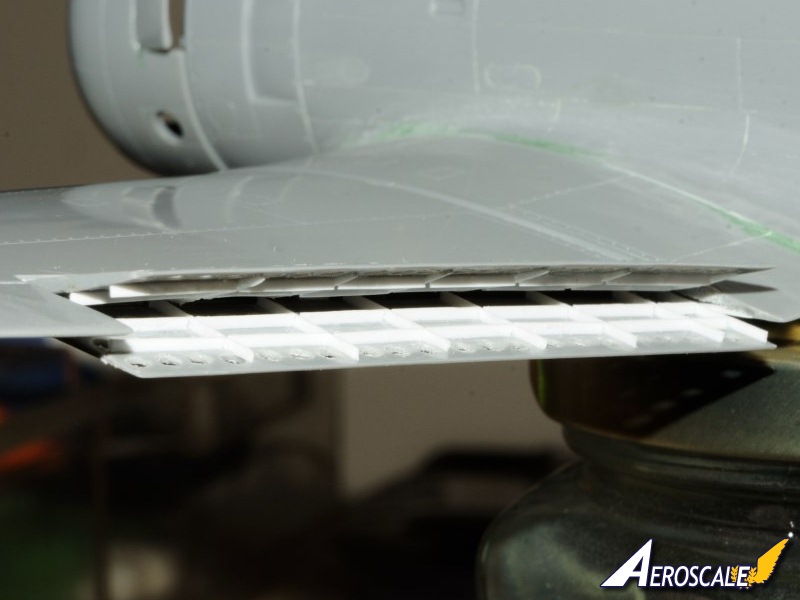
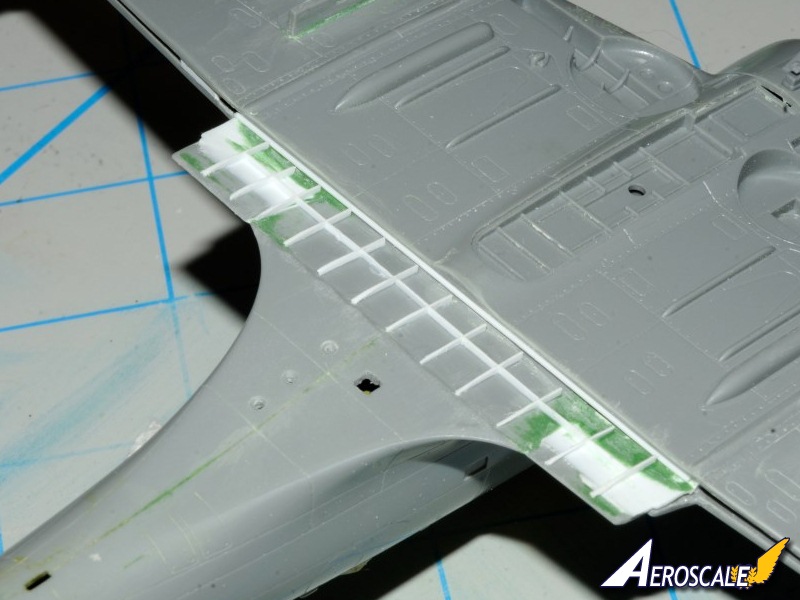
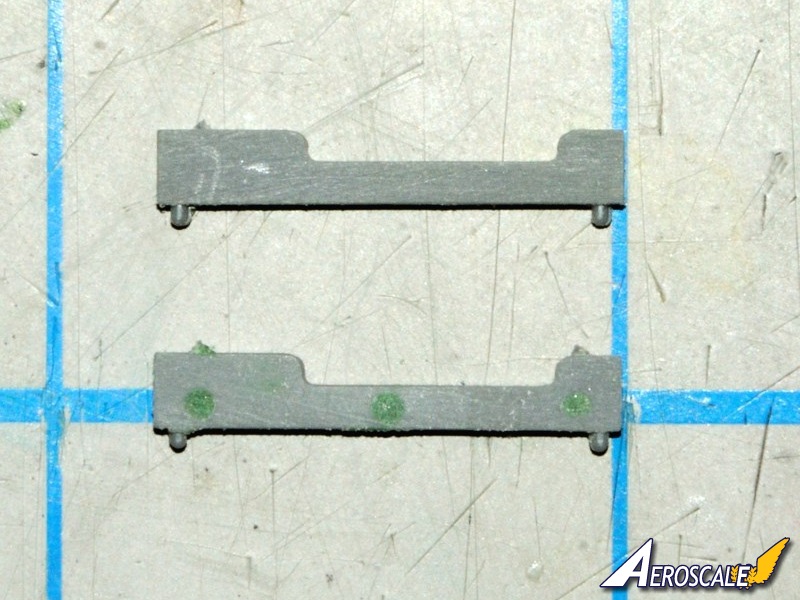
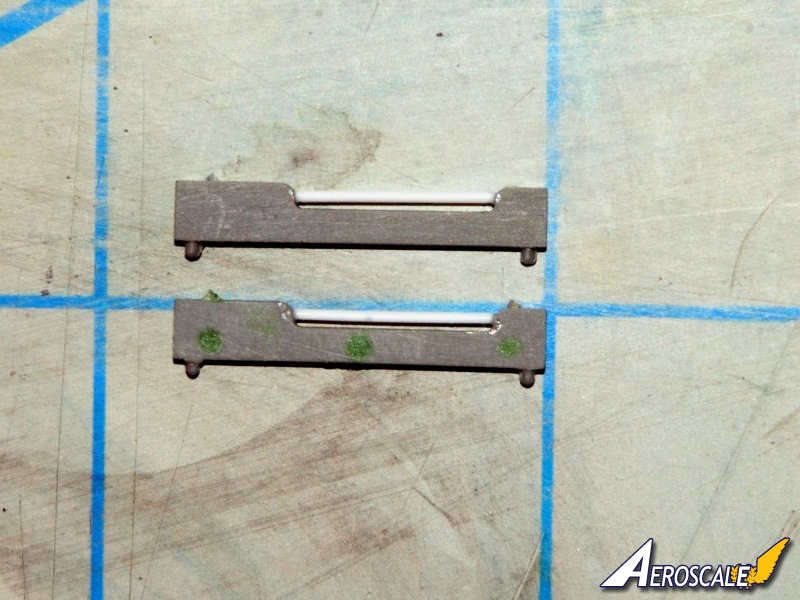
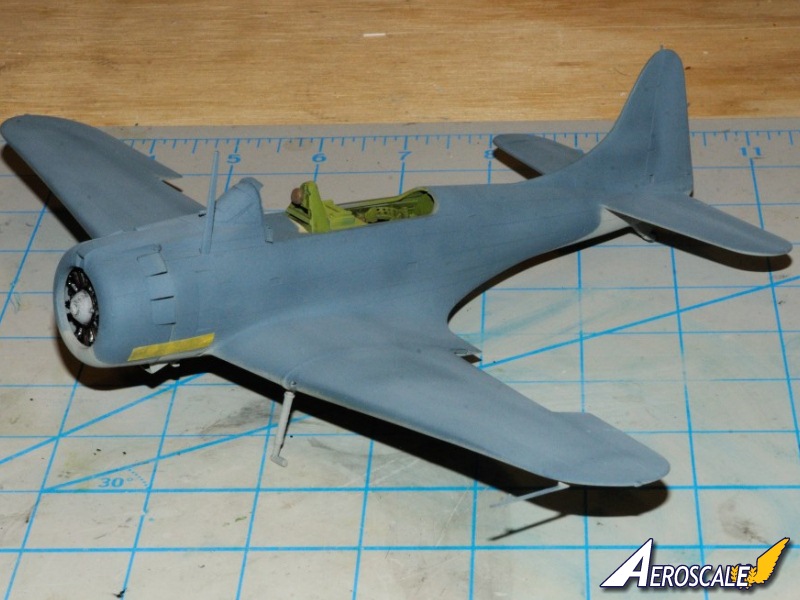
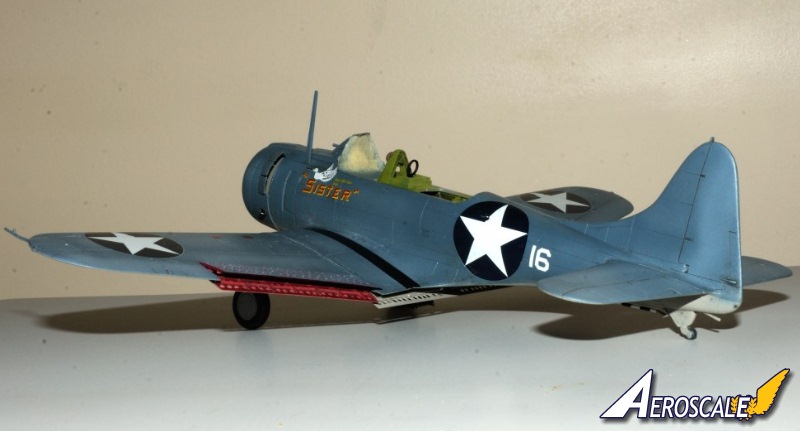
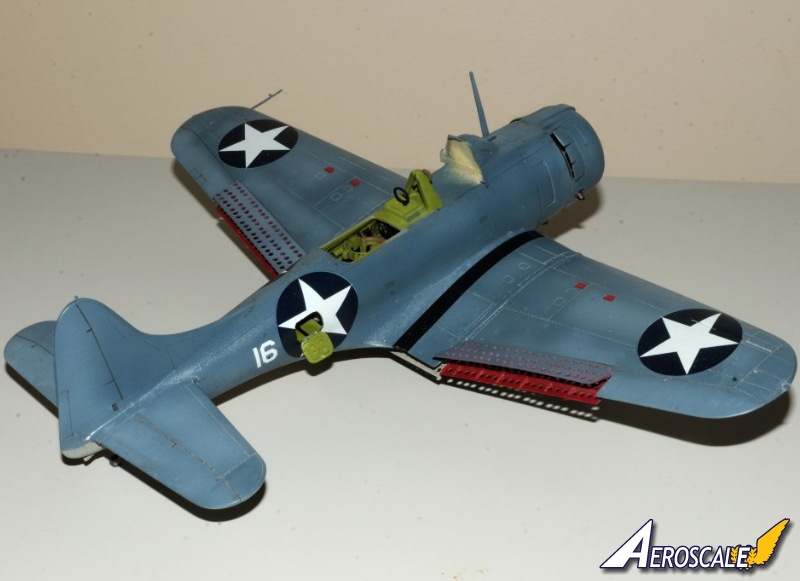
Every time I pulled the kit down from my small stash, I looked at it, and just couldn't get into the build, so back it went. Finally after several years, I pulled the kit down, ordered the Quickboost R2800 resin engine, and a set of Edward PE seat belts and harnesses.As I looked through the box, I couldnt find the PE set for the dive brakes!! How could I loose a whole sheet? But I did. I still wanted to model the Dauntless with the dive brakes in a somewhat lowered position, so I decided to work with the kit wings. Cutting them out was easy. Drilling over 300 holes was time consuming and hand numbing. But finally I got the job done. Then came the realization that I needed to construct from sheet strip the formers and stringers.
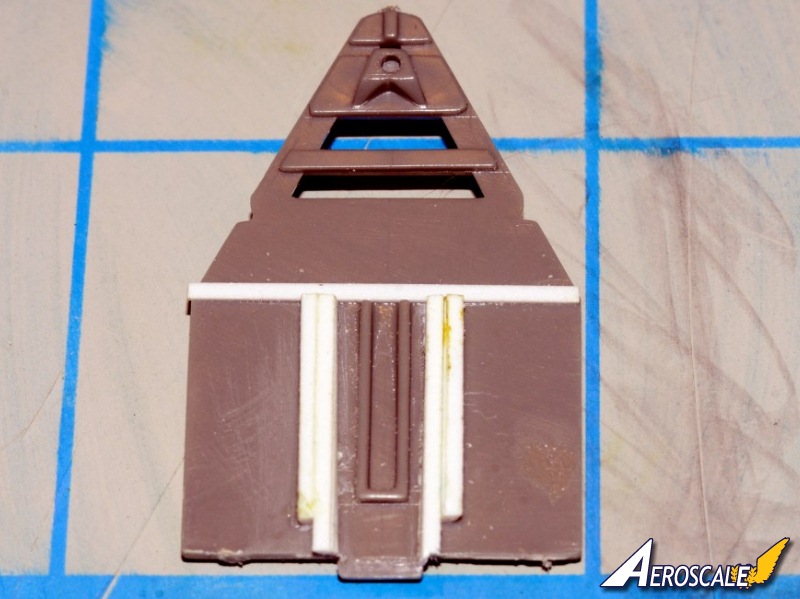
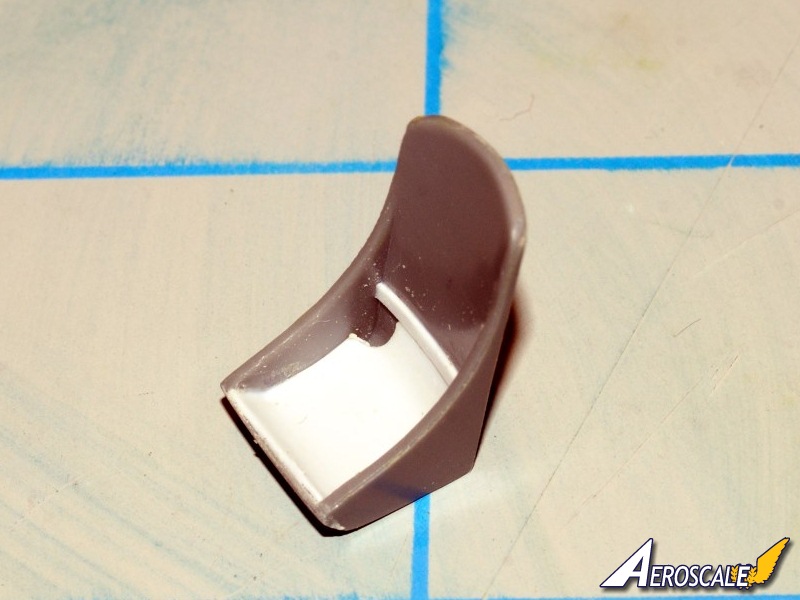
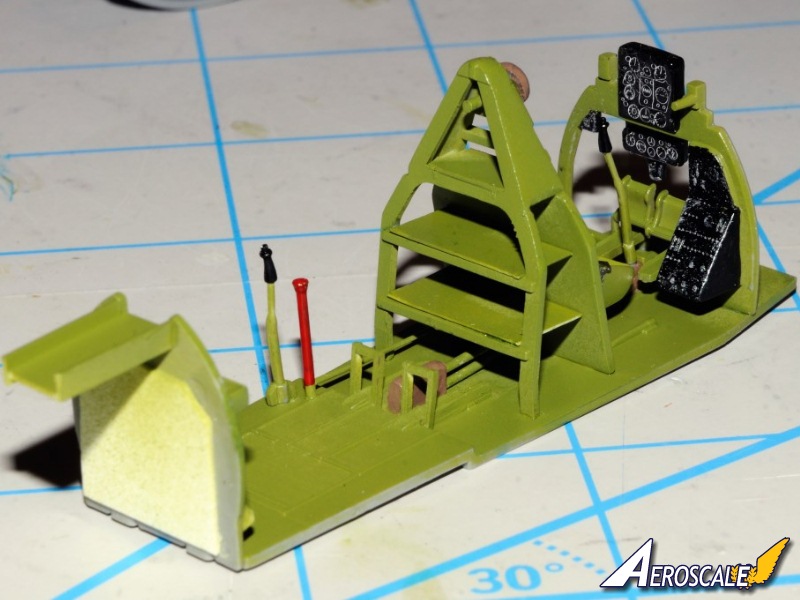
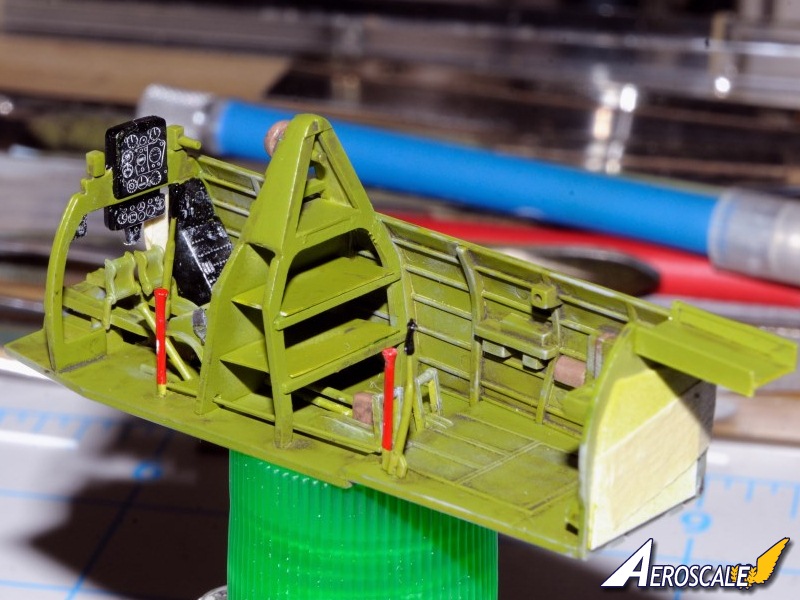
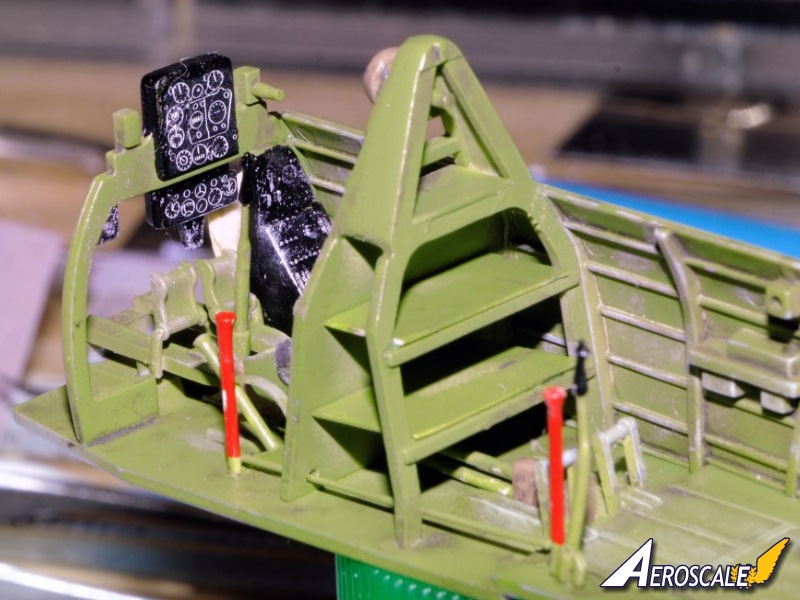
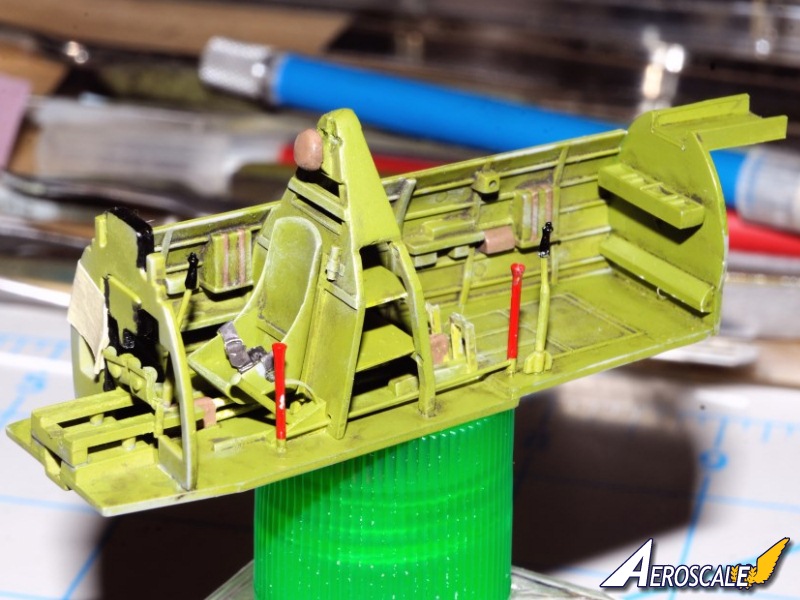
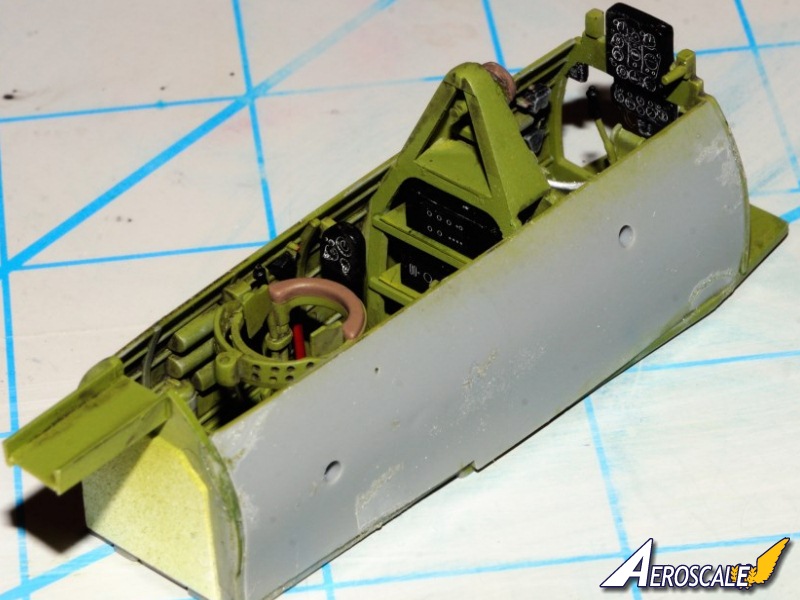
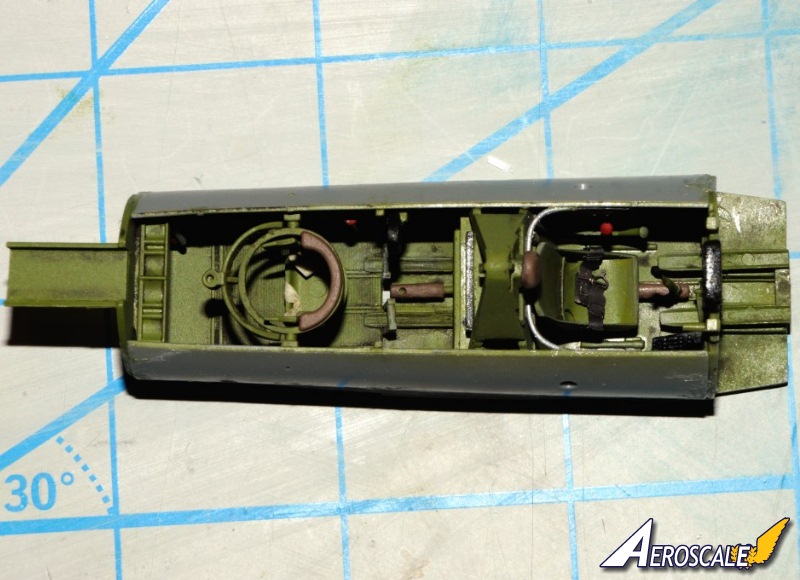
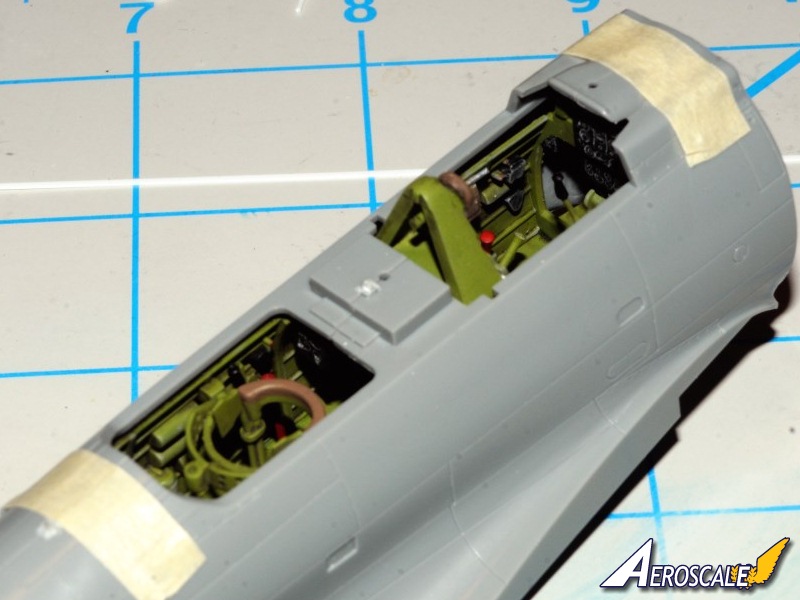
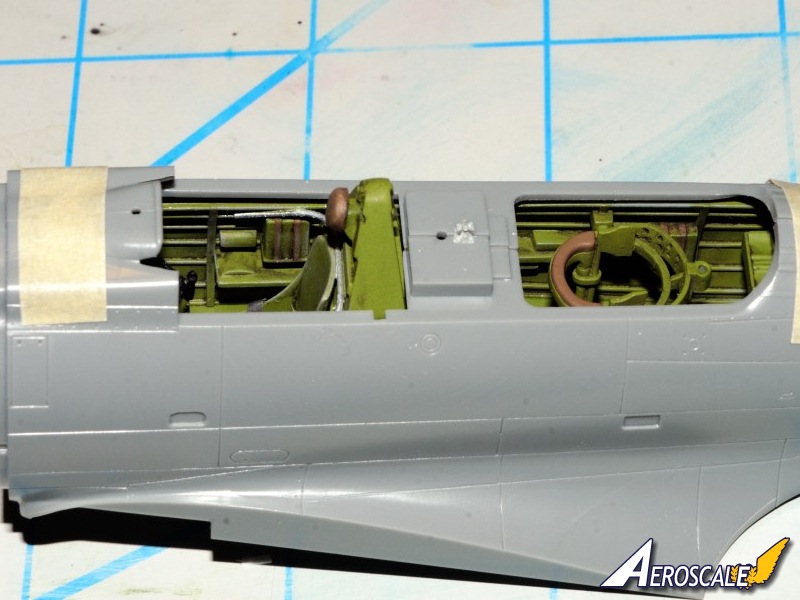
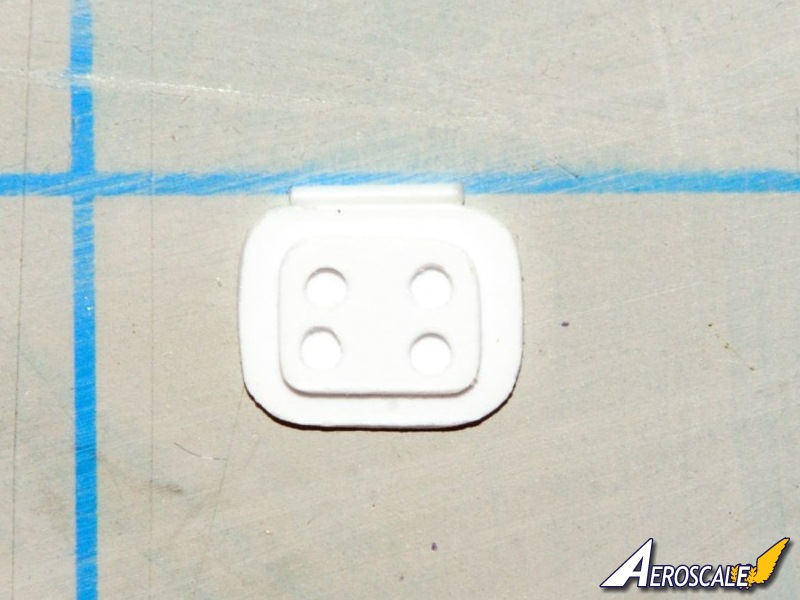
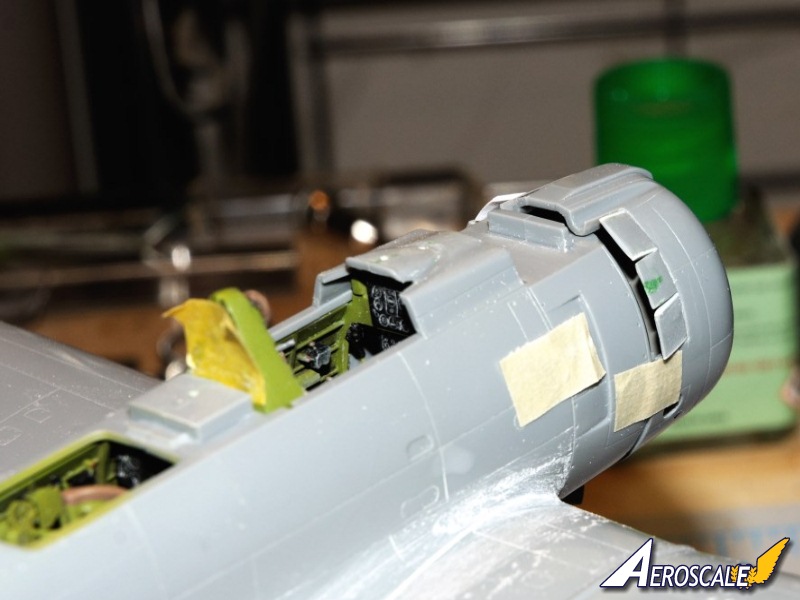
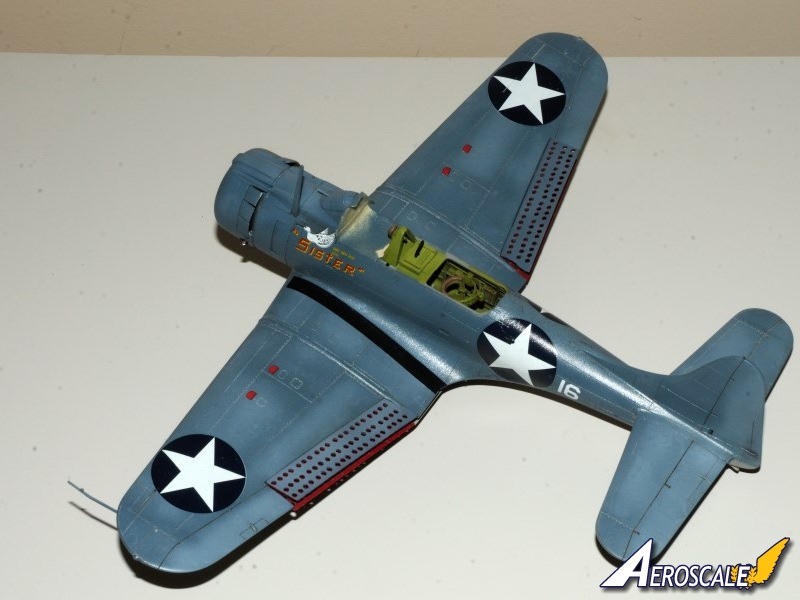
Next my attention turned to the interior. It was basic, but OK and I had enough information to do just enough detailing to make it look busy enough. Work started with the pilot's seat, as it was much to thick and lacked any details.
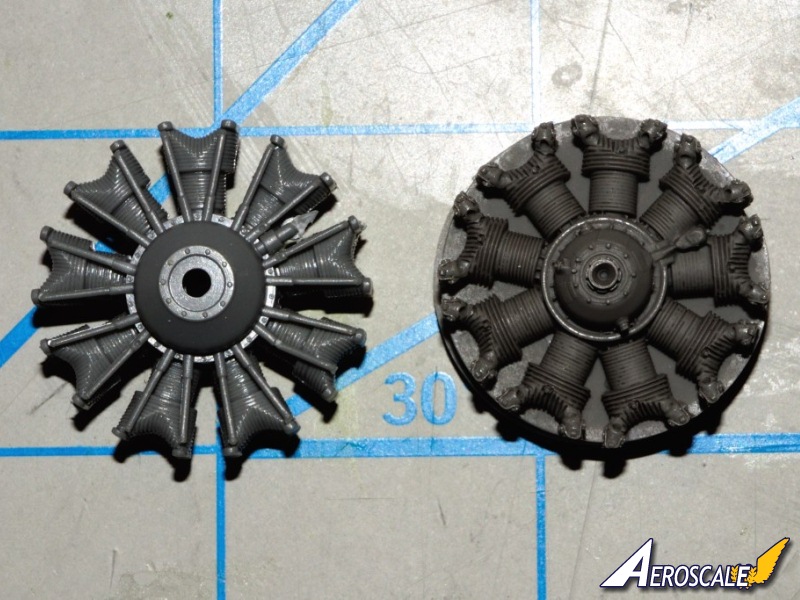
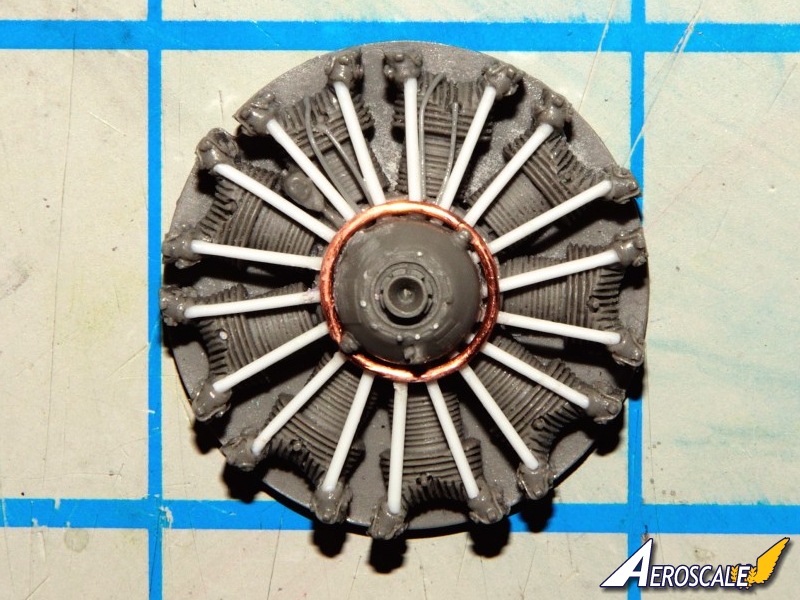
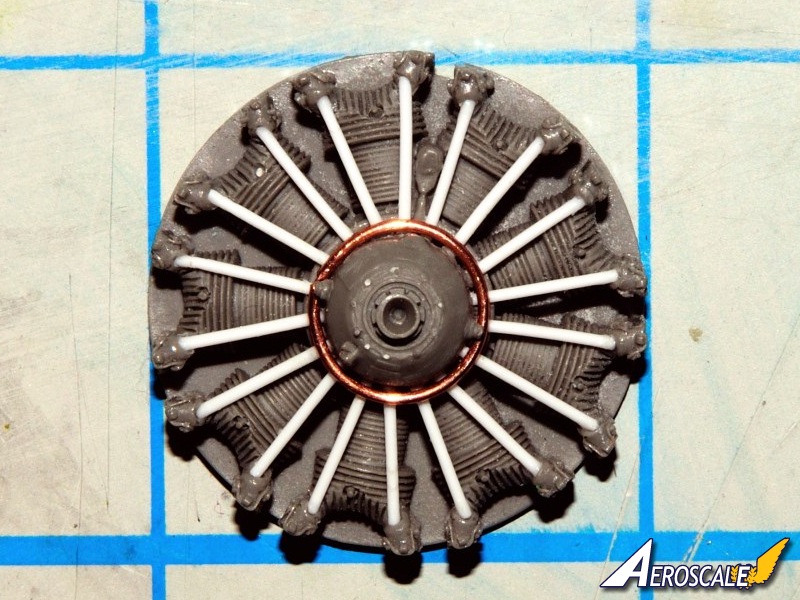
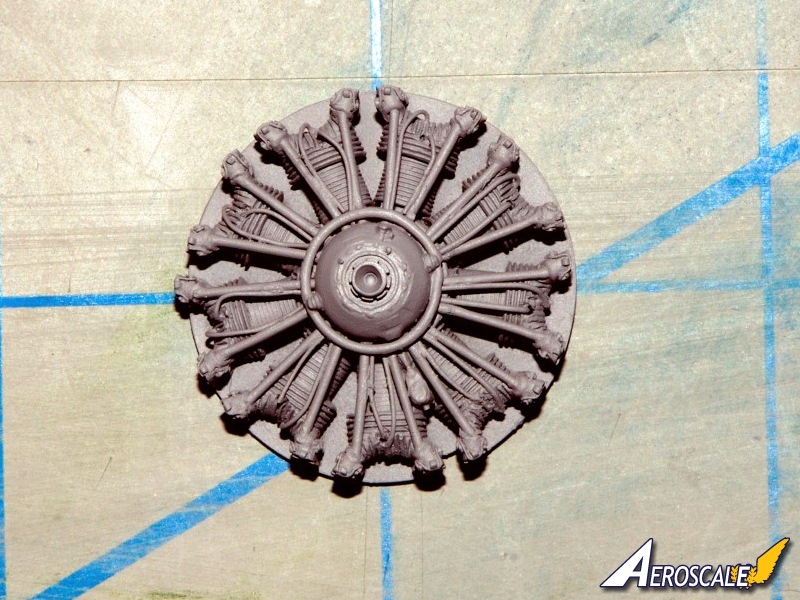
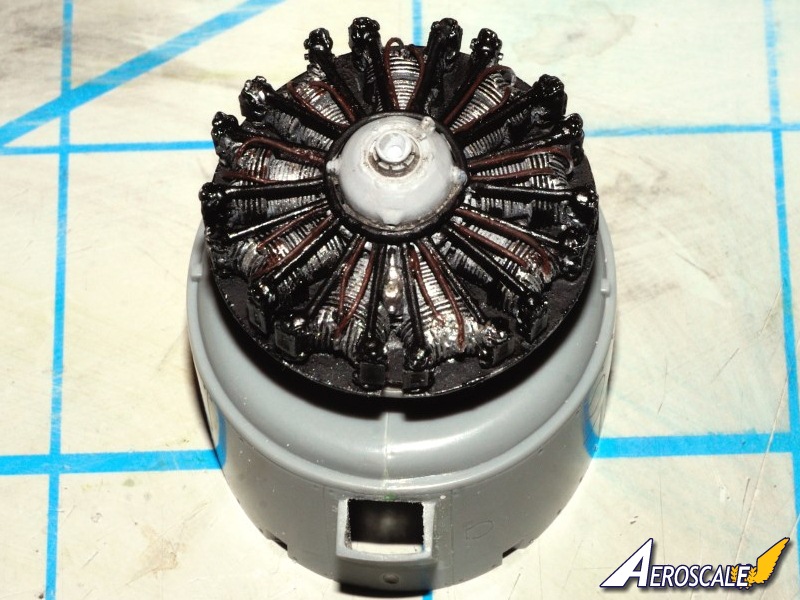
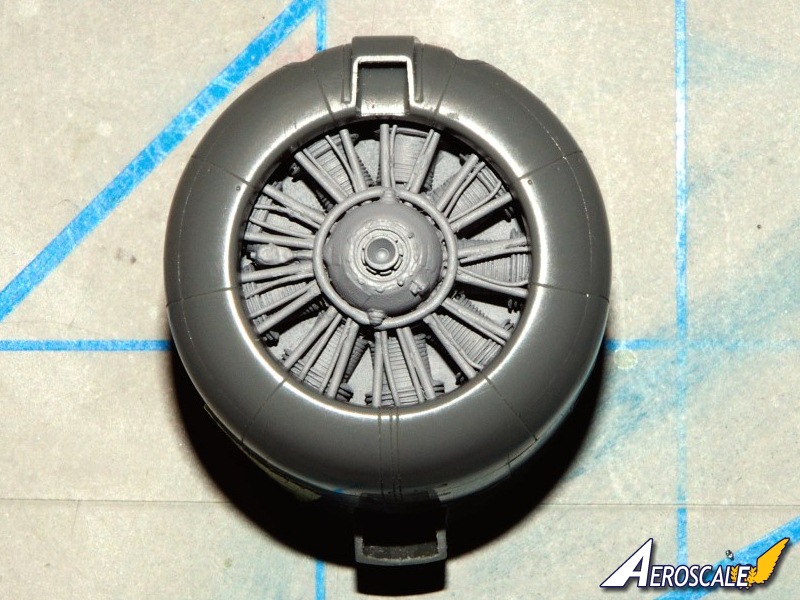
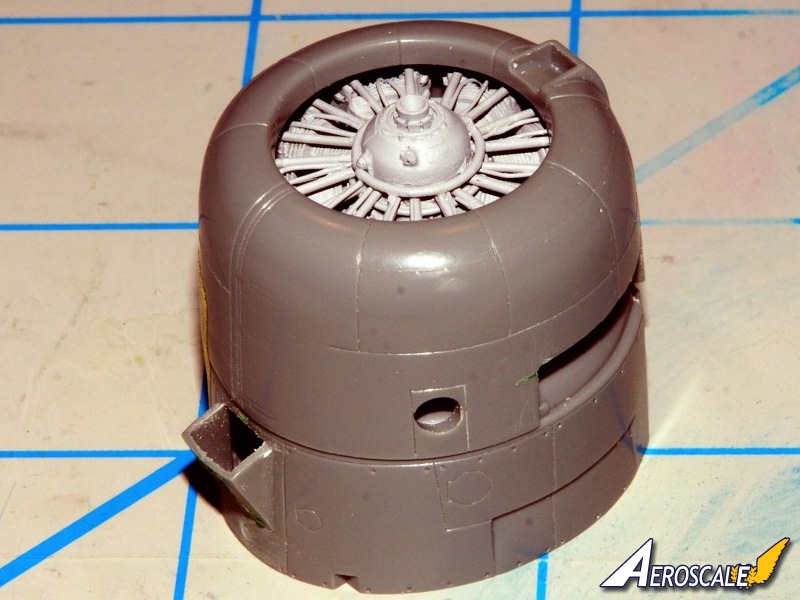
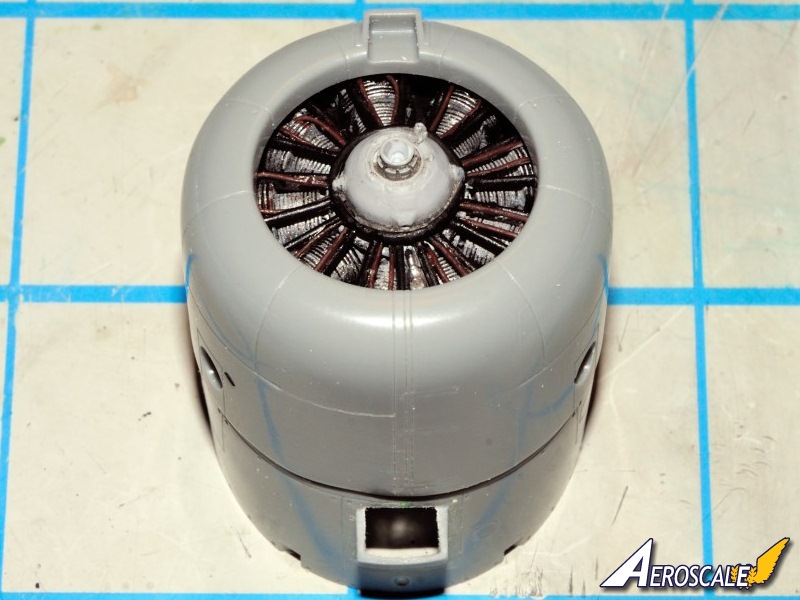
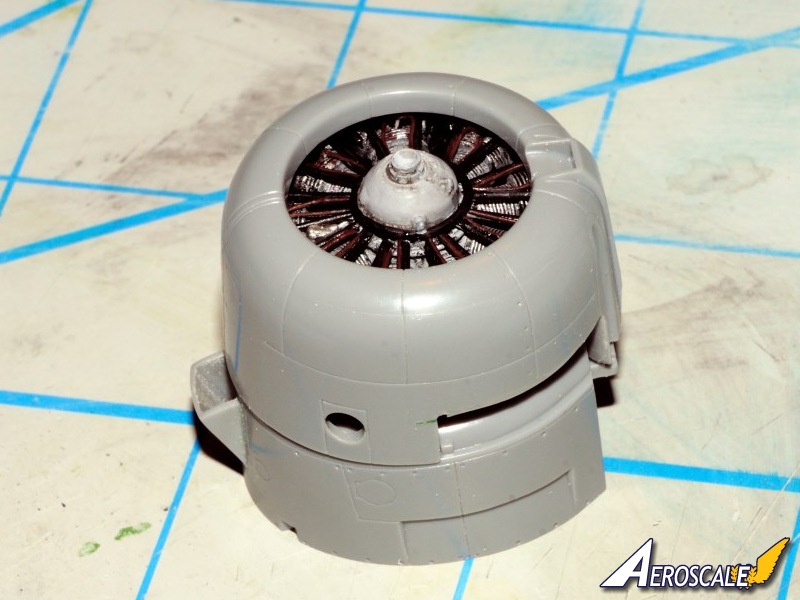
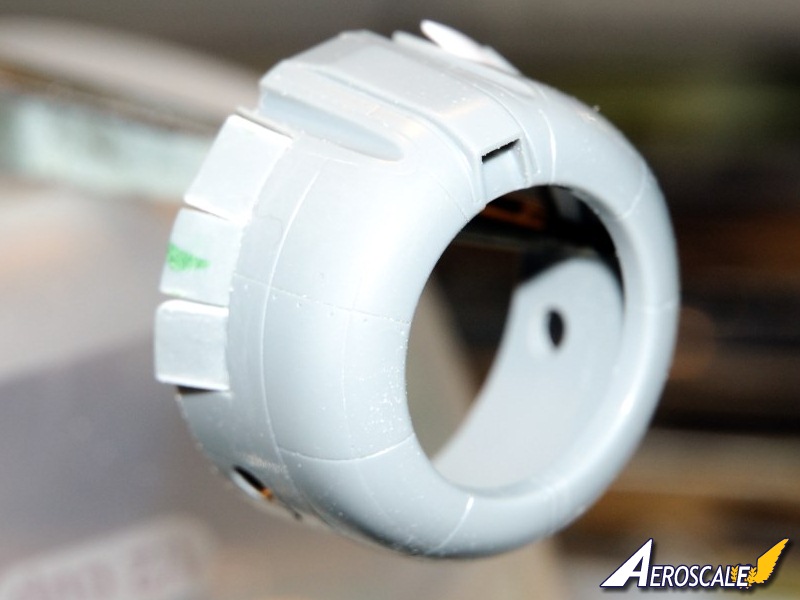
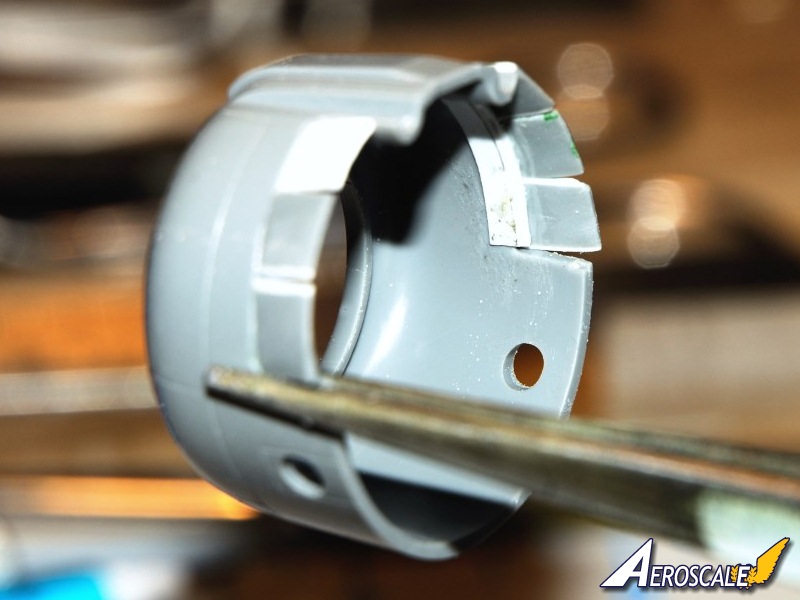
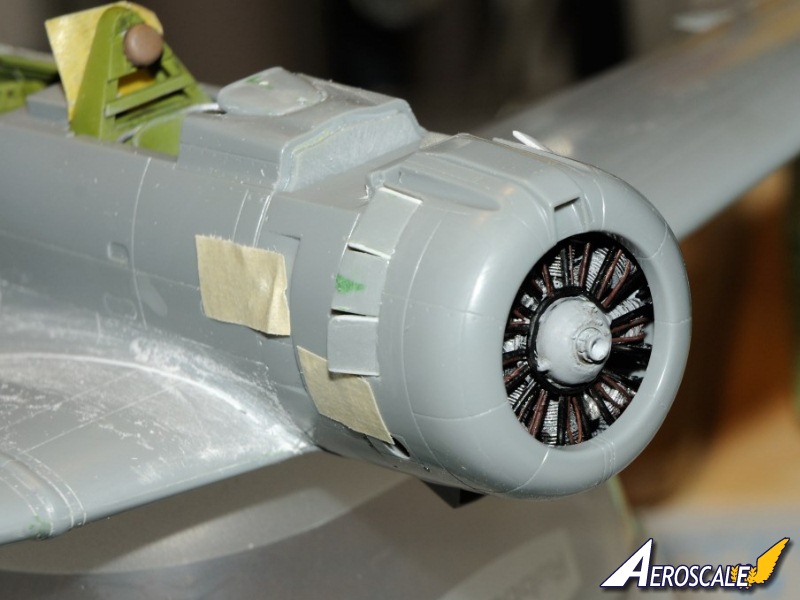
Then came the resin engine. As I pointed out in my build log, while it was detailed nicely, it lacked the push rod casings, and the spark plug wires, as well as another ignition wire manifold in the right place. I also cut out the cowl flaps, thinned them, and then widened them with .020 sheet.
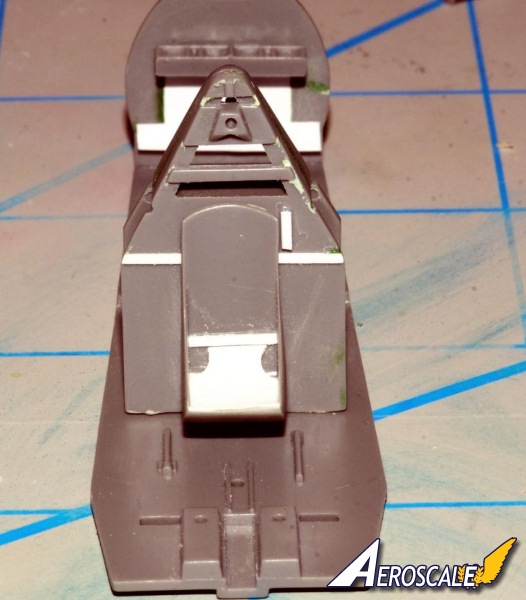
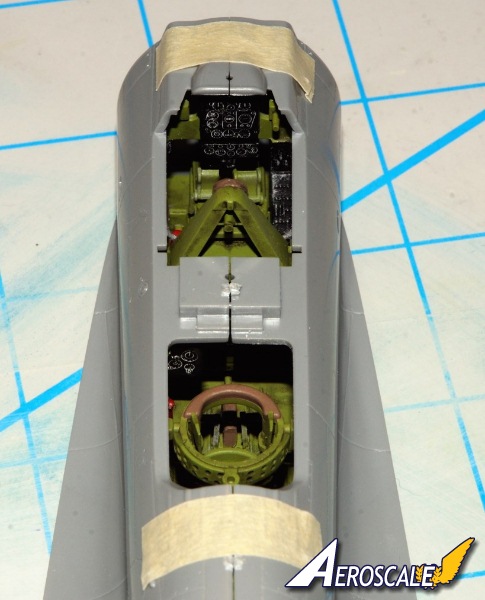
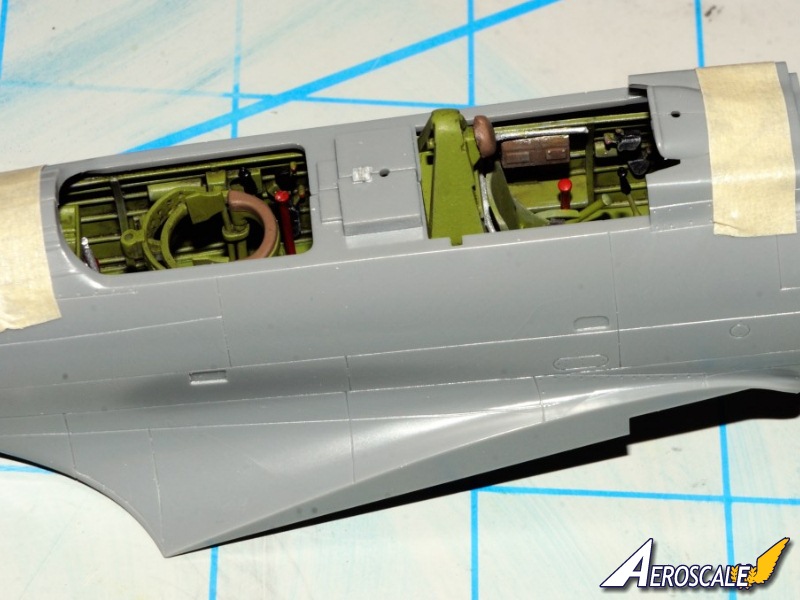
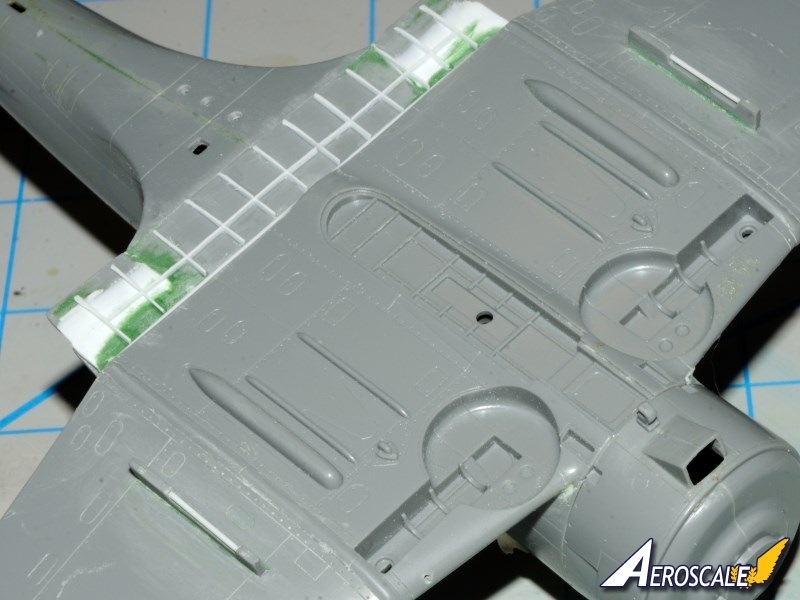
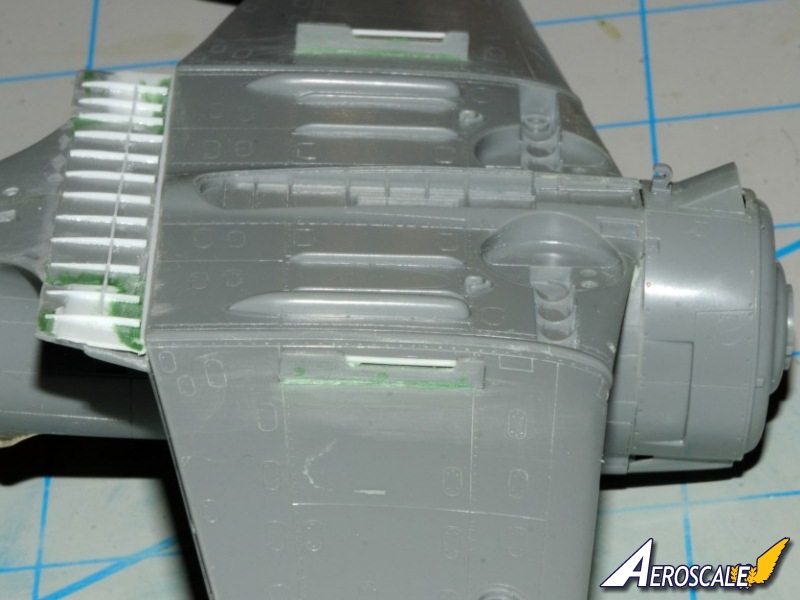
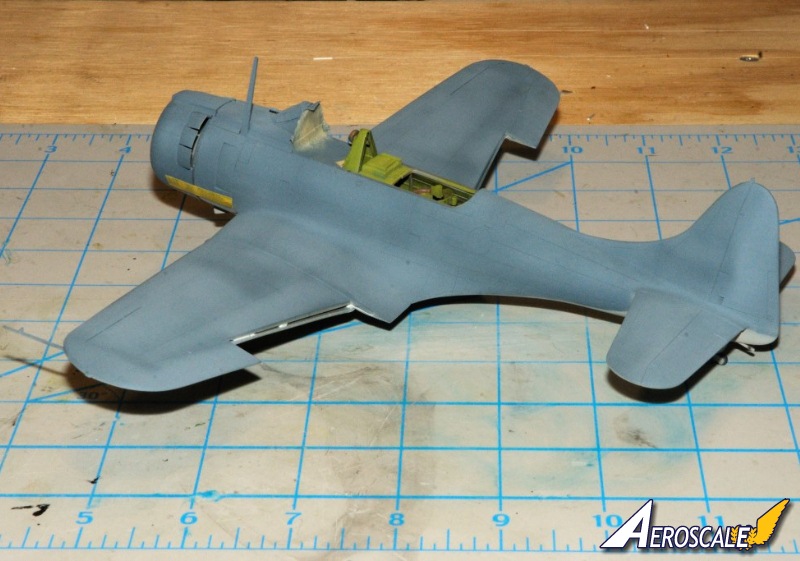
Adding the wings proved to be the next challenge as there was quite a gap on both sides that I filled with scrap sheet, and green stuff. Lost quite a lot of detail, and since I can't re-scribe, what was lost, was lost.
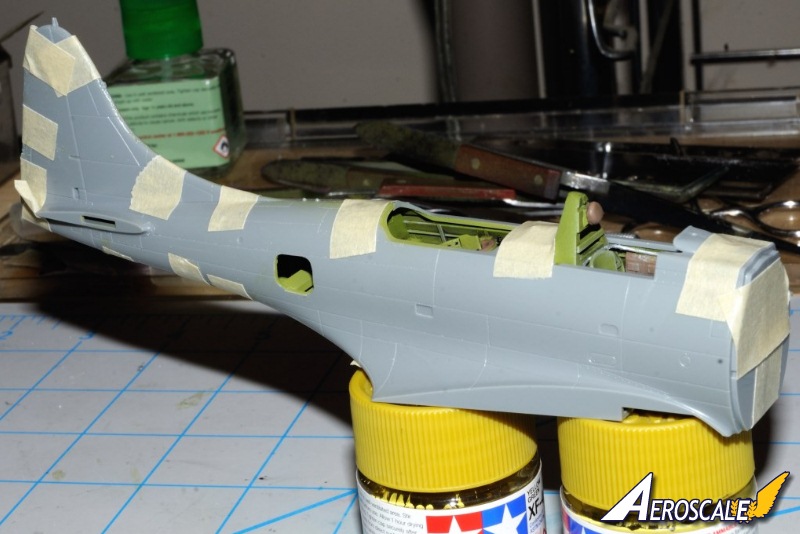
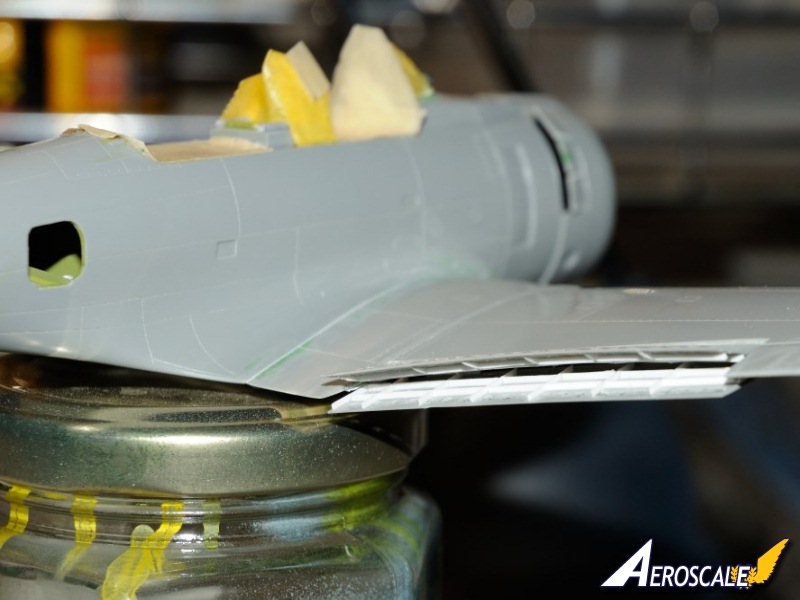
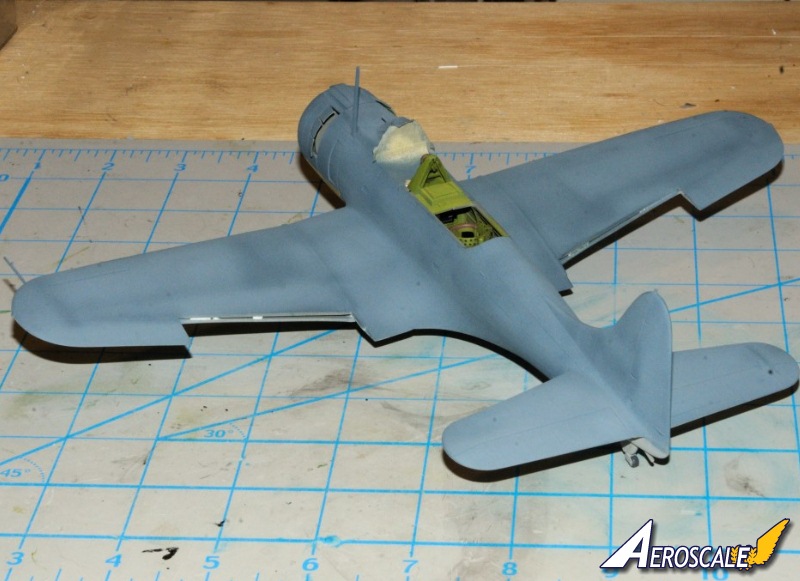
Finally I reached the primer stage. Just a few touch ups, and it was paint time.
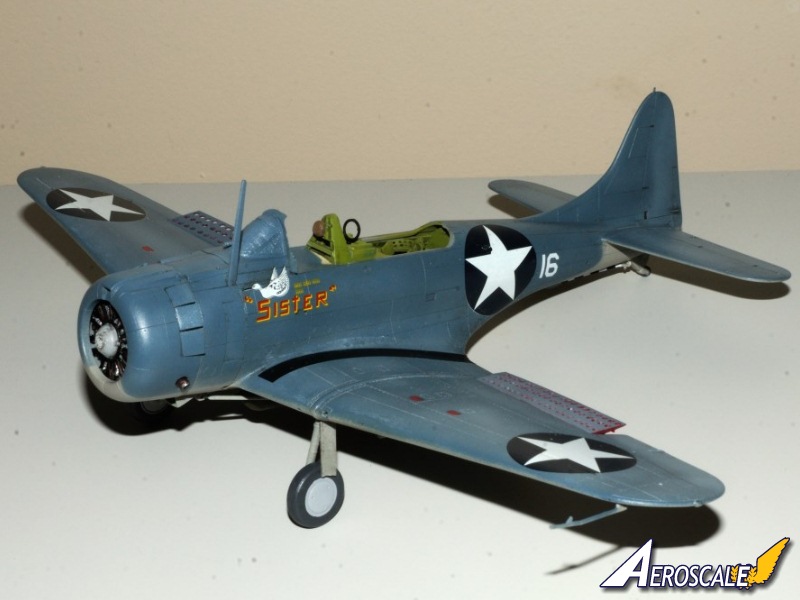
I used Tamiya Acrylics. I started with XF-20 medium grey, thinned 1:1 with X20-A for the bottom of the aircraft. The top was painted with a 1:1 mix of XF-4 & XF-5, and a few drops of XF-1 black, then thinned 1:1 with lacquer Thinner. The sun bleached, faded paint was made by adding XF-2 white, and some XF-20 until the desired colour was achieved. I then thinned it out 2 parts lacquer thinner to 1 part paint, changed the needle & cone on my Paasche H1 gun from my standard #3 to a #1, and decreased the psi. That just about eliminated any overspray issues.
A few coats of Testors glosscoat, then decals, then more glosscoat to seal the decals. Followed by a overall wash of Flories dark wash. When dry, it was rubbed out to remove the excess. A final few coats of Testors Dullcoat finished the painting paint and decal process.
The final step was to add the antennas from stretched sprue.
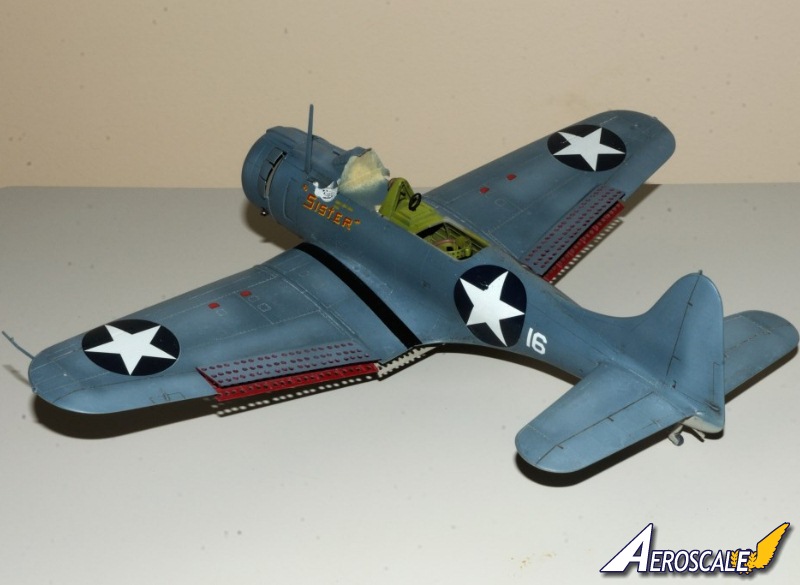
My only issue with the kit was the canopy fit. The sections are too thick to stack so Hasegawa compensated by making them smaller. By the time I got to the last section it was just way too small in cross section. This kit will benefit hugely from a vacuform canopy. Luckily a canopy is available from Falcon in their 1/48 USN set No. 7.
Over all, I really enjoyed this build. What started out as a build with just a little detail, turned into a major detailing effort.


About the Author


FROM: NEW YORK, UNITED STATES
I've been a plastic scale modeler on and off for most of my life since I 1st found them on a shelf at a local toy store way back in the very early 1960s. Once in High School modeling stopped until the mid 1970s when I got married, and needed a hobby that would keep me at home. After 10 years I to...
Comments


A super modeling effort put into a wonderfully enjoyable feature. Well done!!
OCT 05, 2013 - 03:43 PM

JA Awesome work and a stellar build, with the weathering just as I like it: Used but not Abused.
OCT 06, 2013 - 02:08 AM
Thanks Richard, Ben, and Pete for your very kind words.
This was a build that got out of hand from what I originally intended, but the end result was way more then I thought I was capable of. And I have to admit, it was a very enjoyable & fun build.
Joel
OCT 06, 2013 - 02:16 AM
I would really like to take the time to thank our own Jessica Cooper for the effort, & time she put into creating this feature article. It's truly amazing from the few pictures and paragraphs that I sent her, how she turned them into something this professional.
Thank you Jessica for making this such a special event for me.
Joel
OCT 06, 2013 - 02:20 AM

I can only make something look good if it's already good to begin with. Sure I can polish up the writing, and arrange the pictures in the article but if the model isn't built well there's nothing I can do. That's the key to having a good feature; a good model is the centrepiece. Without it you've got nothing.
OCT 06, 2013 - 04:16 AM

Copyright ©2021 by Joel. Images also by copyright holder unless otherwise noted. The views and opinions expressed herein are solely the views and opinions of the authors and/or contributors to this Web site and do not necessarily represent the views and/or opinions of AeroScale, KitMaker Network, or Silver Star Enterrpises. Images also by copyright holder unless otherwise noted. Opinions expressed are those of the author(s) and not necessarily those of AeroScale. All rights reserved. Originally published on: 2013-10-05 15:28:37. Unique Reads: 9708

WEB HOSTING BY


Copyright ©2021 AeroScale and Kitmaker Network, a subsidiary of Silver Star Enterprises
All Rights Reserved. Please read our Conditions of Use and Privacy Policy.
All Rights Reserved. Please read our Conditions of Use and Privacy Policy.