

1⁄48Northrop P-61A
15
Comments
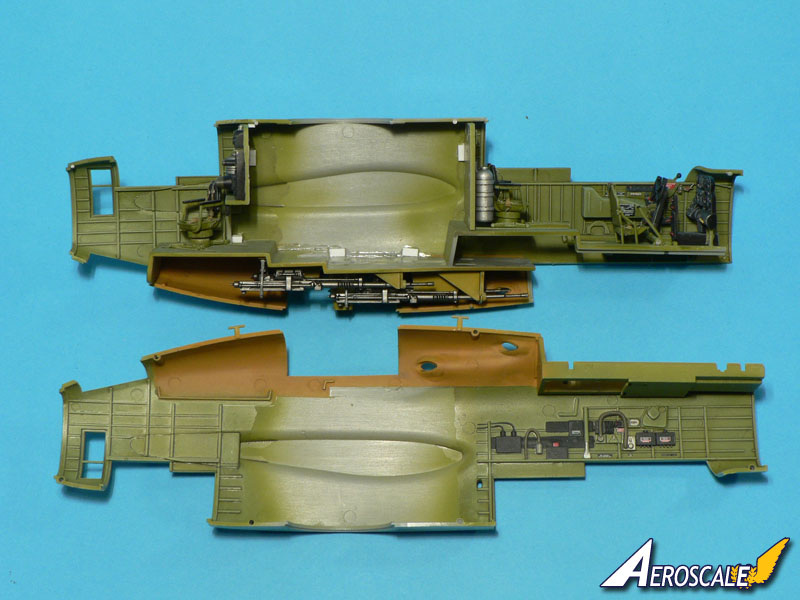
Interior construction
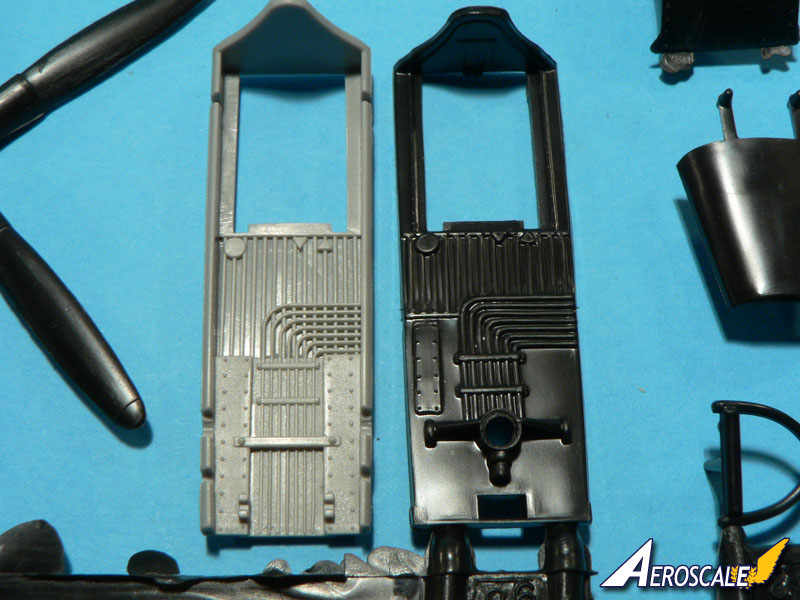
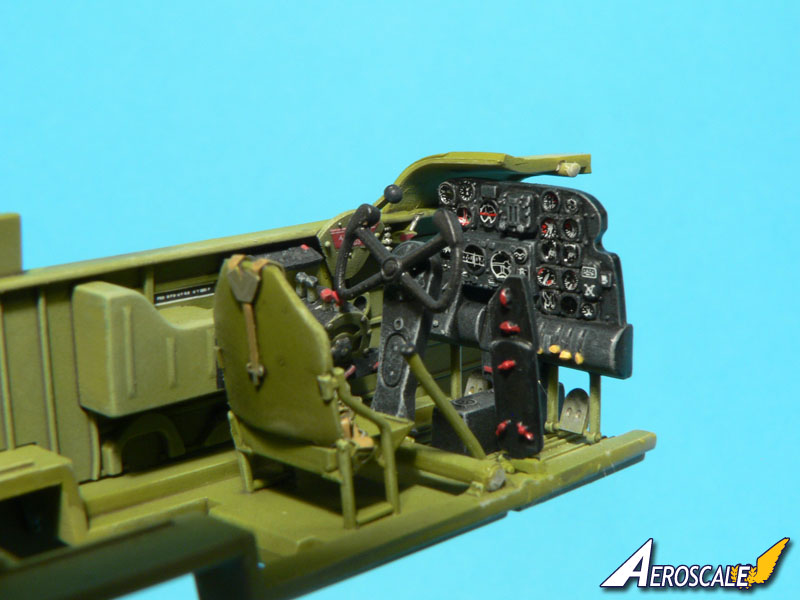
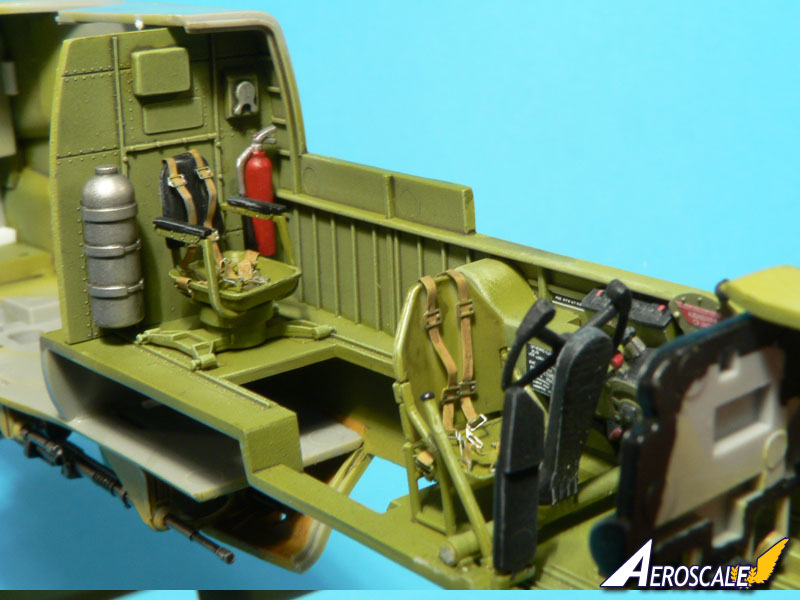
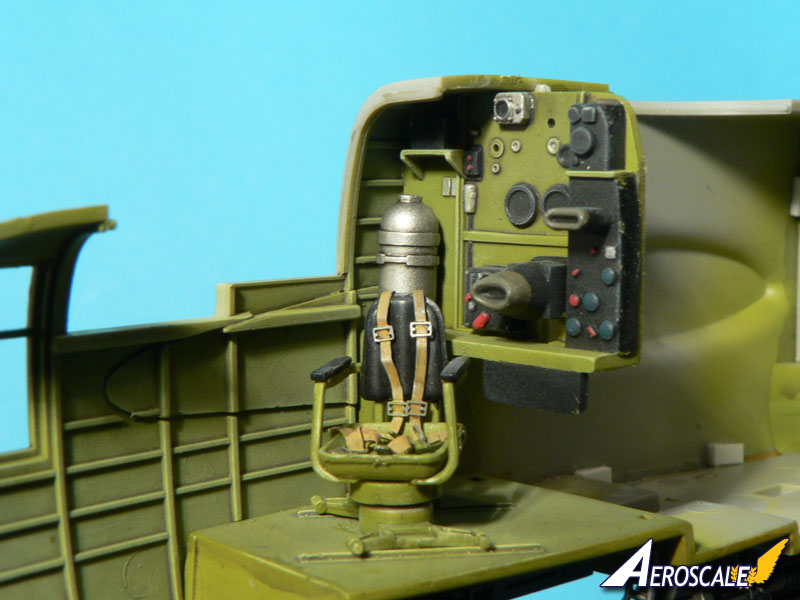
Construction starts with the cockpit interior. If you have built the Monogram kit, the interior parts of the Great Wall one will look very familiar so one shouldn't expect to find more detail here except for the added PE seat belts. But once assembled and painted, the end result, will look more defined as the relief detail is simply crisper. Getting the parts together was very easy except for the seats which were a bit fiddly, but in return they look very convincing. The instrument panel receives some nice dial faces in decal form but each one must be positioned individually as they come as separate pieces on the sheet. Some placards for the sidewalls are present as well and they make the cockpit area look more busy, nice touch! There are some PE pedals provided and the instructions ask you to remove the plastic one but it is far more easy to leave them in place and glue the metal parts over them.I have painted the interior according to the instructions in Interior Green with some areas in black and some details in silver or red. The radar operator instrument wall looks a bit strange to me when compared to period photos but there may well have been different configurations and in the end it looks like a radar operator instrument wall. Once completed, the various sub-assemblies were easily glued in place but I decided to add some styrene blocks (Evergreen) to keep the floors and walls in place before closing the fuselage. Since I wanted to leave the machine gun compartment visible on my model I had to paint this area as well. I have used a yellow color (Tamiya XF-3) with a hint of Dark Brown (XF-9 Hull Red) to reproduce one of the numerous shade of Zinc Chromate. In other places I have used Tamiya XF-4 or random mixes of Yellow with very little Black like in the forward wheel well.
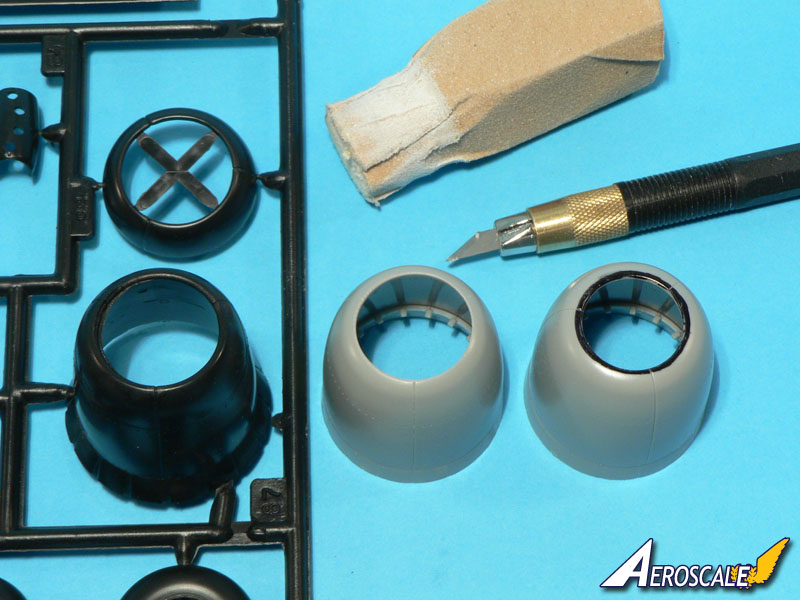
Engines, cowlings and booms
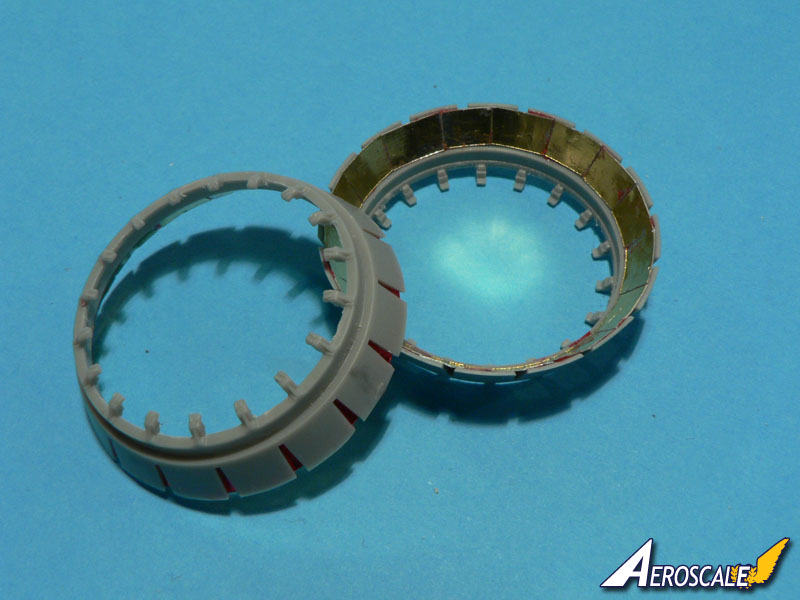
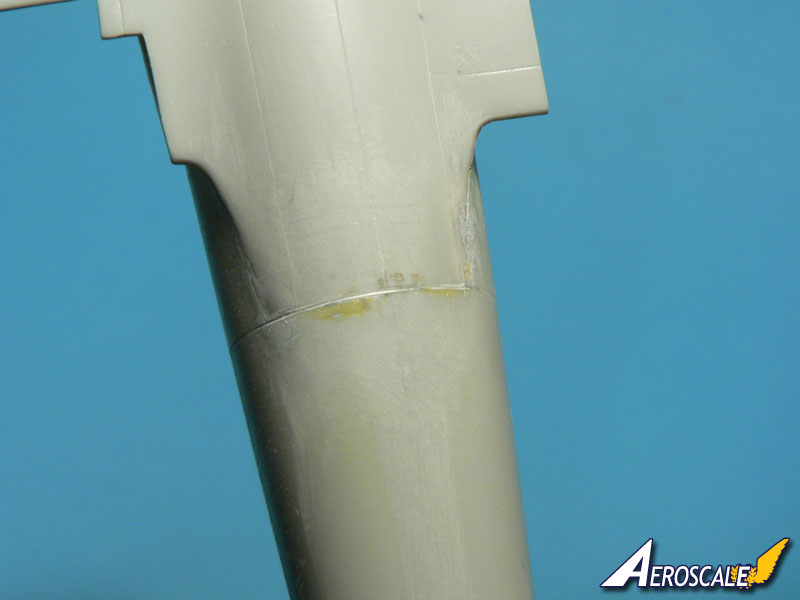
As mentioned before, the openings of the engine cowlings are too small. However, this problem is very easy to fix with a modeling knife and sandpaper fixed around a piece of styrofoam. It took me 20 mins in total to prepare the tools, decide how much I wanted to remove according to pictures I found on the net, to sand the first cowling, to take the photo for the present article and finally to sand the second cowling. Next time I think I can make it in 10 mins. In my opinion, this just can not be considered as a fatal flaw, so easy it is to correct.The engines look very convincing once painted and assembled. Problems like the absence of the magnetos, the extended reduction fairings and the wrong exhaust design are only marginal since they will not be very visible in the end. However, I have added magnetos made from leftover parts from the Eduard MiG-21 armament sprues just in case someone wants to look inside the cowling openings with a small flashlight. If the wrong exhaust design are an issue for you, you can use parts N1 (closed cowlings flaps) because in this case the exhaust ring must be omitted. If in the opened position, the space between the cowling flaps must be filled with thin aluminum foil like on the real aircraft (see photos accompanying the article). Aluminium foil can also be used to reproduce a protecting plate which was present over the grills (PE parts in the kit) located on the bottom of the booms, between the landing gear bay opening and the engine cowling. Just behind this grill, it seems as if Great Wall Hobby have copied some kind of flap from the Monogram kit which shouldn't be there. This area must be sanded smooth and a simple access hatch scribed instead. The propellers are OK, but it is a shame that the blades and spinner are not separate as it would look more realistic. Here, one must eliminate a mould step and be very careful when masking and painting the part.
The boom halves fit together well, even with the wheel well inserts in place. The latter were painted in a Zinc Chromate shade as well. Normally one should fix the landing gear legs at this stage but I decided to leave them aside until the end of the build, because with some care it is still possible to put them in place if their locators are slightly shortened.
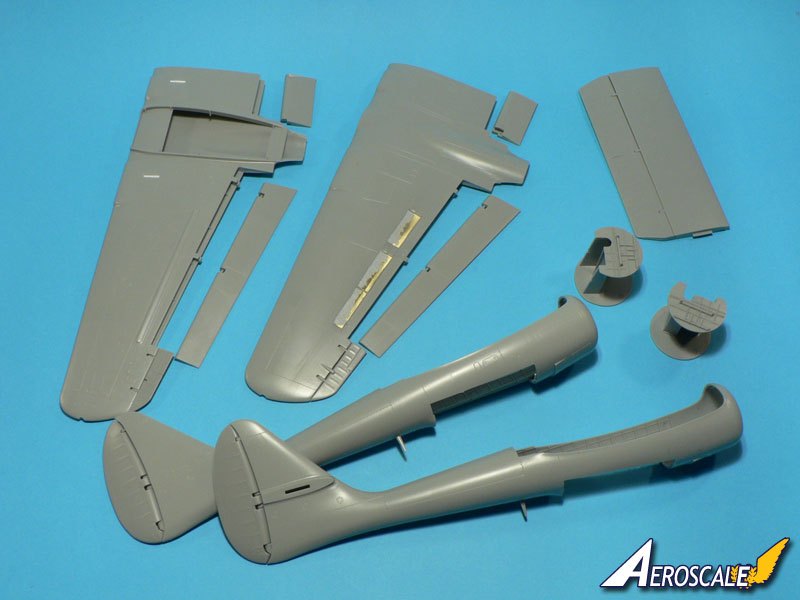
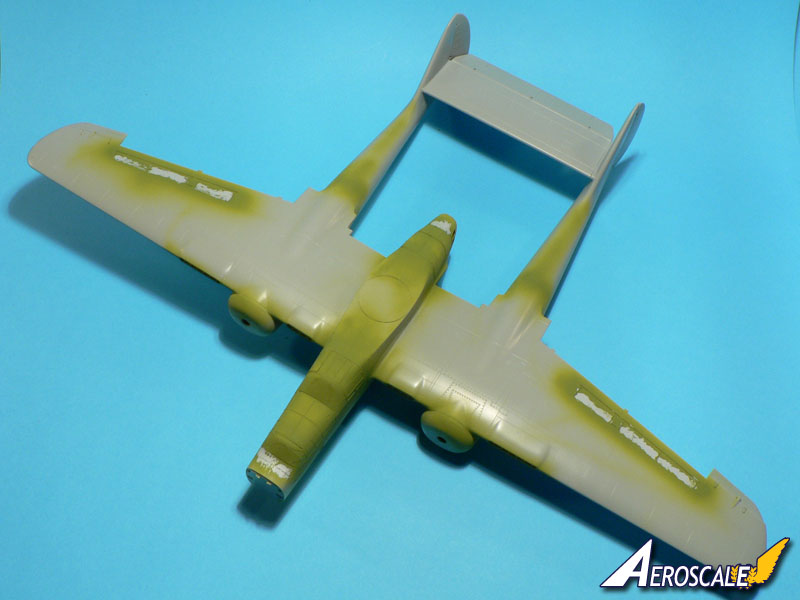
Wings and main assembly
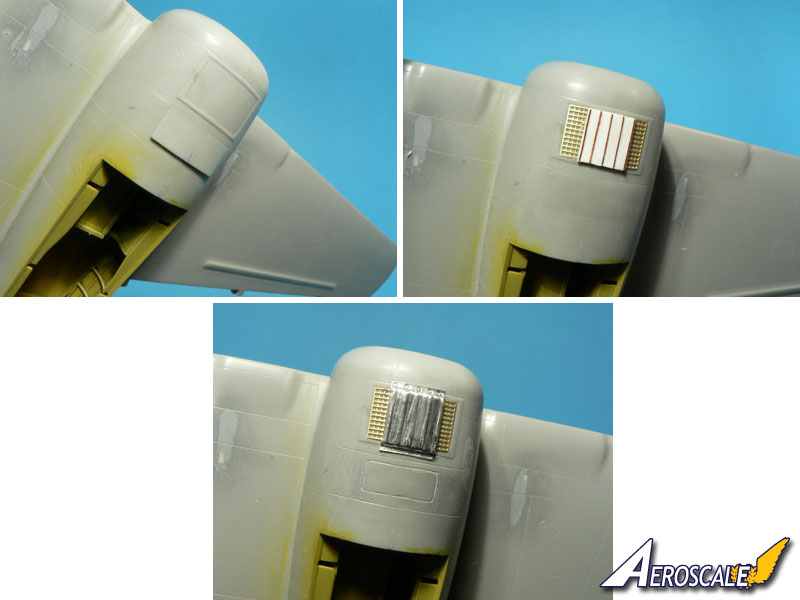
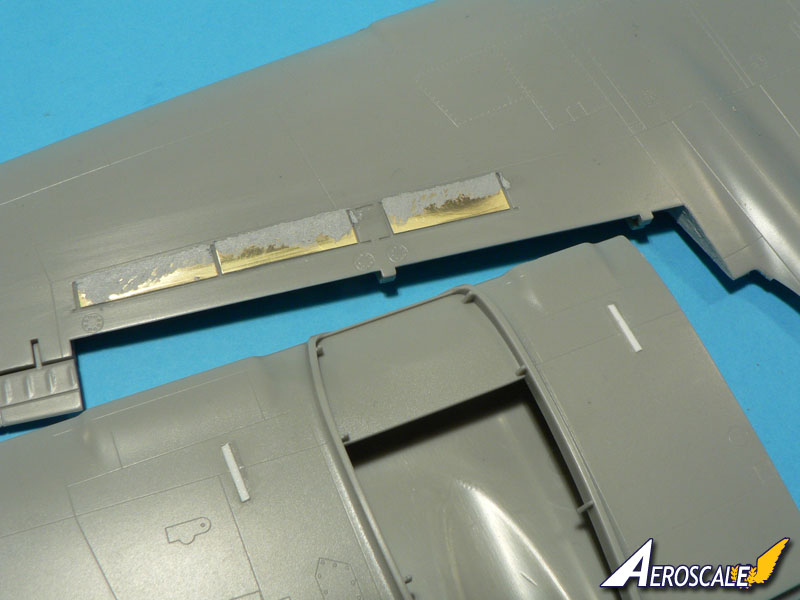
Great Wall Hobby have decided to provide photo etched spoilerons which can be displayed in the open position. Sadly they are rendered like air brakes and useless if glued in place like in the instructions. One should know that these spoilerons were stored almost vertically into the wings (hence the long cover on the underwing) so the only real solution is to glue the metal parts on the wing as if the "air brakes" were in the down position and fill the resulting gaps. If I had to do it again I would use some Evergreen sheet as it would make the sanding process easier. If you want to know how these spoilerons operated, you can watch an interesting vintage P-61 presentation video on YouTube at 06:10 of the 27:34 video (just type "P-61" in the search bar, it's the movie called "Flying The P-61 Series Airplane (1944)" in the list).Under the wings one must also fill the locators for the fuel tank pylons since the P-61 A variant didn't carry them. I closed the gap with plastic strips which I've sanded smooth. Other than that there is really not much to say about the wings except maybe that all the movable control surfaces come as separate pieces, elevator and flaps included.
With the main sub-assemblies ready, it was time to get these pieces together to make the model look like a P-61 at last. The boom to wing fit was good but some filler was needed here and there but only in small quantities. The wing to fuselage fit was excellent and the big rear stabilizer was a dream to put in place. I was surprised how fast and how easy this part of the build was.
Clear parts
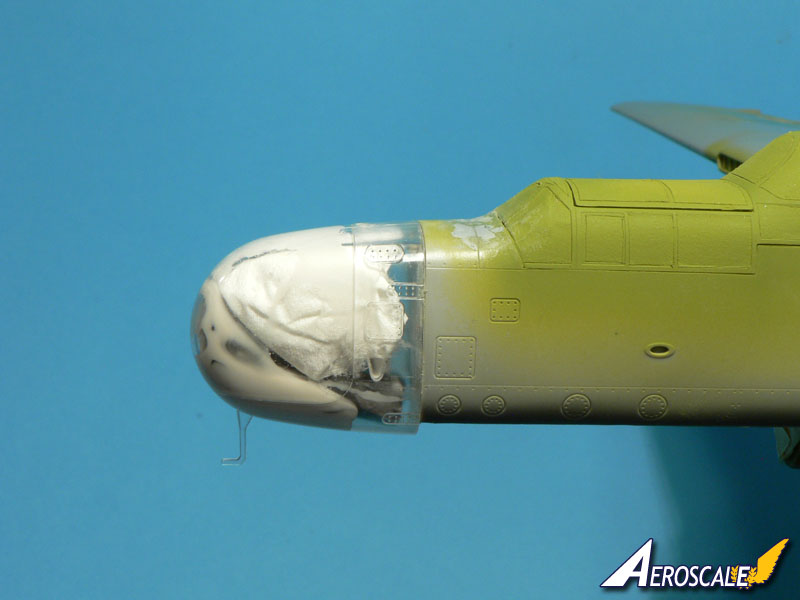
Getting the clear parts in place was another story. They look very nice and fit is generally very good but there are two or threes place were one must use some filler to blend the transparencies into the fuselage. It is particularly the case just in front of the pilot's windscreen where it is necessary to raise the fuselage a little to avoid the presence of a small step. This part of the aircraft was the most discussed on the modeling forums as it is obviously not dimensionally correct. The frontal windscreen should be the same size as the rear operator's one for a start and in the kit it is clearly not. I artificially tried to add some surface to the too small front panel by erasing the bottom frame but it is still far from enough. The rear upper transparent part also needs to be blended into the fuselage using filler. To add insult to injury the central frame is wrongly positioned and this is a problem impossible to fix without major surgery. For all these canopy issues I'm afraid only the aftermarket industry will be able to provide an acceptable solution. Until then you can either leave the parts as they are or wait 40 more years until another company tackles the P-61 in 1:48 scale (provided they get the canopy right this time).With the clear parts in place at last, one can start to mask the windows with the appropriate material. In my case I always use Tamiya tape. This time Great Wall Hobby didn't provide it's own masks. Some were included in their Fw189 kit but they were not very good so I did not miss them for the P-61. A lot of panels can be left in the opened position if one wishes so. The nose cone is also a clear part (at least it was the case in the sample kit I received, but it seems as if the next batches will feature a grey part) but rather than fit the radar in it I have used the available space to glue about 30gr of lead. The latter was secured with white glue. Don't use styrene glue for this as if you use too much it can eat it's way through the plastic when it cures, even weeks after completion of the model!


About the Author


FROM: MOSELLE, FRANCE
I'm mainly interested in WW2 aircraft and I build them in 1/48 scale.
Comments

Beautiful build J-L, very nicely done indeed, and a great review.
Cheers, D
JAN 14, 2012 - 10:42 AM

Beautiful build as always JL and nice review most excellent
JAN 14, 2012 - 12:00 PM

Jean-Luc,
Wow, you bring back some memories! This looks like a fine revision of the old classic. Great build.
JAN 14, 2012 - 01:53 PM

Well who would've thought that you would defend the "rivet counters". These are the people who lurk in hobby stores and at shows denigrating people's work without actually displaying any built work.
Gaston, well done on highjacking Jean Luc's review. Why don't you post your own review instead on taking over this thread.
As Jessie said it doesn't look fatally flawed to me, in fact it looks like a P-61.
JAN 15, 2012 - 10:15 AM
Thanks for the great build-up review and óutlining the shortcomings of the kit so clearly. While the maker, I certainly hope they will heed you advices to improve on future releases. I am glad to hear that the general fit makes lining up the airframe and booms so easy. I remember blood, sweat and tears when building my Monogram widow a decade ago. I hope I'll find some time to build the GWH kit sometime soon.
Your works keeps inspiring me greatly! Keep it up, mate!
Cheers,
Guido
JAN 16, 2012 - 04:05 AM

Hi all,
Thank you for your kind words about the model and the article.
Gaston, this looks like a fine work on the clear parts. If I tackle the P-61 in it's B variant, could you send me one of your vacu replacement part?
Guido, I'm looking forward to the Devastator. It looks very promising from what I have seen so far.
Torsten, I think we will find an occasion to compare our P-61. It will be interesting to have the Monogram and GWH models side by side.
Matt, no worries. I don't feel as if Gaston has highjacked my review. To the contrary. His input is always very interesting.
All the best,
Jean-Luc
JAN 16, 2012 - 08:14 AM

Jean Luc, an absolutely magnificant build! I think you did a great job on this kit even with it's flaws. So good in fact Gaston Maty hasn't even bombaded us with his typical rant. Great work and thanks so much for sharing. Take care :-)
Jim
JAN 16, 2012 - 12:06 PM

Thanks Jean-Luc,
I will see what I can do with the spare clear plastic pieces I have: The master often has a lot of primer on it to smooth flaws out, and this makes it susceptible to surface damage from the heat of the softened plastic after a few copies: It is very little damage however, so I should be able find, or complete, one more useable copy...
Gaston
JAN 17, 2012 - 06:38 AM
Copyright ©2021 by Jean-Luc Formery. Images also by copyright holder unless otherwise noted. The views and opinions expressed herein are solely the views and opinions of the authors and/or contributors to this Web site and do not necessarily represent the views and/or opinions of AeroScale, KitMaker Network, or Silver Star Enterrpises. Images also by copyright holder unless otherwise noted. Opinions expressed are those of the author(s) and not necessarily those of AeroScale. All rights reserved. Originally published on: 2012-01-14 00:00:00. Unique Reads: 17545

WEB HOSTING BY


Copyright ©2021 AeroScale and Kitmaker Network, a subsidiary of Silver Star Enterprises
All Rights Reserved. Please read our Conditions of Use and Privacy Policy.
All Rights Reserved. Please read our Conditions of Use and Privacy Policy.