

1⁄48TBM Avenger
5
Comments

construction of the aircraft
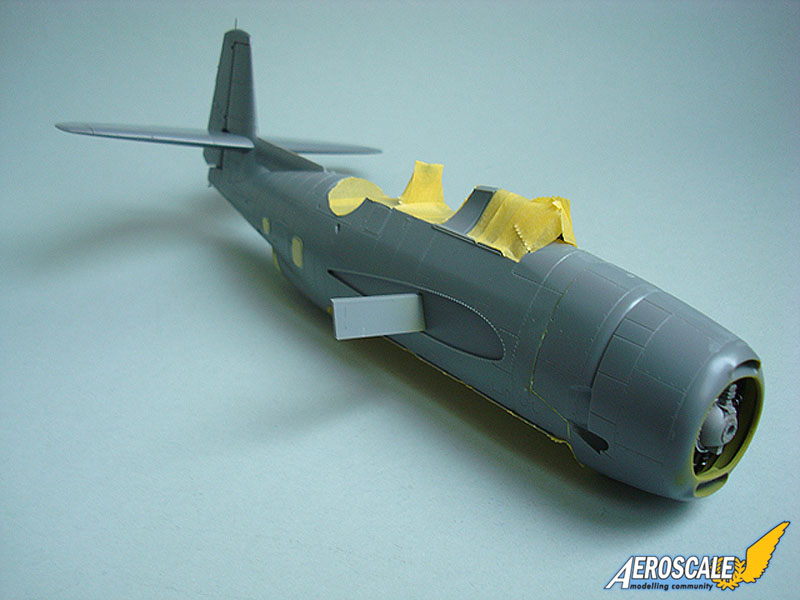
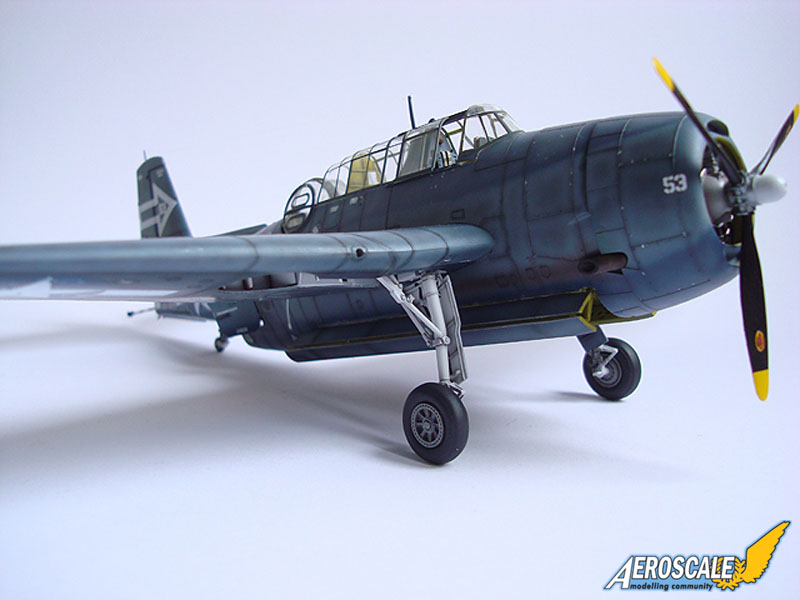
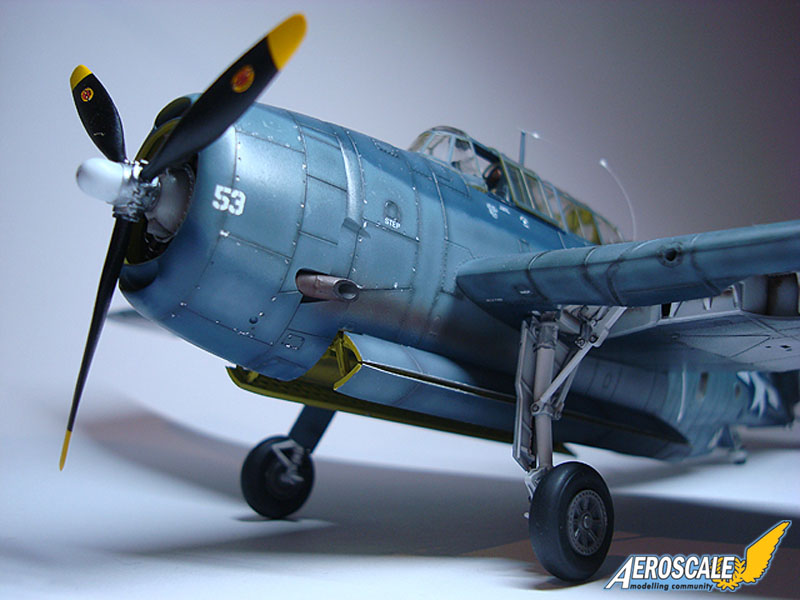
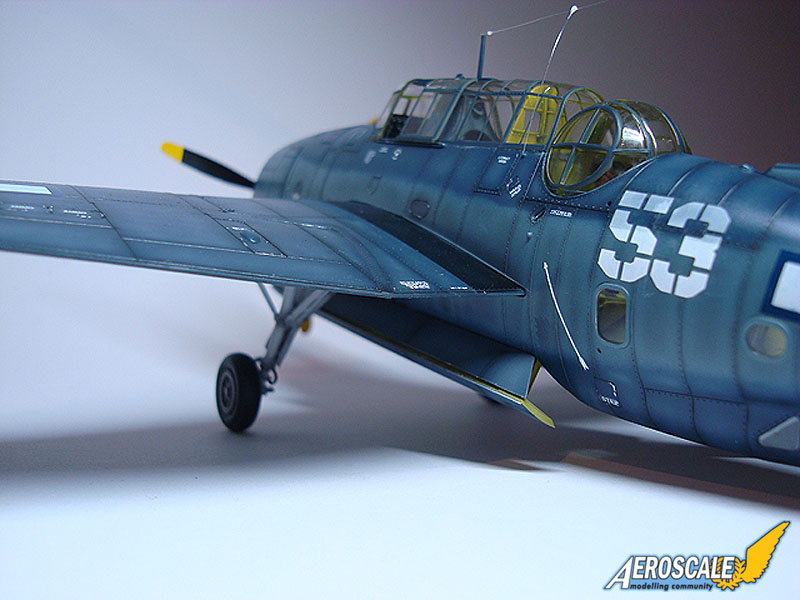
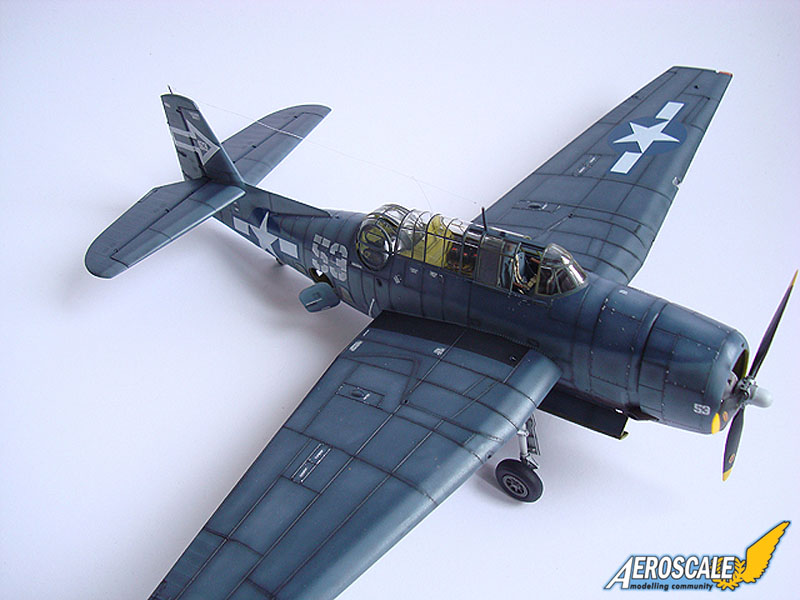
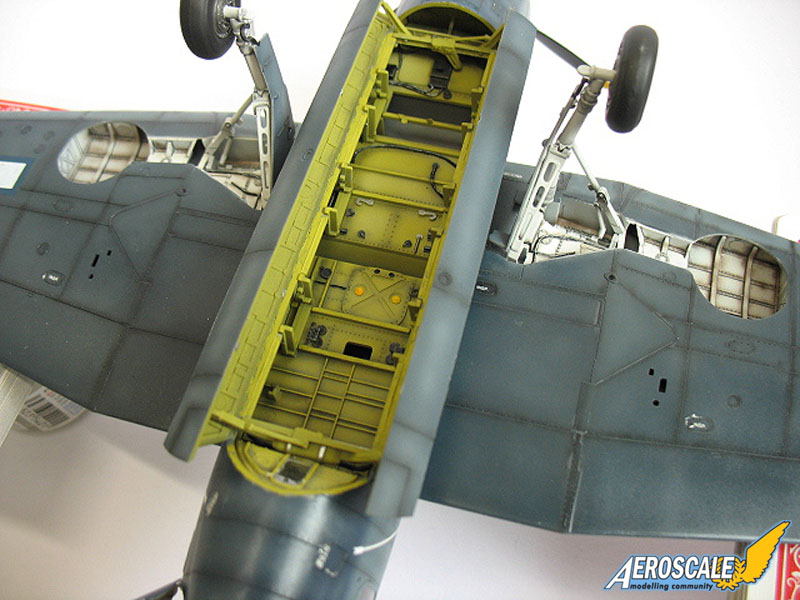
To build my TBM Avenger, I used the excellent kit from Accurate Miniatures and added some photoetched parts from Eduard. Some of them were already pre-painted. However, during construction, I noticed that the original plastic instrument and radio panels would have had a better 3D look than the flat PE parts. Next time I'll build an Avenger, I'll use the radio and instrument panels from the kit. In the end, I didn't used all the PE parts provided by Eduard.The step-by-step guide from JM Villalba on the Accurate Miniatures homepage is just amazing, so I followed this as a general guideline (as the manual from the kit is very hard to follow and I didn't want to invest much time in it).
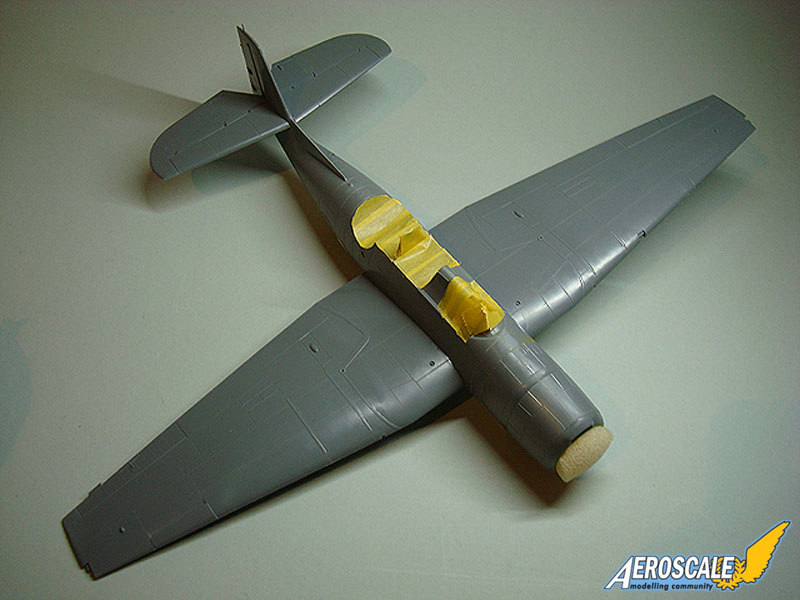
I started the build of the model with the cockpit, fuselage interior and the bomb bay. The fit of the kit is just great and assembly was very easy. Like JM Villalba, I followed his "spanish style" technique to do the painting of the interior.
Fuselage assembly is a little bit tricky so dry fitting lets you know where to pay attention. Next time I'll put the turret in place before gluing the fuselage halves together. After having assembled the whole aircraft, I got to the painting stage.
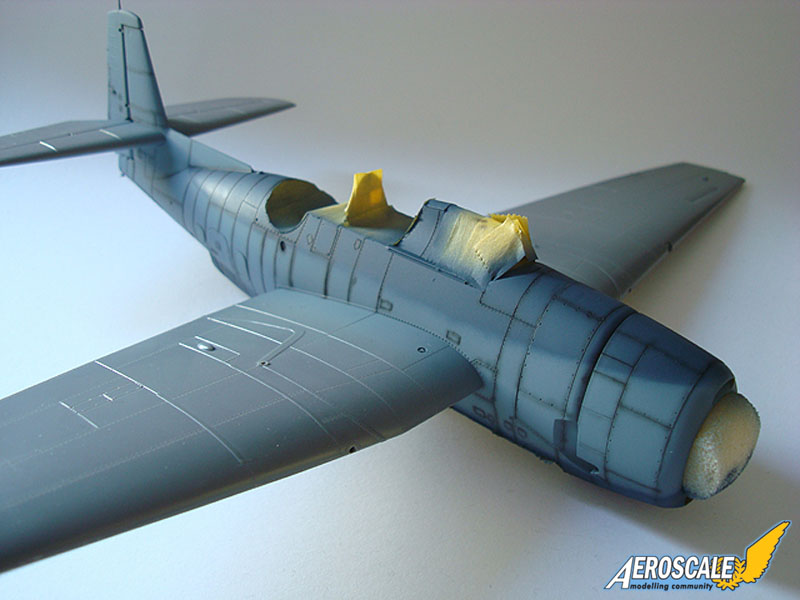
Painting the Avenger
The two tone night fighter camo scheme was applied with self mixed colors from Tamiya. This brand was also used for painting the interior. I used a different approach than on my other models. Without a preshading I applied the base coats. After these had dried I post-shaded the panel lines with a very diluted mix of black. To weather the panels I again used a very diluted lighter tone from the base color or again black.Decals and finish
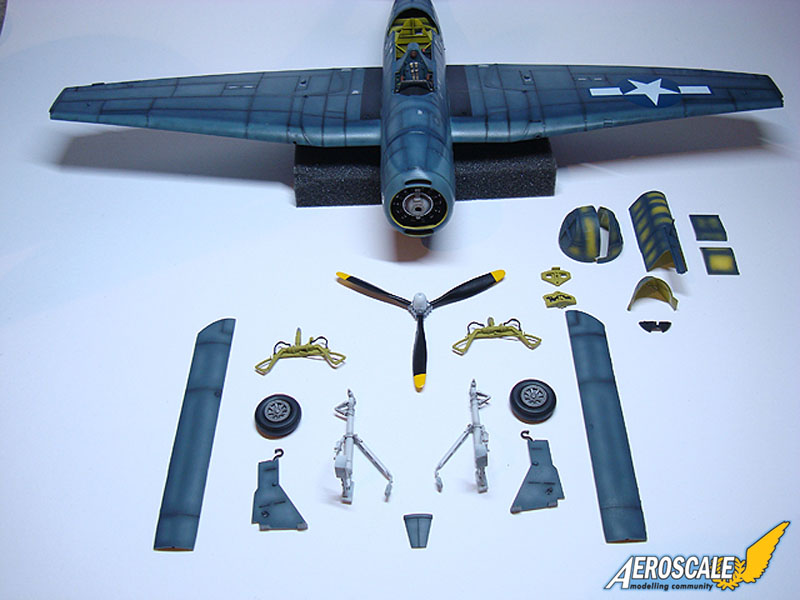
I finished the paint job with a coat of clear to apply the decals. The decals went on easily but I made some huge mistakes with the Gunze softer. I think I hadn't put enough gloss on the model, so the decals didn't slip into the panel lines. As consequence I have applied to much softer on the national insignia on the underside and it began to destroy the decal. Lesson learned.As a last coat I sprayed a very light coat of flat base. I like when the plane is a little bit shiny, I think it looks more realistic than a flat coated model. But that's just my opinion.
After the last little bits and canopy where added, I finished my longest build and painting process. Et voila, my own TBM Avenger!
Aenea Wasmer


About the Author


Comments

Great build, Aenea. I love the weatherbeaten look of the aircraft. I can almost feel this one sitting on a carrier deck at the open seas.
Thanks for sharing
MAR 16, 2009 - 08:07 PM

Spectacular job on that paint scheme. Very nicely done. Thanks for sharing. Nice work man. Nice work. Very nice indeed.
MAR 19, 2009 - 02:49 PM

Very nice indeed. I agree with Carl, you have a contest winner on your hands.
Cheers,
Mike
MAR 19, 2009 - 03:30 PM

Thanks a lot guys for you charming comments! I really appreciate it. Next will be the Fairy Fulmar which I'll try to paint in the same style I used on the TBM...
MAR 20, 2009 - 07:18 AM
Copyright ©2021 by Aenea Wasmer. Images also by copyright holder unless otherwise noted. The views and opinions expressed herein are solely the views and opinions of the authors and/or contributors to this Web site and do not necessarily represent the views and/or opinions of AeroScale, KitMaker Network, or Silver Star Enterrpises. Images also by copyright holder unless otherwise noted. Opinions expressed are those of the author(s) and not necessarily those of AeroScale. All rights reserved. Originally published on: 2009-03-07 00:00:00. Unique Reads: 12146

WEB HOSTING BY


Copyright ©2021 AeroScale and Kitmaker Network, a subsidiary of Silver Star Enterprises
All Rights Reserved. Please read our Conditions of Use and Privacy Policy.
All Rights Reserved. Please read our Conditions of Use and Privacy Policy.