

1⁄35P-51 D Mustang
Introduction
There are many ways to build a kit, probably as much as there are modellers. However, building a kit "out of the box" is certainly the most relaxing method, because you don't have to worry about accuracy and detail. Once finished, if the model isn't an exact replica of the real subject, you can always blame the kit manufacturer for the flaws and errors!The Kit
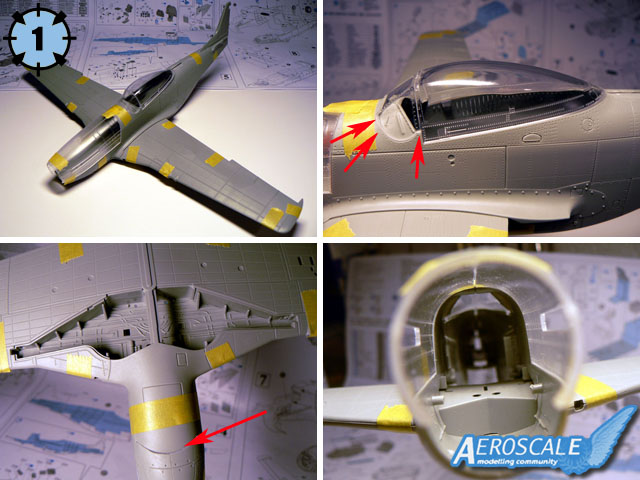
If you want to know precisely what is provided in the box, a review of Dragon's 1/32 scale P-51 D Mustang can be found here. Before starting the build, I wanted to check the overall fit of the main parts, so I assembled the fuselage, wings, canopy, engine cowlings etc... As you can see in picture 1, the result is good and I didn't expect to use a lot of filler. But I noticed some areas of concern about the kit...
- The surface detail is heavy, especially the rivets and the panel lines.
- The windscreen didn't fit to the fuselage very well and I had to sand some plastic away (red arrows) to achieve a better match.
- The wing to fuselage joint isn't perfect on the underside and will need some filling and sanding to get a flawless finish.
Building the engine
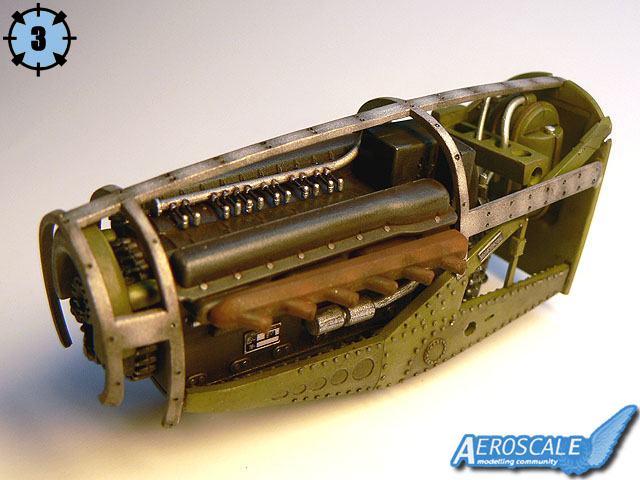
The kit comes with a detailed engine which is very easy to build, just follow the instructions carefully (picture 2). The red arrows show the areas where I had to use some filler. As you can see, there are not many. I painted the sub-assemblies in their respective colors (Interior Green, Black and Silver) and used some pastel powders and washes to weather them. I also printed placard with my ink jet printer to add some realism. The finished result is quite convincing as you can see in picture 3.
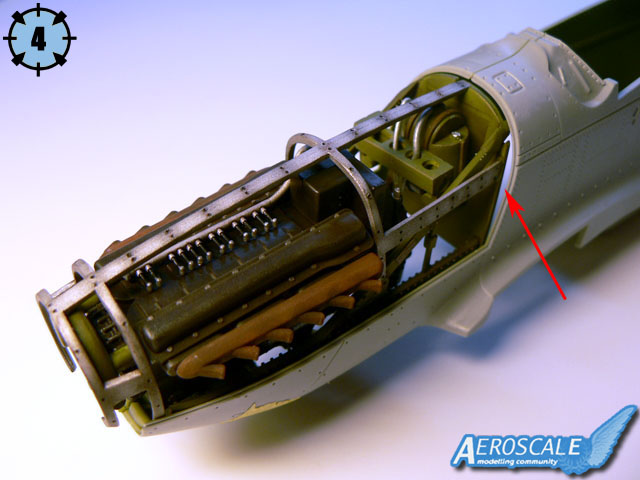
- When test-fitted to the fuselage, one can notice the firewall is too small (picture 4). If you want to display the model with the engine cowlings removed, you may scratchbuild a new one for a better result.
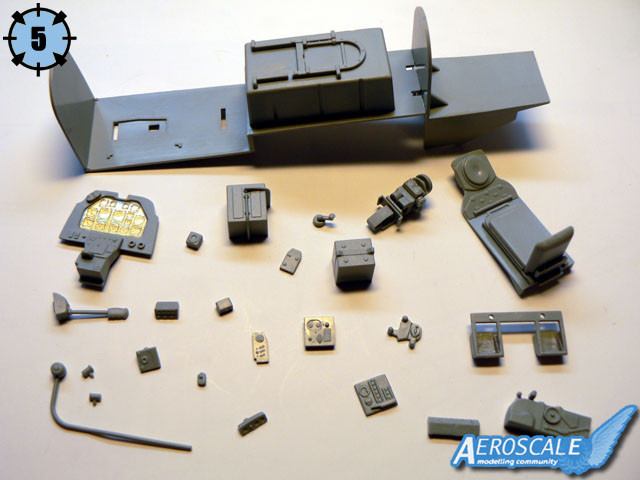
Building the cockpit
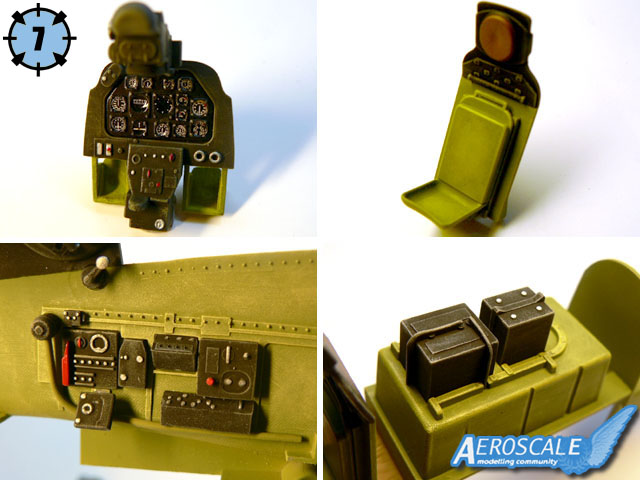
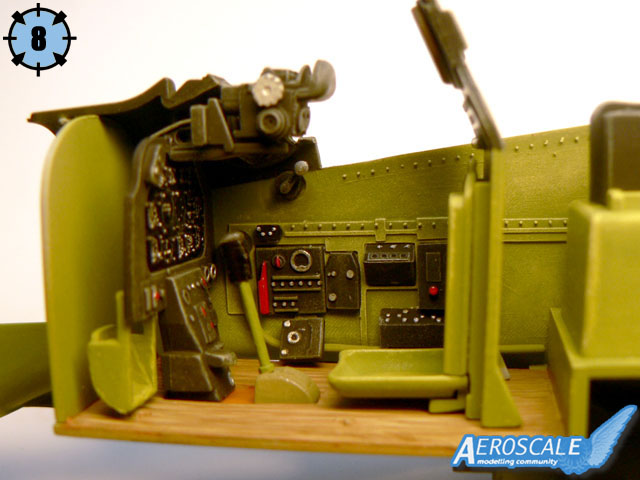
For the cockpit interior, I used the same method as for the engine. I build the sub-assemblies and painted them in their respective colors (pictures 5 and 6). Once drybrushed the instrument panel, the seat, the side consoles and the radio compartment look very nice. The completed cockpit may not have the level of detail that some expect from an 1/32 scale kit but for me it is good enough (picture 8).
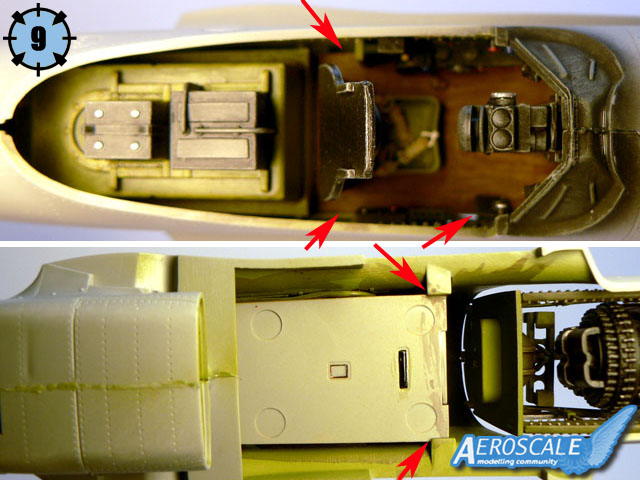
- The cockpit floor is undersized (see picture 9) and this is noticable from below. So you must be carefull while gluing it to the fuselage locators.
- It seems the seat is too advanced in the fuselage. I choosed to push it back a little (1 mm).
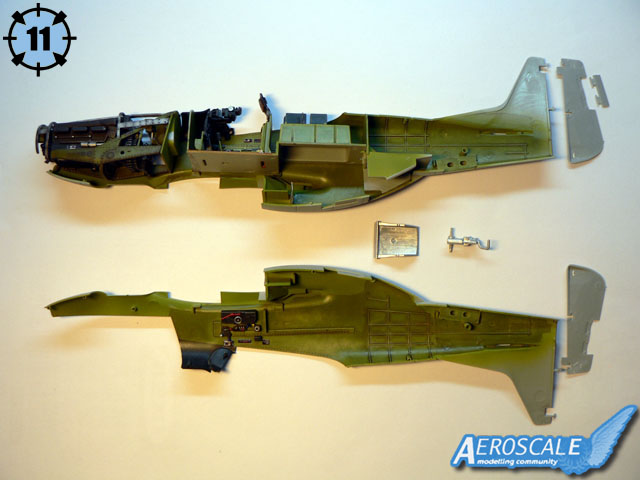
Getting the fuselage halves together
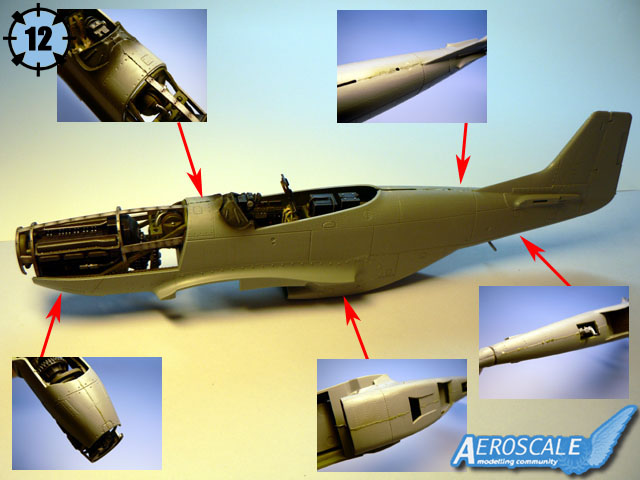
Once finished with the cockpit, you will be ready to glue the two fuselage halves together. Of course, you must paint the interior in the appropriate color before (picture 10). Once the engine and the cockpit sub-assemblies are secured in place you can get the two main parts together (picture 11). Don't forget to add the rudder and the tailwheel at this time! I didn't encountered any problem at this stage and almost no filler was necessary for the fuselage (picture 12).
- Don't forget to add the ventral radiator! Don't ask me why I tell you that...
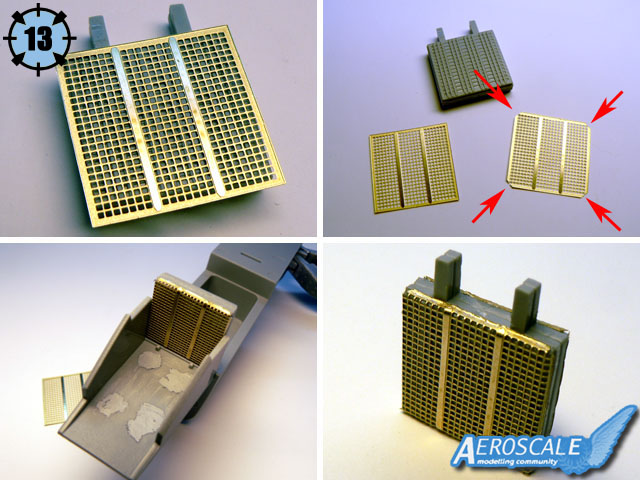
- If you want to use the photo etched grills you must cut their corners and then fold them around the plastic part (picture 13).
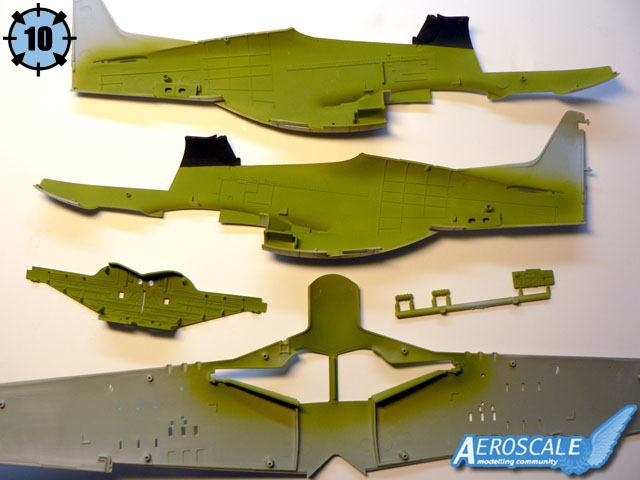
Wing to fuselage assembly
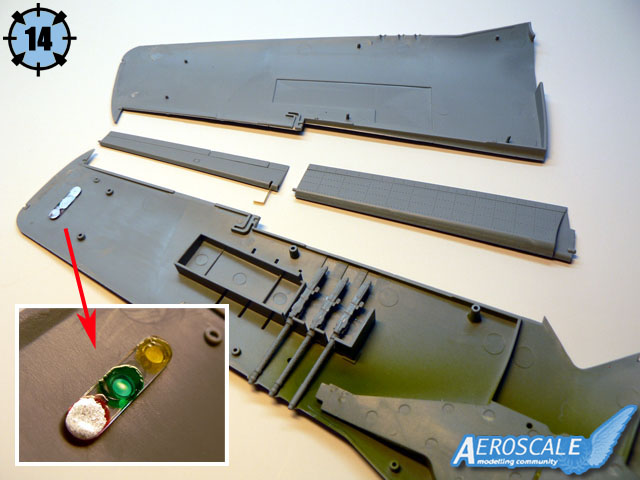
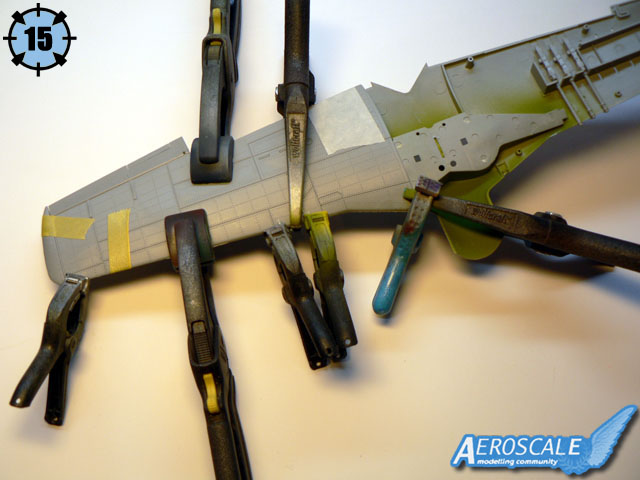
While the fuselage is set aside to dry, it is time to concentrate on the wings. The wheel bay insert and the guns are glued in place first, then the clear formation lights part which is painted with Tamiya clear paints (red, green and yellow) and silver (picture 14). The ailerons and flaps are also completed at this stage. Now it's time to get the underwing and the upper wing parts together. As you can see on picture 15, a lot of clamps are needed for this task! Before gluing the wings assembly to the fuselage, it is better to make some test fits...
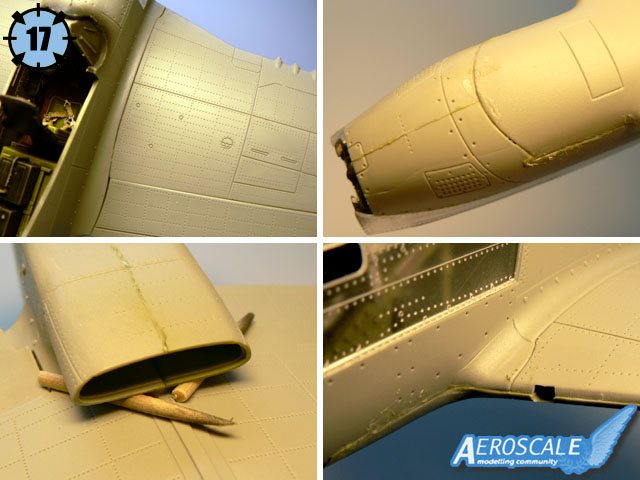
- Only put a small amount of glue on the wing roots (see red area in picture 16).
- Add a spreader made of plastic sprue at the bottom of the fuselage.
- Remove some plastic on the fuselage (see red arrows) so to achieve a better fit.
- Use very strong clamps at the wing roots.
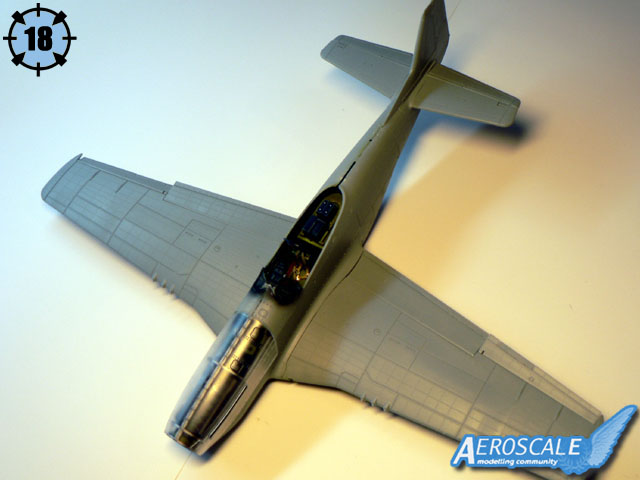
If you follow the above advices, the fit will be very good! (picture 17 and 18)
Painting the model
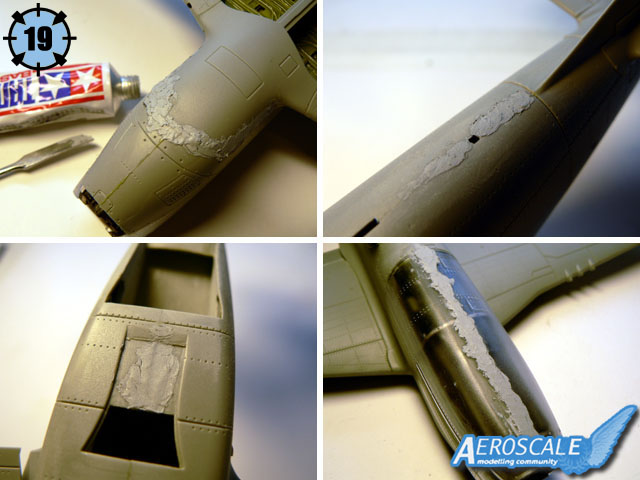
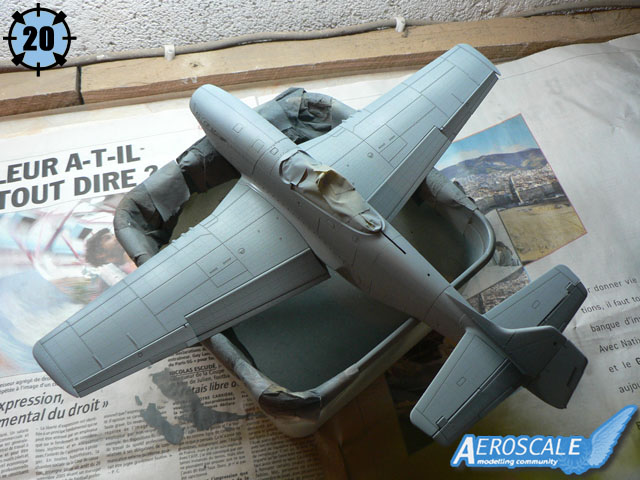
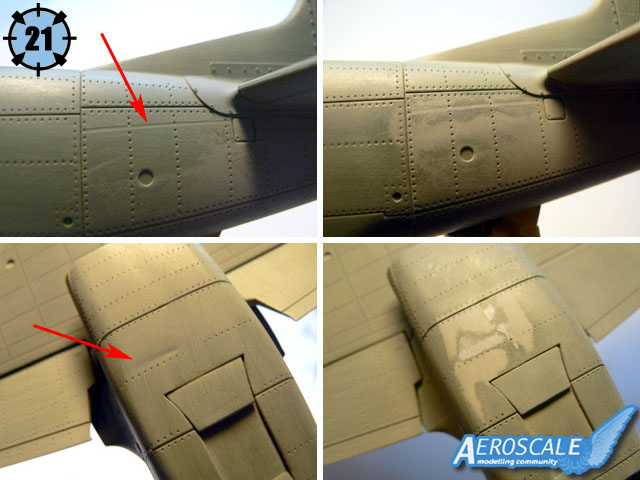
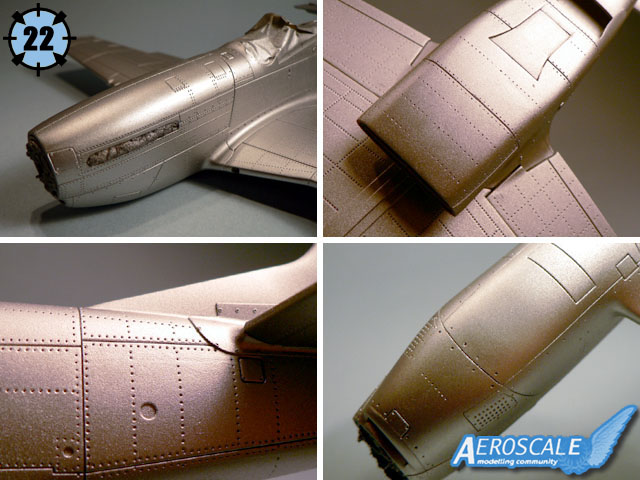
Prior to add a first coat of primer, you must of course fill and sand some areas of the kit (picture 19). It was not much though, except for the underside and the engine cowling. But for the latter it was probably my fault and not because the kit was badly engineered. With the first coat of grey sprayed on (picture 20) it was now possible to check the model for surface imperfections and eliminate them (picture 21). After several sessions of filling and sanding, a coat of Tamiya X-11 Chrome Silver was finally sprayed on the entire model (picture 22). I decided to add some life to the aluminium finish so I painted some panels with different shades of silver (picture 23). Coats of future and Tamiya X-22 Gloss was then applied to protect the paint. The last touch was to add the blue paint of the nose, a mix of Tamiya X-14 Sky Blue and XF-8 Flat Blue (picture 24).
- It is better to glue the ailerons, flaps and rudders before painting. I didn't do it and keeping them movable damages the aluminium finish.
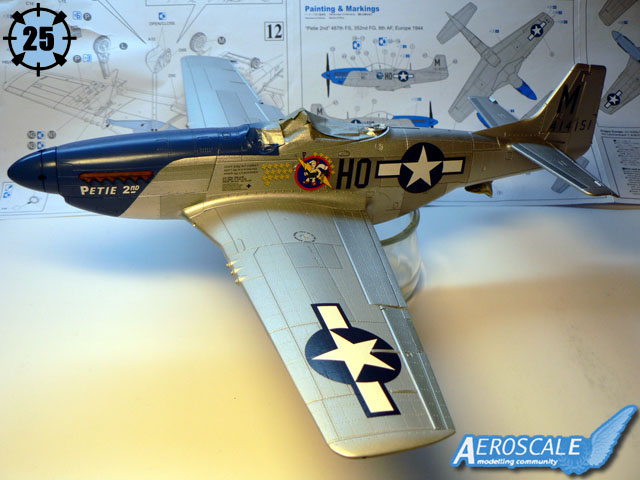
Applying decals and weathering
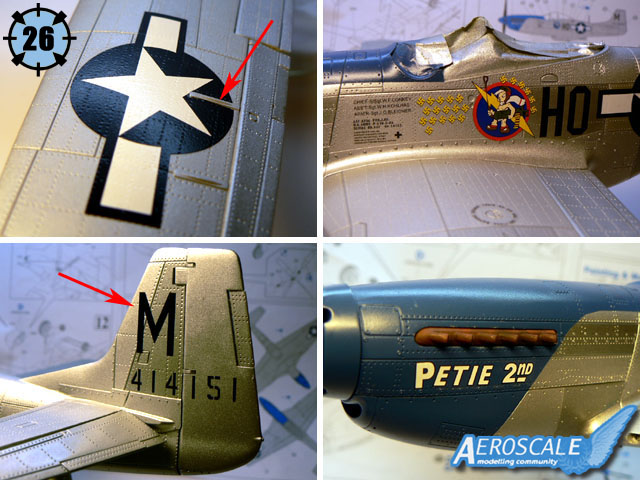
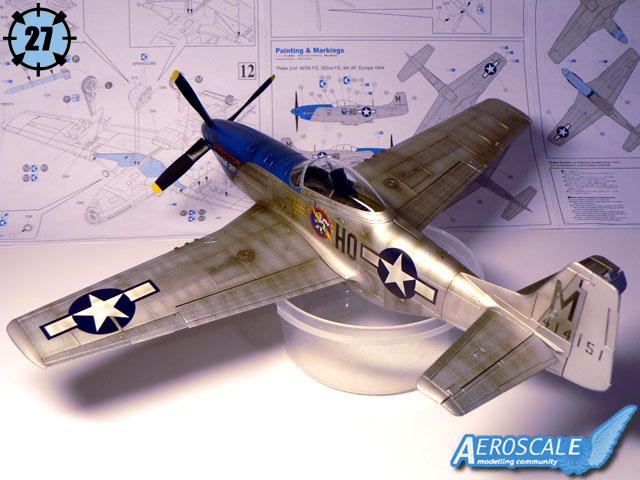
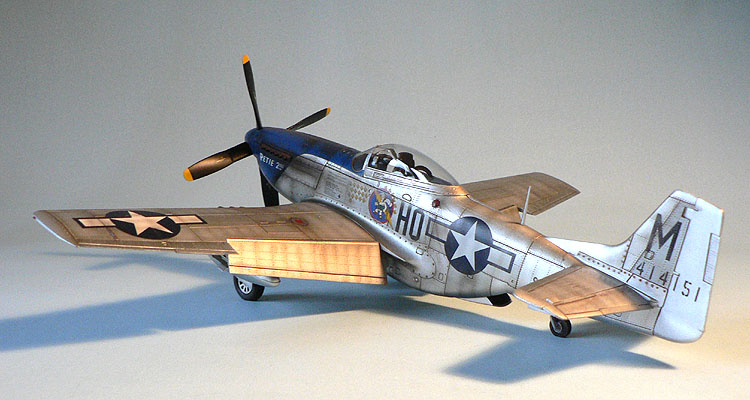
This is what I like most when I build a model: applying the decals! Those provided in the Dragon kit have been printed by Cartograf and they worked very well with Micro Set (picture 25 and 26). I choosed the well know Petie 2nd markings from the kit's box cover artwork. Once the decals have dried, I applied thin layers of Tamiya Smoke to weather the aircraft.
- I cut away a small area of the upper Wing insignia (picture 26) because the aileron hinge cover was somewhat in the way. It was painted dark blue later.
- Be careful while using the decals because some of them have almost no carrier film. The M was a real pain to get properly in place!
- The weathering is a question of taste. It is most unlikely that a real Mustang ever had such a surface finish!
Finishing
Now that the painting, decalling and weathering is done, it's time to finish the model by adding the landing gear, canopy, additional fuel tanks, bombs, rockets etc...
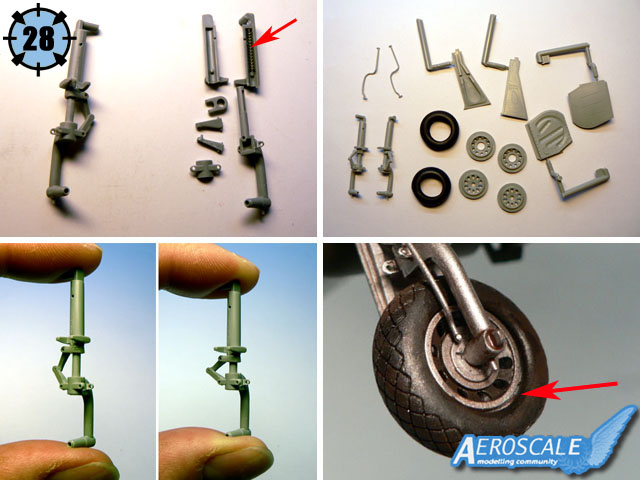
- The gear legs are quite nice but unfortunately the vinyl tyres are over-sized (picture 28)
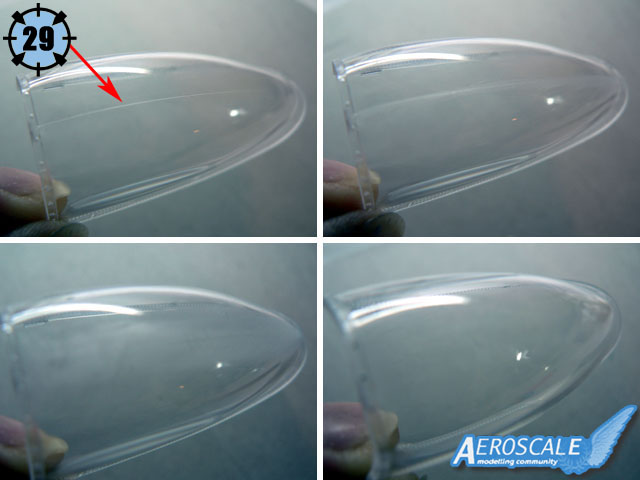
- There is a seam right in the middle of the clear canopy part which will have to be sanded smooth and polished (picture 29).
- Don't forget to paint the fuel tank caps in red. I used a Verlinden PE template to do it (picture 30).
- If you want to use the bombs or the fuel tanks, you must cut away the locators of the racks to place them so they don't cover a shell ejection opening (picture 31).
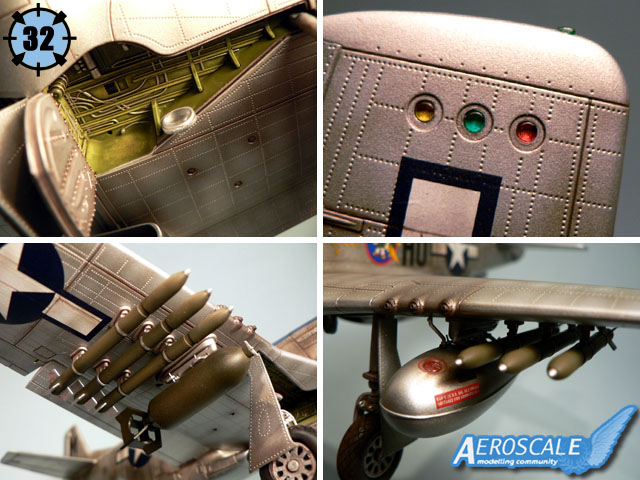
- If you want to add the rockets, you will have to cut away some plastic away on the rear mount to get a proper fit. The red arrow shows a modified part while the one in front is untouched (picture 32).
- I also had to place a bit of plastic sprue in the front of the engine to get a proper alignment for the propellor (see arrow in picture 32).
- There are no gear cover actuators in the kit so you will have to scratchbuild some (picture 32).
- It is most unlikely that this P-51 D (Petie 2nd) ever carried rockets! If you want to present this model to a contest, don't use the rocket rails with these markings.
Conclusion
Overall, it was a very enjoyable build. I think Dragon's new 1/32 scale P-51 D is a good kit... for a relaxed modeller. It is well engineered and pretty straightforward for someone with a little building experience. I won't recommend it to beginners though, because of the complexity of some assemblies (landing gear legs, movable ailerons with PE parts etc...) I won't recommend it to Mustang fanatics neither because the surface finish and obviously other inaccuracies would be simply to difficult to accept for them.I hope Dragon will manage to please more people with their next aircraft releases, but that's probably the most complicated goal to achieve for a model kit manufacturer!


About the Author


FROM: MOSELLE, FRANCE
I'm mainly interested in WW2 aircraft and I build them in 1/48 scale.
Copyright ©2021 by Jean-Luc Formery. Images also by copyright holder unless otherwise noted. The views and opinions expressed herein are solely the views and opinions of the authors and/or contributors to this Web site and do not necessarily represent the views and/or opinions of AeroScale, KitMaker Network, or Silver Star Enterrpises. Images also by copyright holder unless otherwise noted. Opinions expressed are those of the author(s) and not necessarily those of AeroScale. All rights reserved. Originally published on: 2007-02-01 00:00:00. Unique Reads: 20773

WEB HOSTING BY


Copyright ©2021 AeroScale and Kitmaker Network, a subsidiary of Silver Star Enterprises
All Rights Reserved. Please read our Conditions of Use and Privacy Policy.
All Rights Reserved. Please read our Conditions of Use and Privacy Policy.