History
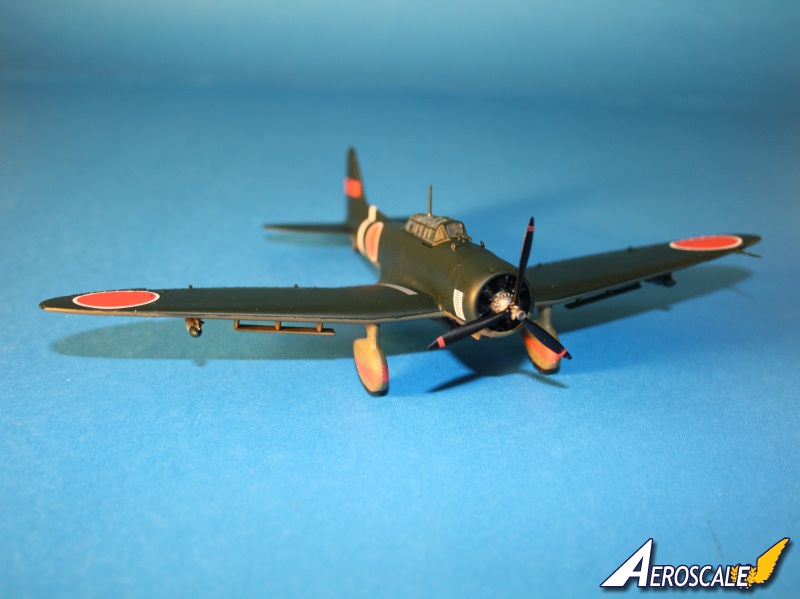
The Aichi D3A, (Allied reporting name "Val") was a World War II carrier-borne dive bomber of the Imperial Japanese Navy (IJN). It was the primary dive bomber in the Imperial Japanese Navy, and participated in almost all actions, including Pearl Harbor. The Aichi D3A was the first Japanese aircraft to bomb American targets in World War II, commencing with Pearl Harbor and U.S. bases in the Philippines, such as Clark Air Force Base. During the course of the Second World War, the Val dive bomber sank more Allied warships than any other Axis aircraft.
From
Wikipedia
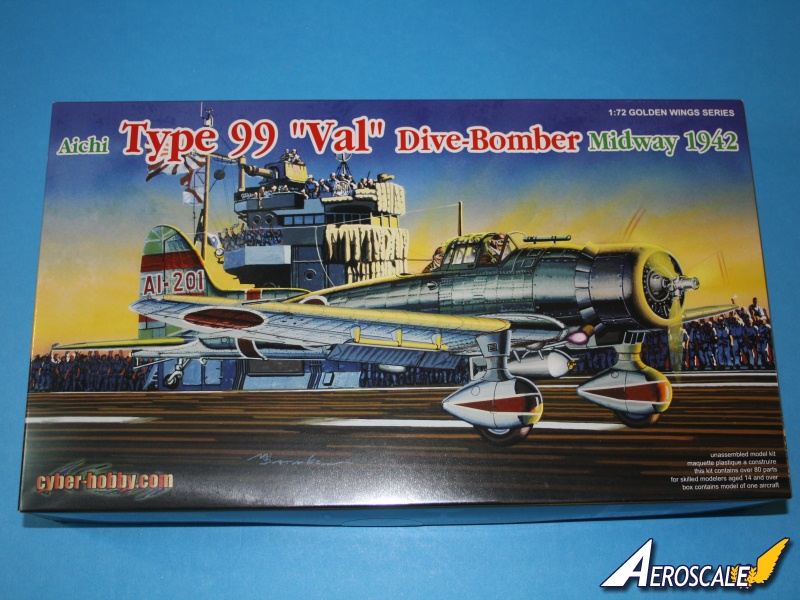
Step #1
Photos 1 3
Build the cockpit. Assembbly begins with the one part cockpit floor. Some detail is moulded onto floor. Seats are installed at this stage. No seat belts are provided.
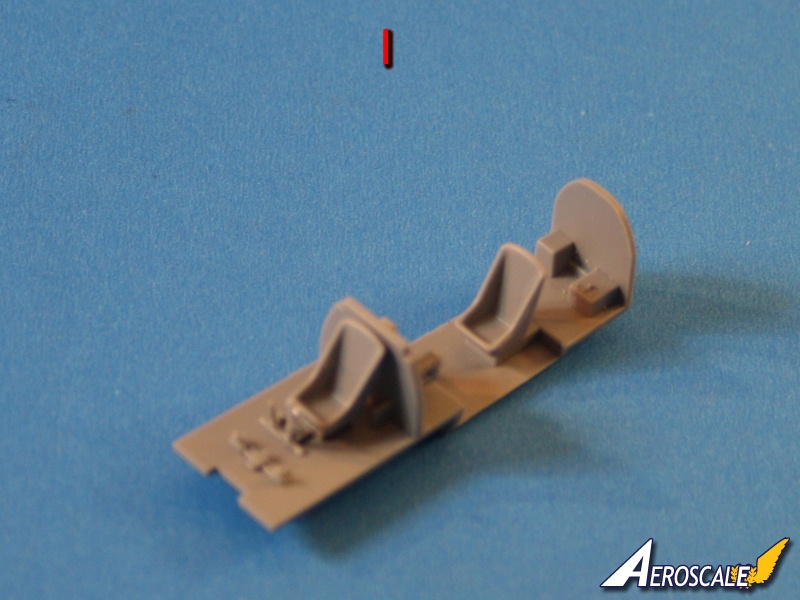
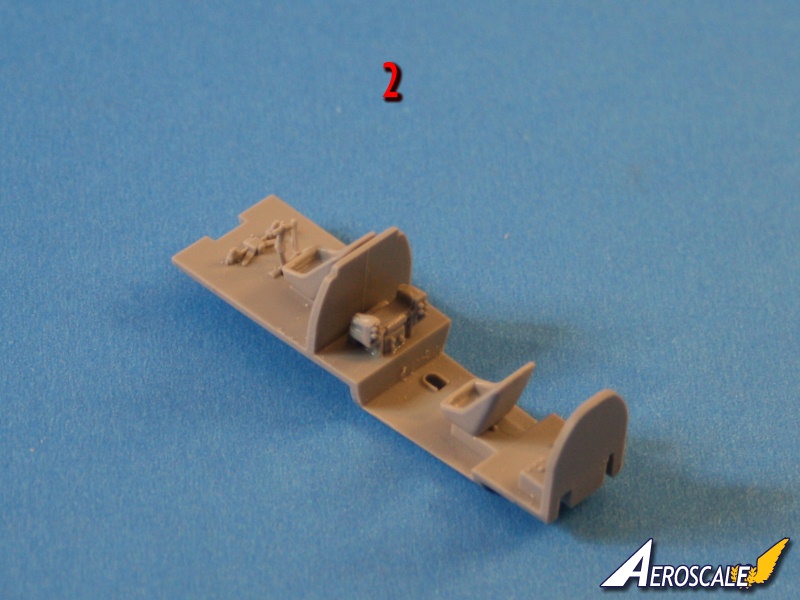
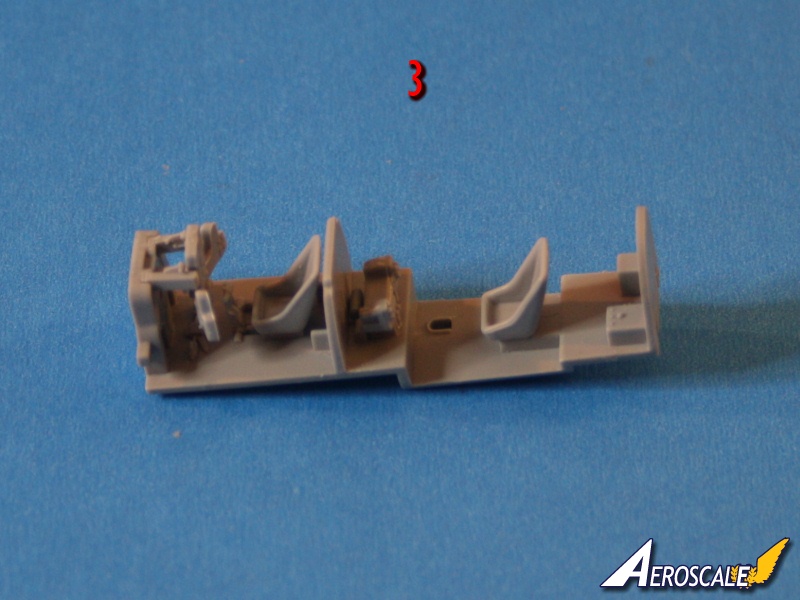
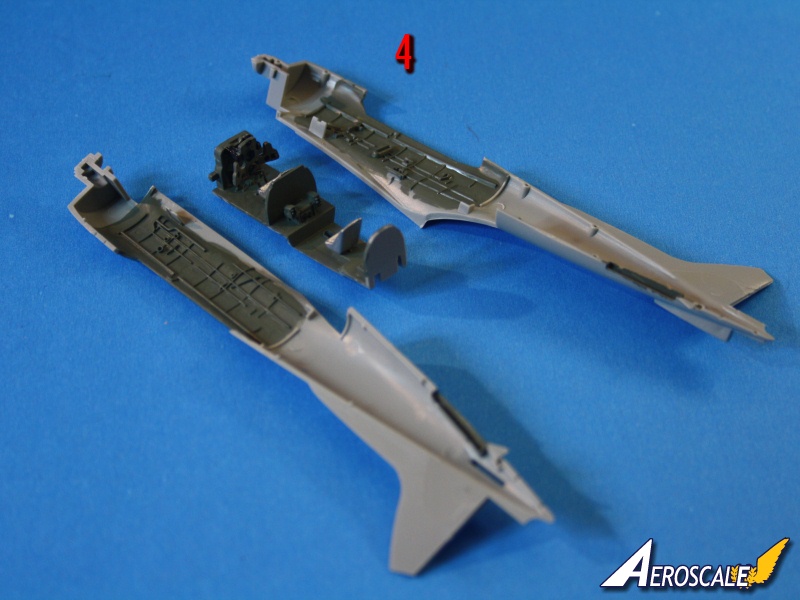
Step #2
photo 4
Insert the cockpit into the fuselage, close the fuselage. The Instrument panel is attached to the floor of the cockpit. It has some molded detail on it, but I really feel that it should have had a decal for this step. No paint colour is specified for any of the interior parts. Searching the Web I found that the Aichi company used a green similar to US Interior Green. The seats are painted bare Aluminium.
The fuselage joints are very good and no filler is required,
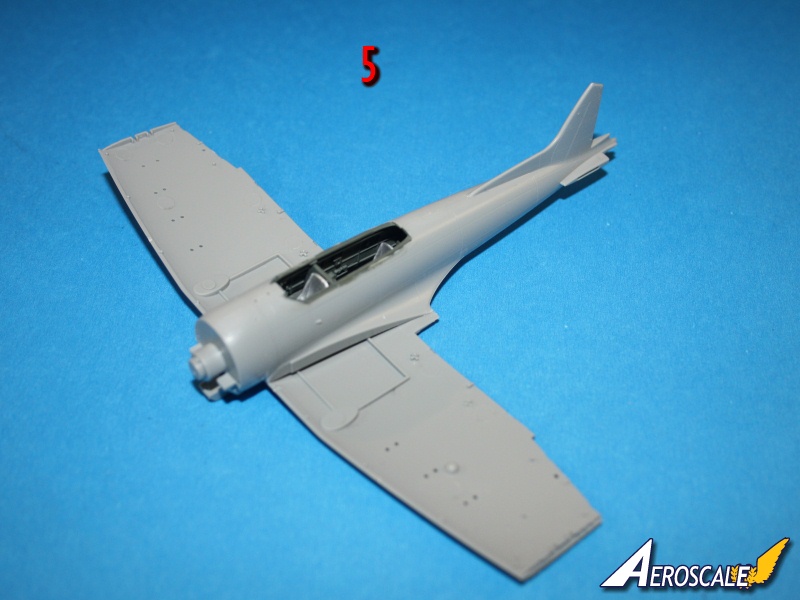
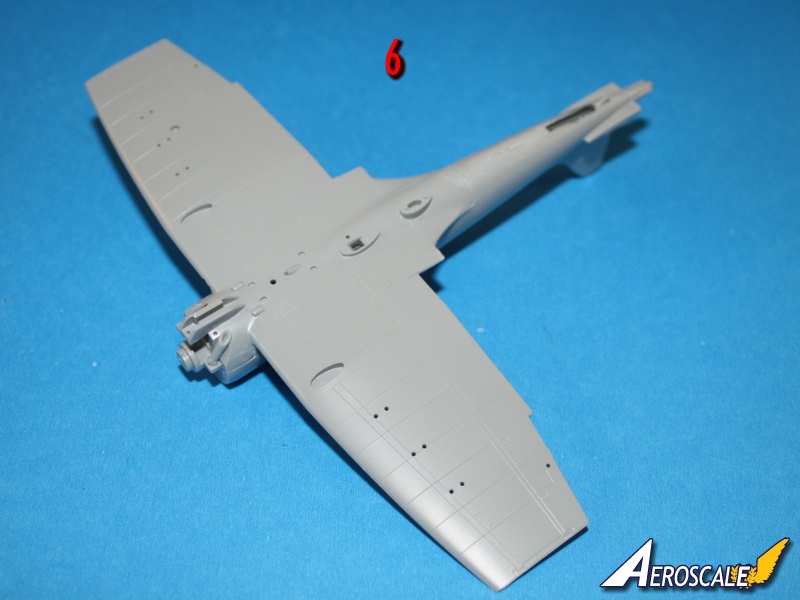
Step #3
Photos 5 and 6
Install the lower wing to the fuselage. The lower wing and fuselage join together well and no filler is needed.
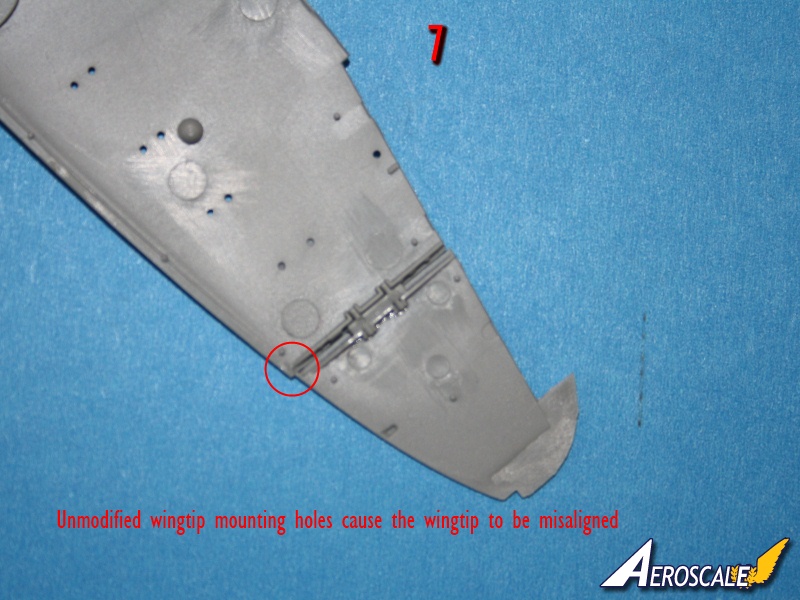
Step #4
Photos 7-10
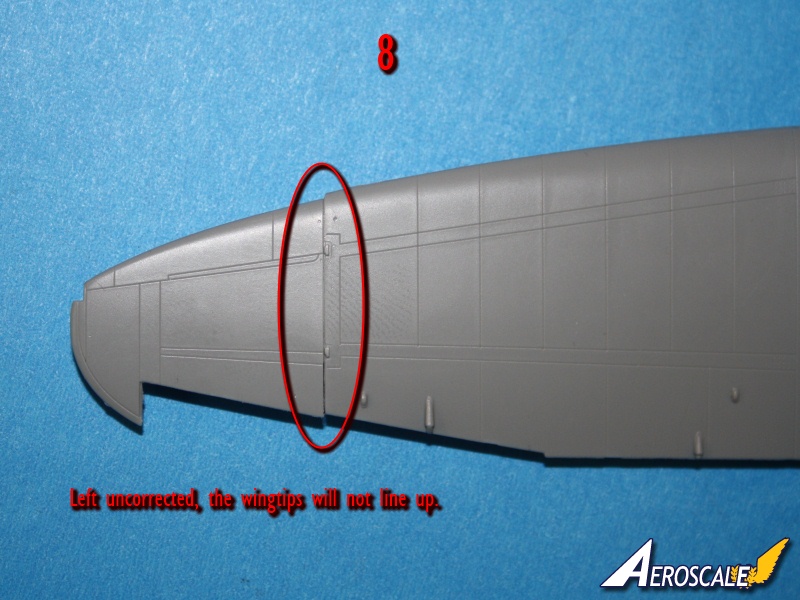
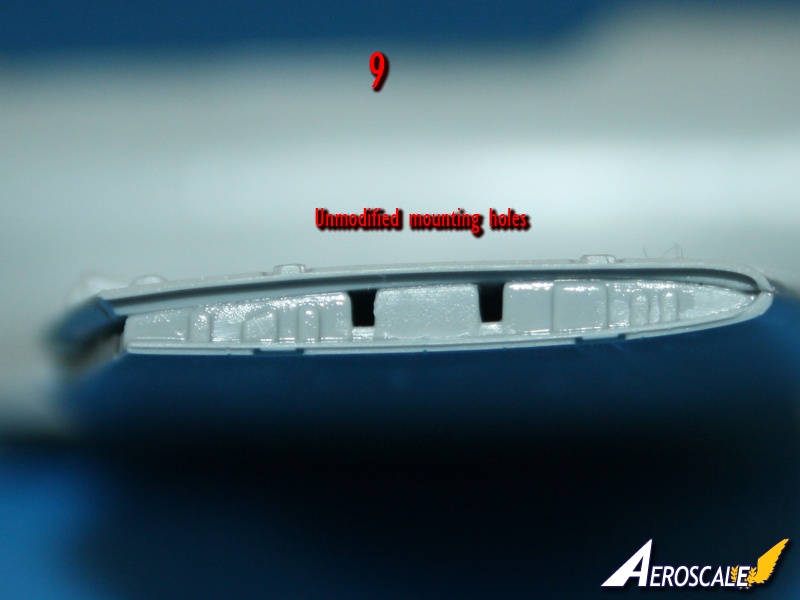
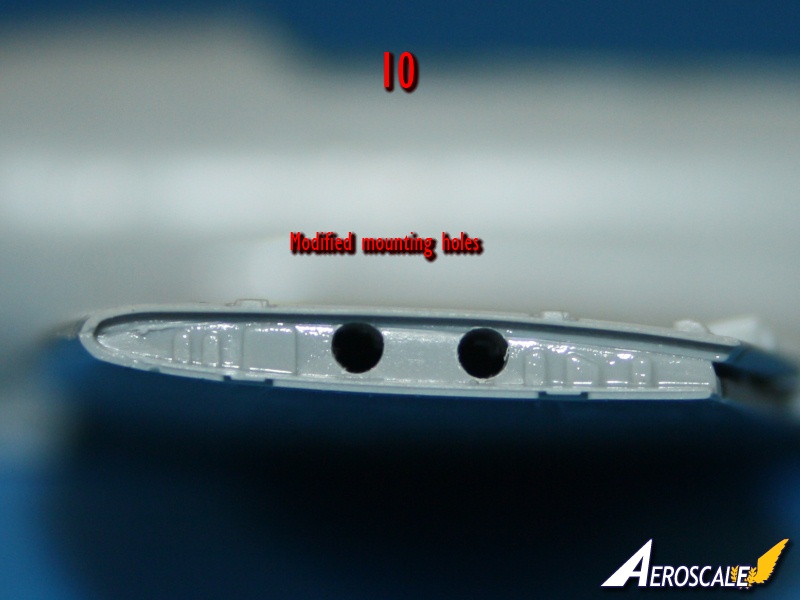
The upper wing halves fit nice and tightly to the fuselage. Now we have to chose between folded or extended wing tips. Upon dry fitting the extended wing tips, I was unpleasantly surprised to find that the wing locators are not in the correct position (see Photo 8). I drilled out the slots with a 0.064 diameter drill bit. This gave enough play to move the tip forward and the problem was solved. If you chose Folded wings (use C3/C4), the misalignment will not be as apparent. Photos 9 and 10 show the unmodified and modified locating holes respectively. There is no location hole for the pitot tube. Check the internet for photos and drawings to determine the proper location to drill the hole.
The engine was installed and painted along with the inside of the cowl. There is a choice of two cowls (C24 with flaps open) or ( C21 / C22 flaps closed) I used the latter. Next, the gun sight is added.
The canopy is clear but the frame moulding looks heavy. There are two options for the cockpit canopy: 5 pieces to pose open or 1 piece to pose closed. The early release of this kit had problems with the separate canopy parts, so I used the closed canopy to avoid this possible problem. The radio mast and Prop should be installed after painting,
Step #5
All control surfaces are separate and have an exaggerated canvas covering which some may wish to sand off. As build this is OOB, I left this alone.
The wheel spats are moulded in two halves. The tires are weighted and held by the pins in the spats and with care after glueing should rotate. The spats insert into very well-defined mounting points in the lower wing.
Lastly, the bombs and racks are installed at this step. No paint colours are given for the bombs or racks. Thank you to Frederick Boucher for this
great bomb colour link.
It would help if the drawing for the centre bomb rack assembly were larger (for parts D8 / D9)
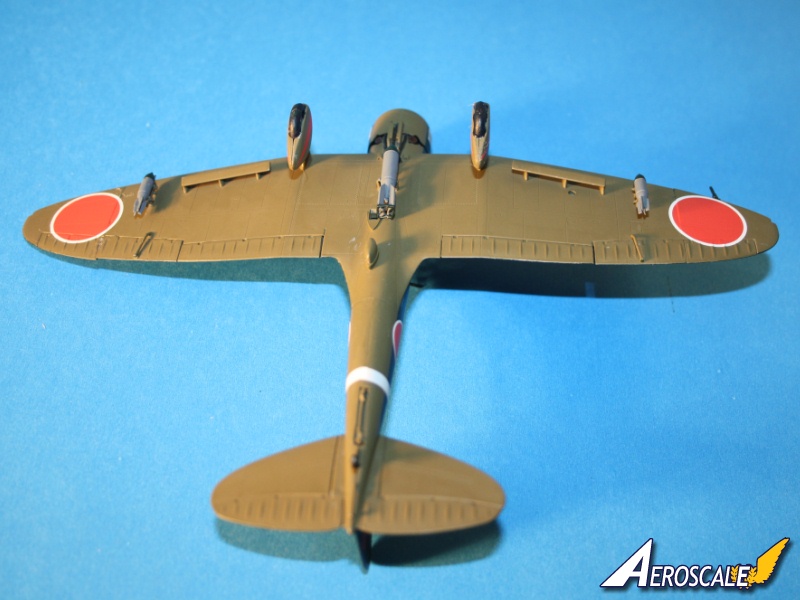
painting and finishing
Decals are for four aircraft, all of unidentified units:
2 aircraft from
Akagi ,Midway Island 1942.
1 aircraft from
Shokaku, Coral Sea 1942.
1 aircraft from Celebes Island 1942.
Each of them is overall green upper surfaces over
Ameiro grey undersurfaces. All necessary trim colours are provided on the decal sheet.
I used the
Shokaku Coral Sea decals for this build.
Related reviews
Kit 5045 reviewed by Tim Hatton.
Kit 5107 reviewed by Richard Tonge.
Please remember, when contacting retailers or manufacturers, to mention that you saw their products highlighted here - on
AEROSCALE.


Comments