All the time you hear about getting out of your comfort zone, and here I am staring a Japanese jet from 1960 in the eye. Show of hands; who out there is an expert on Japanese jet trainers? A few of you? Good. Chime in if you want.
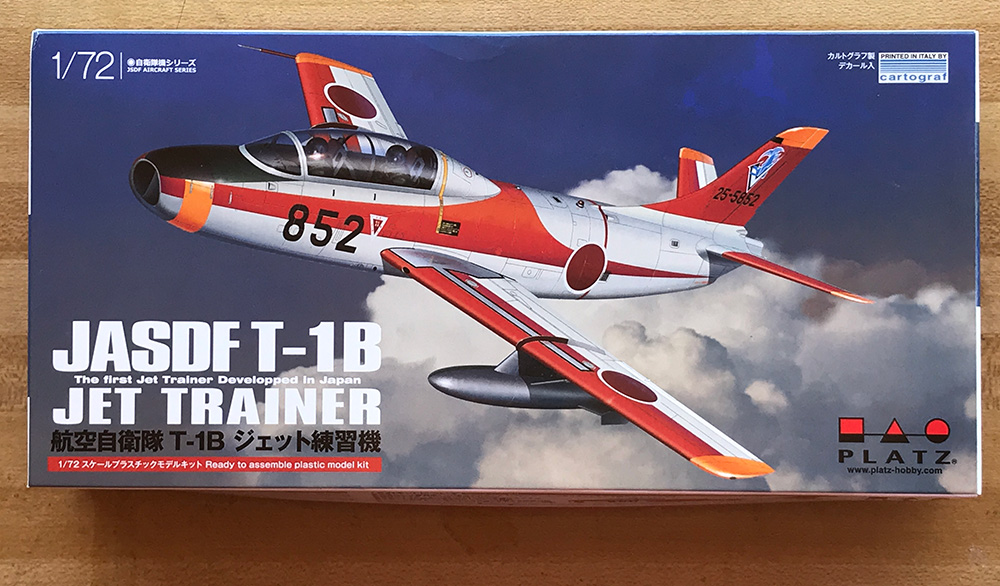
After WW2, Japan was forbidden to research the new and burgeoning field of jet propelled aviation. That ban was lifted in 1952. Development of the Fuji T-1 began in 1955 along with the J3, a domestically produced jet engine, but the J3 engine was delayed. The first prototype of the T-1A was harnessed to a British Orpheus engine and was successfully flew in early 1959, but production did not begin in earnest until 1960. The J3 engine was finally available the same year and the Japanese powered trainer was changed to the T-1B.
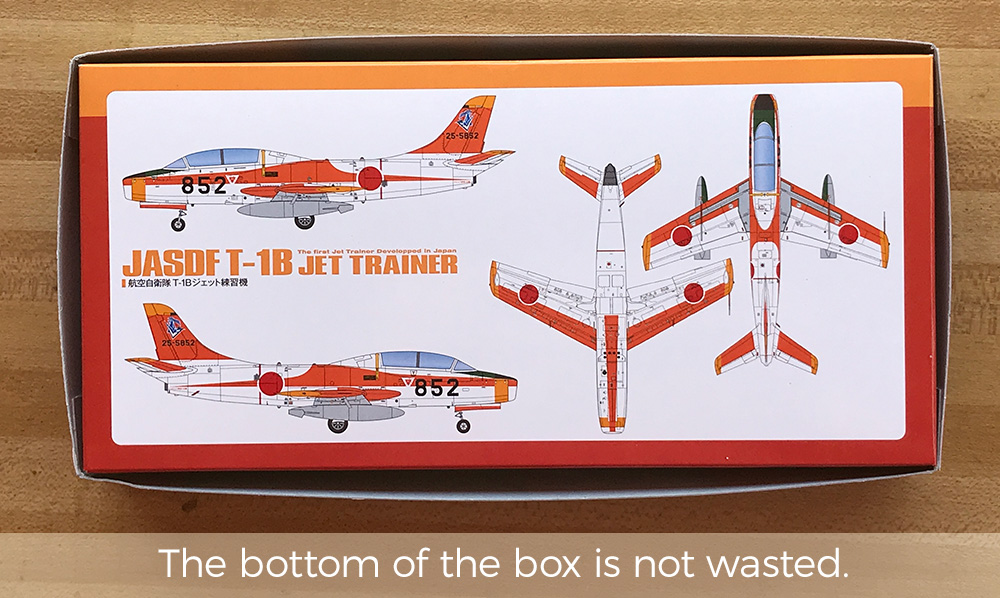
Sixty-six were built. For over 45 years the T-1B was active as a training aircraft by the Japan Self-Defense Forces, or as the translated text on the box reads "T-1Bs were produced to be cradles of many JASDF pilots until 2006., when the final one was retired. You get the idea. That is one hefty lifespan for a military aircraft.
This is a new 2018 tooling and release from Platz. Its refreshing to see since the only other 1/72 offering has been frequently re-released by Hasegawa since its initial tooling in 1971. I realize now why this plane feels so familiar to me; it reminds me of the rocket carrying jets in the early Godzilla movies that I loved so much as a kid. A company made a 1/80 scale Gojira kit at some point. If you can find one of those youre on your way to a diorama.
IN THE BOX
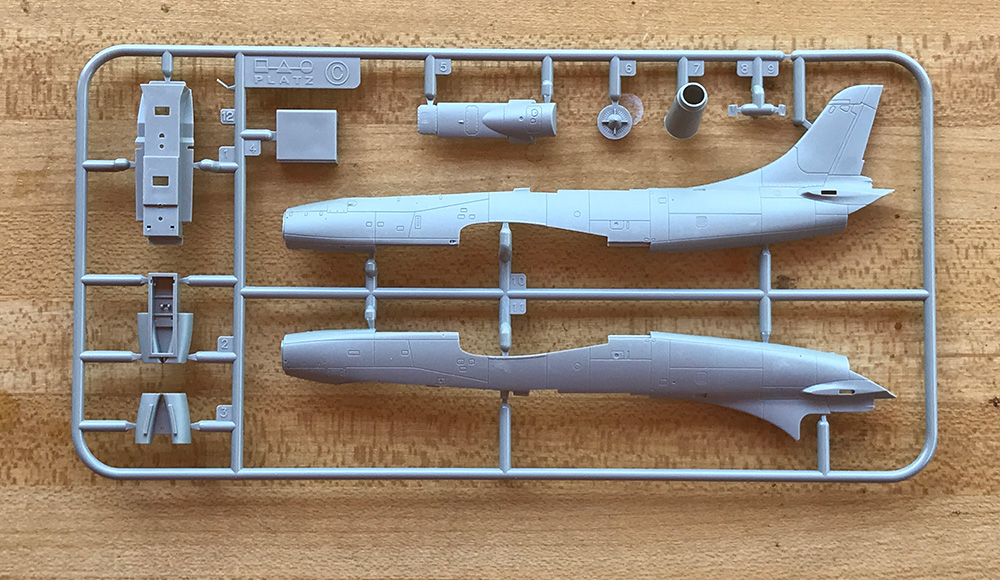
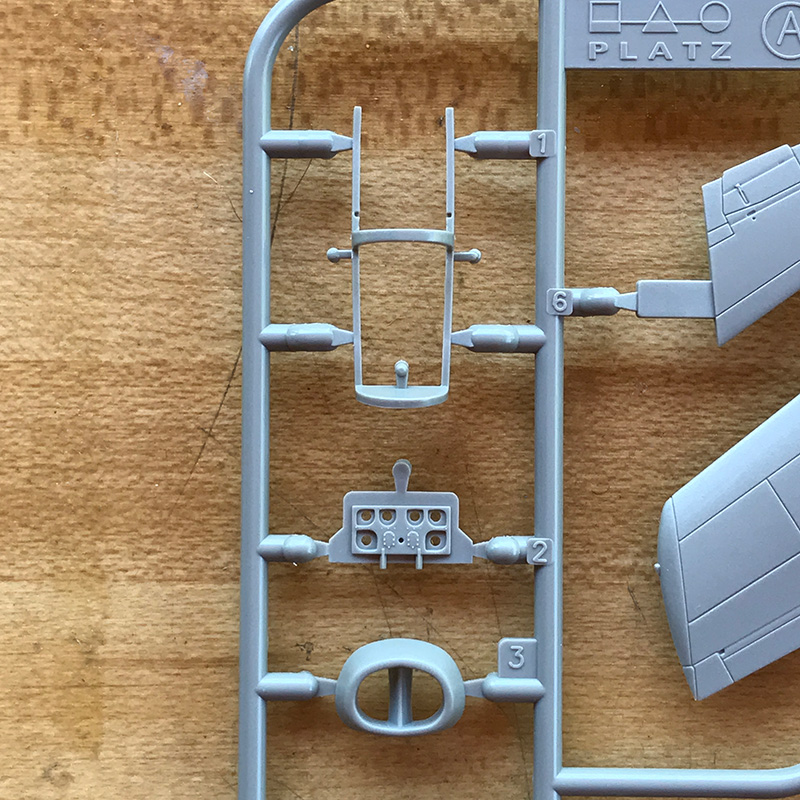
3 sprues of grey plastic bagged together
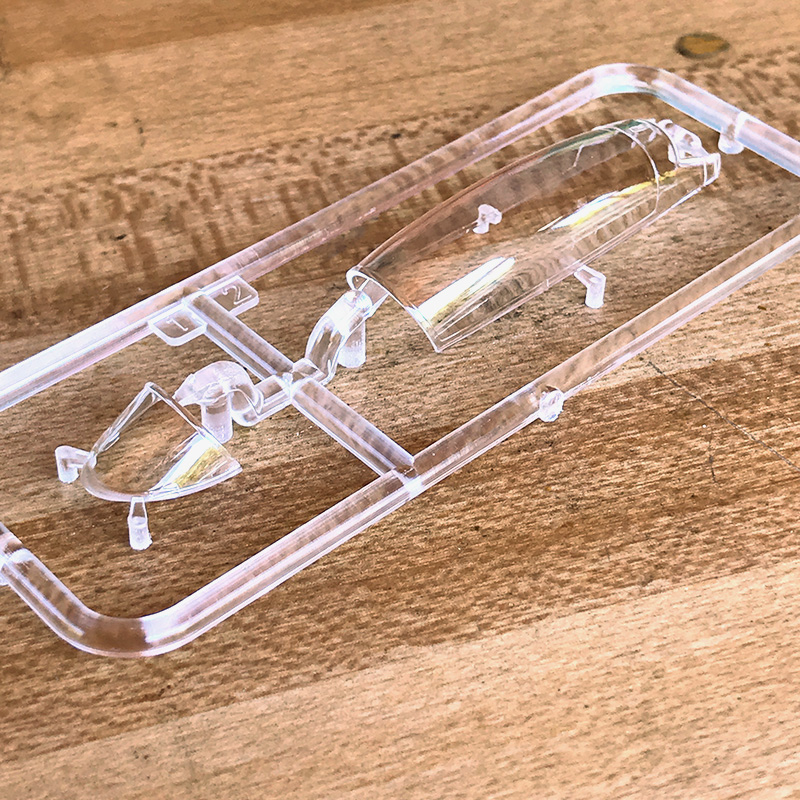
1 clear sprue bagged separately
Decal Sheet
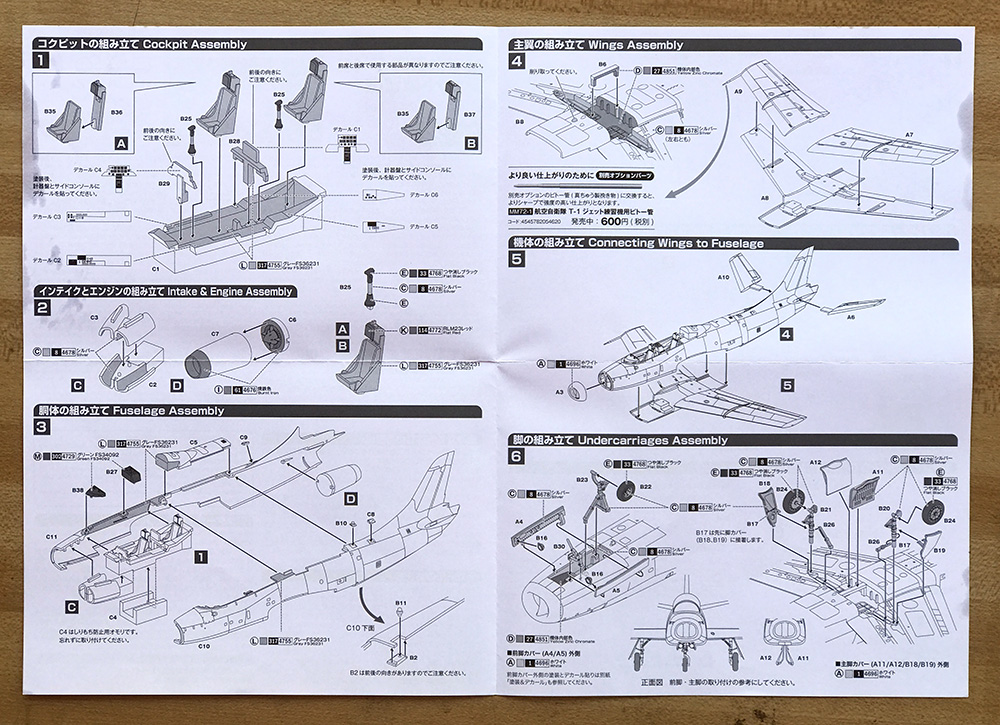
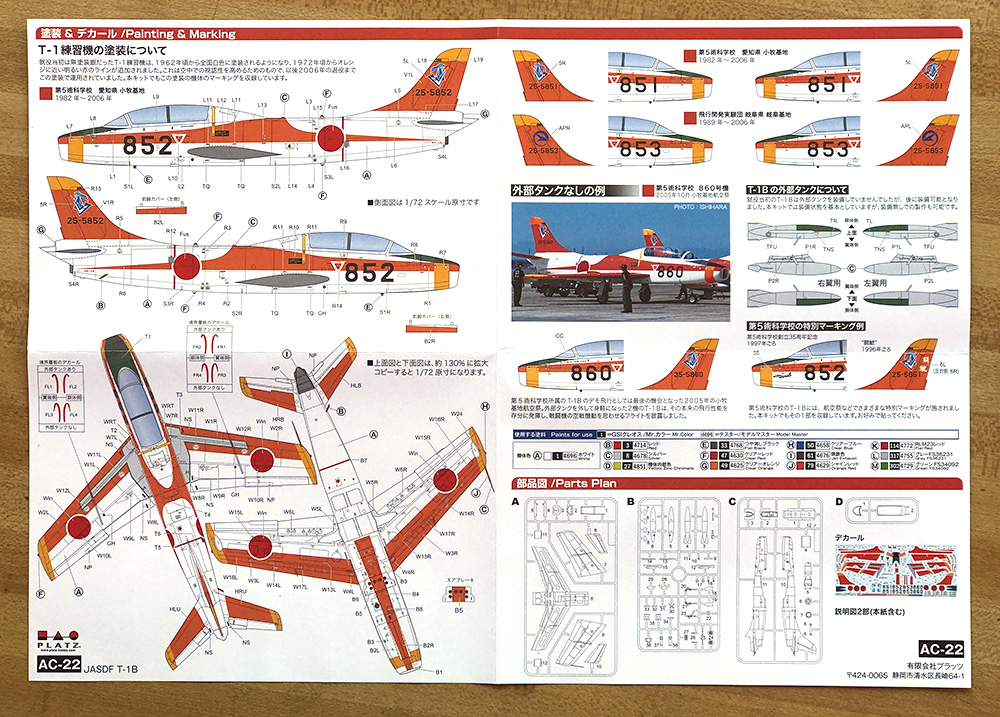
Instruction booklet (3 pages)
Beautiful full-color glossy sheet for decal placement
Review
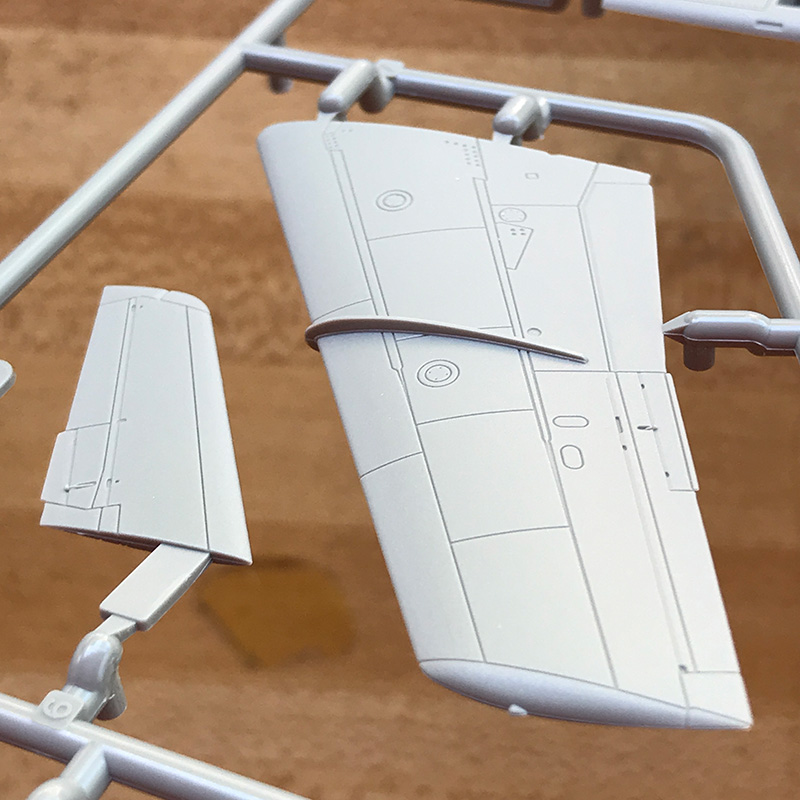
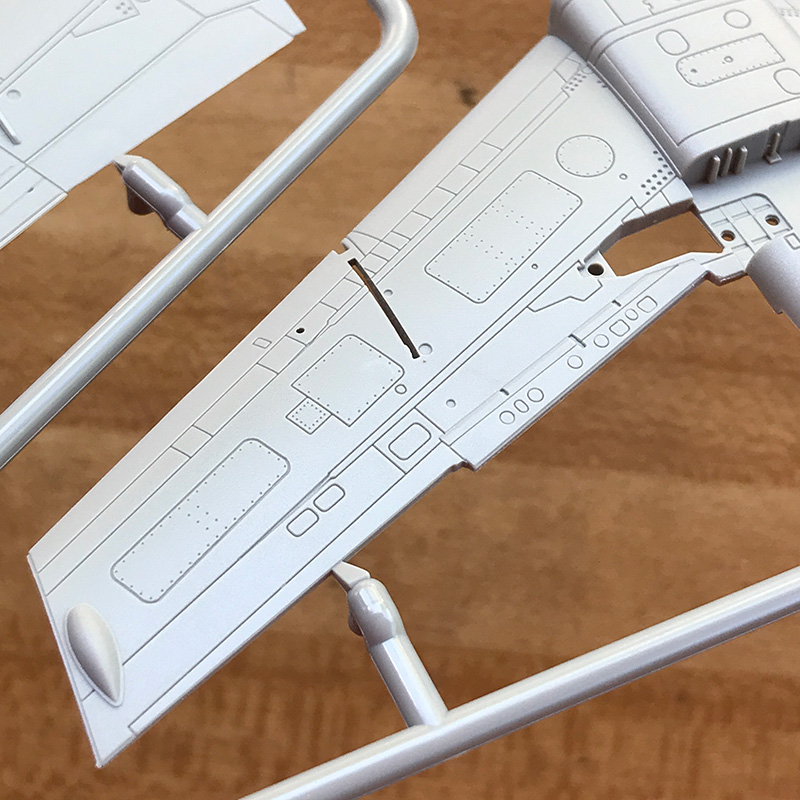
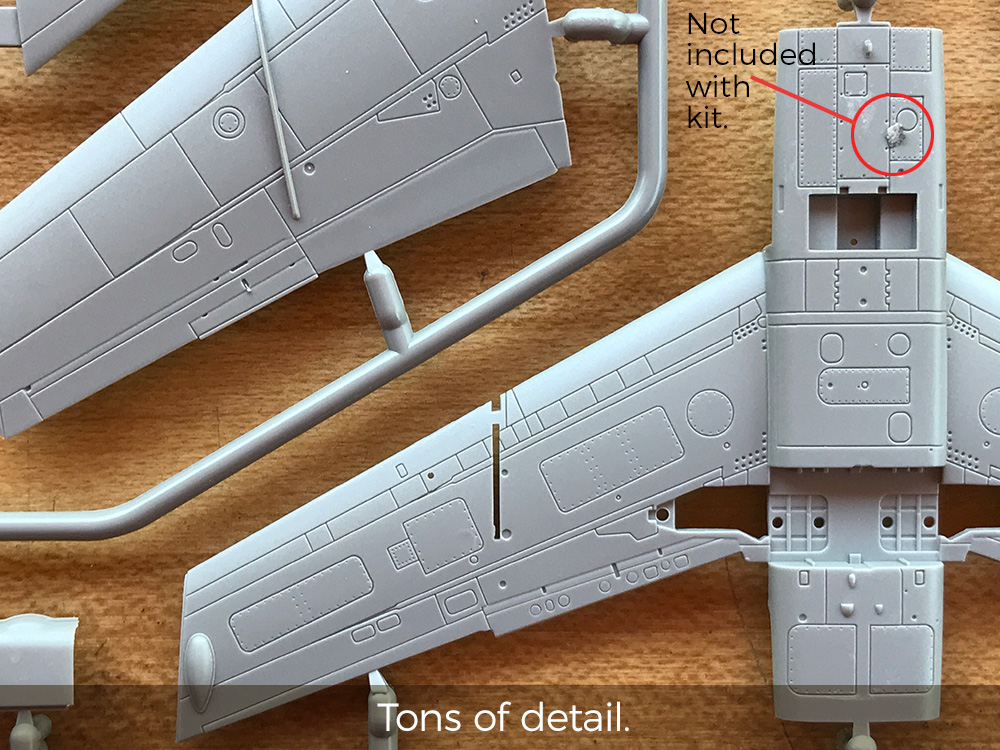
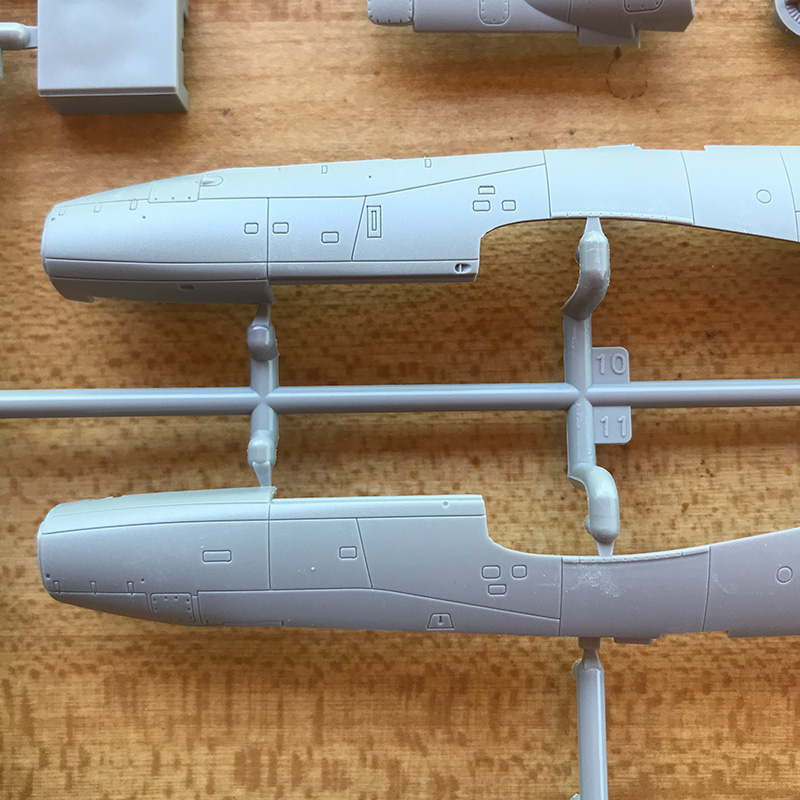
The parts are molded nicely. The plastic is hard, the kind that has a high pitched click when flicked with a fingernail. It sands wonderfully. There is a slight grainy texture on all the part surfaces, very similar to the Tamiya Spitfire I just reviewed here on Aeroscale. Its not bad, but worth noting. An Academy kit that I am building right now is completely smooth, almost shiny, so I dont know why this is so hard to achieve.
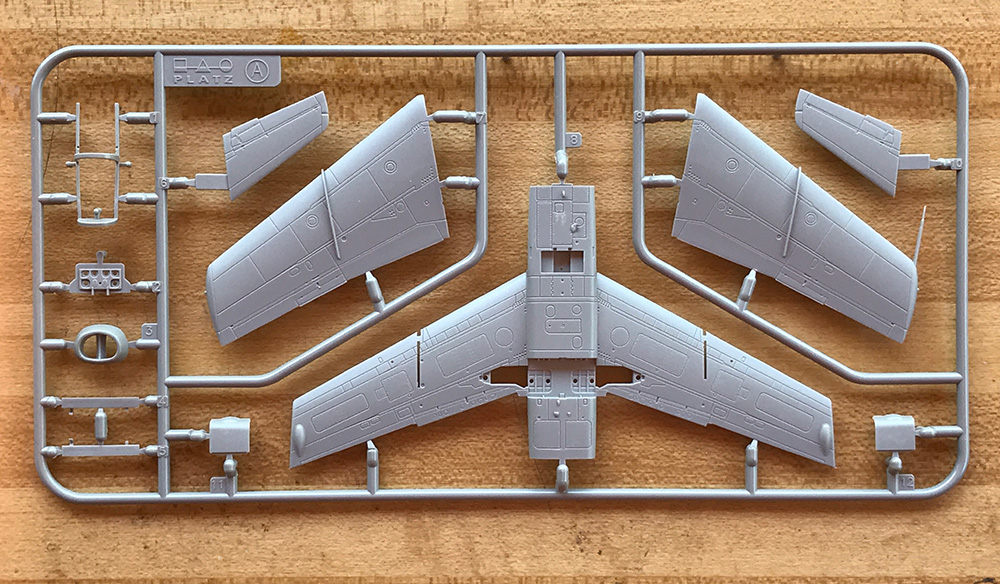
The panel lines are very pronounced and crisp. They are pretty big for 1/72 scale so handle accordingly. No masks are provided for the canopy, but the mold lines are crisp so masking should not be difficult.
Decals are included for the flat control surfaces in the cockpit, but no harnesses are supplied, neither molded into the seats, nor as decals or PE. Belts would have been a nice addition since the canopy hinges fully open if desired. I could not find any aftermarket parts to fill the void, although Im sure there are some 1/72 harnesses that would suffice. Platz does make a metal pitot tube as an aftermarket part though. I may have need for it, since the plastic pitot tube is molded right onto the wing. I give that thing about a 10% chance of making it to the end of the build intact. I know myself.
BUILD
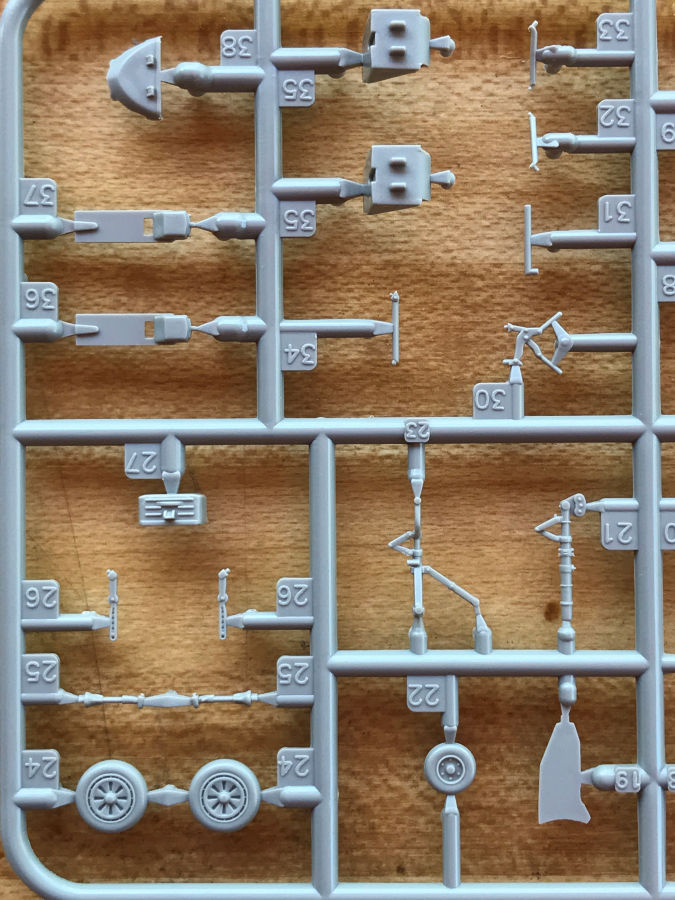
The build itself should be very quick. There are only three pages of instructions. You first build the cockpit. Ive noticed that there are ejection pin marks all over the interior tub and seats. They are on the arm sills, the floor, and the seats. Since there is no detail offered inside I might just do a basic painting and leave the canopy closed. The jet engine intakes and exhaust have to be built next.
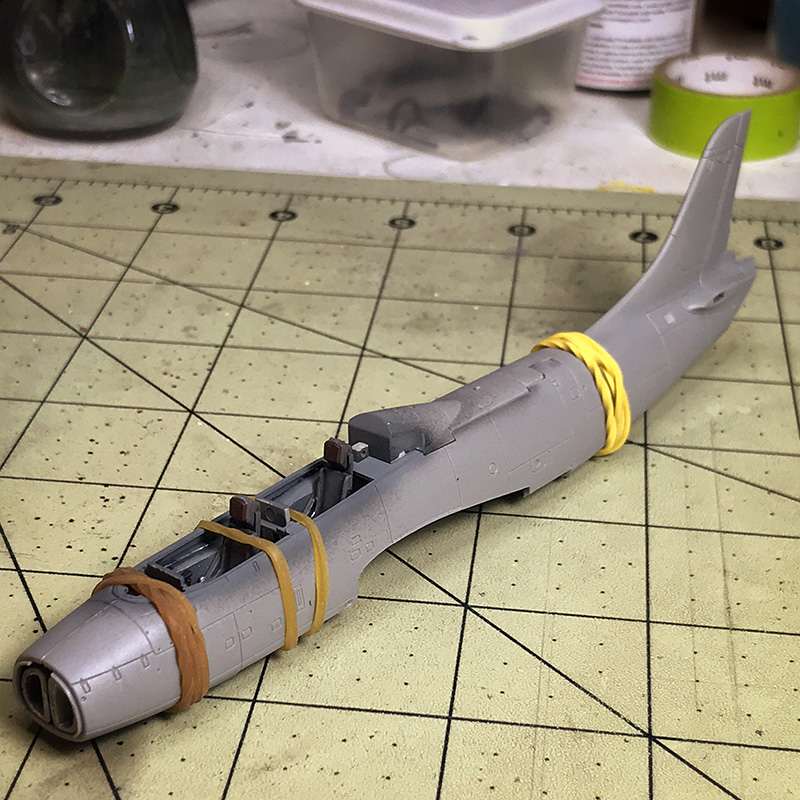
Those all get sandwiched between the fuselage halves which fit together just fine. The upper wings are attached to the separate lower wing / belly pan of the plane, which should eliminate any dihedral issues. That whole wing section is cemented under the fuselage. Next up is the landing gear, bay doors, external fuel tanks and the canopy and youre done.
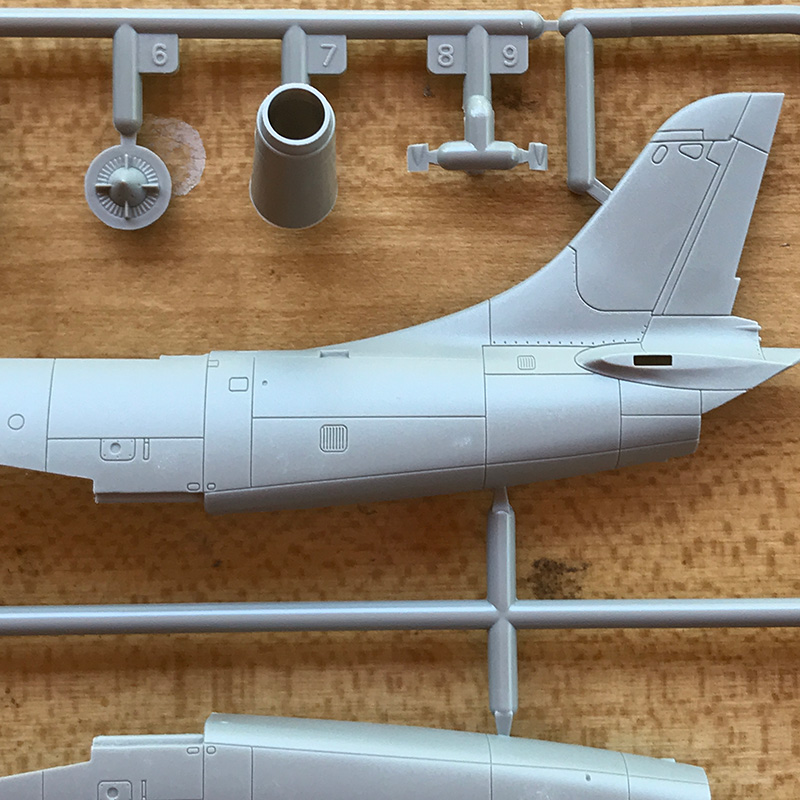
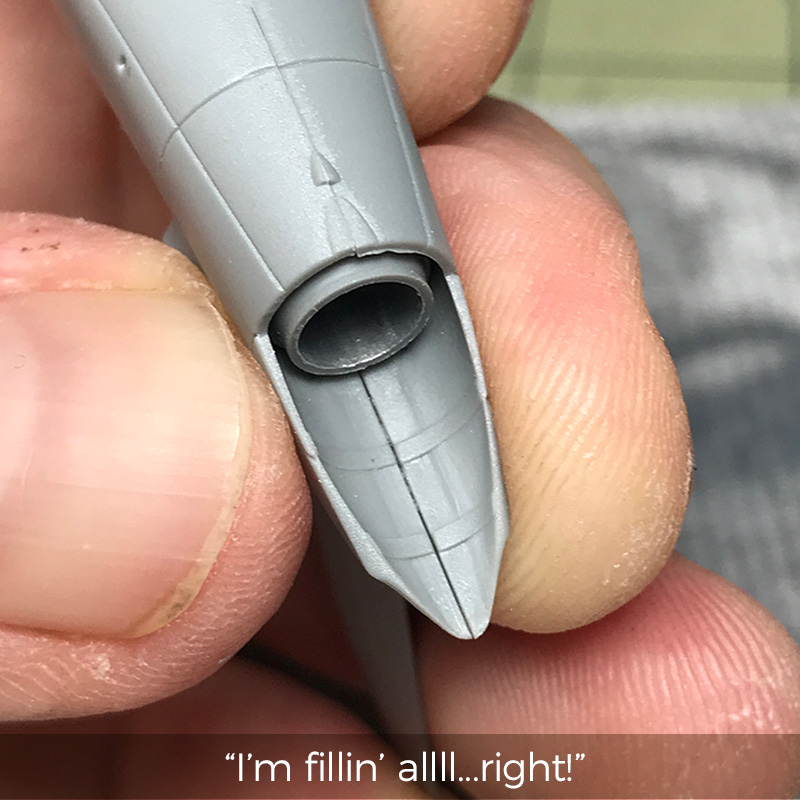
I hope this kit is not a tail-sitter, because once you get the cockpit and the intakes / wheel well crammed into the nose there is no room left for weight. I think I can shove some lead all the way up into the intakes just to be safe. The intakes that sit inside the nose are molded in two halves. Those seams will need to be filled a little, but not much will be visible once the nose is attached to the body.
The other end of the bird is another story though. Here is where the worst part of the kit resides. Filling will be needed where the fuselage halves meet on the heat shielding above the exhaust. And you have to install the exhaust nozzle before you close up the fuselage. So youll have to fill and sand around it, plus the shielding is ribbed. I wish the shielding was a separate part attached to the fuselage to avoid this whole mess. Im thinking I might sand the ribbing down flat, join the halves, fill & sand it, then replace the ribbing with some strips of styrene or tape. (See last photo)
Other than the landing gear and bays, the painting is just a gloss white coat over the fuselage and wings. The longest part of construction has got to be the decals.
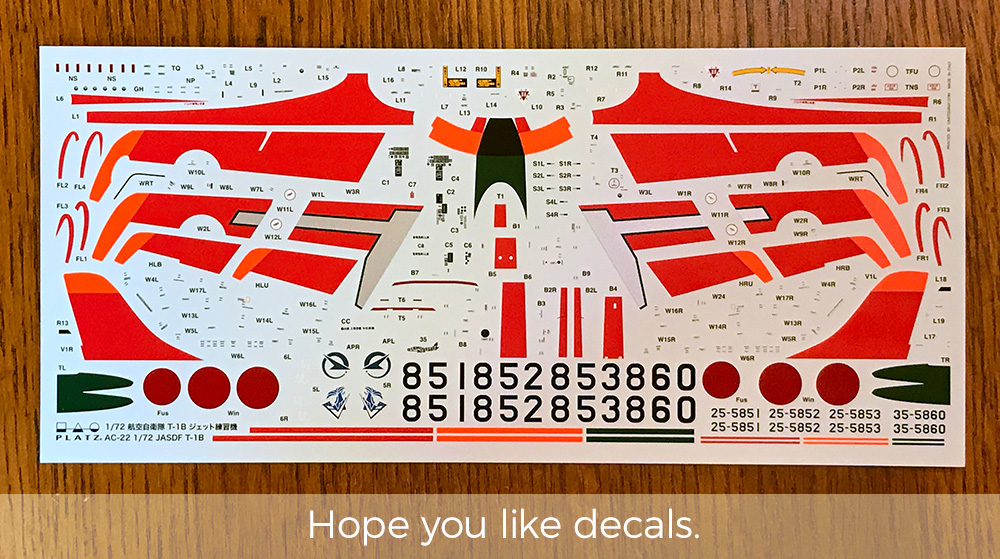
I HOPE YOU LIKE DECALS...
The colorful paint scheme immediately drew me to do a review of this kit. The bright red-orange stripes, the fluorescent orange wing tips, and the red Hinomaru really pop off of the pure white fuselage. I figured that some of the markings would be decals, and some would need to be painted. But no every bright marking you see is a decal, including the whole vertical stabilizer and the silver patches on the upper wings. This takes the stress out of matching paint to the decals, but adds a whole new worry. I tried to count all the decals for you but lost track around 160. That does include stencils.
The good new is that they were printed by fan-favorite Cartograf and should offer little resistance. Initial decaling in the cockpit reveled them to be both thin and strong, just as expected.
If you want to build the only scheme provided you had better be prepared for many nights of decal application, and a smooth paint foundation to apply them over. To make handling less unwieldy, it might be easier to leave the wings off while applying most of the numerous large decals on the fuselage and wings, then attaching them after. This all depends on how tight the fit is at the wing roots after test fitting.
I think Platzs decal numbering scheme is brilliant. Unlike most companies who just number them from 1 to 160-ish, every marking has a prefix based on its position on the plane. For instance, L for the fuselage left side, R for the fuselage right side, W for the wings, etc. This method should be adopted by everyone. It makes trying to decipher where those super-tiny stencils go a little less time consuming.
All the photos Ive seen of this plane show that they were clean, well cared for and bright. I dont think I will do much weathering except for the tires, exhaust and a little under the drop tanks (which are very good looking by the way). Ive already begun to test build it and it has been a lot of fun so far.
SUMMARY
Highs: A fresh take on a unusually colorful jet, crisp molding, clean panel lines and rivets, parts fit together well, a bazillion Cartograph decals.Lows: Sparse interior, no harnesses, no masks provided, troublesome heat shielding, a bazillion Cartograph decalsVerdict: A great kit if you crave an breezy build, easy painting, and colorful decals. And it wont take up much shelf space.
About Wiggus (WIggus) FROM: PENNSYLVANIA, UNITED STATES
Like a thousand others here, I've returned to the sport after a 20 year hiatus, primarily building planes. The first kit I ever built with my dad was MPC's 1/16 Petty Charger with the clear body. I'd love to have that kit again. I am thrilled to see how the hobby has grown, and the generosity of its...


Comments