

1⁄32Sopwith Pup
5
Comments
History
Officially known as Admiralty Type 9901 in the RNAS and Sopwith Scout in the RFC, the aircraft is colloquially referred to as "Pup" - name that stuck after Brigadier W Sefton Brancker's famous remark upon seeing the aircraft for the same time, "Good God! Your 1½ Strutter has had a pup!".The Sopwith Pup was a British single-seater biplane fighter aircraft built by the Sopwith Aviation Company. It entered service with the Royal Flying Corps and the Royal Naval Air Service in the autumn of 1916. With pleasant flying characteristics and good manoeuvrability, the aircraft proved very successful. The Pup was eventually outclassed by newer German fighters, but it was not completely replaced on the Western Front until the end of 1917. Remaining Pups were relegated to Home Defence and training units. The Pup's docile flying characteristics also made it ideal for use in aircraft carrier deck landing and takeoff experiments.
In 1915, Sopwith produced a personal aircraft for the company's test pilot Harry Hawker, a single-seat, tractor biplane powered by a 50 hp Gnome rotary engine. This became known as Hawker's Runabout; another four similar aircraft have been tentatively identified as Sopwith Sparrows. Sopwith next developed a larger fighter that was heavily influenced by this design, though more powerful and controlled laterally with ailerons rather than by wing warping.
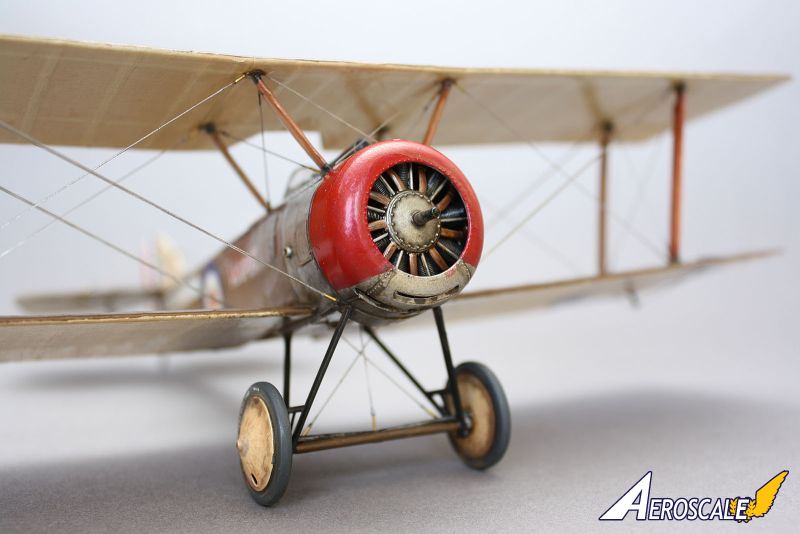
The resulting aircraft was a single-bay, single-seat biplane with a fabric-covered, wooden framework and staggered, equal-span wings. The cross-axle type main landing gear was supported by V-struts attached to the lower fuselage longerons. The prototype and most production Pups were powered by the 80 hp (60 kW) Le Rhône 9C rotary engine. Armament was a single 0.303 inch (7.7 mm) Vickers machine gun synchronized with the Sopwith-Kauper synchronizer.
A prototype was completed in February 1916 and sent to Upavon for testing in late March. The Royal Naval Air Service (RNAS) quickly ordered two more prototypes, then placed a production order. Sopwith was heavily engaged in production of the 1½ Strutter, and produced only a small number of Pups for the RNAS. Deliveries commenced in August 1916.
The Royal Flying Corps (RFC) also placed large orders for Pups. The RFC orders were undertaken by sub-contractors Standard Motor Co. and Whitehead Aircraft. Deliveries did not commence until the beginning of 1917. A total of 1,770 Pups were built by Sopwith (96), Standard Motor Co. (850), Whitehead Aircraft (820), and William Beardmore & Co. (30).
History adapted from the pages of Wikipedia.
The Model
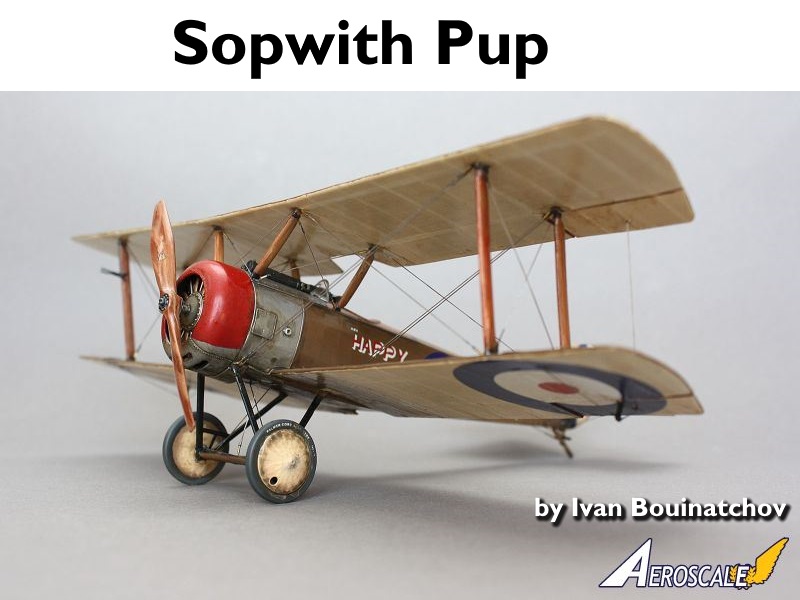
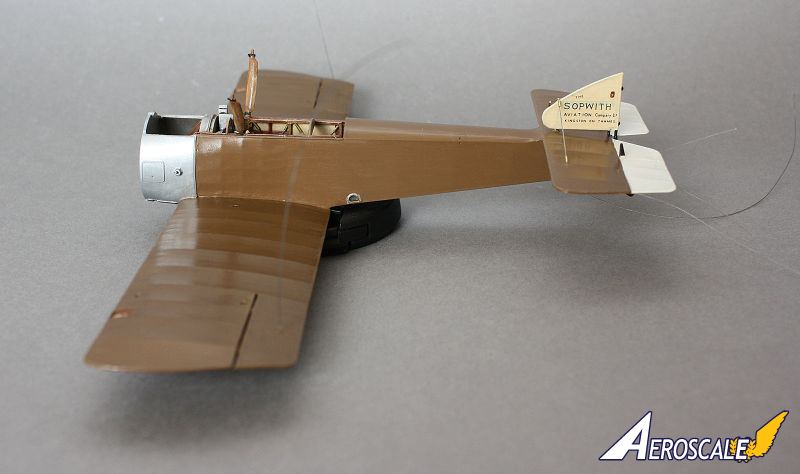
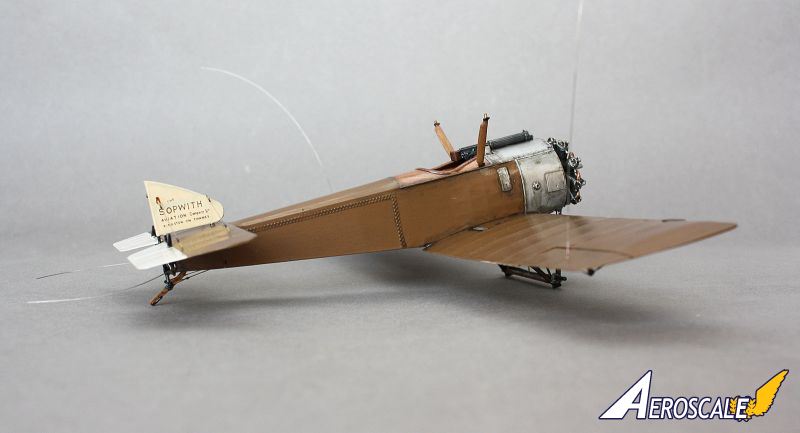
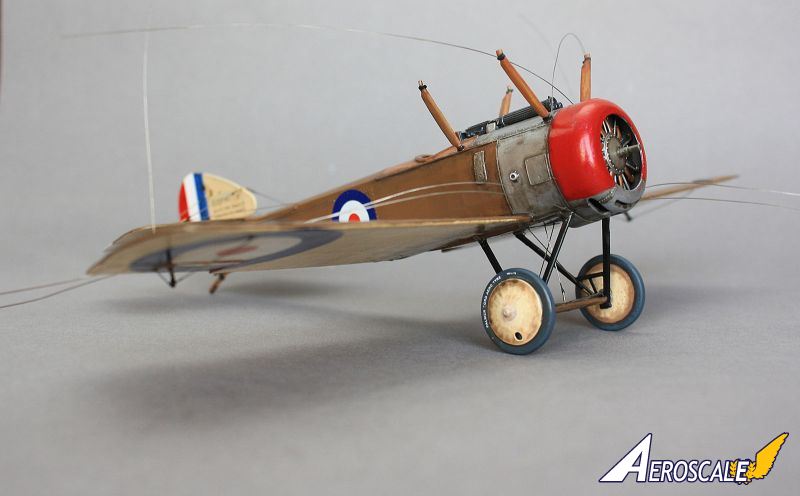
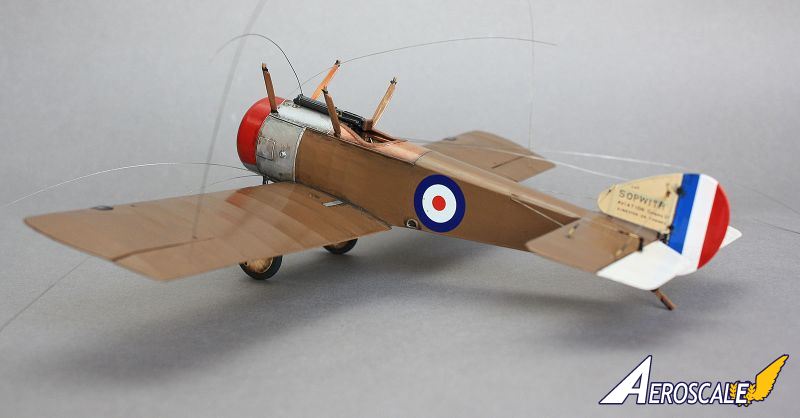
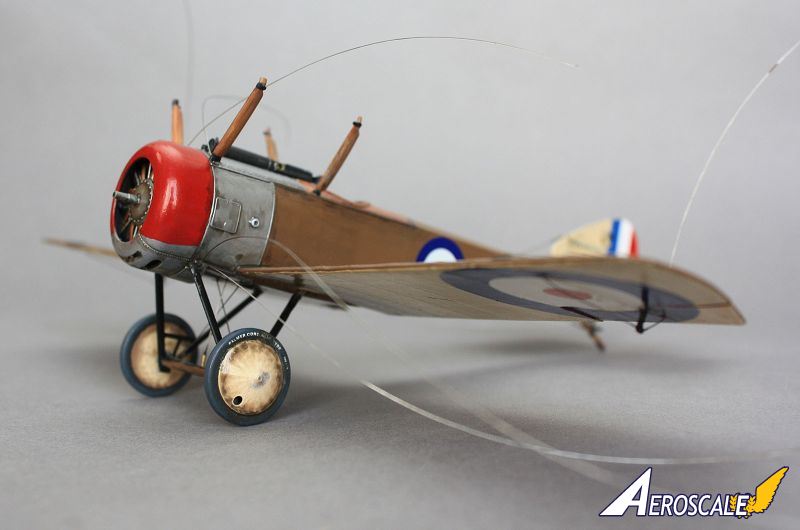
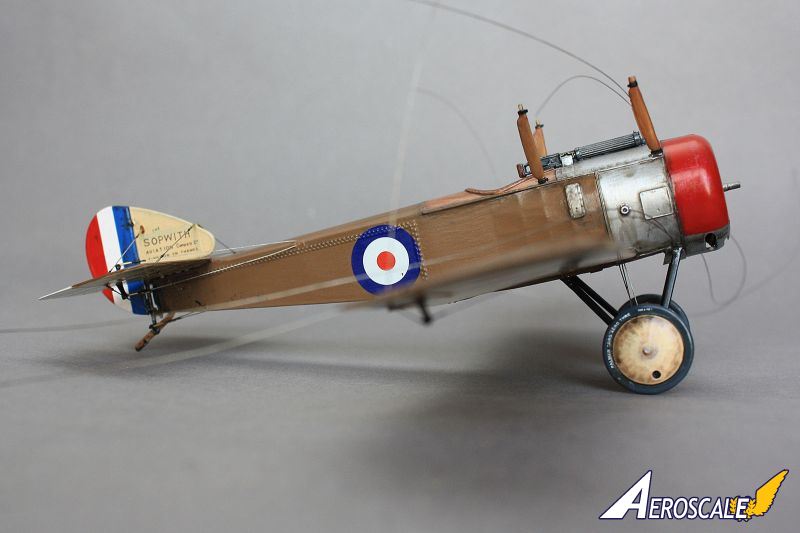
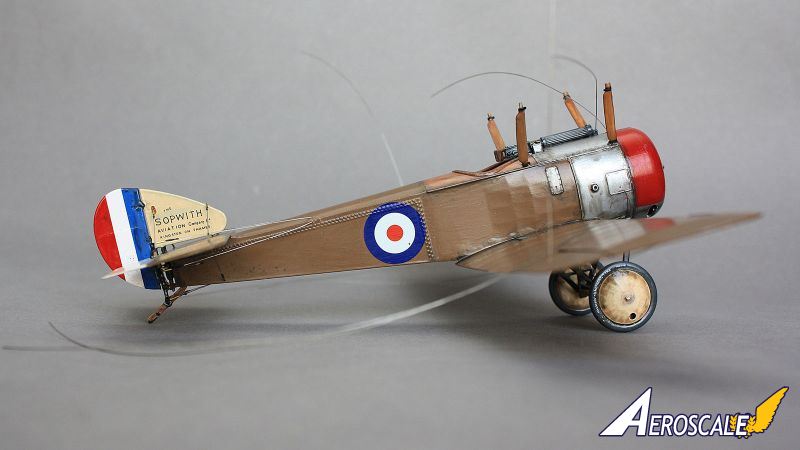
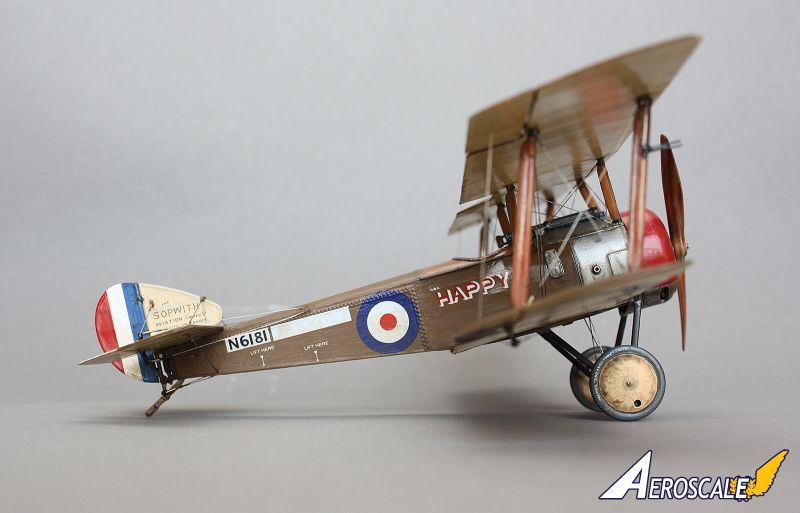
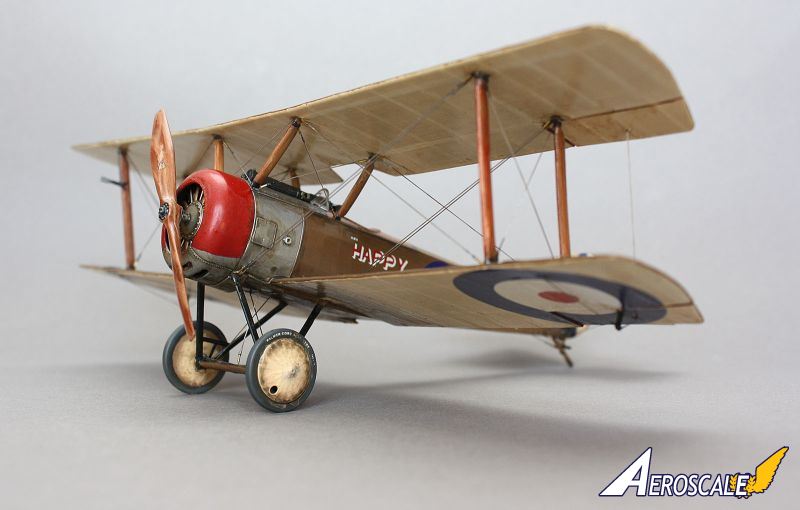
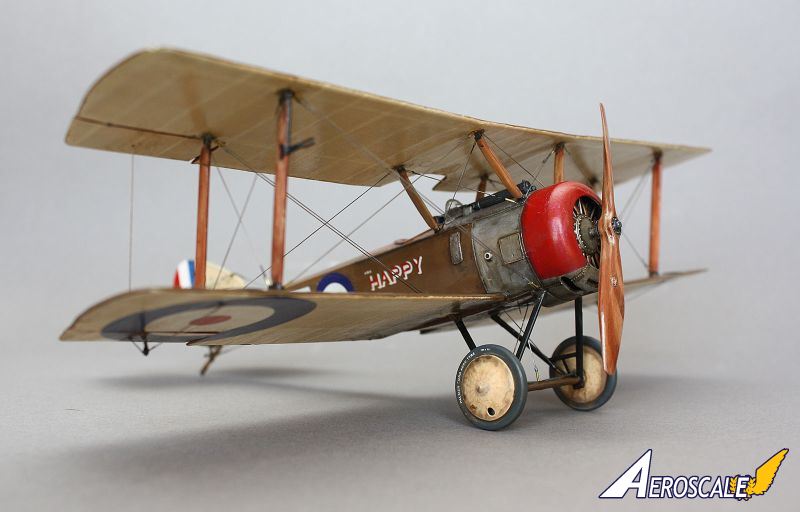
At the time of the build, the Limited Release Wingnut Wings Sopwith Pup RNAS kit (32016) has reached its "Sold Out" status, so combination of Sopwith Pup RFC (32013) kit and Pheon Decals' "RNAS Operational Pups" decal set 32014 were used. Kit components and build procedure between two kits were identical - for the scheme chosen.The aircraft and the resulting model are relatively compact, but neither lack in the detail. RNAS were allowing their pilots to decorate their aircraft a lot more freely than the RFC brass, resulting in relatively more striking paint schemes - I have chosen RNAS scheme with varnished wood, partially bare cowling / cockpit coaming and CDL covered tail plane. My subject is N6181 Happy 3 Naval Sqn, Marieux, France. April 1917. Flt Cdr L.S. Breadner.
On to the Building
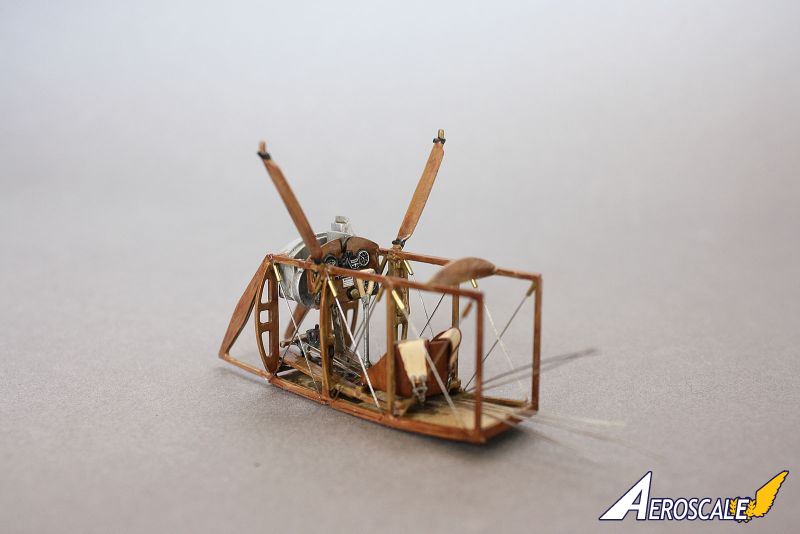
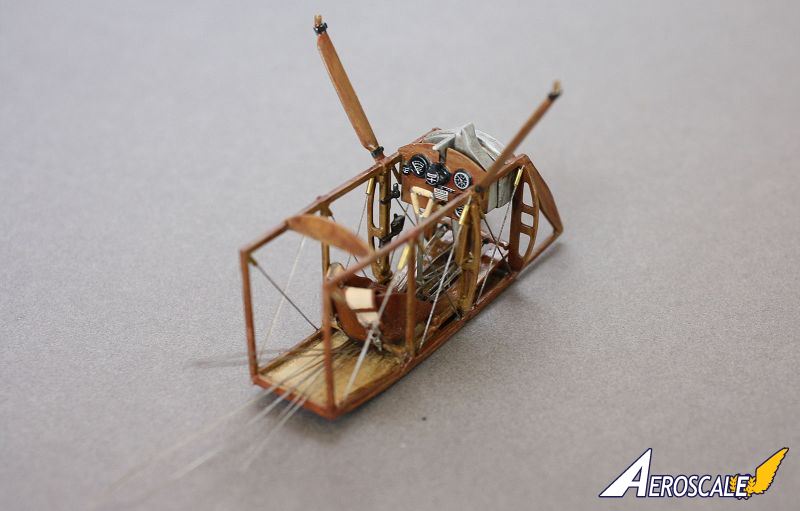
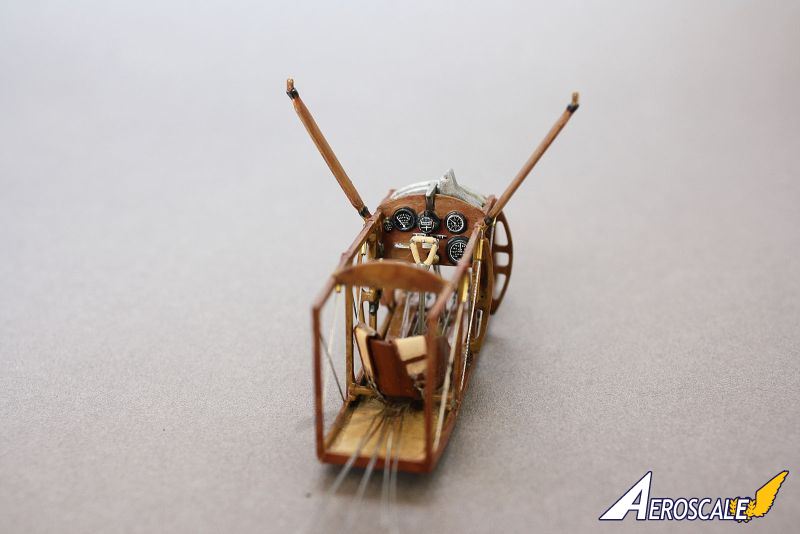
As all Wingnut Wings kits, the builder is invited to start with the pilot's office, which includes some of the internal framing and builds into an impressive display by its lonesome. The kit may be modified to build with portions of fuselage fabric removed, exposing the beautiful internals, though the modeler would need to re-create some of the more spindly framework that WnW chose to mold into fuselage halves.The aircraft frame was internally braced, the manual providing reference for both internal bracing and control wires as they attach to various controls and run the length of visible cockpit - the control wires are numerous and will provide challenge both in dissecting which line is which, as well as arranging the lines on the model.
It's worth noting that opening in the cockpit is rather large and a lot internals are visible through it - especially some of the empty floor and walls that extend behind the pilot's seat. I would suggest not to leave any of the internal areas fuselage halves unpainted.
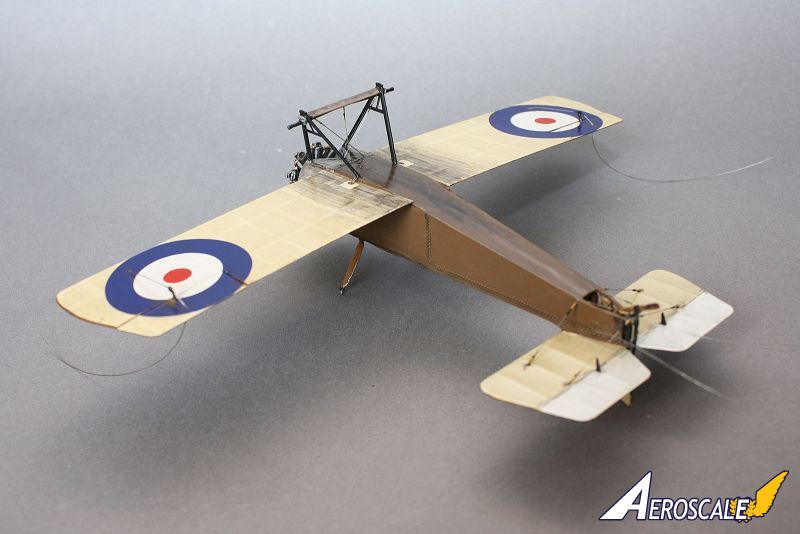
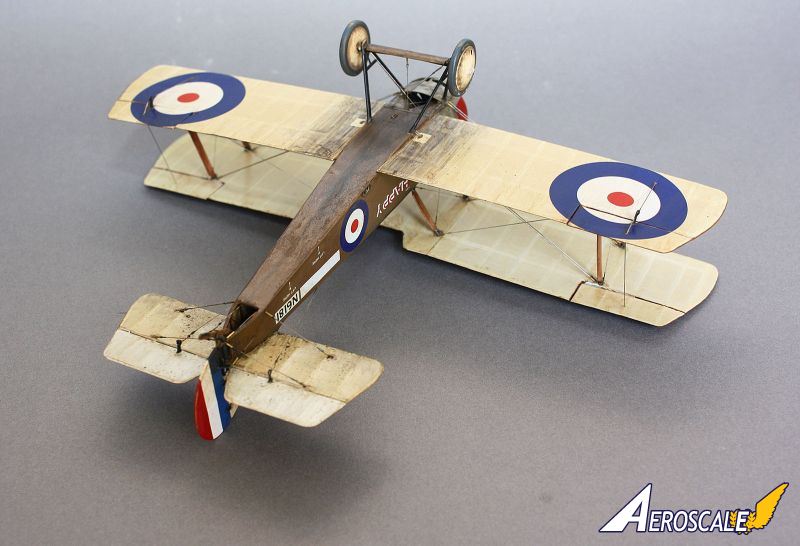
Finished cockpit is installed between fuselage halves and married with lower wing and tail assembly. Infamous early WnW precise fit pinched the cockpit a bit, bowing internal bracing - causing a small detour in filing fitting pieces and repainting. Tail fin is adjustable and bracing should give early taste of rigging job ahead, I've abandoned hopes of finishing tail in one go and spread the work well into "almost completed" stages.
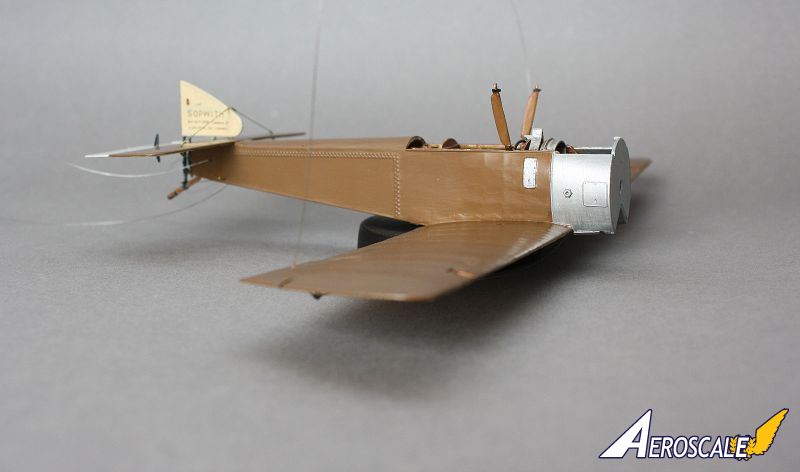
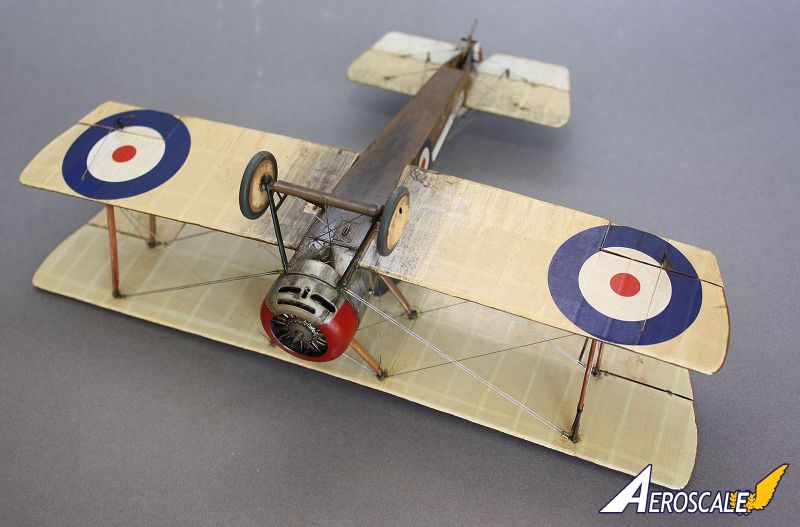
LeRhone 9c engine is a kit in itself - a good balance of ease of assembly and desired level of detail. It's largely concealed by the cowling pieces, so the work of firing the leads to the sparkplugs went largely wasted. If building the engine to rotate, do take some of the material from the inside of the cowling - straight up fit is tight and will prevent engine from spinning freely.
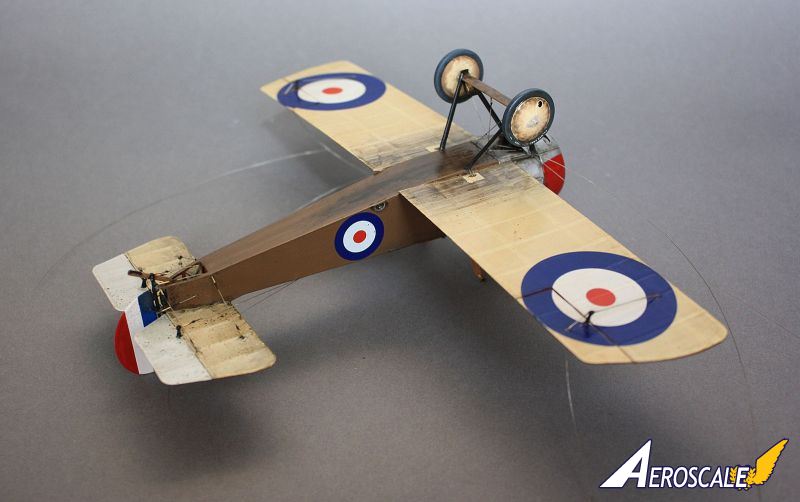
Landing gear is reported weak on the particular build, though I cannot report the same issue with my choice of steel jeweler's wire for rigging.
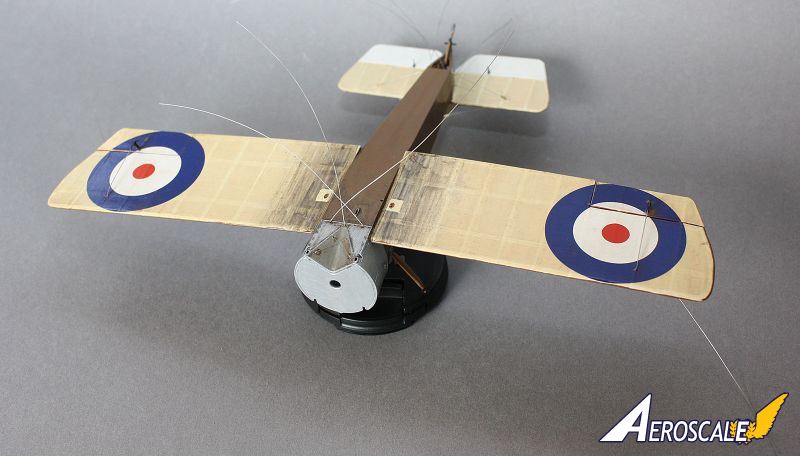
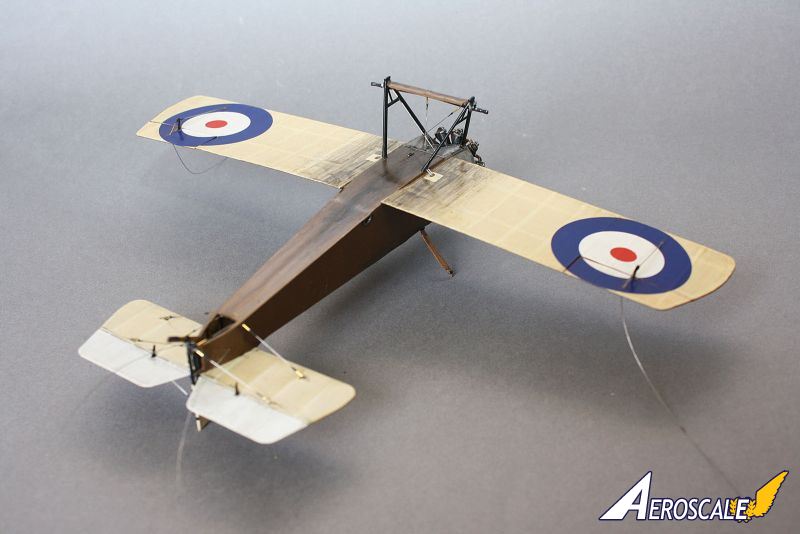
The Clear Doped Linen is simulated with Aviatic CDL transparent "Linen Effect" decals. The desired surfaces are painted cream color with lighter contours of the framing on the down facing planes and darker for tail plane - decal sheet is cut to shape and applied for semi-translucent linen look.
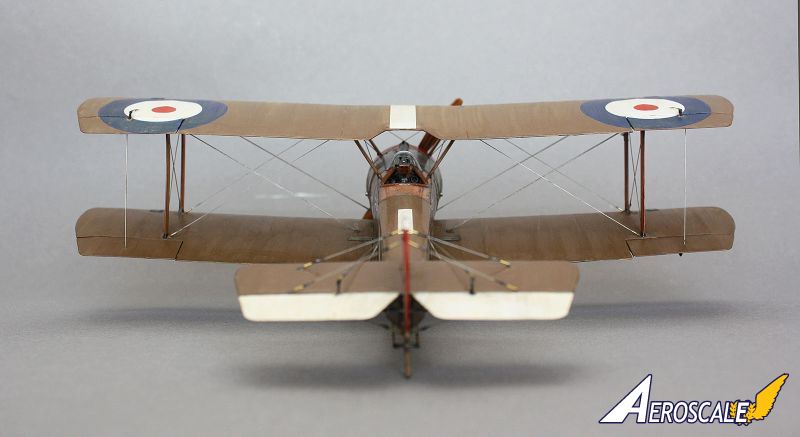
The rest of the build continued as preparation for rigging - I've tapped and installed 0.01" (0.25mm) jeweler's wire in the fuselage and the lower wings, tapping all the way through the upper wing for "through wing" method. I find the latter desirable, as it greatly enhances rigidity of Early Aviation airframes - even at cost of extra clean up.
The historical aircraft was braced with aerodynamic "wires" (more like rods) that were "rhombus" or flattened in shape - quite different from braided wire and turnbuckles of Central Powers aircraft (which are still applicable to Pup's control wires). Cut to (small) size brass tube simulate the connection points for said bracing. While I've agonized a bit over "flat" vs "round" rigging, I've decided to go with my usual material (round wire) as scale is still too small to tell. The real trick is keeping double wires parallel and equally tight. Start rigging on the outlying / long wires, cross alternate between the lines to avoid twisting the wings - work inward towards fuselage to avoid slack lines.
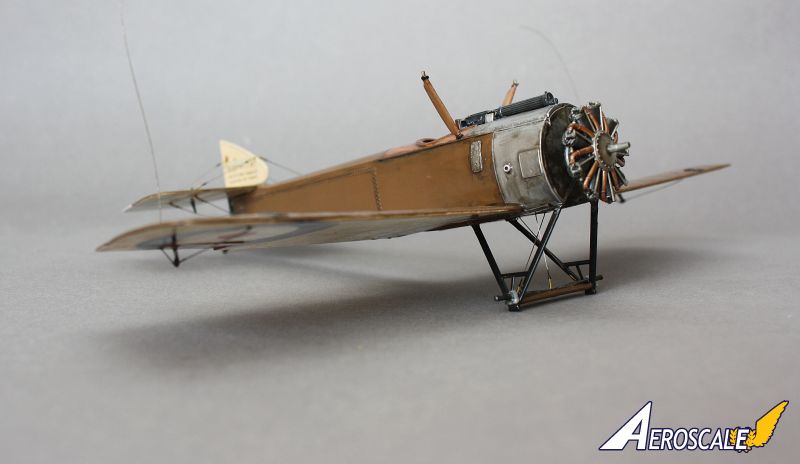
Weathering was done throughout the build, with touch up and 2 long weathering sessions once everything else was completed. The aircraft and the engine are known for heavy Castor staining, so one has no reason to hold back - I've mixed my own shades with combination of Future, burnt umber, black and a dash of burnt sienna.

About the Author

Comments

Hi Ivan
That's a beautiful build of one of my favourite aircraft. Many thanks for submitting - and keep 'em coming!
All the best
Rowan
NOV 05, 2016 - 01:11 AM
Ivan, While I don't build WW1 (mostly through lack of the needed skills), I still appreciate the beautiful builds that is see in Aeroscale. And your Pup certainly is a magnificent build. Your review is certainly well detailed in what one will face during the course of their build.
NOV 05, 2016 - 03:26 AM

A bit of a follow-up to Ivan's feature. Pups will fly again over Vimy Ridge.
NOV 13, 2016 - 10:18 PM


Copyright ©2021 by Ivan Bouinatchov. Images also by copyright holder unless otherwise noted. The views and opinions expressed herein are solely the views and opinions of the authors and/or contributors to this Web site and do not necessarily represent the views and/or opinions of AeroScale, KitMaker Network, or Silver Star Enterrpises. Images also by copyright holder unless otherwise noted. Opinions expressed are those of the author(s) and not necessarily those of AeroScale. All rights reserved. Originally published on: 2016-11-05 10:46:36. Unique Reads: 6954

WEB HOSTING BY


Copyright ©2021 AeroScale and Kitmaker Network, a subsidiary of Silver Star Enterprises
All Rights Reserved. Please read our Conditions of Use and Privacy Policy.
All Rights Reserved. Please read our Conditions of Use and Privacy Policy.