

1⁄32Siemens-Schuckert D.III
2
Comments

The subject aircraft
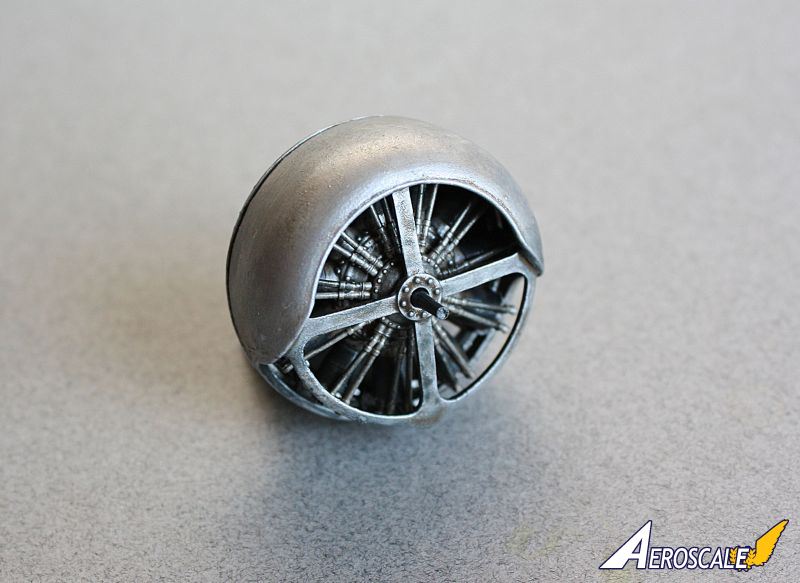
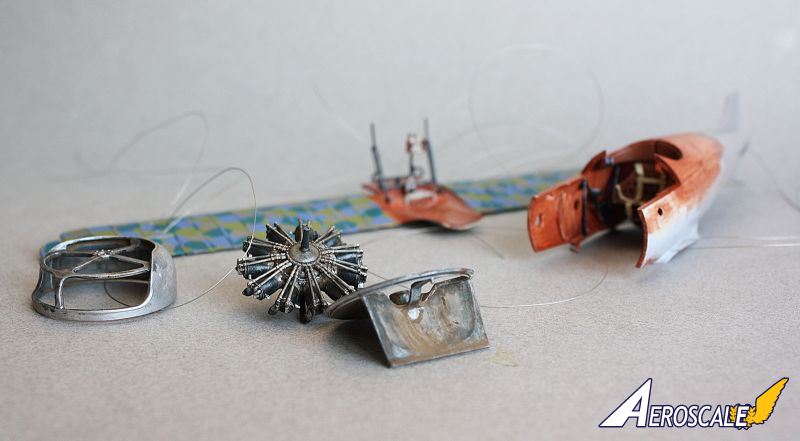
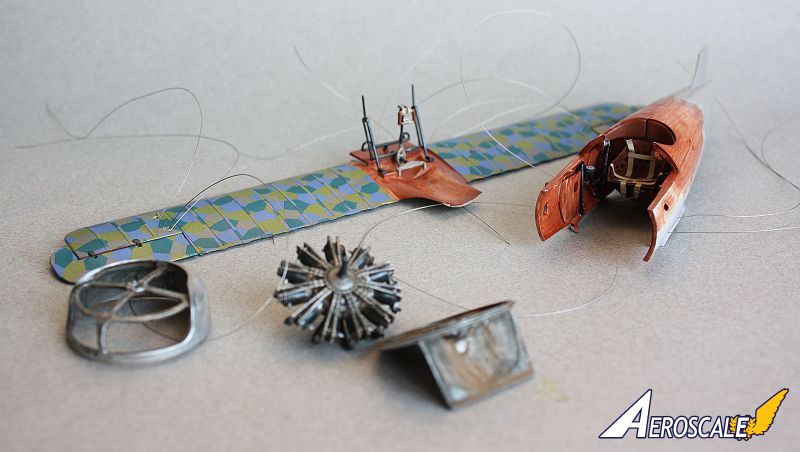
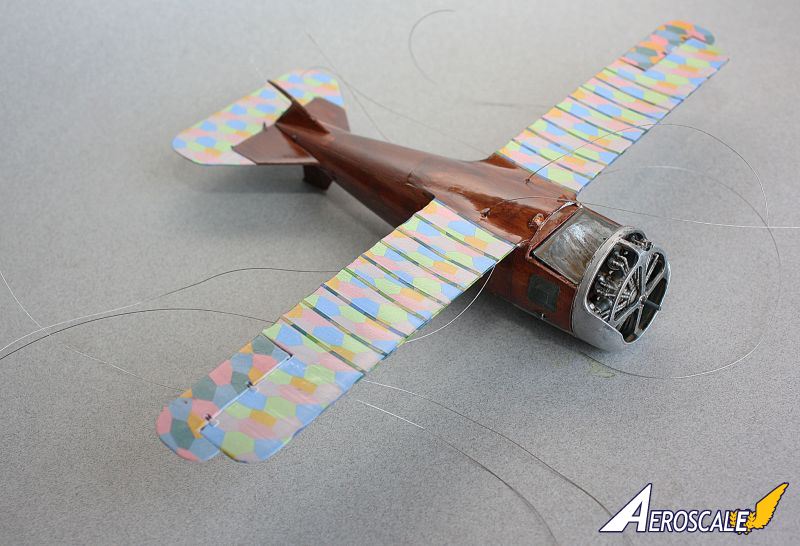
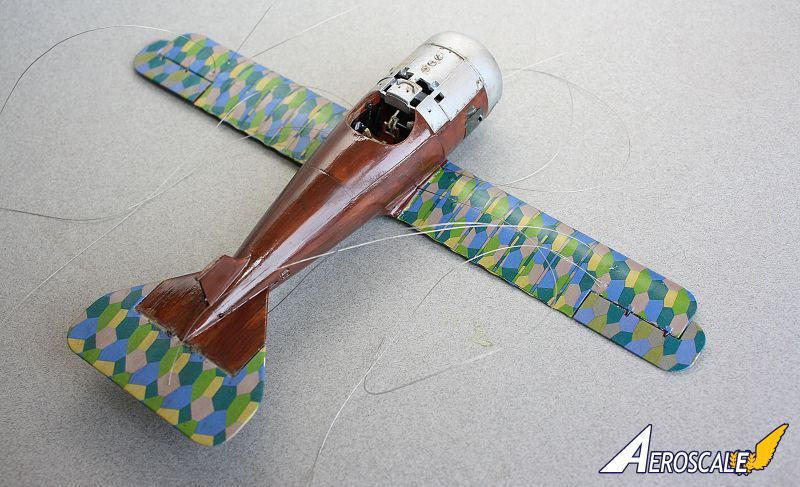
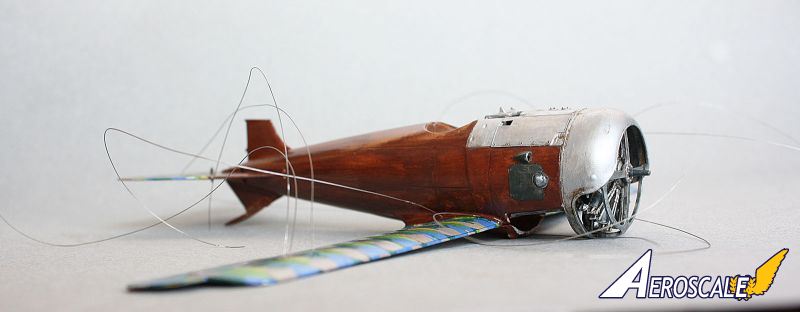
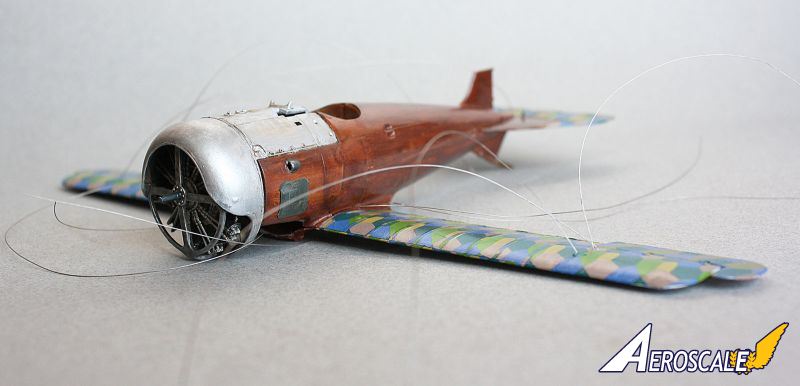
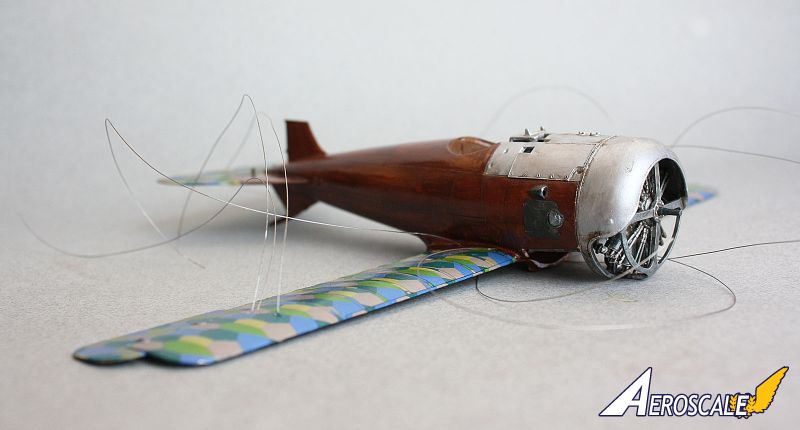
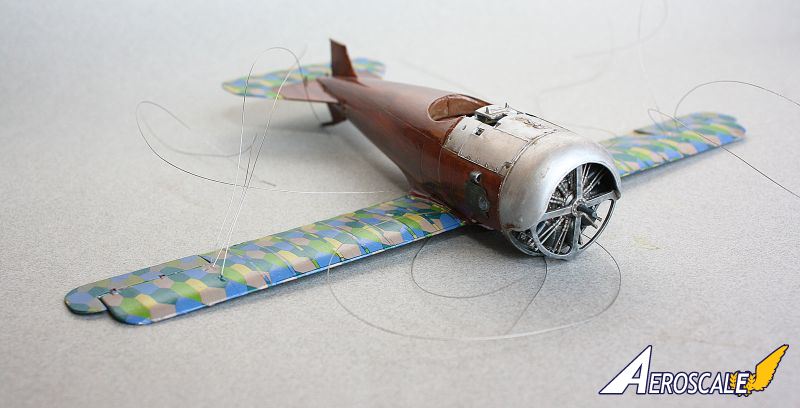
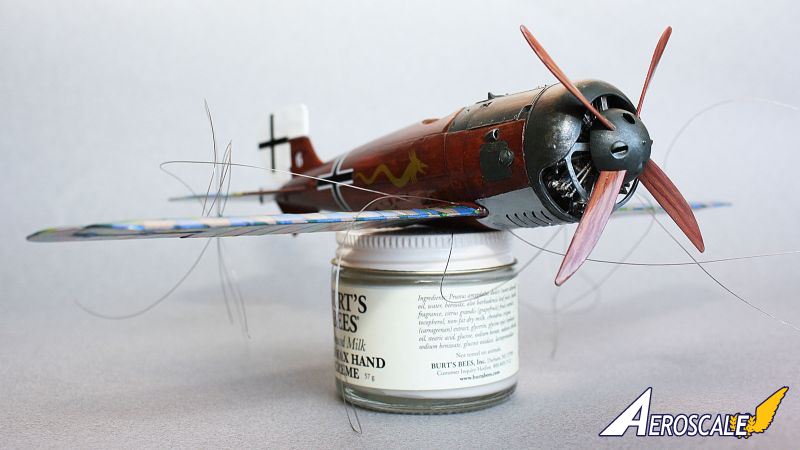
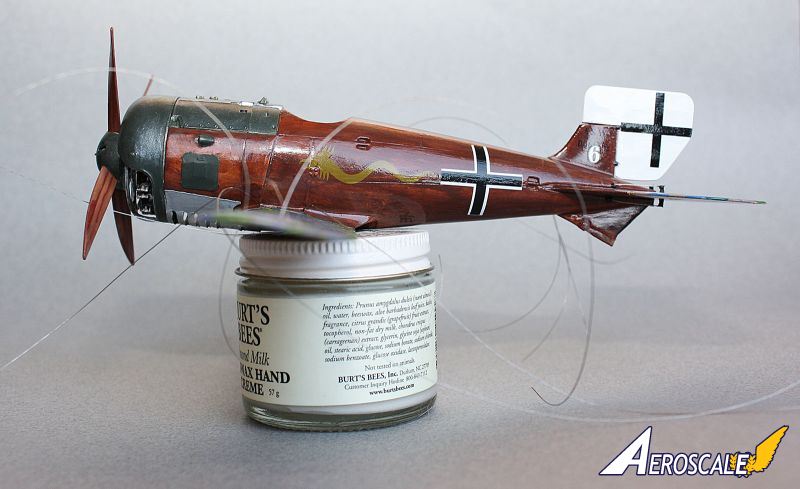
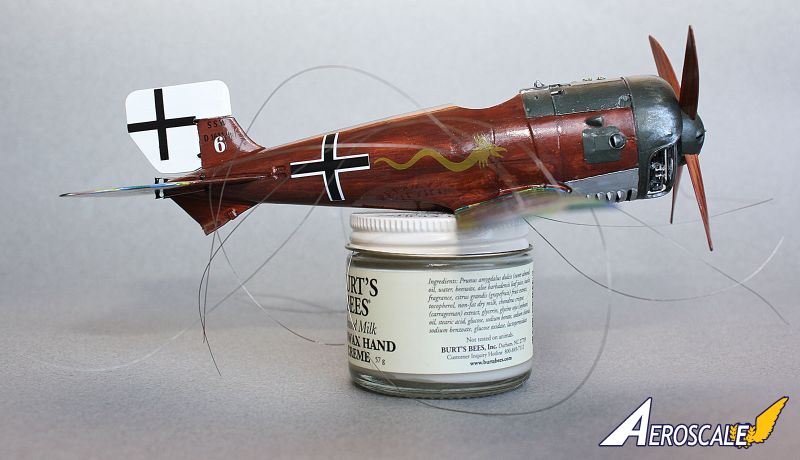
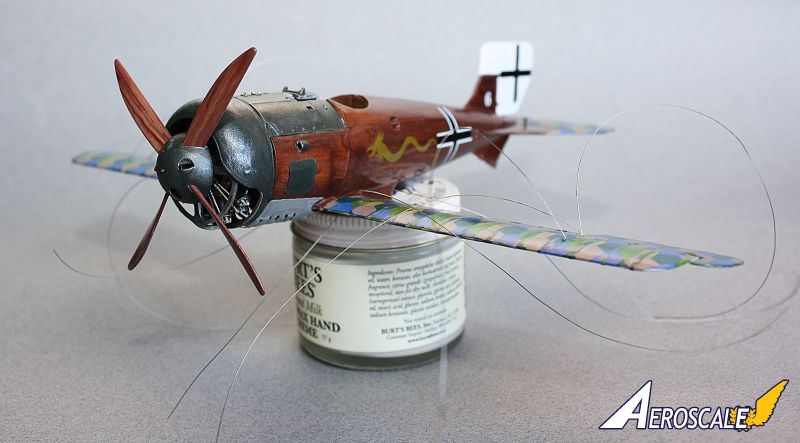
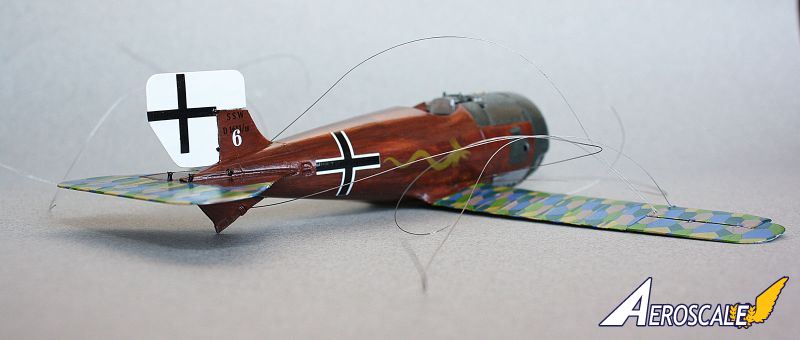
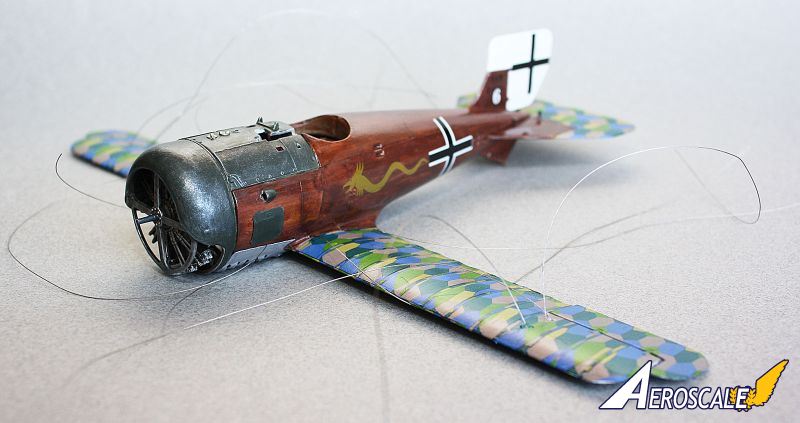
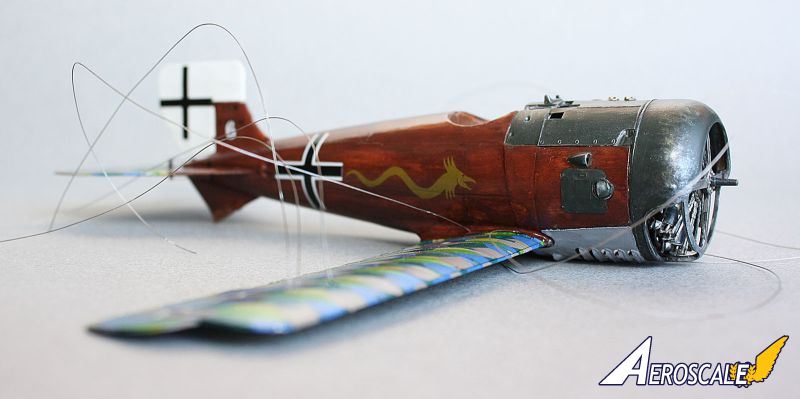
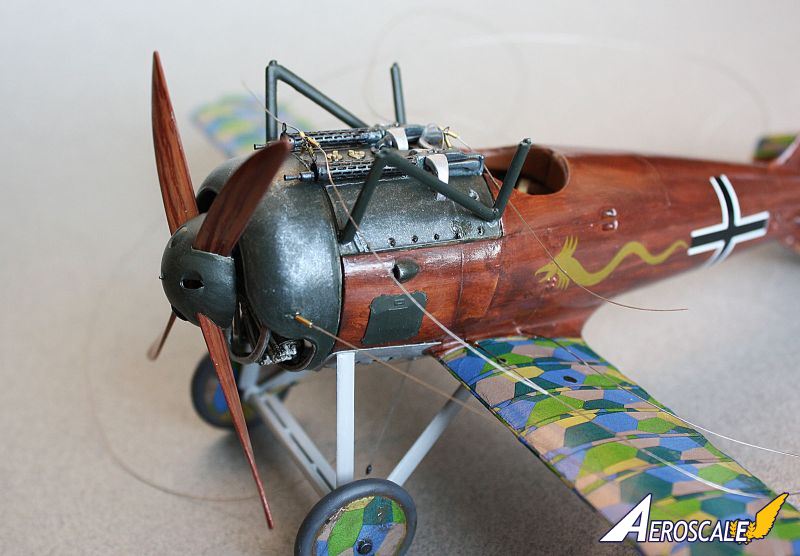
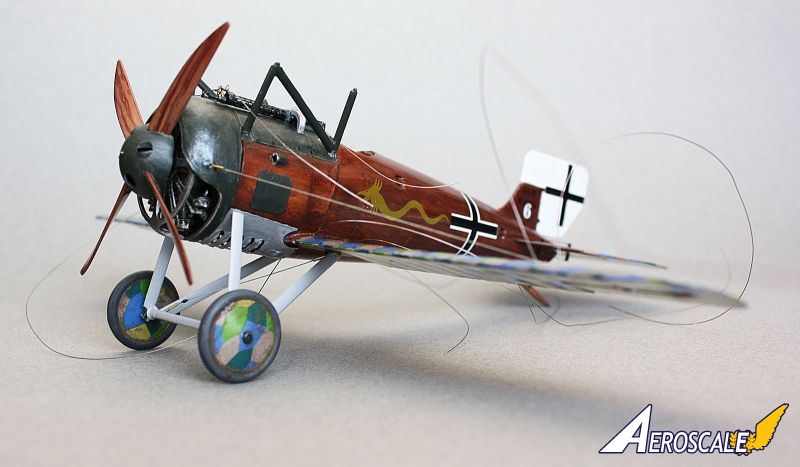
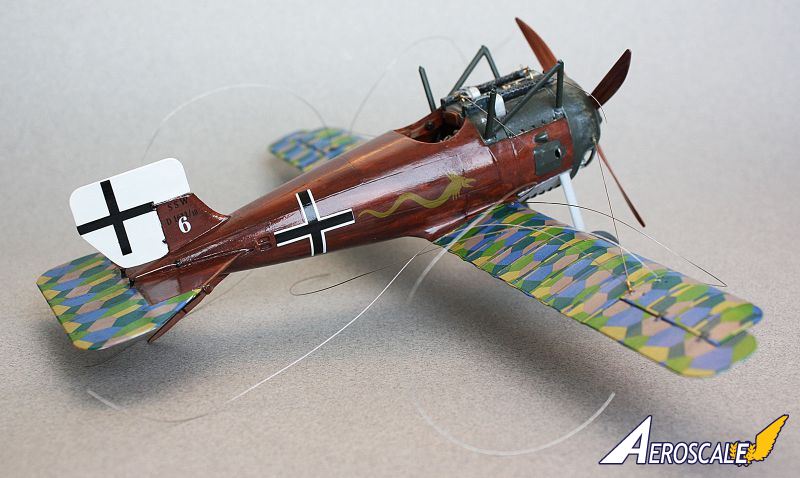
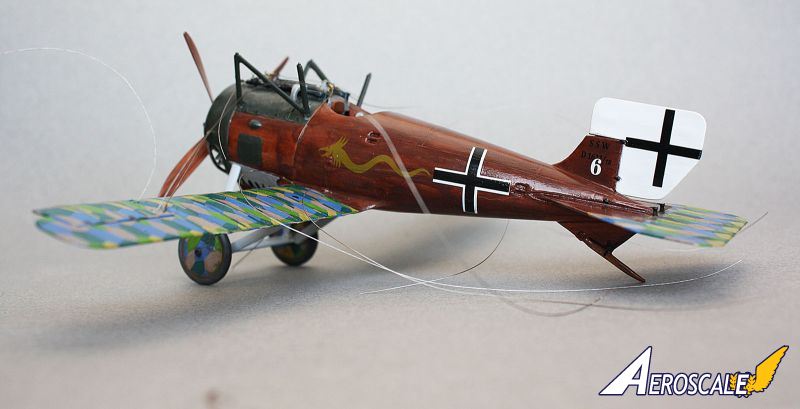
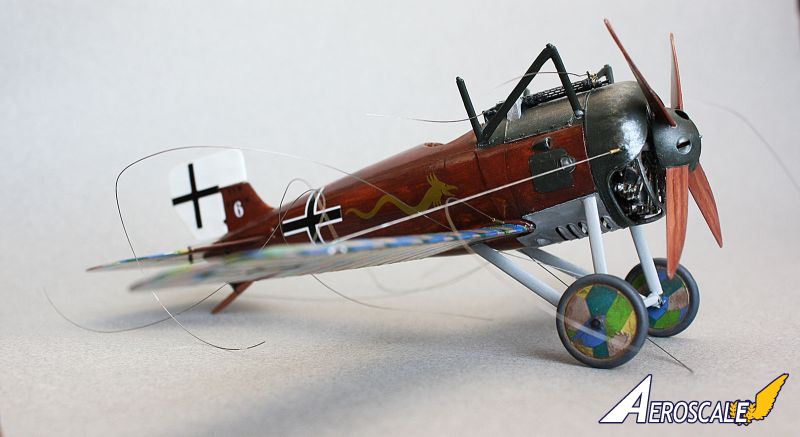
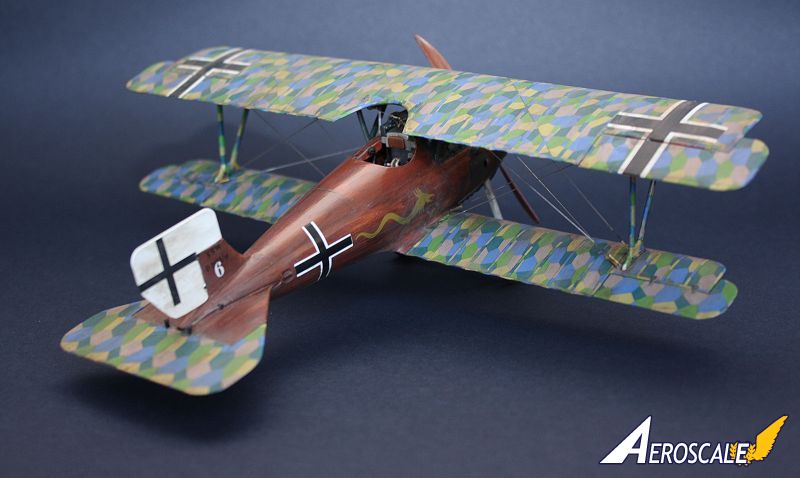
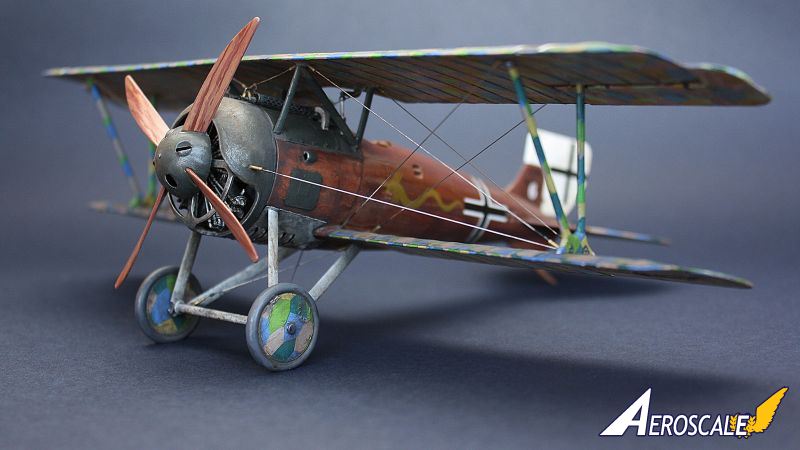
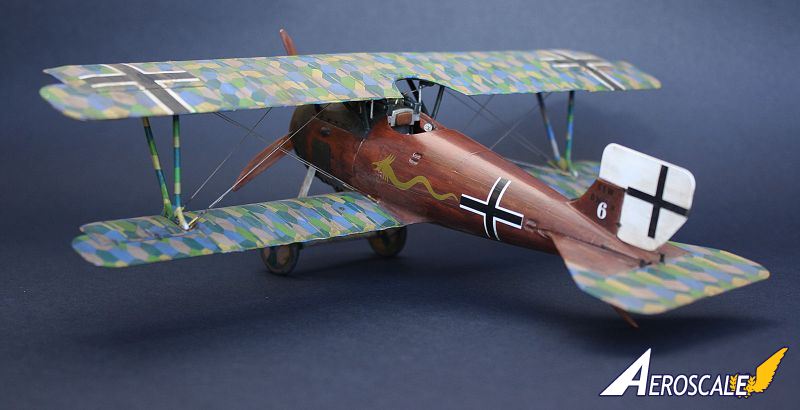
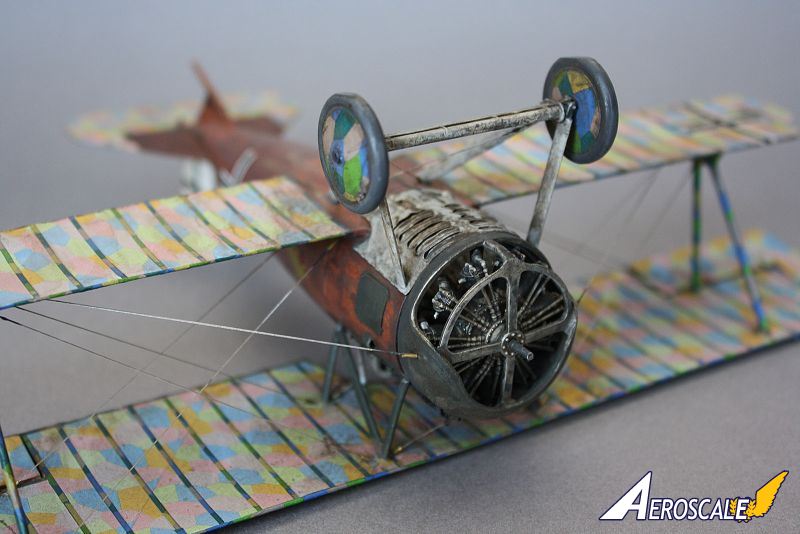
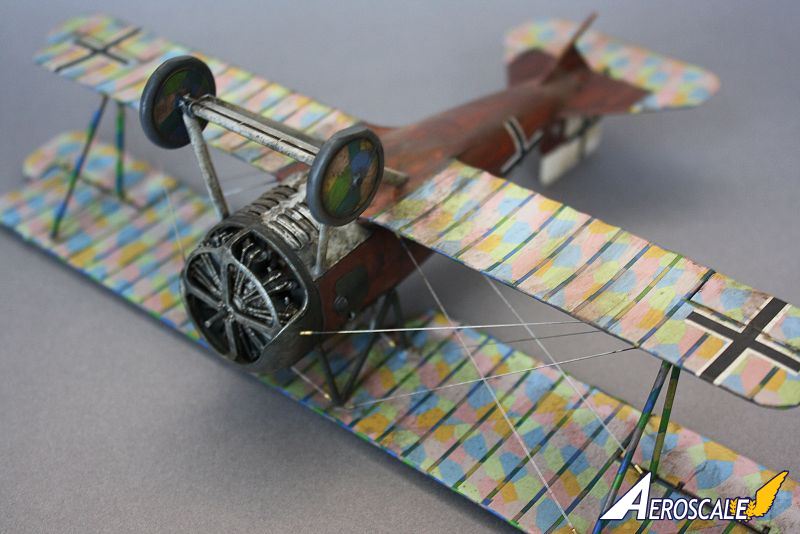
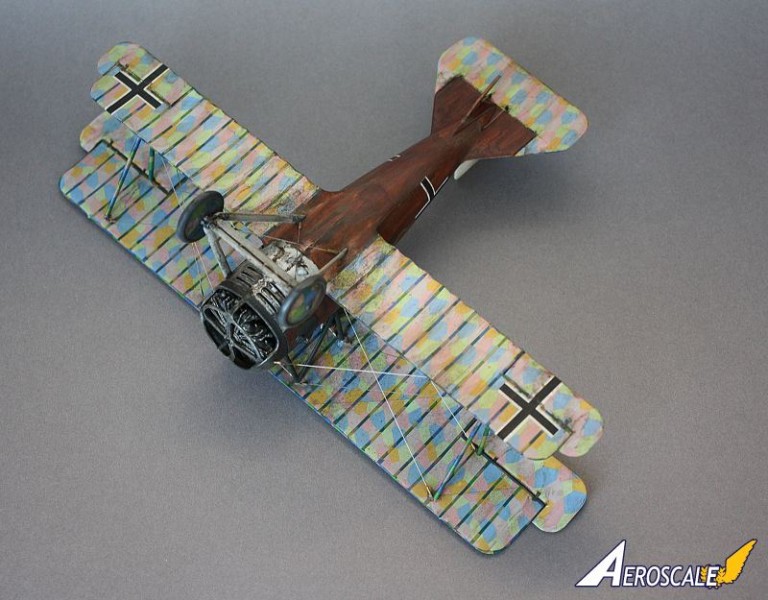
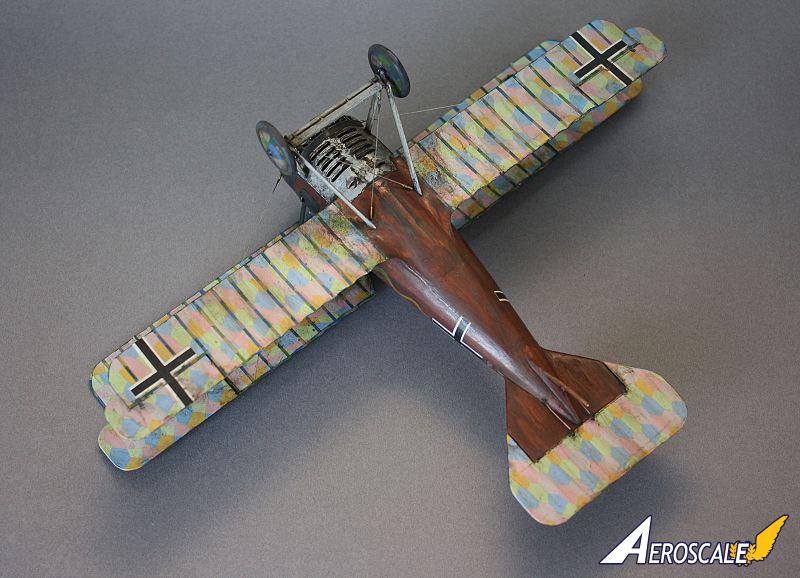
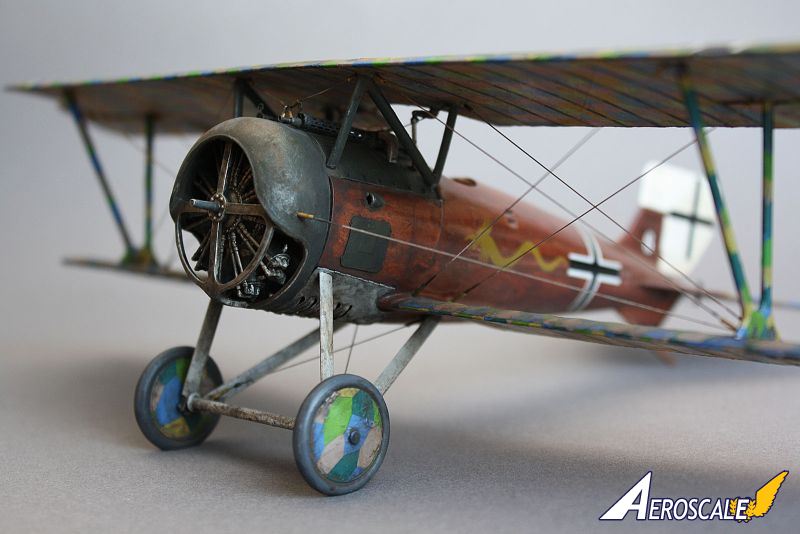
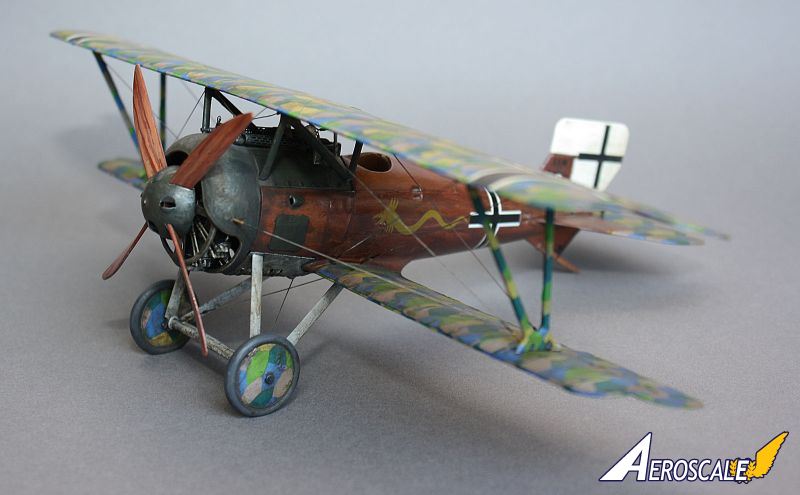
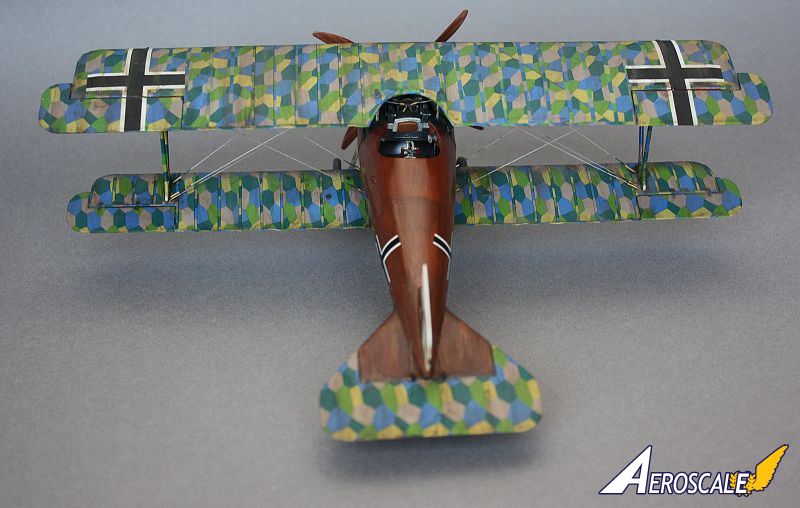
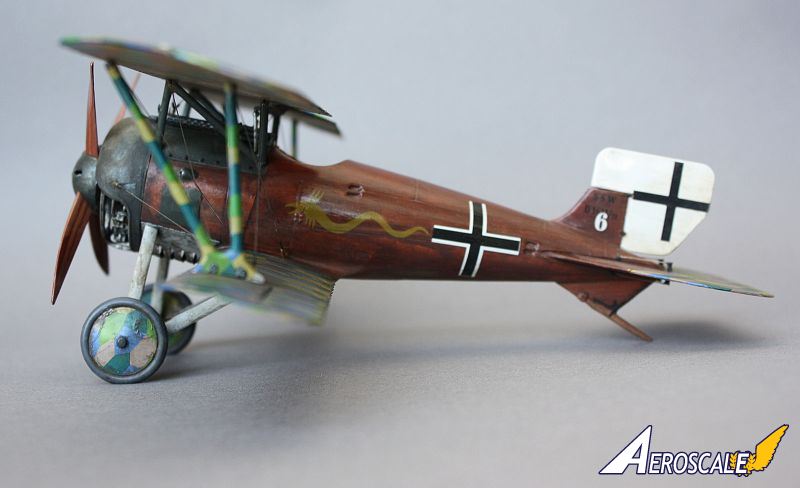
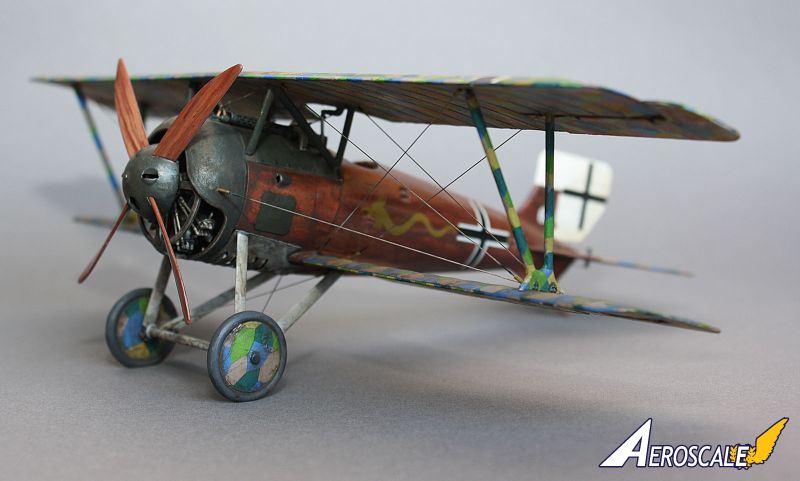
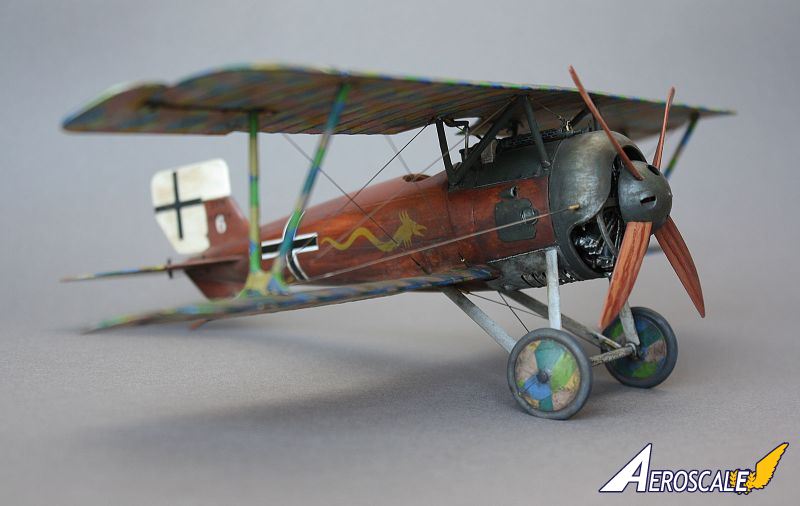
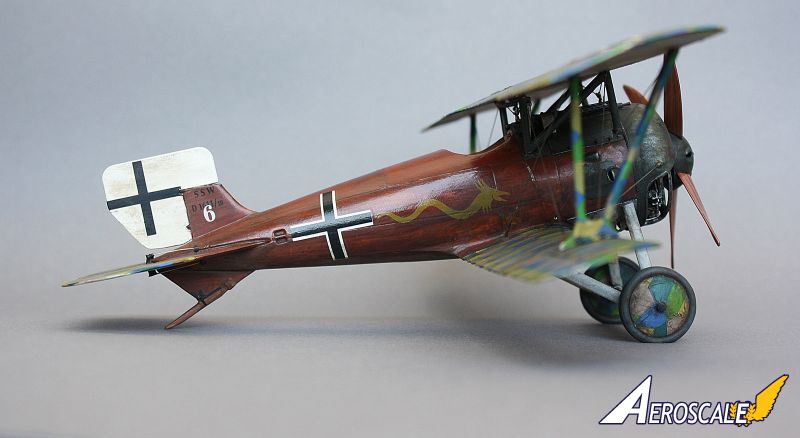
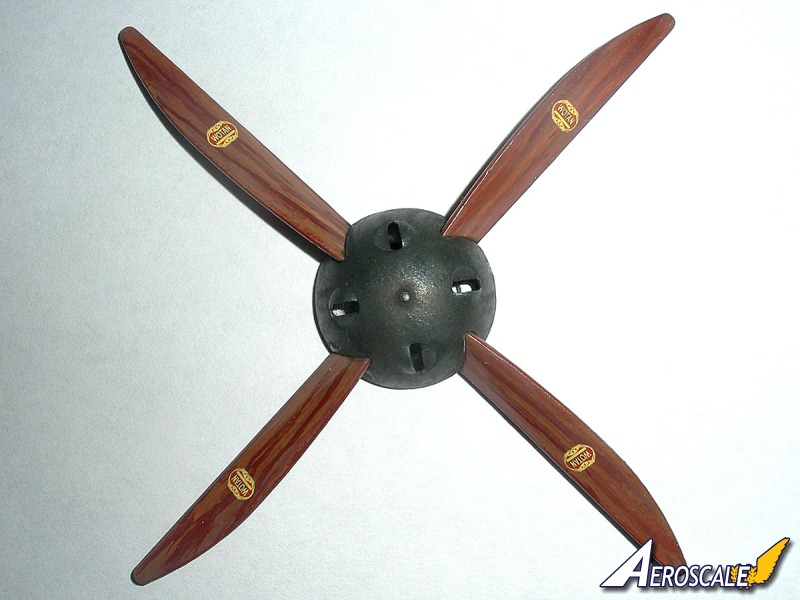
Siemens-Schuckert D.III, commonly referred to as SSD.III (for every use but the web search), was a late model World War I fighter built around 160hp Siemens-Halske Sh.III bi-rotary (or counter-rotary) engine; the unique design of the latter meant that the propeller spun in the opposite rotation of the engine crankshaft, countering the torque commonly associated with rotary engines. The rpm's were also lower on the propeller than the engine, allowing for larger and more efficient four bladed propeller to be used. Though popular with the pilots for handling characteristics and astonishing rate of climb, the aircraft had to be withdrawn from service after a few months when it was discovered that Voltol mineral substitute oil was inadequate to keep the Sh.III engine from tearing itself up in a matter of a few hours. While a very similar fate stricken and shortened the service life of the iconic Ur.II equipped DR.I triplane, SSD.III's would make a comeback in the summer of 1918 with redesigned cowling, enlarged rudder and Sh.IIIa engine that stood up to the operational rigours in the role of an interceptor of the homeland defence squadrons. Characteristics of the aircraft were impressive enough for Allies to order destruction (or seizure) of all these aircraft post the Armistice.The aircraft is very compact, with short wingspan and rounded "beer barrel" fuselage - all in following the rotary engine design. The late model cowling leaves good portion of the engine exposed to view (and cooling air) and fortunately Roden has put effort in accuracy and detail in this area. Twin "Spandau" LMG 08/15 guns in classic German configuration were set to fire through large 4 bladed Wotan propeller, the latter requiring extra tall landing gear supports. Looks wise, the modeller presented with even span sesquiplane wings were covered in 5-colour "lozenge" camouflage pattern fabric against dark shellacked (or overpainted) wood fuselage and black / very dark green steel and aluminium parts - there is enough going on to keep boredom from setting in and final results that are kind of hard to make look lacklustre.
The Kit
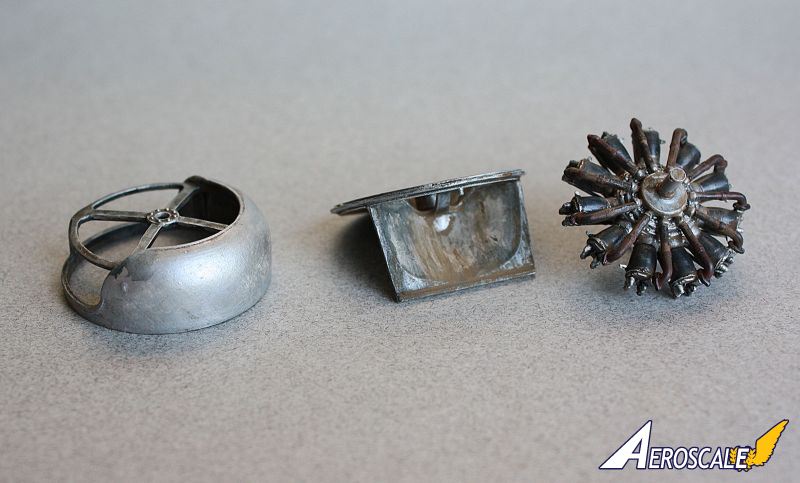
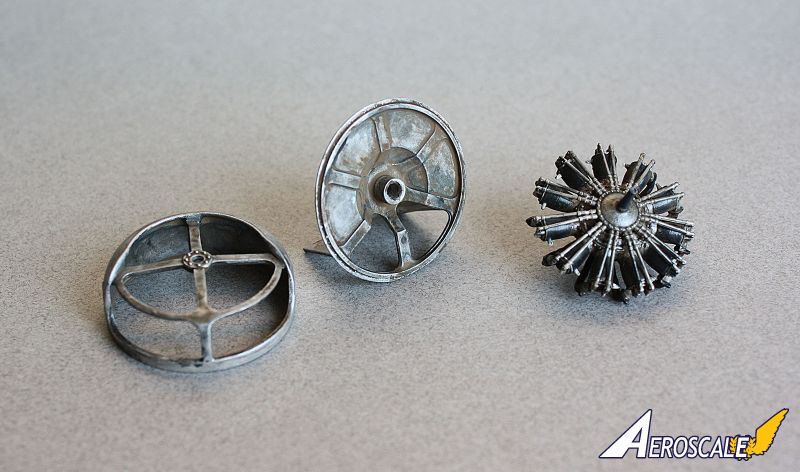
The subject is not really spoiled with the choices for this aircraft in scale kits, the chosen 1/32 scale being represented by Roden's relatively recent release on the subject - the late model represents the aircraft that were re-designed and returned to duty in the summer of 1918. The detail and cast of the model kit is workable, though would be considered as rudimentary for the time - I turned to calling it the "throwback kit" the moment I opened the box. The "throwback" does not imply sudden urge to throw model box back into the stash or try to pass it onto some other unsuspecting soul in an online auction, but rather like a term of experiencing nostalgic feeling that one hasn't felt in ten plus years of advances made in model kit design and production - the long gone necessity to shave copious amounts of flash off the parts, fitting, shaping and filling most of the parts that have but an approximate fit in the best of cases. Some details are little soft or omitted, so there was no question that aftermarket updates would be involved. There is, however, a special place of disdain for the kit's lozenge decals - while appearing convenient in its ready-made one-stop templates, the colours are awful and they are prone to cracking or even breaking apart when submersed in water... There are no decals for instrument gauges - it's a good thing that my collection in spares box offered up all the necessary dials. I may also been spoiled, as of late, having built nothing but "stupendous" WingNut Wings kits; your experience may vary.Most of the kit is solid - provided elbow grease and planning, so I won't go into detail of all of the pluses (of which there are too many to list) and only the occasional shortcomings - don't let that discourage you from tackling a build of your own. If I haven't complained about it, then it most likely came together without a pause.
The Aftermarket Parts
Shortly after envisioning the project, I come across the product from BrenGun.cz that offers the update for the very kit, on this very (Kitmaker Network) website - I liked what I saw and it took no time to arrive. In addition, I purchased Master Models Spandau Gun updates (Photo-etch cooling jackets and turned brass barrels with separate muzzles) and Eduard German WWI aircraft seatbelt set. There is a variety of high grade lozenge decals on the marked, though I have opted to substitute with WingNut Wings lozenge from 1/32 Roland VI.b that's a lot further off in the build queue.Short rant on cost... With the purchase of the kit, aftermarket parts, individual piece shipping but not counting plundering other kits / spares box - the cost ballooned well over 100 USD mark, making a high premium kit price just to make up for shortcomings of the base kit...
The Build
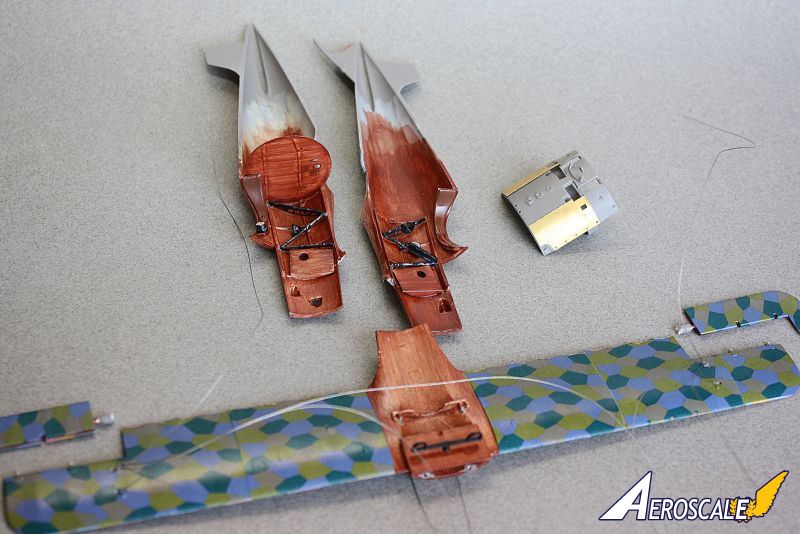
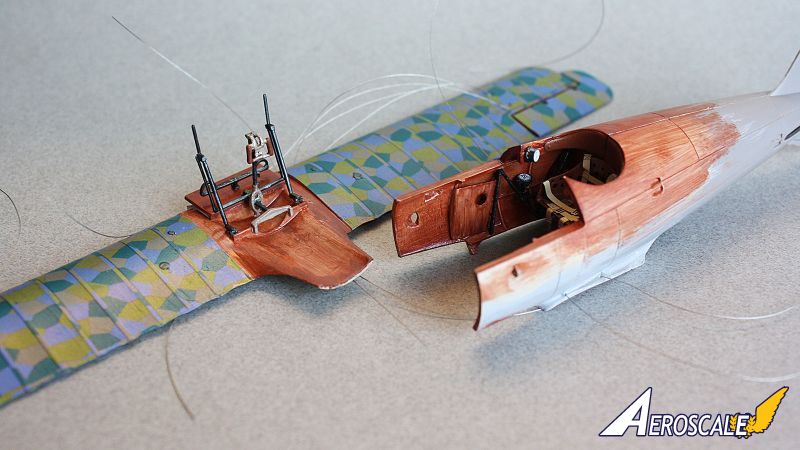
Cross-check aftermarket instructions with instructions of the kit and determine what styrene bits are being omitted / modified. When in doubt, pour over Windsock datafile and internet for reference. If not in doubt, do it anyways. I built in order from Roden's instructions and things went pretty straightforward, though the first step was to clean up / fit fuselage halves and lower wing - this is not easy, as there is a felt lack of guides or connectors of any sort. Once big pieces lined up reasonably well, I moved on with page one of the instructions - or I got tired of sanding and said the never right "We'll fix it in post"...Early aviation subjects offer wide views into cramped cockpits where every other component was made of a different material - varnished wood, bare or painted metals (steel or aluminium), leather, brass etc. Because of this, I find that the interior and engine bay assembly is often the slowest and most detail oriented portion of the build. I plan which parts will be painted to represent similar material / colour, prep said parts for individual painting and detailing, then assemble in order. Especial attention is paid to painting in wood grain and attaining good amount of gloss representative of varnish (I opted to contrast varnished wood interior to darker shellacked wood exterior) - there will be no second chances once the fuselage is closed around the interior. SSD.III particular method suggests assembling interior frame and details on the fuselage halves, while floor panel with controls are assembled as part of the lower wing. This method leaves the seat suspended by two connection points with another two hanging in midair until fuselage is closed up - I left the seat as a very last step and used rigidity of photo-etch seat belts to support the seat at the right angle. Dry fitting every piece and checking every step of the way takes time, but the resulting pieces slid in place with reasonable "made work" precision.
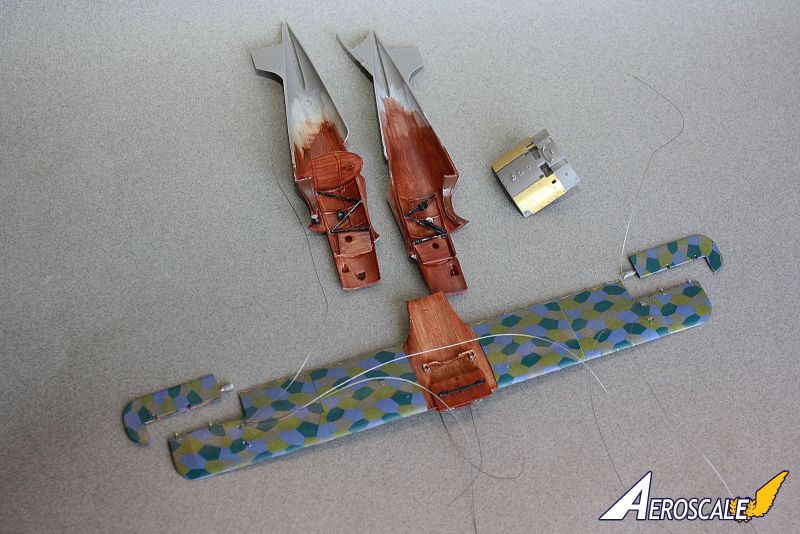
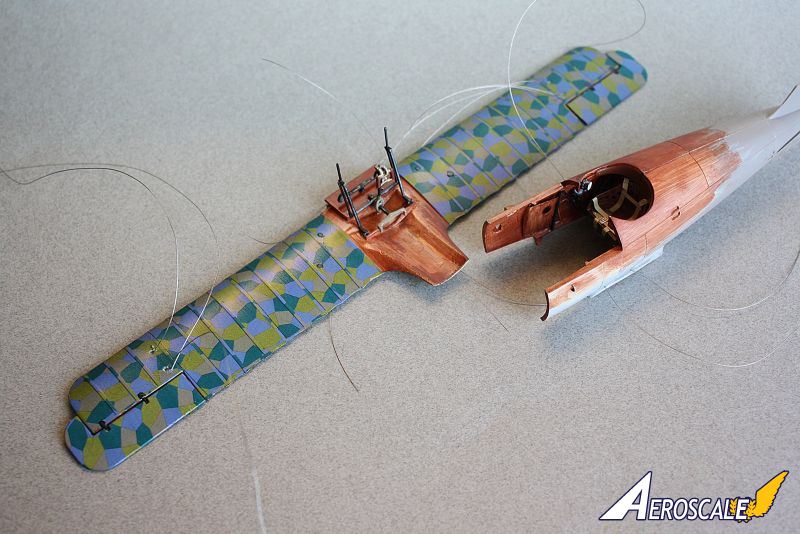
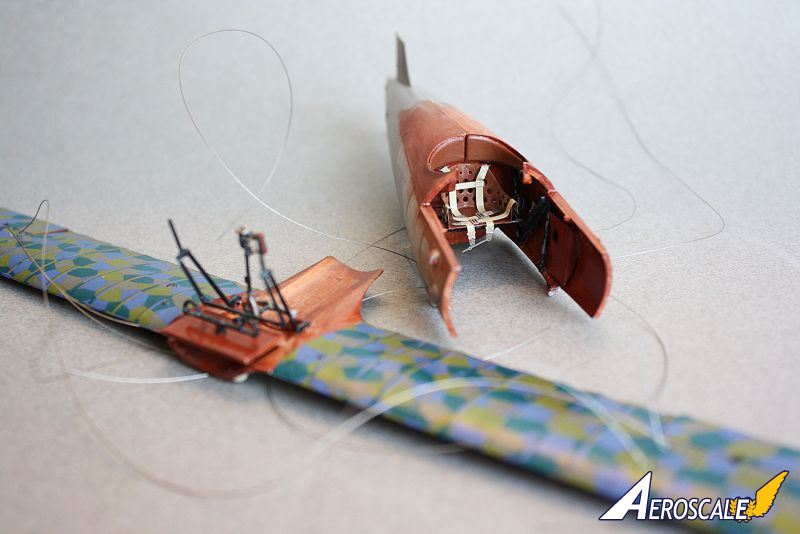
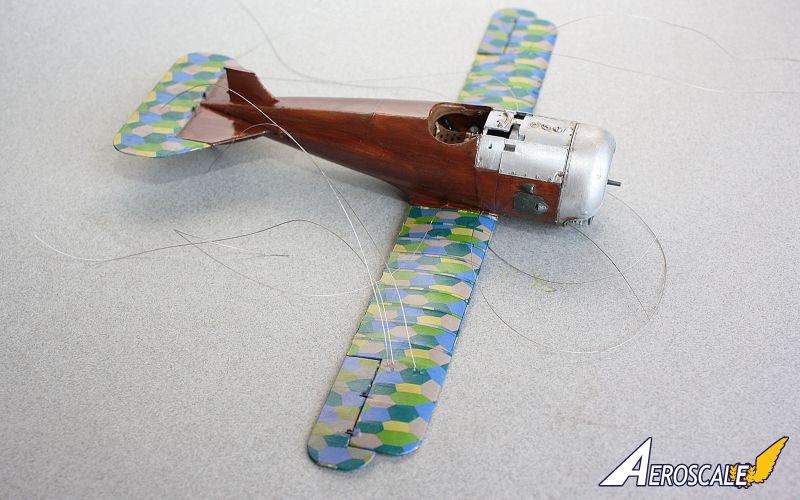
BrenGun's photo-etch replaces the kit's styrene seat with two part seat with perforated back, adds omitted interior frame elements and control panel - along with other features, these are most visible and make the PE addition very worthwhile. I have prepped the lower wing for lozenge application - sand, prime, apply a coat of gloss where decal will lay, apply decal onto the surface mopped with MicroSet, let cure for 15 minutes before massaging out bubbles with MicroSol mop (repeat last step as necessary). I don't wait to rig until the final step, so the wings were tapped and 0.1" jeweler's wire (steel 7 strand braided bright wire encased in clear plastic cover) anchored in a through the wing application - the bottom surface of the wing received necessary clean up and lozenge application proceeded the same was as above. Engine, cowling, ailerons were receiving my attention while decals were setting and drying. Then an ooops happened.
ooops
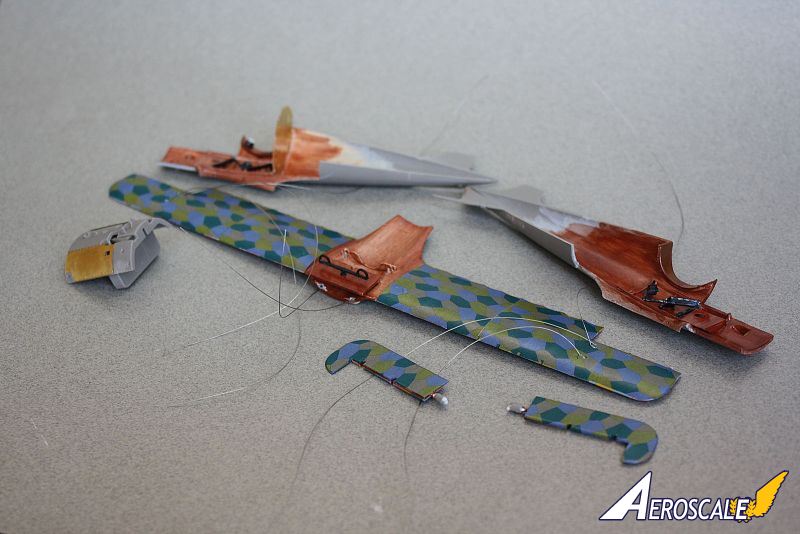
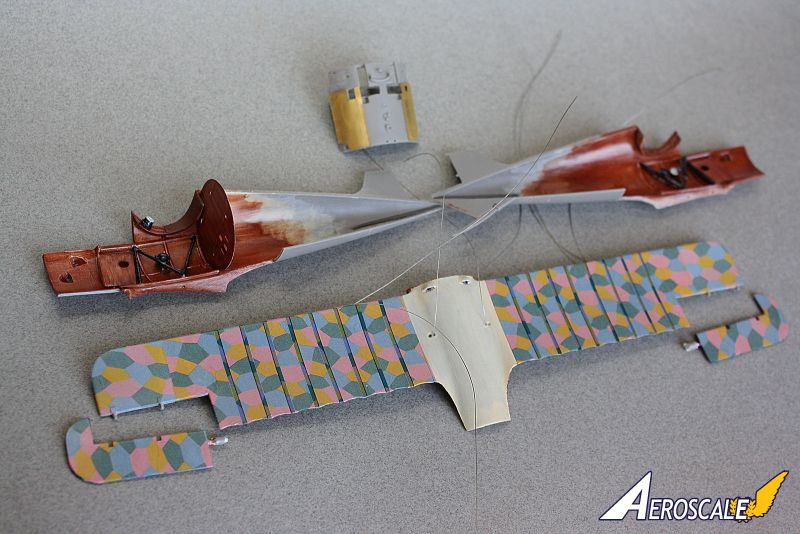
in my preparation stage, I had misidentified 5-colour lozenge as 4-colour and further more had the application direction wrong for the lower wing. Luckily, my mistake was pointed out to me during my build log in the Aeroscale Forums and saved me from agony of undermining many build hours and reaching the point of no return... Priming and painting over decals is a delicate task and I had to cut to allow for rigging wires already in place. Note that the correction of lozenge is lengthwise 5 colour lozenge on the lower wing and diagonally (from starboard to port) on the upper wing - the lighter "lower" coloured fabric continues in a wrap-around fashion over the wing, so it should appear flipped as it travels over the edge.after recovery
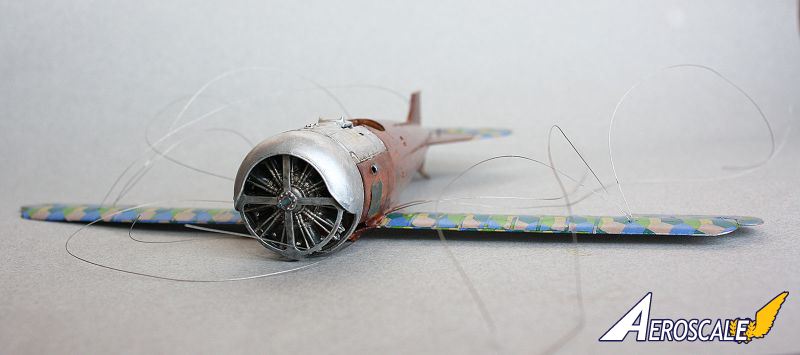
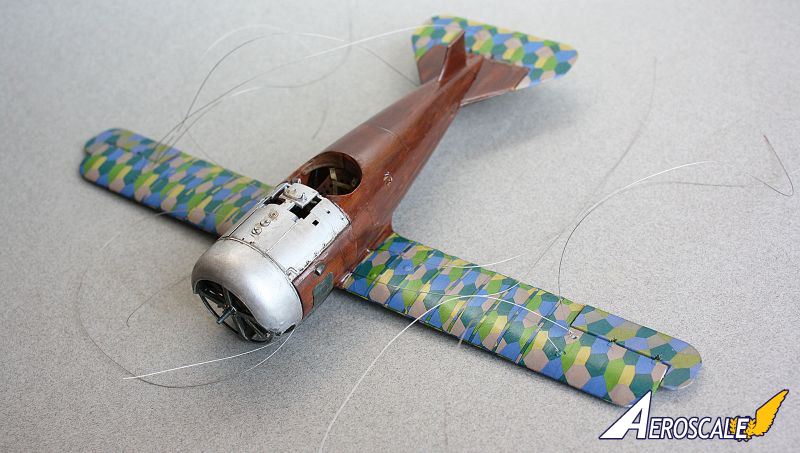
Ooops averted, the build became fun again - the fuselage halves were assembled and onto the desert portion of the mid-build - painting dark wood grain and finish, metal components that were painted solid aluminium with very dark green overpaint (purposely left streaked and not covering bare metal all the way). BrenGun's PE offers update to the metal portion of the cockpit, with separate hatches making the biggest difference - most notable were two frames suspended in pilot's view, superimposing which over the target would provide accurate aiming point for the pilot. Instructions are seriously lacking in this regard on either kit and correct position had to be obtained from reference photographs.Roden's kit is seriously lacking in any sort of positive connection point for inner wing struts or the intended angle - I used bits of broken pin vice drill bits to both strengthen and pin the struts and landing gear supports to the fuselage. I hand drilled as deep as I could into styrene parts with appropriate size drill bit, then inserted and glued the broken bits I collect for this very purpose, to act as a strengthening pin. Average size of pin turned out about 1/4", with some steel sticking out - drilling into correct place on the fuselage then provided correct and secure attachment point. I roughed the angle and got lucky - in hindsight, I should have saved the final position of the inner wing struts for top wing alignment.
Before I knew it, the aircraft was painted, installed on its landing gear, given its top wing, rigged lines tightened on their opposing connection points and "through wing" connections cleaned up; I left these portions of the wings to be applied with lozenge / ribtapes post-assembly. Decals were applied midst the building process and shellacked wood was given copious amounts of gloss coat. Thecompleted model as given a blast of Dull coat over the wings and beneath the aircraft, then brushed on Gloss again over the wood of the fuselage top to centre. Bottom of the aircraft's fuselage was left with Dull coat, heavier towards the areas most affected by the engine.
Weathering
A light overall coat of oil to simulate usual engine grime and exhaust, with accents of heavier fouling and muck was applied. Areas protected by Dull coat, accept washes more readily, so there is a good degree of control of where most grime accumulates. Flicking the brush provided spatter for added effect. I wanted no mistake for the power and capriciousness of the Sh.IIIa that this aircraft was built around, as well as heavy operational use that wore both pilots and the machines to the limit.Notes and acknowledgements
I would like to thank Stephen T. Lawson aka "JackFlash" for his dedication and wealth of knowledge shared in the Early Aviation - especially the Lozenge Camouflage 101 and Lozenge Camouflage 201 primers, without which lozenge would still be Latin for me.Terri aka "thegirl" - special thanks for catching my 4-colour lozenge snafu in time to get it fixed and providing the set of Wotan propeller badge decals from Pheon Decals. Also a source of inspiration for scratch building and setting examples for working the unworkable.
And last, but not least - all other Aeroscale members who followed the build process and offered their encouragement.


About the Author

Comments

Hi Ivan
Lovely job! Thank you for the excellent detailed article.
All the best
Rowan
AUG 09, 2014 - 07:16 PM
Looks fantastic. The rigging and lozenge markings are superb.
Thanks for sharing
AUG 12, 2014 - 08:57 PM
Copyright ©2021 by Ivan Bouinatchov. Images also by copyright holder unless otherwise noted. The views and opinions expressed herein are solely the views and opinions of the authors and/or contributors to this Web site and do not necessarily represent the views and/or opinions of AeroScale, KitMaker Network, or Silver Star Enterrpises. Images also by copyright holder unless otherwise noted. Opinions expressed are those of the author(s) and not necessarily those of AeroScale. All rights reserved. Originally published on: 2014-08-09 16:39:37. Unique Reads: 6766

WEB HOSTING BY


Copyright ©2021 AeroScale and Kitmaker Network, a subsidiary of Silver Star Enterprises
All Rights Reserved. Please read our Conditions of Use and Privacy Policy.
All Rights Reserved. Please read our Conditions of Use and Privacy Policy.