

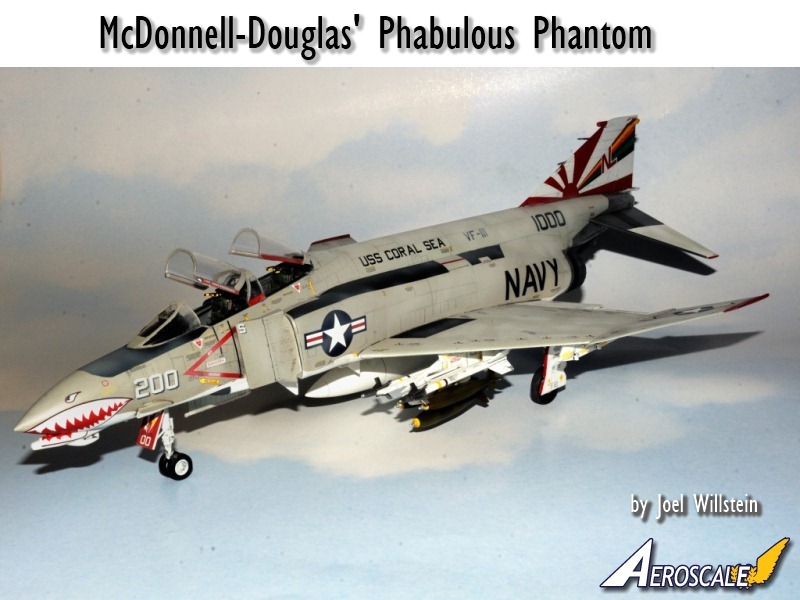
1⁄48McDonnell-Douglas' Phabulous Phantom
16
Comments
History
The McDonnell two seat, twin jet, all-weather F-4 Phantom II, with top speeds greater than Mach 2, was one of the most versatile United States fighters ever built.F-4s saw combat from the Vietnam War right through Operation Desert Storm. Both of the U.S. military flight demonstration teams: the Navy's Blue Angels, and the Air Force's Thunderbirds, flew the F-4 Phantom from 1969 to 1973.
The 5,000th Phantom was delivered on May 24, 1978, and McDonnell Douglas delivered the last F-4 Phantom in October 1979. A grand total of 5,057 were built. The U.S. Air Force purchased 2,874 aircraft, while the Navy and Marine Corps purchased a combined total of 1,264. International orders from 11 countries totalled 919 aircraft.
In 1953, McDonnell Aircraft began work on revising its F3H Demon naval fighter design. In September 1953 McDonnell approached the U.S. Navy with a proposal for their "Super Demon", an all-weather fighter-bomber design.
In July 1955, the Navy placed an order for two XF4H-1 prototype test aircraft, and five YF4H-1 pre-production fighters. The Phantom made its maiden flight on May 27, 1958, and entered service in 1961.
The Phantom was first used by the U.S. Navy as an interceptor, but also as a ground-support bomber for the U.S. Marine Corps. The F-4 eventually flew every military air mission: air superiority, close air support, interception, air defence suppression, long-range strike, fleet defence, attack and reconnaissance.
The U.S. Air Force received its Phantoms as the result of Defence Secretary Robert McNamara's unified fighter concept. The USAF began accepting deliveries of its F4-C's in 1963.
The Model
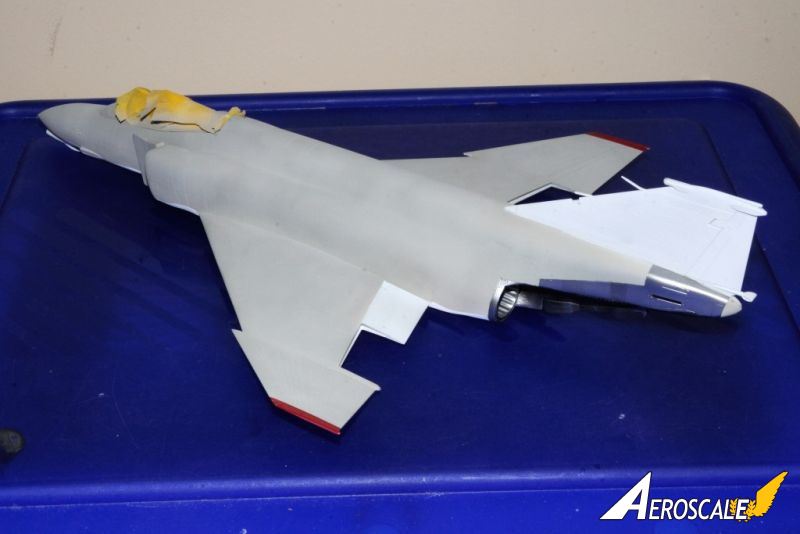
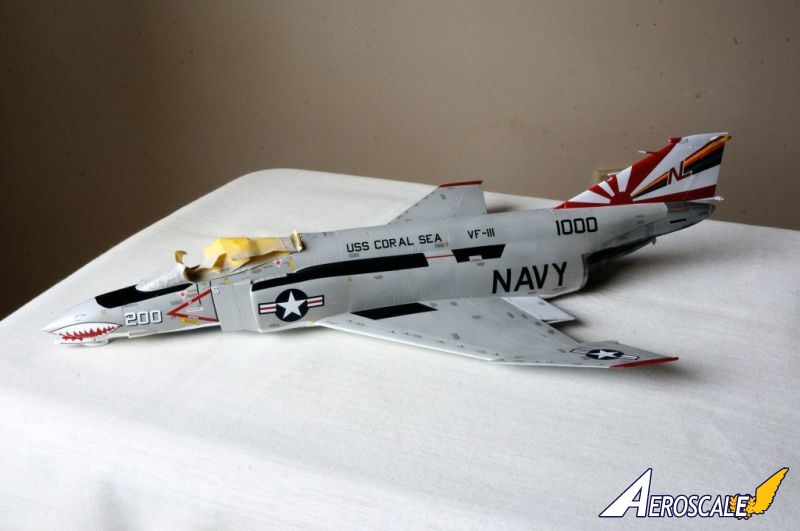
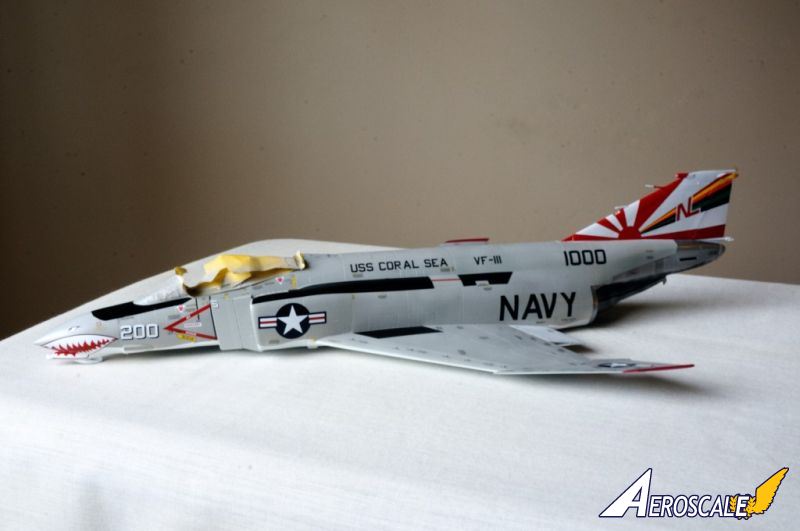
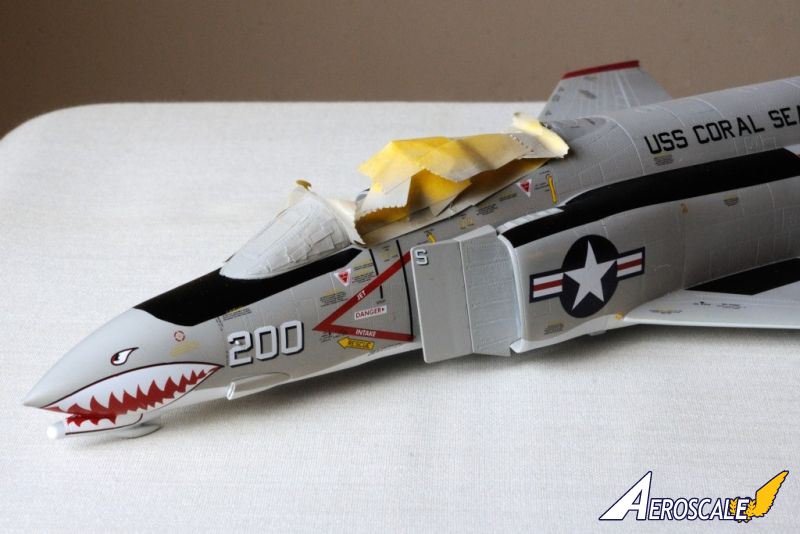
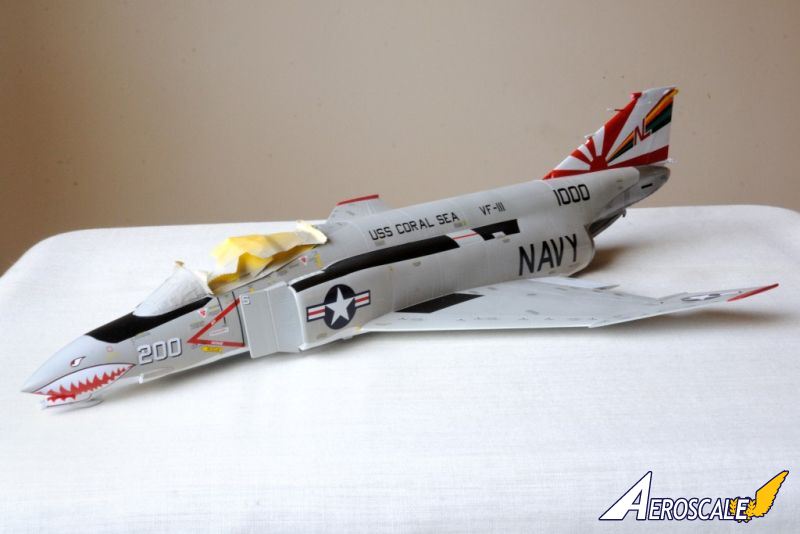
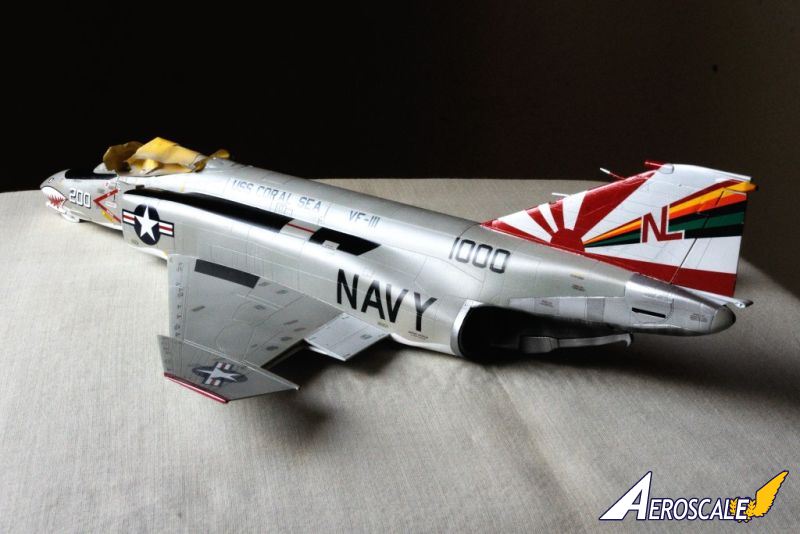
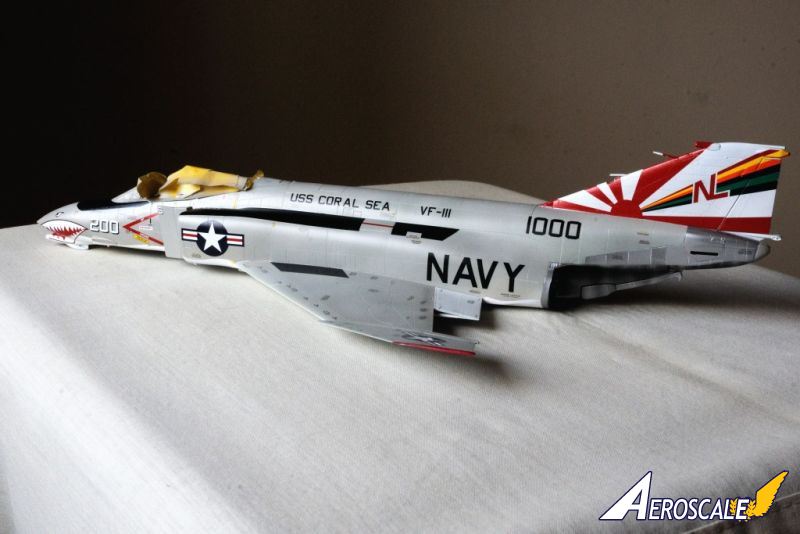
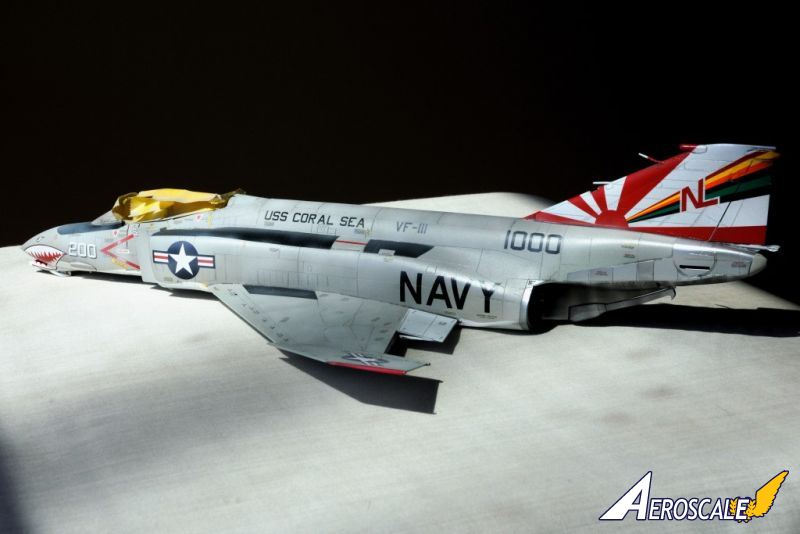
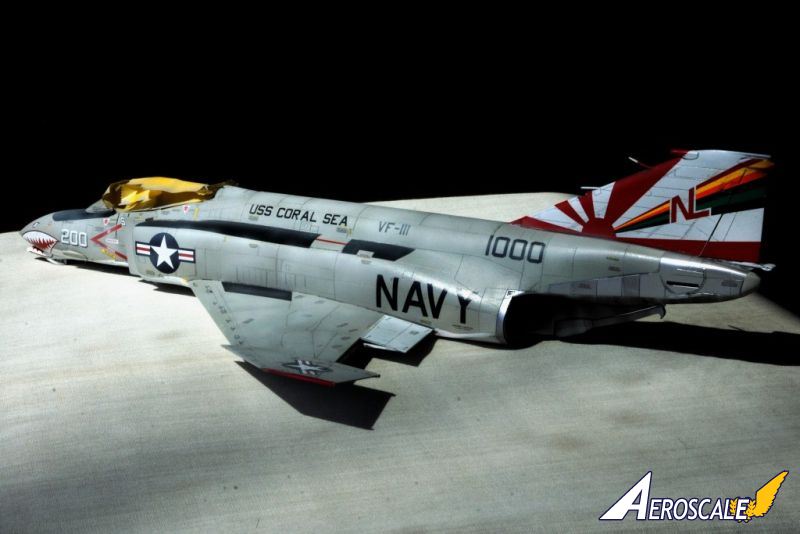
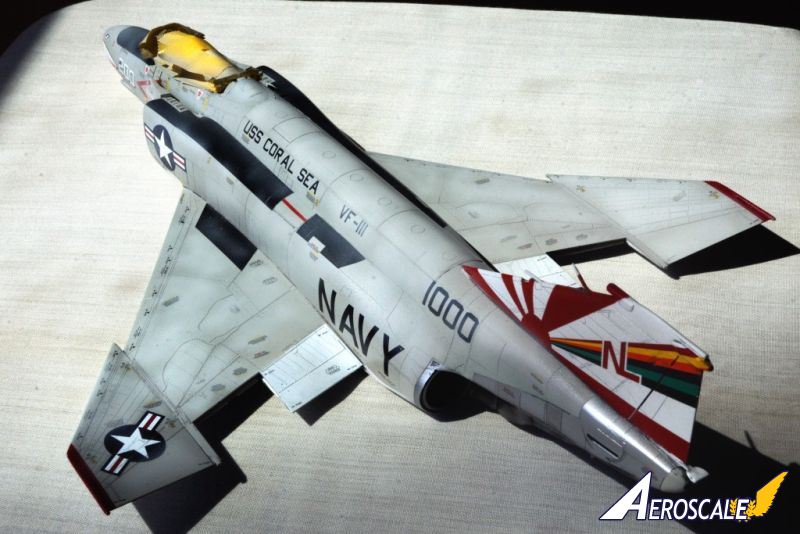
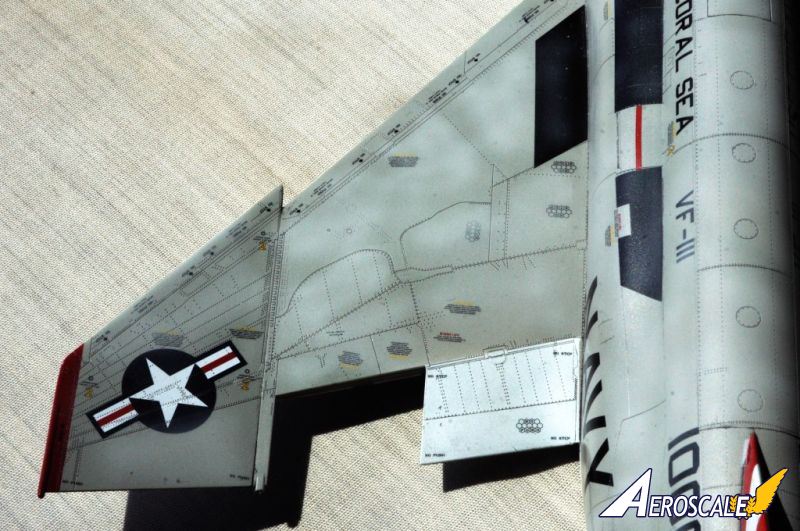
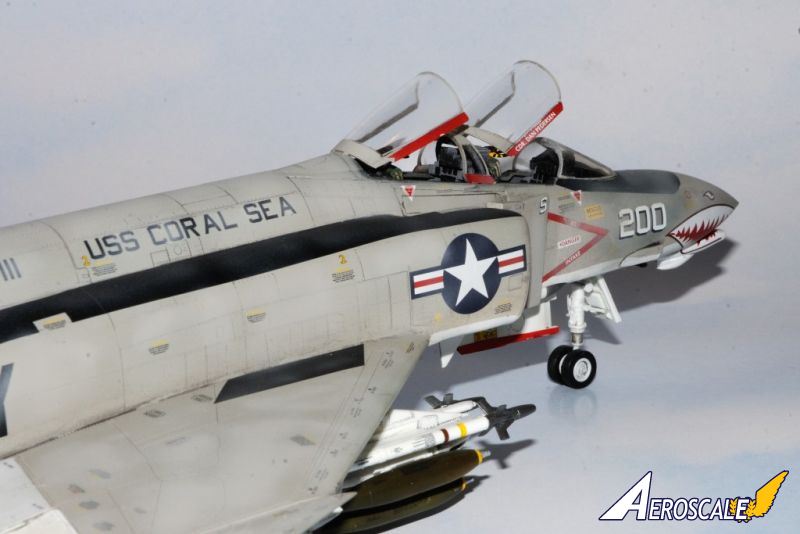
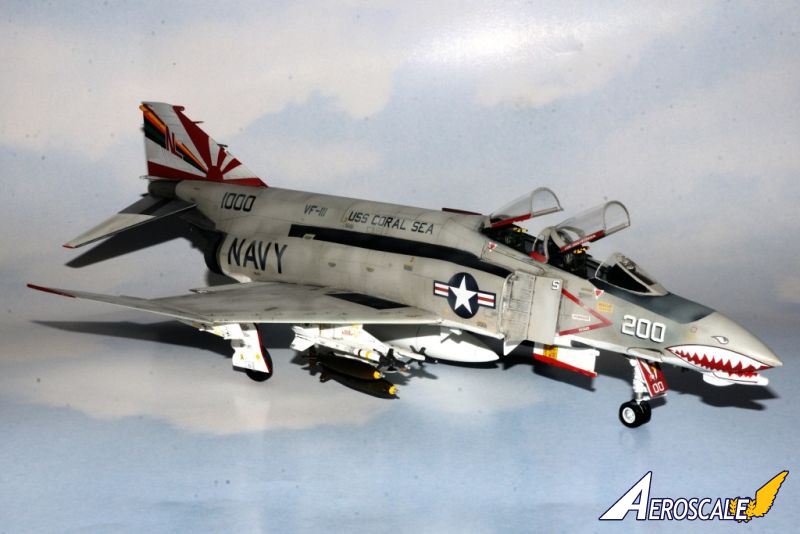
For years on end Hasegawa has literally owned the 1/48 scale market for the F4 family of Phantoms. Now Academy joined in with a truly state of the art F-4B kit. It differed from the usual Hasegawa offering with Cartograf decals for the USS. Coral Sea VF 111 Sundowners, with an absolutely mind boggling separate sheet of stencils. Those markings are the only ones offered. While a excellent choice, it would have been nice to have a few options to choice from.The kit breaks from the traditional method of construction with the fuselage being one piece. The result is a perfect fuselage with no top and bottom seam to deal with. The wing fit is just perfect. No flash, pin ejection marks, or soft details were to be found. I was really quite impressed, especially since this is my 1st jet aircraft model.
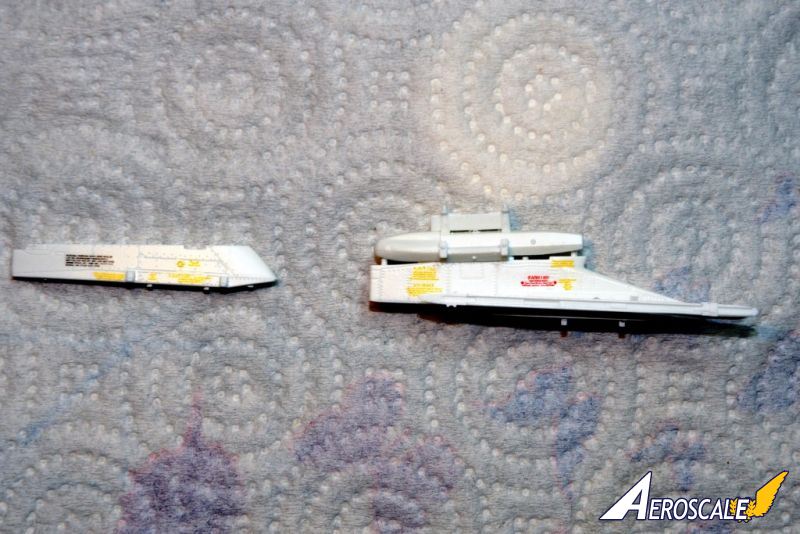
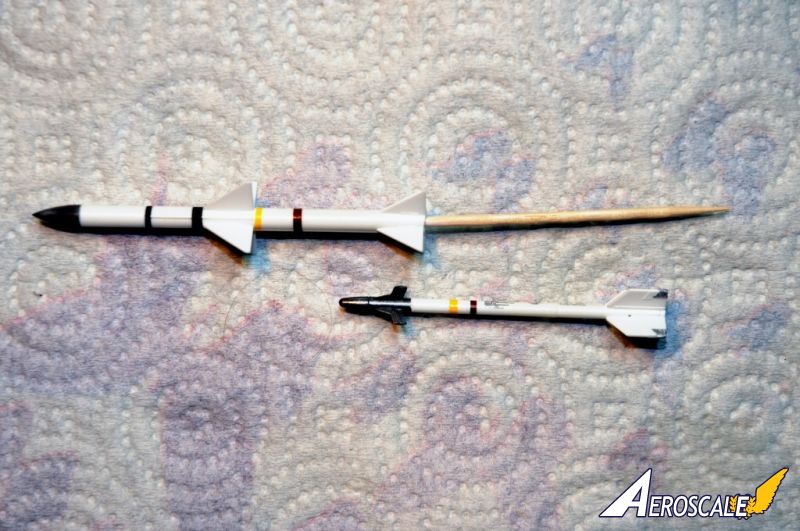
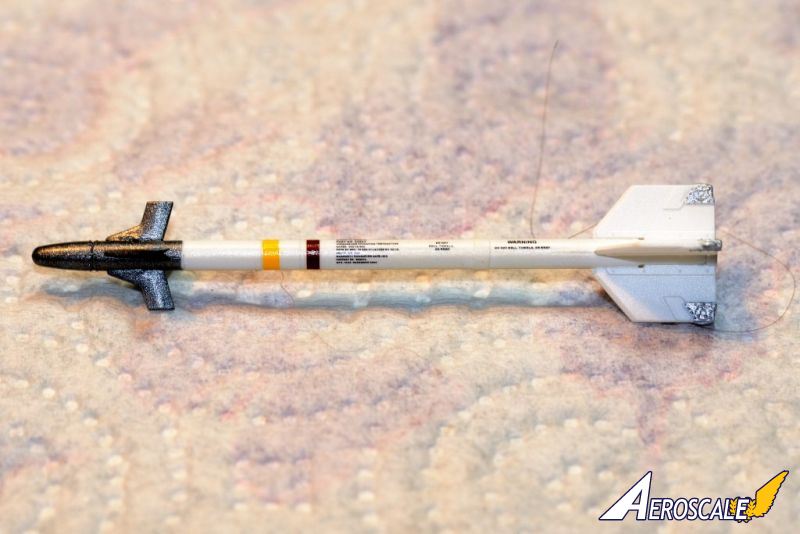
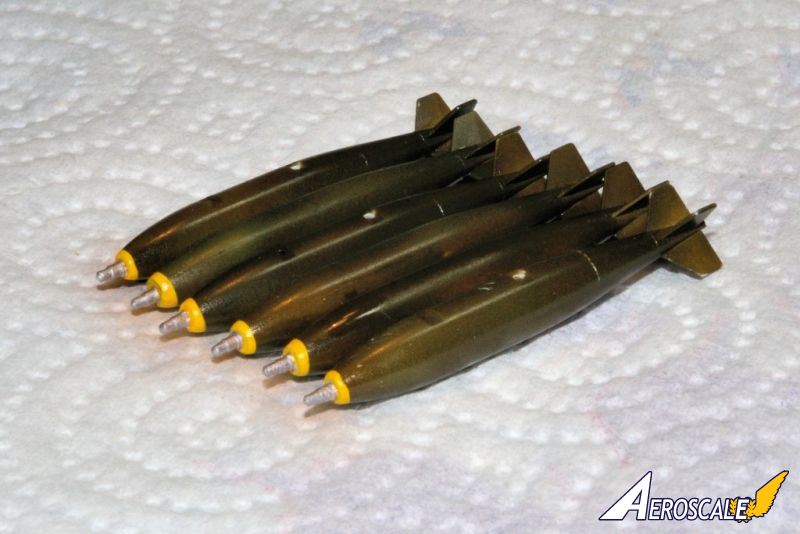
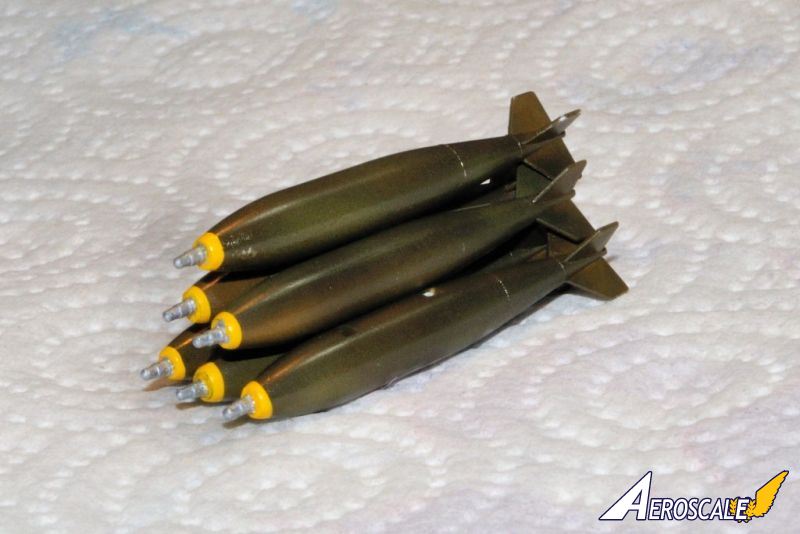
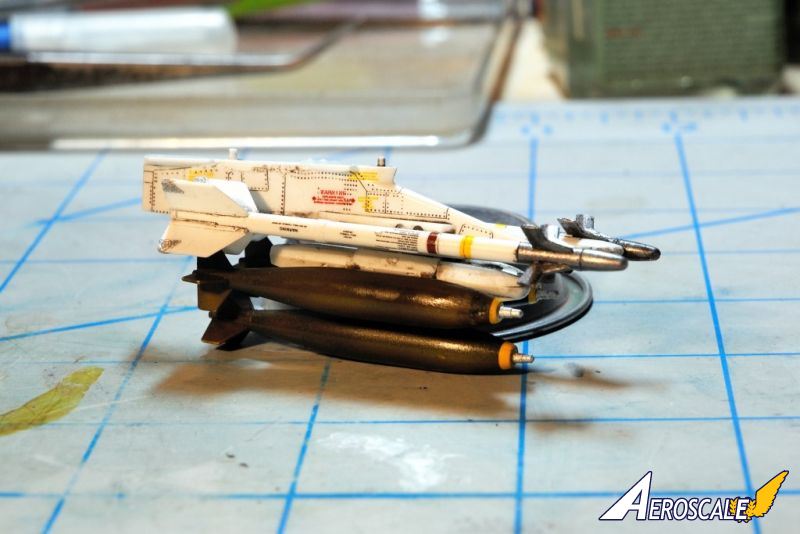
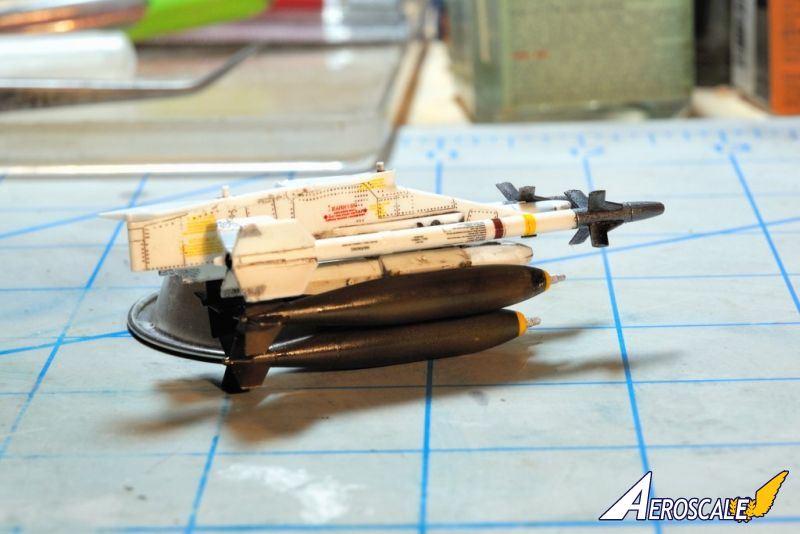
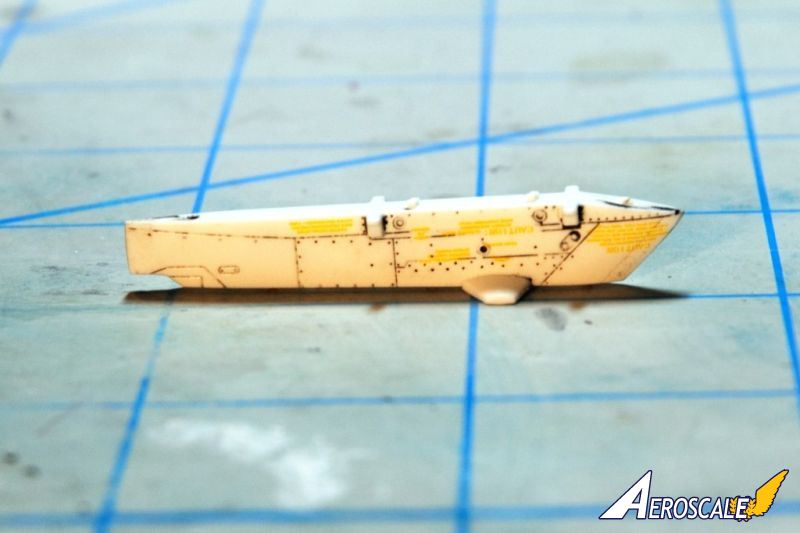
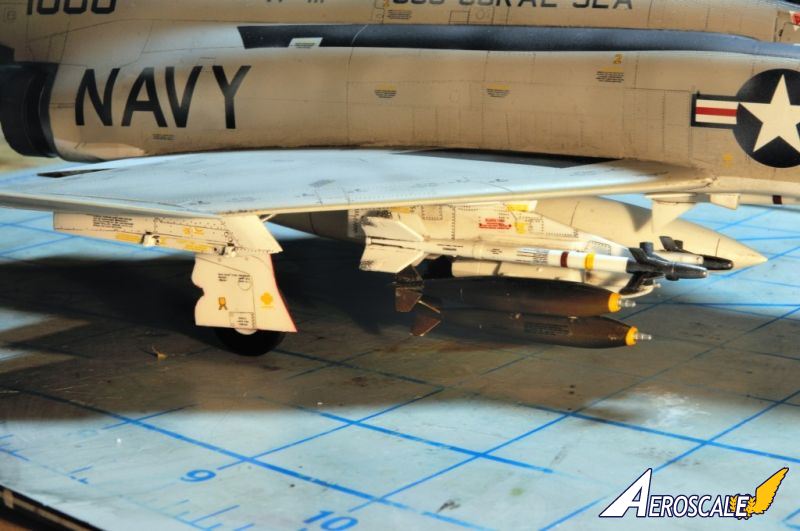
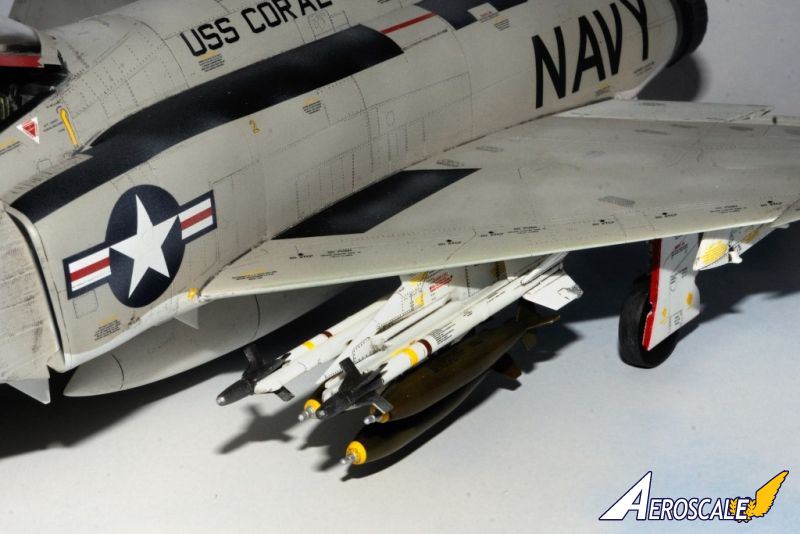
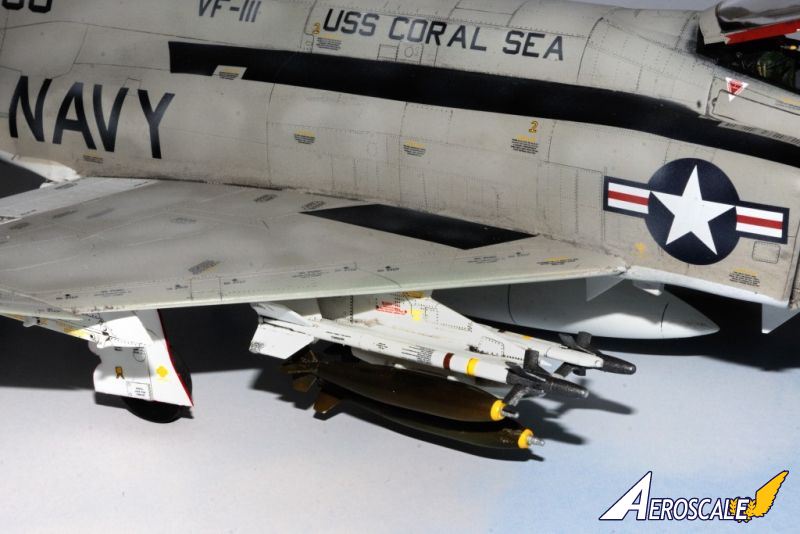
Rather than follow Hasegawa's method of requiring the modeller to purchase a separate weapons pack, the kit comes with a full load, plus you'll find ordinance for other versions on various sprues.
The Build
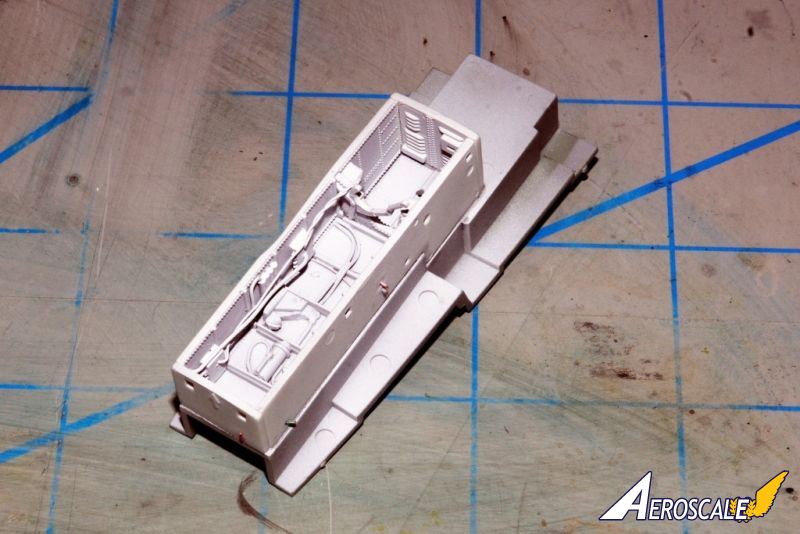
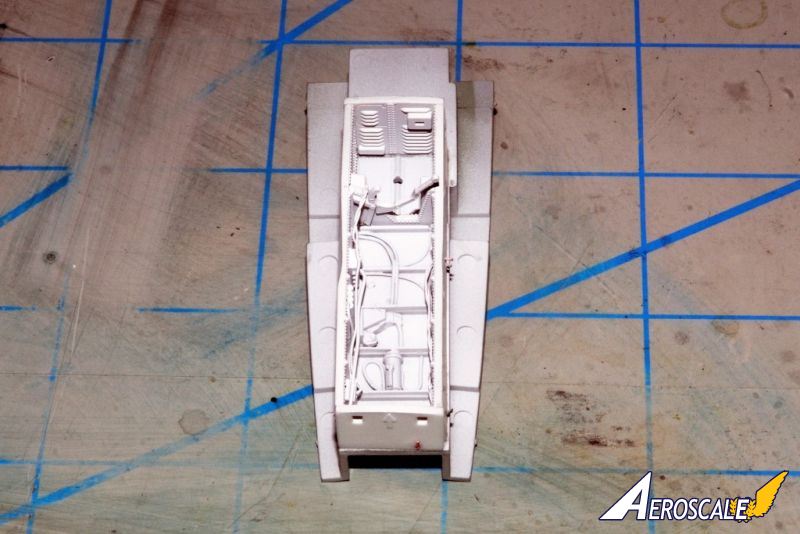
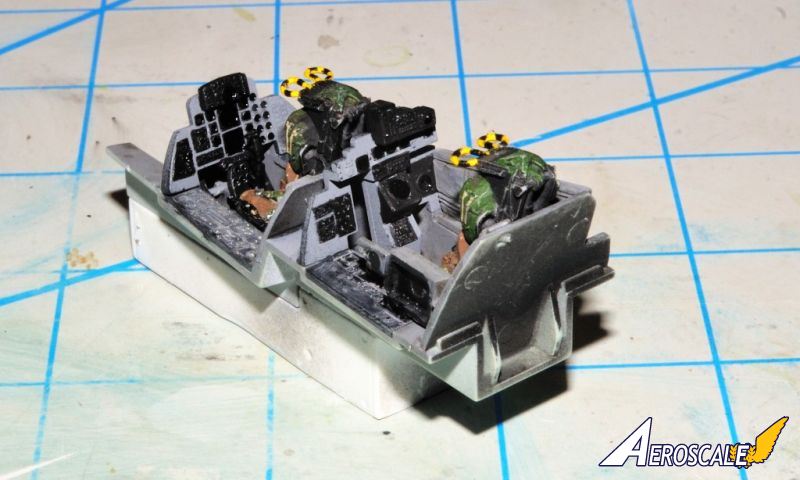
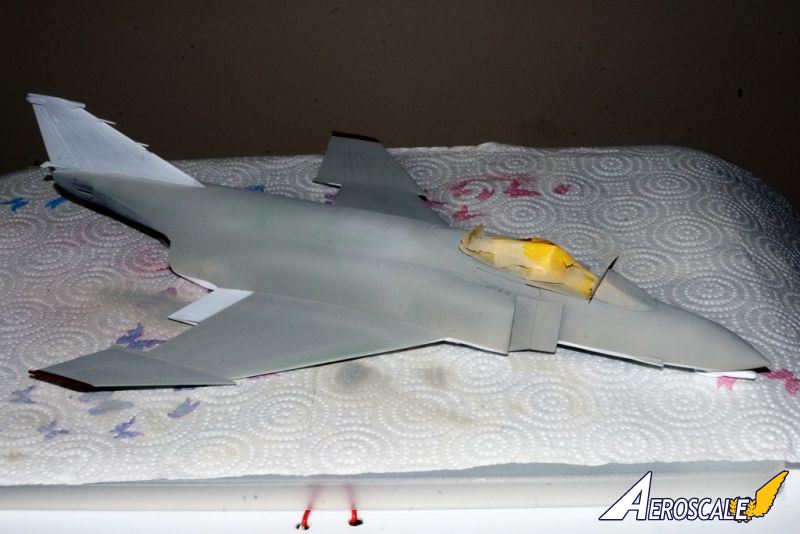
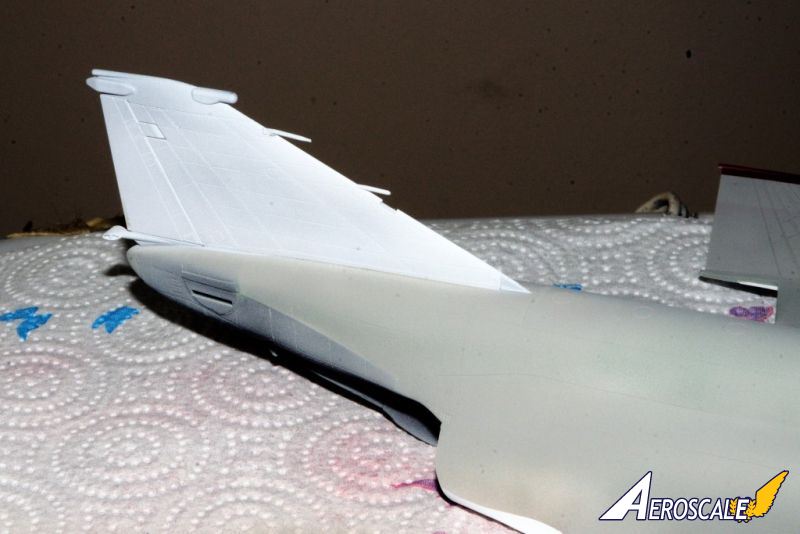
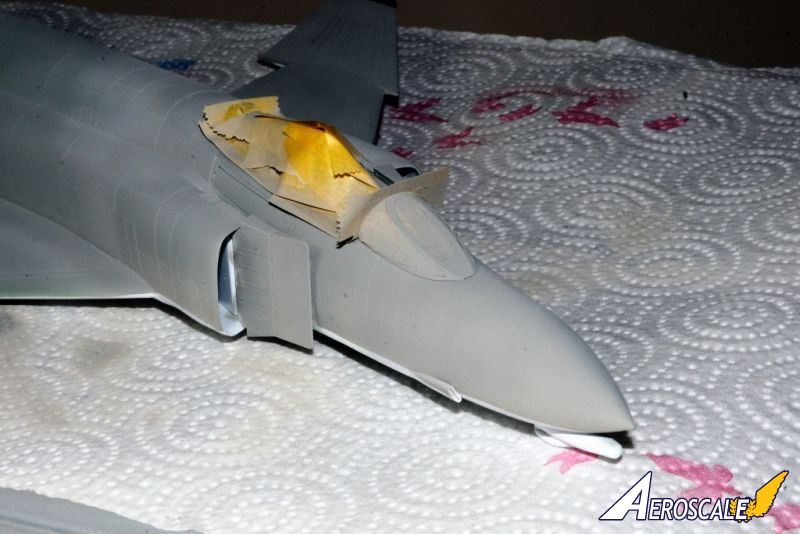
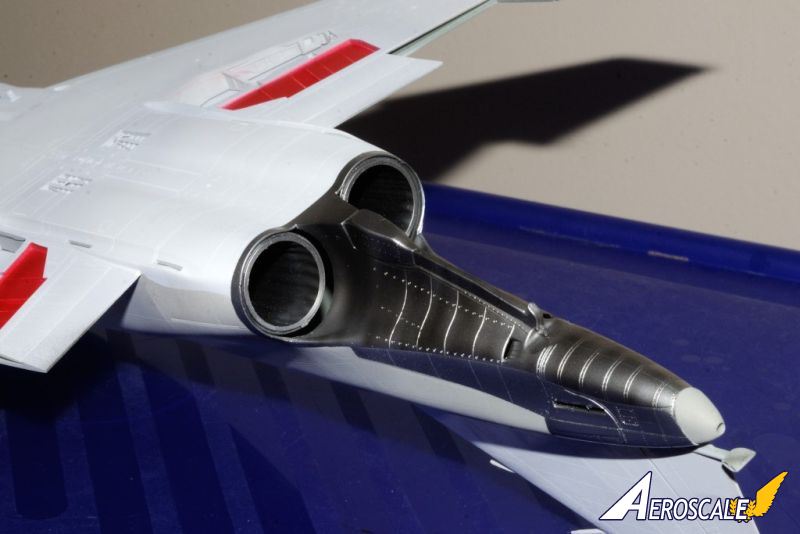
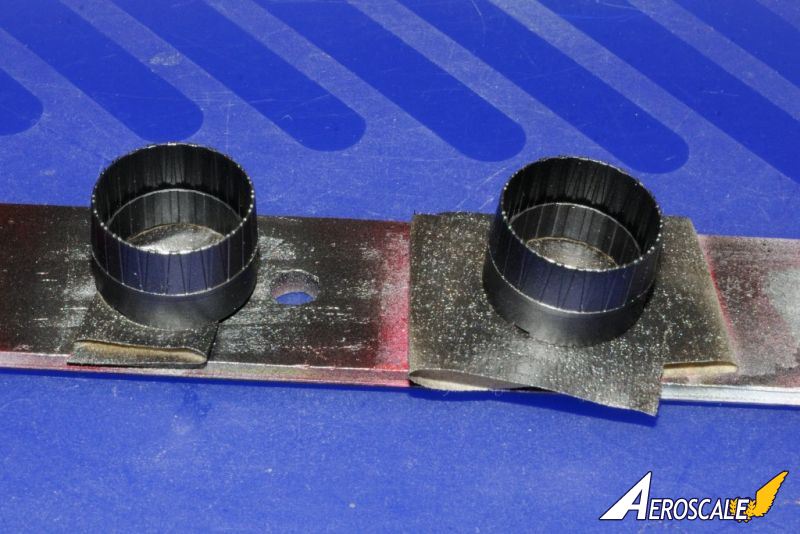
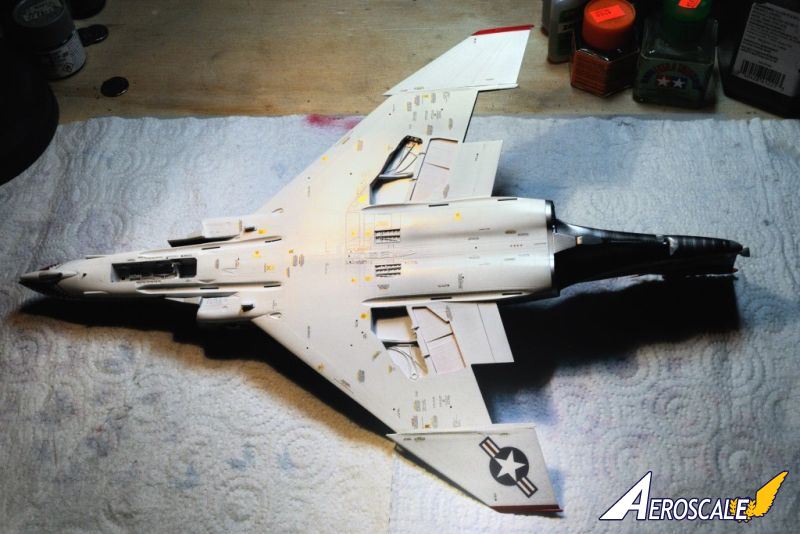
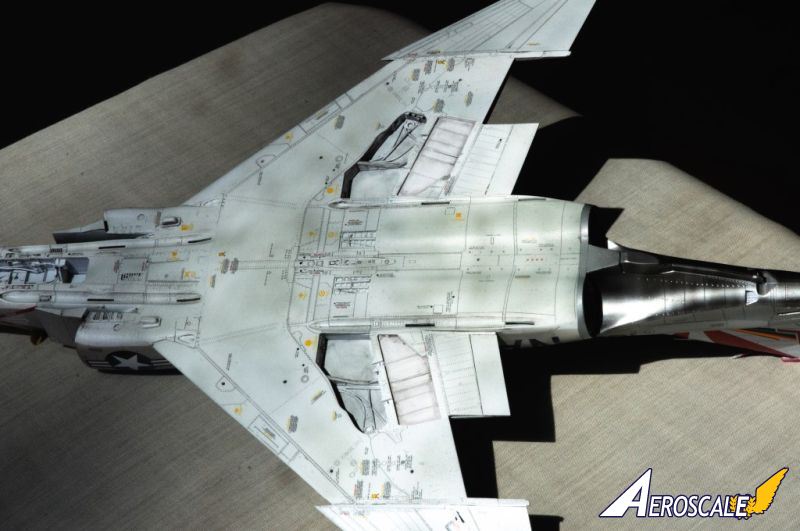
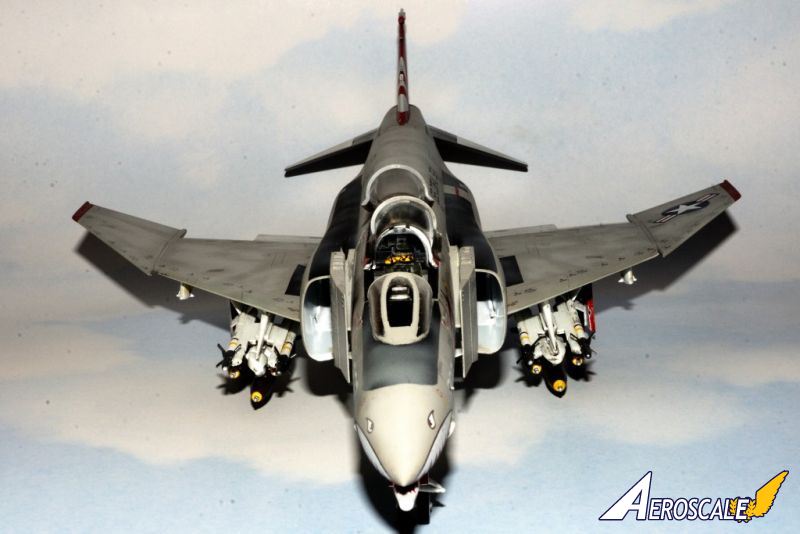
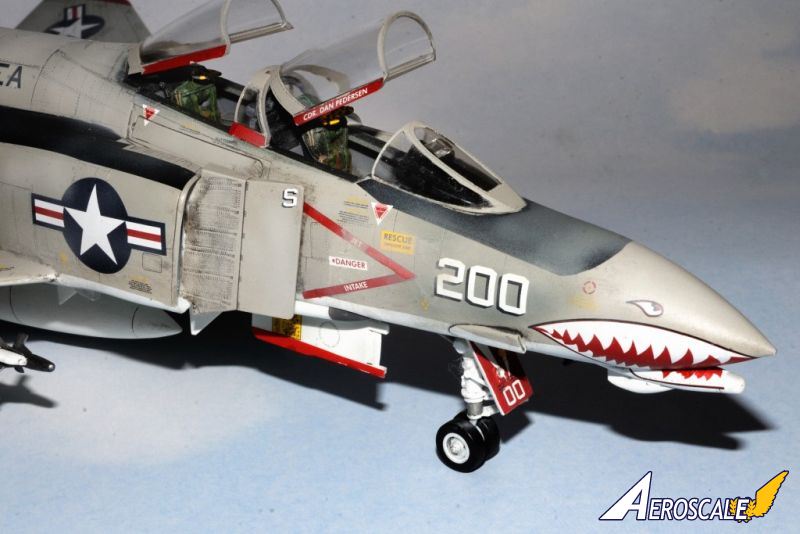
The kit builds up right from the box to a very impressive, well detailed model. The cockpit is quite complete, and even the MK7 ejection seats are very well detailed. I did opt to use a set of Quickboost MK 7 seats that I had already purchased, but in hindsight really weren't needed.I added extra detailing to the cockpit, and spent a great deal of time detailing the wheel wells. A few areas did require a fair amount of work and filler, that being the intakes, and the lower wing/fuselage joints.
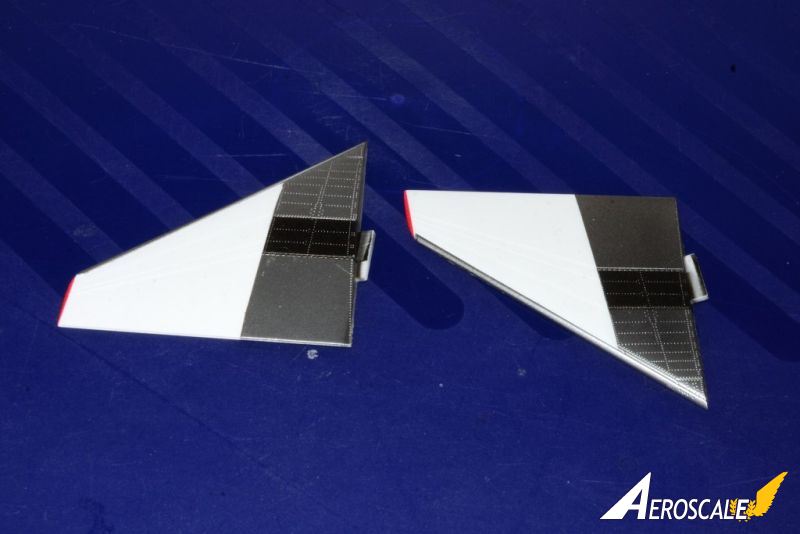
The overall construction of the kit was logical following the instructions which are a single folded page into a 8 sides, 15 step design, that is hand drawn. The landing gear did have black and white photo inserts to aid in their construction and placement. The wing tips and wheels also had inserts but are hand drawn. there are two other separate sheets supplied. One is for 4 options of loads out and their correct stations. 3 of them use the outboard wing tanks, which I wasn't able to find any supporting documentation on that they were used in combat missions. The 3rd sheet has 4 fully coloured, detailed drawings of all 4 sides of the aircraft for exact decal placement. There weren't any surprises throughout the entire build. Part fit was generally excellent, with very little filler needed.
Painting
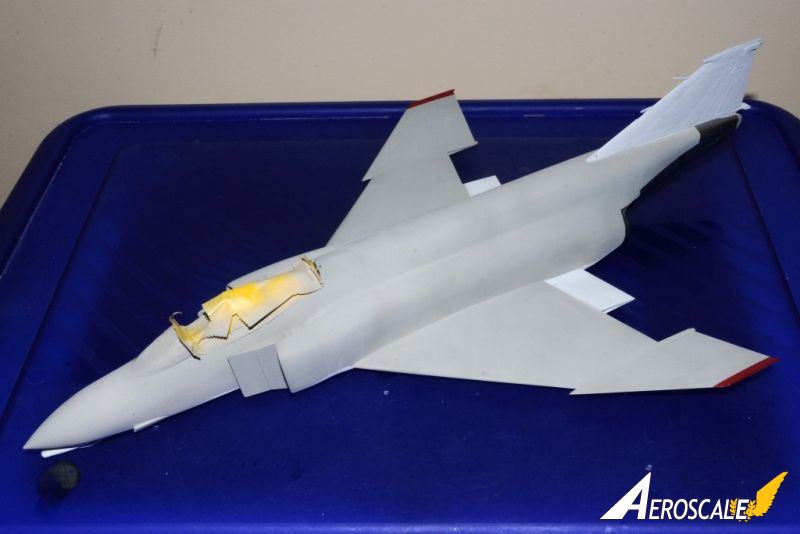
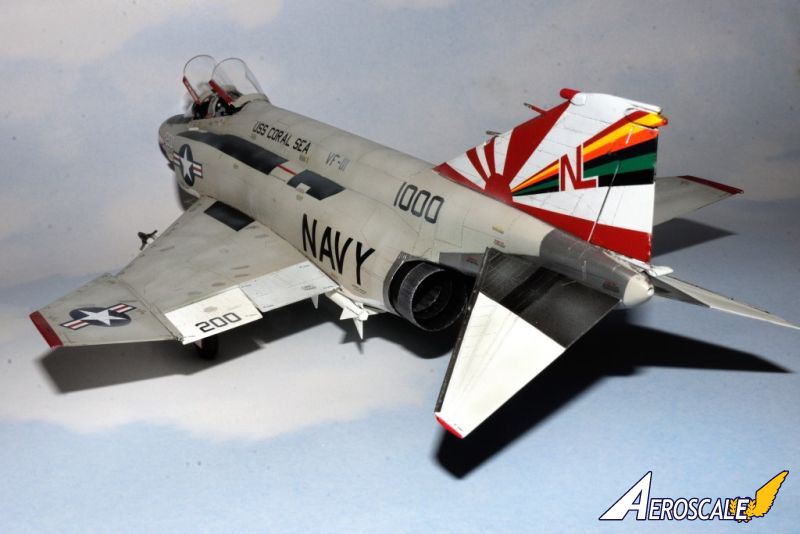
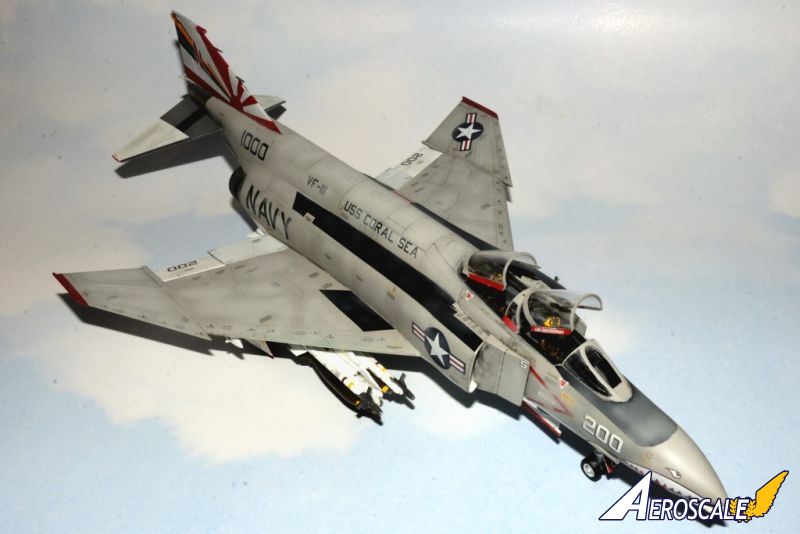
I used Tamiya Acrylics throughout the build. The Light Gull Gray is a custom mix. The exhaust cans, and exhaust metal areas, as well as the Natural Metal areas on the Stabilators, are painted with various shades of Alcad 11s. While painting such a large plane took quite a bit of time, there were no surprises or issues.I've never been a big fan of pre-shading, as my efforts tended to look more like a chequerboard, so I prefer the post shading methods. Basically, I airbrush the inside of panels with the base coat lightened with white in a random pattern, then a darker shade over various panel lines, producing a much more random and natural effect. Then sealed with Pledge/Future.
Decalling
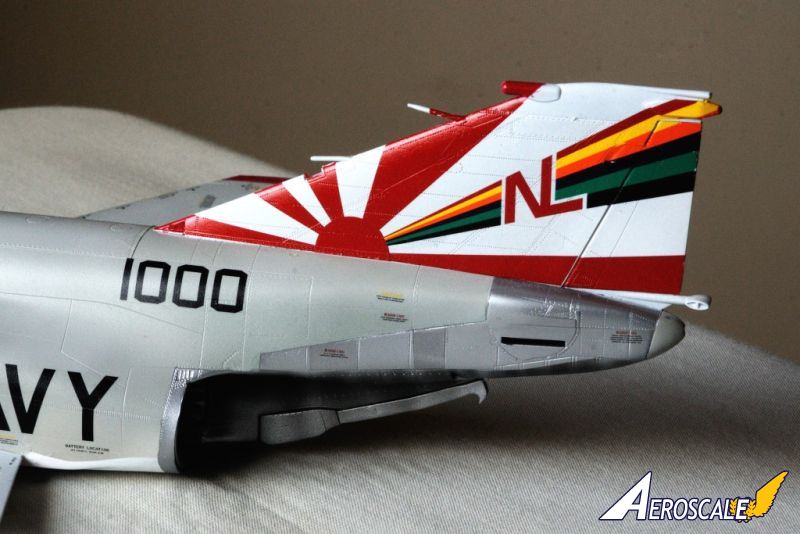
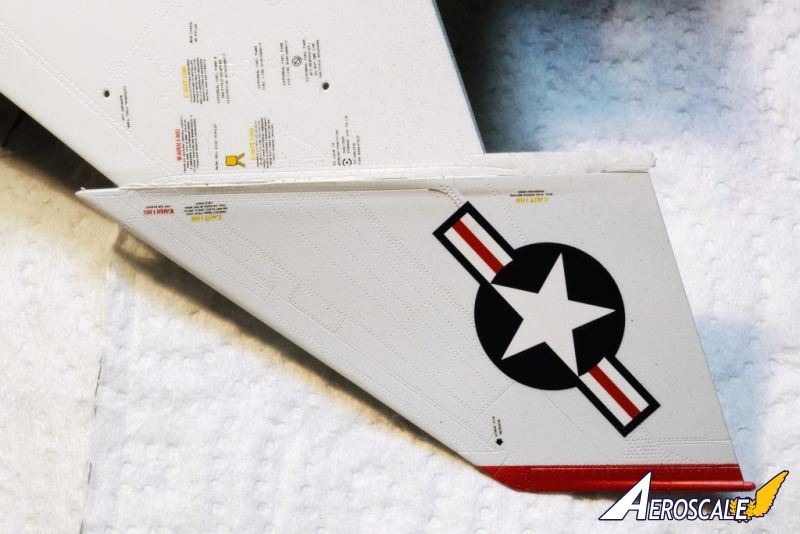
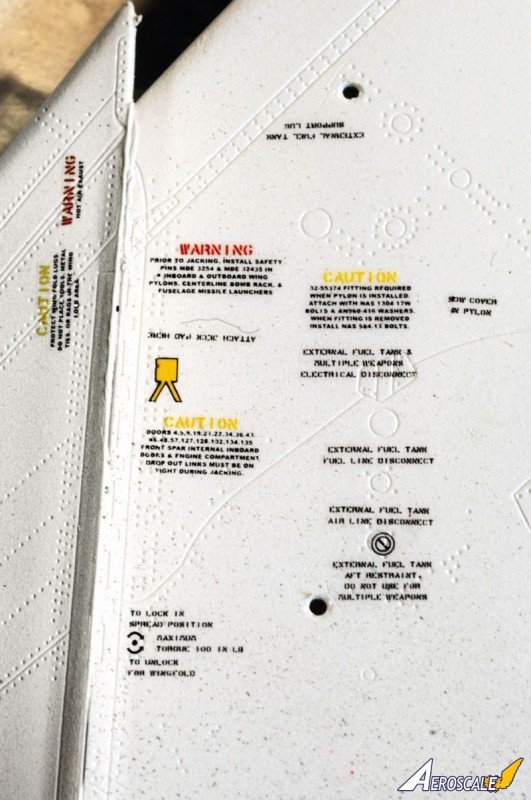
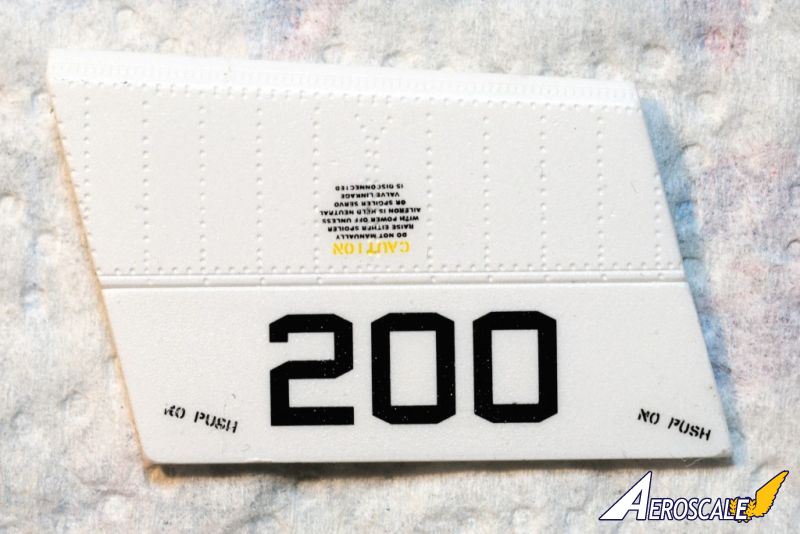
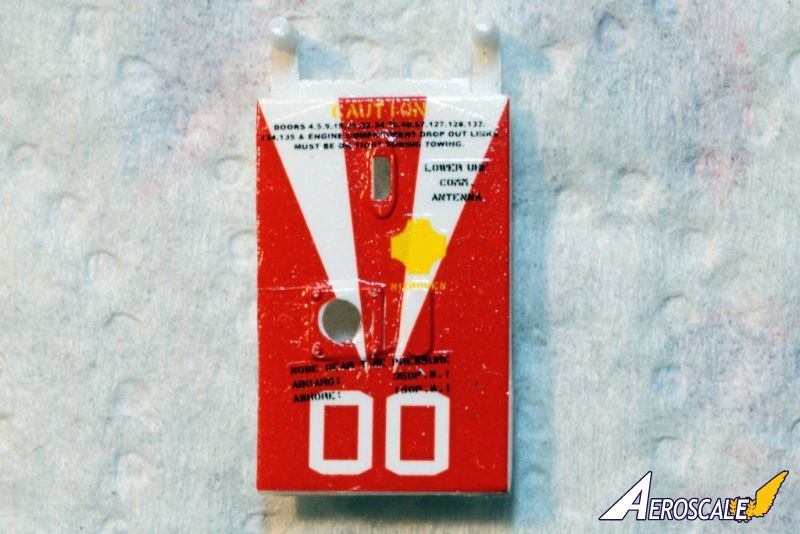
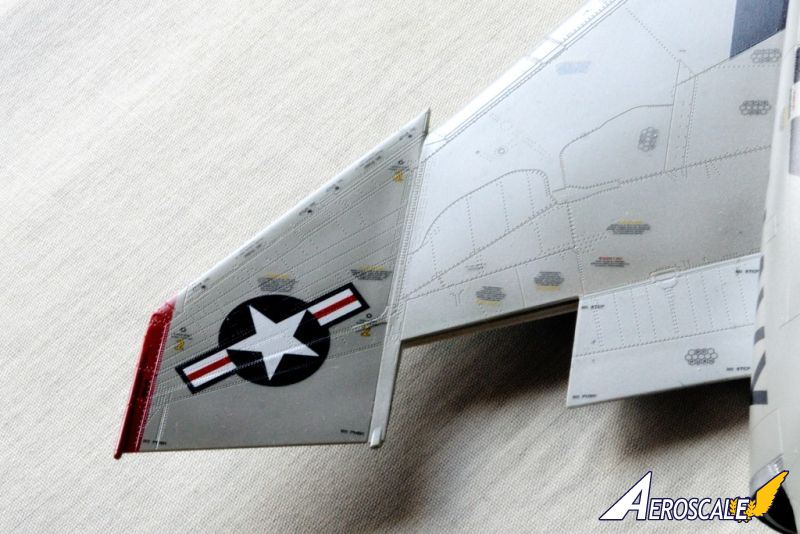
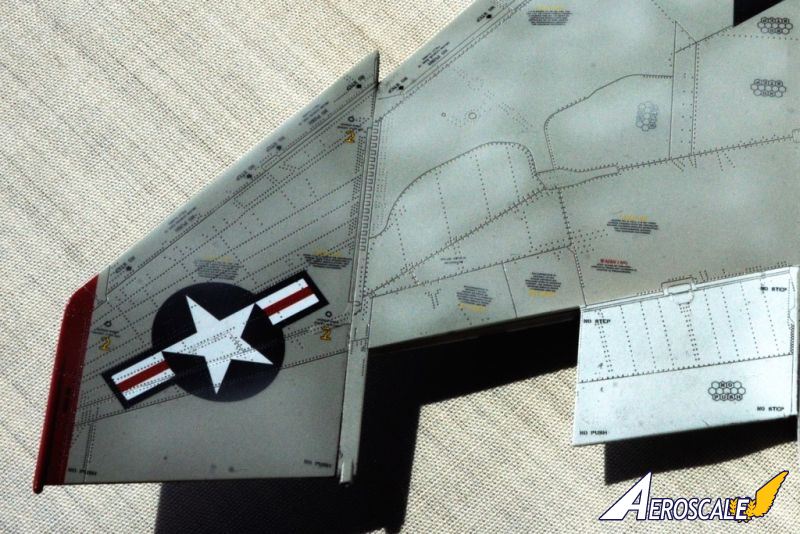
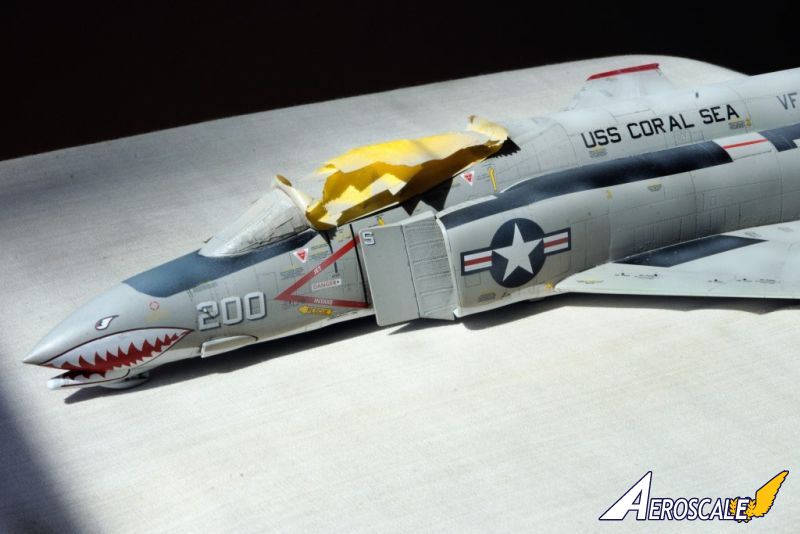
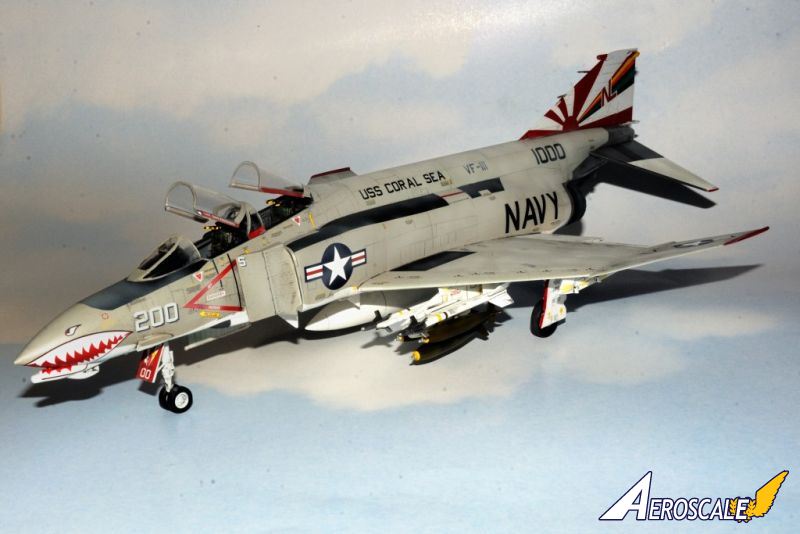
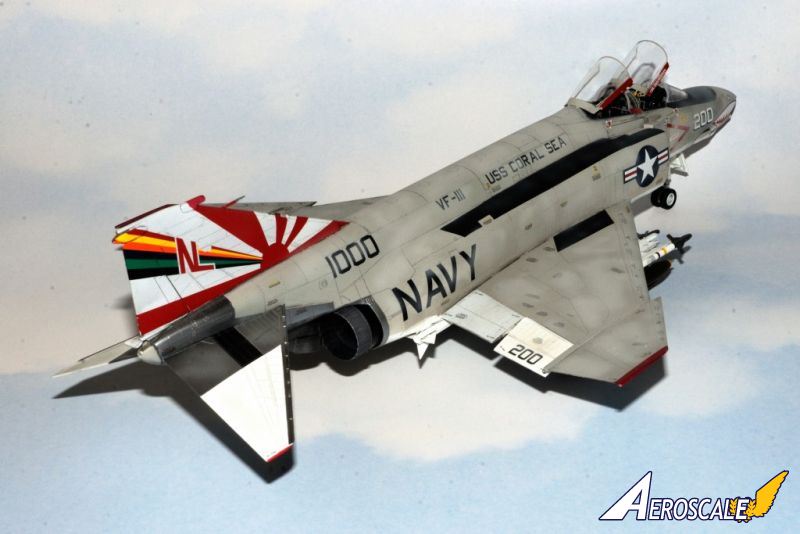
Decalling seemed to take longer then the build. The Cartograf decals are a little on the thick side, but I suspect that it's the wishes of Academy to have them that way, as they will take more abuse then the more traditional thin AM offerings. They did settle down into every nook and cranny using the Microscale system. For the large tail decal, I cut one side into 3 parts but left the clear film, the other side I cut all the clear film off, and the decal into 4 parts. Both sides came out nearly perfect. I did have to touch up a few areas as the decals just don't wrap around all the way around. Most certainly that's my error, not theirs. I had major issues with both Shark mouths even though each side is comprised of two pieces. There are just too many compound curves for the decals to properly settle down. I ended up cutting the decals where ever I had a crease or large bubble, then appliciation after application of Sol, and letting the Sol dry overnight which finally worked. I still needed to touch up a little with some red paint, but you just can't see it.Now came the very long and laborious sessions of applying the stencils. I applied each one using the full Microscale system. All told it took nearly a month to just finish applying them. Then I sealed everything with a few coats of Future.
Weathering
As post shading was done before decalling, and once the decals were sealed, I started weathering with two different custom mixed Flory Sludge washes (one for the top, and one for the bottom), to bring out the panel lines, and dirty up various areas. Then a coat of Testors Dullcoat. then I airbrushed various shades of very thinned light greys to complete the weathering process.Conclusion
The Academy 1/48 scale F-4B is a highly detailed kit that builds into a outstanding model. Academy has released the F-4C version, which hopefully I'll be building this year.If anyone would like to read through my build log, you can find it here .


About the Author


FROM: NEW YORK, UNITED STATES
I've been a plastic scale modeler on and off for most of my life since I 1st found them on a shelf at a local toy store way back in the very early 1960s. Once in High School modeling stopped until the mid 1970s when I got married, and needed a hobby that would keep me at home. After 10 years I to...
Comments

Beautiful Rhino, Joel!! Nothing like a Phantom in hi-viz markings.
JUN 21, 2014 - 03:29 PM
Really nice, I'm building a Marines phantom from Danang 1968 right now. Great planes!
JUN 25, 2014 - 02:25 AM

Hi Joel, yes they can fly, even without a prop ! I have seen it years ago, two Luftwaffe F-4Fs thunders very low over my head,they made both a roll and curved in the distance and came back.
What a sight ( and a sound ) long after they were gone a massive plume of black smoke, still stands in the sky.
A Phantom Phan was born !
Your Spook looks real sharp and it is a great inspiration to
start mine in the future.
All the best
Bernd
JUL 03, 2014 - 06:26 PM
Bernd,
thanks so much for the kind words. I do remember seeing a few F-4Bs coming in and out of Oceana Naval Station Va. back in the very early 70s, it's the amount of black trailing smoke that I have a recollection of. Yet after all these years my most vivid memory is seeing the sole T-33 flying from Langley every once in a while.
Joel
JUL 04, 2014 - 05:33 AM

Nice job on this kit Joel, the work you out into this build really shows in the finished model! I enjoyed following your build blog of this build as well and will certainly check it again whe I get around to building mey kit. Thanks for taking the time to share it with us.
Doug
JUL 17, 2014 - 02:55 PM
Doug,
Thanks so much for your most kind words. I've always enjoyed following your builds. You're an exceptional modeler.
Joel
JUL 18, 2014 - 08:26 AM
Copyright ©2021 by Joel Willstein. Images also by copyright holder unless otherwise noted. The views and opinions expressed herein are solely the views and opinions of the authors and/or contributors to this Web site and do not necessarily represent the views and/or opinions of AeroScale, KitMaker Network, or Silver Star Enterrpises. Images also by copyright holder unless otherwise noted. Opinions expressed are those of the author(s) and not necessarily those of AeroScale. All rights reserved. Originally published on: 2014-06-21 02:54:26. Unique Reads: 9466

WEB HOSTING BY


Copyright ©2021 AeroScale and Kitmaker Network, a subsidiary of Silver Star Enterprises
All Rights Reserved. Please read our Conditions of Use and Privacy Policy.
All Rights Reserved. Please read our Conditions of Use and Privacy Policy.